American Adventurist Down Under

Halls Gap

A seven day solo motorcycle adventure touring Australia’s Grampians National Park, Great Ocean Road, and Blue Mountains National Park with resources and advice on what to bring, what not to bring, and suggestions for what to do when you get there.

[vc_row][vc_column][vc_column_text]

Day 1: Arrival and Picking Up the Bike

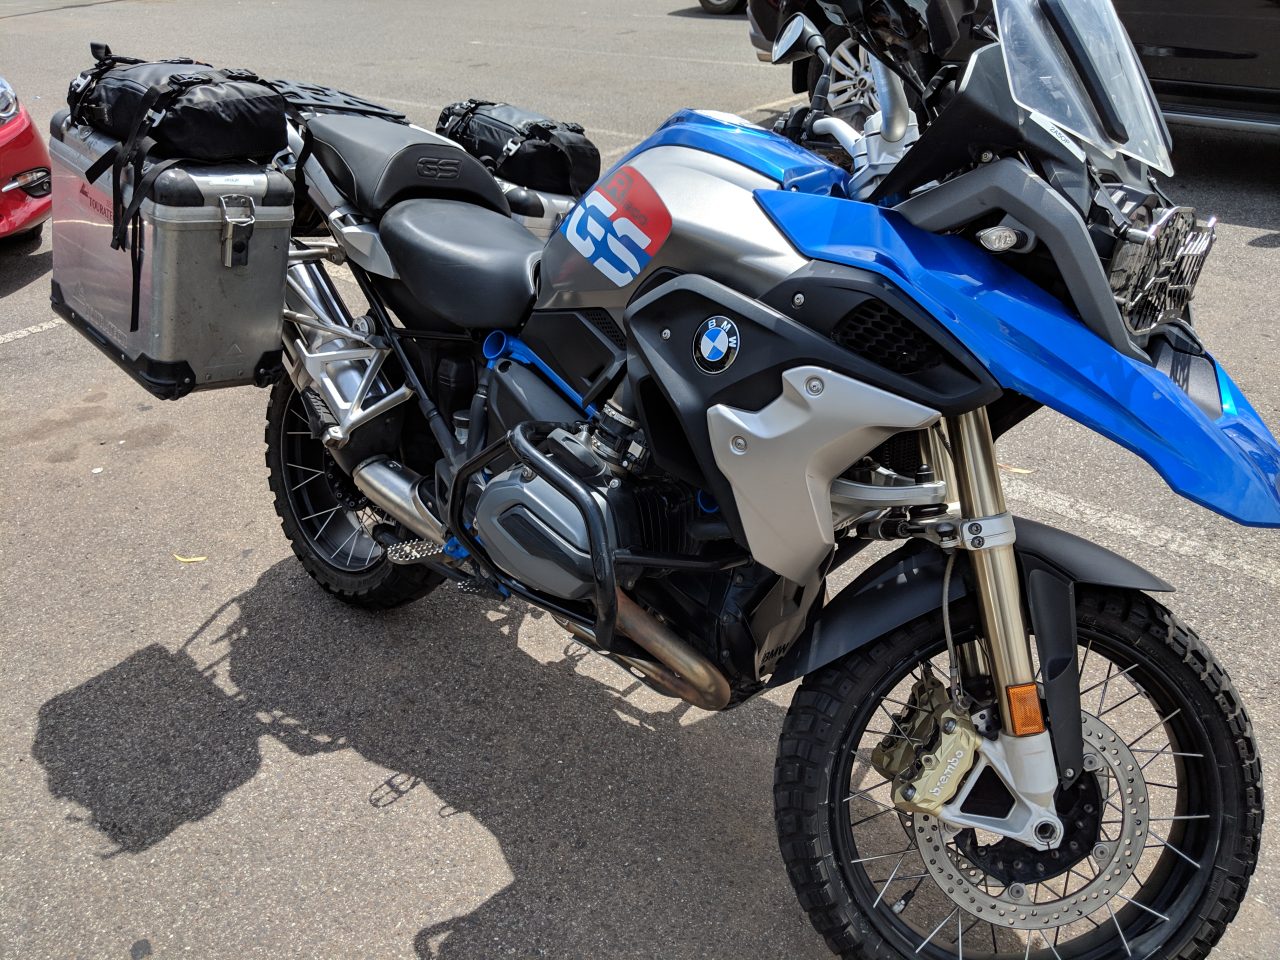
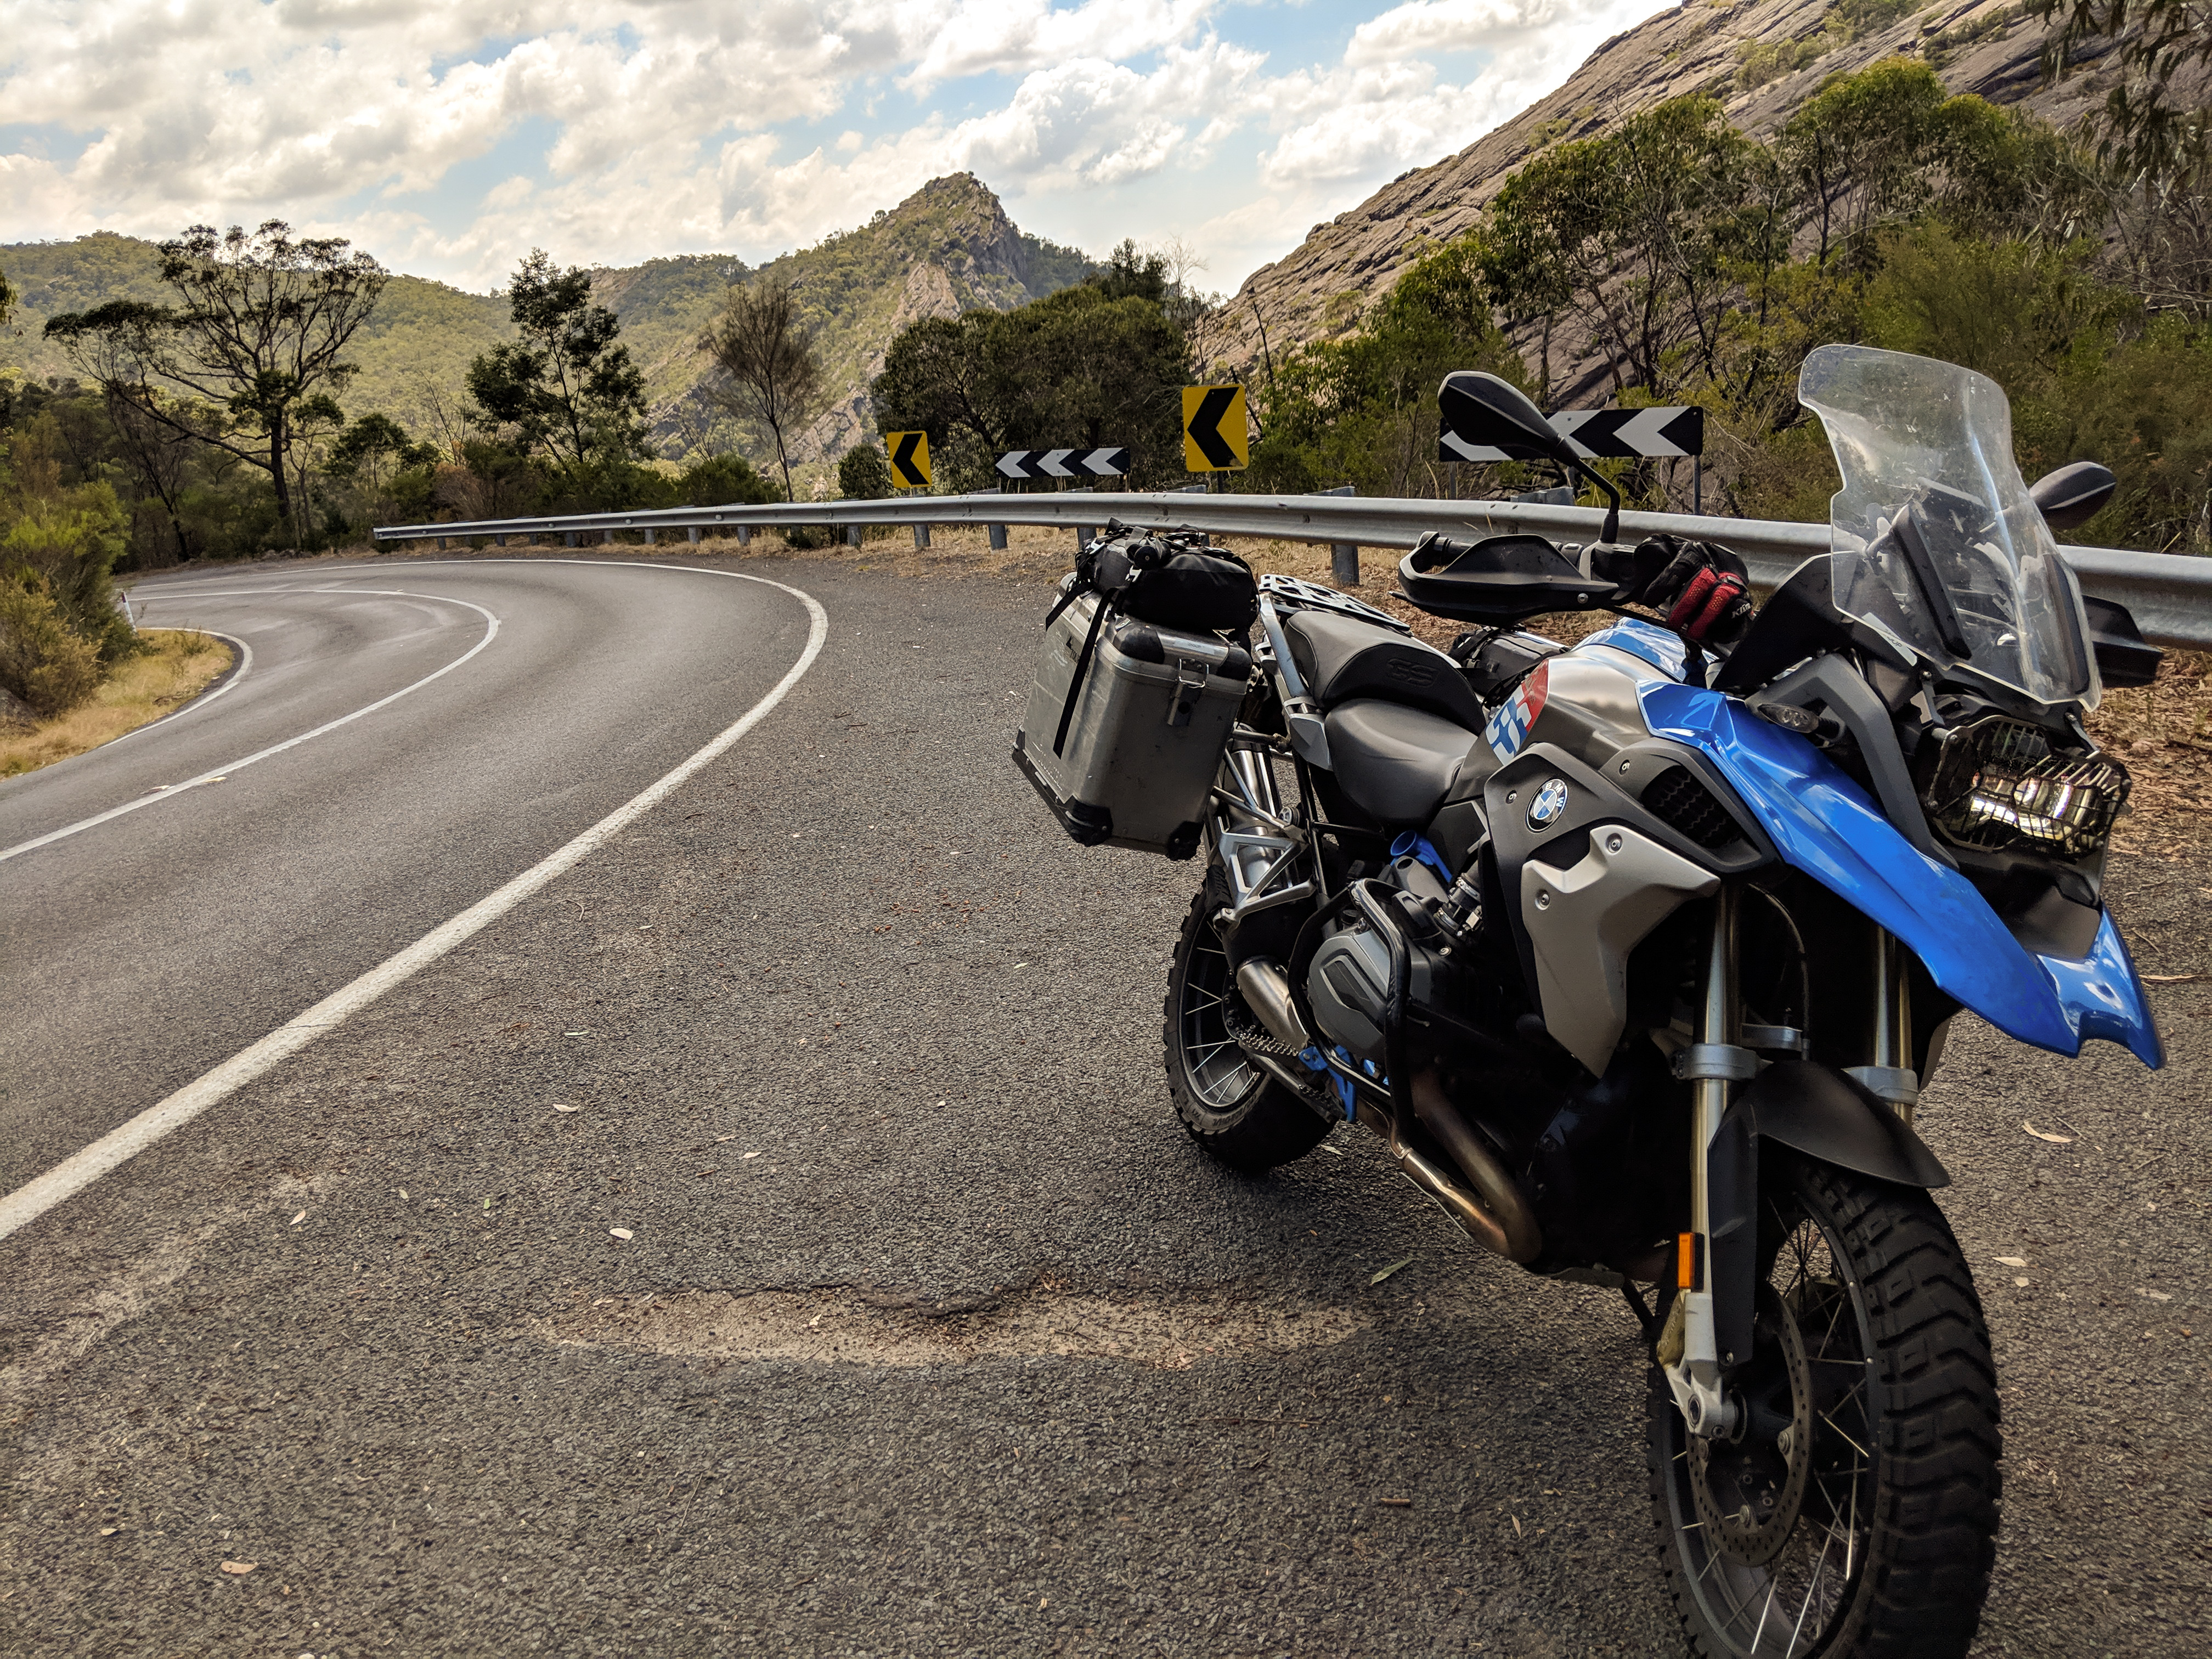
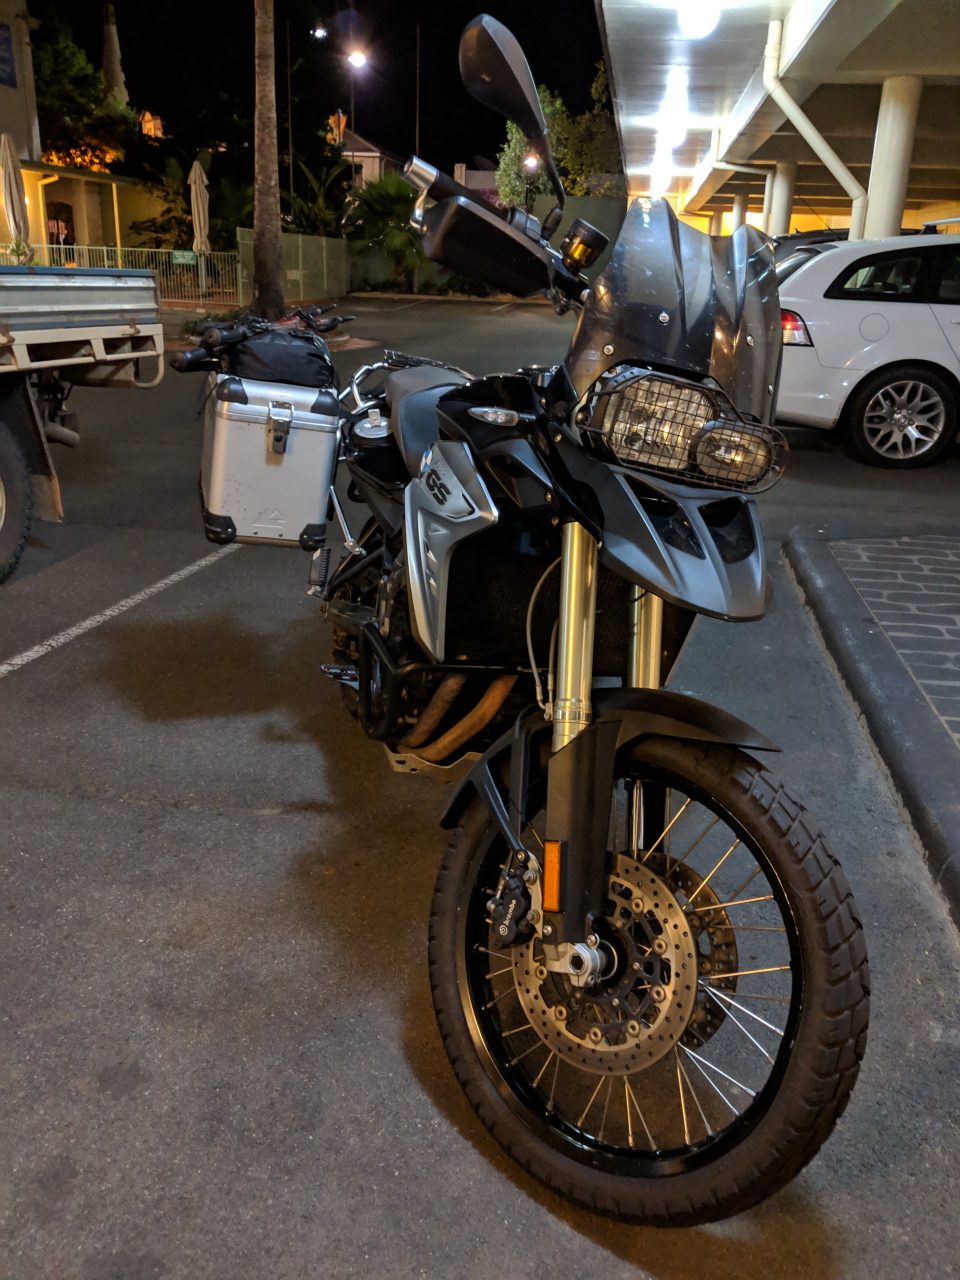
I had reserved a BMW R1200GS with BikeRoundOz since I currently own and ride the same bike. I wouldn’t be dealing with becoming familiar with it or how it handles while at the same time getting learning to ride on the left. What I didn’t know was that they had set me up with a Rallye. This is a sweet bike.

[/vc_column_text][/vc_column][/vc_row][vc_row][vc_column][vc_single_image image=”8471″ img_size=”full” add_caption=”yes” alignment=”center”][vc_column_text]
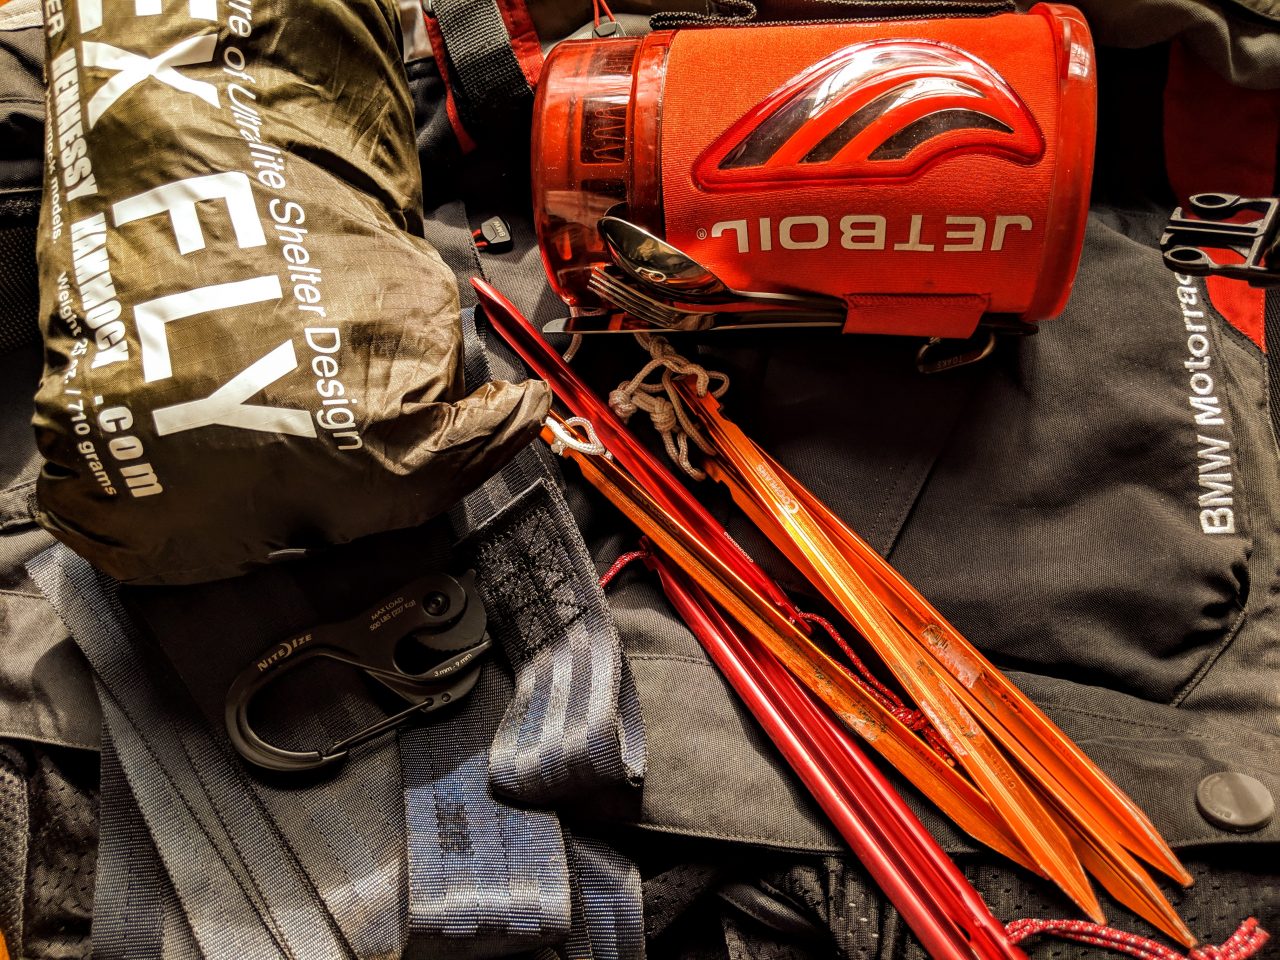
One reason why I brought a JetBoil was that I knew Anaconda in Melton had the fuel. I would have to leave the fuel behind when I flew home, but the stove itself would be free of fuel residue and I could bring it back. I spent some time in the hotel checking everything again before repacking it on the bike.[/vc_column_text][vc_single_image image=”8475″ img_size=”full” add_caption=”yes” alignment=”center”][vc_column_text]After the bike was packed I needed to pick up the few things I could not bring with me. Isobutane fuel for my JetBoil, etc.. After that I’d head back to the hotel. Get something to eat. The next day I hit the road early.

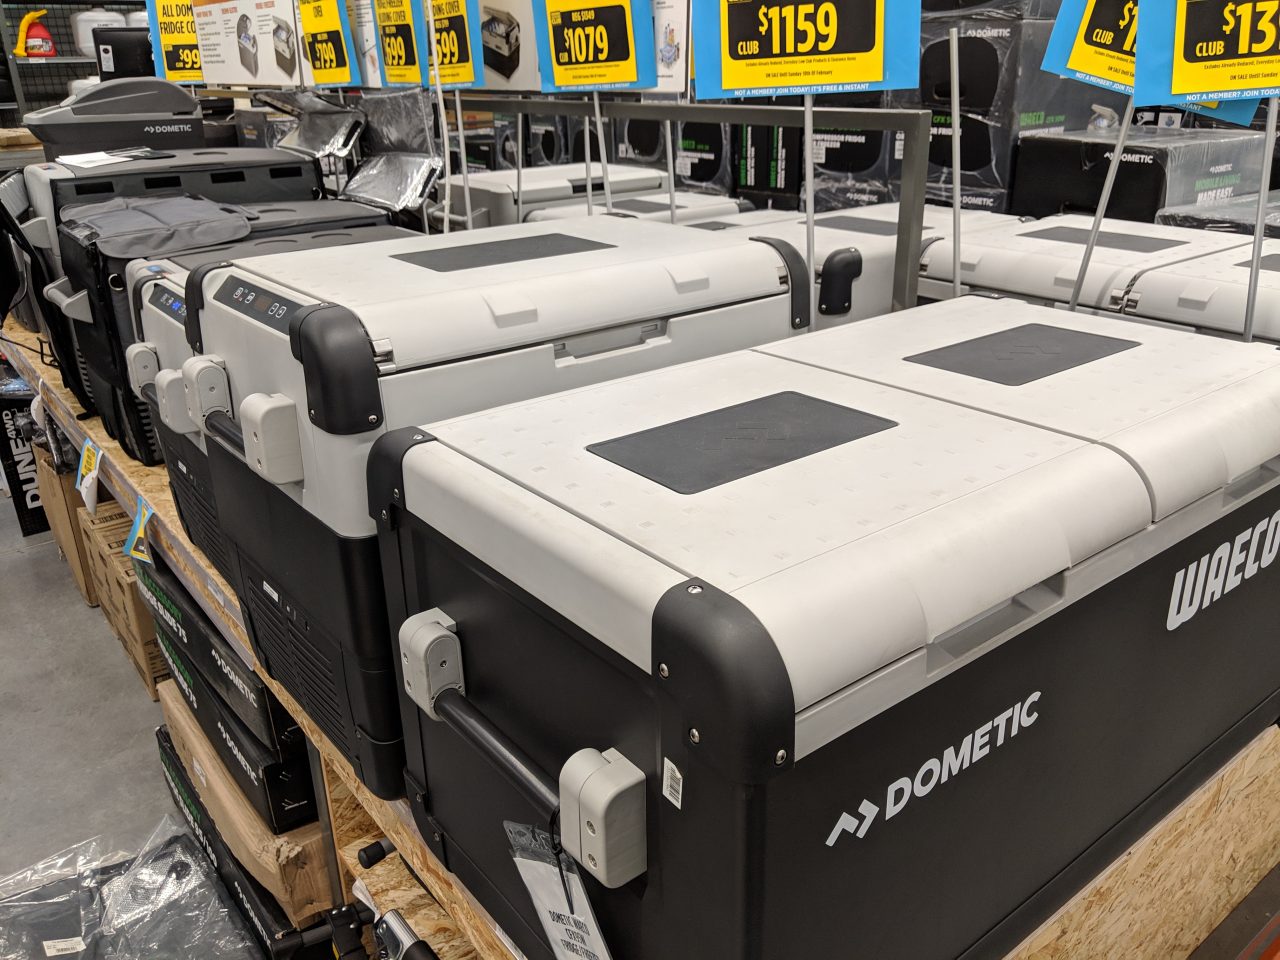
Anaconda is a relatively small store and I wasn’t expecting the gold mine I found inside. A far cry from the average sporting goods store back home in the states.[/vc_column_text][vc_single_image image=”8469″ img_size=”full” add_caption=”yes” alignment=”center”][/vc_column][/vc_row][vc_row][vc_column][vc_column_text]

Day 2 & 3: Grampians National Park

[/vc_column_text][vc_column_text]
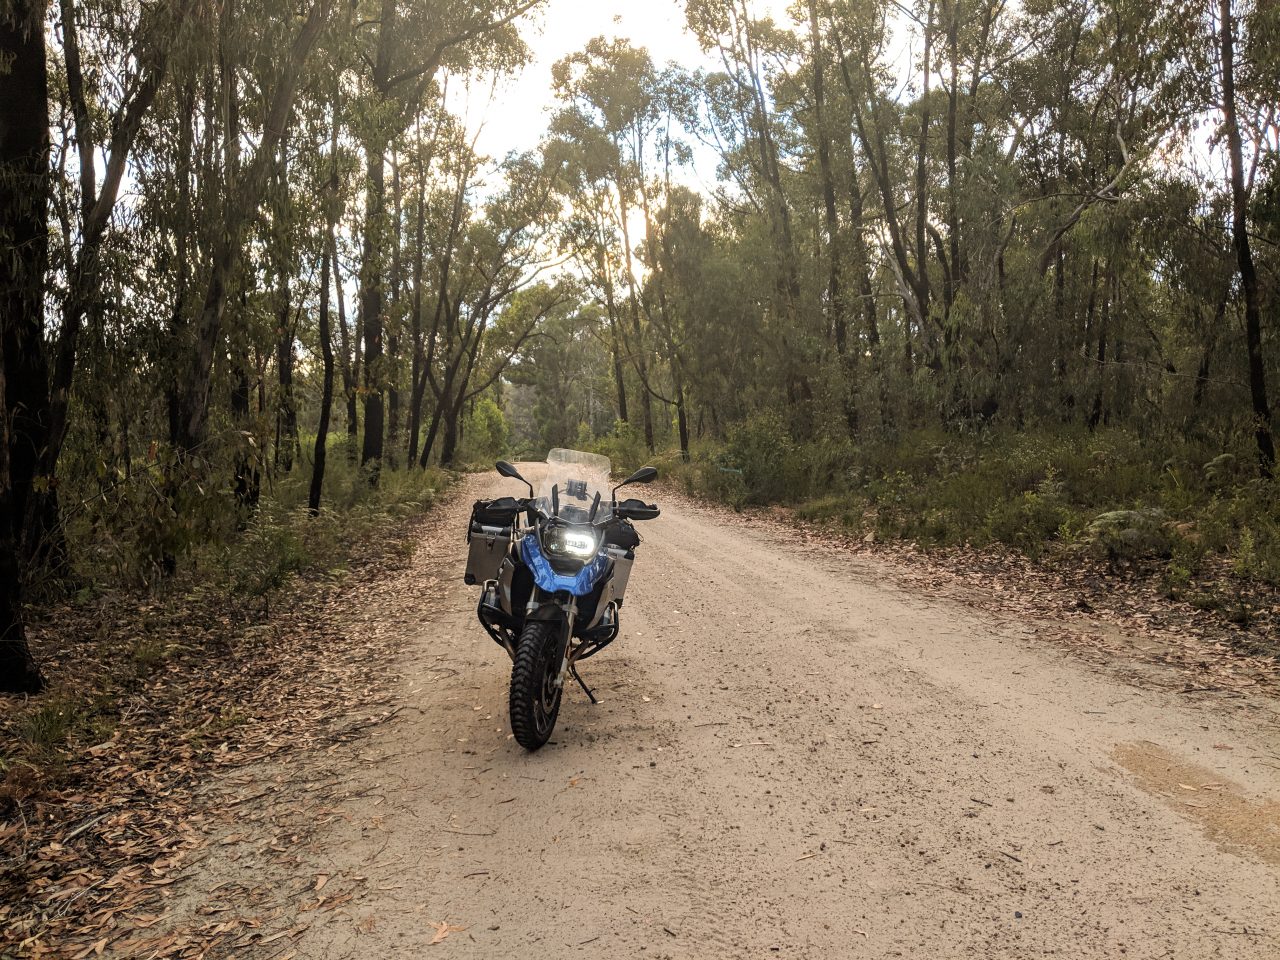
Finally! After months of planning and waiting, after endless mundane logistical details, I’m on the open road in search of Adventure in Australia![/vc_column_text][vc_video link=”https://youtu.be/6RG63JnL19c” align=”center”][vc_video link=”https://youtu.be/mAG54DHQwwM” align=”center”][vc_column_text]
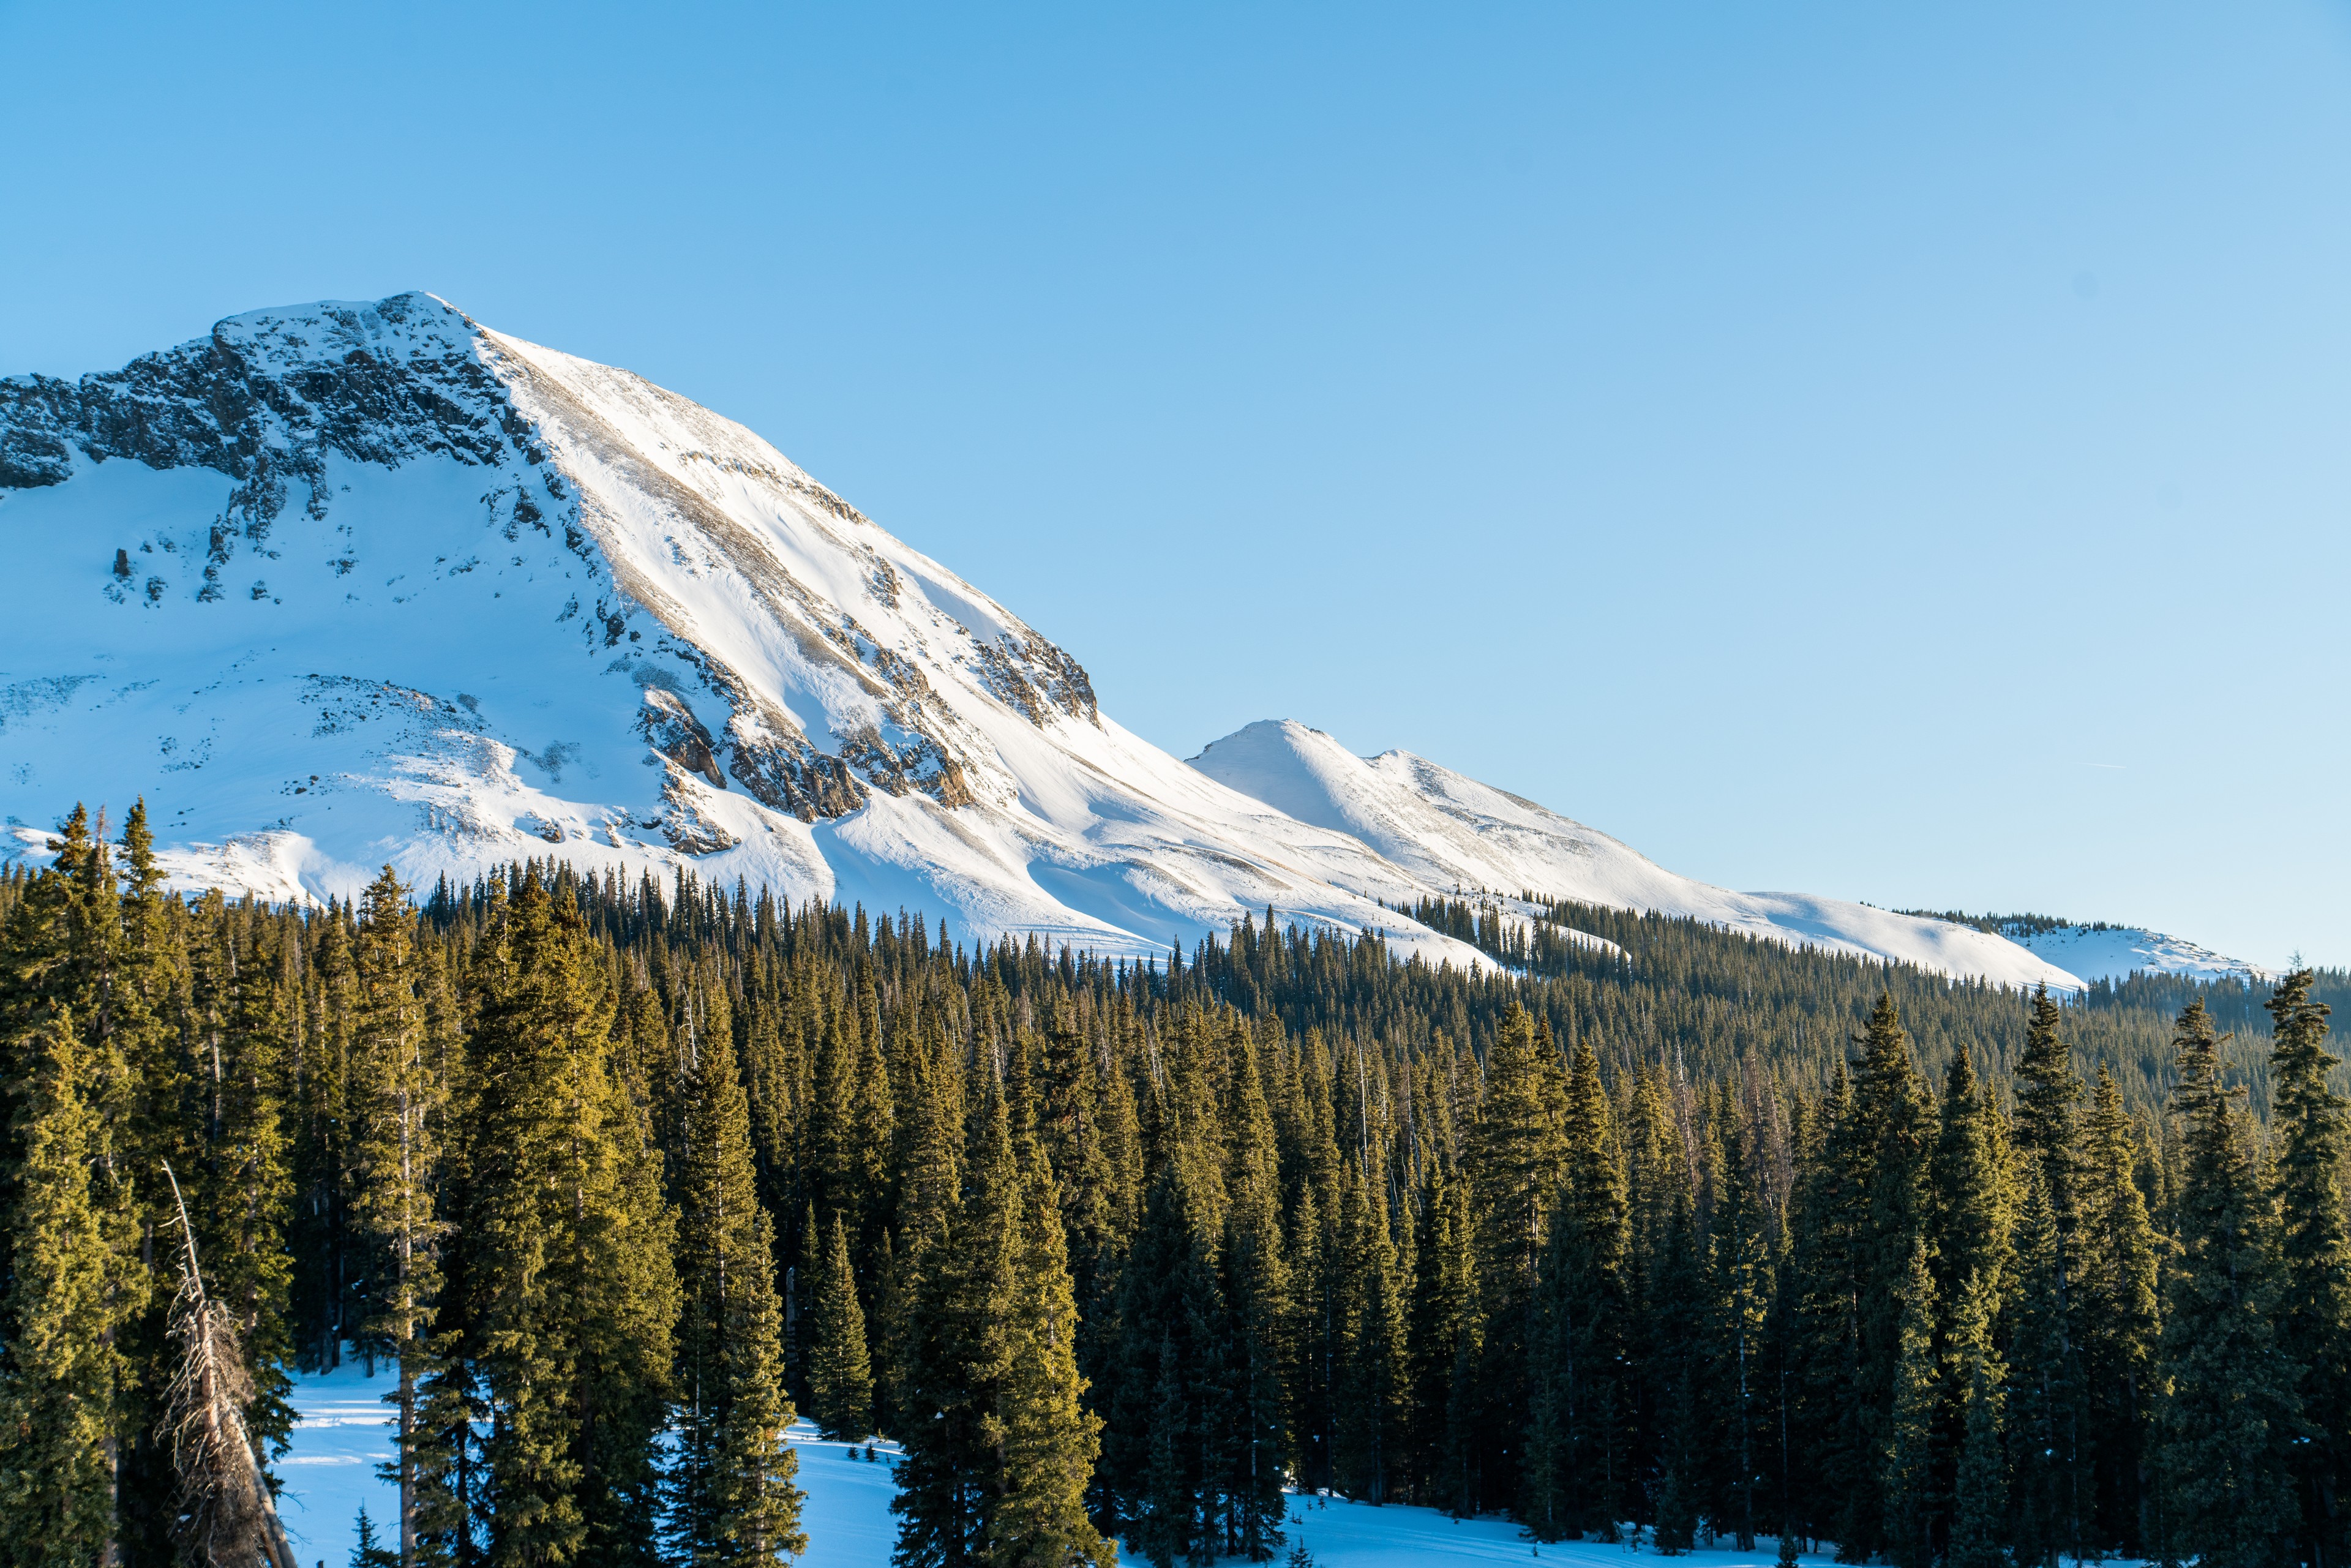
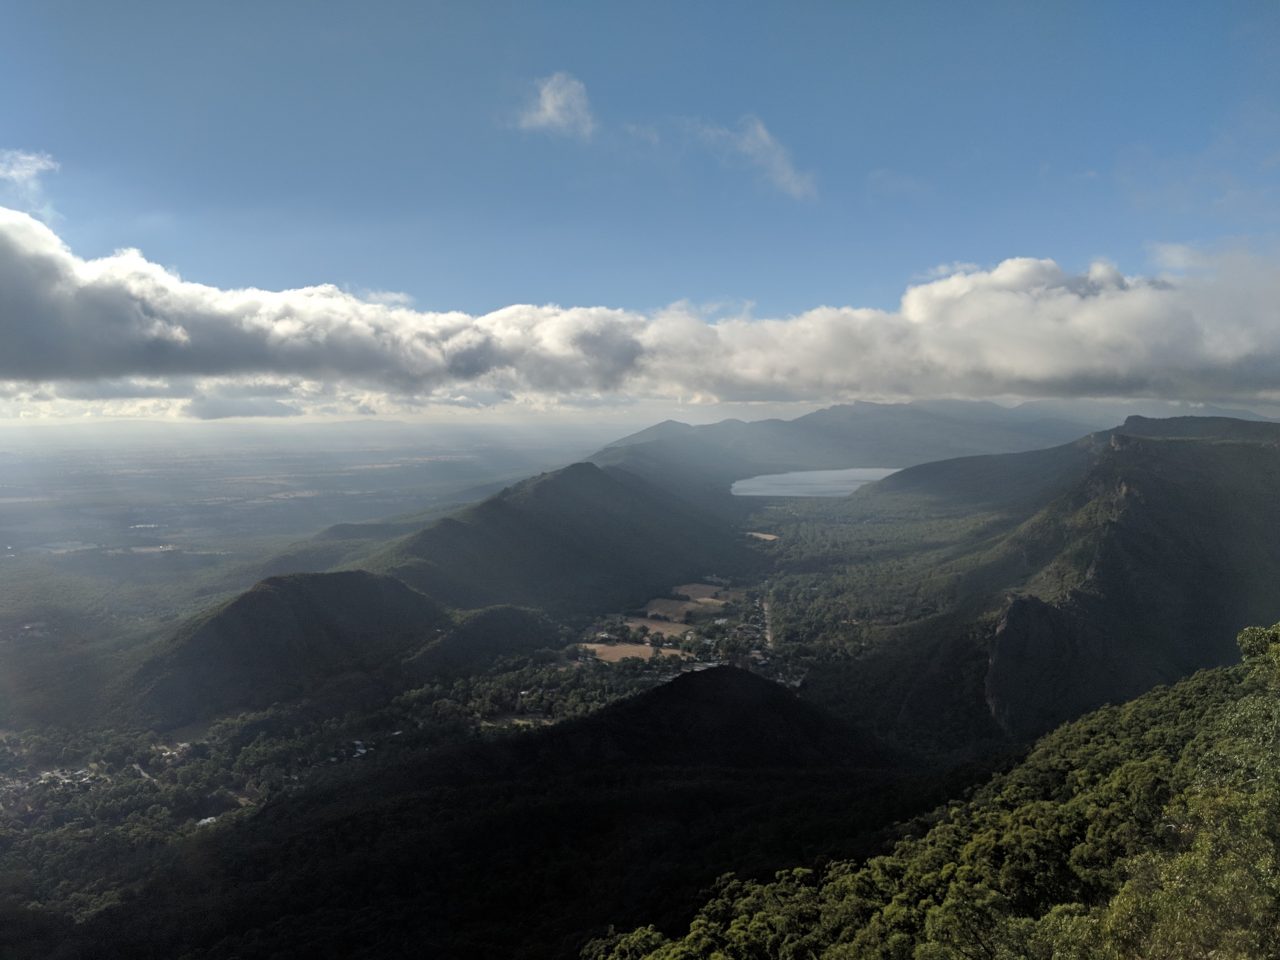
This was the first area that I set out to explore. Dirt roads in every direction beckoned me and tempted me to explore further. I did some exploring, but I had to remind myself that I was there riding solo, that even though I did have a Spot 3 satellite GPS messenger with me that I wasn’t invulnerable. Alone in a foreign country it’s always wise to use the KISS principle and stick to your plan as much as possible.

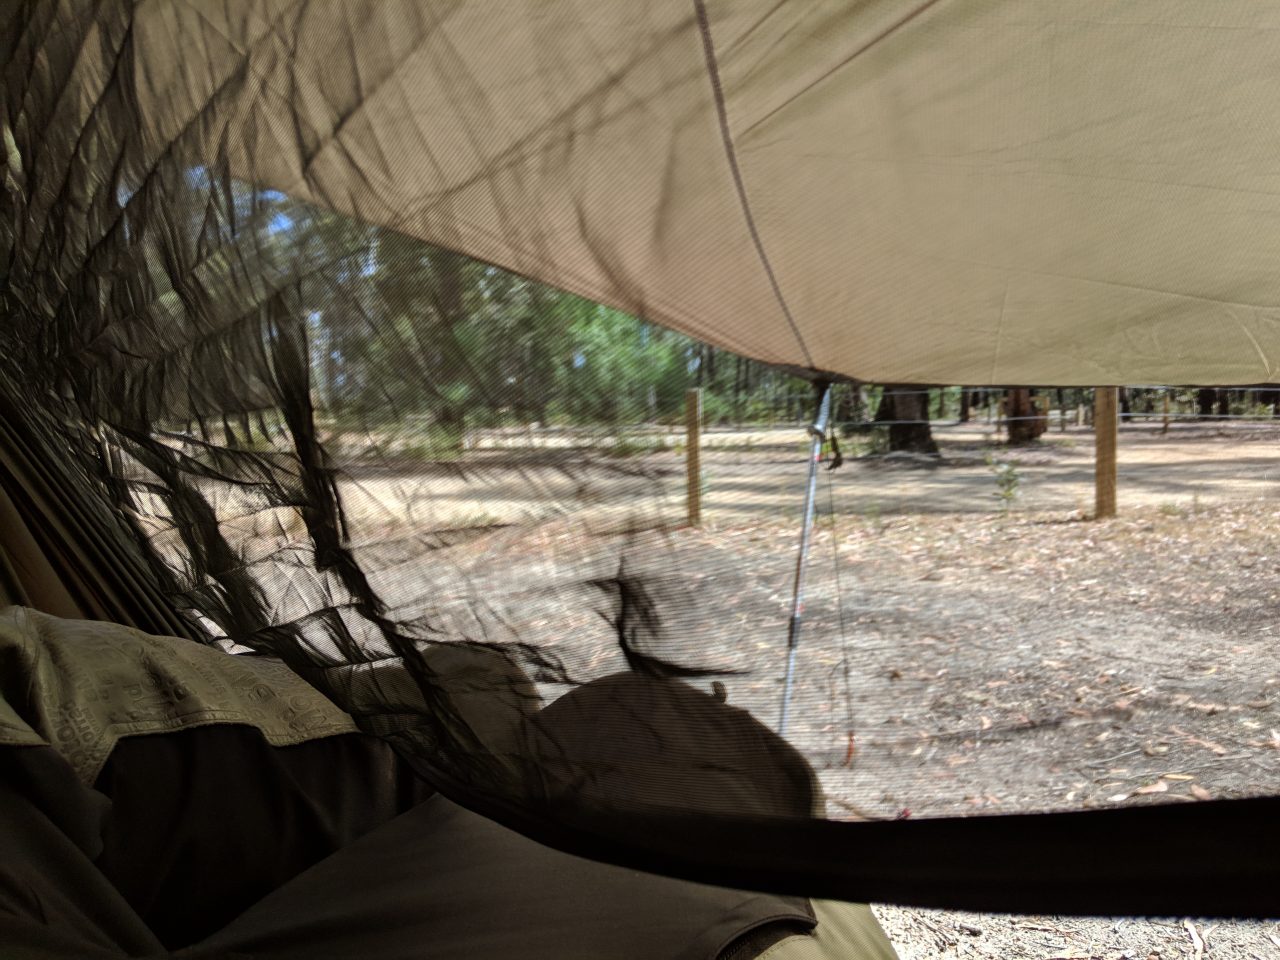
I camped at Smiths Mill Campground in Grampians National Park. Very close to the MacKenzie Falls which requires a reservation. Plenty of trees for the hammock and providing shade. There’s even a bush shower.[/vc_column_text][vc_single_image image=”8535″ img_size=”full” add_caption=”yes” alignment=”center” onclick=”img_link_large”][vc_video link=”https://youtu.be/Qx2MOu9svlk” align=”center”][vc_single_image image=”8215″ img_size=”full” add_caption=”yes” alignment=”center” onclick=”img_link_large”][vc_single_image image=”8439″ img_size=”full” add_caption=”yes” alignment=”center” onclick=”img_link_large”][vc_column_text]The second day was a hike down to the base of MacKenzie Falls is about 1.6 miles (2.6 km) round trip. It’s an in and out trail with narrow steps that will allow only one person to pass at a time in either direction. The total descent is approximately 270 feet. After my day hike it was time for packing up and heading out.[/vc_column_text][vc_single_image image=”8438″ img_size=”full” add_caption=”yes” alignment=”center” onclick=”img_link_large”][vc_single_image image=”8658″ img_size=”full” add_caption=”yes” alignment=”center” onclick=”img_link_large”][vc_column_text]On my way out of Grampians National Park I encountered an Emu wandering down the middle of the road. One piece of advice given to me was avoid traveling at night because Kangaroos and these guys like to hang out on the road and can ruin your night.

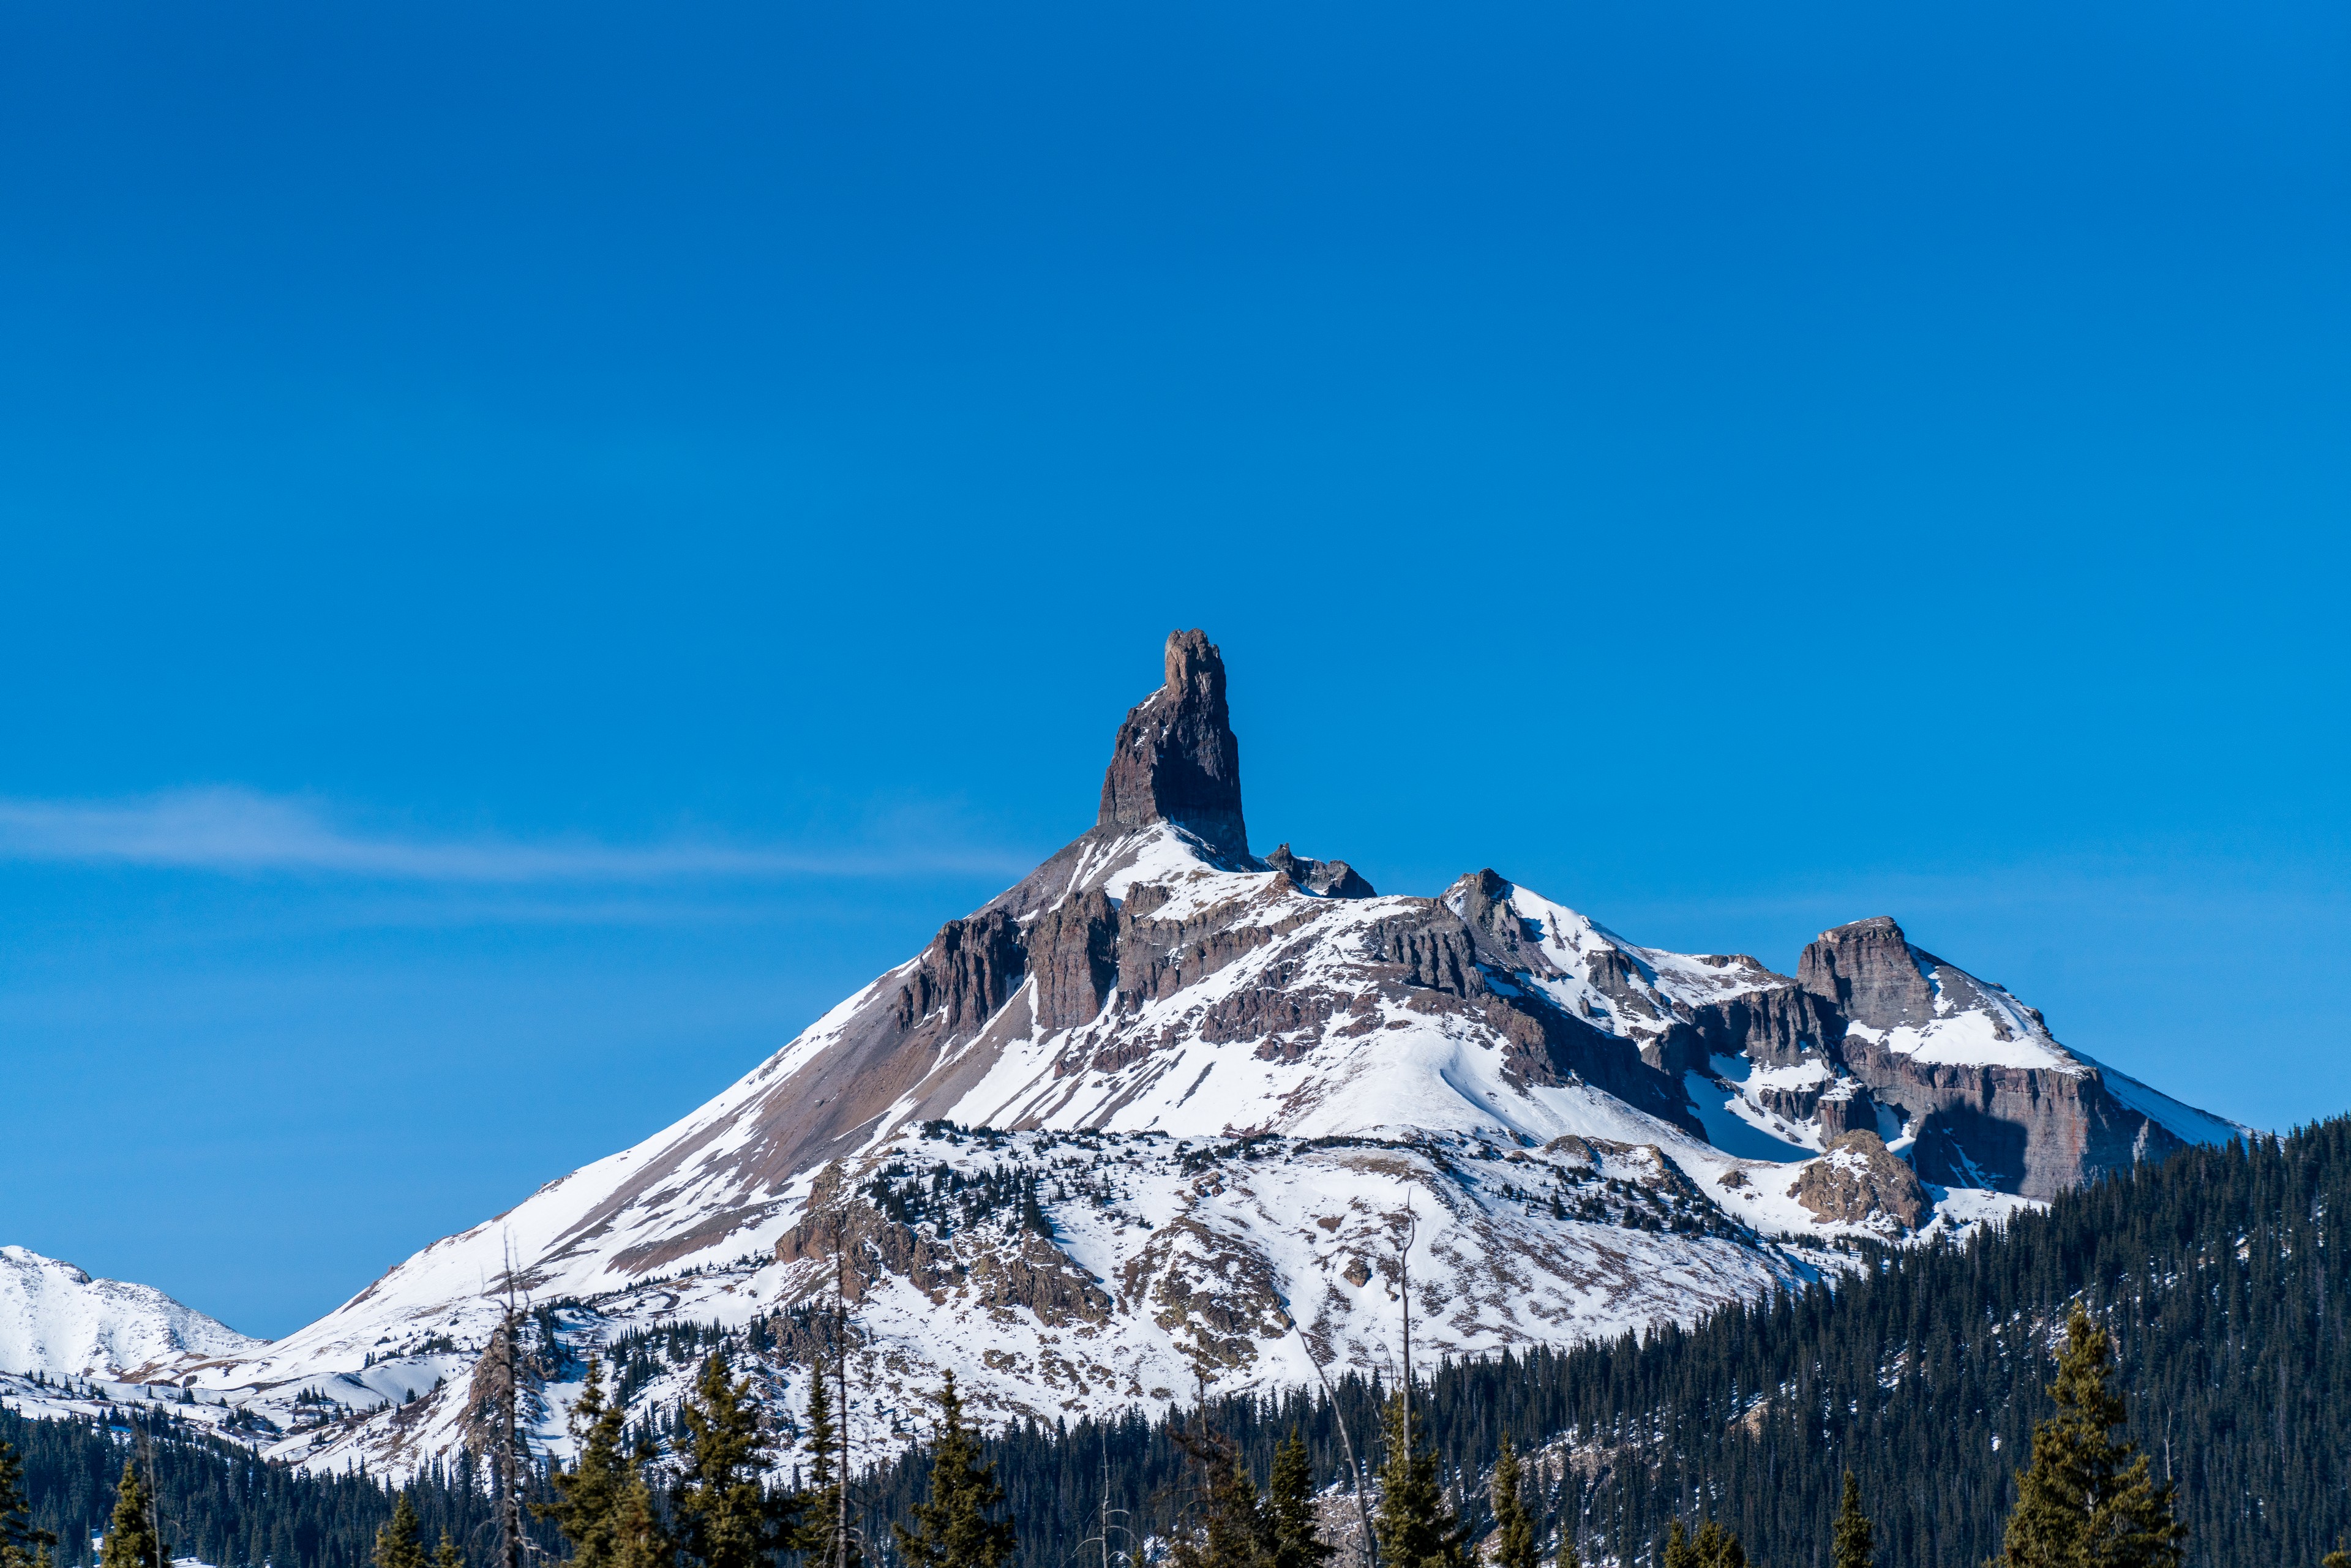
You’ll also notice the black fire scars on almost all the tree trunks here. Late evening on 19 January 2006 a lightning strike on Mount Lubra (later renamed to Mount Warrinaburb) started a bush fire. By the time it was extinguished it had burned for approximately two weeks and covered approximately 130,000 hectares of land.[/vc_column_text][vc_video link=”https://youtu.be/_eFI_natfUY” align=”center”][/vc_column][/vc_row][vc_row][vc_column][vc_column_text]

Day 4: The Great Ocean Road, Rain, and a Malfunction

[/vc_column_text][vc_column_text]
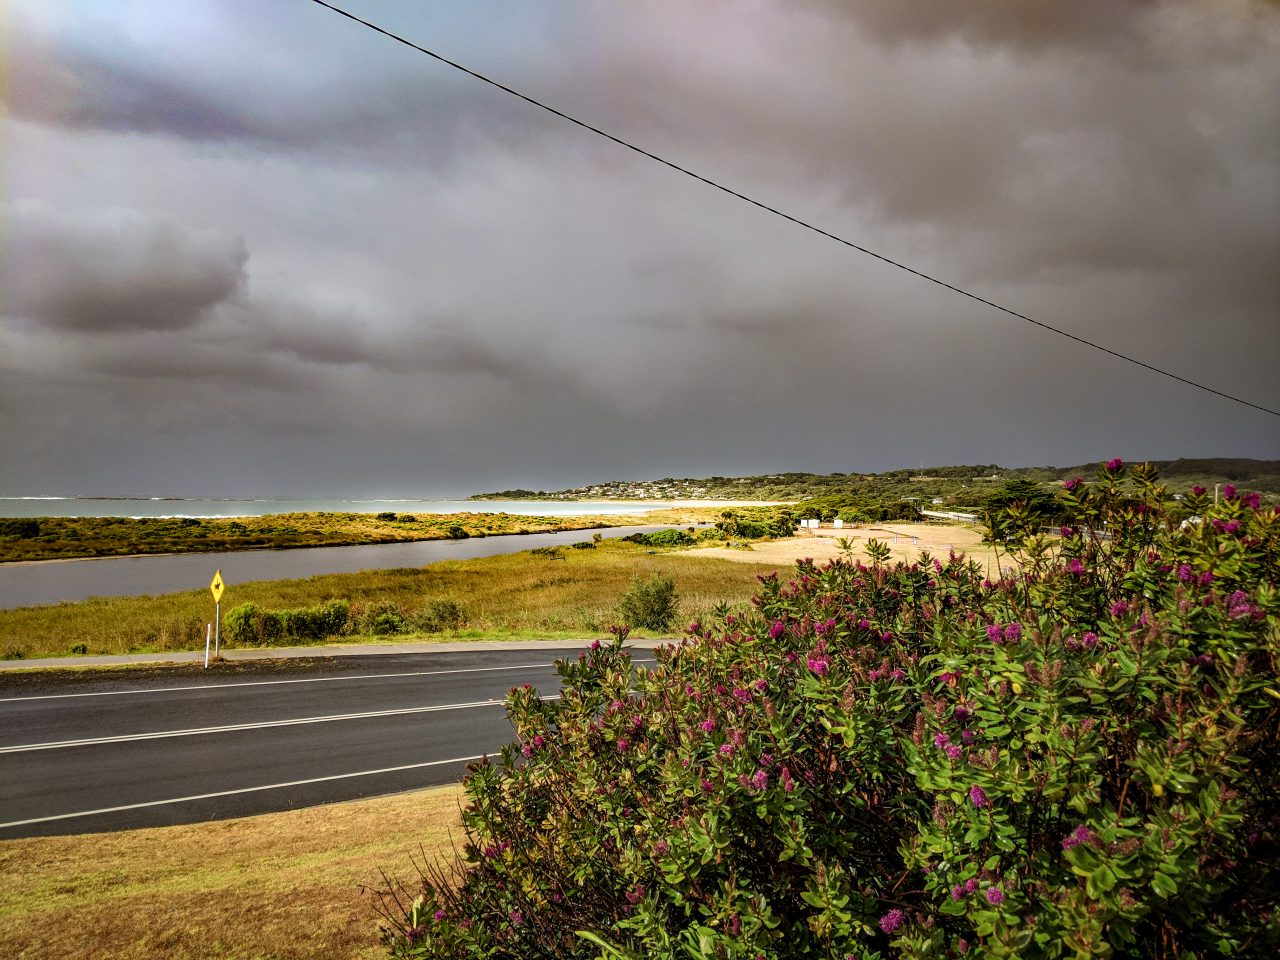
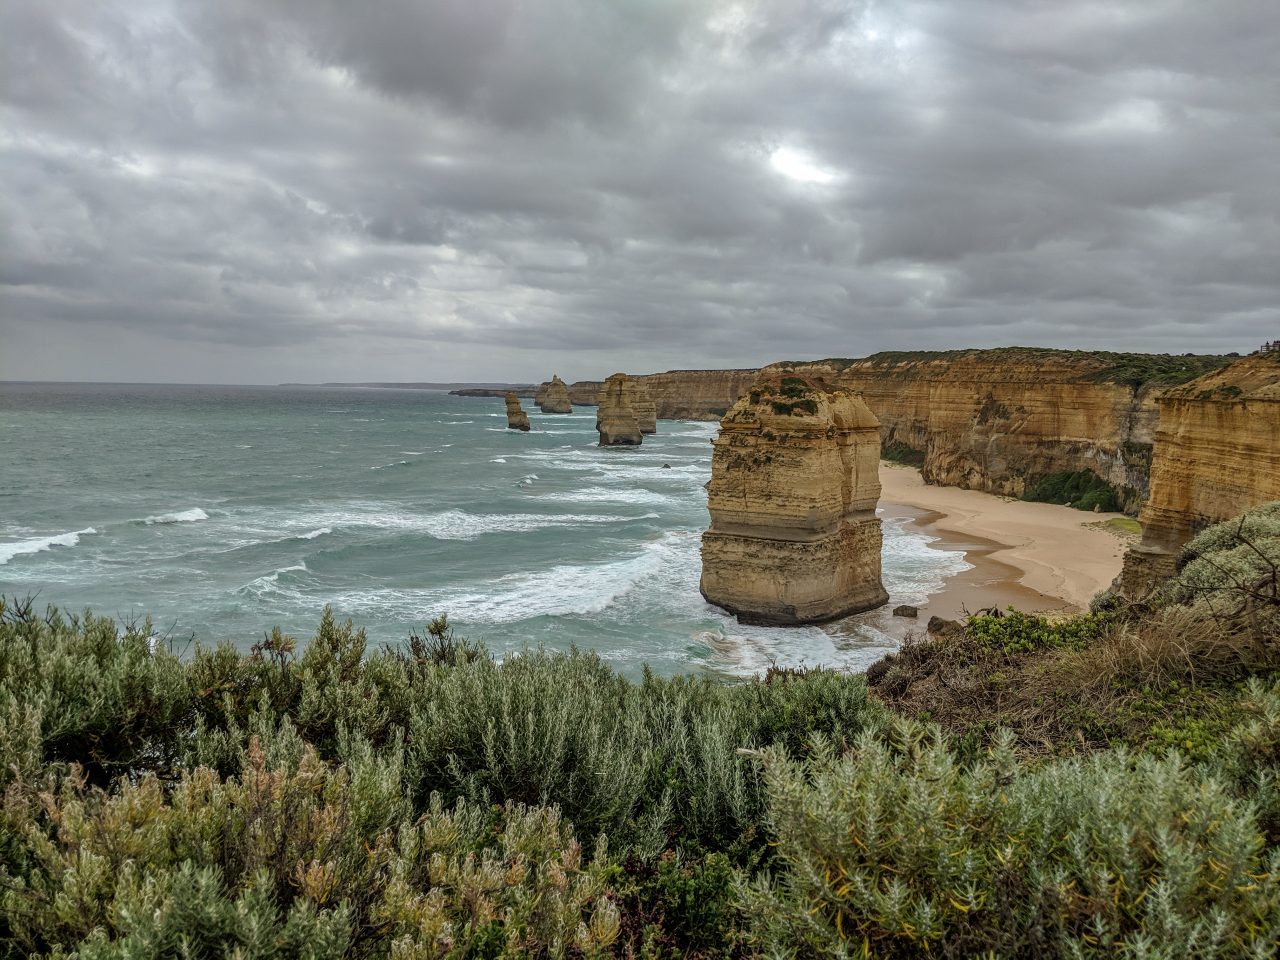
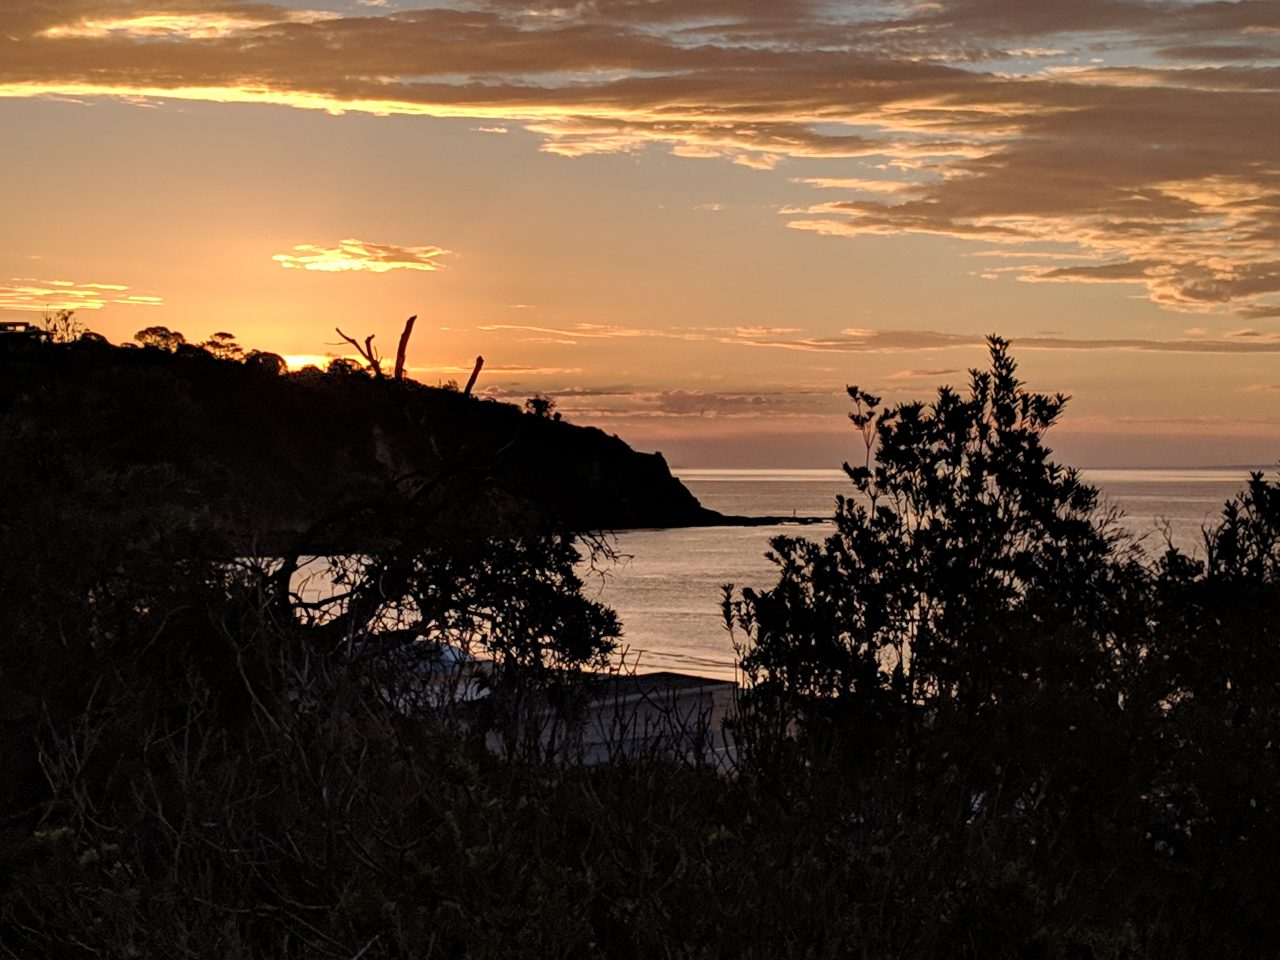
Of the two days I encountered rain I would compare both to the spin/rinse cycle of a washing machine. It would pour. Then the sun would come out and I would quickly dry off. Then it would pour again. Rinse. Repeat. Thankfully, I did get a chance to visit the ocean again later and in much better weather.

I camped at Parker Hill in Great Otway National Park. This is an awesome campsite overlooking the beach and reservations are required. Given the inclement weather I had arrived cold and wet and it took me a while to dry out. Thankfully, the hill is protected by substantial tree cover that helps shield against ocean winds.[/vc_column_text][vc_video link=”https://youtu.be/_rqOzy99lPY” align=”center”][vc_single_image image=”8545″ img_size=”full” add_caption=”yes” alignment=”center” onclick=”img_link_large”][vc_single_image image=”8539″ img_size=”full” add_caption=”yes” alignment=”center” onclick=”img_link_large”][vc_single_image image=”8540″ img_size=”full” add_caption=”yes” alignment=”center” onclick=”img_link_large”][vc_single_image image=”8541″ img_size=”full” add_caption=”yes” alignment=”center” onclick=”img_link_large”][vc_column_text]

Being Prepared

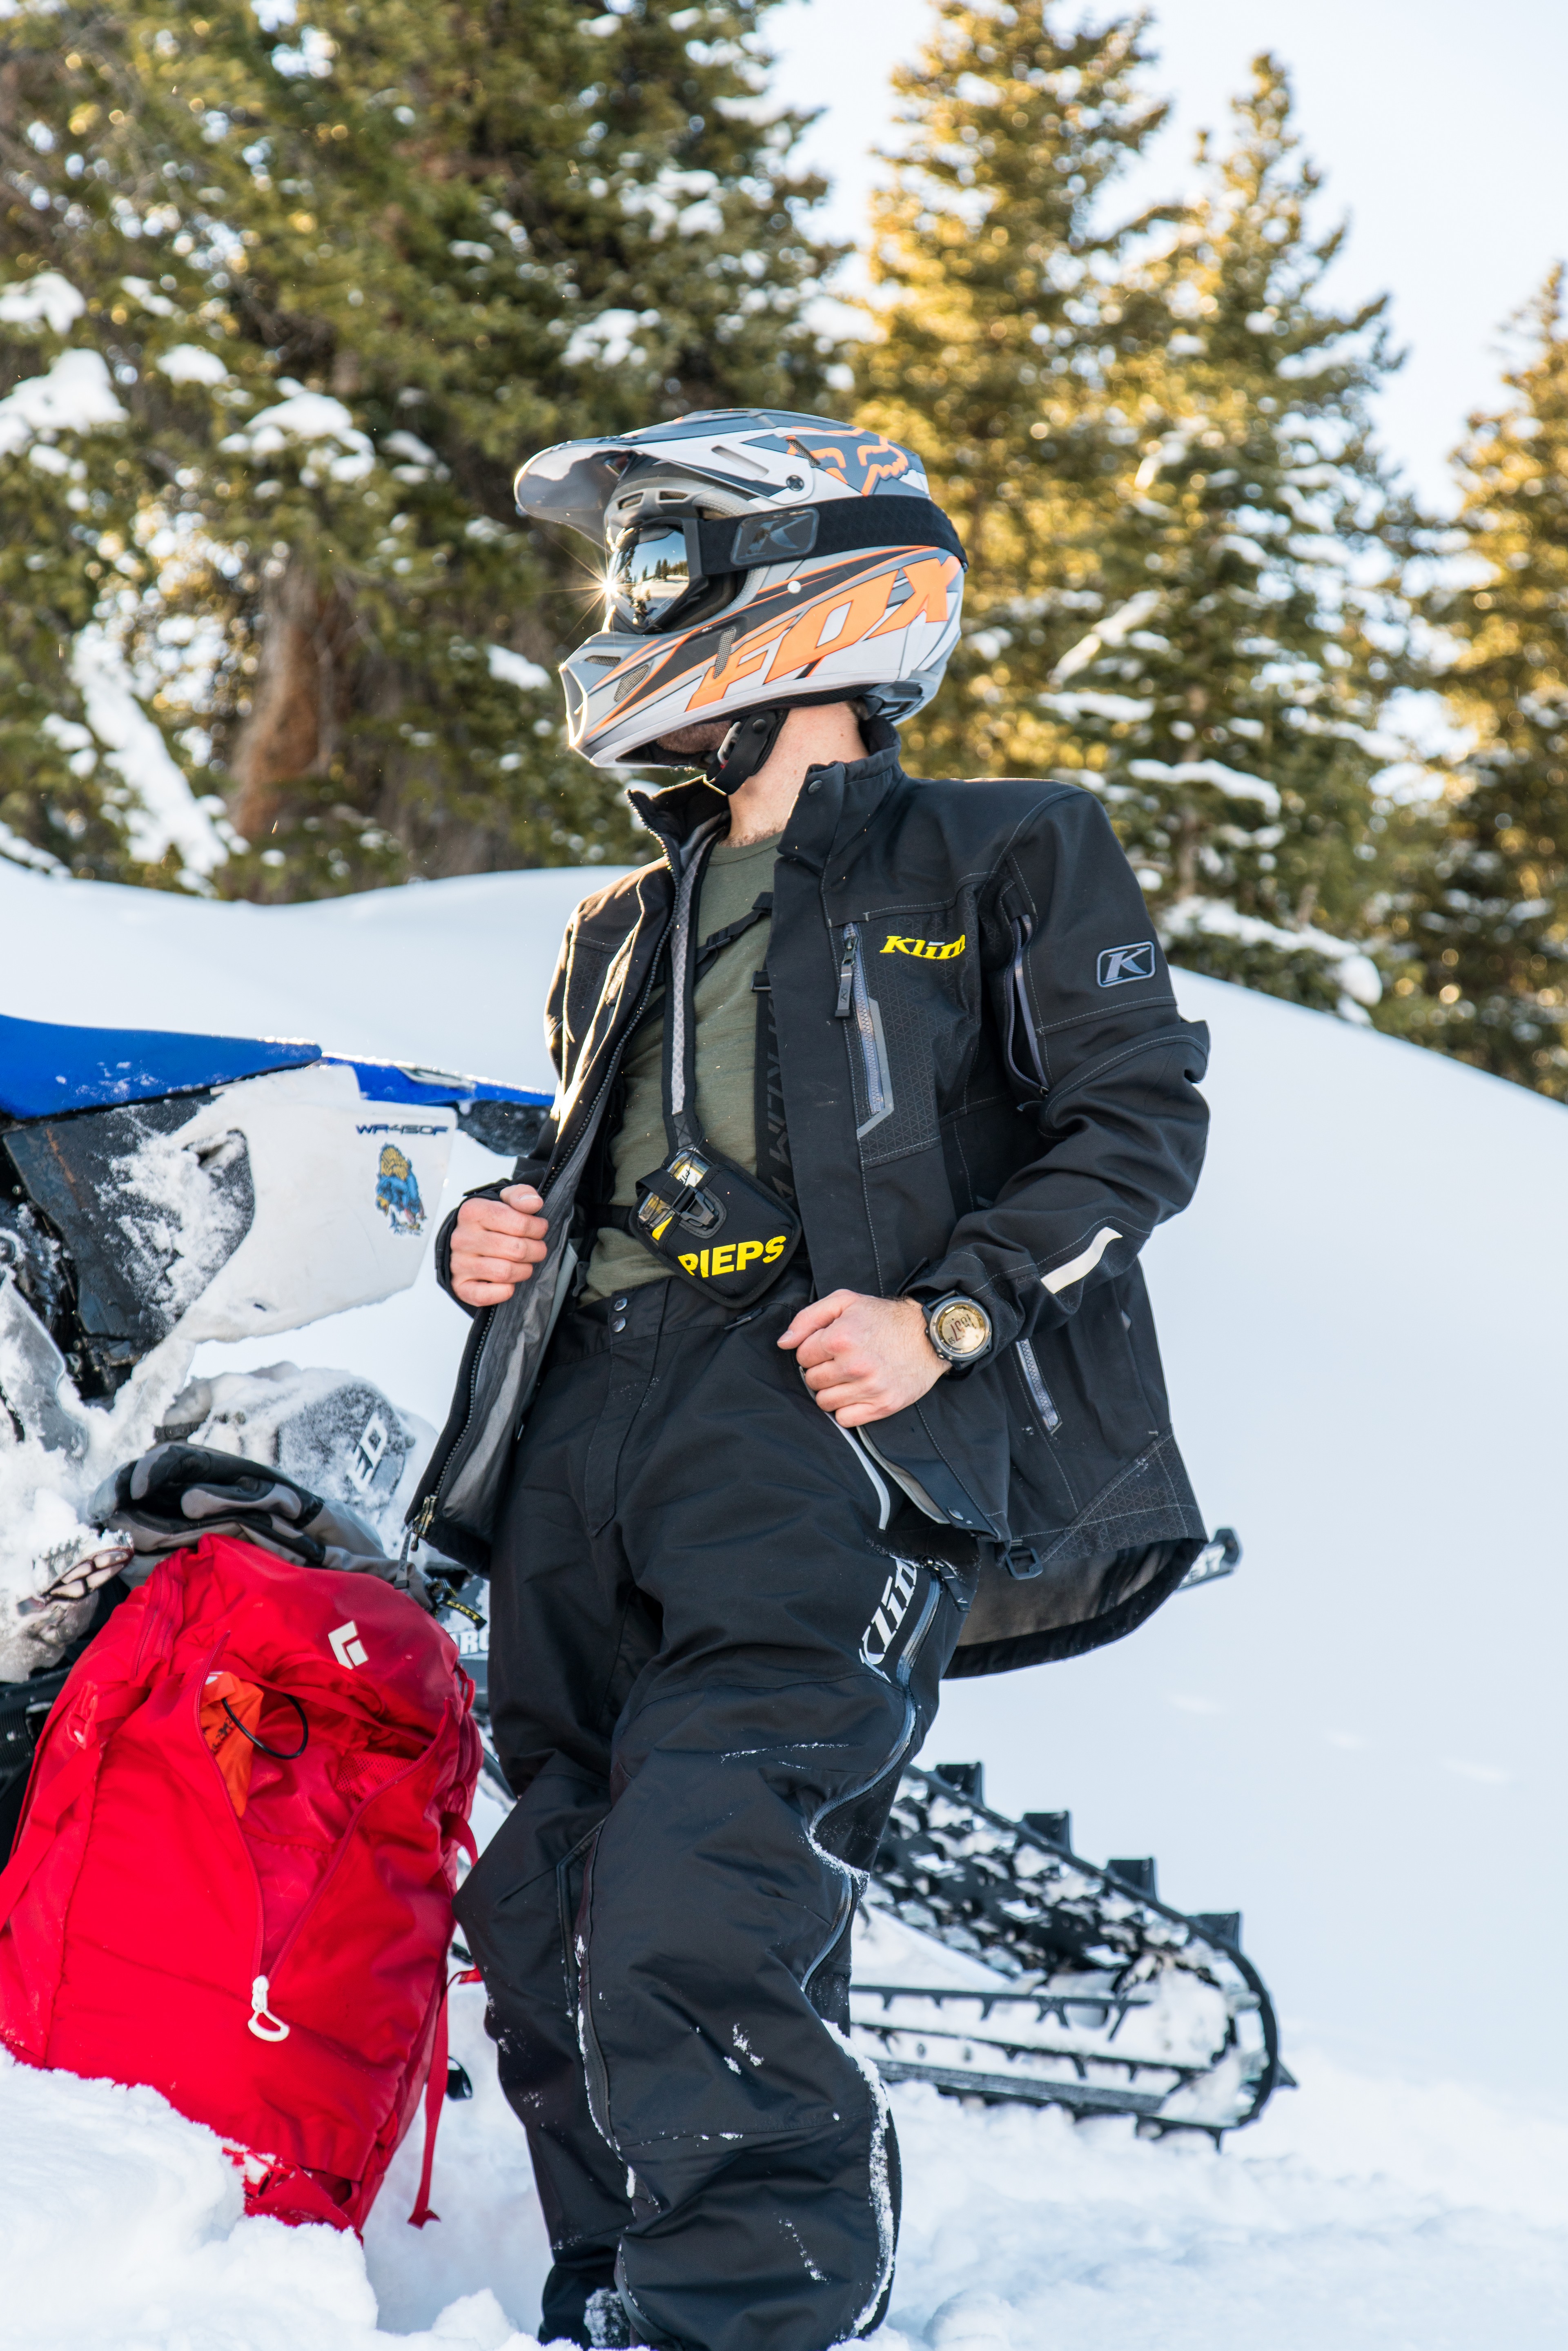
In my previous article Choosing the Right Tent The First Time, I stressed anticipating dramatic changes in the weather and this is why. Seasons are reversed in the Southern Hemisphere so January and February are Melbourne’s hottest months with the interior seeing temps of 110° F. Given that I have limited carrying capacity on a motorcycle, I had contemplated bringing just the Klim mesh suit but that left me without rain protection so that thought was immediately dismissed. The BMW Rallye suit would be hotter and uncomfortable at times but I would have to deal. This decision paid off with the unseasonably cold and wet weather. After putting the rain liners into the jacket and pants I was warm again and drying out.[/vc_column_text][vc_video link=”https://youtu.be/ZofvQEIsu0Q” align=”center”][/vc_column][/vc_row][vc_row][vc_column][vc_column_text]

Day 5: A Pit Stop to Change Bikes then on to Wagga Wagga

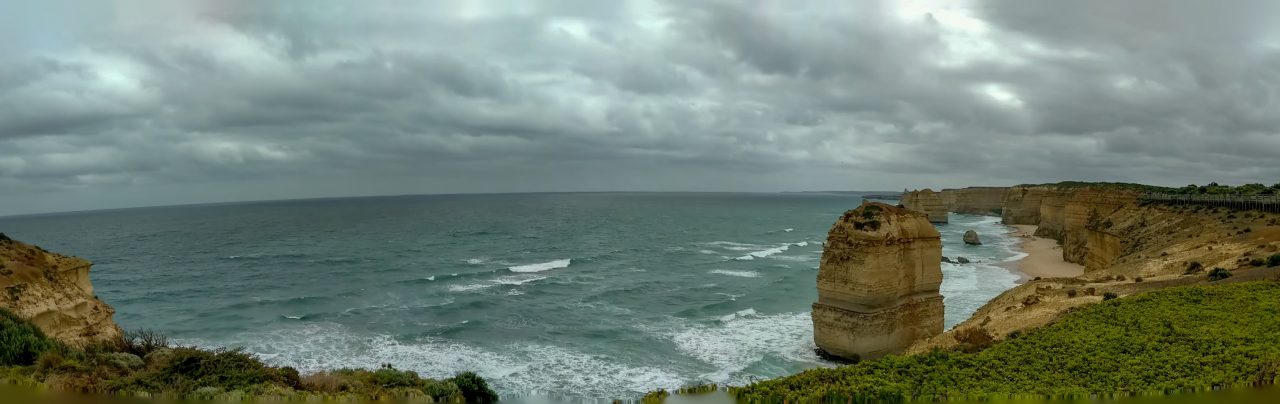
Parker Hill camp the next day. The bike wasn’t liking the weather either. In the morning the bike’s throttle was sluggish and the check engine light came on. After breaking camp and packing I let the bike idle for a bit. A few miles later things were back to normal but the code wasn’t clearing. Nothing but guesses as to the cause. As I rode on I had an internal debate about the merits of heading back to Melton to swap out bikes and losing a day, or continuing on as-is with a check engine light on. The entire time the debate raged in my head I was heading back to Melton. I will miss the Loch Ard Gorge and the day I had planned to tour the coast.
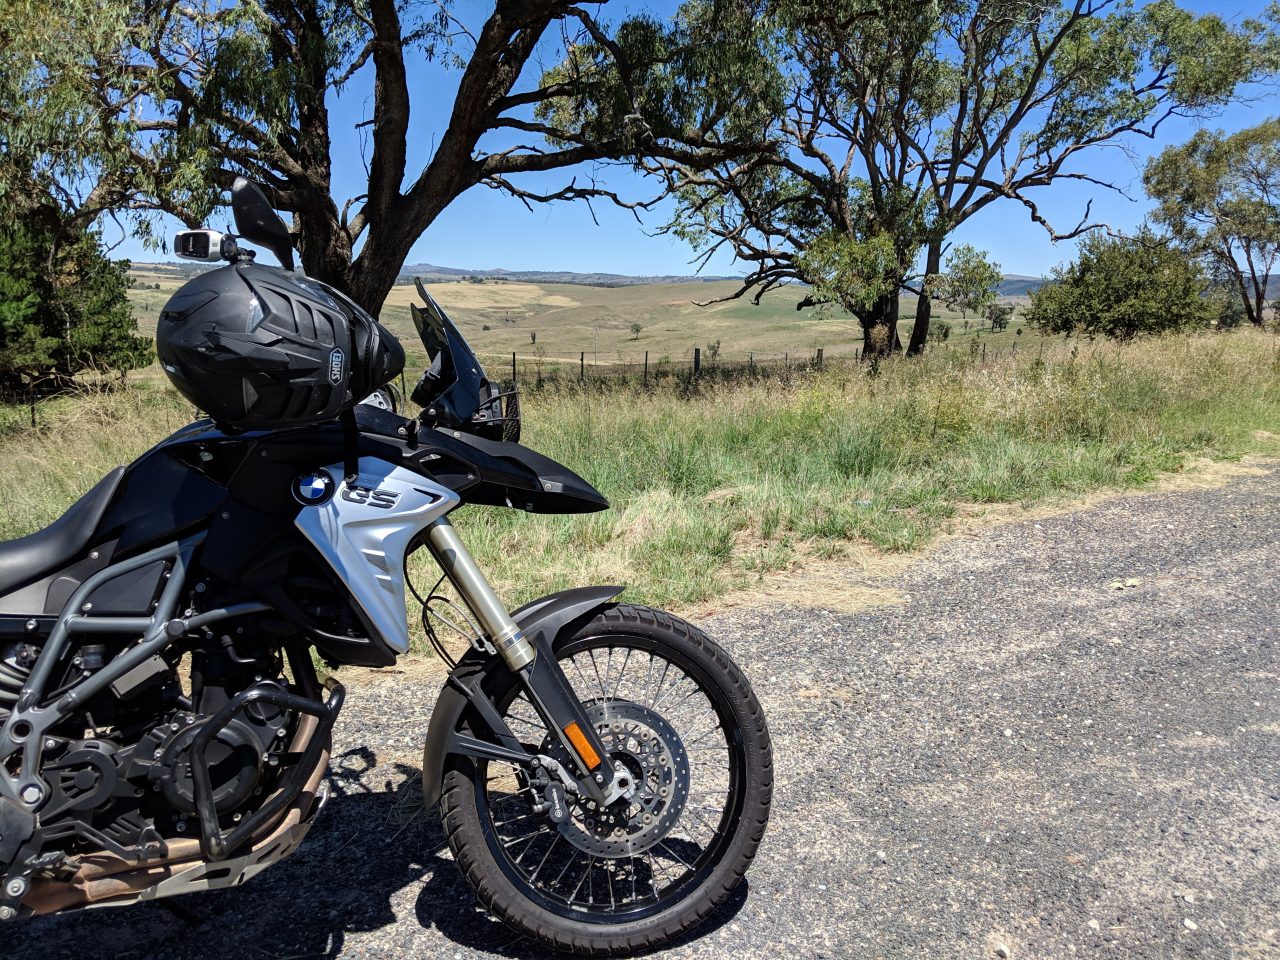
The Melton Pit Stop

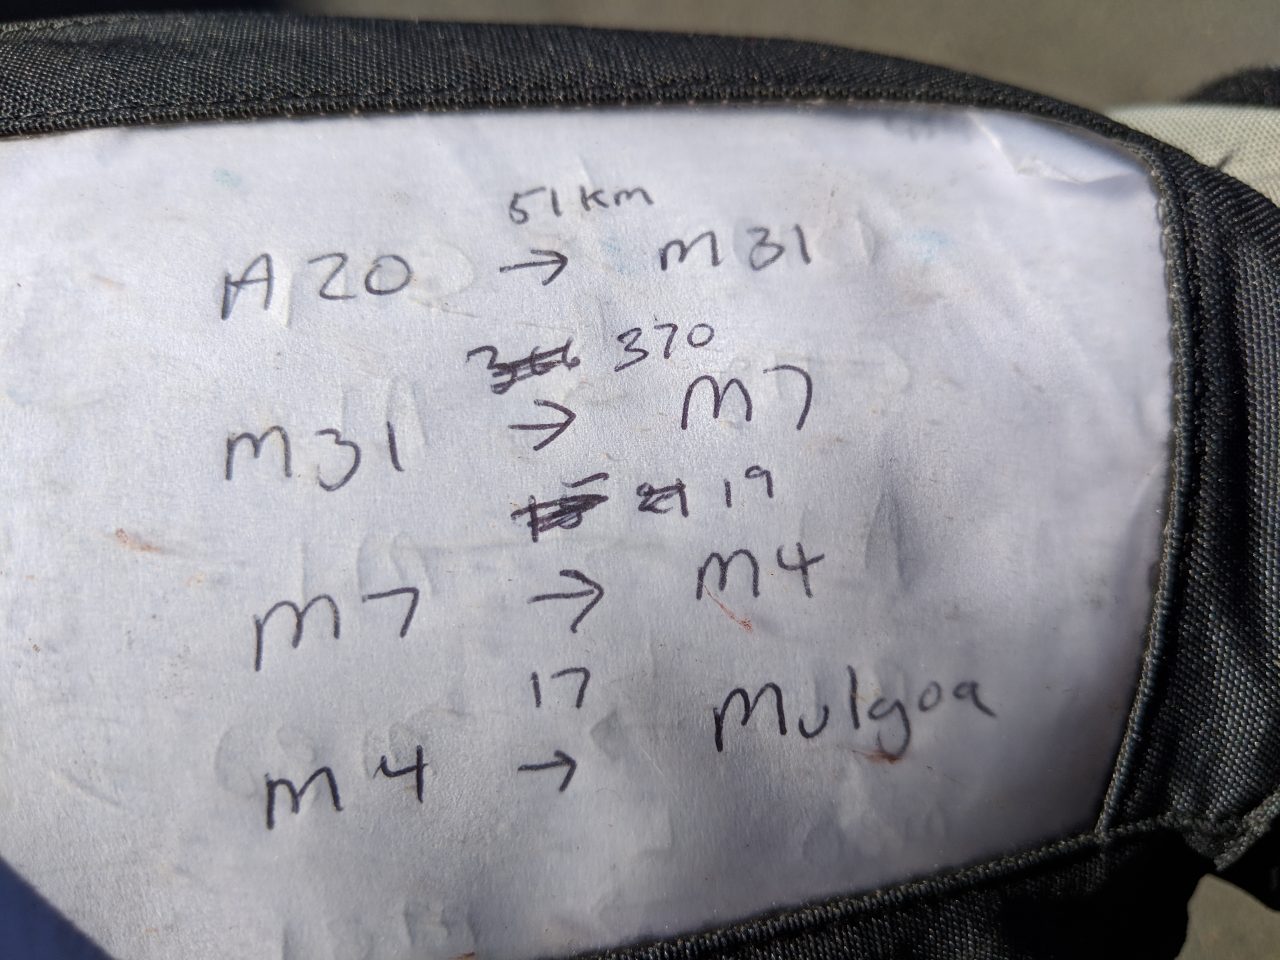
BikeRoundOz had me back on the road pretty quick. From rolling into the depot on the R1200GS Rallye, to moving panniers and everything over to an F800GS, to rolling out was only an hour and 30 minutes. The trip back to Melton itself had cost me most of the day. I’m quite familiar with marathon miles on a bike. 500-700 miles in a day is my typical ride in the states. I could make up the lost time if I hustled and that was my plan. I made reservations at the Prince of Wales Motor Inn over in Wagga Wagga New South Wales and hit the road. The weather had turned for the better and I was feeling good with the wheels turning and the miles stacking up behind me.

(At this point I also decided to swap the helmet camera to time lapse. The SD card was filling quickly. Battery drain for video was also an issue.)[/vc_column_text][vc_single_image image=”8477″ img_size=”full” add_caption=”yes” alignment=”center”][vc_single_image image=”8505″ img_size=”full” add_caption=”yes” alignment=”center”][vc_column_text]I rolled into hotel’s parking lot at 9:40 pm with about a half gallon of fuel in the tank. I was on fumes as well. The proprietor had stashed the key to my room and told me where he hid it. There was even milk for tea. Every battery was in need of a full charge, and I was in need of a hot shower and sleep so I wasted no time.[/vc_column_text][vc_single_image image=”8481″ img_size=”full”][vc_single_image image=”8550″ img_size=”full”][/vc_column][/vc_row][vc_row][vc_column][vc_column_text]

Day 6: Blue Mountains National Park

[/vc_column_text][vc_column_text]
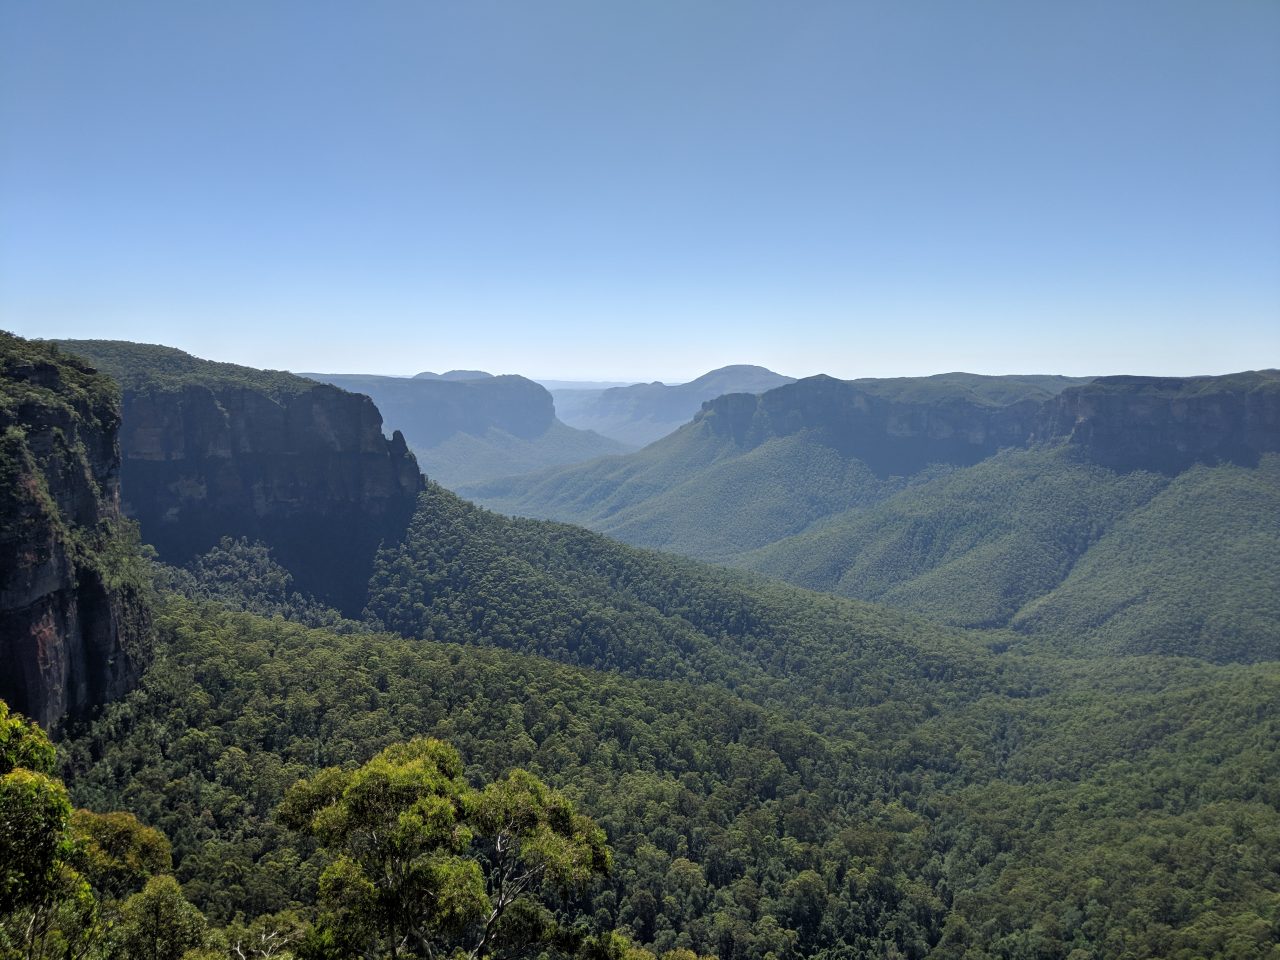
The small part of Grand Canyon track lays ahead of me. The Blue Mountains are a hiker’s paradise. The trails date back to 1825 and features one of the most extensive trail systems in Australia. What little exposure I give it here does not do it justice!

This night I stayed at Murphys Glen campground in Blue Mountains National Park. It’s a free primitive campground reachable only by 2 track or 4WD.[/vc_column_text][vc_single_image image=”8224″ img_size=”full” add_caption=”yes” alignment=”center” onclick=”img_link_large”][vc_single_image image=”8462″ img_size=”full” add_caption=”yes” alignment=”center” onclick=”img_link_large”][vc_single_image image=”8225″ img_size=”full” add_caption=”yes” alignment=”center” onclick=”img_link_large”][vc_single_image image=”8463″ img_size=”full” add_caption=”yes” alignment=”center” onclick=”img_link_large”][vc_single_image image=”8543″ img_size=”full” add_caption=”yes” alignment=”center” onclick=”img_link_large”][vc_single_image image=”8508″ img_size=”full” add_caption=”yes” alignment=”center” onclick=”img_link_large”][vc_single_image image=”8509″ img_size=”full” add_caption=”yes” alignment=”center” onclick=”img_link_large”][/vc_column][/vc_row][vc_row][vc_column][vc_column_text]

Day 7: Wagga Wagga Again

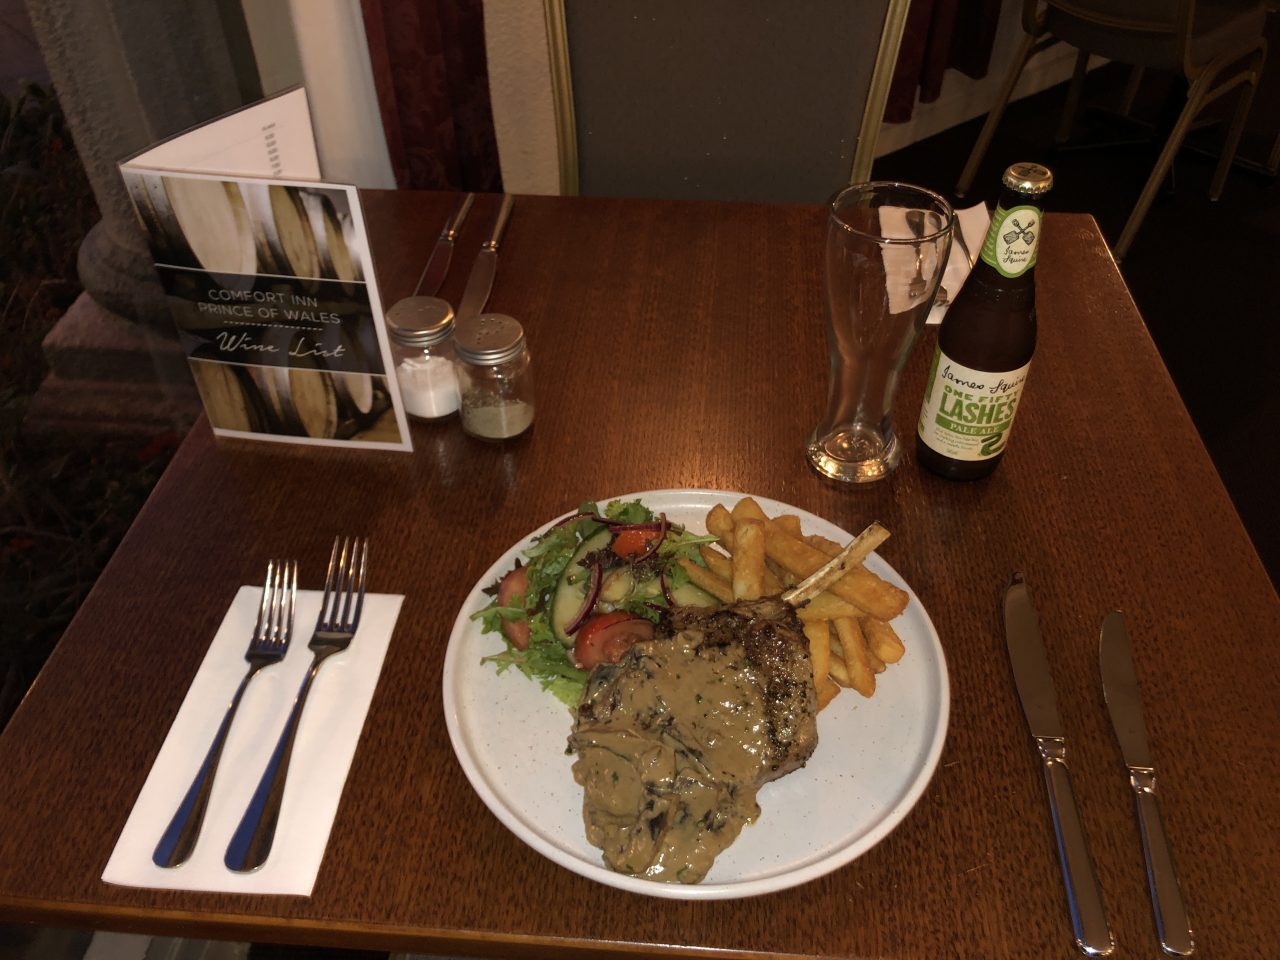
Packing up at the Blue Mountain campsite, it was time to head back. When I get back in to Melton I will have covered 1764 miles, but first I had one more night. I decided to spend that night at the Prince of Wales Motor Inn again. Making sure I had a room when I rolled in late the first time was appreciated. I felt choosing to stay there again was a good way to show that appreciation. And perhaps showing up at a reasonable time too.

But I can’t say my motives were entirely altruistic. The first time I stayed there I noticed a brewery was right next door. When in Australia one must do as the Australians![/vc_column_text][vc_single_image image=”8770″ img_size=”full” add_caption=”yes”][vc_column_text]

Logistics Again

Back at Melton and BikeRoundOz it’s time to get back into street clothing and unpack the bike. Time to deal with the explosion of gear everywhere and then the repacking for the trip home. Cheers to BikeRoundOz for tolerating the use of your garage and office space for this. I also found out what happened to the Rallye. They had brought the bike to a dealer and had it serviced. After the code was cleared they couldn’t find anything wrong with the bike. Damn the luck.[/vc_column_text][vc_single_image image=”8500″ img_size=”full”][/vc_column][/vc_row][vc_row][vc_column][vc_masonry_media_grid initial_loading_animation=”none” grid_id=”vc_gid:1553294904596-ba85d8ea-2af2-8″ include=”8525,8636,8635,8634,8633,8637,8632,8645,8653,8638″][vc_column_text]

An Epilogue to an Adventure

The first half of this adventure ends here. The second half of my trip was for the wedding of my Brother and his Fiancée. I’ll skip the wedding photos but there are parts that are relevant and would fit in well with any adventure tour of Australia.

Healesville Sanctuary

Formally known as the Sir Colin MacKenzie Sanctuary, it is located in Badger Creek, Victoria, Australia. About an hour’s drive east north east of Melbourne. Healesville Sanctuary specializes in native Australian animals. Keeper talks offer an opportunity to hear about the animals, their care, and the conservation work being done for various species in Australia.[/vc_column_text][vc_single_image image=”8218″ img_size=”full” alignment=”center” onclick=”img_link_large”][vc_single_image image=”8431″ img_size=”full” alignment=”center” onclick=”img_link_large”][vc_single_image image=”8430″ img_size=”full” alignment=”center” onclick=”img_link_large”][vc_single_image image=”8432″ img_size=”full” alignment=”center” onclick=”img_link_large”][/vc_column][/vc_row][vc_row][vc_column][vc_column_text]

Mount Martha Victoria, Australia

The town dates back to the 1840s and today it’s a vacationer’s beach town. If you are planning on following the Australian coastline on your Oz adventure it’s a good place to swap things up from camping and still put your toes in the sand and get your feet wet (far better than a cold rain storm wet too).[/vc_column_text][vc_single_image image=”8548″ img_size=”full” add_caption=”yes” alignment=”center” onclick=”img_link_large”][vc_single_image image=”8449″ img_size=”full” add_caption=”yes” alignment=”center” onclick=”img_link_large”][vc_single_image image=”8450″ img_size=”full” add_caption=”yes” alignment=”center” onclick=”img_link_large”][vc_column_text]You really can’t expect me to travel all the way to Australia and not try a meat pie.[/vc_column_text][vc_single_image image=”8560″ img_size=”full” alignment=”center” onclick=”img_link_large”][/vc_column][/vc_row][vc_row][vc_column][vc_column_text]

Highway Travel in Australia

There isn’t an extensive interstate highway system in Australia like you will find in the U.S. I found this refreshing. The temptation to get from point A to B the fastest possible way to maximize your time at those locations is really strong. As a result you can make your way across the entire United States on our interstate system isolated from the local communities stopping only at gas stations, hotels, motels, and dining on fast food and chain restaurants. Honestly, you miss a lot of the U.S. that way. An Adventure isn’t just full throttle point A to B. It’s about exploring the spaces in between as well, and Australia will force you down main street in the small towns.[/vc_column_text][vc_video link=”https://youtu.be/IigTOewrvd8″][vc_column_text]

Speeding

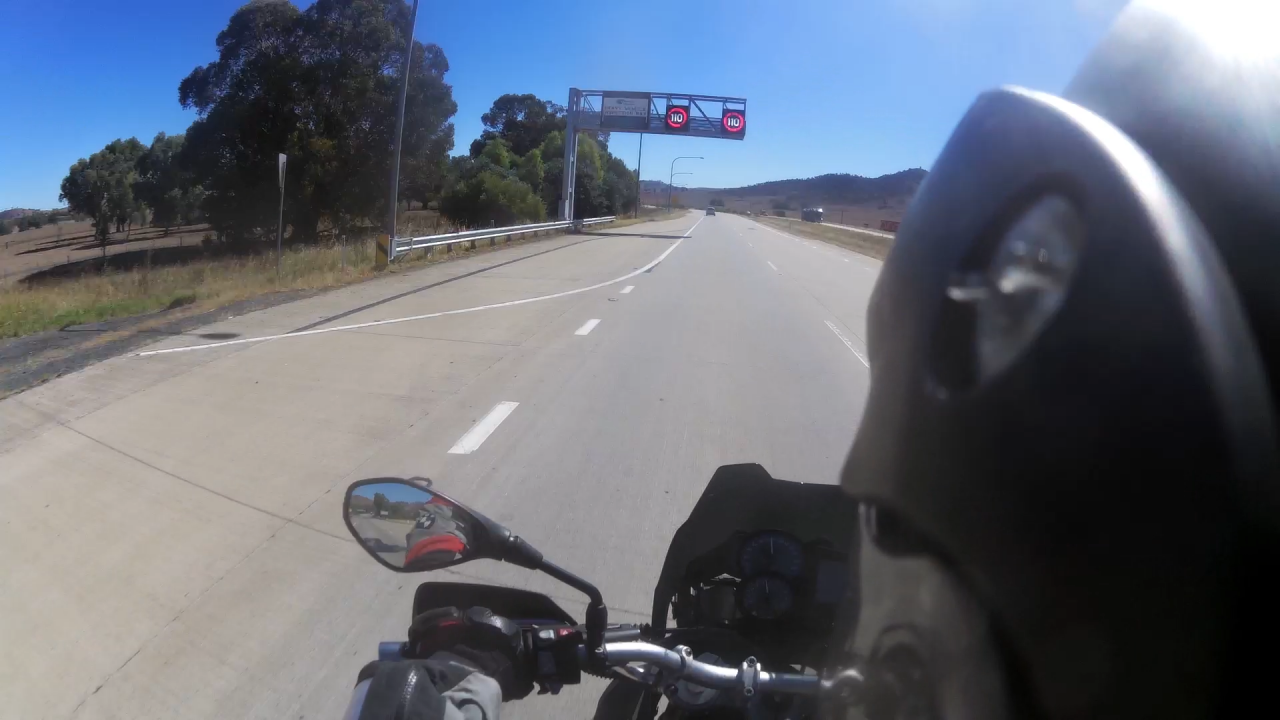
Don’t. There isn’t the leeway you will find here in the U.S., and there is no such thing as going 5 or 10 over the speed limit and being “ok”. The police are extremely rigorous when it comes to speeding, and speed cameras are used in cities and on the major highways. So keep to the limits and obey all traffic laws.[/vc_column_text][vc_single_image image=”8515″ img_size=”full” add_caption=”yes” alignment=”center”][/vc_column][/vc_row][vc_row][vc_column][vc_column_text]

Dangerous Environments

You’ll hear the phrase “everything in Australia can kill you” before you go. Yes. It can happen but it’s rare. There are some simple things you can do to keep yourself out of trouble when in the wild. Most importantly if you see a sign warning you to avoid an area then don’t ignore it.[/vc_column_text][vc_column_text]Wear appropriate boots that protect your ankles and toes from snakes when walking in the bush. Armored ADV boots are perfect. Snakes usually avoid being out in the open and are often hiding underneath bushes, stacks of leaves, or other ground debris.  Keep your body parts off, out, and away from these areas and always look before you sit anywhere. If you are not a meal snakes will prefer to leave an area and avoid the encounter. Announce your presence by walking heavily.[/vc_column_text][vc_single_image image=”8221″ img_size=”full” add_caption=”yes” alignment=”center”][vc_column_text]Make it a habit to always keep mosquito net zipped up by closing it behind you as soon as you exit/enter. Don’t leave your gear outside your tent at night. Spiders or other critters may make a home out of them. If keeping your gear inside a tent isn’t an option then check the gear before putting it on or stowing it. Don’t place a hand inside or underneath. Flip and shake out your boots. Grab a camp chair by the back and flip it over to expose the underside before folding it up.[/vc_column_text][vc_single_image image=”8465″ img_size=”full” add_caption=”yes” alignment=”center”][/vc_column][/vc_row][vc_row][vc_column][vc_column_text]

Getting There

[/vc_column_text][vc_column_text]There is simply too much for me to cover every item and situation when traveling to Australia. What’s included here is the information that I needed for my trip, some general advice, and a list of basic resources to give you a head start for your Australian Adventure.[/vc_column_text][vc_single_image image=”8564″ img_size=”full” add_caption=”yes” alignment=”center”][/vc_column][/vc_row][vc_row][vc_column width=”1/4″][vc_column_text]

AU Government

AU Parks

AU Camping

AU Gear

US Government

[/vc_column_text][/vc_column][vc_column width=”3/4″][vc_column_text]

Traveling With Medication

You must declare medication on your Incoming Passenger Card (IPC). Don’t bring someone else’s medication. Ensure the medication remains in its original packaging with the dispensing label intact. All medications containing codeine will require you to bring the prescription from your Doctor. Just to be on the safe side it is advisable to have a letter or a prescription from your doctor or practitioner. You will need special permission to bring more than a 3 months’ supply of medicine into Australia.

Backpacks

This was my carry-on. Why not? Right? In it I had placed my spare (uninstalled) lithium batteries. Spare lithium batteries (both lithium metal and lithium ion/polymer) are prohibited in checked baggage. My personal hygiene kit. My Spot and Garmin GPS electronic devices. Contact your airline in advance. Ensure the backpack conforms to their carry-on size restrictions. I don’t recommend it but if checking your backpack then ask if it can be placed in a container or use heavy duty wrapping plastic to secure the straps to keep them from getting caught in the conveyor belts and to deter theft of opportunity. Also consider how you will accomplish this if checking your backpack on the return trip as well.

Camp Stoves

Camp Stoves must be free from fuel fumes emitting from the stove. Camping fuel, burning paste, etc. are prohibited for obvious reasons. These items must be obtained at a camp store after you arrive.

Insect Repellent

It’s a must-have. The liquid limits apply when carrying these in your carry-on bags so pack it in your checked baggage.[/vc_column_text][vc_column_text]

Australian Biosecurity

Australian biosecurity laws are very strict. This is to protect agriculture and unique wildlife from invasive species and diseases. Check with the Australia Department of Agriculture and Water Resources for what you need to declare. When in doubt just declare it. Also make note that you must declare on your Incoming Passenger Card (IPC) if you have visited a rural area or been in contact with, or near, farm animals in the past 30 days. Clean your tent spikes before you pack!

Food Items

I brought freeze dried camping food and declared it on my Incoming Passenger Card (IPC) and had no issues. I could have gone through customs faster though so just leave food items at home. Plan on stopping by a camping store like Anaconda and/or a market after you arrive to get fuel, insect repellent and camp food.

Camping equipment, including backpacks

To protect Australia’s livestock industries from foot-and-mouth disease and African swine fever the biosecurity officer will be inspecting items for soil and/or manure that is being carried with them. Thoroughly clean and dry your equipment before you travel to Australia. Don’t forget to clean your tent pegs.

Freshwater recreational and water sport equipment

Didymo (Didymosphenia geminata) is a cool, freshwater algae that forms thick mats which smother river beds. It is almost impossible to eradicate and takes just a single live cell to establish and spread. While not present in Australia, it has invaded rivers and lakes in Europe, Asia, North America and New Zealand. Special care is therefore required when bringing equipment into Australia that has been used in fresh water overseas. You must declare freshwater equipment on your Incoming Passenger Card (IPC). It must be thoroughly cleaned to remove any algal clumps, and be completely dried for inspection in Australia.[/vc_column_text][/vc_column][/vc_row]

Snowbike Project – Part 2

THE SOBERING REMINDER

The winter of 2017-2018 has been a rough one.  Snowfall has been well below average in the Southwest, and that’s made for scary conditions both in terms of snowpack stability (lots of avalanches) and hazard coverage (stumps and rocks).  The sad truth is that since the New Year, two individuals I’ve known personally who were both experienced winter backcountry travelers have died while backcountry skiing and snowboarding.  I’m not sharing this with you to try and scare you away, but to point out the fact that winter backcountry recreation can be very dangerous.  Yet the backcountry is also one of the most enjoyable places on earth, which explains why folks seek out the peace of the wilderness in every season.  If you want to snowbike in the backcountry and make it home at the end of your ride, then you need to have the gear, knowledge, and training to safely ride in backcountry avalanche terrain.

THERE WILL ALWAYS BE MORE TO LEARN

Snow science and snow safety are two disciplines that I would strongly encourage you to approach with the mindset of “there is always something to learn.”  You can get a doctorate degree in snow hydrology, so no, that’s not an embellishment on the amount of learning potential.  There’s also a great reason to continually practice with your avalanche gear, because if someone in your party is buried in an avalanche, seconds can mean the difference between a successful rescue and a body recovery.  If that someone buried is you, you’re going to want highly skilled buddies coming to your rescue, so make sure the folks you ride with are on the same level of training and preparedness.

Standard avalanche kit consists of a shovel, probe, and transceiver which is commonly called a beacon.  I’m personally a big fan of carrying the biggest shovel I can fit in my pack, so I’m currently carrying Black Diamond’s Evac 9 shovel.  Yes, it takes up more space and weighs more than other options out there – but when it comes time to dig, I can move snow much faster and dig more effectively than if I were using a tiny shovel (have you tried to dig a hole while standing with a foot long shovel?  It doesn’t work so well).  Probes are typically available in aluminum and carbon fiber—I own both, and use both, so I’d say it’s a matter of preference.  Just make sure your probe can be assembled quickly and will lock into its assembled form.  Beacons could take up a number of articles to cover completely, so I’ll just say that I’ve been using the Peips DSP Pro for the last few winters, and have been really happy with it.  Having the ability to mark multiple buried beacons is a huge help when searching in a multiple burial situation.

Yet the most important feature on any beacon is going to be the skill of the operator using said beacon.  So practice with your beacon of choice to the point that using it becomes an instinct. Then go practice some more.  If you ski or snowboard, many ski areas have beacon basins where you can do practice searches on beacons buried by ski patrol.  If you don’t live by a ski area, have a buddy go bury a transceiver in a backpack for you to go find.

Airbag backpacks are also becoming much more common in the backcountry because they reduce the chances of burial, and have the potential to protect the wearer from injury.  Black Diamond has taken things a step further with its Jetforce line of airbag backpacks that can also create a pocket of breathing air, should a burial occur.  Jetforce packs use a battery powered ducted fan to inflate their airbags where other brands use CO2 (Jetforce is an accurate name, the thing sounds like a jet engine when you deploy it).  Black diamond’s packs can be deployed multiple times on a single battery charge (CO2 packs are a one inflation per cartridge deal), which is a comforting feature when you consider that Mother Nature isn’t limited to only one avalanche per day.

Lastly, carrying radios is a great way for your group to communicate, especially when moving through hazardous terrain one at a time.  Many places have adopted radio communication plans so that multiple groups in the same area can communicate and make plans that do not risk the safety of other groups.  Once you’ve picked up all of your avalanche gear, it’s time to go take an avalanche class.

GO TO SCHOOL

A level 1 class from the American Institute for Avalanche Research and Education (AIARE; pronounced air-ee) is an excellent way to learn about backcountry decision making, avalanche rescue, and avalanche terrain identification.  Level-one courses will have a classroom element and a field element so you can apply what you’ve learned in the classroom by analyzing real terrain and digging actual snow pits under the guidance of an instructor.  Snow pits allow you to see every layer in the snowpack and to gauge how stable the snowpack is with a number of different tests.

Another great resource exists with avalanche information centers, such as the Colorado Avalanche Information Center (CAIC) which provides weather and avalanche forecasts, snowpack discussions, and detailed reports whenever backcountry travelers are involved in an avalanche.  Consult Google or your local ski or snowmobile shops to find out where to get good avalanche information.

LEARN FROM OTHER’S MISTAKES

When you’re in the backcountry, pay attention to what’s going on around you.  The weather can change in an instant, and a calm bluebird day can turn into a blinding blizzard in minutes.  Keep an eye on which way the wind is blowing and how the wind may be scouring snow from one place and depositing it another.  Is the sun causing the snow to melt in certain areas (that will freeze at night) while shade is keeping other areas fresh and fluffy?  Snowpack can change significantly from aspect to aspect.  During a recent ride, we happened upon a perfect example of how wind-loading + shade + a bad snowpack had caused a really bad day for a snowmobiler.

This slide happened where the wind loaded snow on a Northeast facing aspect that receives little sun.  The weight of all that additional snow brought in by the wind strained a weak snowpack (note the cornice on the top and the increase in thickness of the snowpack at the top of the slide, called the crown, at the top left). When a sled came ripping into what looked like a great untracked hill the snowpack let go.  Backcountry travel in avalanche terrain is a slow process, so take your time and make good terrain assessments.  YOLO around one time too many and you might not get to go home.

The same feature shot hours apart.  In the morning the weather was perfect bluebird calm, but the afternoon got quite stormy.

GOOD GEAR MATTERS

In the blink of an eye an awesome day in the backcountry can turn into a serious situation, which is why having good riding gear is so important.  It may be warm and sunny in the morning, but should an afternoon storm roll in, or worse yet, should you get delayed by several hours or worse (a mechanical or a really stuck snowbike), having gear that will keep you warm and dry is critical.  You may be totally comfortable with just a cotton hoody when the sun is out, but how will you stay warm if you end up having to spend a windy night in the backcountry?

Klim’s Valdez parka and Havoc bibs have extensive venting that can be opened up when conditions call for just that cotton hoody, and when it gets cold and nasty these two pieces can be closed up becoming a veritable waterproof shield that can be layered over all the insulation layers you need.  The Togwotee gloves can be run as a shell in warmer temperatures, or used with the included fleece liner when the weather gets cold.  Likewise, the Adrenaline GTX BOA boots worked so well that we didn’t notice them, because our feet were just that comfortable.  From standing on the pegs to hiking exposed rocky ridge lines, these boots worked great.  Rounding out this excellent riding gear setup are the Oculus googles that provided fog-free performance 100% of the time we were riding.  Yes, good gear costs more, but when it comes down to it, I’ll gladly pay more to know that I’ll be warm and dry, no matter what the weather decides to do.  Cold, wet, and several hours from the truck is a special kind of miserable.  Do yourself a favor and buy good gear the first time around—that way you can get out and enjoy more days in a season instead of having to wait for those warm and sunny days.

Timbersleds are amazing machines that will have you saying “worth it” minutes after you first get on one.  Their ability to easily access terrain that has traditionally been the realm of expert backcountry snowmobilers and backcountry travelers means that more riders are heading into avalanche terrain who may not have the proper gear and training.  So please, get proper avalanche gear and good riding gear.  Take an Avalanche class.  Go dig pits and do practice beacon searches.  Read the reports and forecasts from your local avalanche center.  Pay attention to what the world is doing around you when you’re out there, and realize that some days, it may just be a better call to go ski in bounds at the resort.  Most importantly, when you’re out there enjoy every minute of it—because powder days never last long enough.

FULL DISCLOSURE: Timbersled provided demo units for this series of articles.  The motorcycles and all other accessories are owned by the author.  Klim provided all of the riding gear used for this project at no cost to the author or American Adventurist.  Likewise, Black Diamond provided the Jetforce Packs at no cost to the author or American Adventurist.

Snowbike Project – Part 1

From dirtbike to Timbersled

Snowbikes are every bit as fun as they look like on the internet, and then some.  We all know that dirtbikes are an absolute hoot to ride, and few things in life are as excellent as a bottomless powder day on your favorite ski resort.  So, if you can image what enjoying both of these activities at the same time is like, you’ll have a vague notion of how awesome snowbikes can be.  Freeriding in a winter wonderland has never been more free-to-ride, as you can go just about anywhere you want to.  And thanks to several companies, getting setup for snowbiking has never been easier.  This is the first article in an ongoing project that will show you what it takes to gear up for snowbiking, how to ride safely in the backcountry, and get you inspired to explore a winter world with a snowbike.

Wrench Time

Timbersled’s ARO (pronounced “Arrow”) systems make turning your dirtbike into a snowbike easier than ever before.  The days of spending hours cutting airboxes and bleeding brakes have been replaced with a (nearly) bolt-on system that you can install in just a few hours.  We installed Timbersled ARO 137 systems on a 2017 KTM 500 EXC-F and a 2012 Yamaha WR450F.  Here’s how the process went, going from knobbies to a track and ski.

Dirtbikes aren’t designed to operate in snow, so you need to add a couple of things to enable the dirtbike’s motor to run well in a winter environment.  Snow is much more effective at cooling than air, so the problem becomes keeping your bike up at operating temperature when you’re bombing around in the powder.  The first part you need to add to any dirtbike that’s going to become a snowbike is a thermostat, exactly like what would be found in your car.  Thermo-Bob makes thermostat kits for almost every dirtbike that can be turned into a snowbike, and when your engine starts to cool off the Thermo-Bob will cut off coolant flow to your bike’s radiators to help conserve engine heat.

Thermo-Bob installation on both bikes was straightforward and allowed us to install a Trail Tech TTO Temp sensor, so that we could monitor engine temps in real time.  Yet even with a Thermo-Bob, snow flying onto your engine can keep the temperatures too low, so we picked up engine jackets from Power Sports Tech (PST) to keep snow off our engines.  Just like a ski jacket, the PST Engine jackets can be adjusted and vented to allow air and snow to contact the engine or keep it off depending on riding conditions.

Other than the Thermo-Bob thermostats and the PST Engine Jackets, we switched to 0W-40 Shell Rotella T6 synthetic oil to allow for easer cold starts and to help with lubrication in low temperatures.  If your bike doesn’t have a header guard, pick one up to protect your expensive snow pants from melting on a hot header.  Converting your dirtbike to a snowbike is also a great excuse to go through your bike and grease everything in addition to performing any maintenance tasks that you may have been putting off.  Spending a few bucks on parts is a much better deal than having to walk out of the woods in the dead of winter.

In addition to a Timbersled ARO track system, you’ll also need to get a fit kit, which has specific reducer bushings and other parts for your bike.  The Timbersled system also replaces your bike’s rear shock, and we highly recommend the Timbersled Strut System (TSS) which is an airshock that replaces your stock coil unit.  Likewise, the Timbersled TRIO is a great alternative to having to sink money into constantly re-valving your forks for snowbiking and then back to dirt settings.  Snowbiking places different loads on your fork than dirt does, and the TRIO helps your fork better handles those loads.  Like the TSS, the TRIO is an air shock, so you can dial-in the air pressure in to get the exact damping performance you want.  A wheel kit will make moving your Timbersled around much easier on dry land, and a snowbike ramp is also a good buy if you’re going to be transporting your snowbike in the back of a truck as we did.

Installing the Timbersled system on your dirtbike will take a few hours for any experienced wrench.  We installed the kits on both of our bikes in a single day, working at a leisurely pace and stopping to take photos.  Check out the official Timbersled YouTube channel to familiarize yourself with the install process, and look up the part numbers for your specific bike’s reducers before you hit that step in the install process to speed things up.  On both of our bikes, the correct reducers were not stamped with any part numbers, but this was a minor snag that was resolved with test-fitting to check for proper clearance and alignment.  Use common sense if you run into this problem and don’t sweat the extra parts left over – the fit kits are designed to work with more than one model of bike.

We also had to cut off the kickstand bracket on our WR450F to clear the track, so if you’re working with one of these bikes, pick up a spare before you plan on riding dirt again.  Other than that, everything goes together without much hassle, and not having to hack up an expensive airbox or deal with brake fluid makes your time in the shop that much better.  The ARO kits make it feasible to ride snow one weekend and dirt the next, with just a few hours of wrench time in between.

Gear For Your Comfort and Safety

With your snowbike all sorted and ready to ride, you’ll also need to make sure that you’ve got good gear for yourself to stay warm and dry while out riding.  Cold and wet can turn into a serious situation fairly quickly, which is why we recommend quality riding gear, such as the Adrenaline GTX BOA boots, Havoc Pants, Valdez Parkas, Togwotee gloves, and Oculus goggles we used from Klim.  All this gear worked brilliantly, and kept us warm and dry on bluebird powder days and during obscenely windy blizzards.  Riding gear will be covered more in the next article.

If you’re going to be riding anywhere near avalanche terrain, you absolutely must pack and know how to use avalanche gear: A beacon, probe, and shovel.  It’s also worth picking up an airbag backpack, such as the Black Diamond Jetforce Saga 40 which we’ve been using.  Airbag backpacks have been shown to reduce the chances of burials in avalanches, potentially protect the wearer from injury, and in the case of the Black diamond Jetforce packs, provide a pocket of breathing air should a burial occur.  Jetforce packs use a ducted fan to inflate a 200 liter airbag with atmosphere, unlike other packs that use a CO2 cartridge.  We’ll be covering snow safety in depth in the next article.

This may all sound like a bunch of work just to be able to ride your dirtbike in the snow, but I’m here to tell you that it is worth every penny and worth every second of your time.  A Timbersled allows you to explore a wintry world better than anything else designed to go over-snow.  It combines all the best parts of dirt biking with the experience of big mountain powder skiing all without the crowds or the lift lines and at half the price of buying a new mountain snowmobile.  A Timbersled system is the key to unlocking a whole new world to ride in.


FULL DISCLOSURE:

Timbersled provided demo units for this series of articles.  The motorcycles and all other accessories are owned by the author.  Klim provided all of the riding gear used for this project at no cost to the author or American Adventurist.  Likewise, Black Diamond provided the Jetforce Packs at no cost to the author or American Adventurist.


2017 Klim Cow Tag

I never knew that motorcycle trail advocacy could be so much fun.  For me, trail advocacy has always meant being the boots on the ground and swinging a hand tool playing in the dirt to build or maintain trails.  Working dirt is good fun, but we all know that it’s more fun to ride a trail than build it.  Yet, the folks at Klim have figured out how to make riding trails something that directly benefits trail advocacy:  Enter Klim’s Cow Tag event.  Now in its third year, the Cow Tag event brings in riders from all over North America to ride in Klim’s backyard trail system, win great prizes, and most importantly to raise money that goes to trail advocacy groups like The Blue Ribbon Coalition and the Idaho Trail Machine.

THE EVENT

If you’re wondering how Klim, whose gear has awesome names like ‘Drifter’, ‘Badlands’, and ‘Oculus’, decided on ‘Cow Tag’ for an event name, let me explain.  The event works like this:  At registration, you’re given a map of the entire trail system that has the locations of a bunch of cow tags (literally the things you see fixed to a cow’s ear) sprinkled all over it.  During the event, your objective is to ride to as many tags as you can and record the number written on the back of the tag.  Each tag is worth a certain number of points, and the end of the day the number of points you collect determines how many raffle tickets you get.  You’re then free to put your raffle tickets in a drawing to win gear from a number of awesome brands who all support trail advocacy.

THE TRAILS

The Big Hole Mountain trail system is something you can’t truly appreciate until you sampled some of this world class single track in the Caribou Targhee National Forest.  Ribbons of single track are laced over this awesome country by folks who clearly see the world through a dirt biker’s pair of goggles.  Hundreds of miles of trails climb to rocky ridge lines with stunning views and then drop into winding canyons that look like they came straight out of Middle Earth.  Trails thread their way through tunnels in the forest and along the sides of mountains.  There are no fall zones and snowfields, log and creek (read: river) crossings and technical moves innumerable – in short it’s a singletrack paradise.

This trail system has something for everyone.  From fast and flowy to hard-enduro technical, your dream trail is out there.  The folks at Klim have graded all of the trails for the event from green to double black on a difficulty scale (think ski area trail ratings).  Greens are typically two-track trails that are open to ATV’s too.  Don’t let that fact discourage you – ATVs tend to carve out perfectly-bermed turns that are an absolute hoot on a dirtbike.  Blue trails range from fast and flowy to easier technical moves and some exposure thrown in for good flavor.  My riding buddies and I spent most of our time on blues, and we were blown away by just how many miles of awesome trail are in this system.  Single blacks are where things start to get fun, as these trails have mandatory technical moves, and depending on which way you’re going on a trail some rather fun ledges and other obstacles to climb.  Double blacks are where you’re going to find the exposure and technical moves that can mean bad things if you blow a line.  One of the double blacks we sampled was a goat track across a very steep slide slope, and it took everything four guys had to recover a bike that slipped off the trail.

THE BIG PICTURE

Klim’s Cow Tag event is the best trail advocacy experience I’ve had in my life – and I’m fortunate enough to live in a community where we get to build new dirtbike trails with the forest service every year.  Roughly 300 riders participated in this year’s event, and judging by the dusty, smiling faces I saw everywhere at the end of the day – I know everyone had a great time.  And, all of the riders that participated in the Cow Tag can feel good about the fact that not only did they have a great day of riding, but they’ve helped to make sure that places like the Big Hole Mountain trail system stay open to dirtbikes.

Trail advocacy is something that everyone who recreates outdoors needs to be involved in.  Whether you’re on two wheels or four, if you value the trails that you utilize, then you need to support or, better yet, get involved with an organization that’s working to ensure your access to our nation’s trails.  If we don’t get involved, we will only loose access to the trails and trail systems that we all love riding.  Klim has created something brilliant in the Cow Tag event – they made trail advocacy something that is a ton of fun to participate in.  They’ve found great companies and organizations to partner up with to help make this event possible, and it’s my sincere hope that other companies, clubs, and organizations will follow suit to host events like the Cow Tag all over the place.  The more folks that get involved in trail advocacy, the better the odds are that world-class trail systems like the Big Hole Mountain trail system will be open for years to come.  Do yourself a favor – if you can travel to one place to ride next year, go to the Cow Tag event.

Thanks to Adam, Kenny, Stephen, and Christian for letting me continually stop the ride to take photos.  Thanks to all of the awesome folks at Klim and all of the other organizations that put on an outstanding event for a great cause.