DIY: The Ultimate Headlamp (Or Practically Anywhere Lamp)

LIGHTBULB MOMENT:

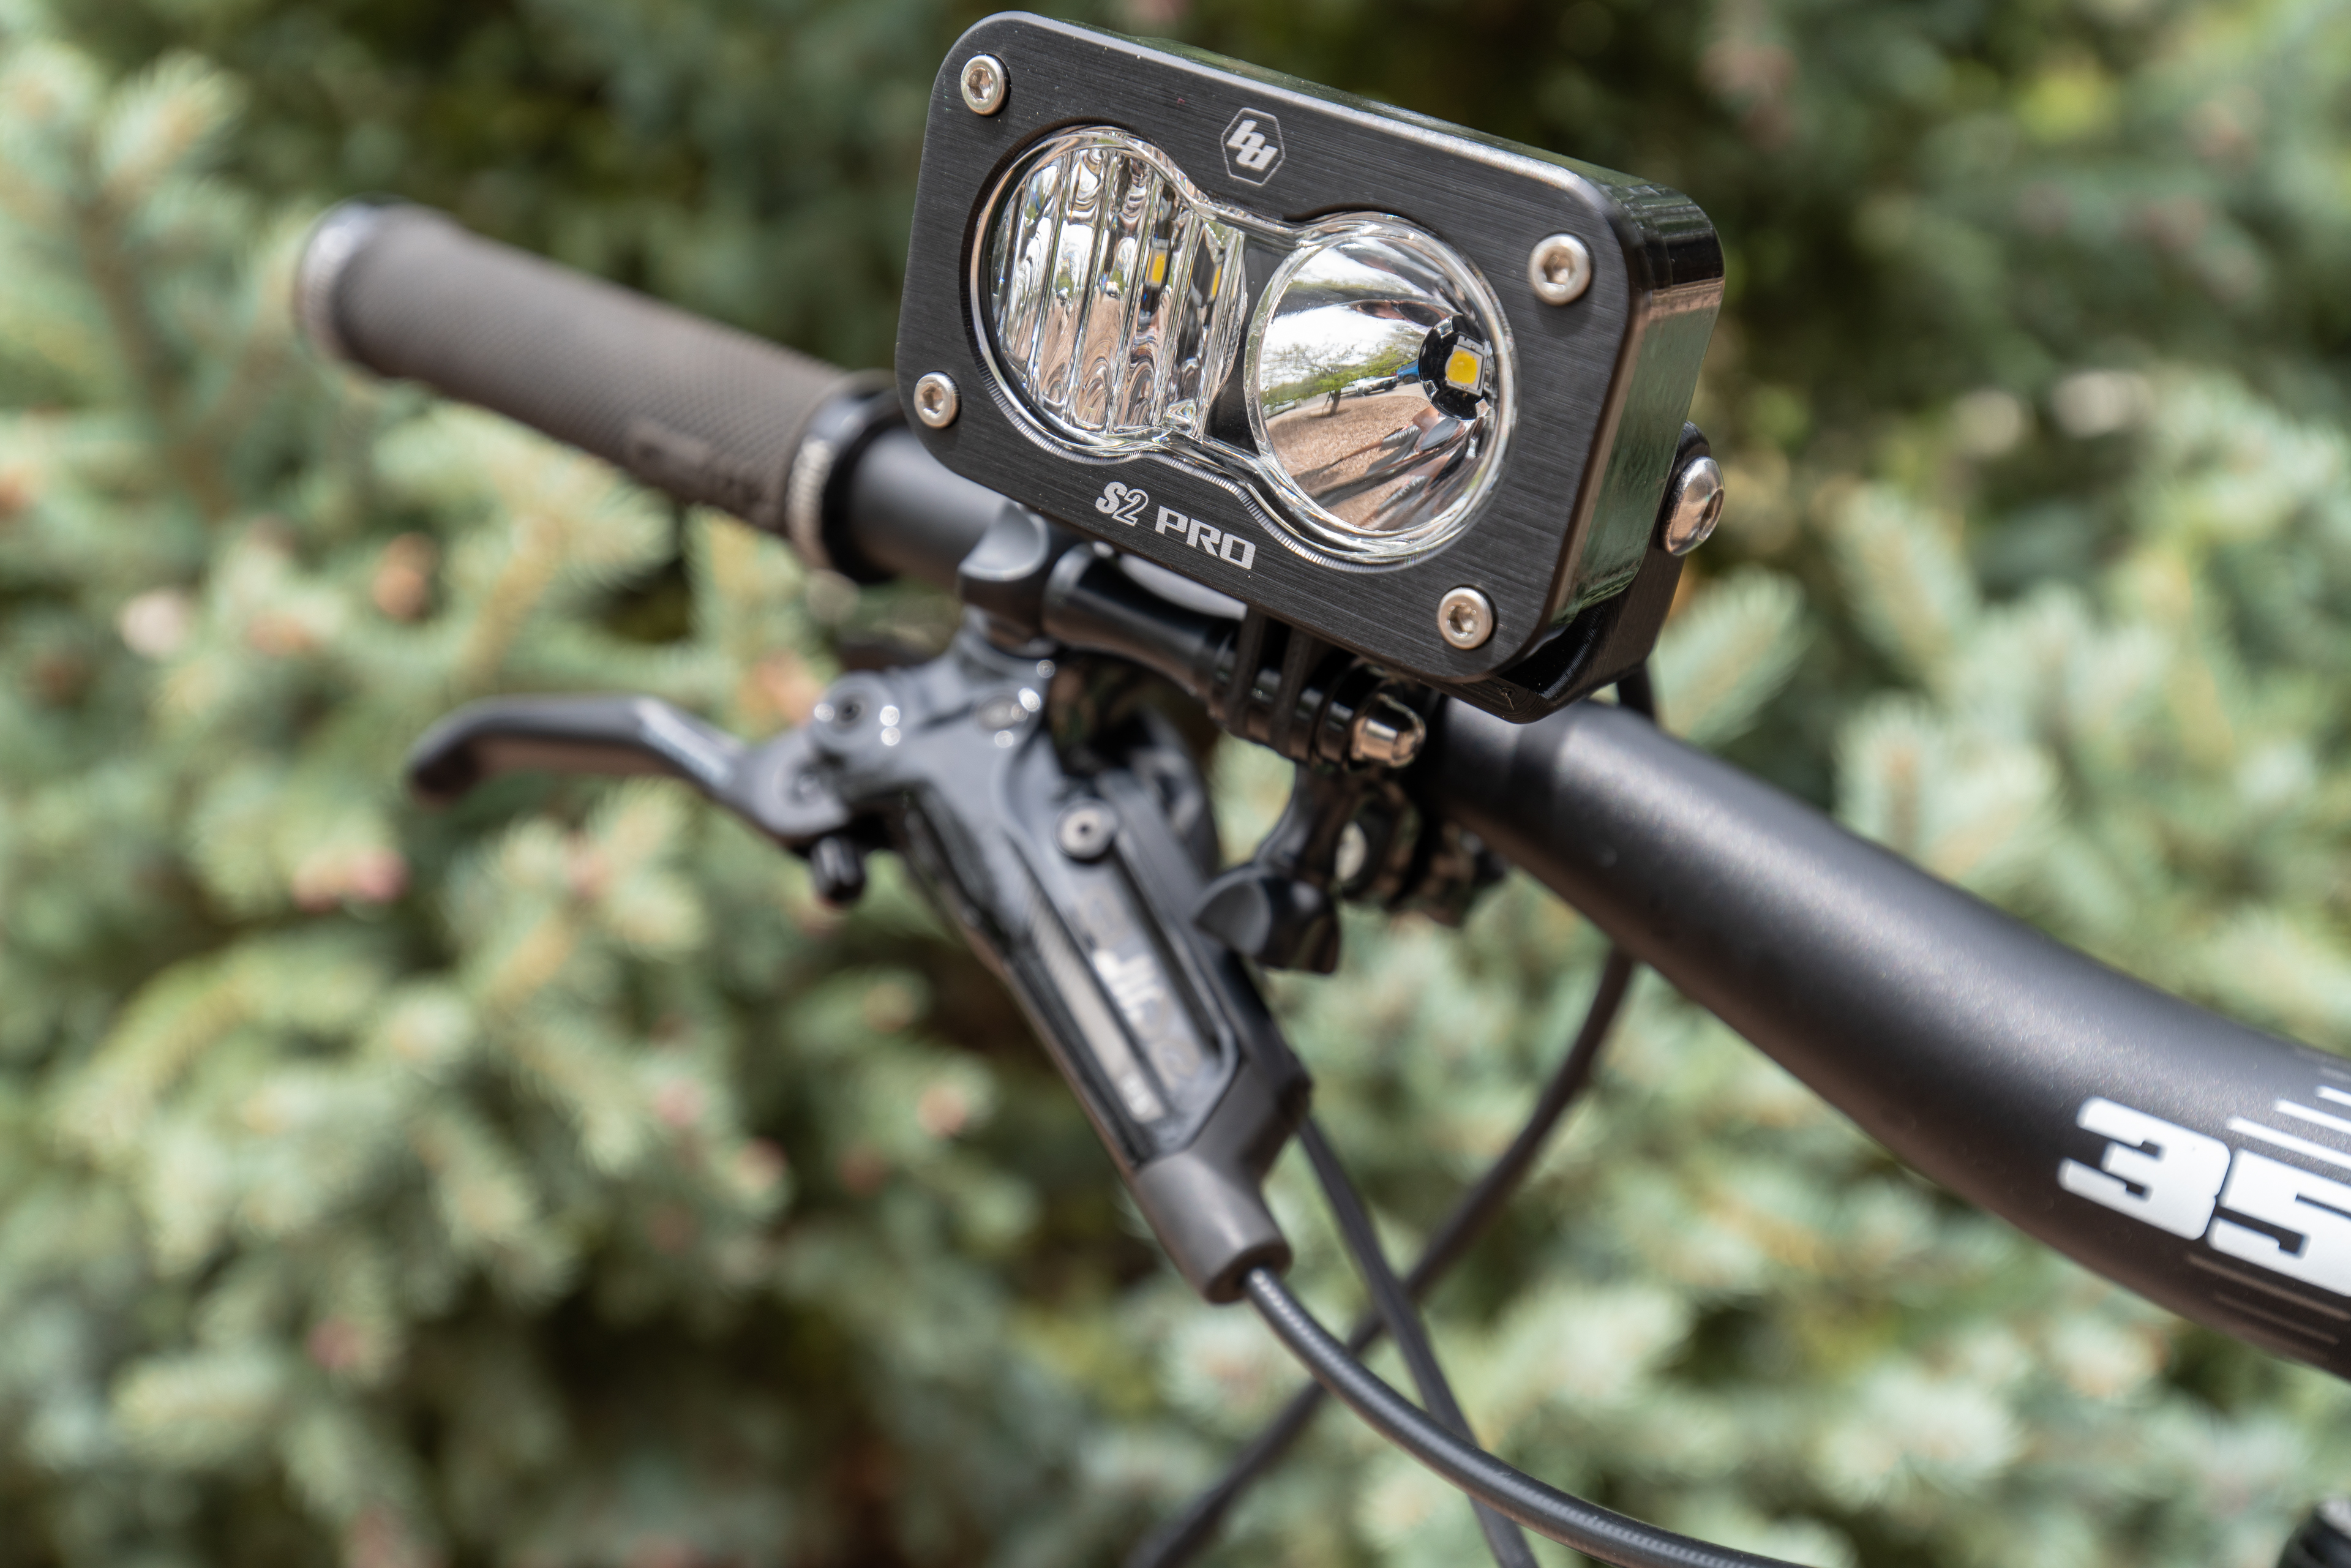
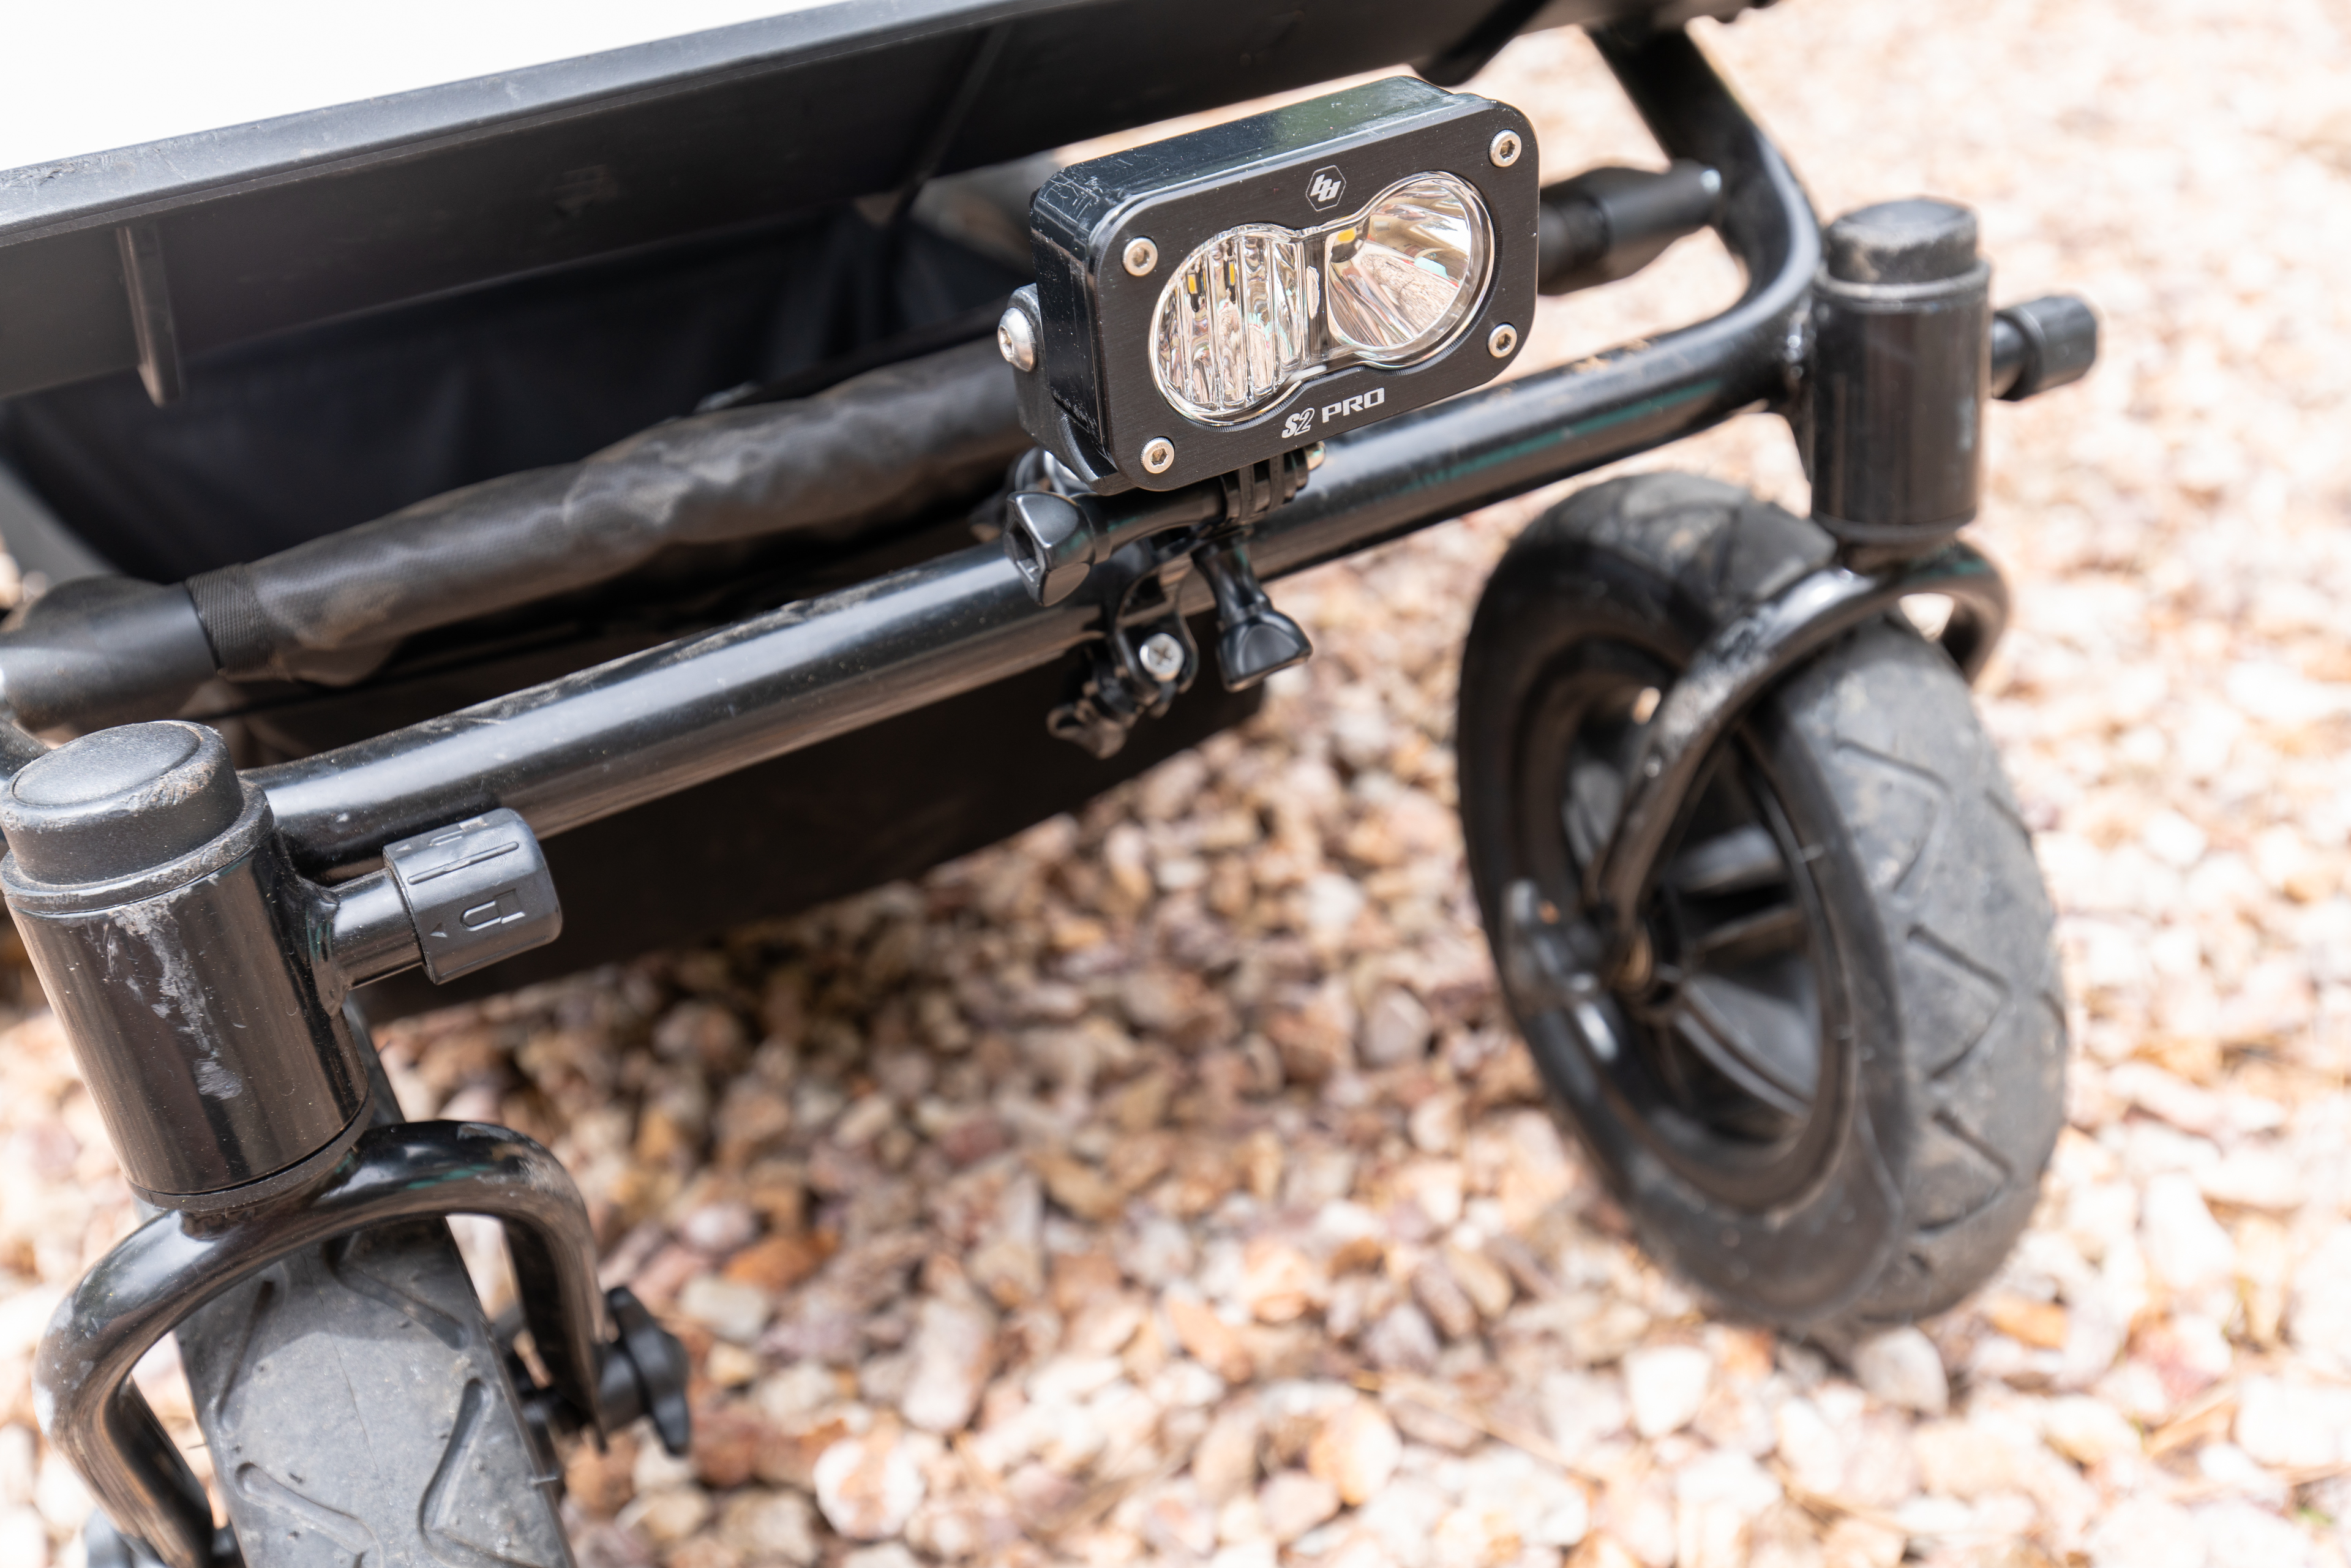
Inspiration comes at the most random times, and in the most random of places.  At the 2017 SEMA show, I was talking to the crew at Baja Designs when I noticed that one of the guys had built a battery powered Squadron light, and it got me thinking.  What if I could take a small Baja Designs light like the S2 Pro, and 3D-print a mount for it that would make the light work with the GoPro ecosystem of mounts?

This way I could mount the light on my helmet, or any place a GoPro mount could be used, including the magnetic mounts we covered in our meet the maker series of articles.  The S2 Pro’s 2,450 Lumens of light mounted on a helmet, bike, or in any dark place would make a huge difference in visibility and safety (in being able to see further at night), and the compact size and minimal power consumption meant that running the light off a battery would not require lugging a car battery around.  I could power the S2 with some of the dozens of LiPo batteries I have (Drone pilot problems) and any 9-30V DC power source.  With this bright idea in my head, I fired up Solidworks, and started raiding my various parts bins in the shop for materials.  Here’s what I came up with:

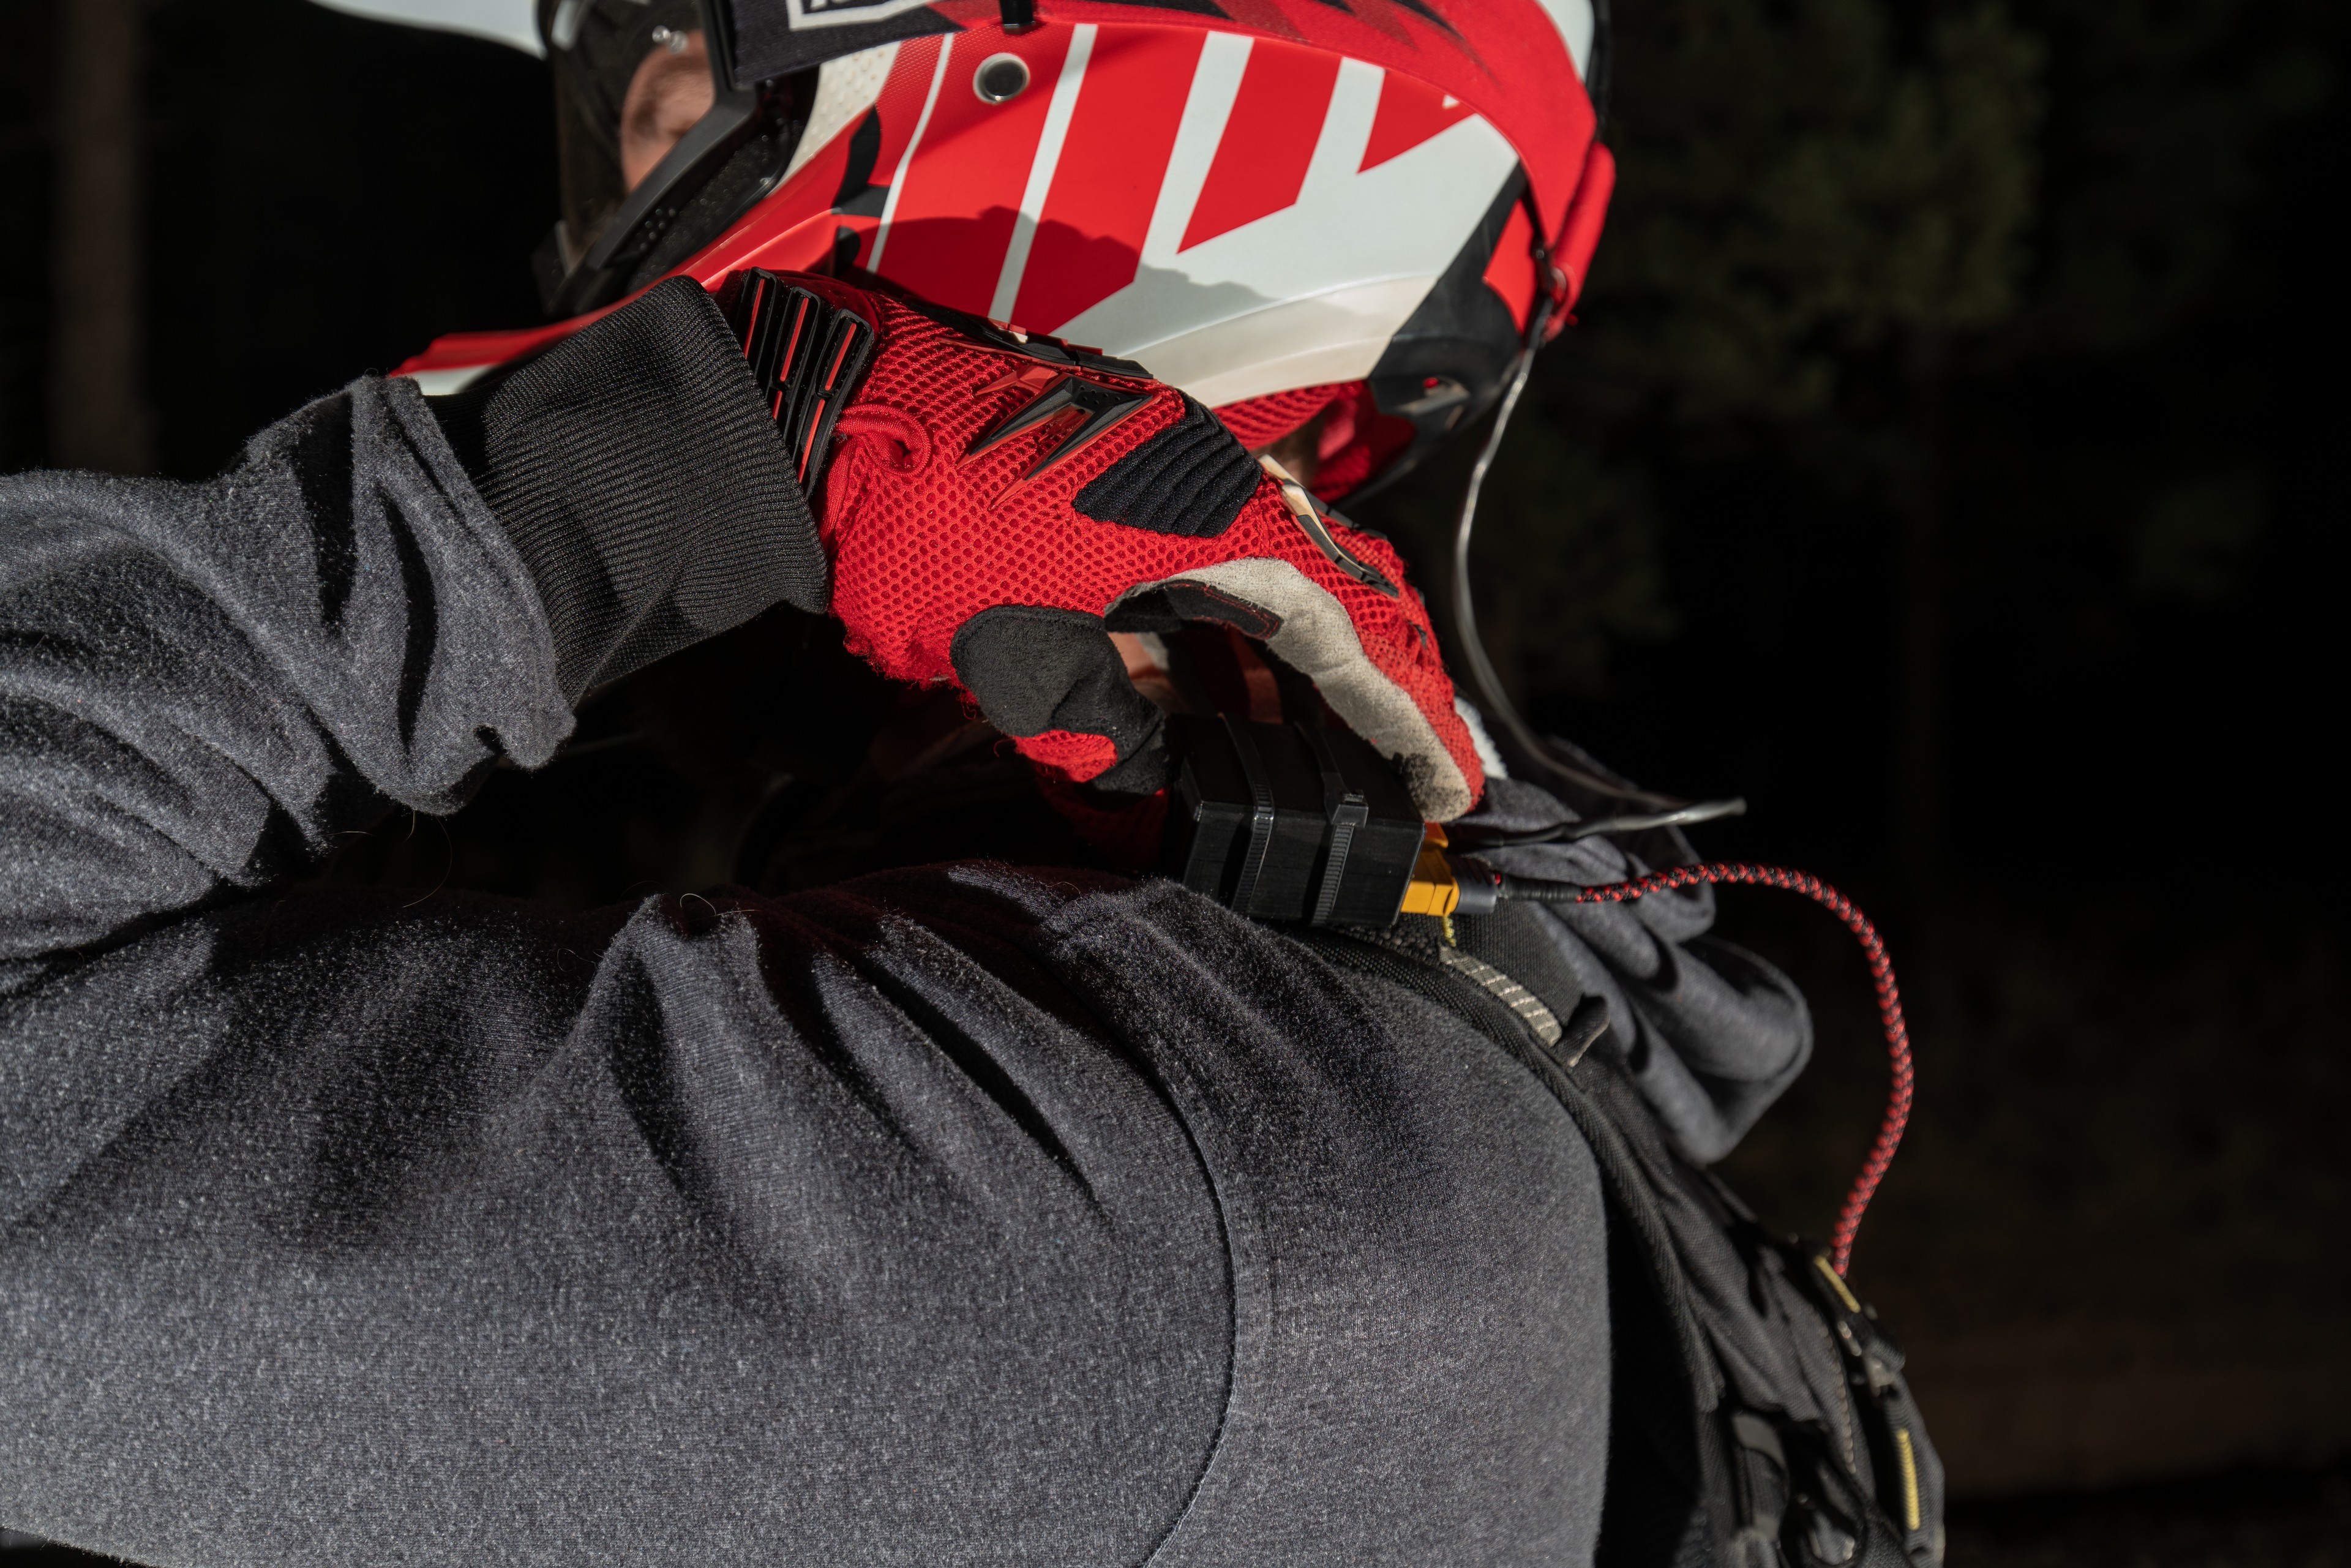
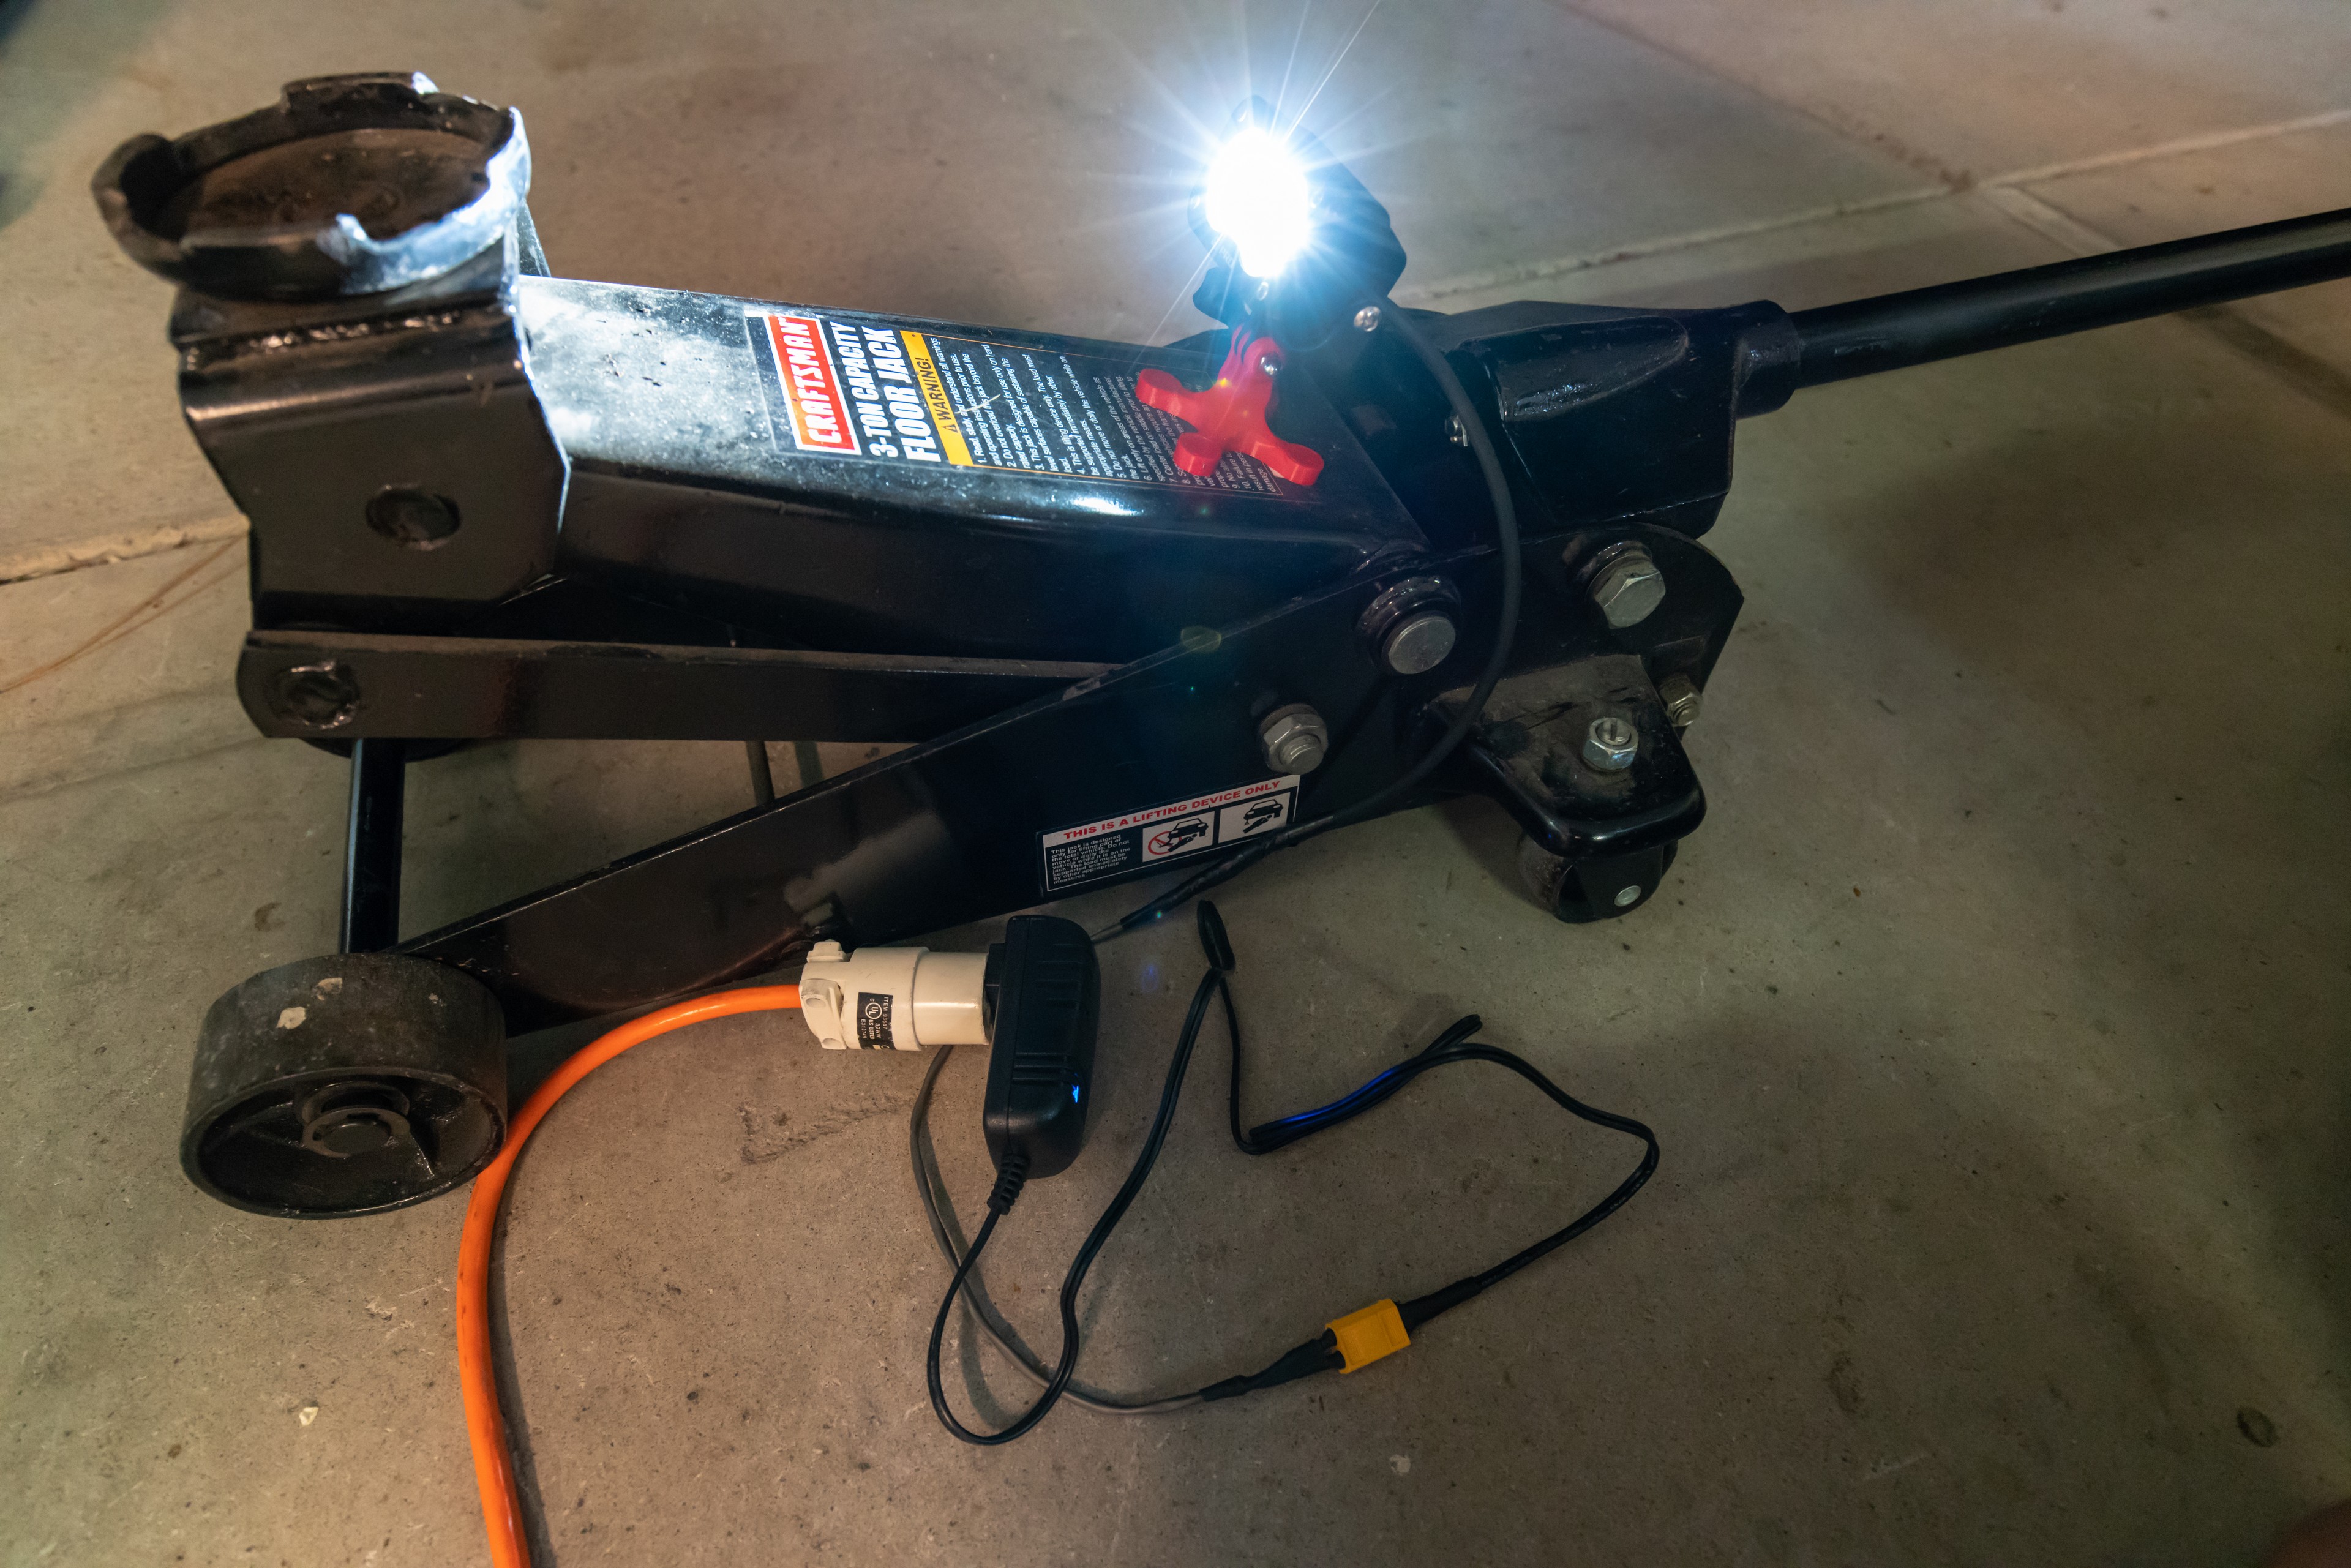
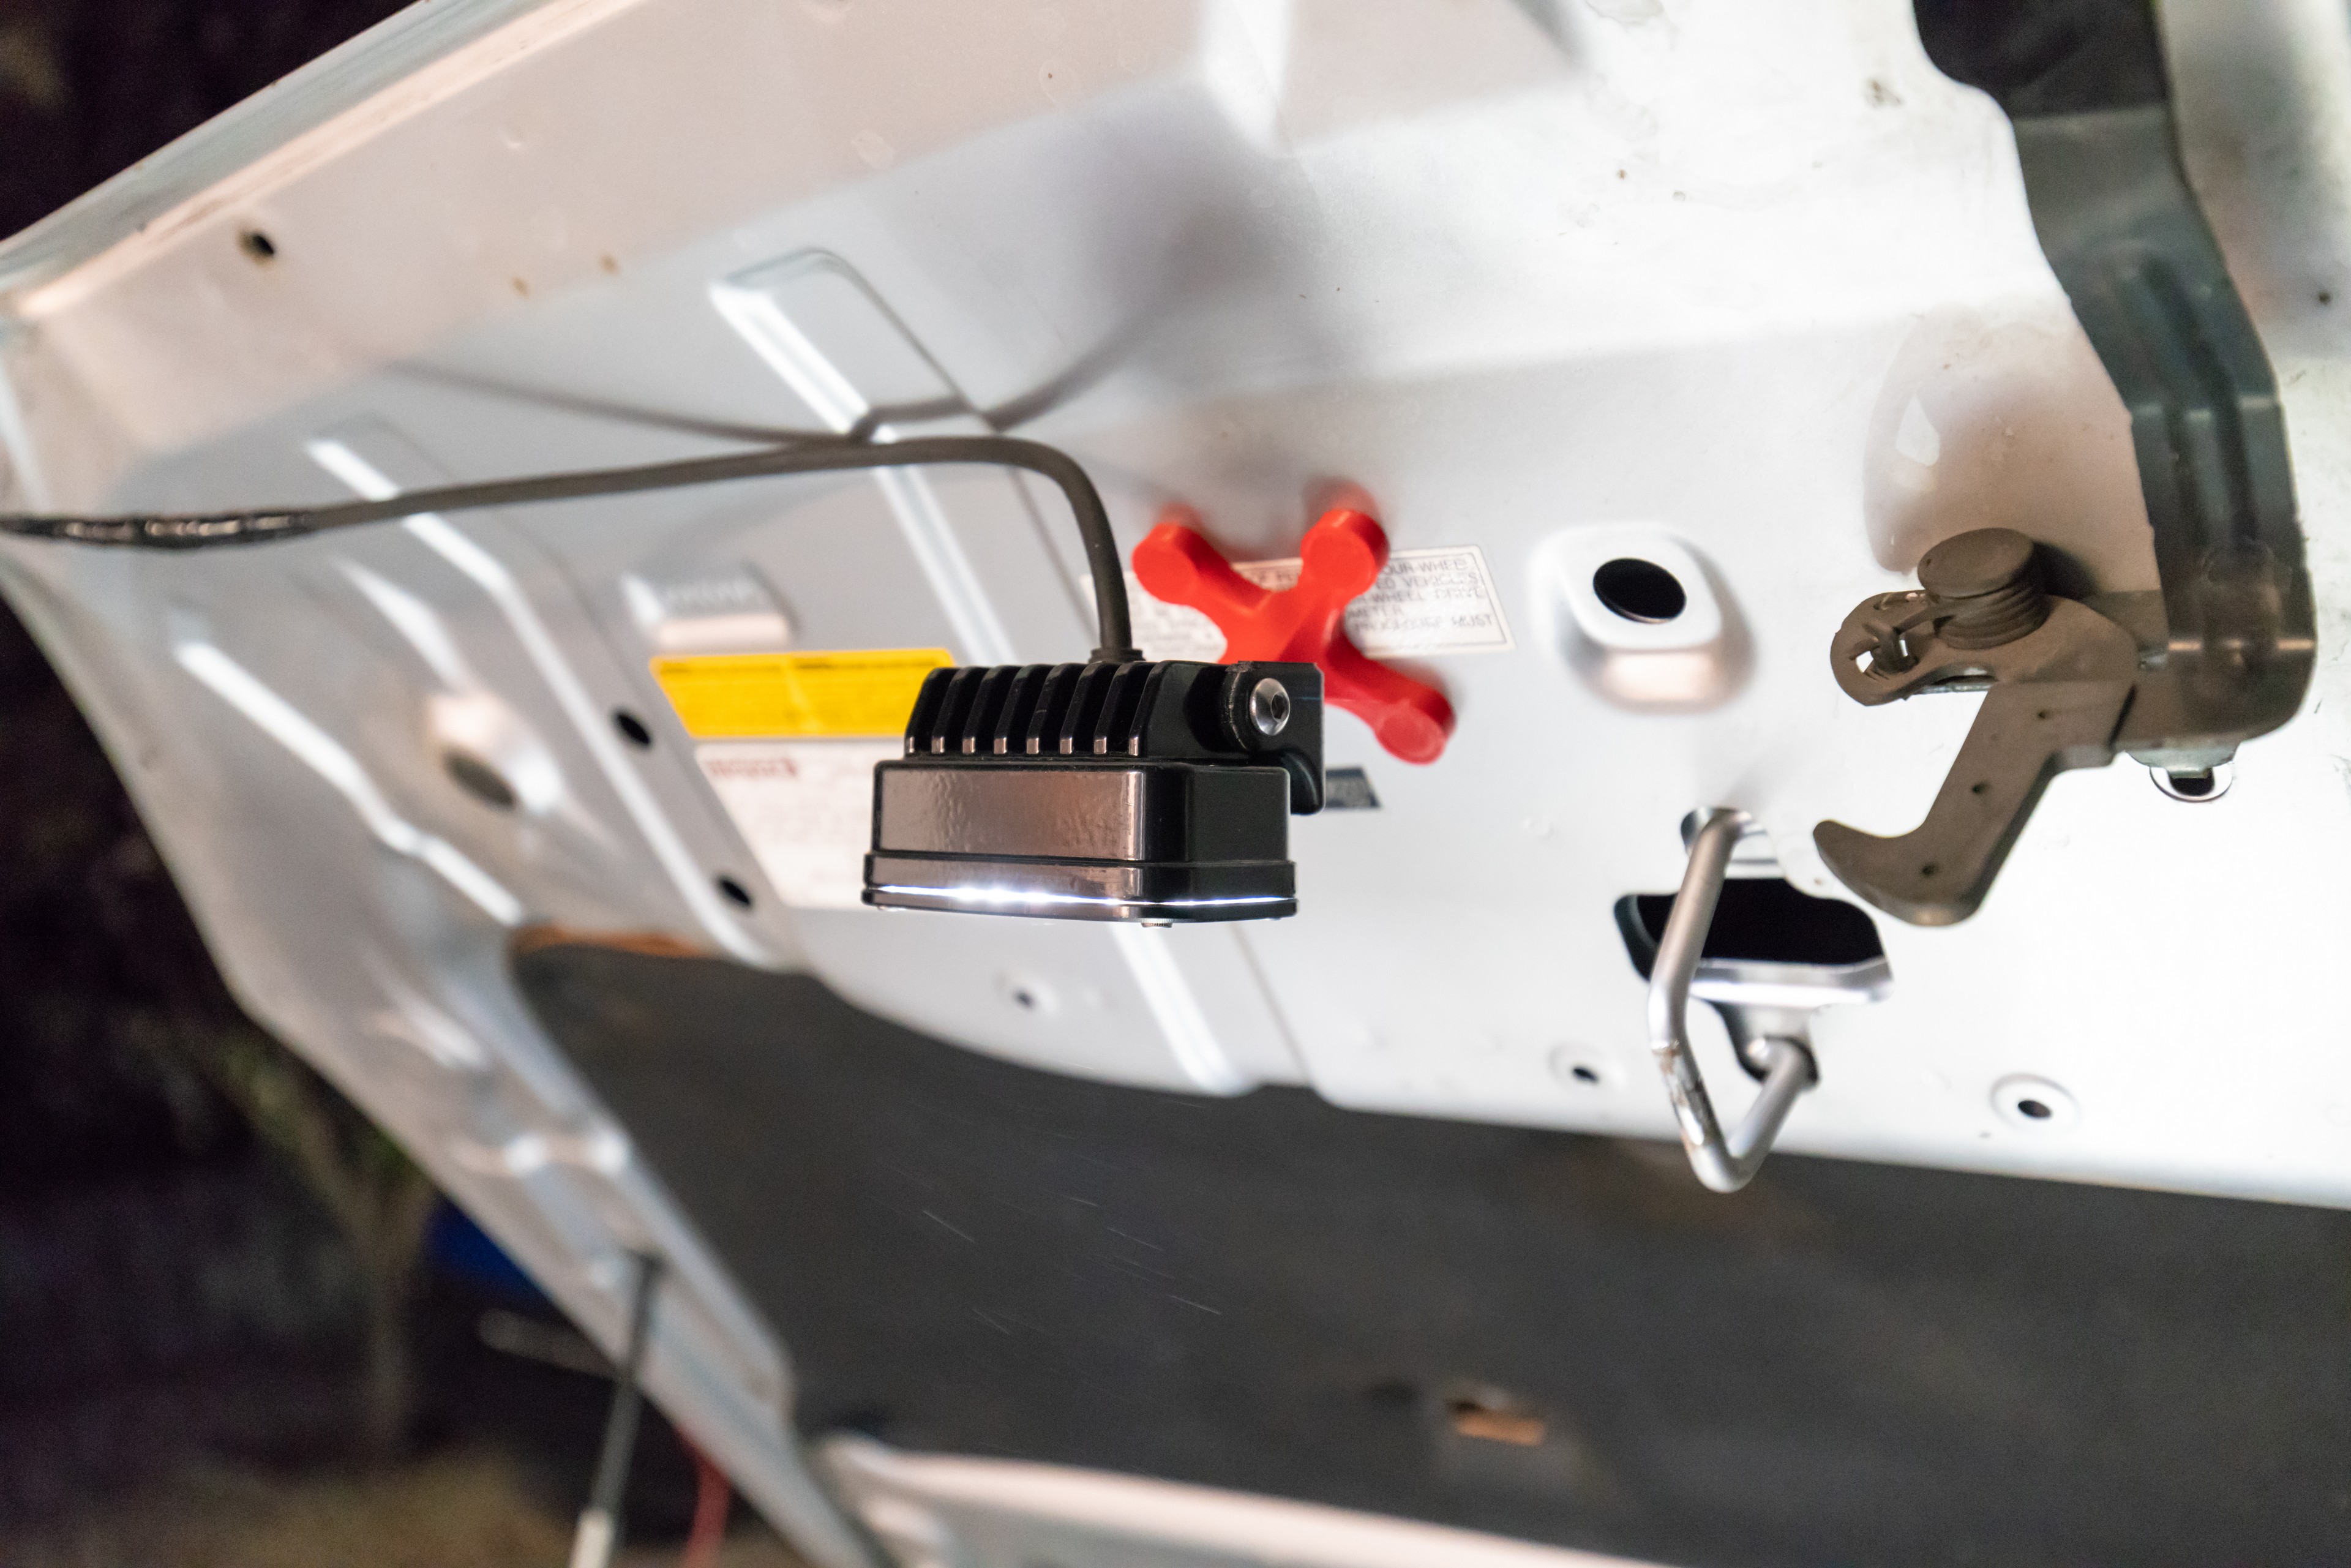
First off, I reverse engineered the metal S2 mounting bracket to create a bracket that is GoPro compatible.  Then I pulled the factory WeatherPak connector off of the S2 and swapped in a XT60 connector and added on another foot of wire. This way, the light can be mounted on the top of a helmet and the connector will come to the wearer’s shoulder.  On the wearer’s shoulder I placed a switch so that turning the light on and off is as easy as flicking a switch, as opposed to having to find a connection to pull apart.  From the switch, I made a meter-long XT60 extension cable so that the wearer could carry a battery in the bottom of their backpack.

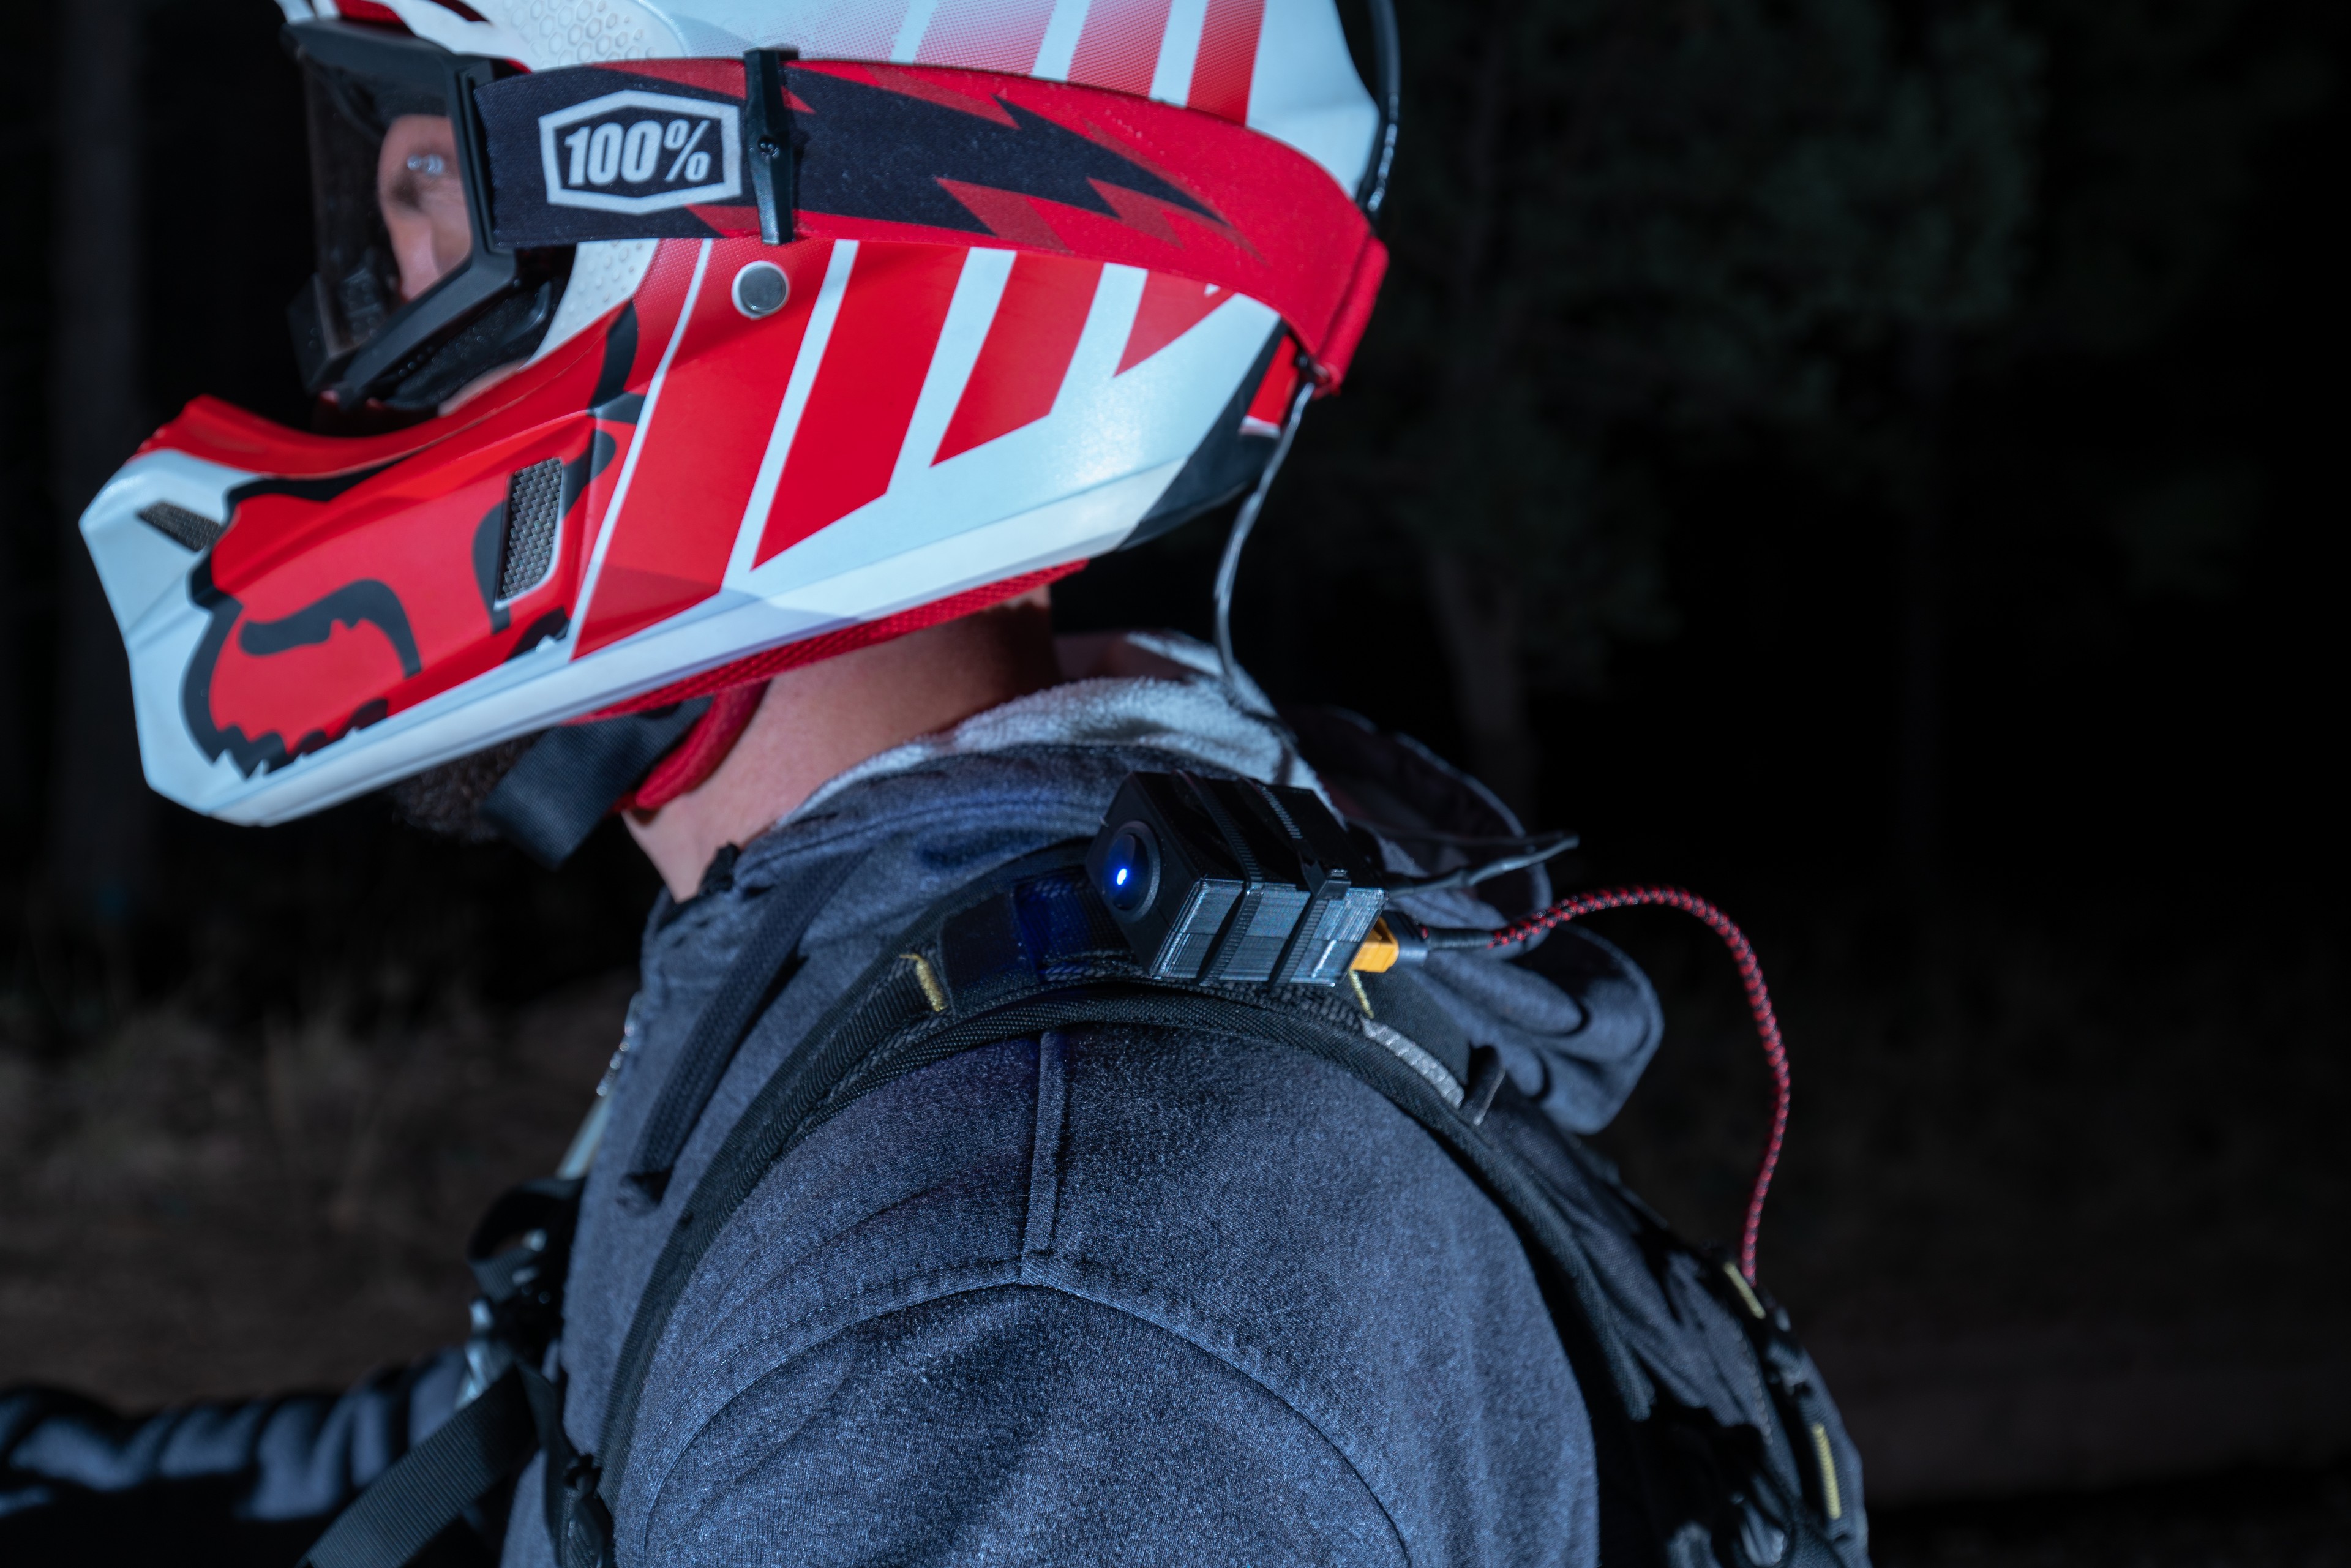
This system allows the light to be configured minimally as a light and a power source (battery), or with the switch and extension cable for a slick setup that works great for a number of pursuits.  I’ve also found myself using the light while working on vehicles at night, and I’ve even taken the light on a Grand Canyon River Trip – because good light is quite helpful when setting up camp in the dark.  I have no doubt that as time goes on, I’ll continue to find more uses for this light – so without further adieu, here’s how you make your own:

SHOPPING LIST:

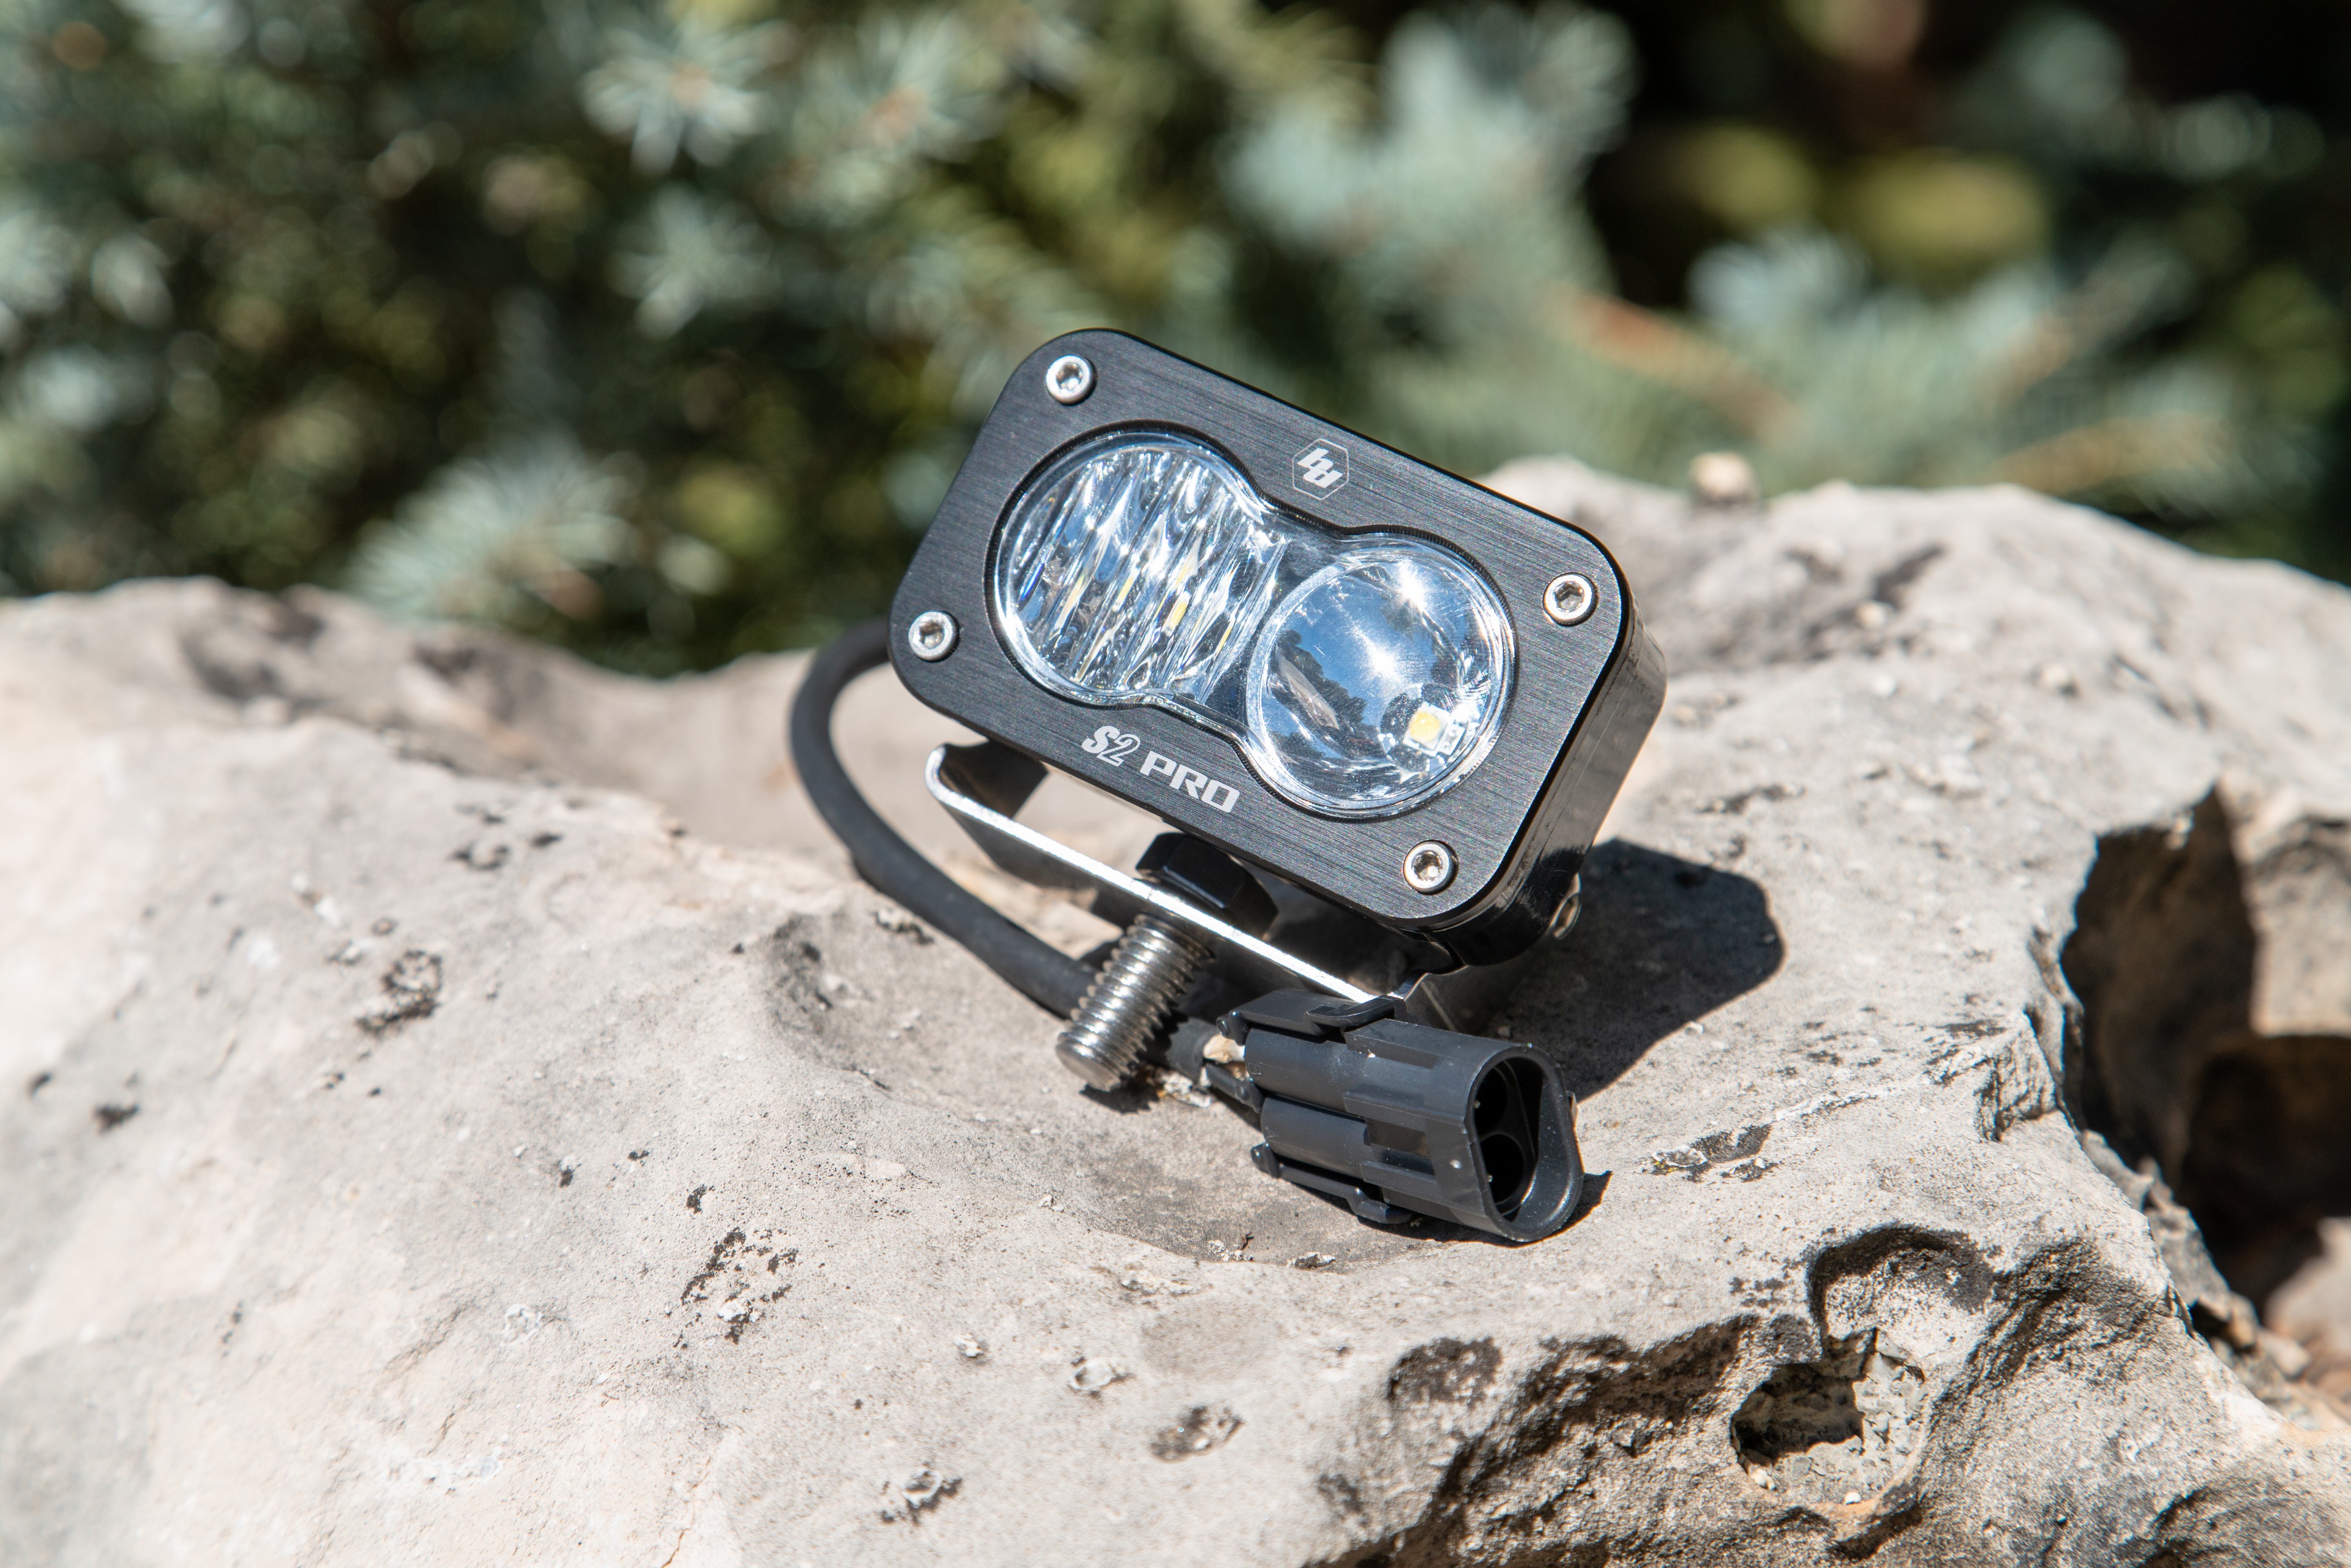
  • Baja Designs S2 Pro.  I recommend the Combo lens for dirtbiking, mountain biking and most sports.  If you’re going to build a dedicated camp light, I would get a wide lens instead.
  • XT60 connectors.  I chose to use XT60 because I have so many batteries and power supplies that use this connector, but any quality connector will work.
  • Wire.  A couple of meters of quality multi strand copper wire.  18 gauge is plenty large enough.
  • Wire sleeving.  Helpful for keeping things clean and organized.
  • Switch.  I used these switches since they’re rated for the DC current in this circuit.
  • 3D Printed S2 GoPro Mount.  Download an STL part file here.

TOOLS REQUIRED:

  • Wire cutters
  • Wire strippers
  • Soldering Iron and electrical solder (get the good stuff with silver)
  • Heat Shrink Tubing
  • Hot Glue Gun and Glue Sticks
  • Electrical Tape (Get the good stuff, Super 88)
  • Multimeter (Helpful for figuring out poles on your switch)

DIRECTIONS:

Step one is to obtain a mounting bracket for the S2 Pro.  We’ve posted the file HERE where you can download it, so print it yourself, borrow a buddy’s printer, use a local maker space, or use an online printing service.  The factory hardware will carry over to the new bracket.

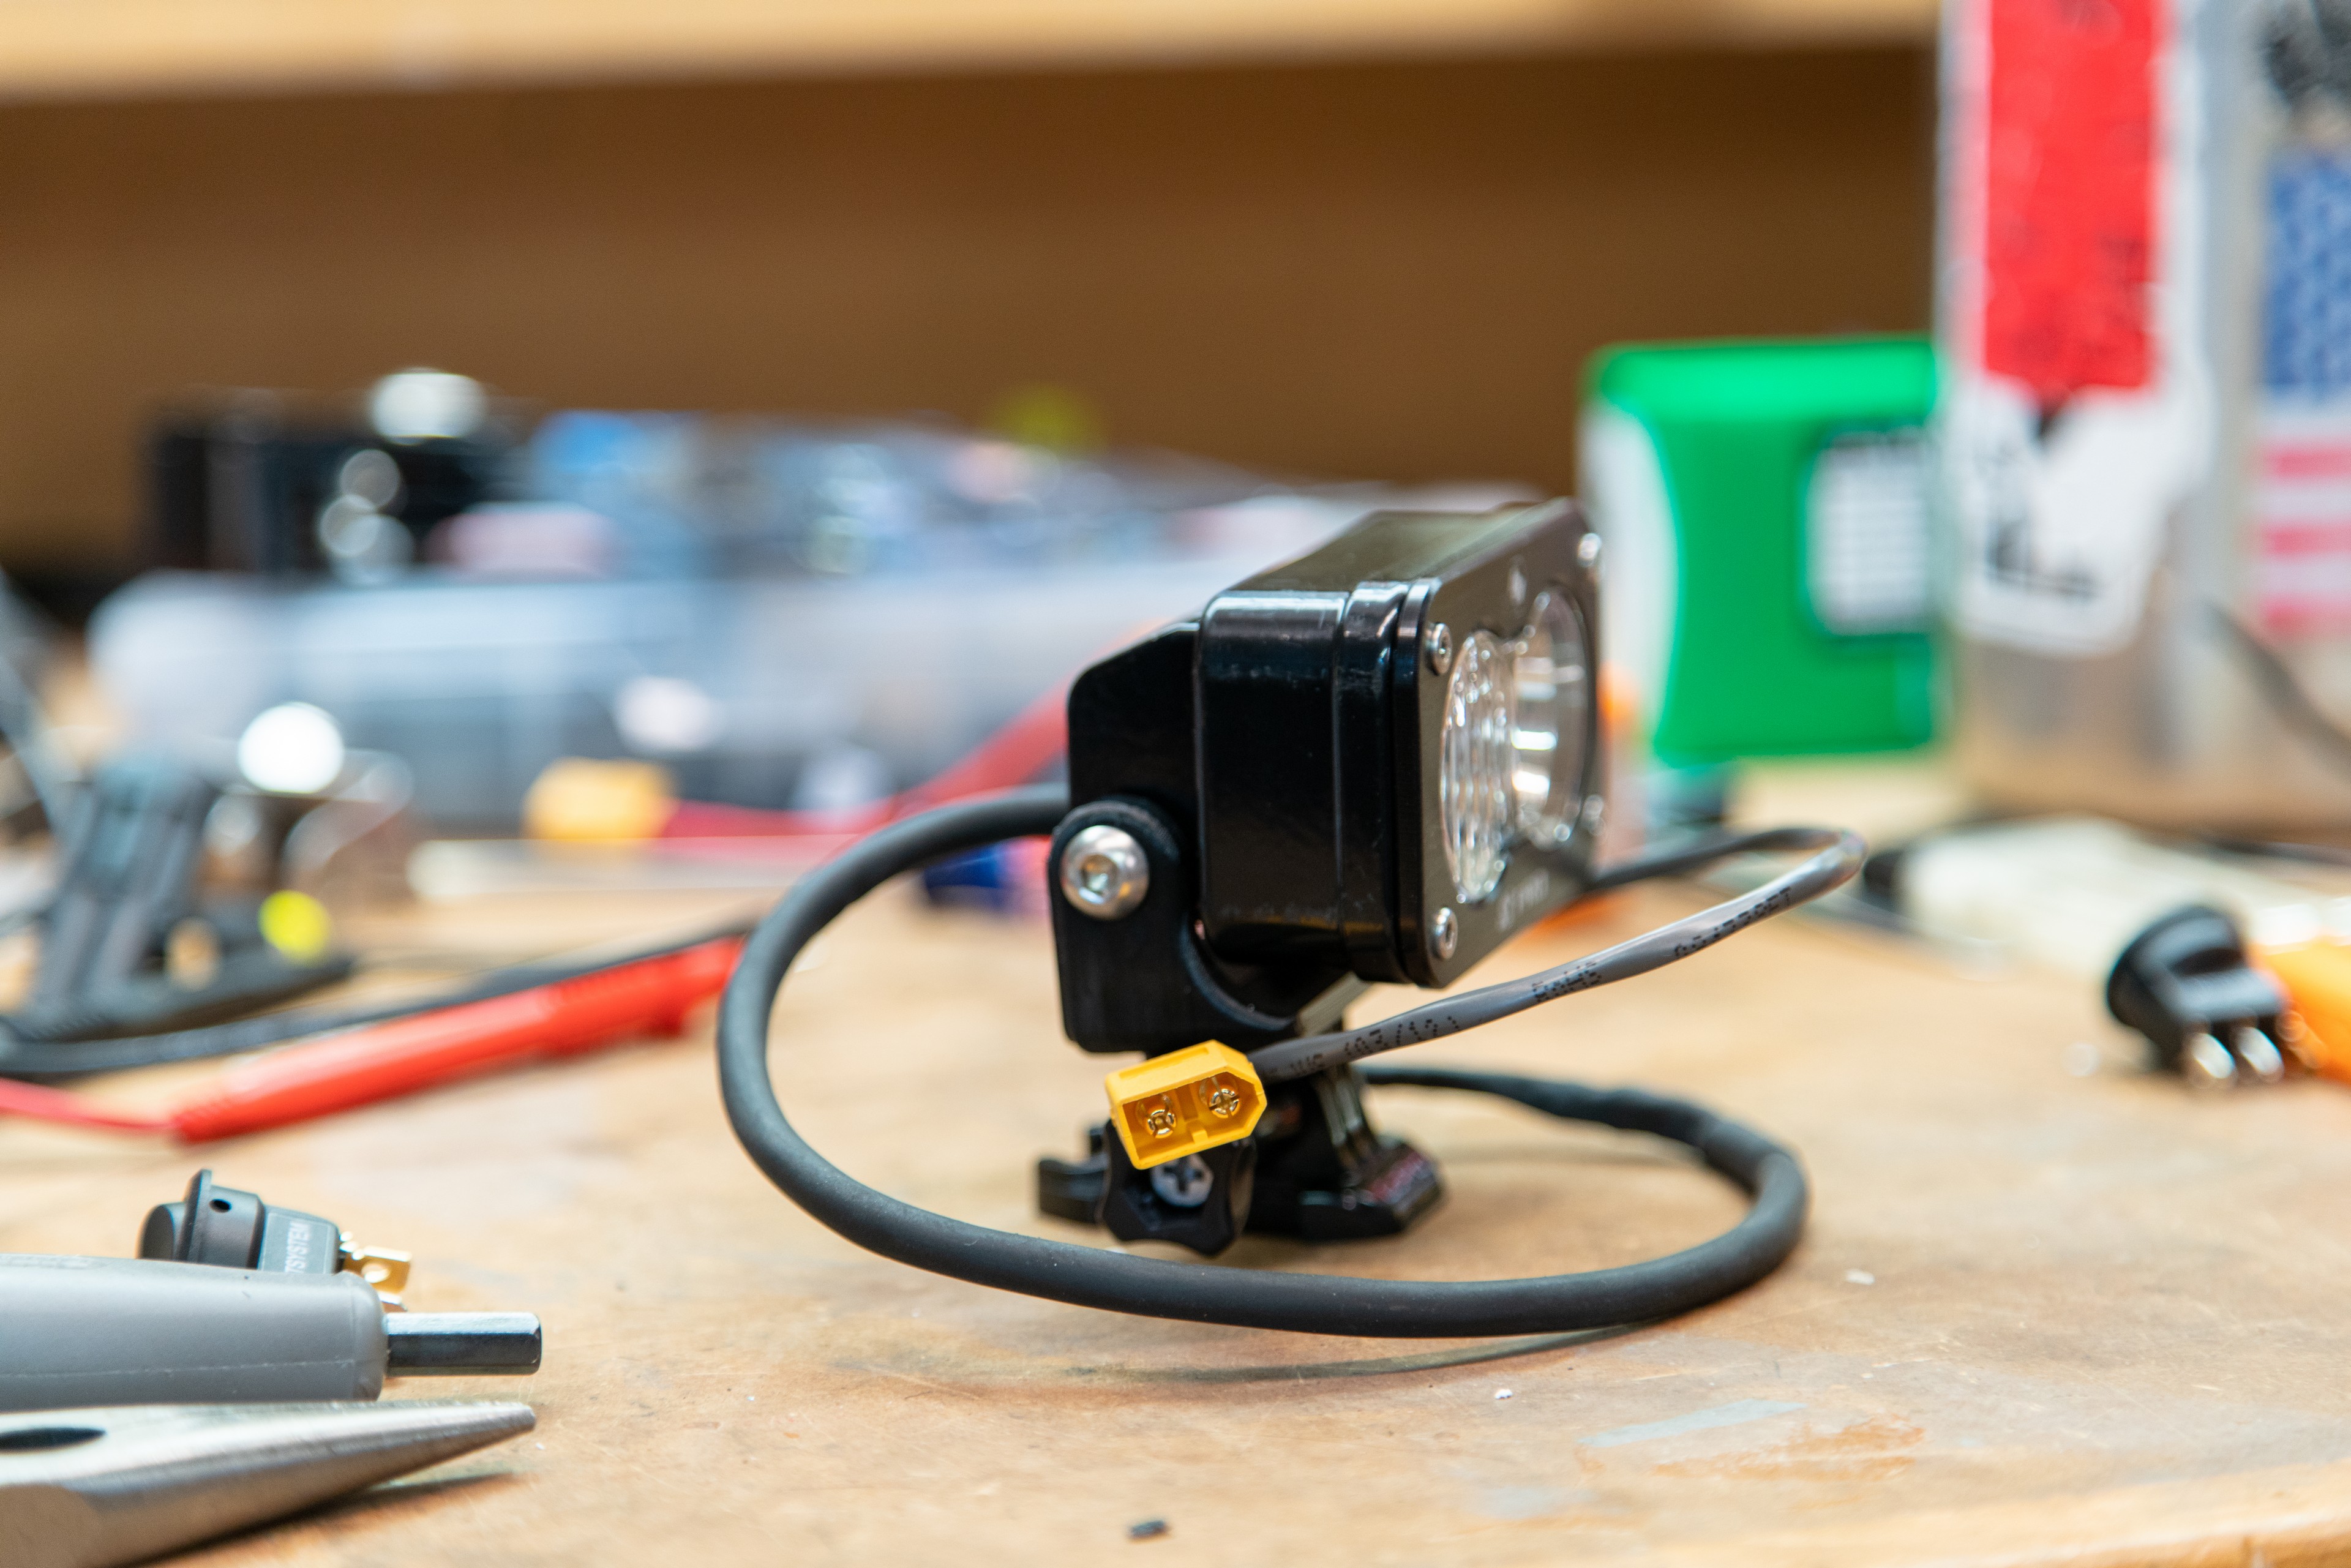
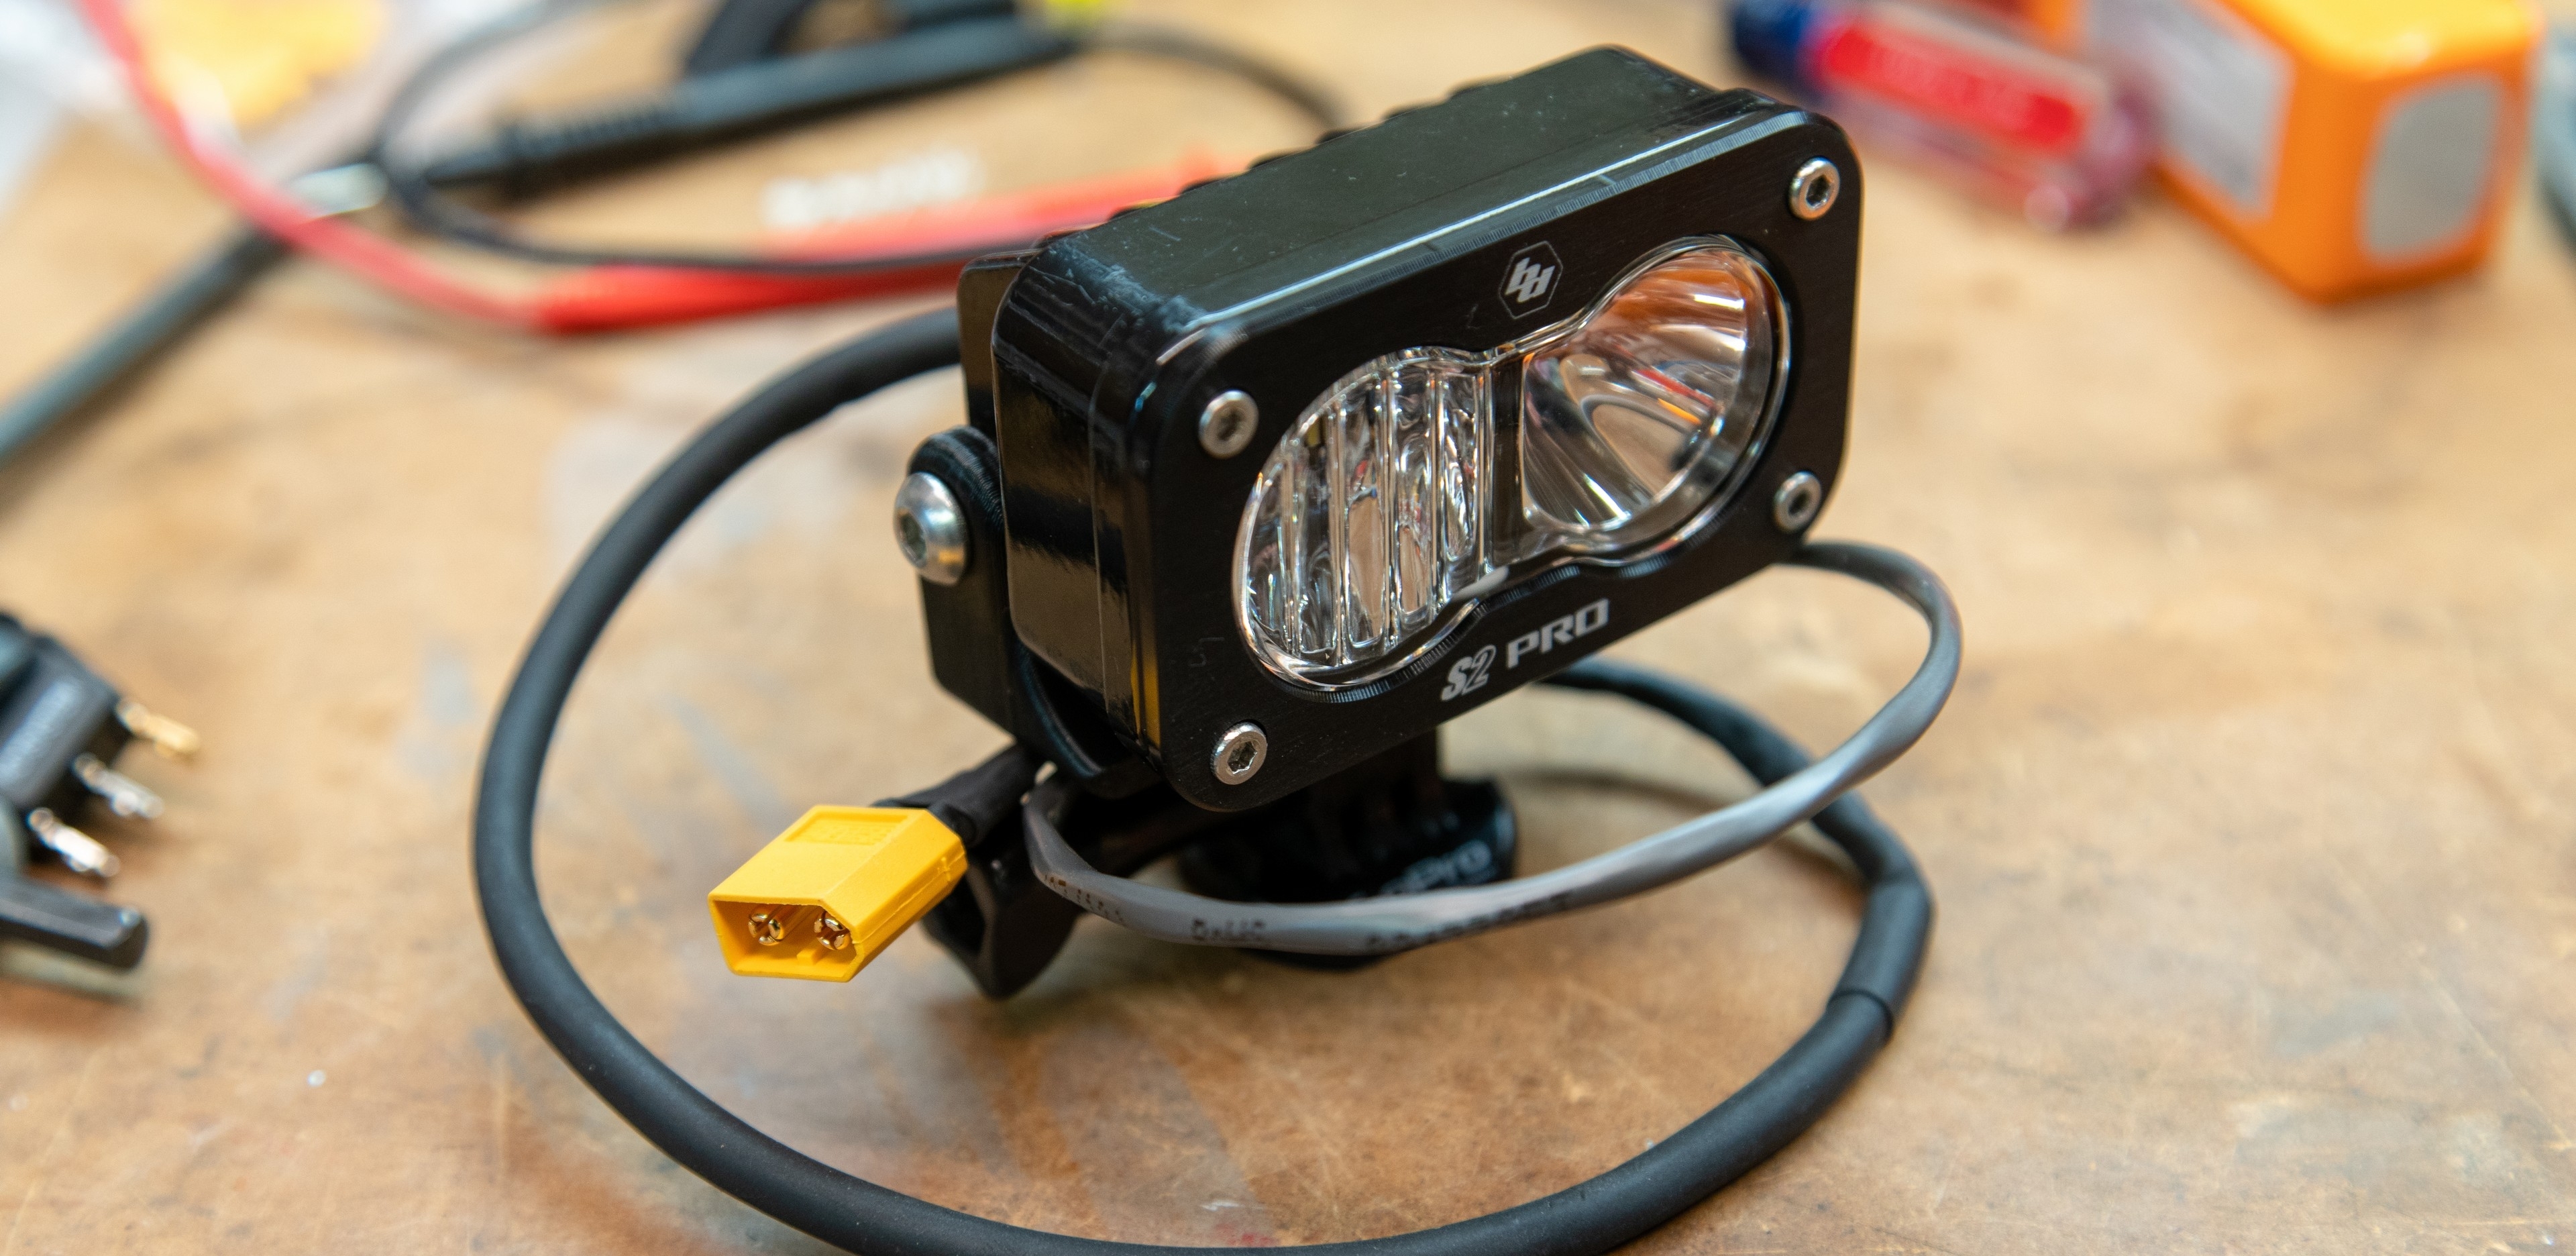
Step two is all about wiring.  Disassemble the weatherpak connector on the end of the S2, and solder on an extension to suit your needs.  I used 18-2 security wire, as it’s a multi strand copper wire with two conductors and a second sleeve providing extra durability.  Make sure to note the polarity of the S2, and ensure that you have the polarity correct (!) before soldering on a XT60 connector to the end of your extended wire.

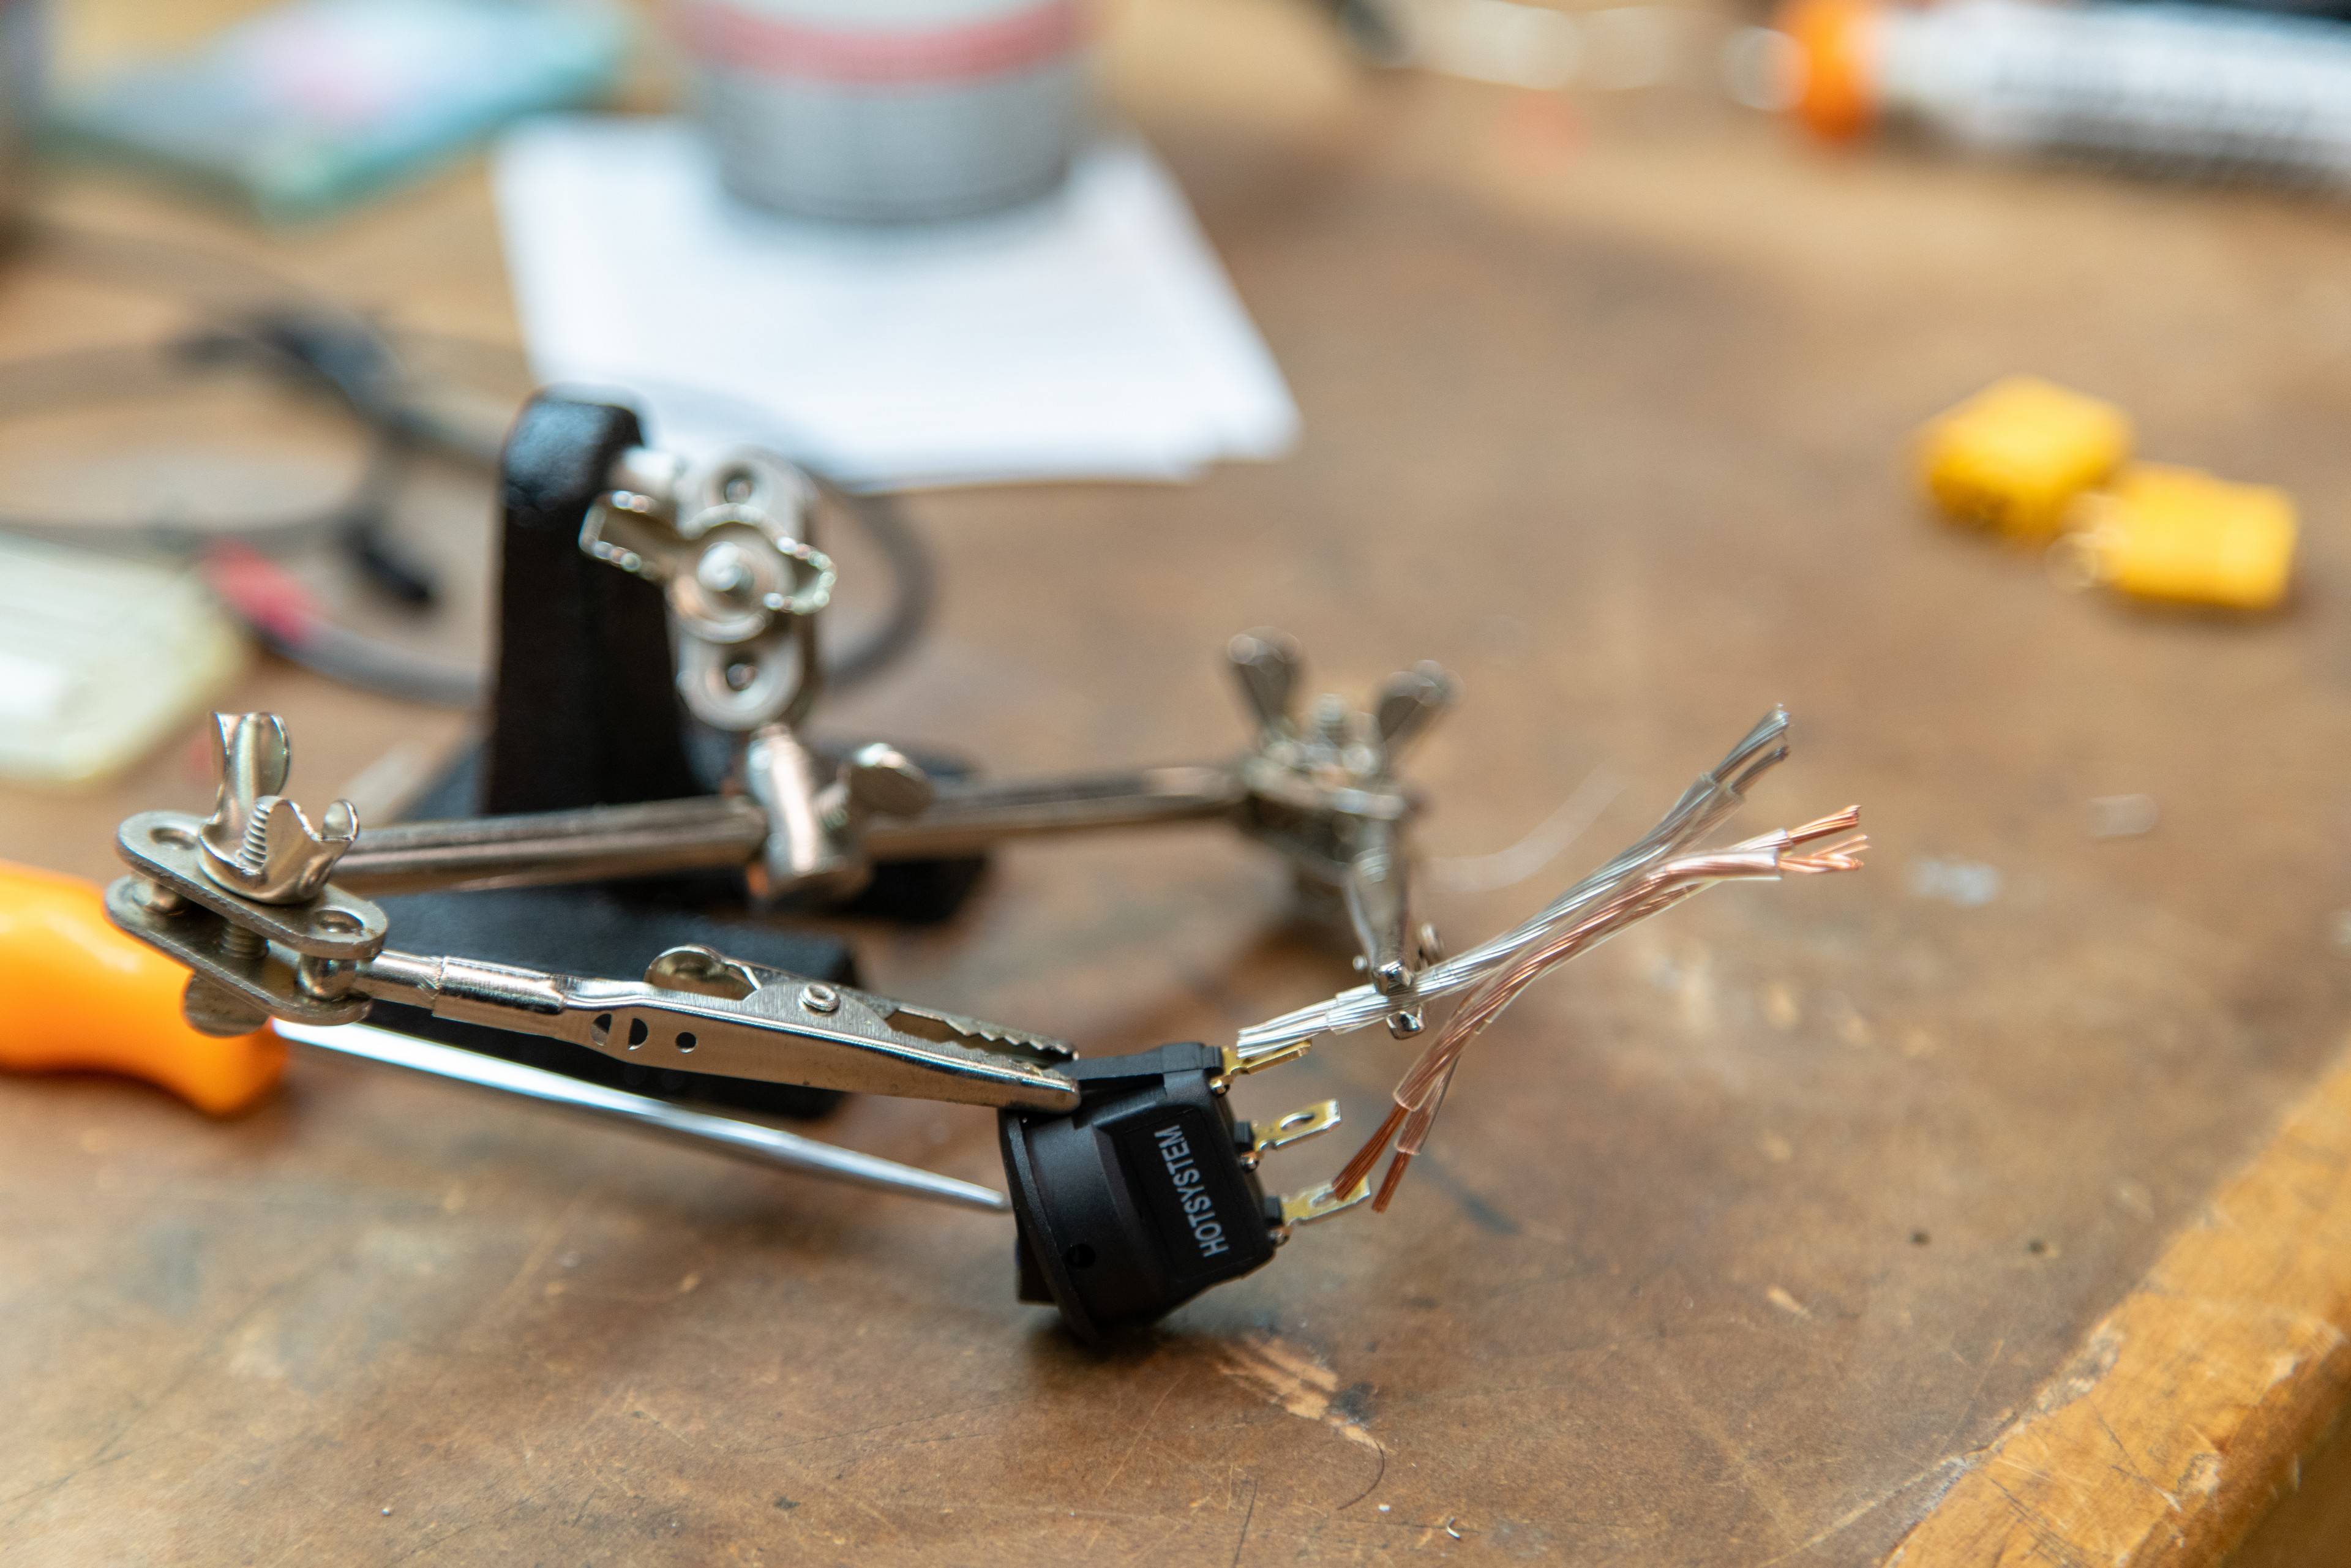
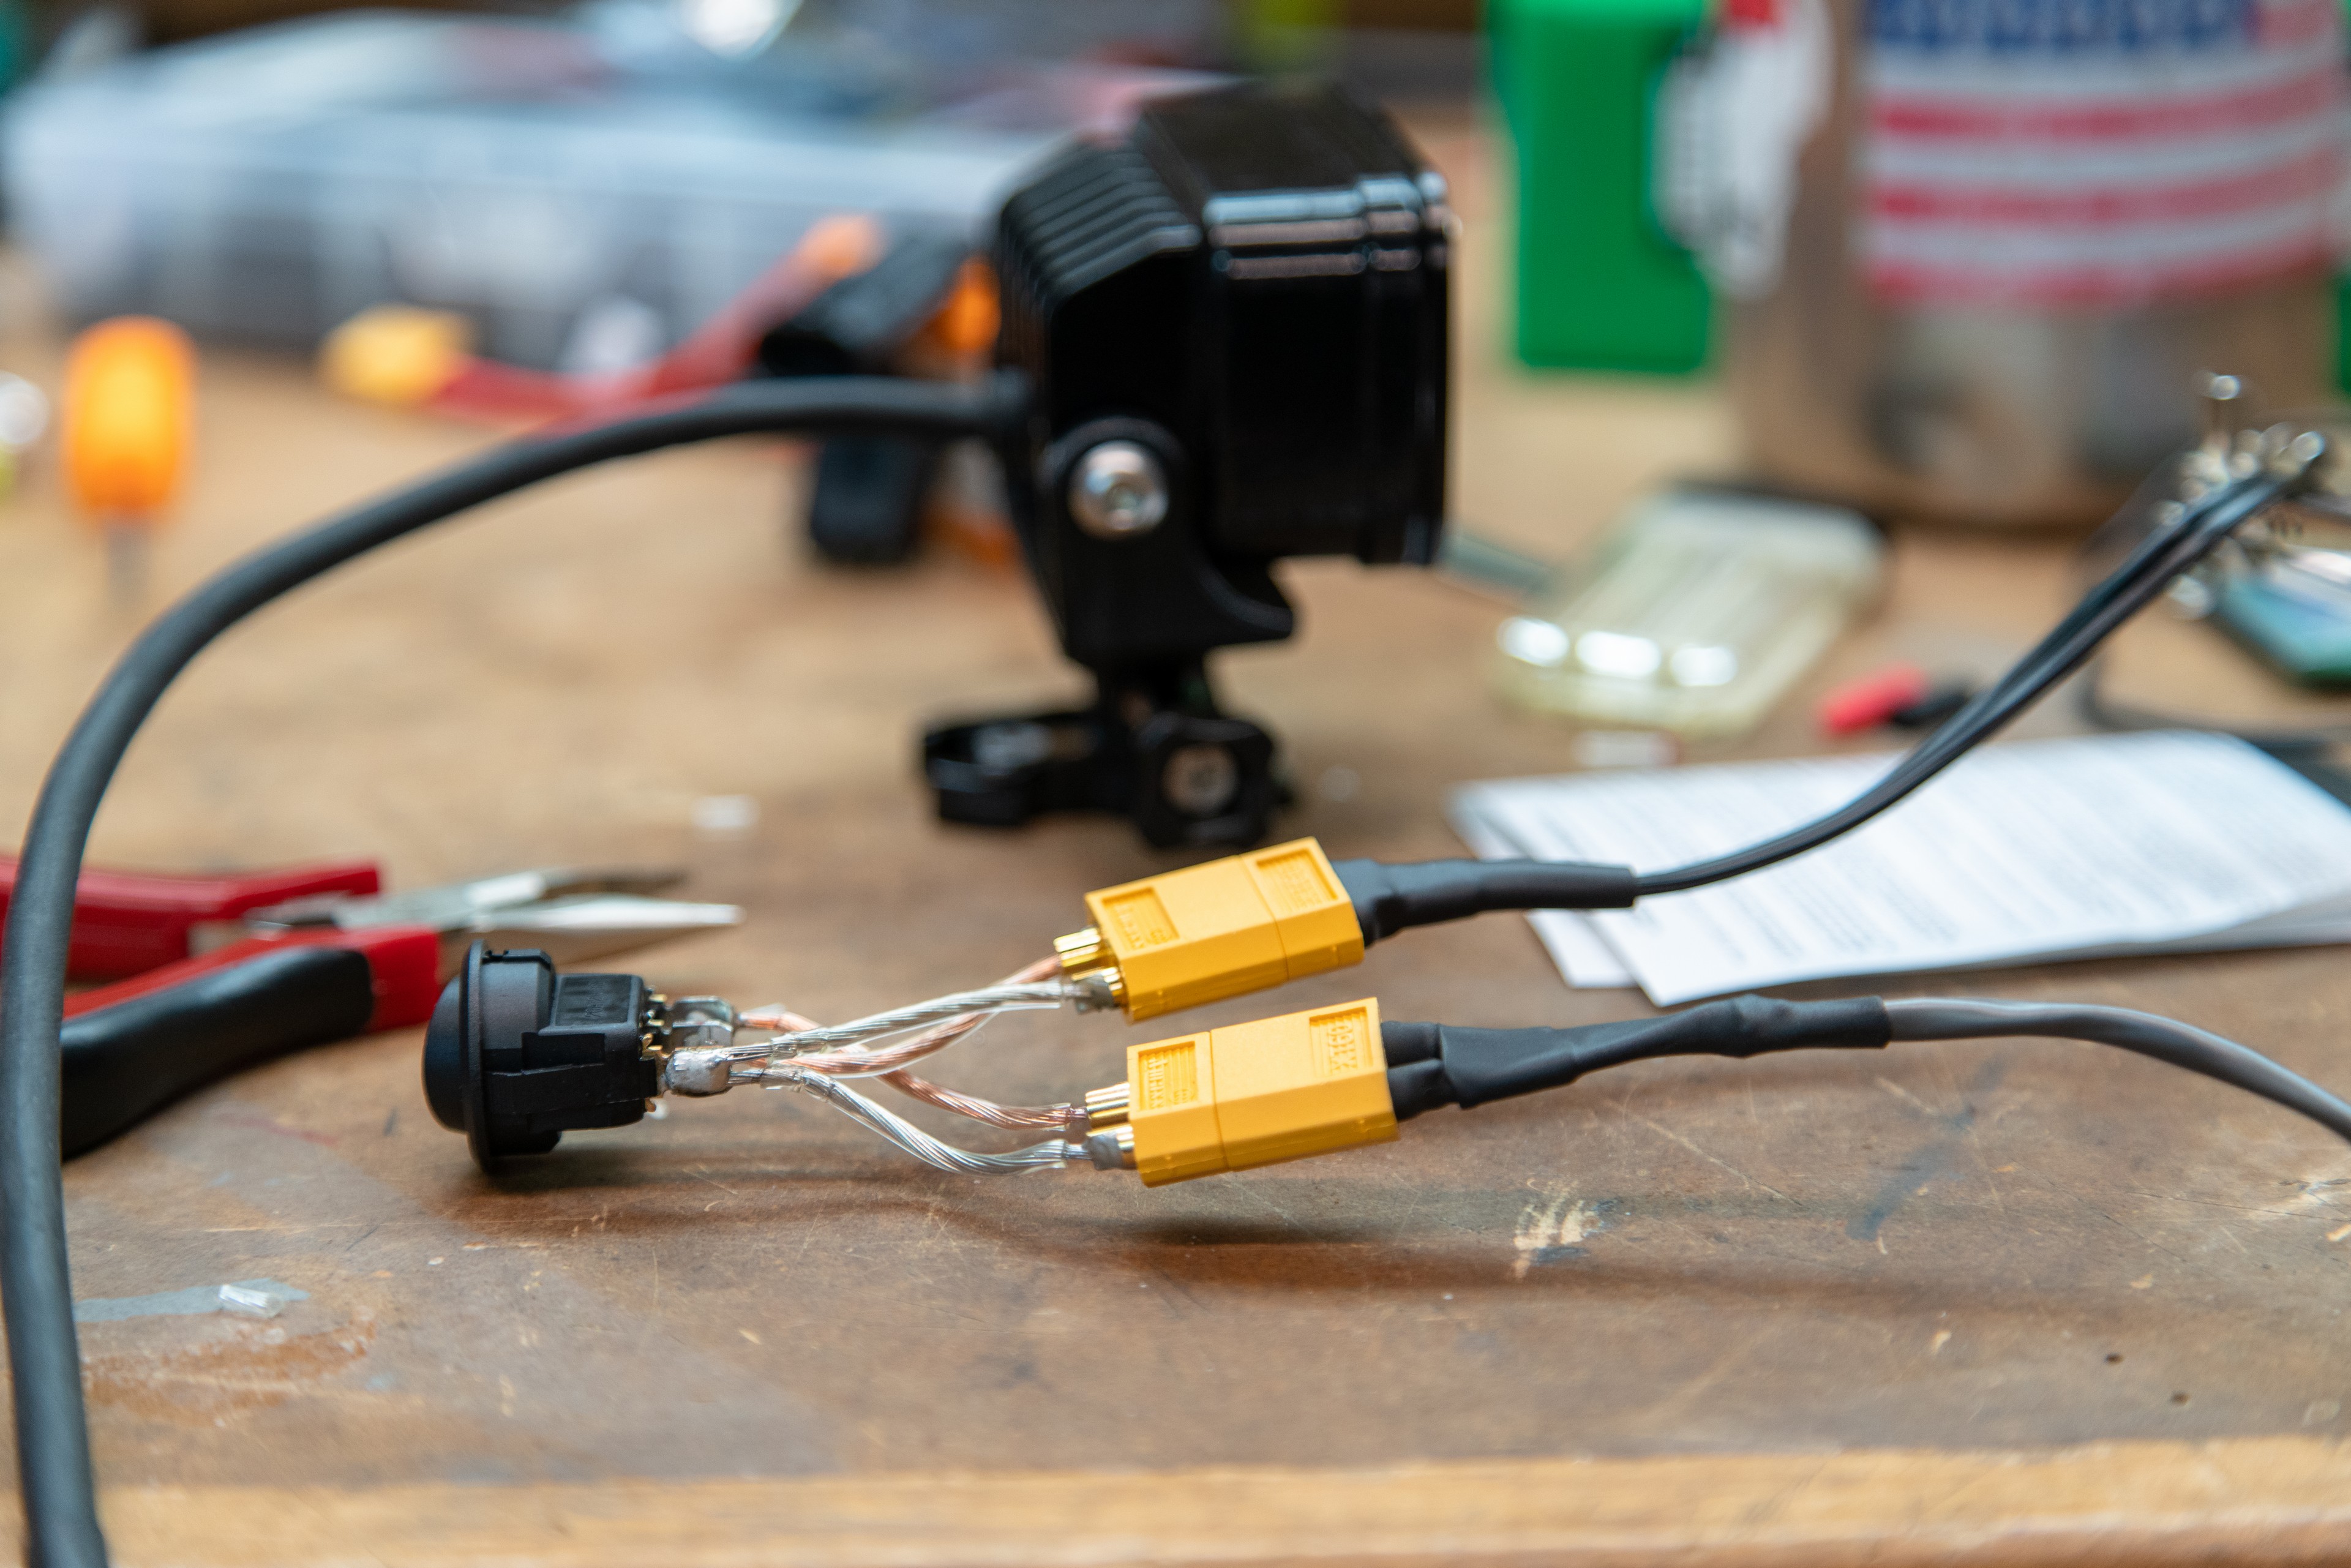
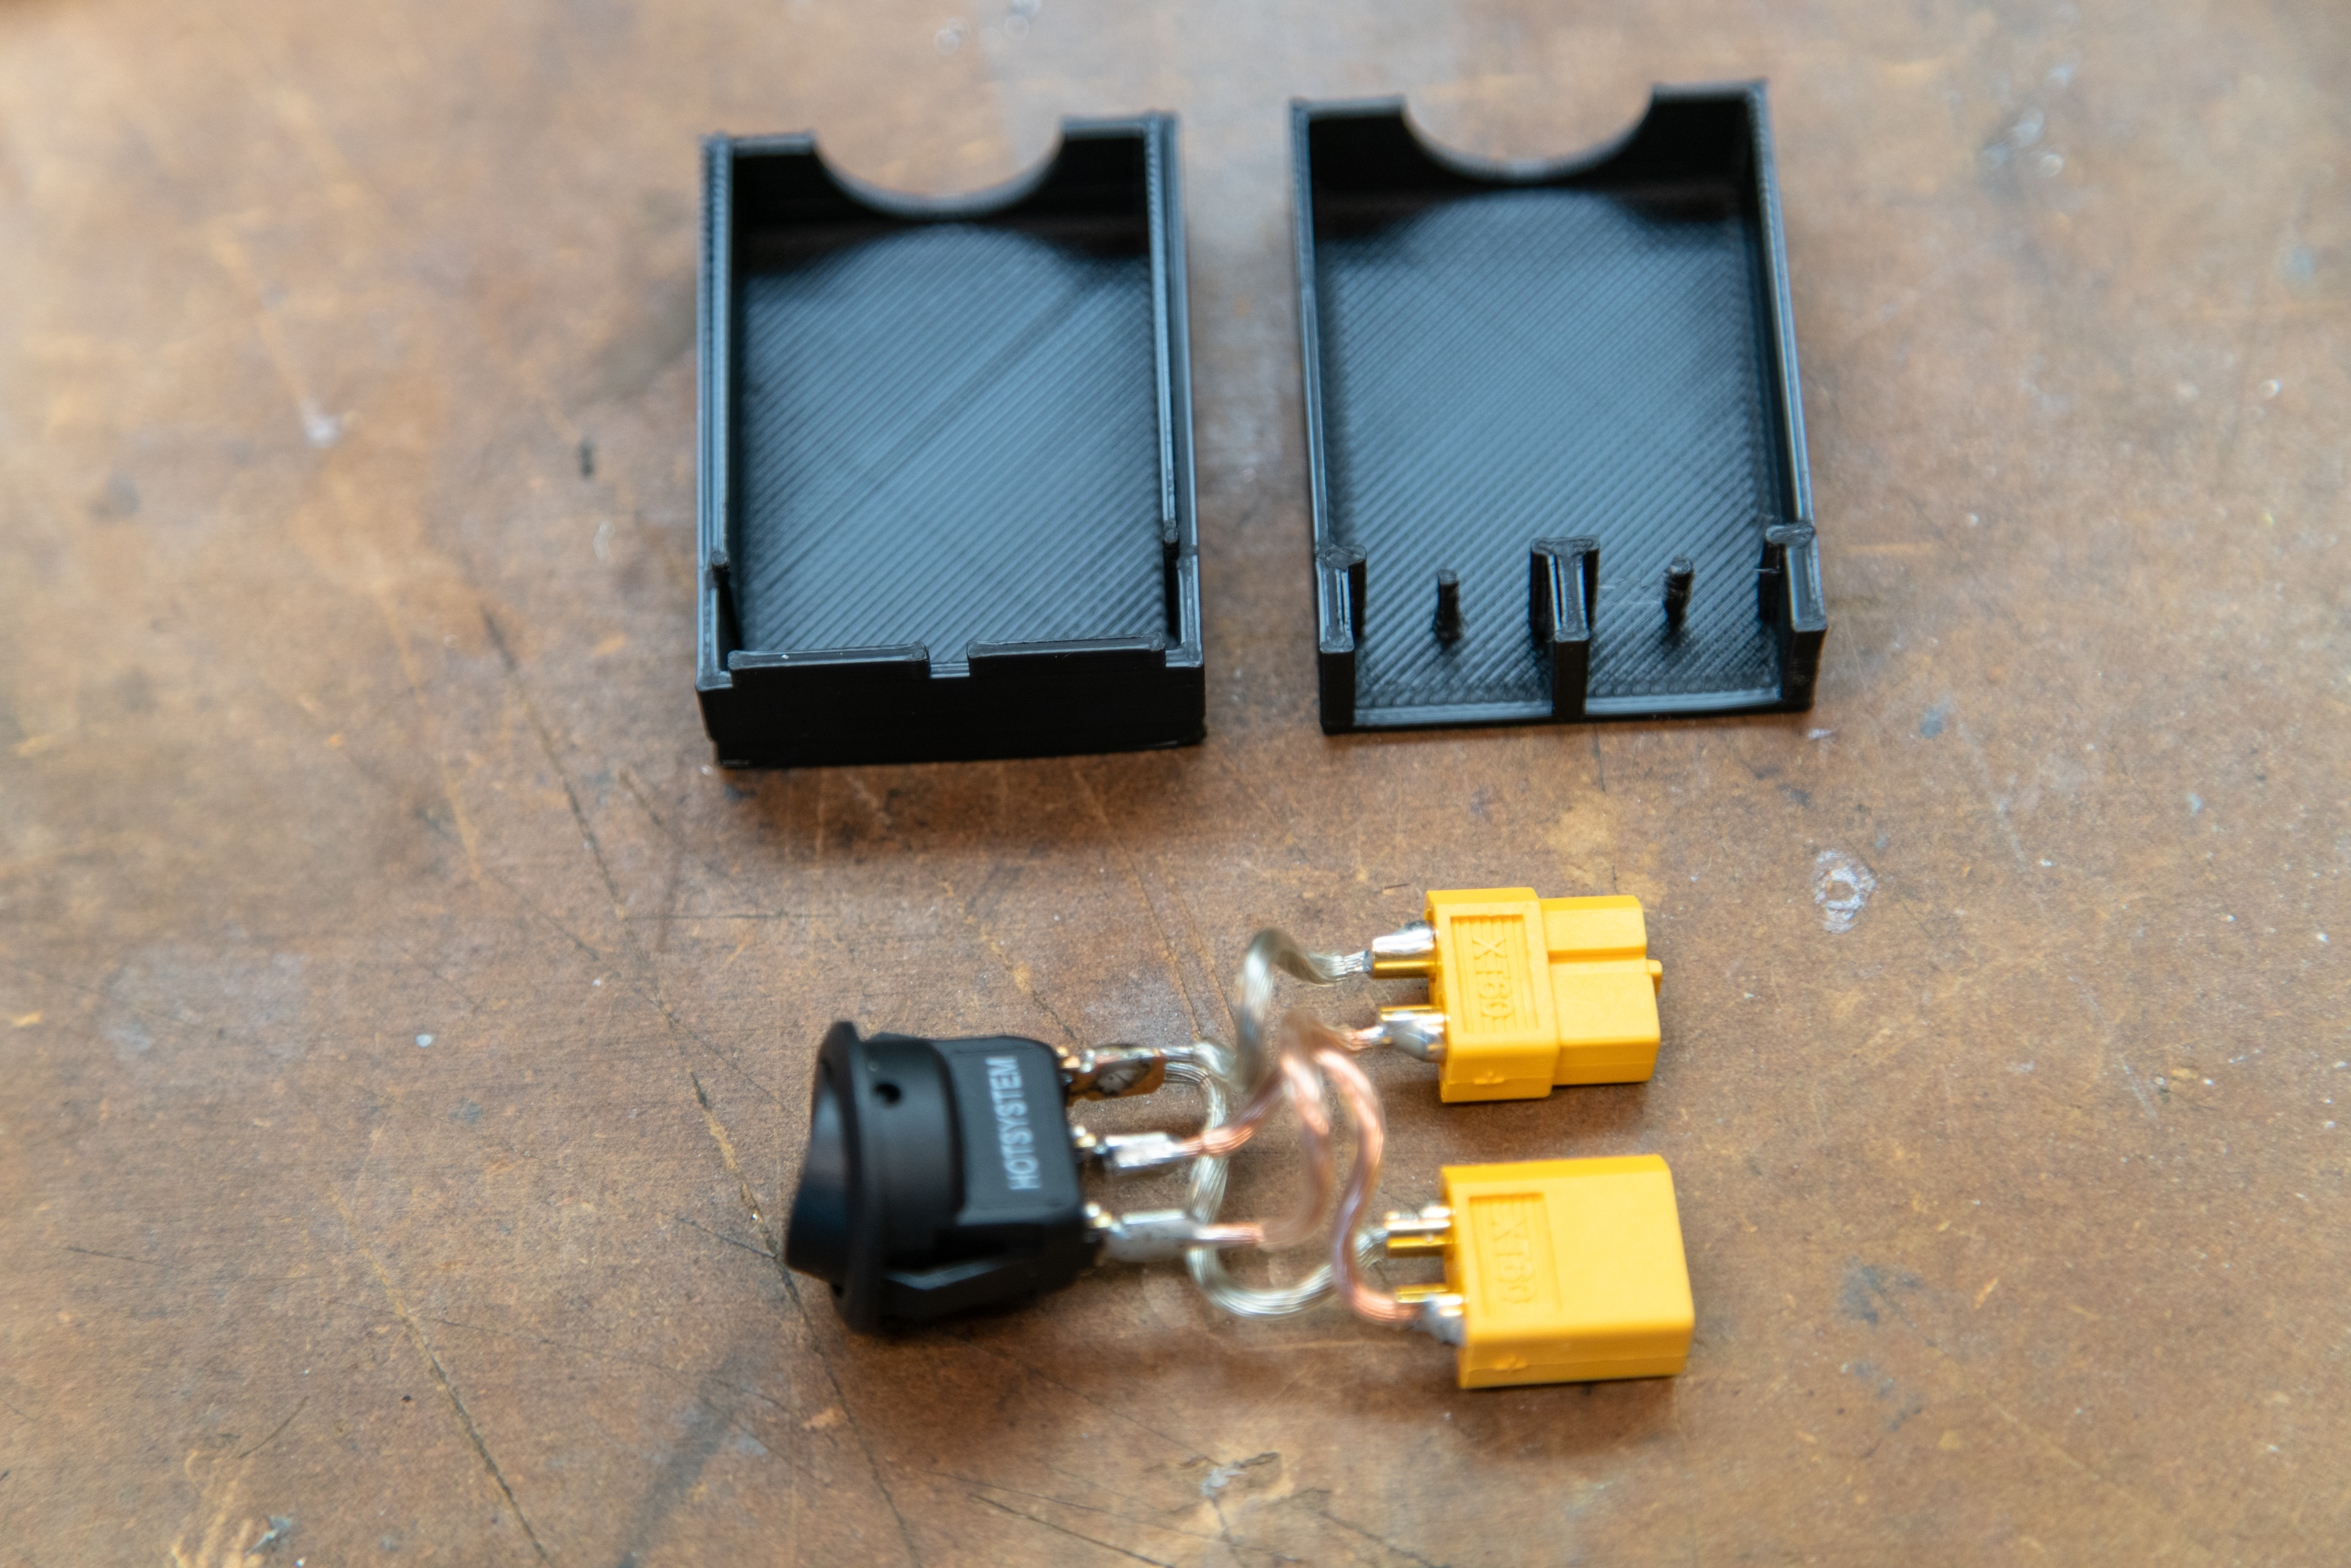
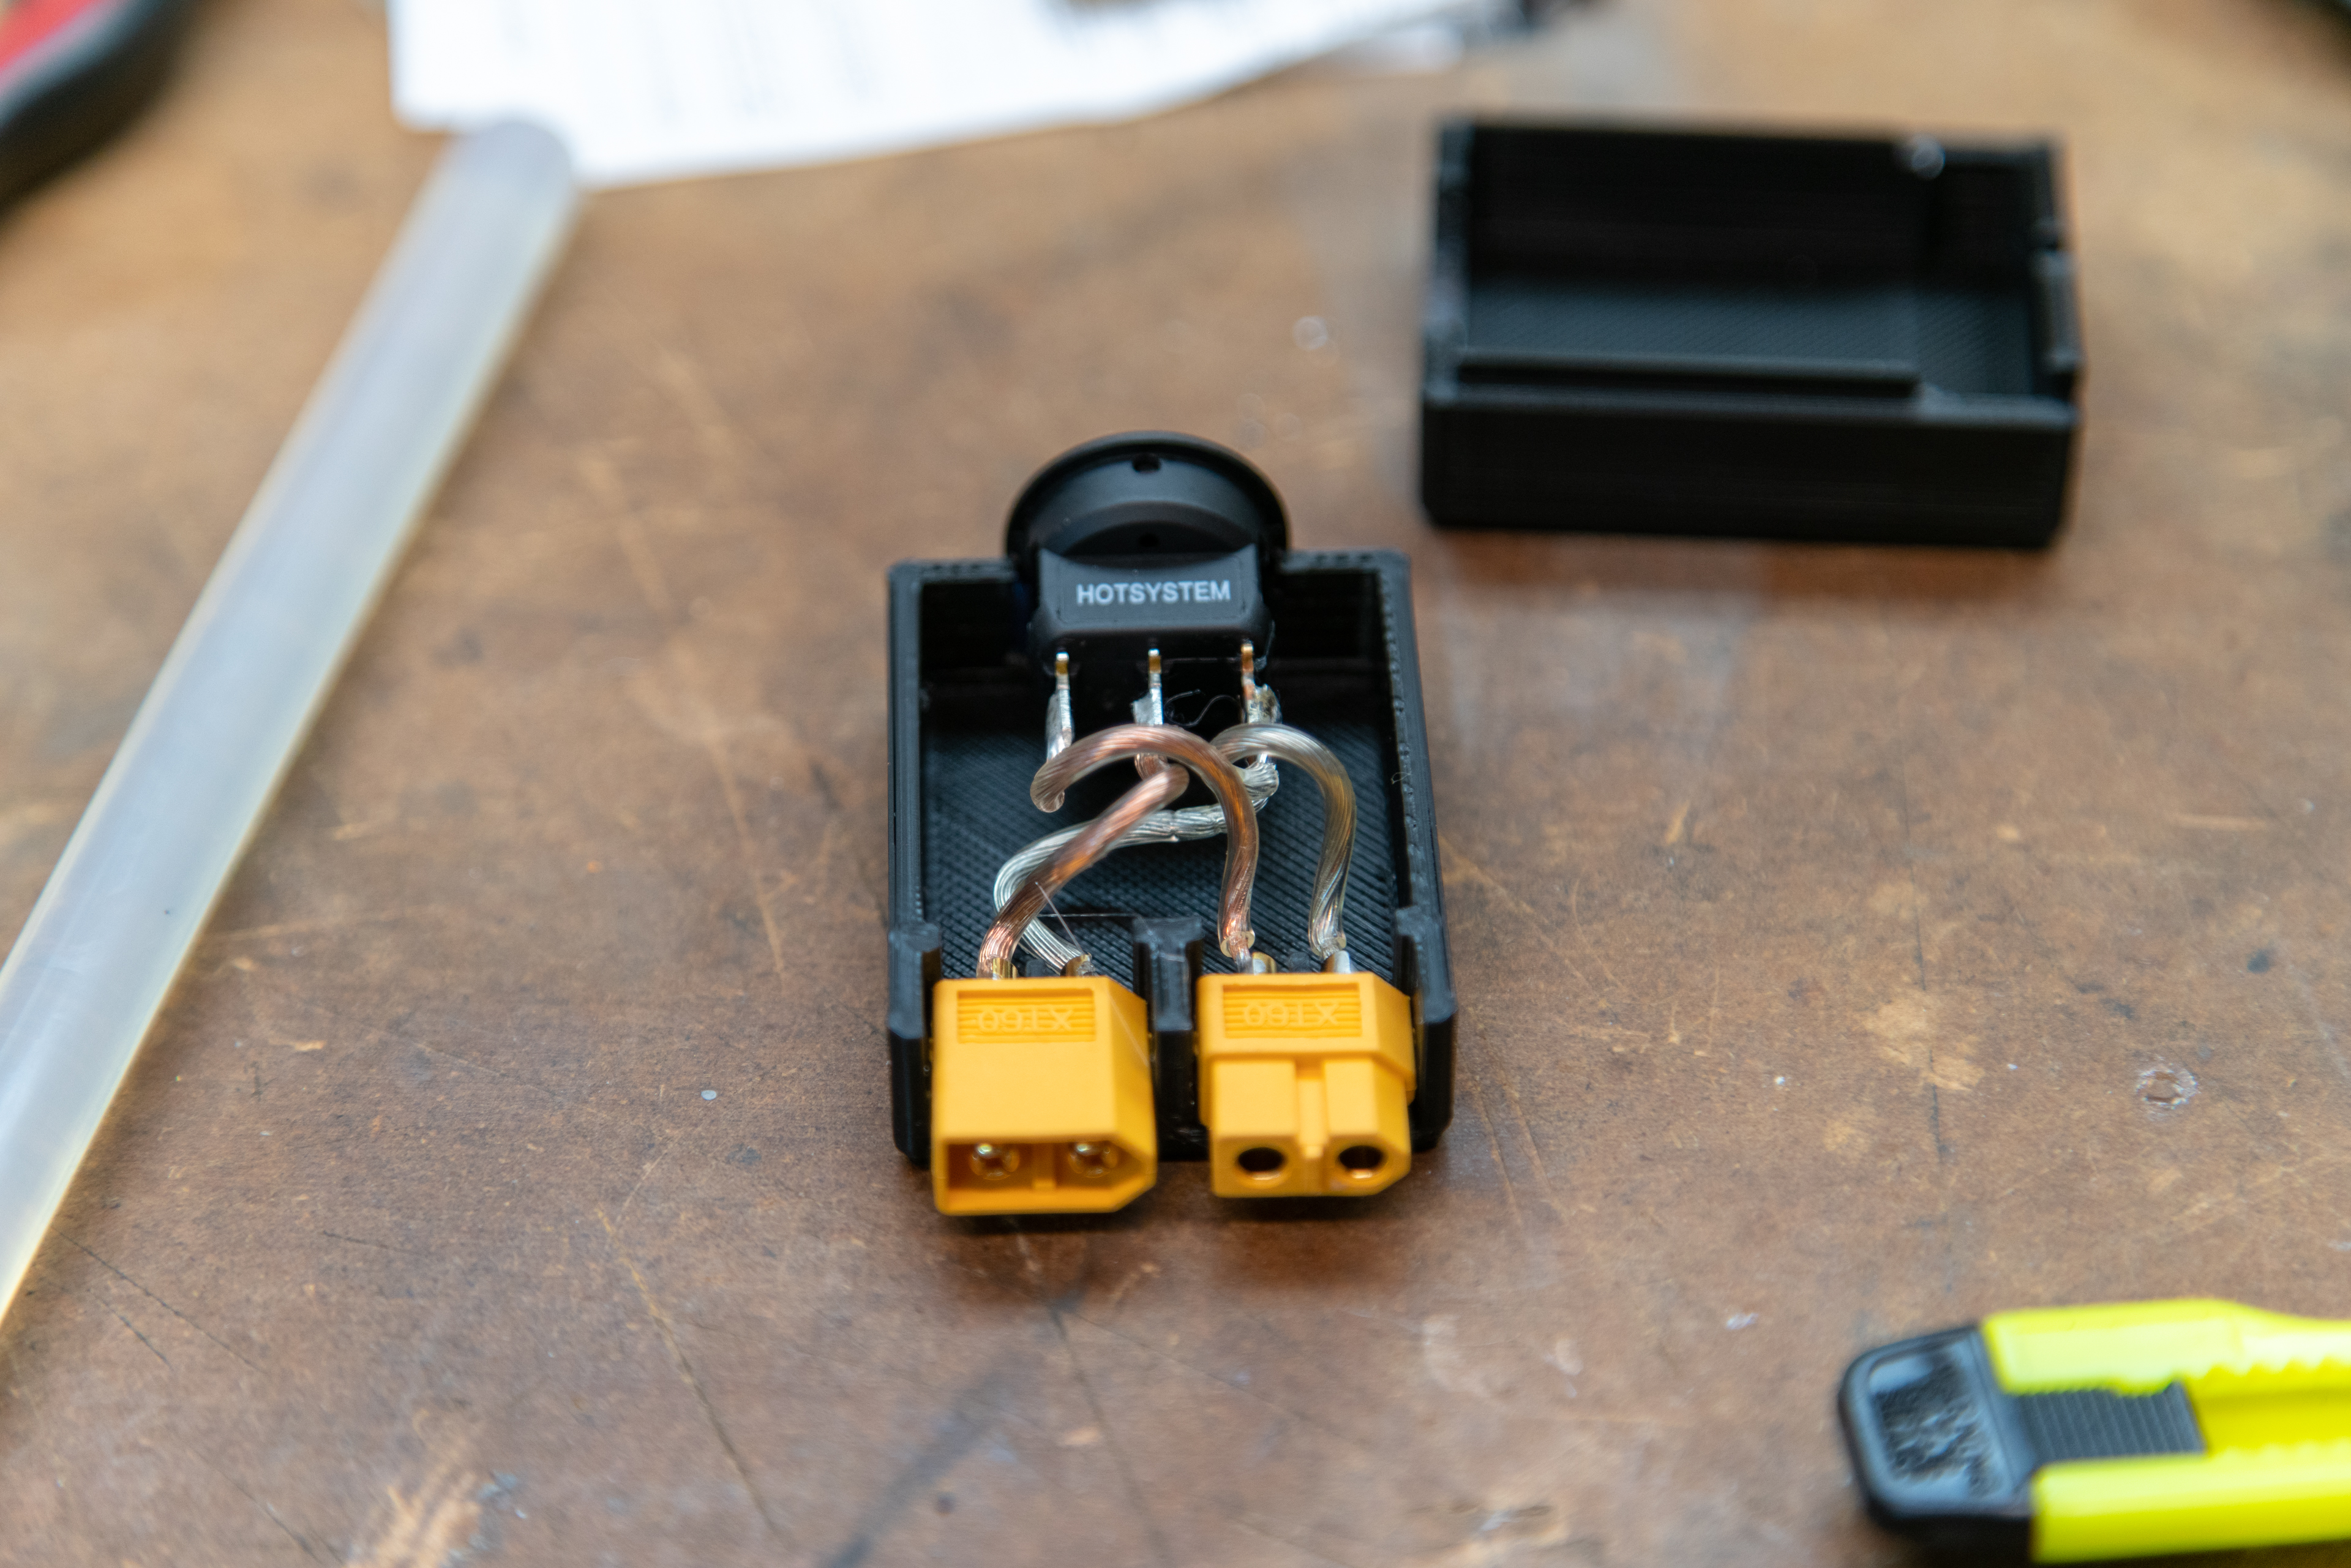
If you want to add a switch to your system you’ll need a male XT60 connector, a female XT60 connector, a few inches of wire, and a switch that can handle at least two Amps at 12V DC.  The switch I used is a single pole switch, so I tied the ground from both XT60 connectors to the ground pole on the switch (silver wire in photos.  I then wired the male XT60 (The male connector has the male gold parts inside the yellow plastic.) to the input on the switch and a female XT60 to the output of the switch.  I designed and printed a simple box to encase all of these parts, but some careful wrapping with electrical tape or any other method you have at your disposal to create a solid switch assembly will work.

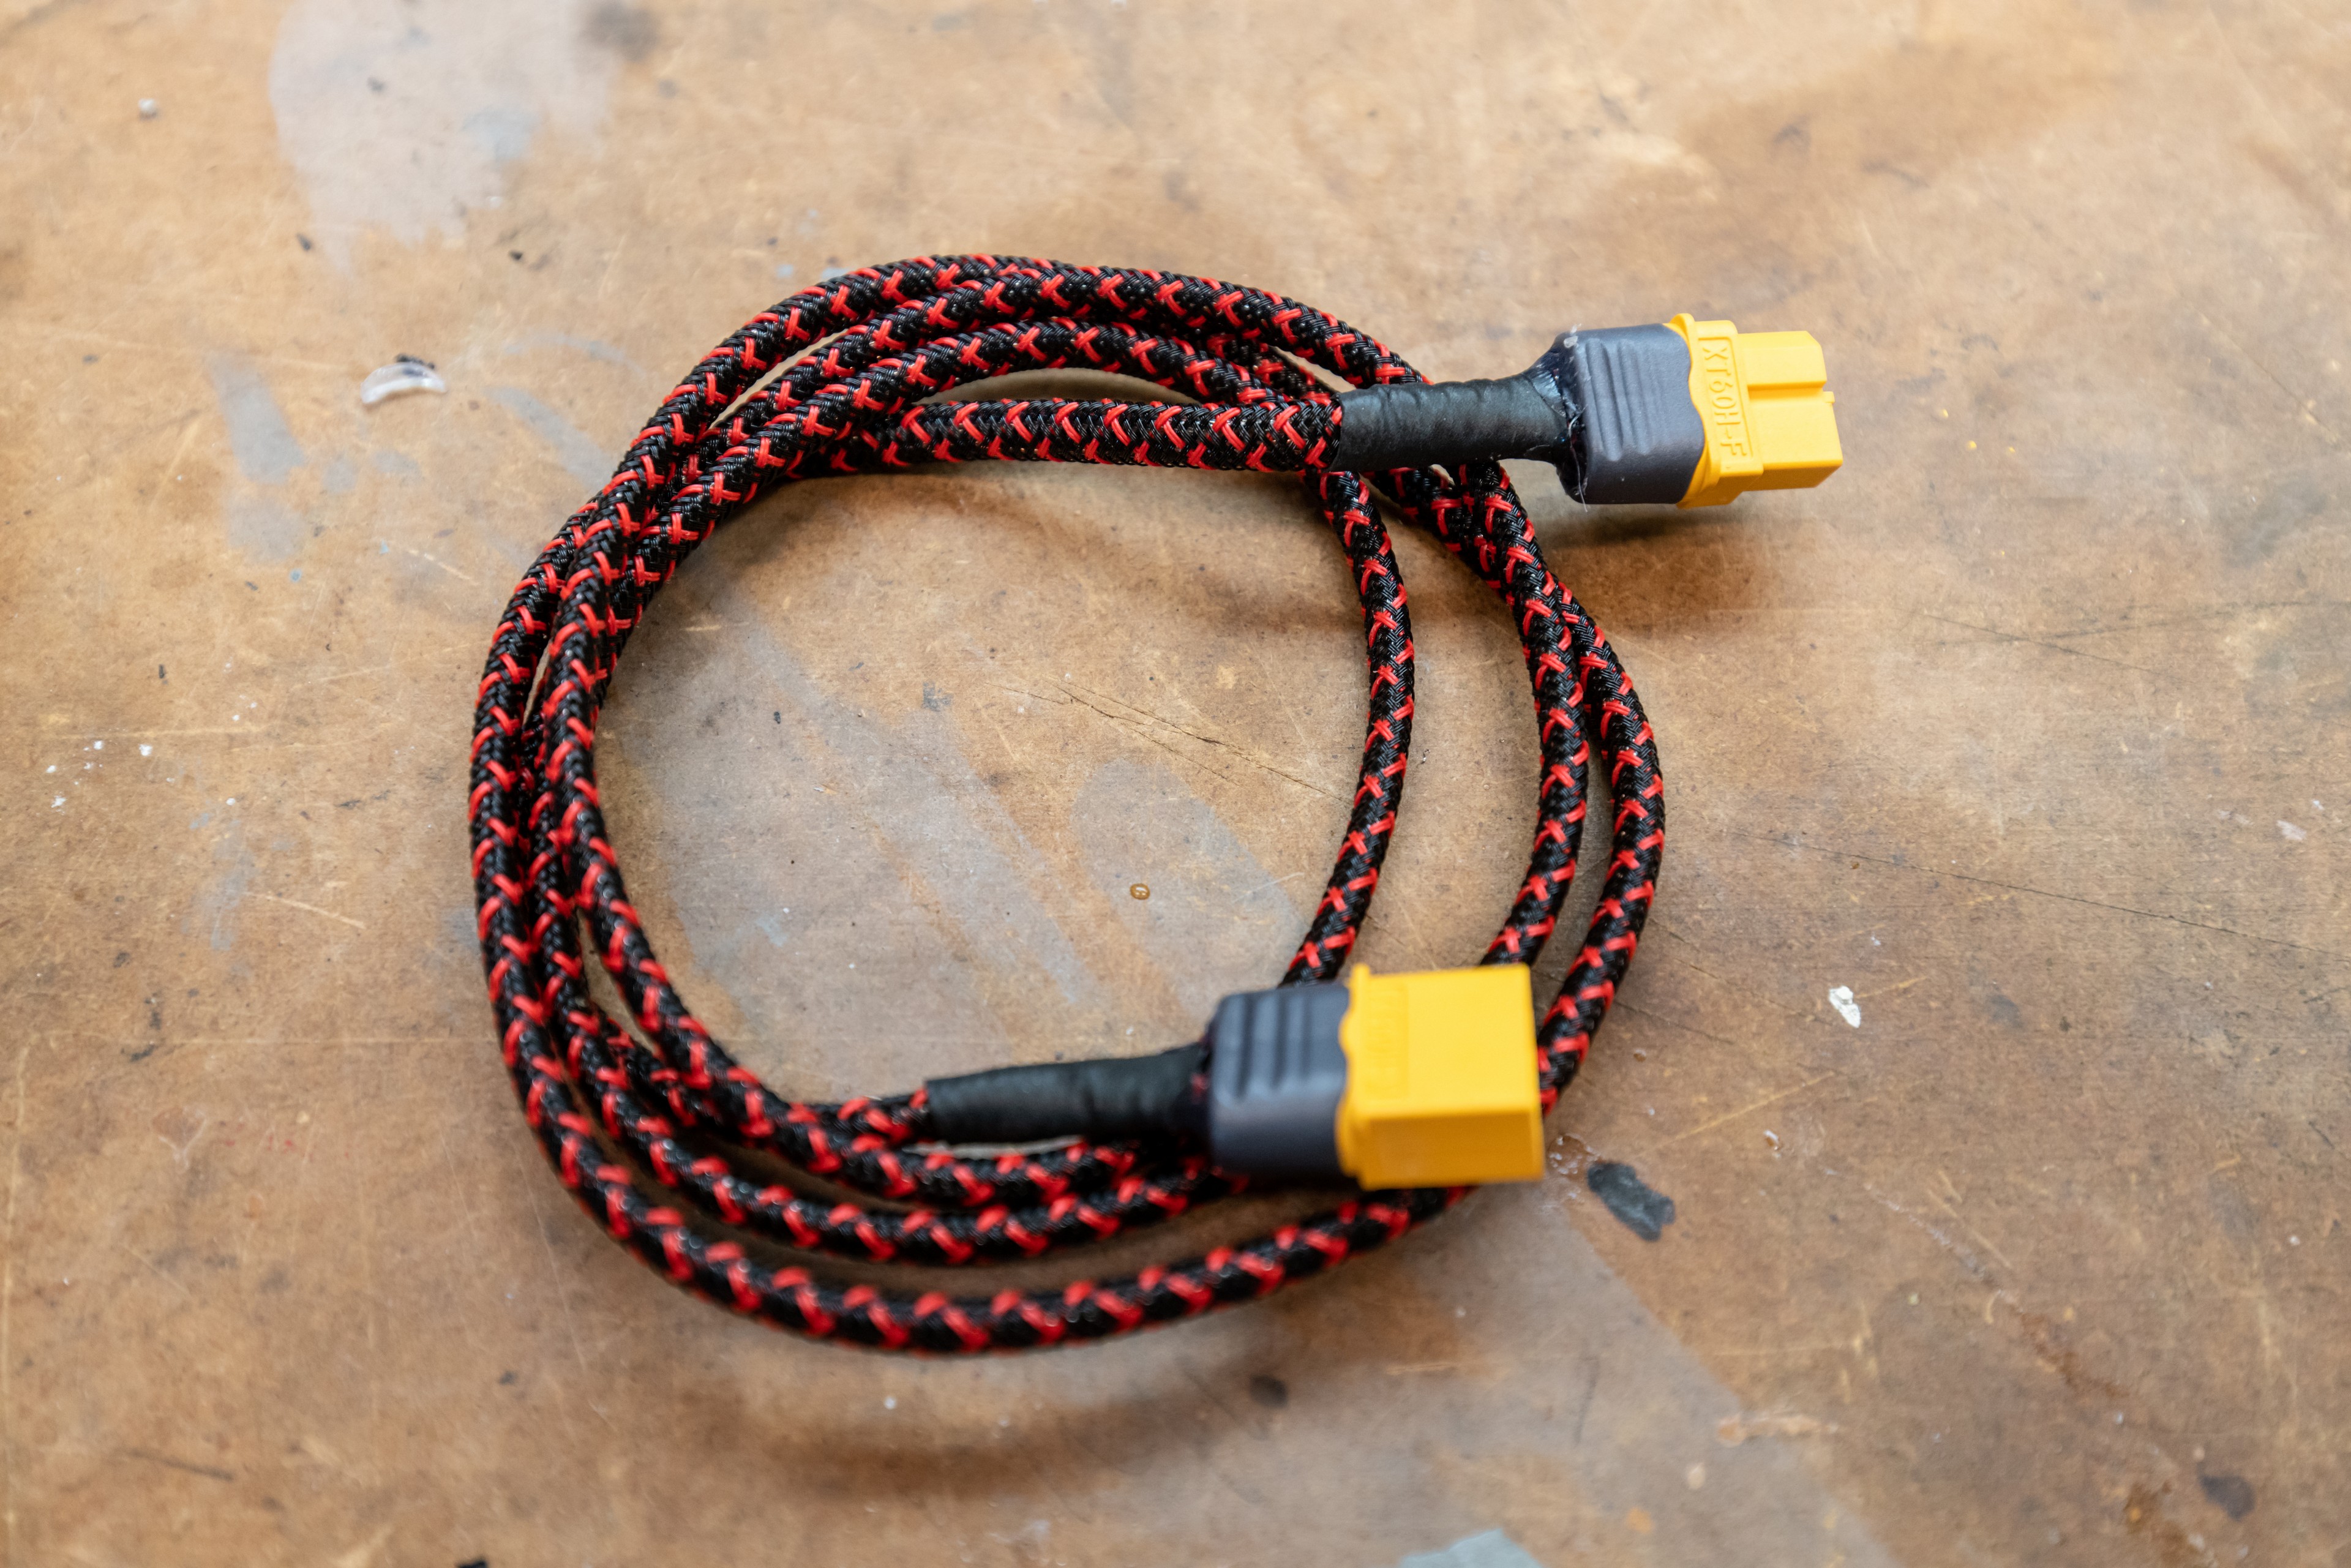
Lastly, I created a one meter extension cable to allow me to carry a battery in my backpack, have the switch strapped to my shoulder strap of my pack, and have the light on my helmet.  I used two 1 meter long pieces of “wet noodle” silicone wire I had and soldered a Male XT60 connector to one end of the wires.  I then slid the wires into a length of expandable sleeving to protect the wires and create a single cable.  I covered the end of the sleeving at the connector with a piece of appropriately sized heat-shrink.  I then repeated the process at the other end of the cable, except I used a Female XT60.

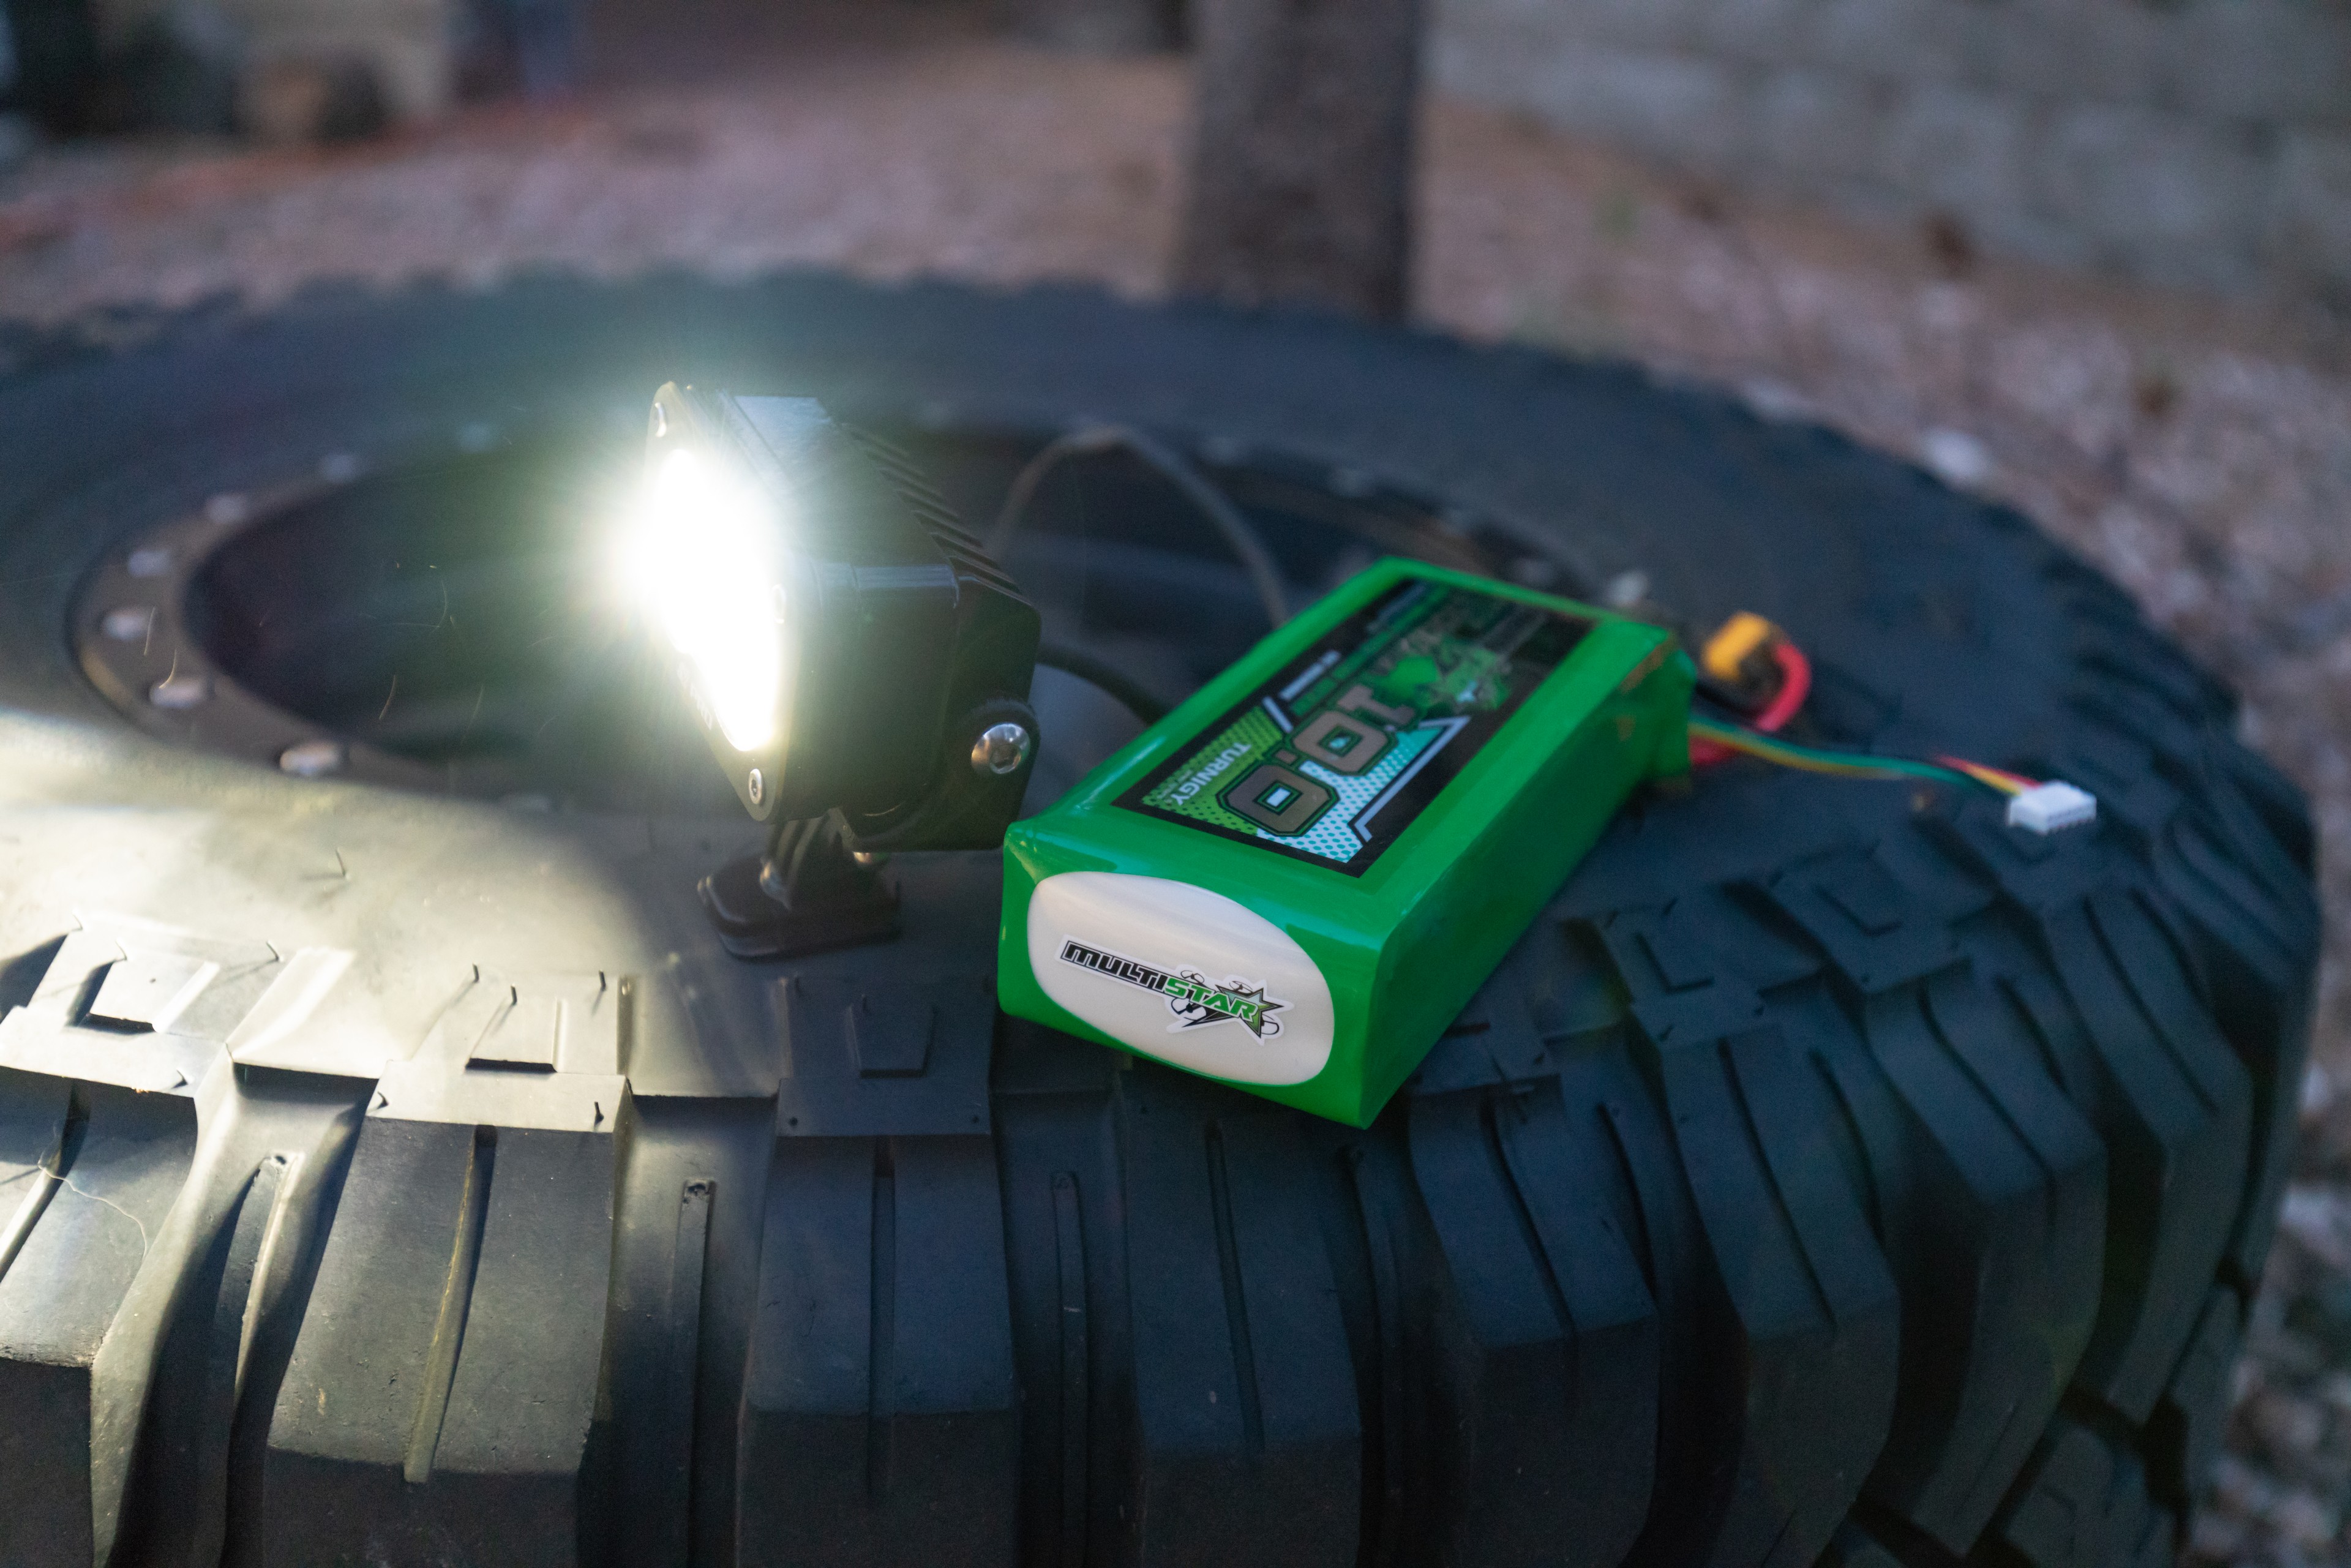
The S2 Pro will work with DC current from 9-30 volts, which makes all of the 4 cell Lithium Polymer (LiPo) batteries that I have great options for powering the light.  To calculate runtime for a given battery simply take the S2’s power consumption of 21 watts at 12V and divide 21/12 to get 1.75Amps of current required to run the light.  I have a few 10,000 miliamp-hour (mAh) 4 cell LiPo batteries that I opted to use, so if we take 80% of the batteries’ capacity (80% is the safe useable capacity of LiPo chemistry batteries) we get 8000 mAh, or 8 Amp Hours.  Divide 8 Amp hours by our Amps (1.75) and we get 4.5 or 4 and a half hours of safe runtime off of a full battery charge.  To determine runtime for a given battery you may have on hand, swap in the capacity and voltage of your battery in place of the numbers in my example. Easy.

The S2 can also be powered from an AC-DC inverter capable of putting out sufficient DC current and DC volts.  This inverter is used to power a small LiPo battery charger, and happens to put out 3A at 12VDC, which makes it a perfect choice for powering the S2 from the grid or a large solar battery pack, like a Goal Zero Yeti.

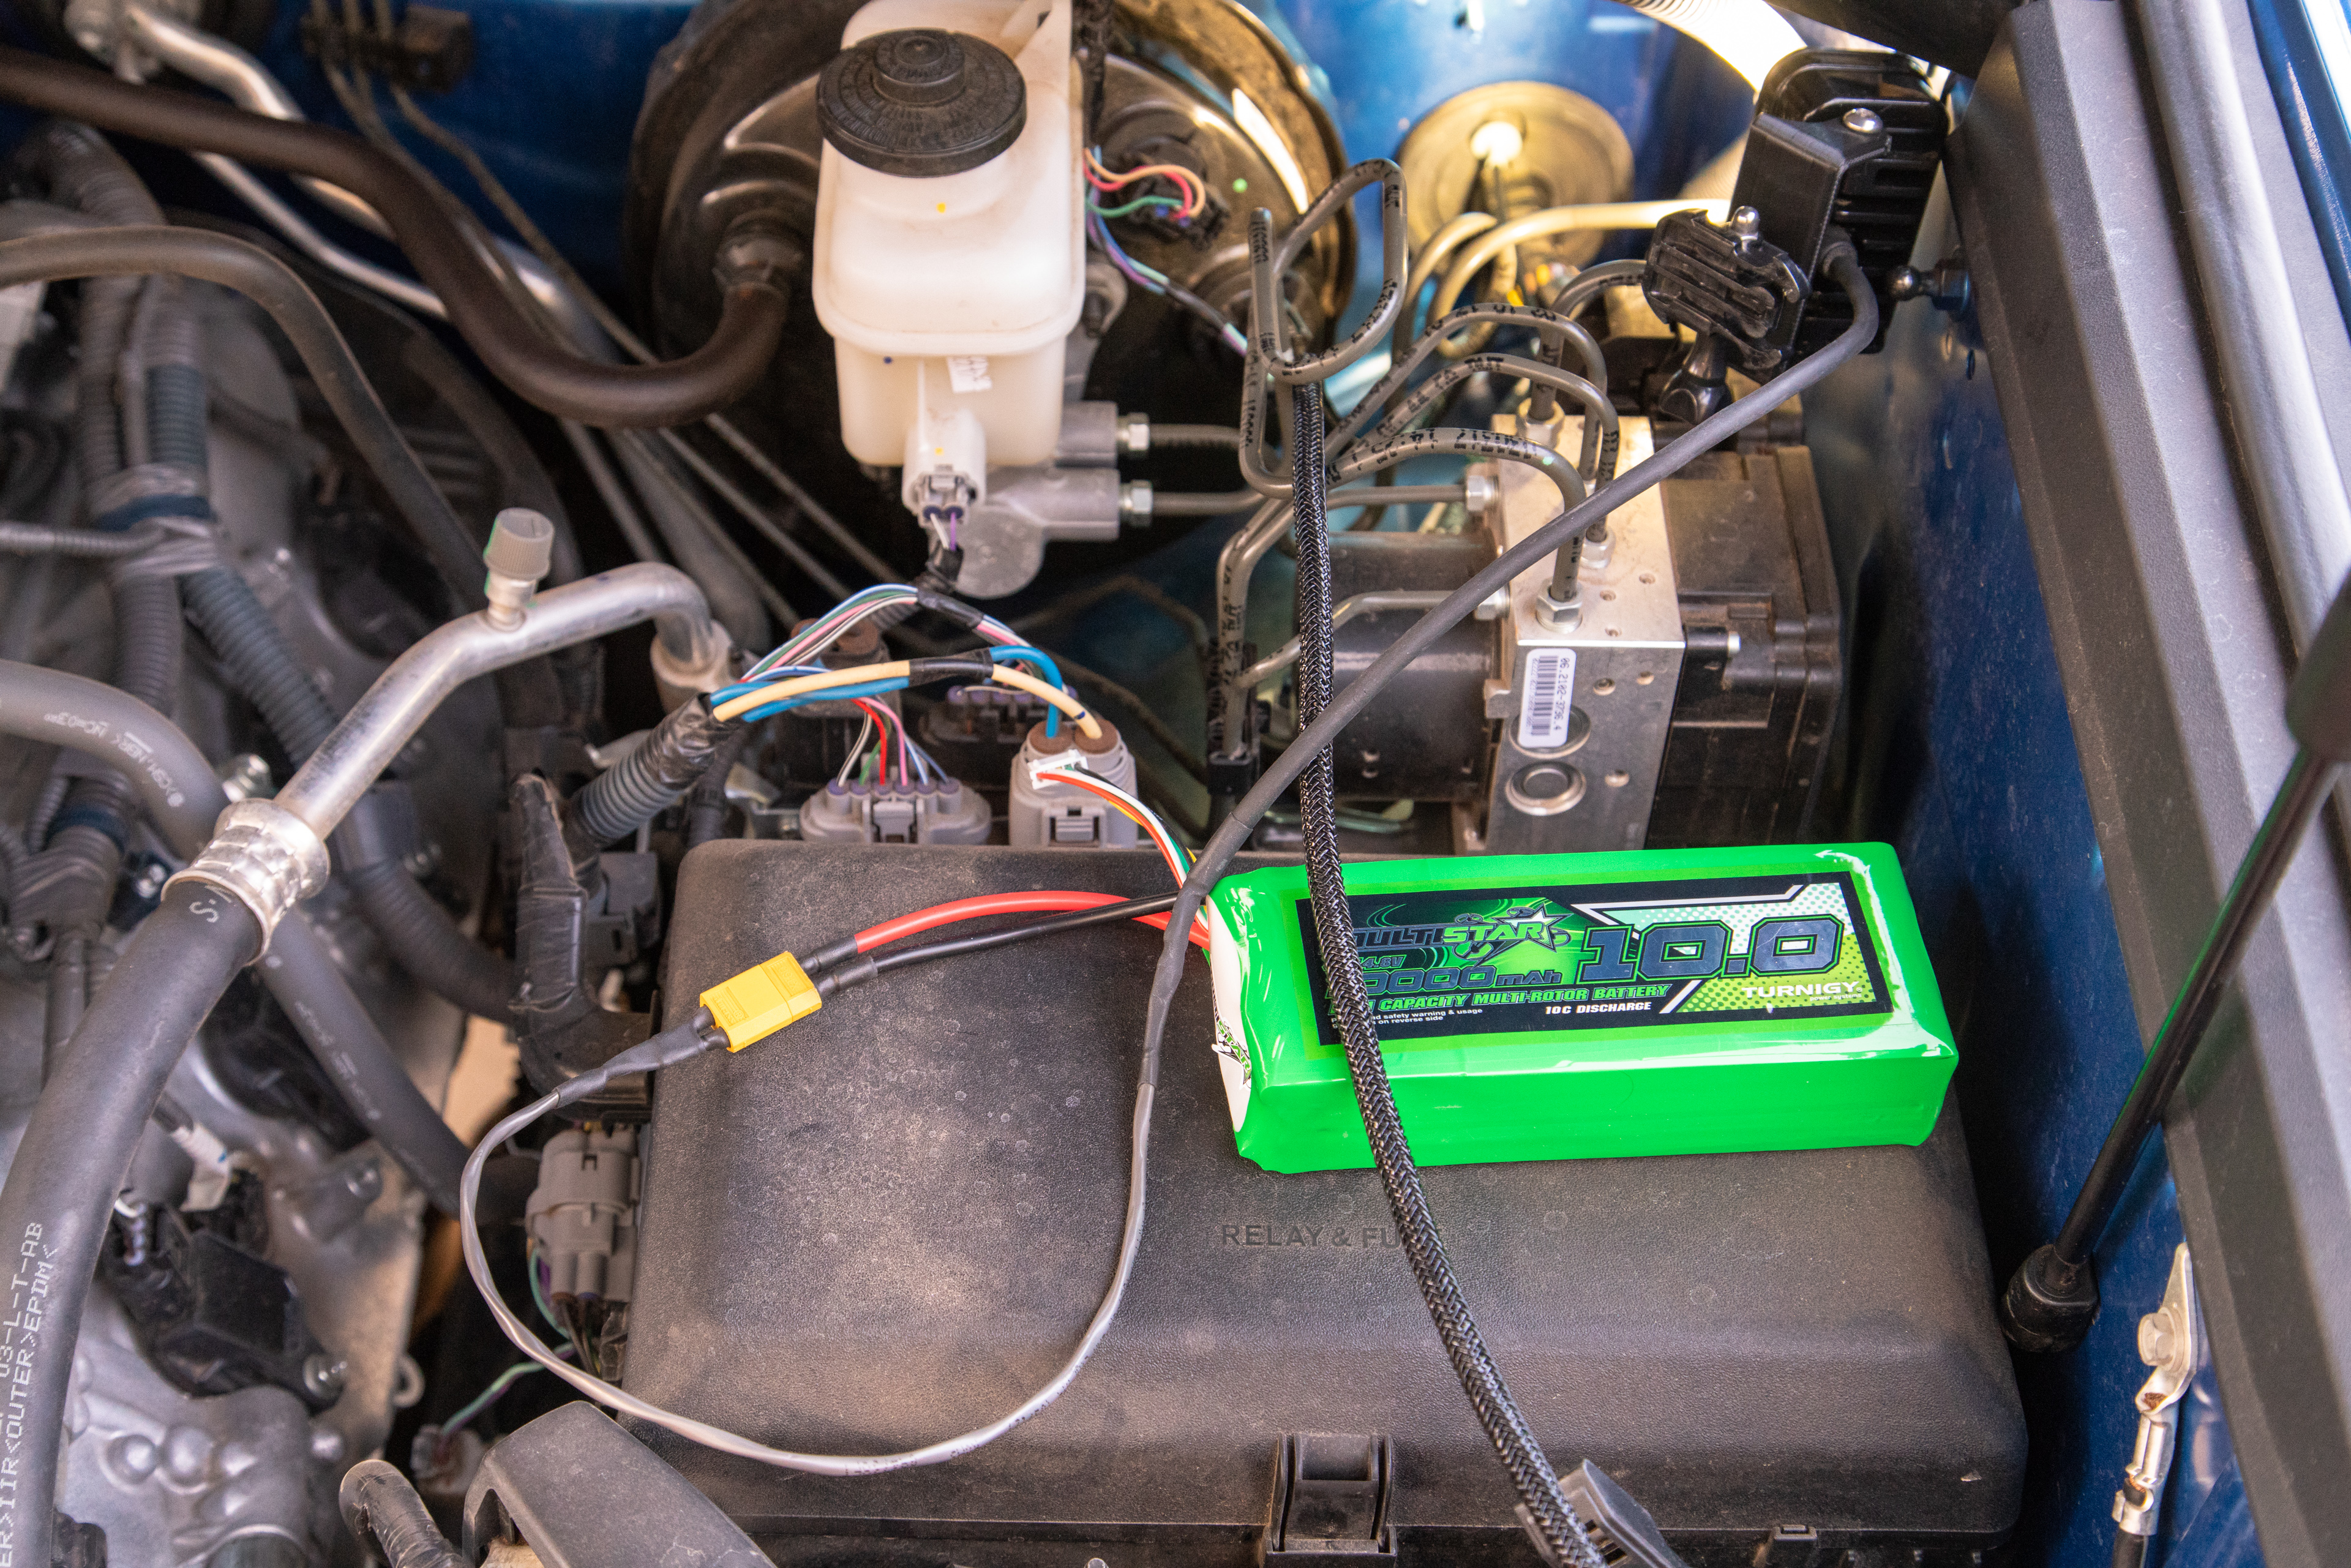
The S2 Pro can literally be powered by anything outputting the correct voltage and current.  Hard wiring a plug into your dirtbike, UTV, or other powersports machine would be an easy way to give your light a limitless supply of power – so I encourage you to use this article as a starting point to make this light exactly the tool that will suit your needs.

The above two images were taken on a tripod with the same exposure settings.  The shot on the left is the stock headlight on a KTM 300 XC and the shot on the right is with the S2 Pro mounted on the helmet switched on.

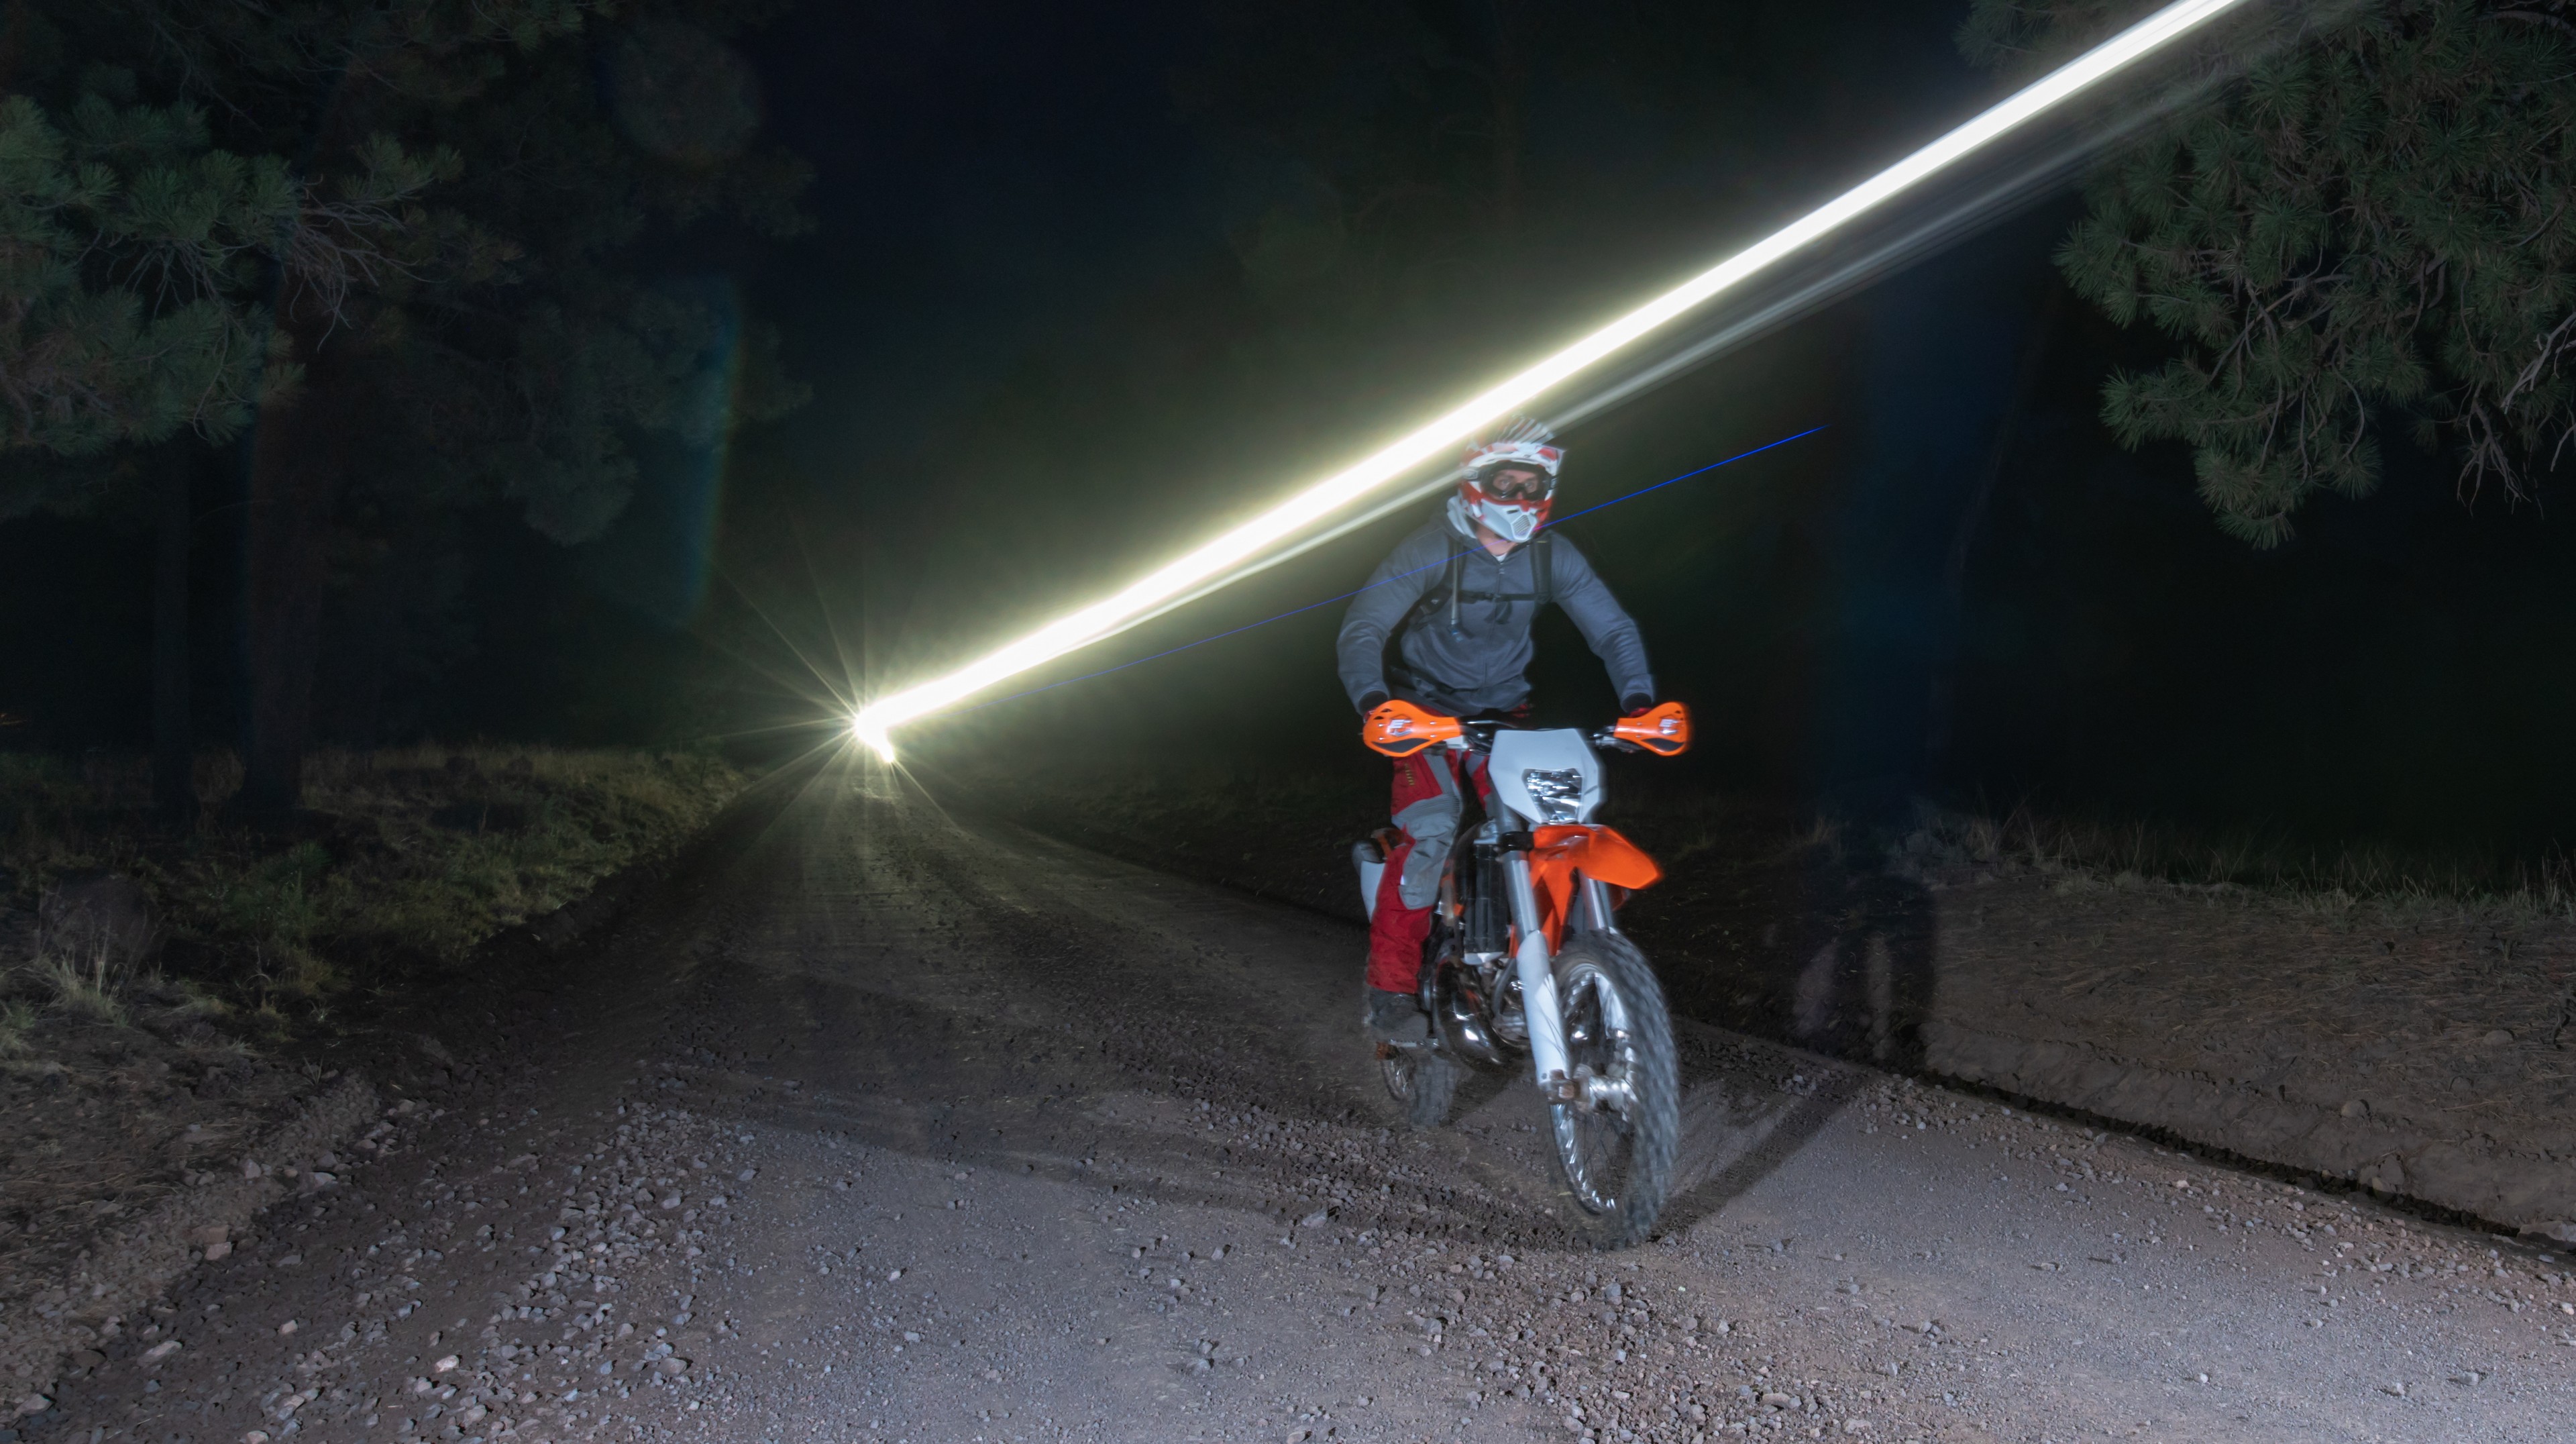
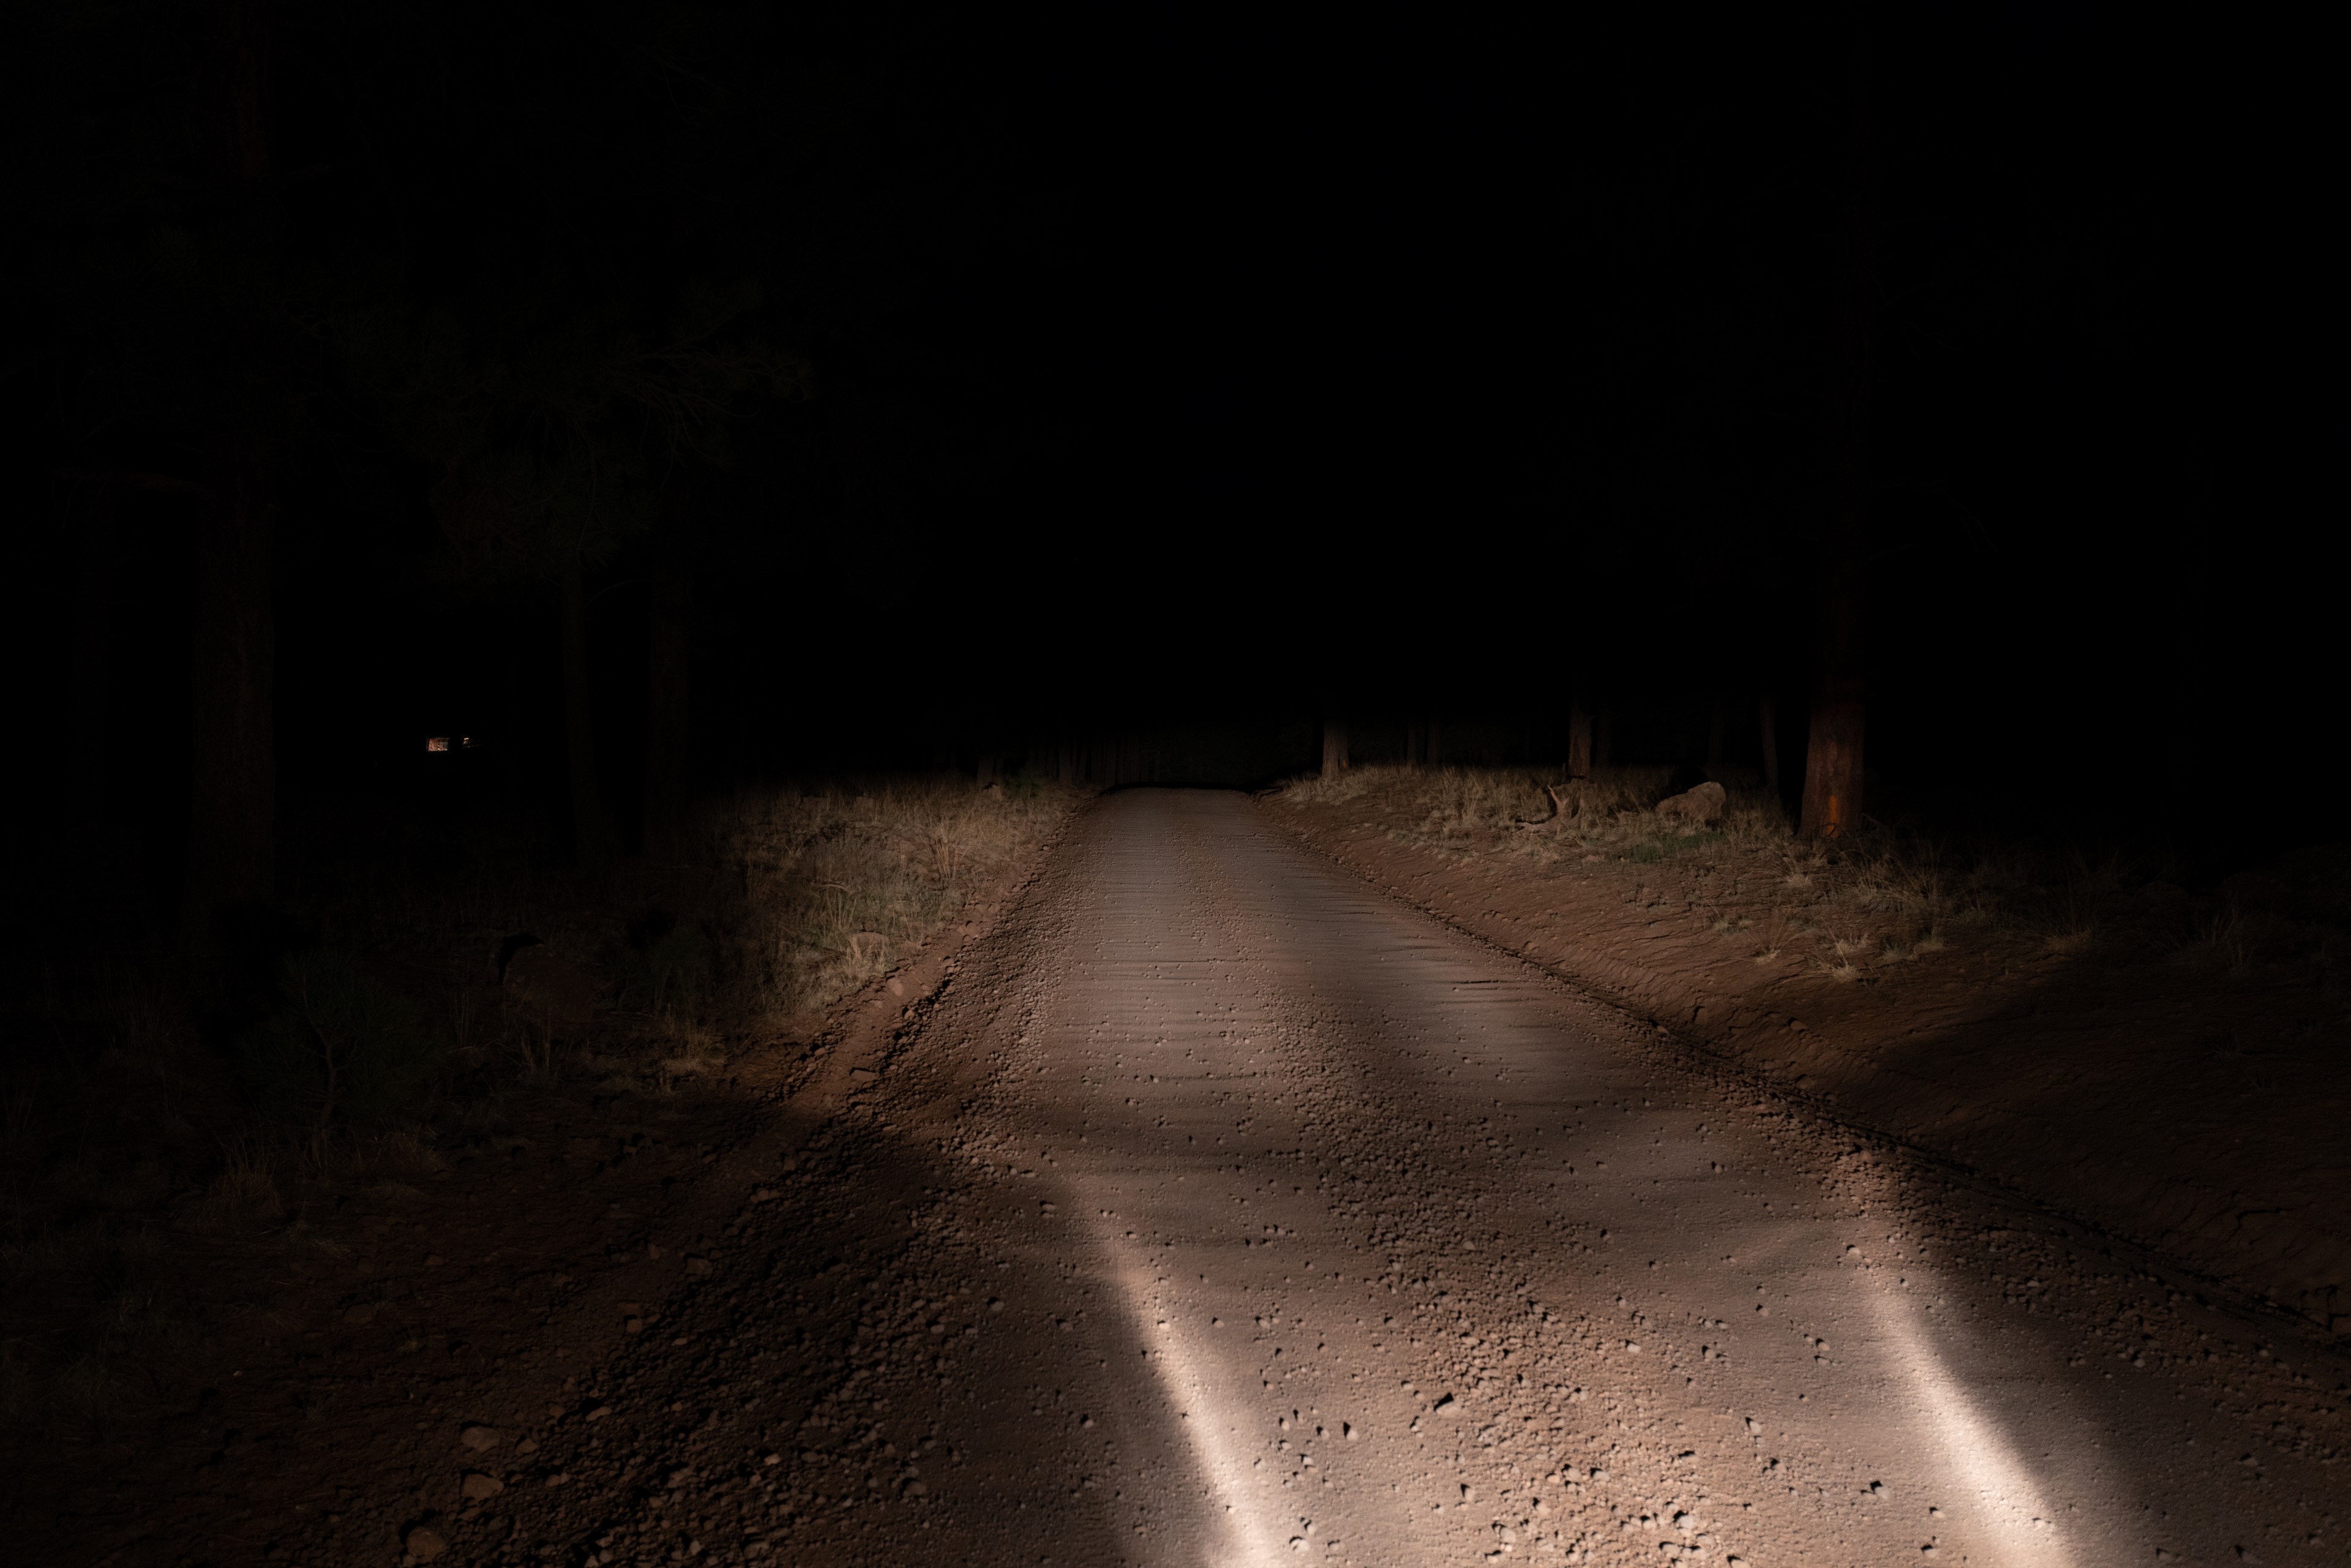
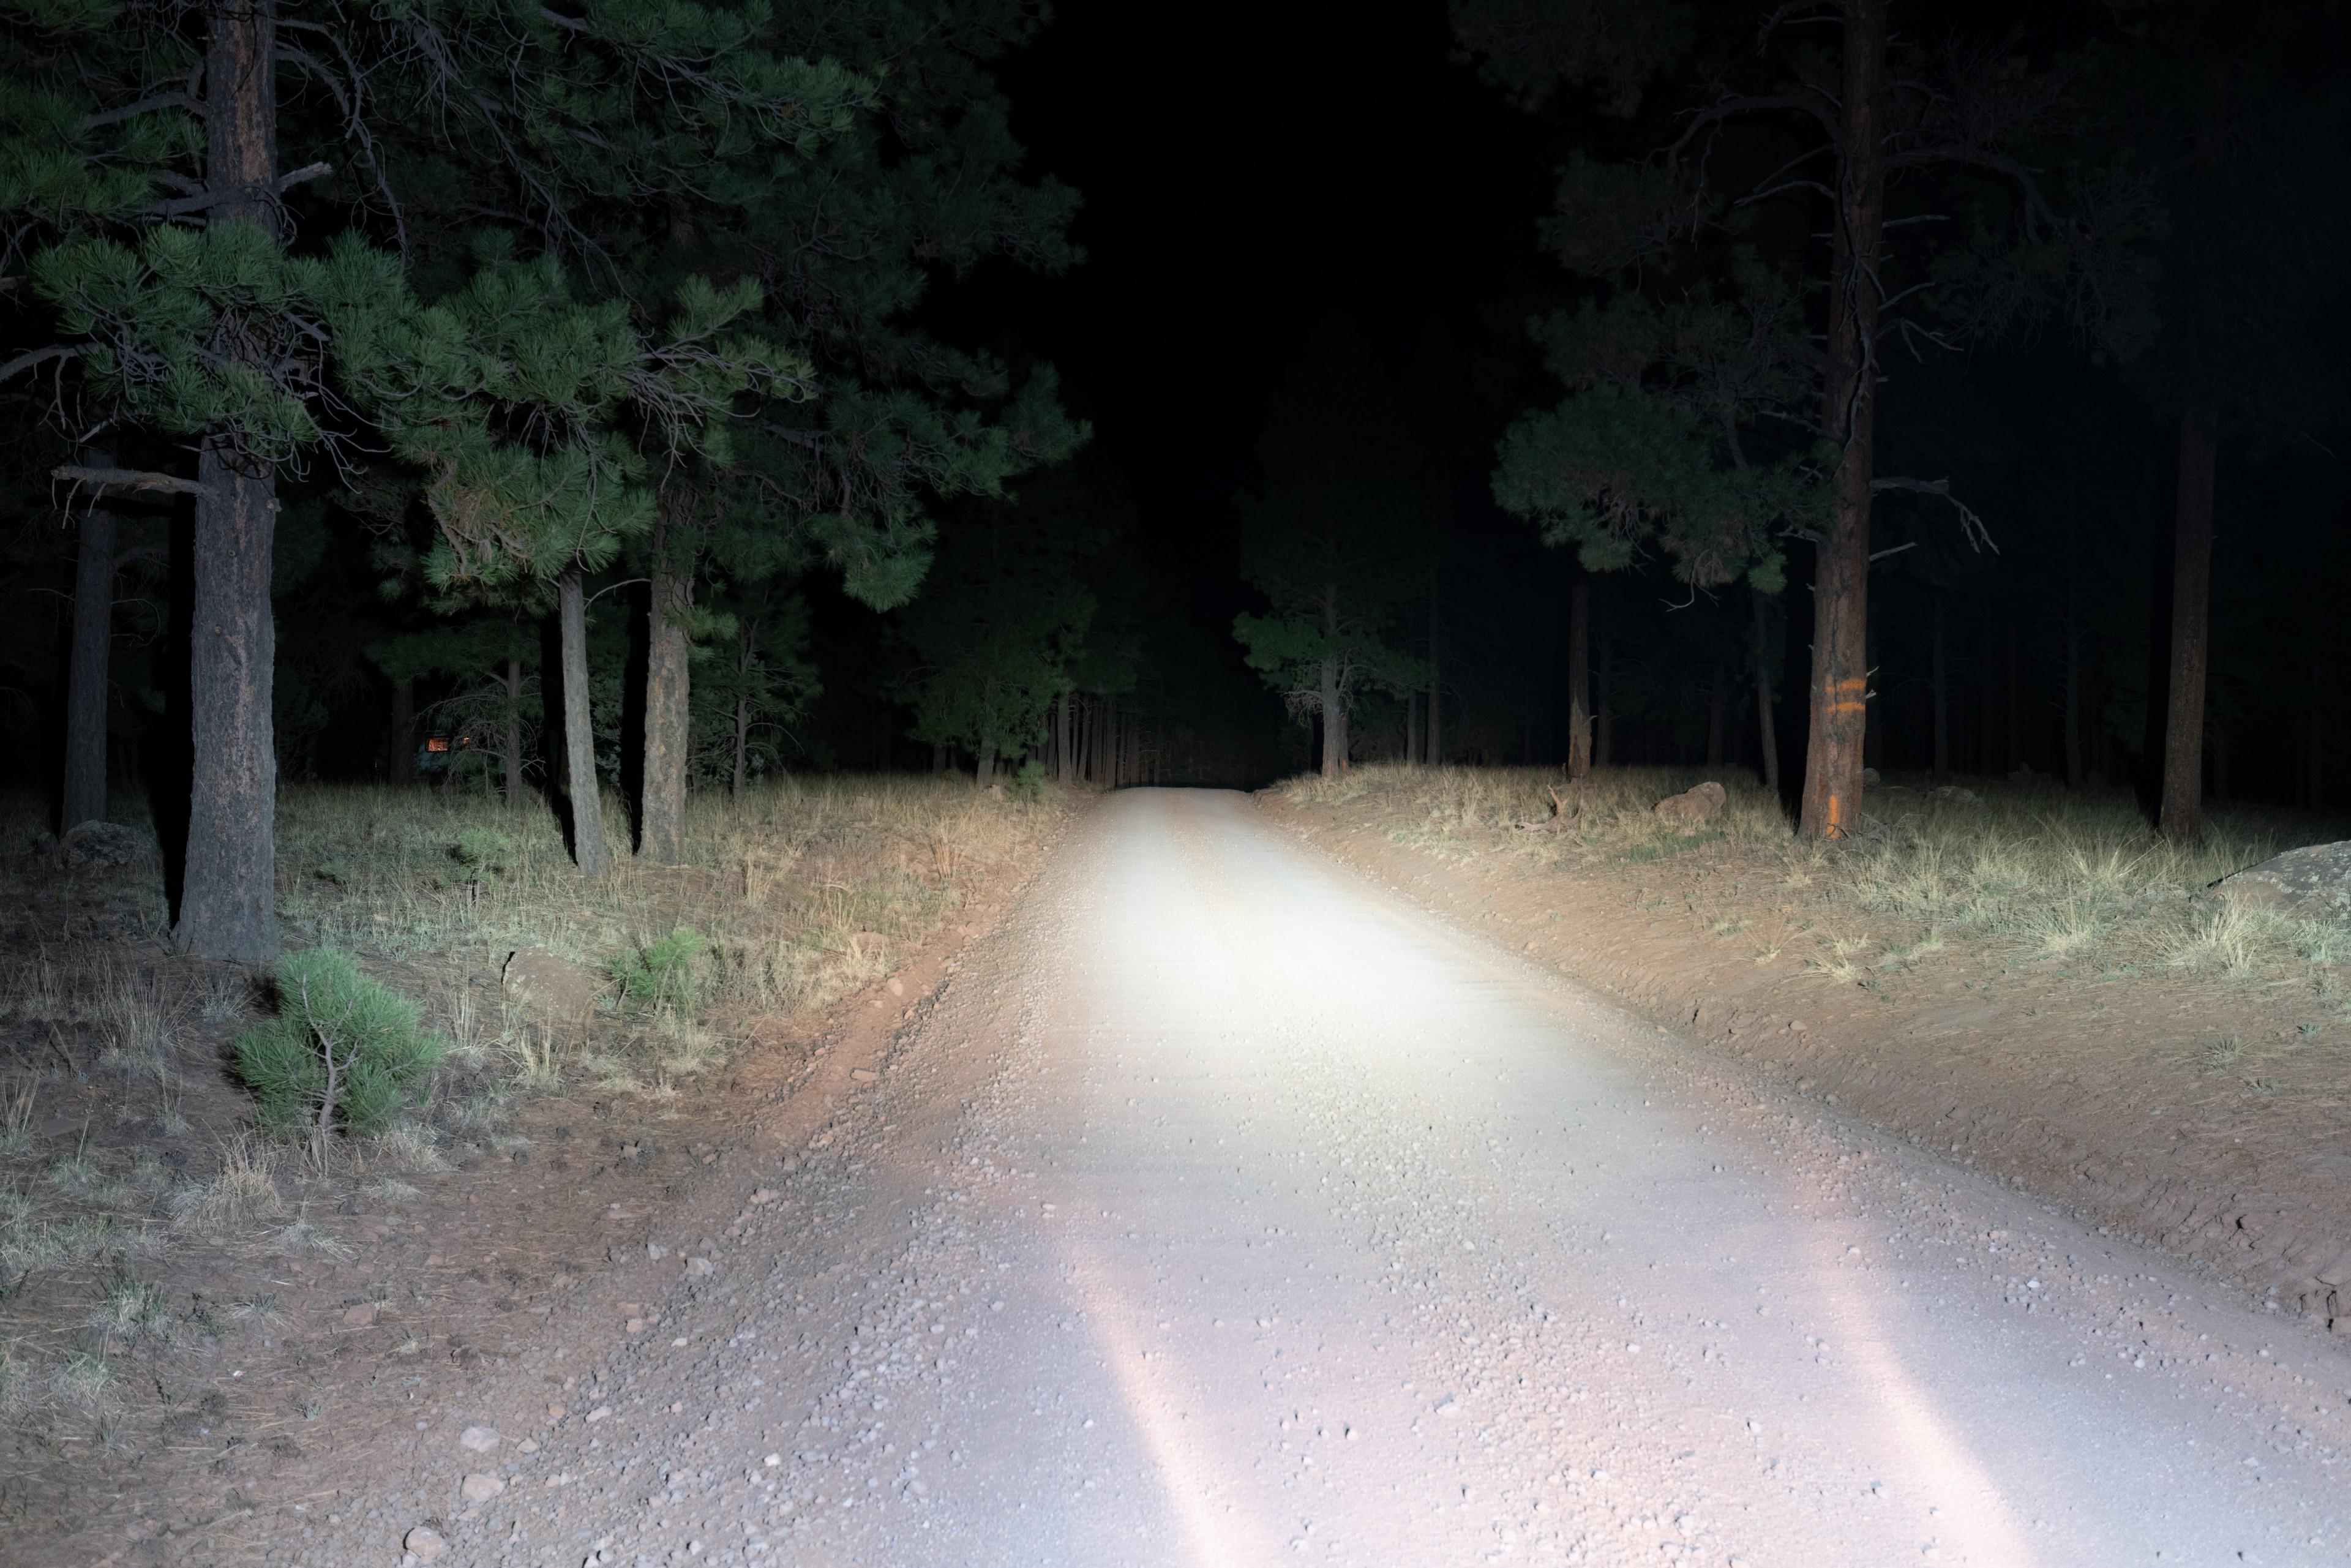
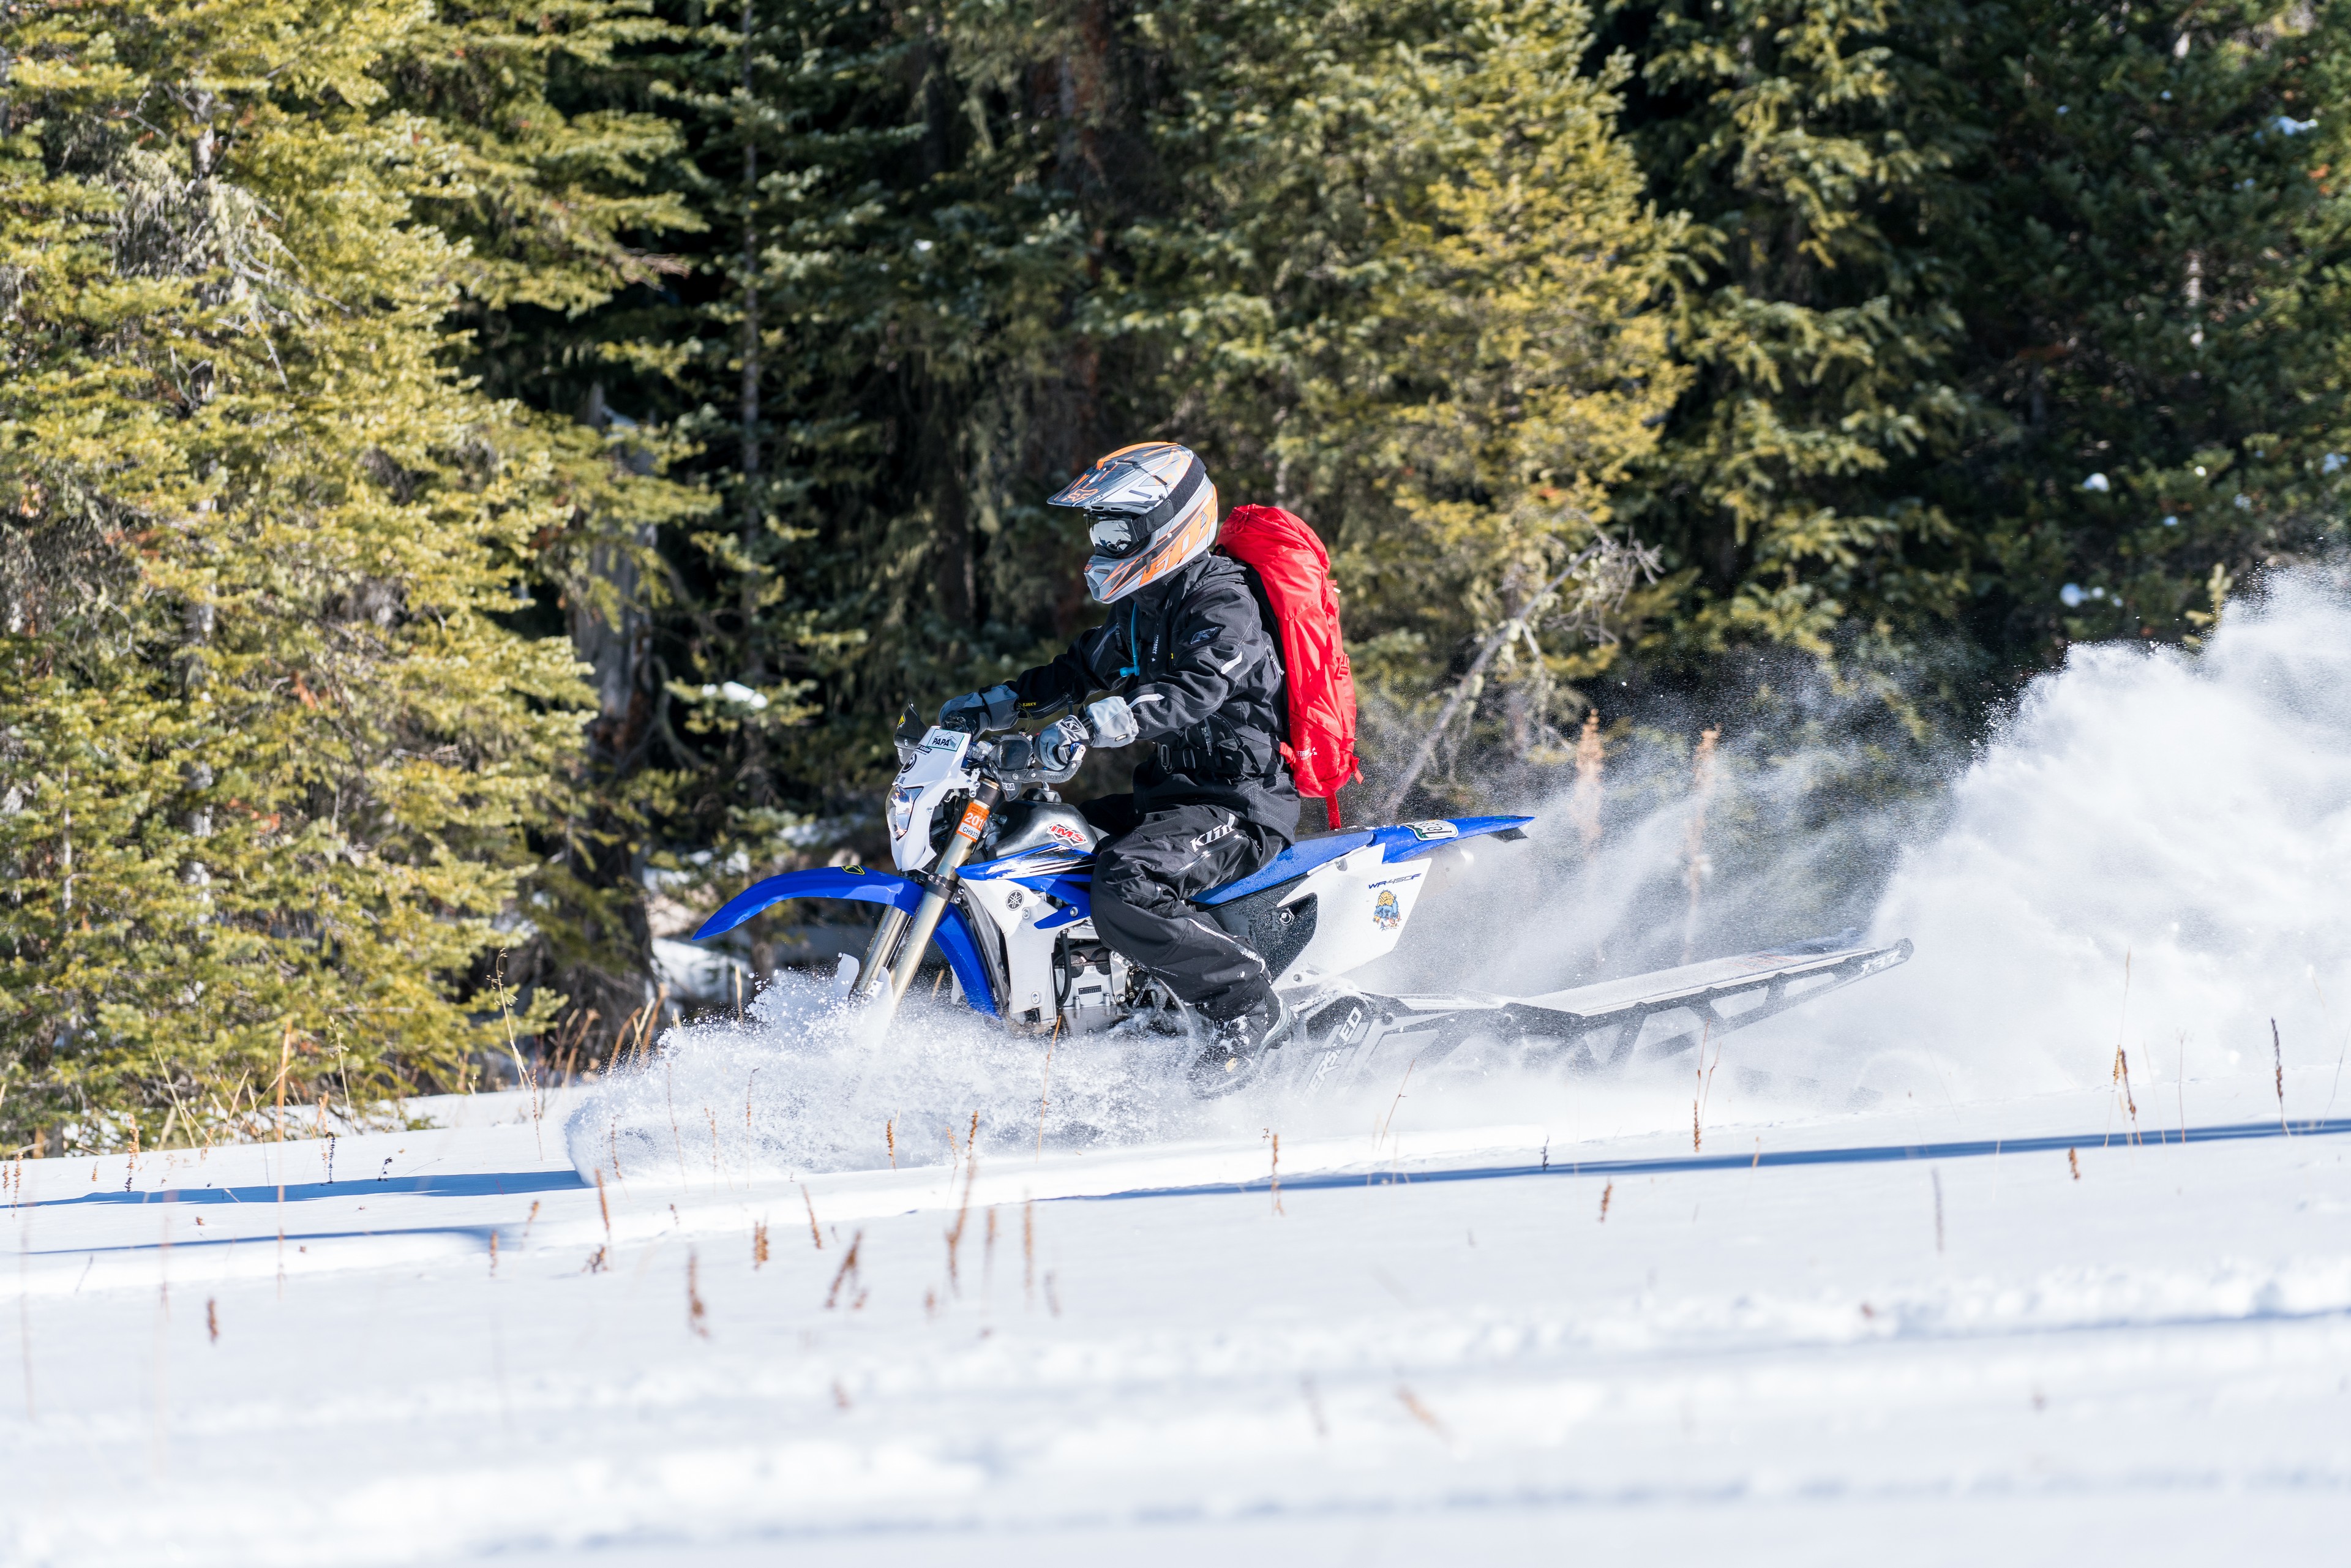
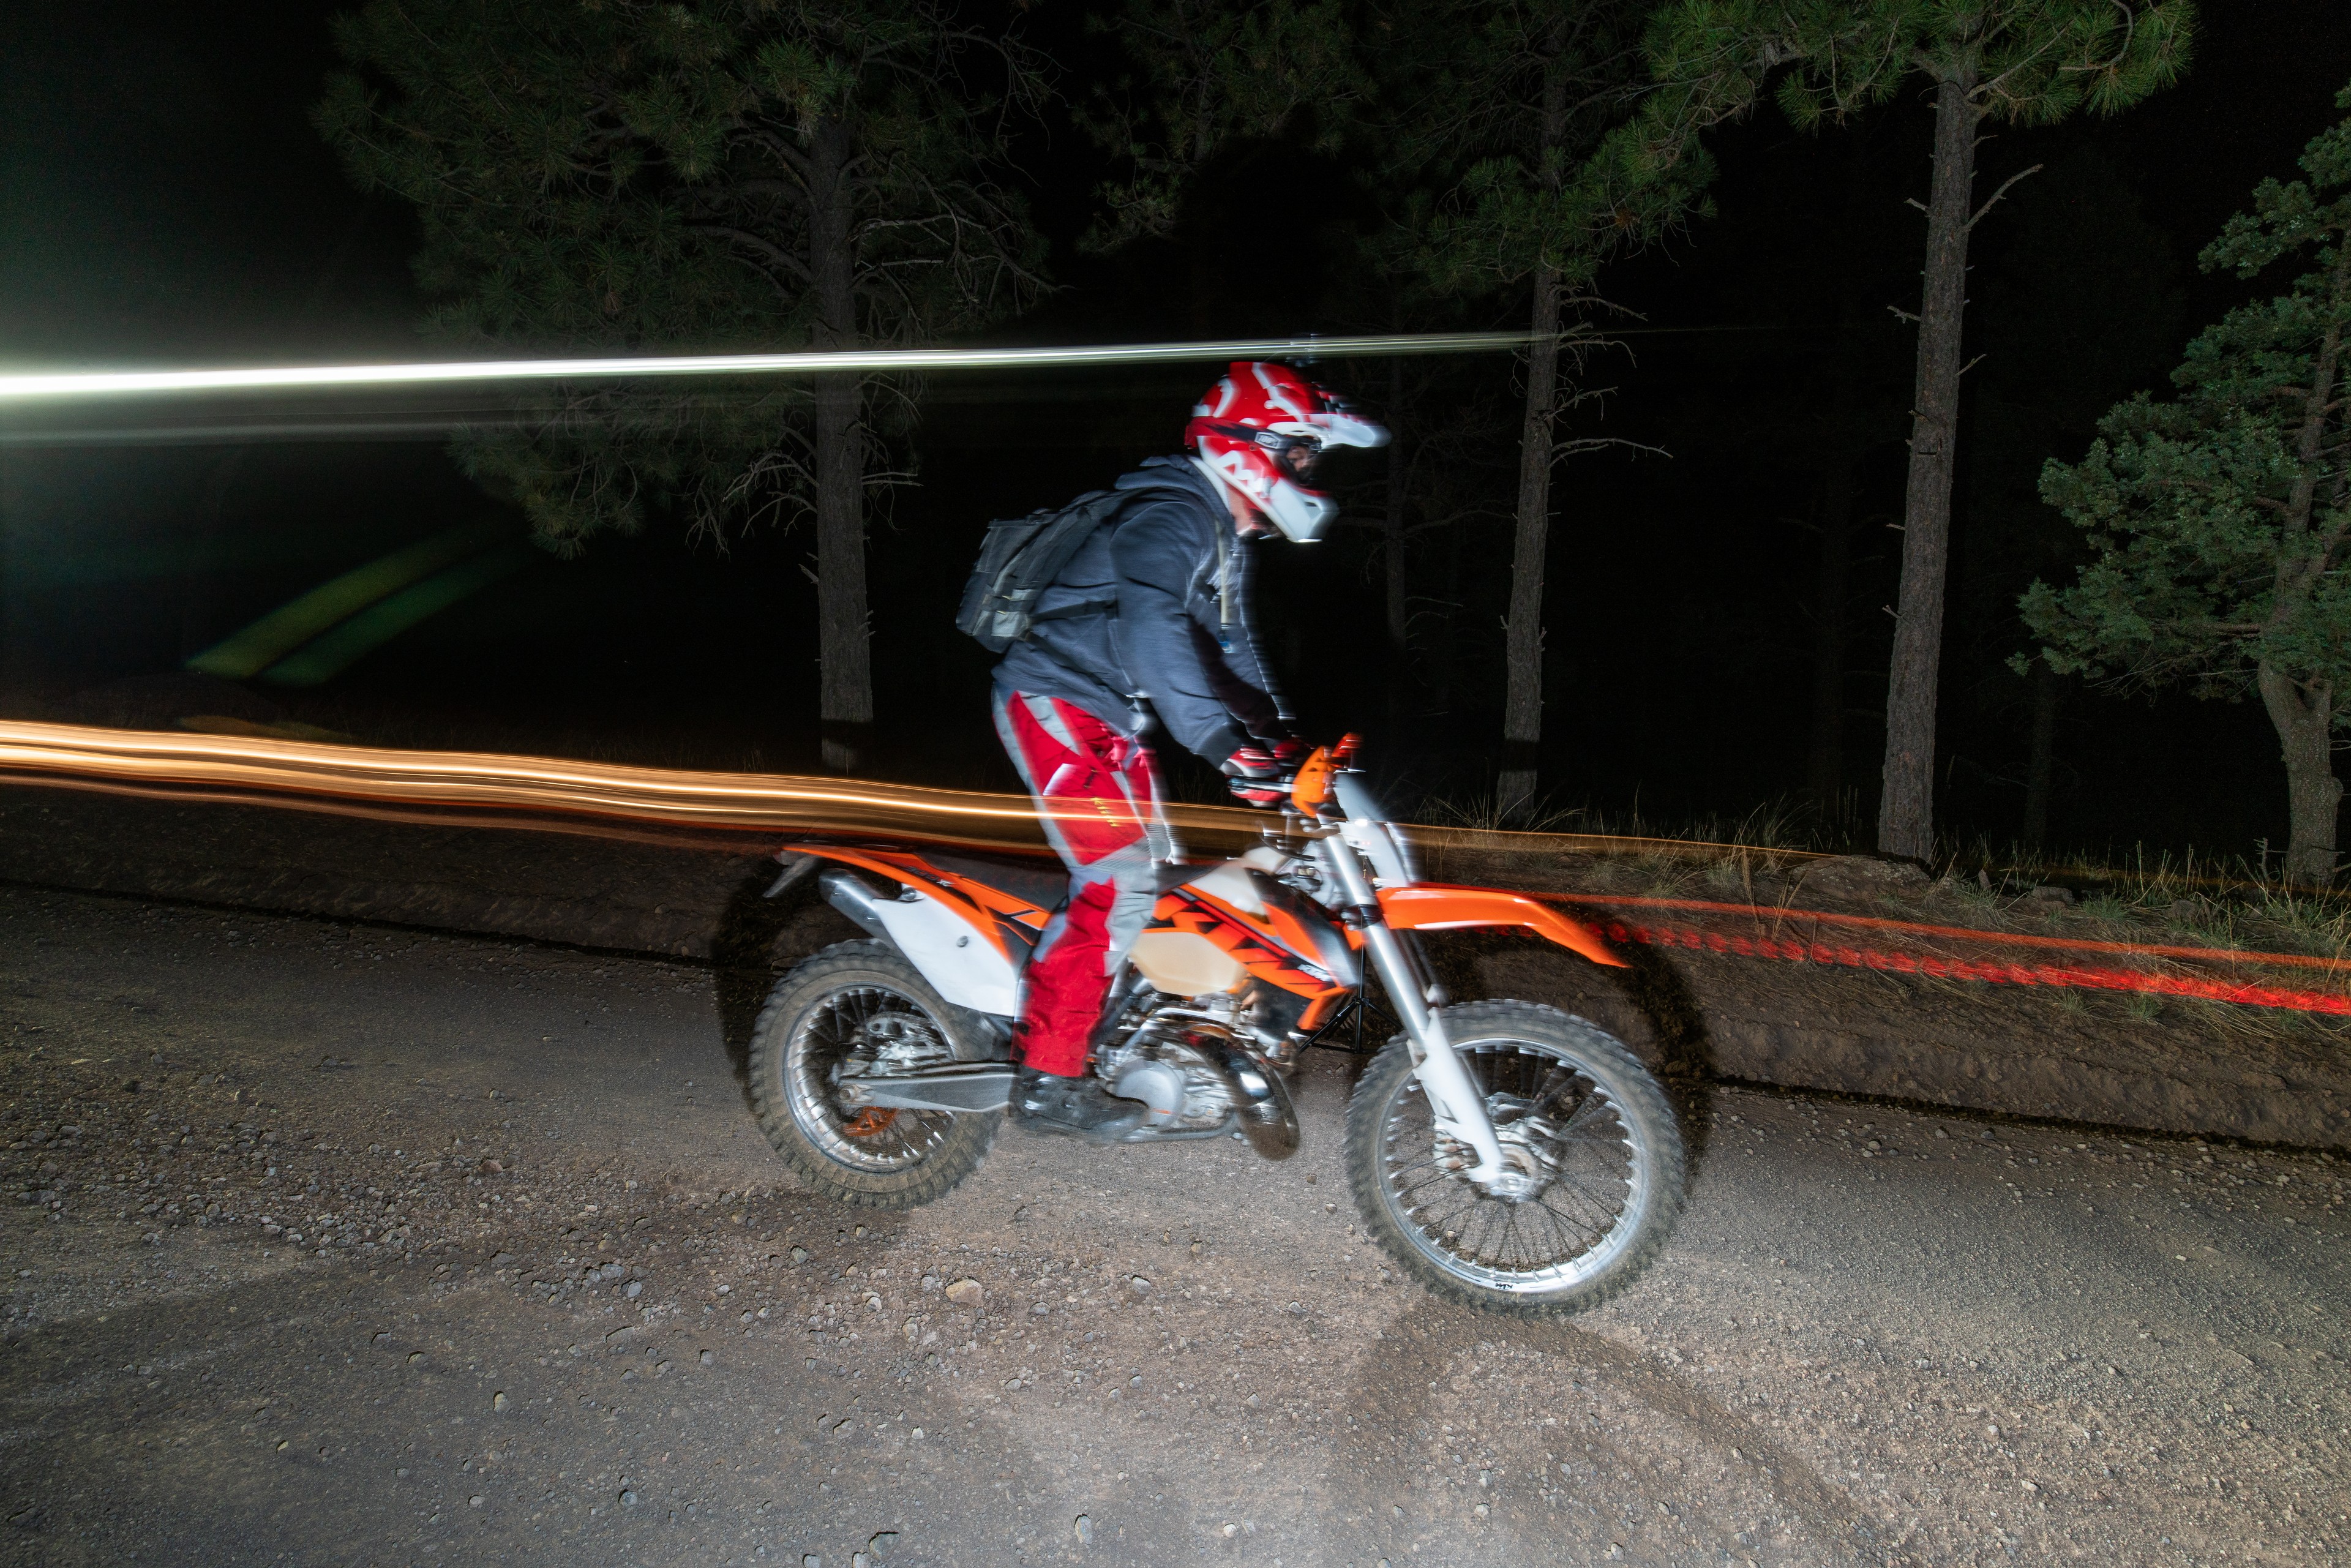
If you’ve ever tried to ride your dirtbike at night, chances are you’ve felt like you were outrunning your lights unless you were idling along in first gear.  Never mind the additional challenge that comes from only being able to see where your front tire and headlight are pointed.  Yet, with an S2 on your helmet, you can confidently navigate at night with plenty of light that is always pointed in the same direction that you’re looking.  Having this light is a huge comfort and confidence boost that will help you find your way and safely navigate the trail, road, or wherever you happen to be riding – being able to see is critical if you choose to play outside at night.

When you make it back to your truck, you can swap the S2 over to a different mount in a matter of seconds and have ample light to make the process of loading your bike in the dark as easy as doing it in the daytime.  This GoPro compatable S2 Pro has become something I find myself using constantly – from the obvious uses of sports at night, to working around camp and the shop, having powerful light that I can truly mount anywhere is invaluable. Do yourself a favor a make one of these lights.

Full Disclosure:  Baja Designs provided the S2 Pro used in this article at no charge to American Adventurist or the author.  All other equipment, tools, and parts used to build this light were purchased by the author.

Disclaimer:  You’re responsible for yourself and your actions, so if you blow up a battery, melt your hand with a soldering iron, or do anything bad as a result of reading this article – that’s on you.  American Adventurist, Chad de Alva, and Baja Designs can’t be held responsible.  Only you can prevent stupid.


Snowbike Project – Part 2

THE SOBERING REMINDER

The winter of 2017-2018 has been a rough one.  Snowfall has been well below average in the Southwest, and that’s made for scary conditions both in terms of snowpack stability (lots of avalanches) and hazard coverage (stumps and rocks).  The sad truth is that since the New Year, two individuals I’ve known personally who were both experienced winter backcountry travelers have died while backcountry skiing and snowboarding.  I’m not sharing this with you to try and scare you away, but to point out the fact that winter backcountry recreation can be very dangerous.  Yet the backcountry is also one of the most enjoyable places on earth, which explains why folks seek out the peace of the wilderness in every season.  If you want to snowbike in the backcountry and make it home at the end of your ride, then you need to have the gear, knowledge, and training to safely ride in backcountry avalanche terrain.

THERE WILL ALWAYS BE MORE TO LEARN

Snow science and snow safety are two disciplines that I would strongly encourage you to approach with the mindset of “there is always something to learn.”  You can get a doctorate degree in snow hydrology, so no, that’s not an embellishment on the amount of learning potential.  There’s also a great reason to continually practice with your avalanche gear, because if someone in your party is buried in an avalanche, seconds can mean the difference between a successful rescue and a body recovery.  If that someone buried is you, you’re going to want highly skilled buddies coming to your rescue, so make sure the folks you ride with are on the same level of training and preparedness.

Standard avalanche kit consists of a shovel, probe, and transceiver which is commonly called a beacon.  I’m personally a big fan of carrying the biggest shovel I can fit in my pack, so I’m currently carrying Black Diamond’s Evac 9 shovel.  Yes, it takes up more space and weighs more than other options out there – but when it comes time to dig, I can move snow much faster and dig more effectively than if I were using a tiny shovel (have you tried to dig a hole while standing with a foot long shovel?  It doesn’t work so well).  Probes are typically available in aluminum and carbon fiber—I own both, and use both, so I’d say it’s a matter of preference.  Just make sure your probe can be assembled quickly and will lock into its assembled form.  Beacons could take up a number of articles to cover completely, so I’ll just say that I’ve been using the Peips DSP Pro for the last few winters, and have been really happy with it.  Having the ability to mark multiple buried beacons is a huge help when searching in a multiple burial situation.

Yet the most important feature on any beacon is going to be the skill of the operator using said beacon.  So practice with your beacon of choice to the point that using it becomes an instinct. Then go practice some more.  If you ski or snowboard, many ski areas have beacon basins where you can do practice searches on beacons buried by ski patrol.  If you don’t live by a ski area, have a buddy go bury a transceiver in a backpack for you to go find.

Airbag backpacks are also becoming much more common in the backcountry because they reduce the chances of burial, and have the potential to protect the wearer from injury.  Black Diamond has taken things a step further with its Jetforce line of airbag backpacks that can also create a pocket of breathing air, should a burial occur.  Jetforce packs use a battery powered ducted fan to inflate their airbags where other brands use CO2 (Jetforce is an accurate name, the thing sounds like a jet engine when you deploy it).  Black diamond’s packs can be deployed multiple times on a single battery charge (CO2 packs are a one inflation per cartridge deal), which is a comforting feature when you consider that Mother Nature isn’t limited to only one avalanche per day.

Lastly, carrying radios is a great way for your group to communicate, especially when moving through hazardous terrain one at a time.  Many places have adopted radio communication plans so that multiple groups in the same area can communicate and make plans that do not risk the safety of other groups.  Once you’ve picked up all of your avalanche gear, it’s time to go take an avalanche class.

GO TO SCHOOL

A level 1 class from the American Institute for Avalanche Research and Education (AIARE; pronounced air-ee) is an excellent way to learn about backcountry decision making, avalanche rescue, and avalanche terrain identification.  Level-one courses will have a classroom element and a field element so you can apply what you’ve learned in the classroom by analyzing real terrain and digging actual snow pits under the guidance of an instructor.  Snow pits allow you to see every layer in the snowpack and to gauge how stable the snowpack is with a number of different tests.

Another great resource exists with avalanche information centers, such as the Colorado Avalanche Information Center (CAIC) which provides weather and avalanche forecasts, snowpack discussions, and detailed reports whenever backcountry travelers are involved in an avalanche.  Consult Google or your local ski or snowmobile shops to find out where to get good avalanche information.

LEARN FROM OTHER’S MISTAKES

When you’re in the backcountry, pay attention to what’s going on around you.  The weather can change in an instant, and a calm bluebird day can turn into a blinding blizzard in minutes.  Keep an eye on which way the wind is blowing and how the wind may be scouring snow from one place and depositing it another.  Is the sun causing the snow to melt in certain areas (that will freeze at night) while shade is keeping other areas fresh and fluffy?  Snowpack can change significantly from aspect to aspect.  During a recent ride, we happened upon a perfect example of how wind-loading + shade + a bad snowpack had caused a really bad day for a snowmobiler.

This slide happened where the wind loaded snow on a Northeast facing aspect that receives little sun.  The weight of all that additional snow brought in by the wind strained a weak snowpack (note the cornice on the top and the increase in thickness of the snowpack at the top of the slide, called the crown, at the top left). When a sled came ripping into what looked like a great untracked hill the snowpack let go.  Backcountry travel in avalanche terrain is a slow process, so take your time and make good terrain assessments.  YOLO around one time too many and you might not get to go home.

The same feature shot hours apart.  In the morning the weather was perfect bluebird calm, but the afternoon got quite stormy.

GOOD GEAR MATTERS

In the blink of an eye an awesome day in the backcountry can turn into a serious situation, which is why having good riding gear is so important.  It may be warm and sunny in the morning, but should an afternoon storm roll in, or worse yet, should you get delayed by several hours or worse (a mechanical or a really stuck snowbike), having gear that will keep you warm and dry is critical.  You may be totally comfortable with just a cotton hoody when the sun is out, but how will you stay warm if you end up having to spend a windy night in the backcountry?

Klim’s Valdez parka and Havoc bibs have extensive venting that can be opened up when conditions call for just that cotton hoody, and when it gets cold and nasty these two pieces can be closed up becoming a veritable waterproof shield that can be layered over all the insulation layers you need.  The Togwotee gloves can be run as a shell in warmer temperatures, or used with the included fleece liner when the weather gets cold.  Likewise, the Adrenaline GTX BOA boots worked so well that we didn’t notice them, because our feet were just that comfortable.  From standing on the pegs to hiking exposed rocky ridge lines, these boots worked great.  Rounding out this excellent riding gear setup are the Oculus googles that provided fog-free performance 100% of the time we were riding.  Yes, good gear costs more, but when it comes down to it, I’ll gladly pay more to know that I’ll be warm and dry, no matter what the weather decides to do.  Cold, wet, and several hours from the truck is a special kind of miserable.  Do yourself a favor and buy good gear the first time around—that way you can get out and enjoy more days in a season instead of having to wait for those warm and sunny days.

Timbersleds are amazing machines that will have you saying “worth it” minutes after you first get on one.  Their ability to easily access terrain that has traditionally been the realm of expert backcountry snowmobilers and backcountry travelers means that more riders are heading into avalanche terrain who may not have the proper gear and training.  So please, get proper avalanche gear and good riding gear.  Take an Avalanche class.  Go dig pits and do practice beacon searches.  Read the reports and forecasts from your local avalanche center.  Pay attention to what the world is doing around you when you’re out there, and realize that some days, it may just be a better call to go ski in bounds at the resort.  Most importantly, when you’re out there enjoy every minute of it—because powder days never last long enough.

FULL DISCLOSURE: Timbersled provided demo units for this series of articles.  The motorcycles and all other accessories are owned by the author.  Klim provided all of the riding gear used for this project at no cost to the author or American Adventurist.  Likewise, Black Diamond provided the Jetforce Packs at no cost to the author or American Adventurist.