Project Tundra: The Latest

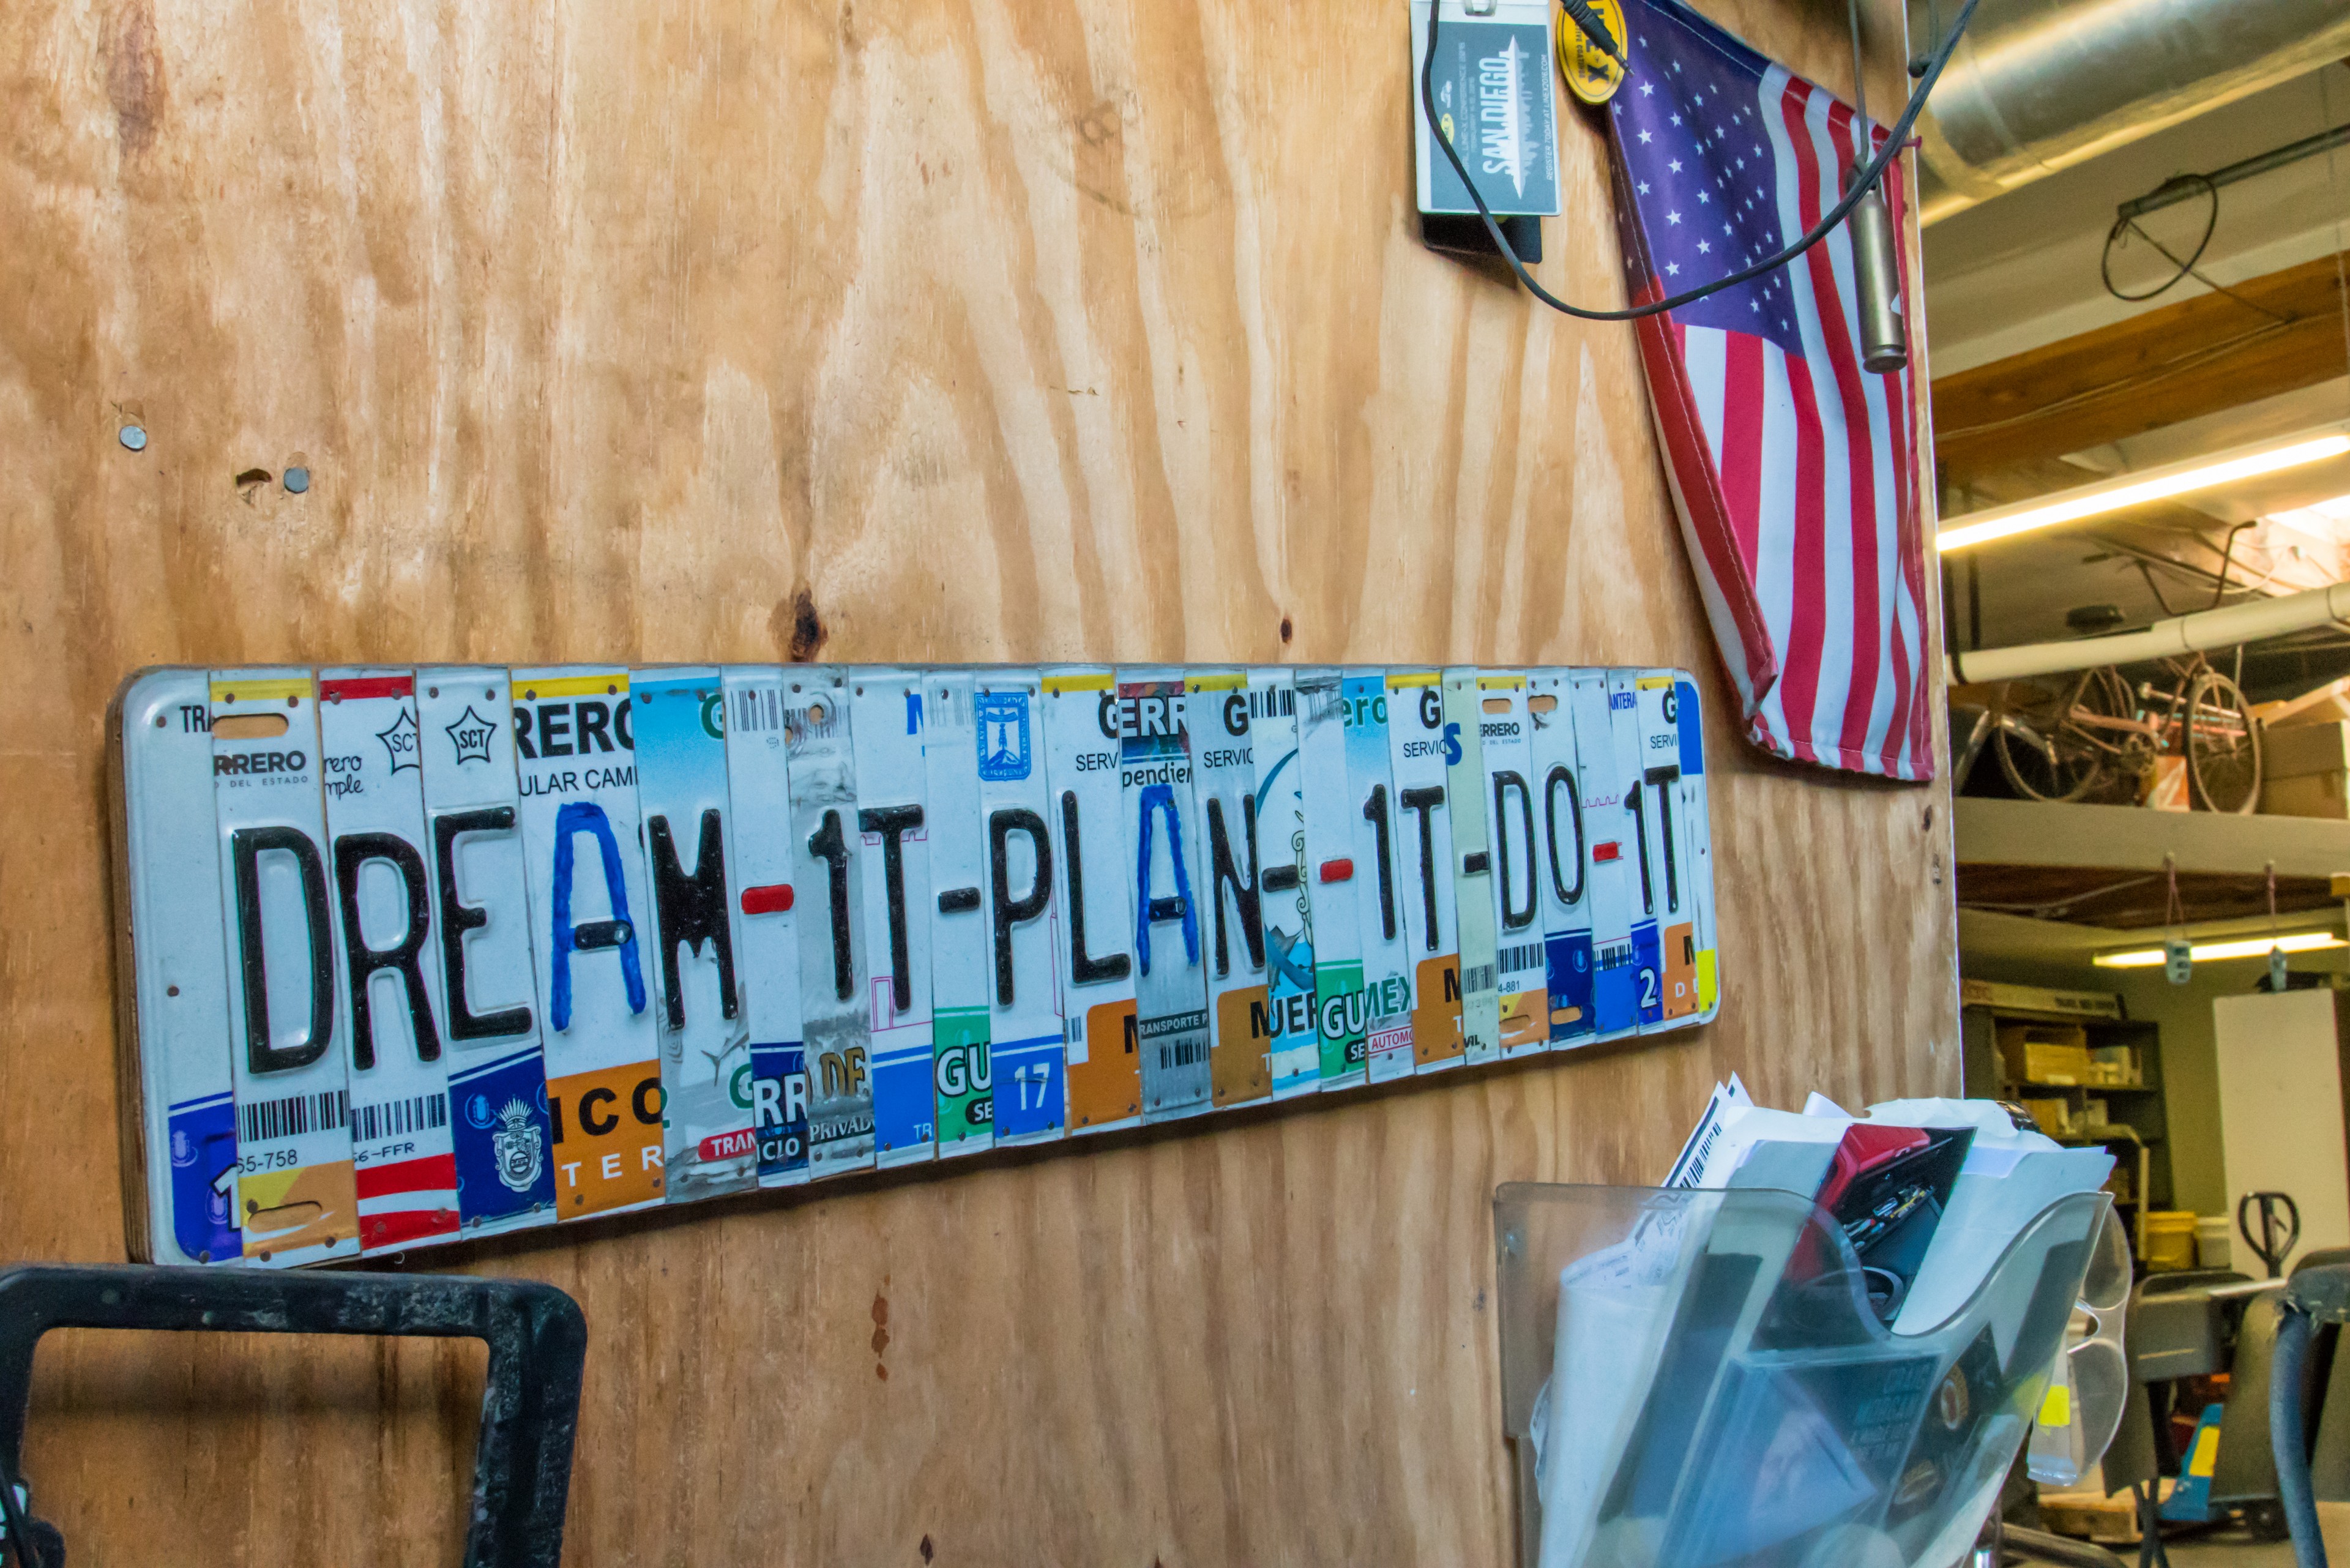
Vehicle builds like Project Tundra never really end. Over time our needs change, and new products appear that sometimes fill needs we didn’t know we had. So just when you think you’ve planned out the perfect build – something is going to come along that’s going to change those plans. And that’s exactly what makes vehicle builds so fun; some new source of inspiration out there or a new adventure to prepare for.

Since the last Project Tundra update, we’ve been all over the Southwest enjoying vehicle-based travel in all seasons.  Here’s what’s new:

ARMOR UP

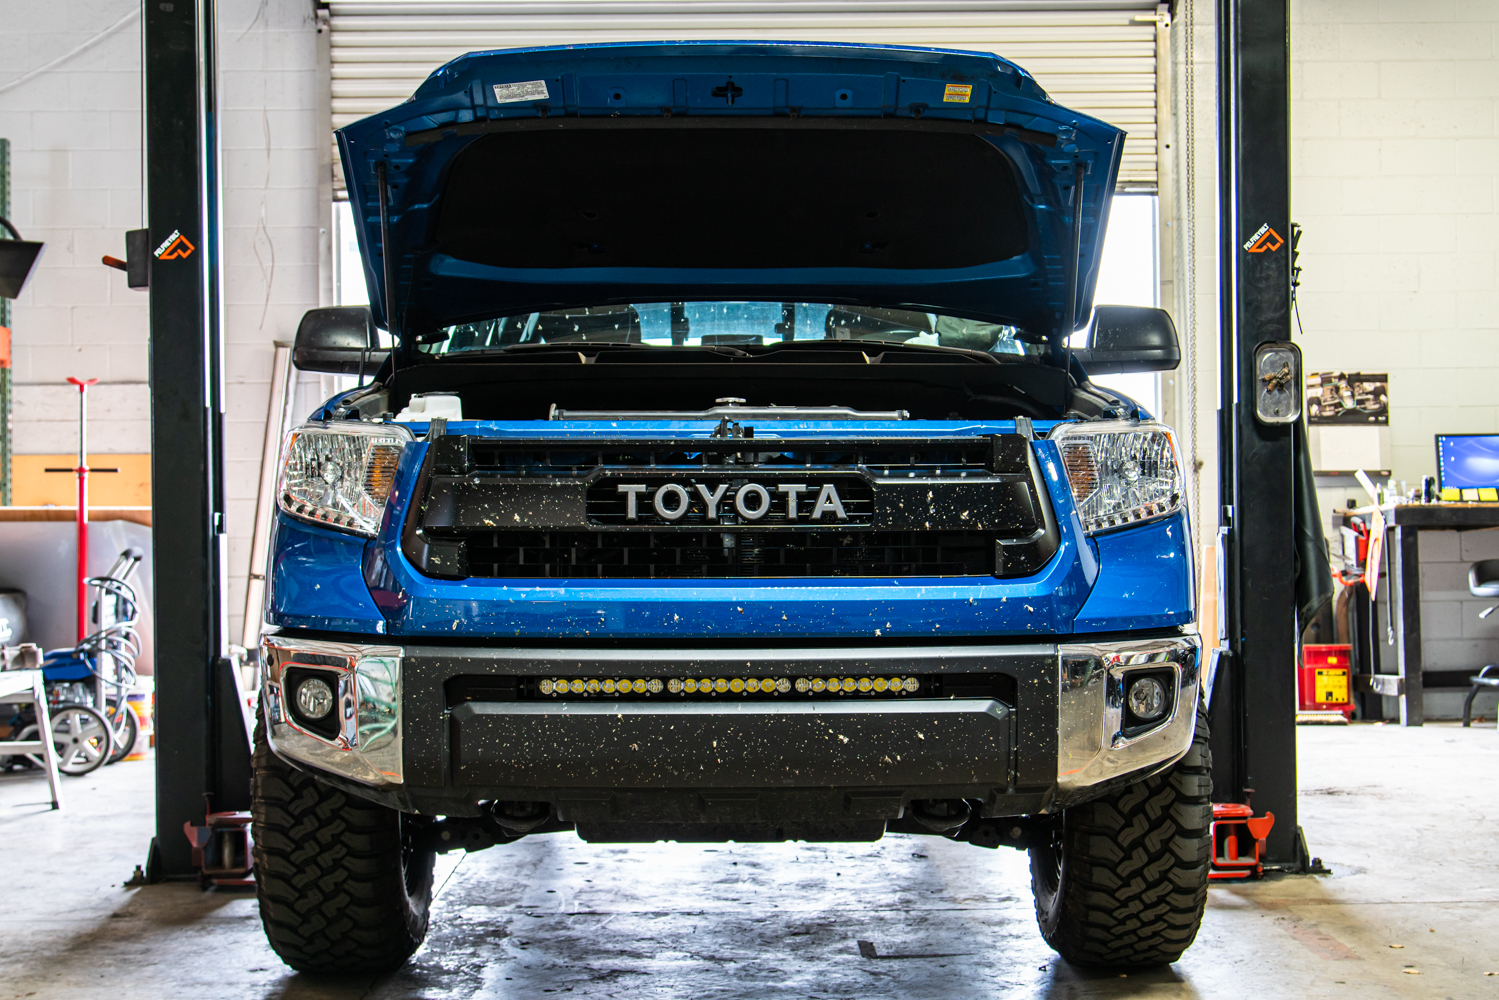
Last year, Project Tundra was fitted with a pre-production set of front and rear bumpers from a SoCal company that’s no longer in business.  I spent several days at this manufacture’s location working on the install and helping to 3D scan the truck to develop additional parts like skid plates and sliders.  Or at least that was the plan, but plans change.  In the end Project Tundra ended up with a great set of bumpers, but no skids or sliders.

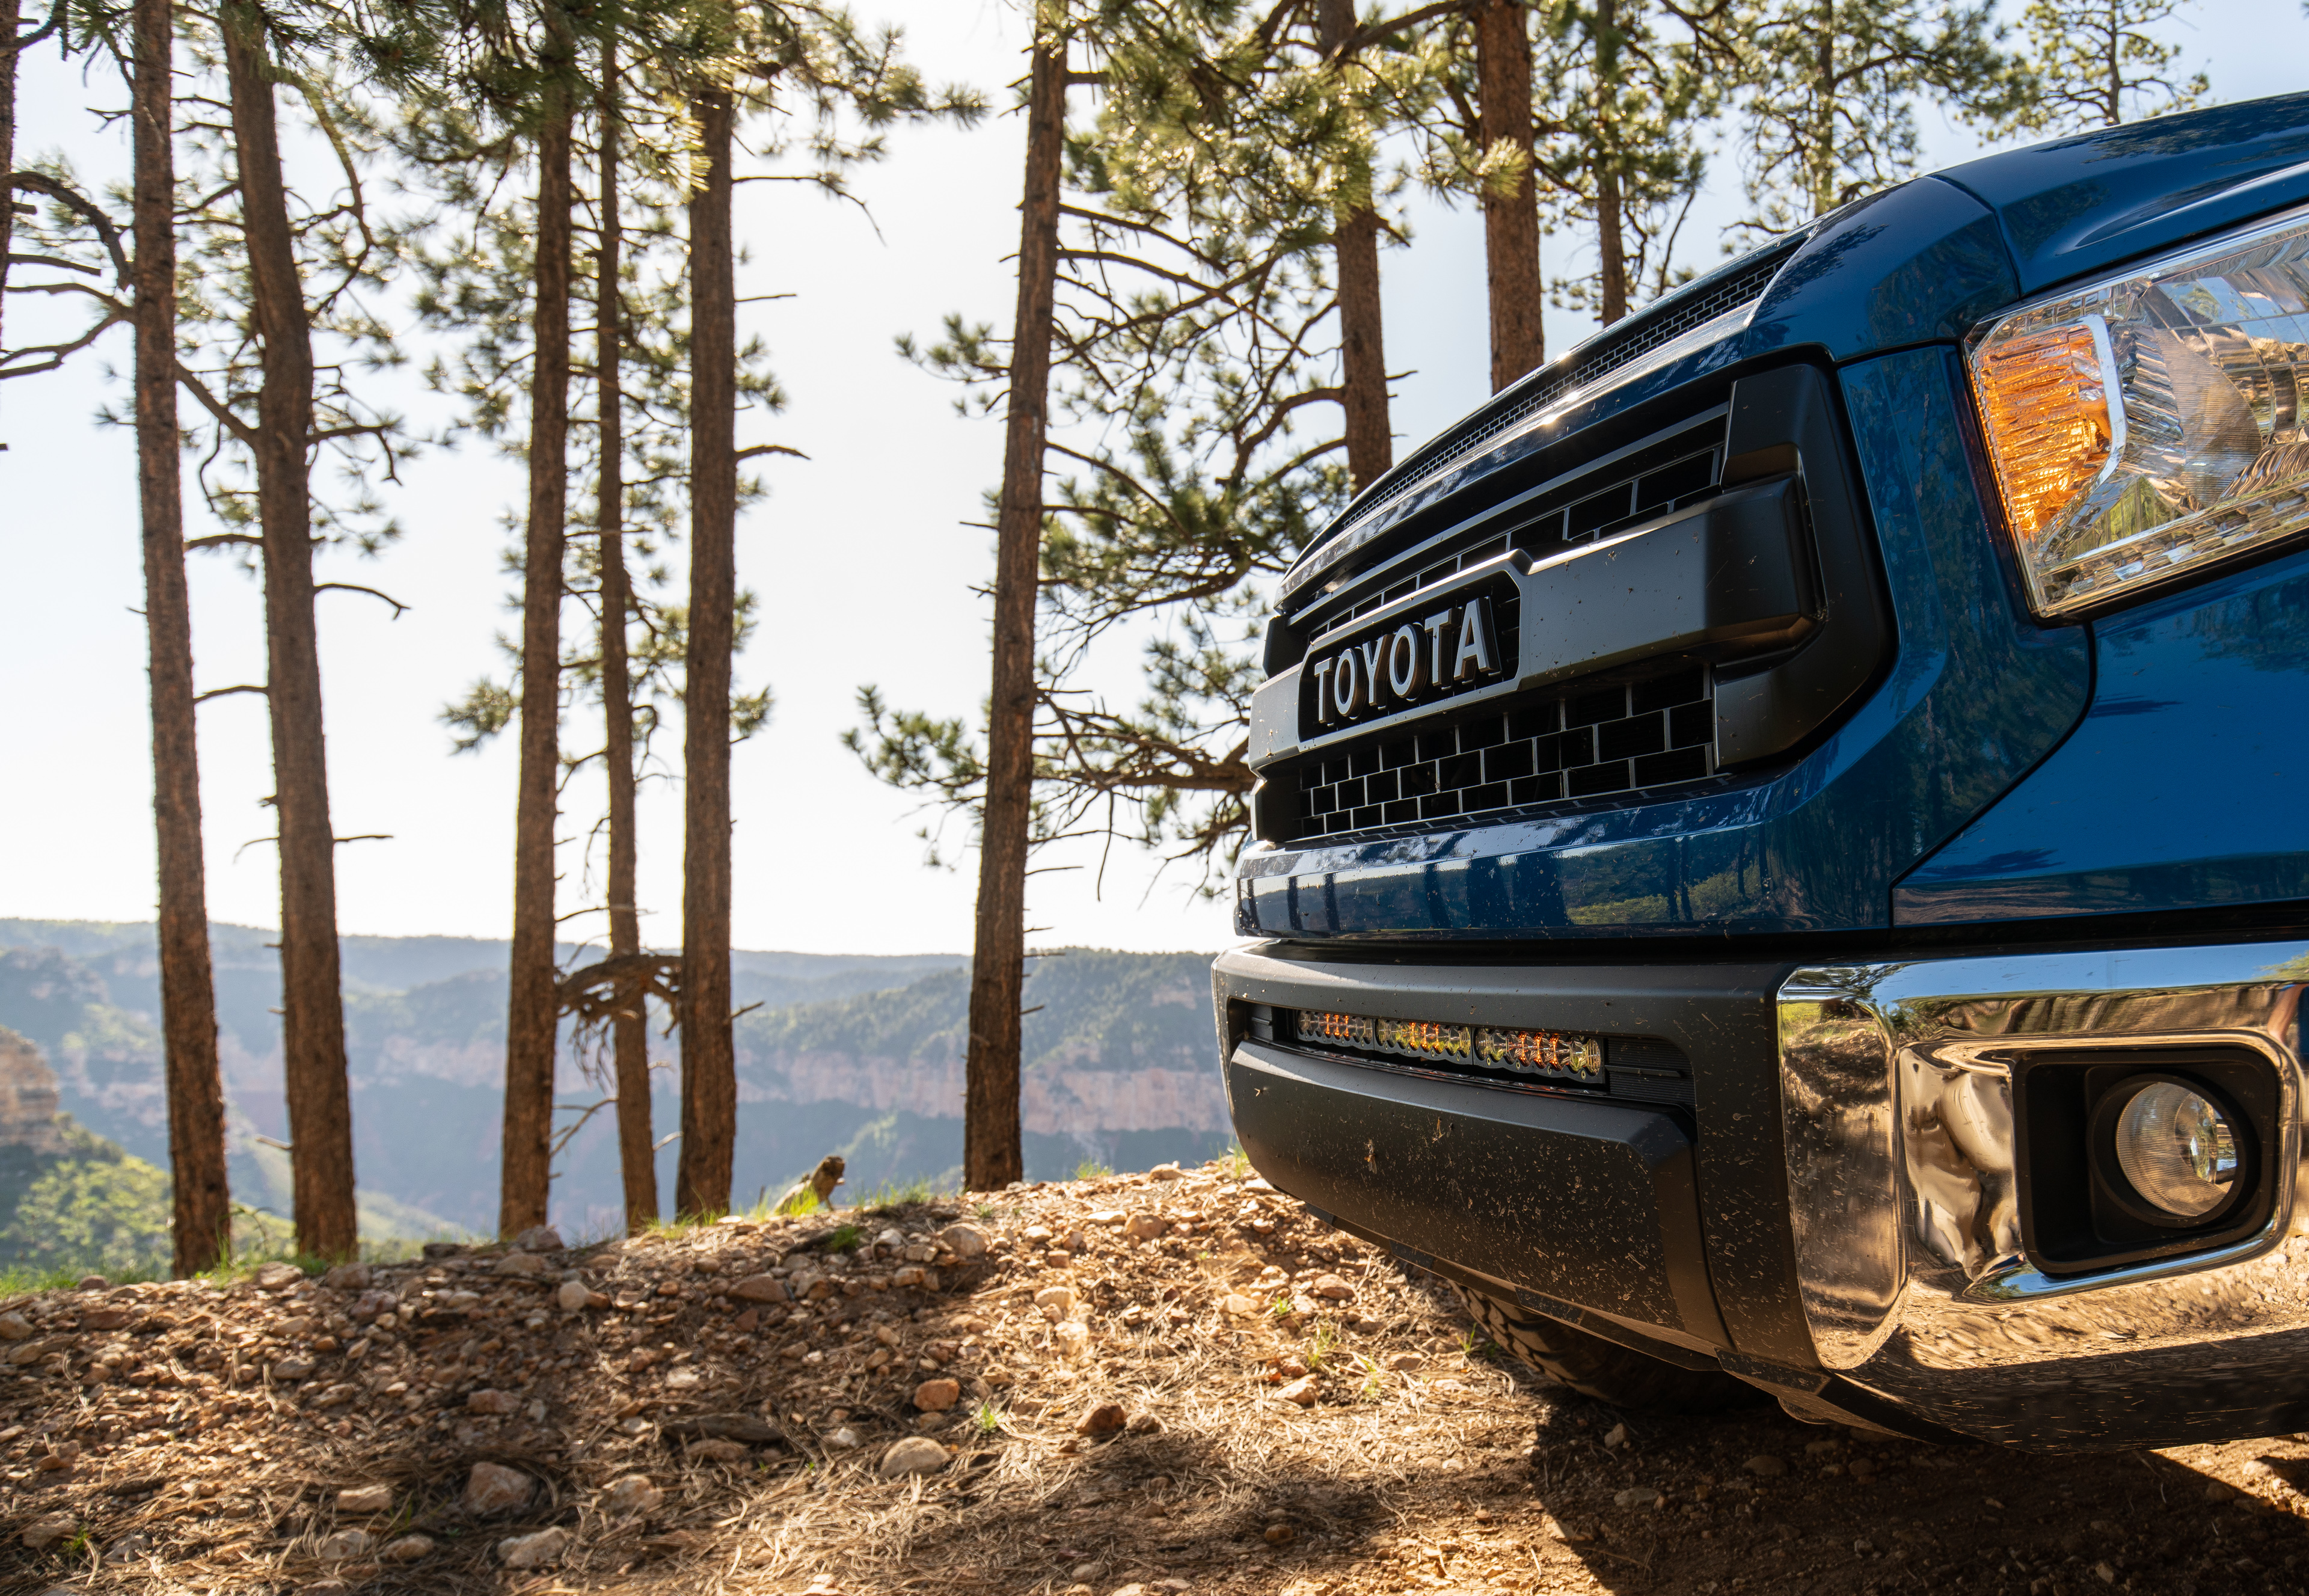
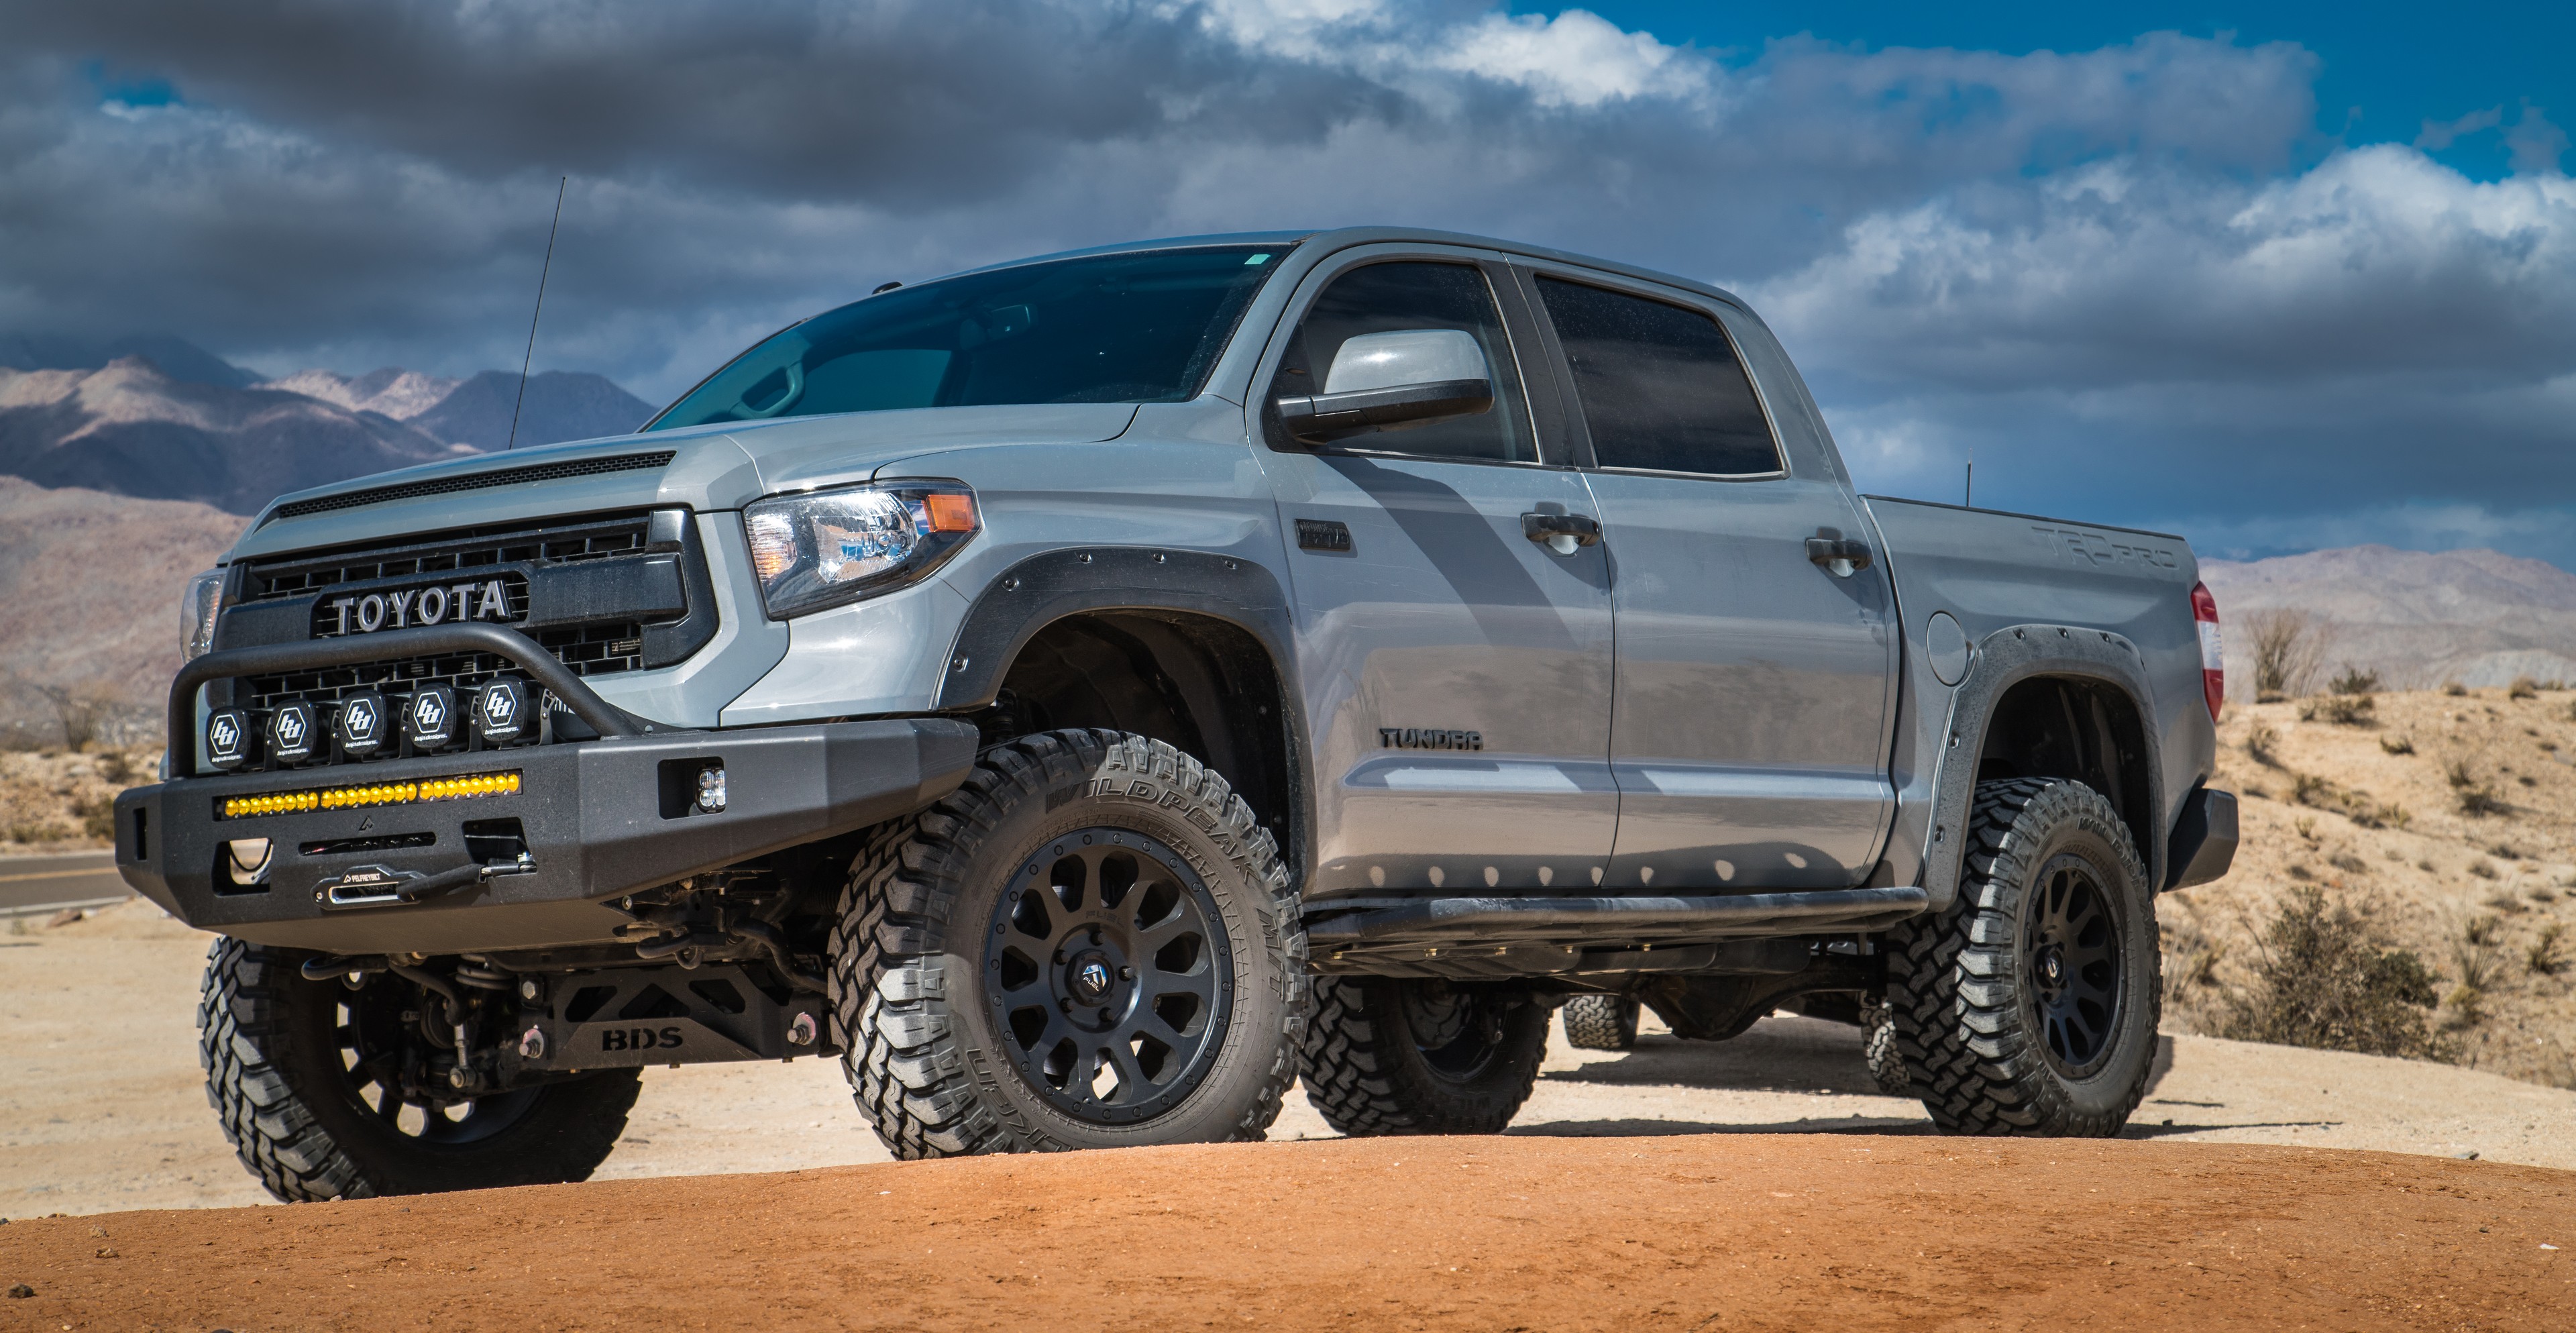
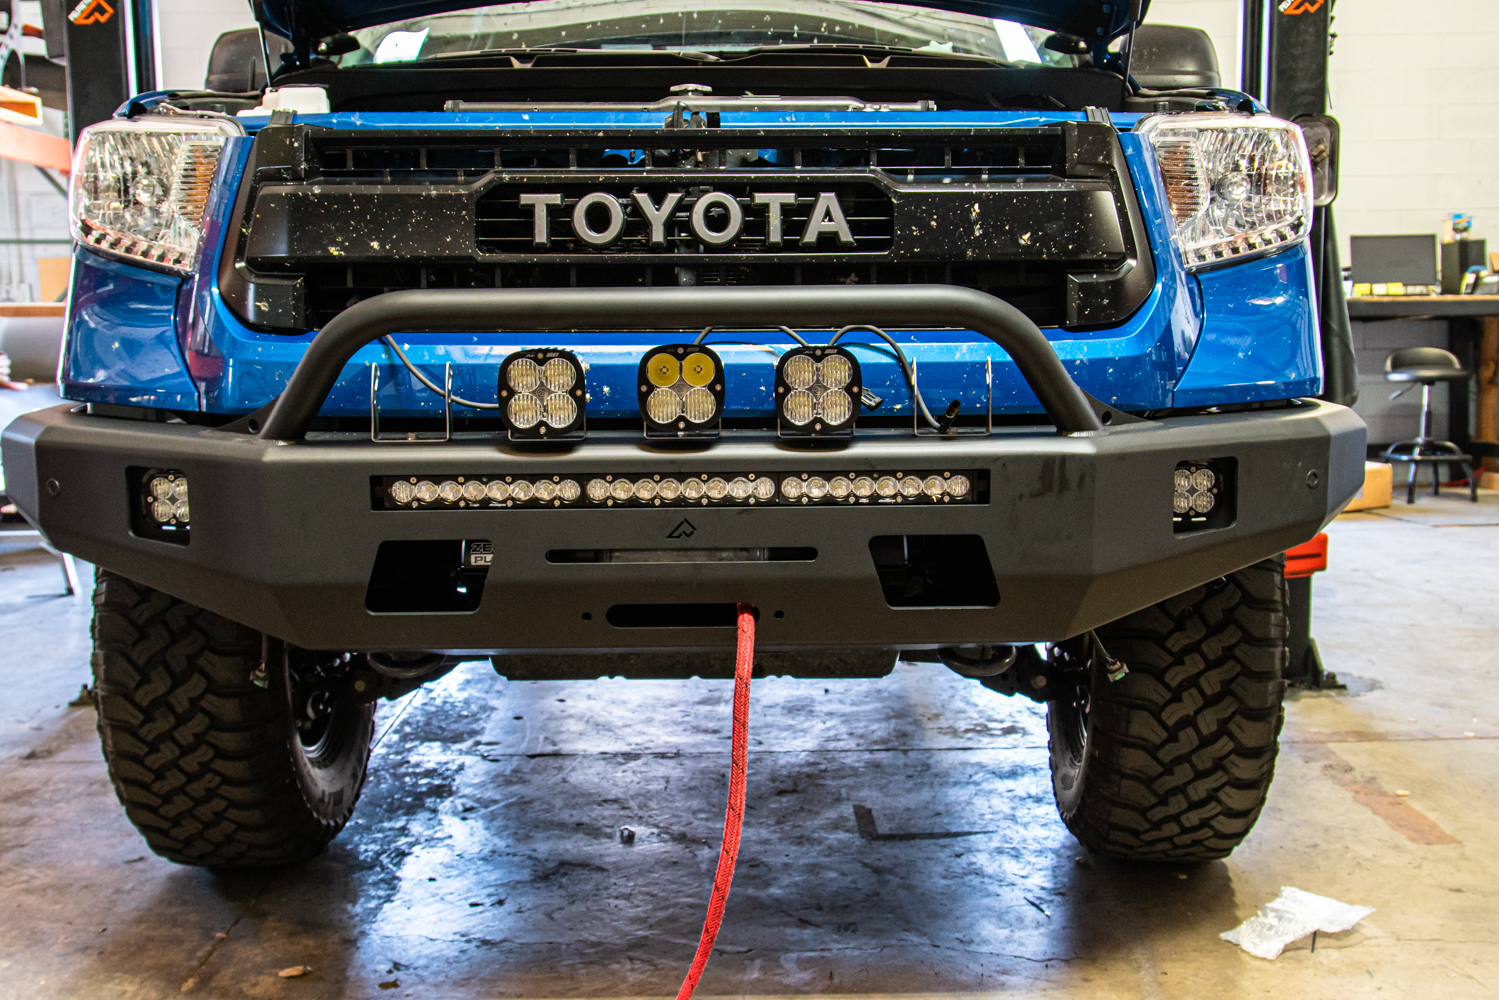
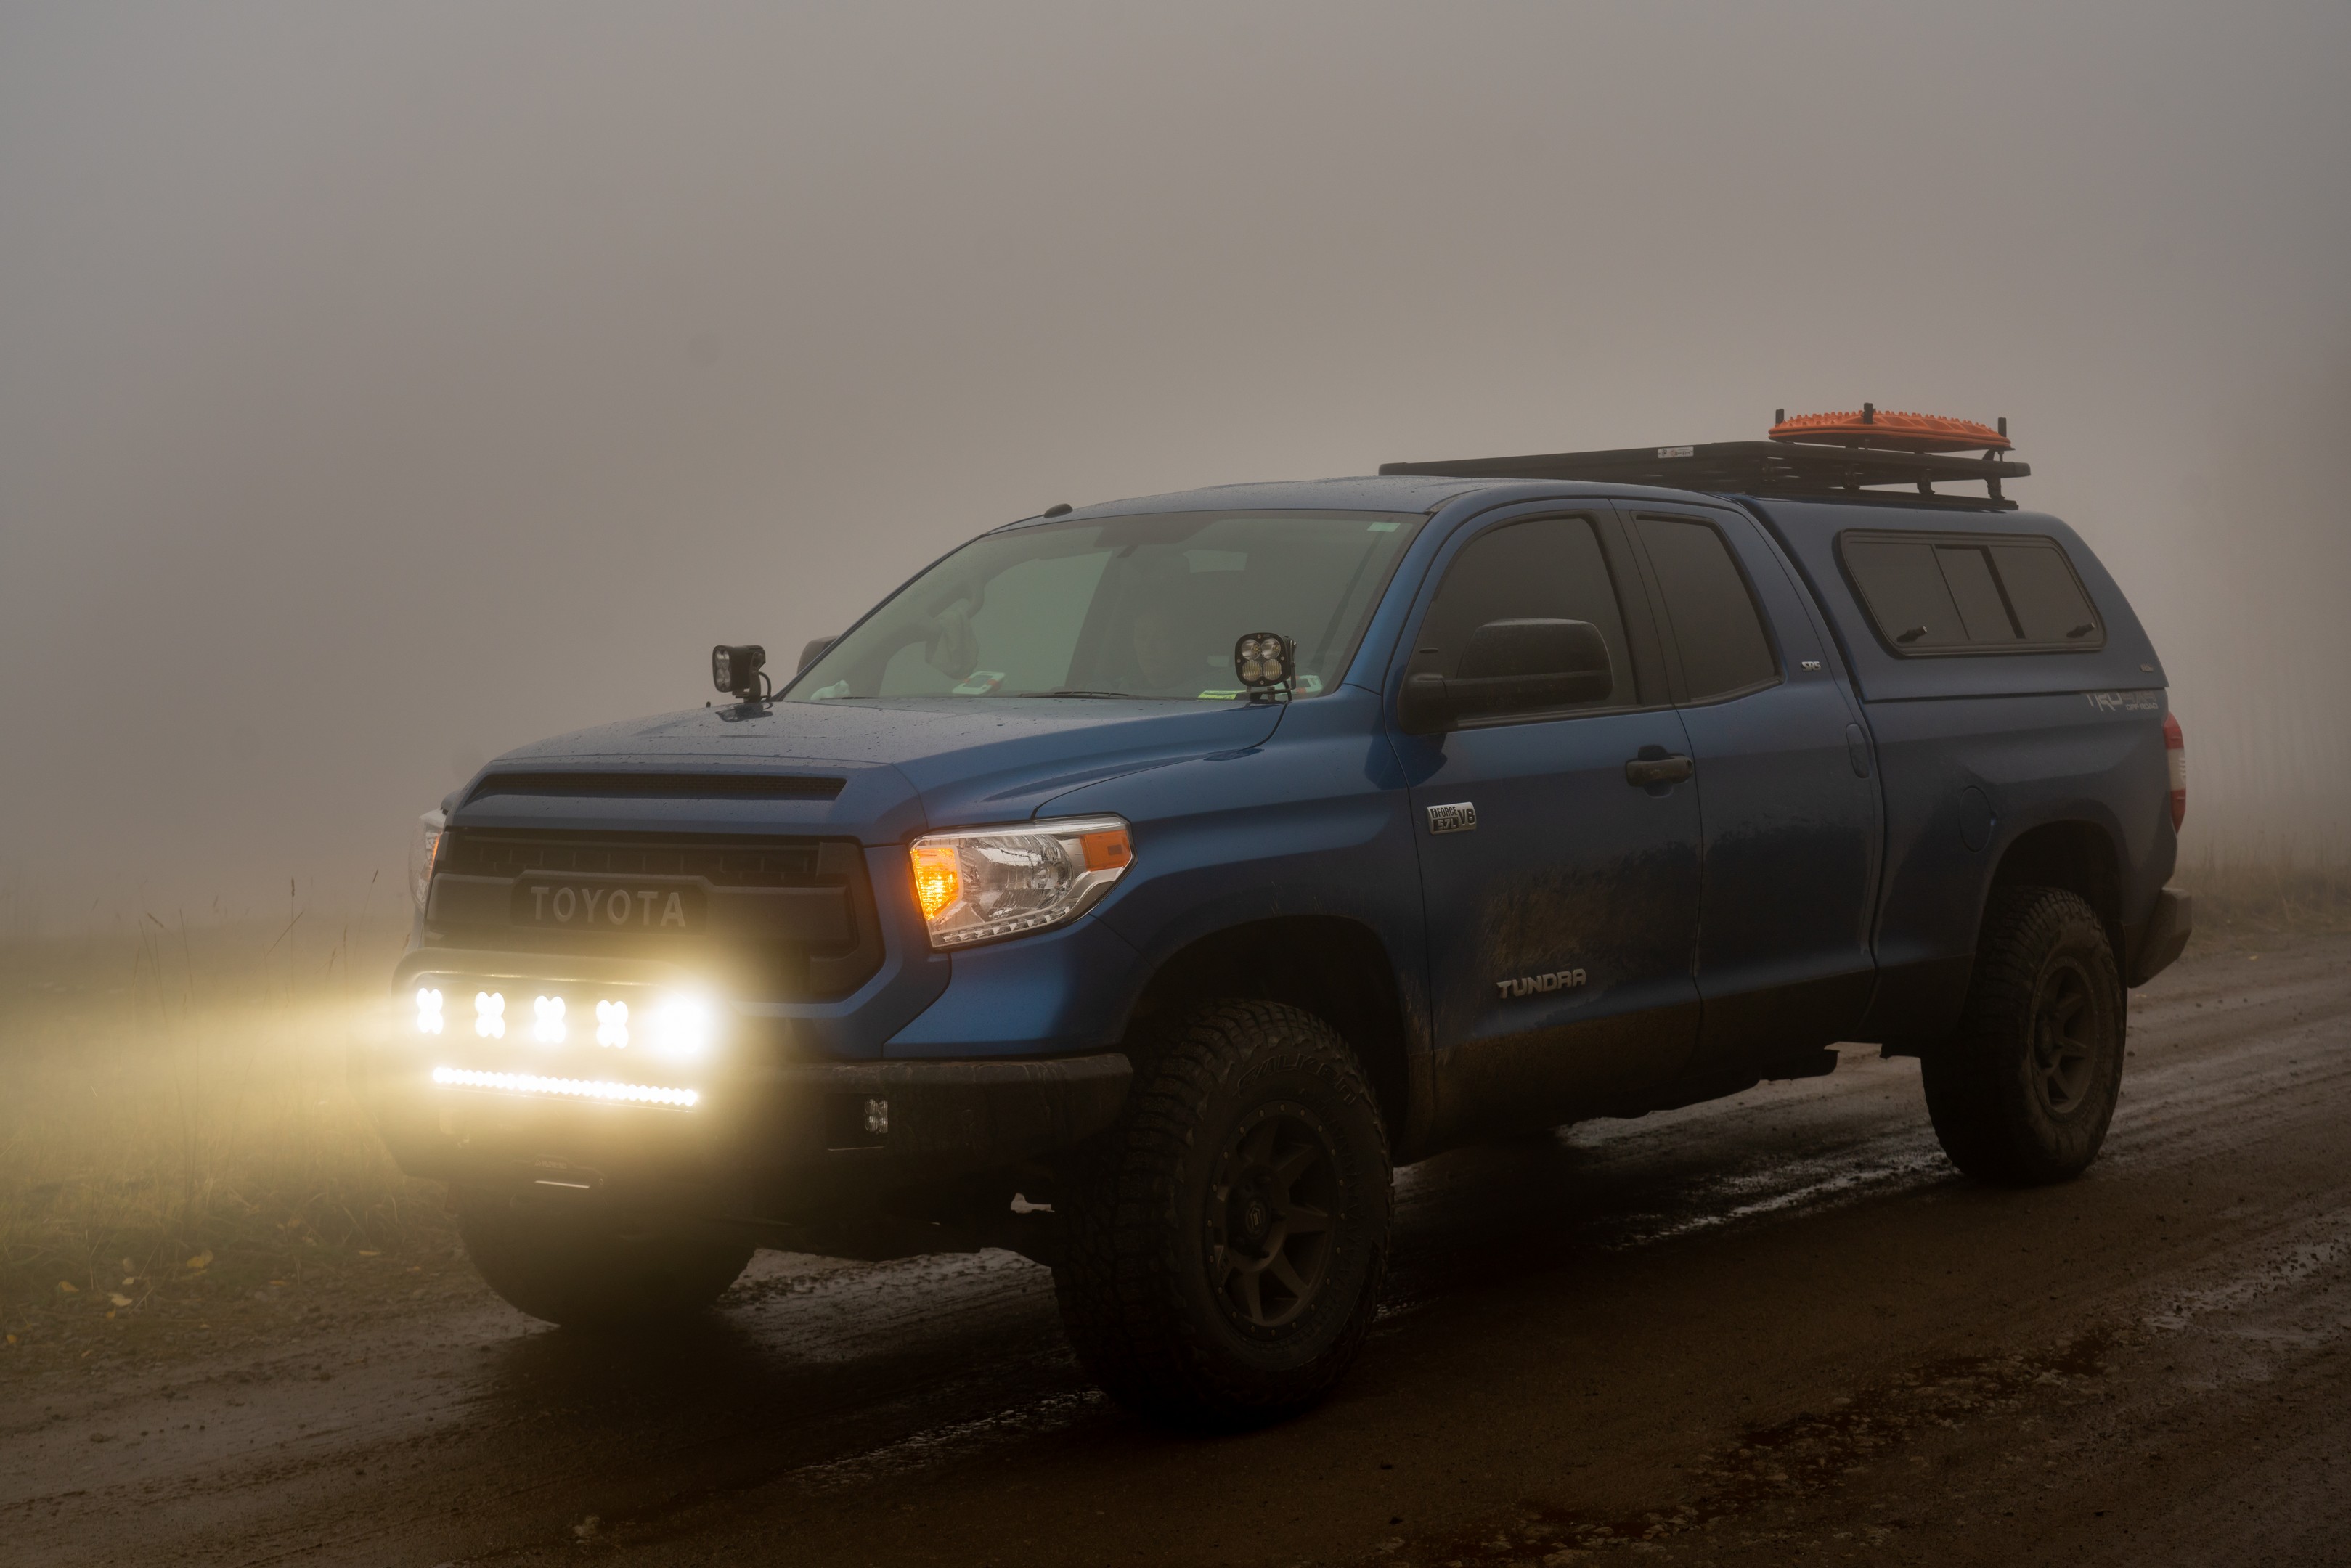
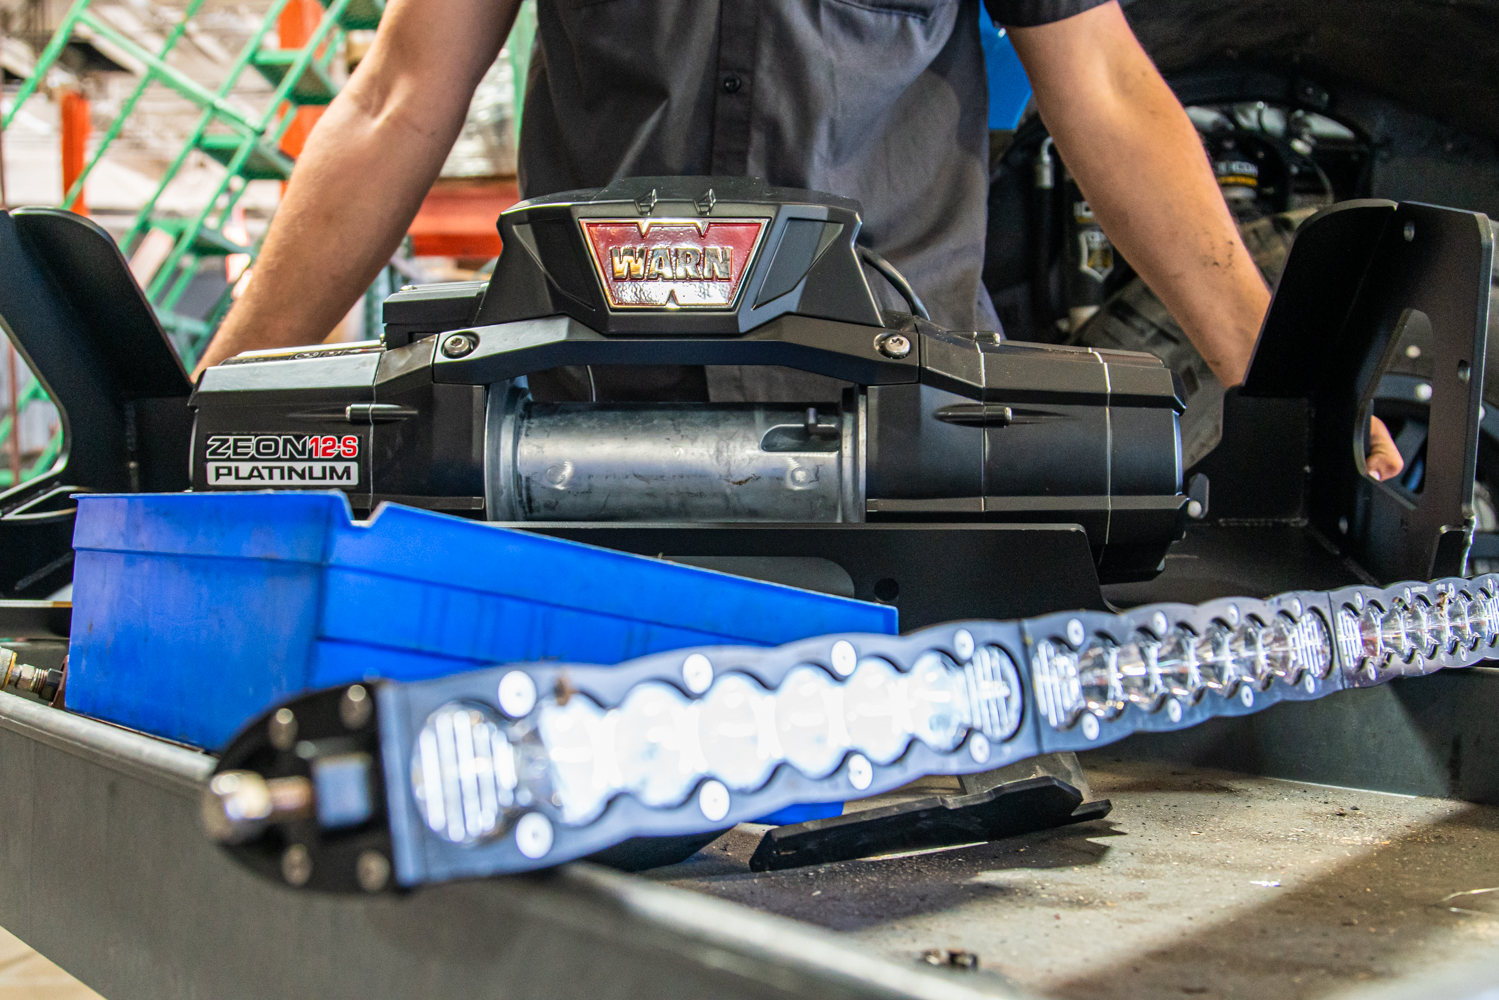
The bumpers are home to some other outstanding parts, namely a bunch of Baja Designs lights, and a shiny new Warn Zeon 12-S Platinum winch.  We’ll cover lighting later, but I want to spend some time talking about the Zeon 12-S Platinum winch.

The Zeon 12-S Platinum is a flagship winch from Warn, and as such it has a number of features that make it stand out.  With a GVWR of 7,100 pounds, going with a 12,000-pound winch would allow for extra performance when it counted, as we were well over the heuristic of 1.5X vehicle weight for winch sizing.  Compared to the solenoid-controlled winches that I’m used to, the Zeon 12-S Platinum is a winch from the 21st century.  Wire rope (which for the record is still totally awesome) is replaced with Spydura Pro Synthetic line, and the wired remote is replaced with a wireless remote that lets you completely control the winch.  Literally the only control on the winch is the power switch.  From the remote, you can spool or unspool the winch, engage or disengage the clutch, control up to two different accessories, and monitor battery voltage and winch temperature.  This remote works great in the cab, or at the end of the line, making solo recovery work much easier and most importantly, safer.  From deep sand in Utah, to deep snow in the Colorado Rockies, this winch has worked flawlessly, and come nowhere close to getting hot even after repeated long pulls with a fully loaded full size pickup.  Consider me impressed.

SLIDERS

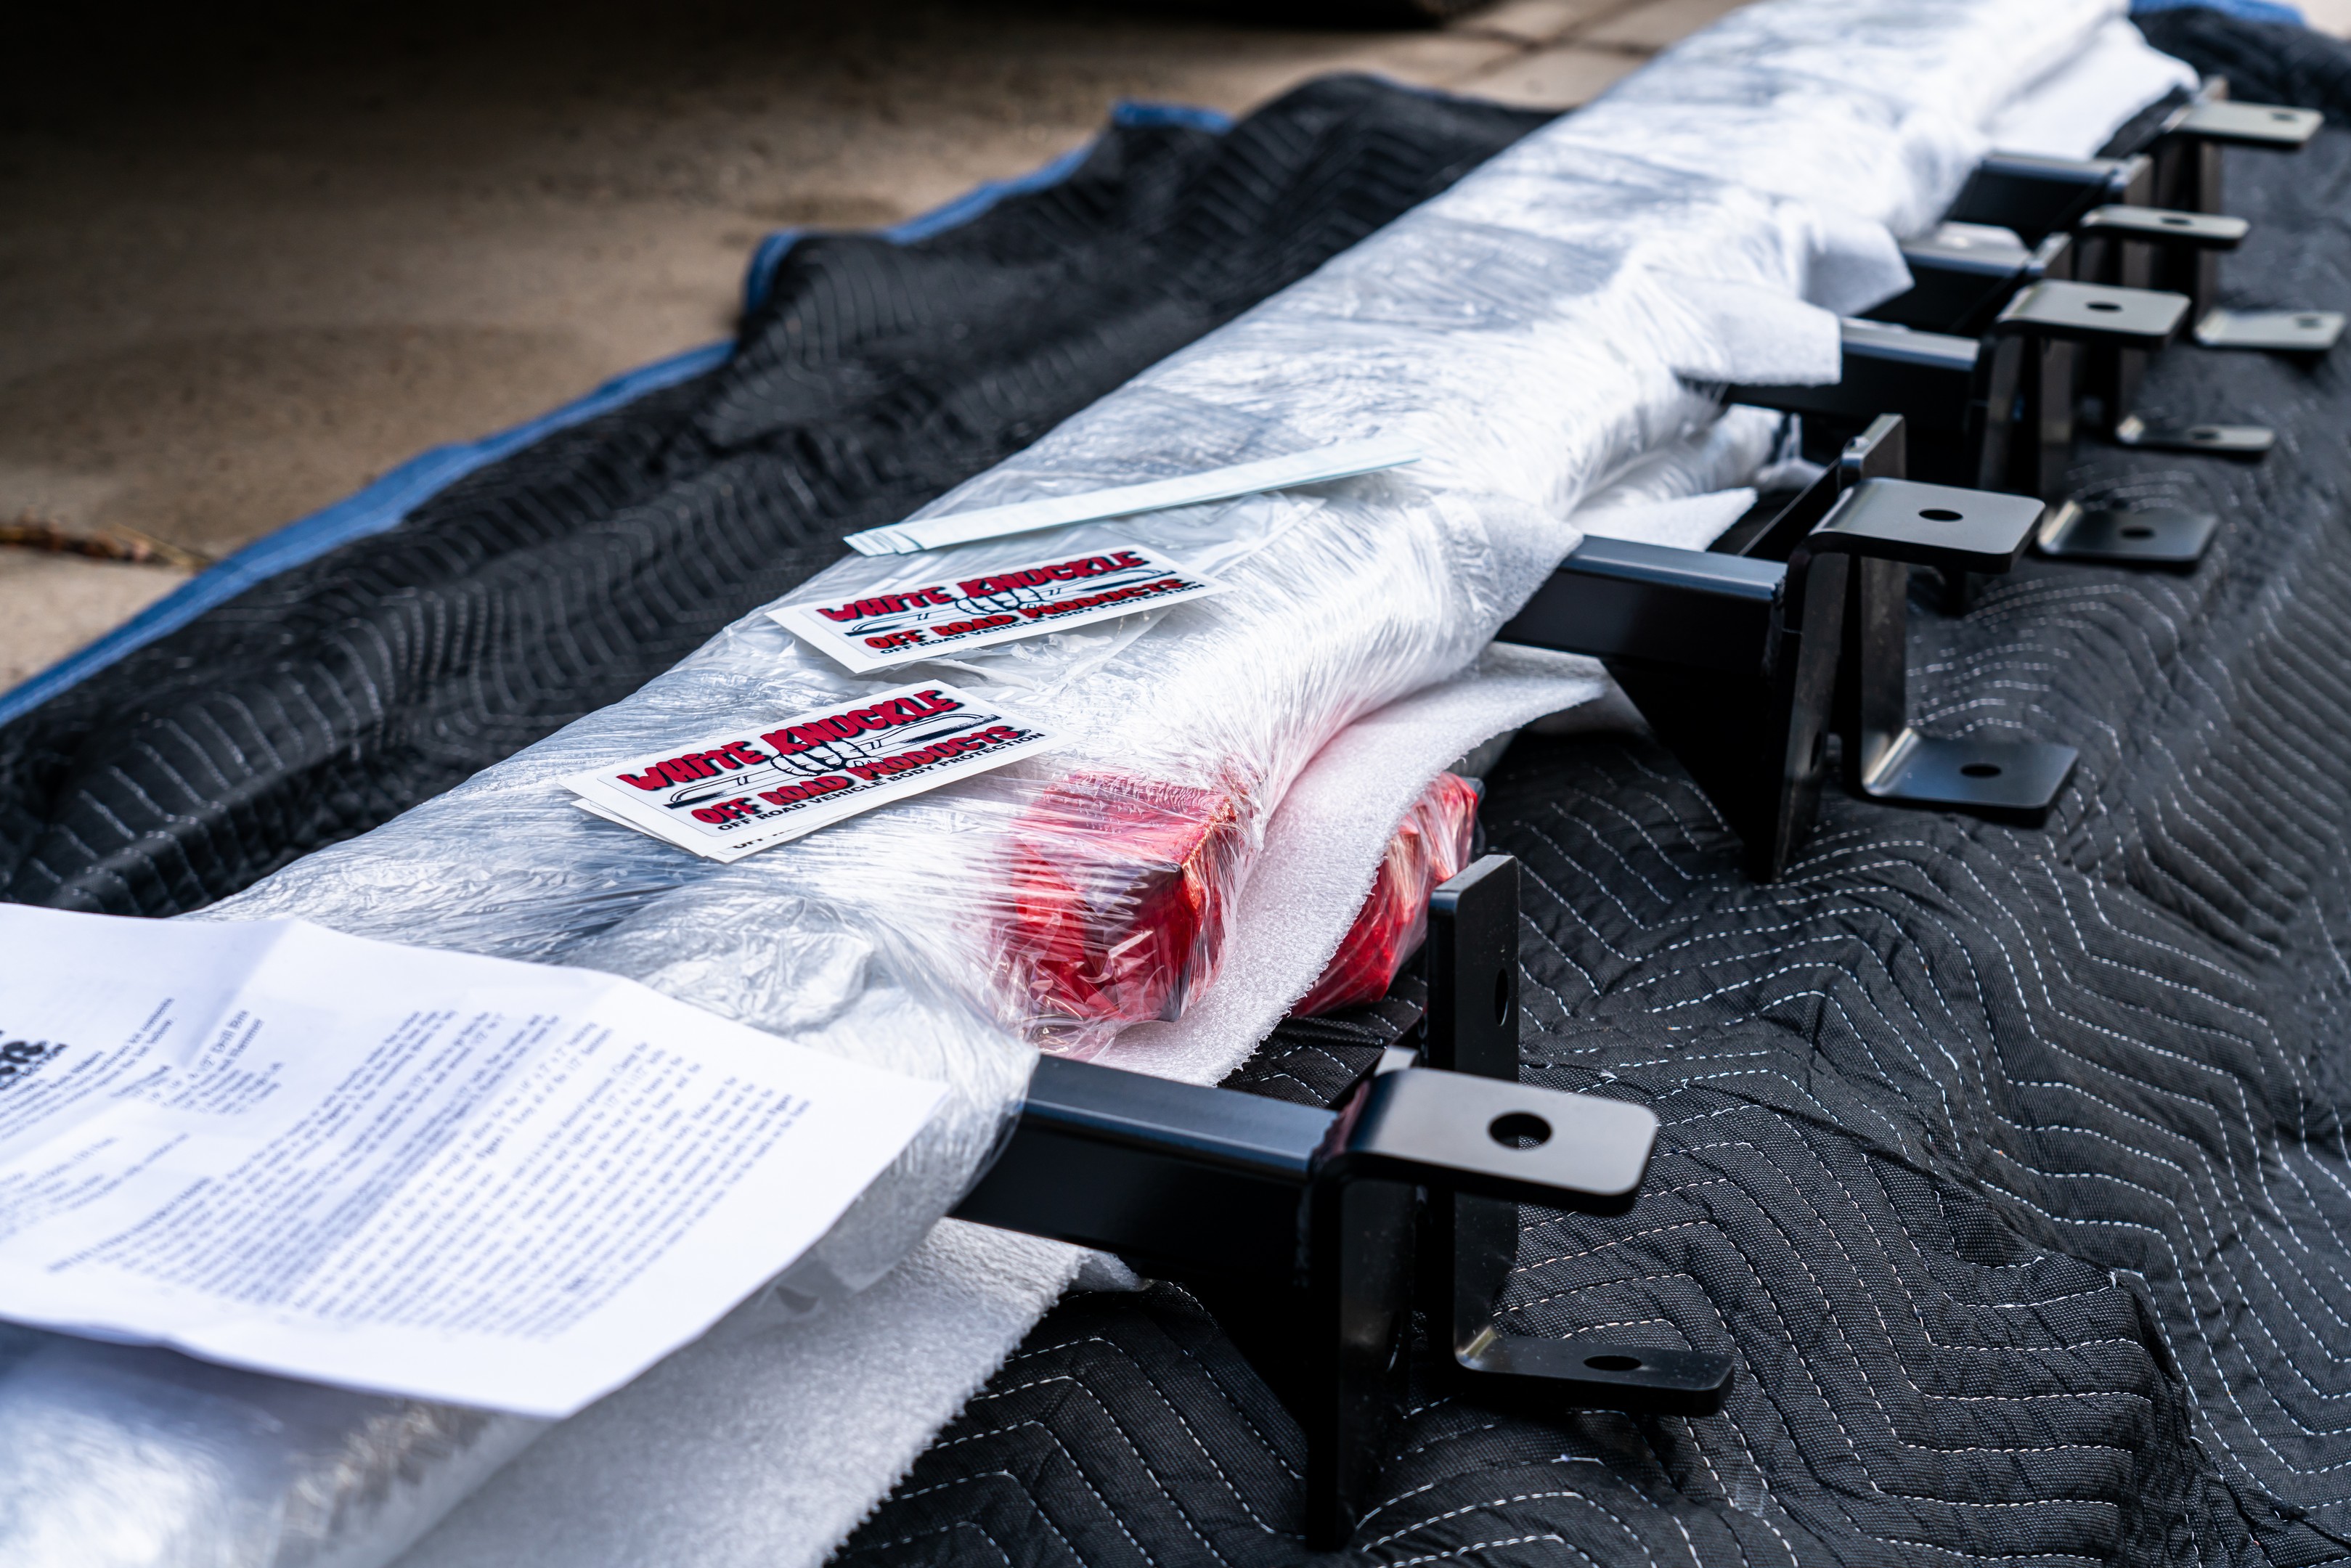
Project Tundra needed sliders, and after watching White Knuckle Off Road products sliders in action on a number of rigs that wheel hard, like Cris Mateski’s BlkWgn (pictured above), the choice of sliders to use was clear.  I knew I had chosen well the minute the door opened on the freight truck that had delivered my sliders revealing one of the most impressive armor packaging jobs I’ve ever seen.  White Knuckle packages their sliders on a custom-made pallet, and the foam padding that is the only protection that many other manufactures use a is supplemented with quilted moving blankets before the whole bundle is wrapped in cardboard.  Even the delivery driver was impressed.

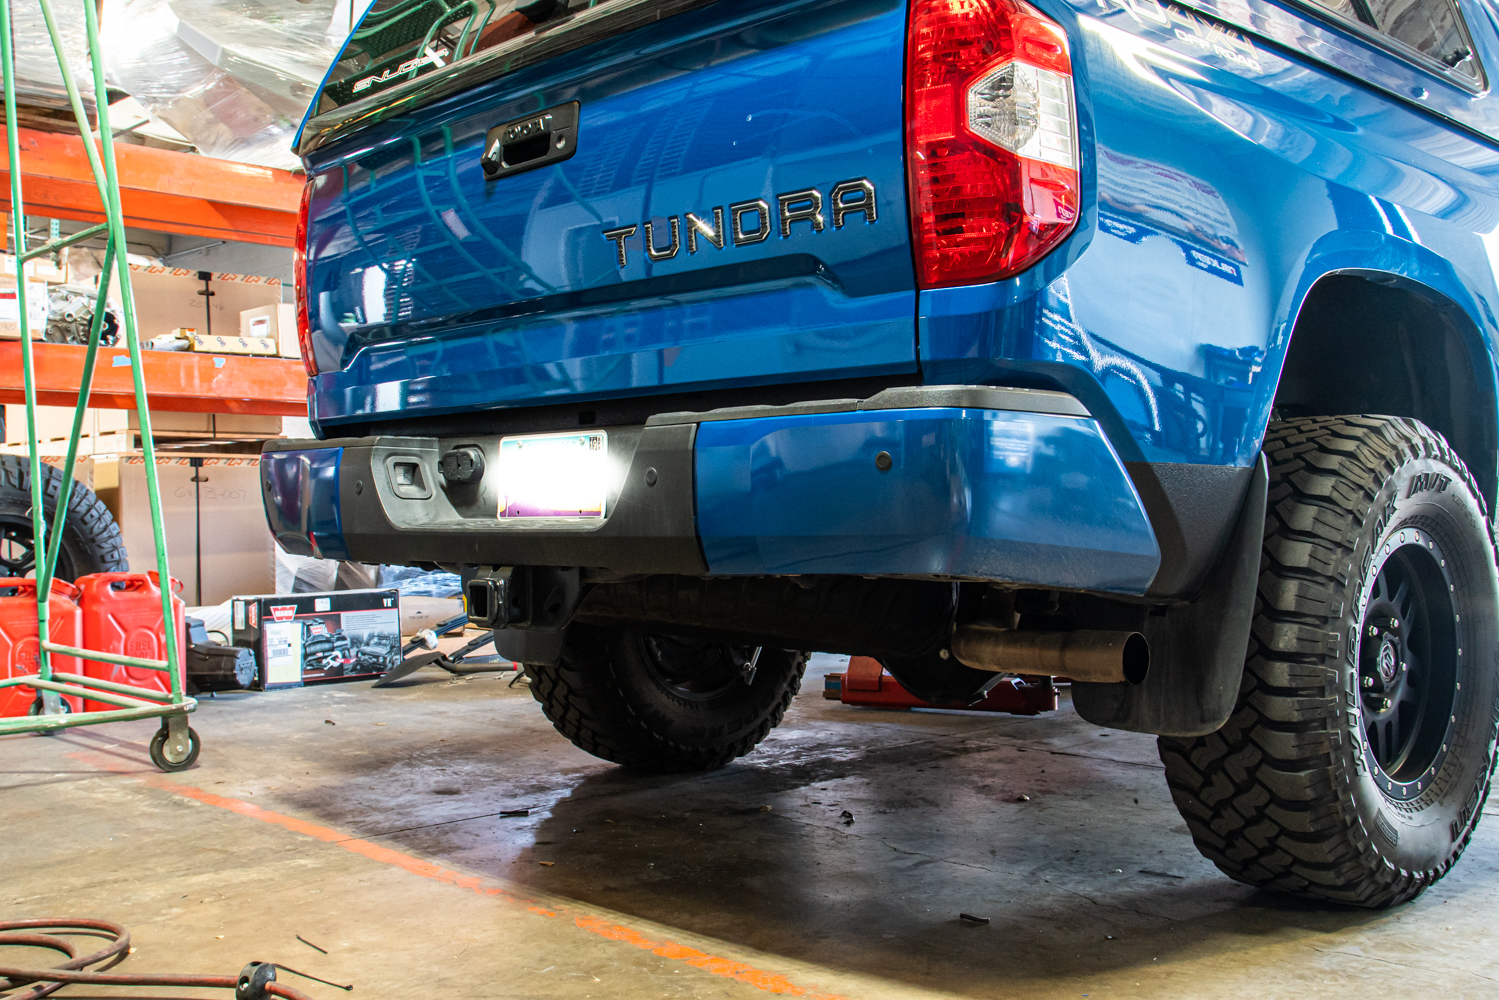
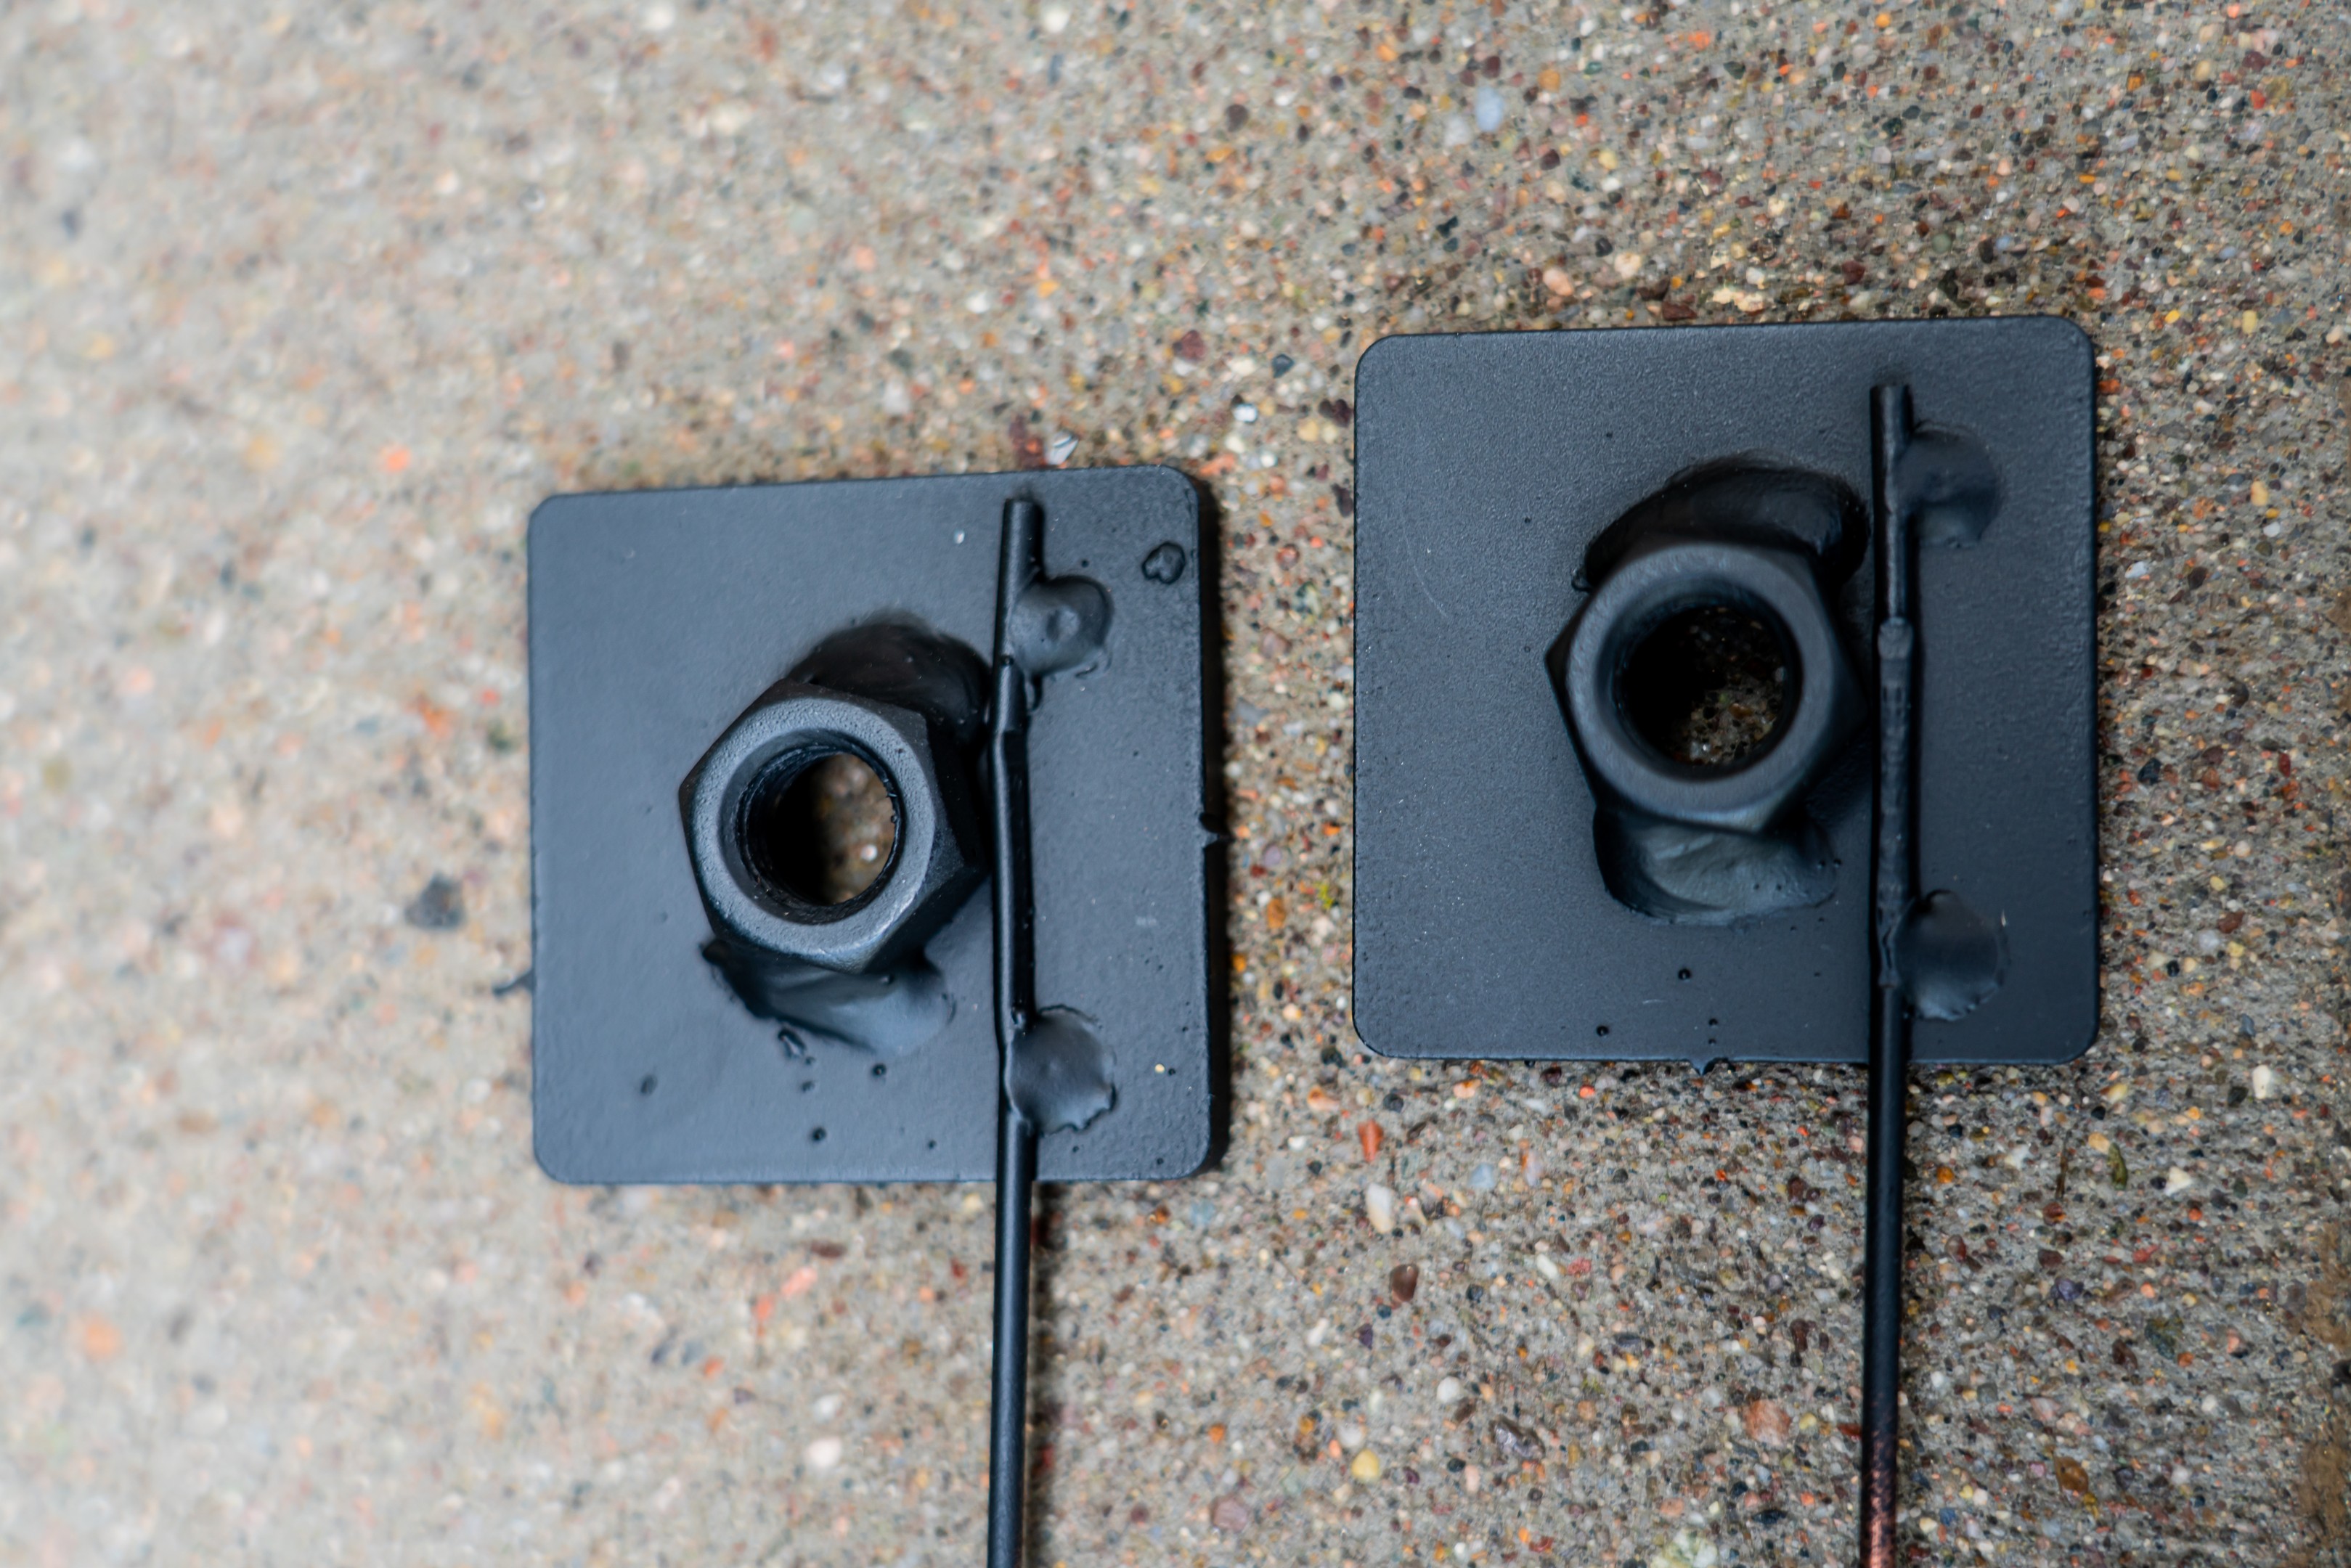
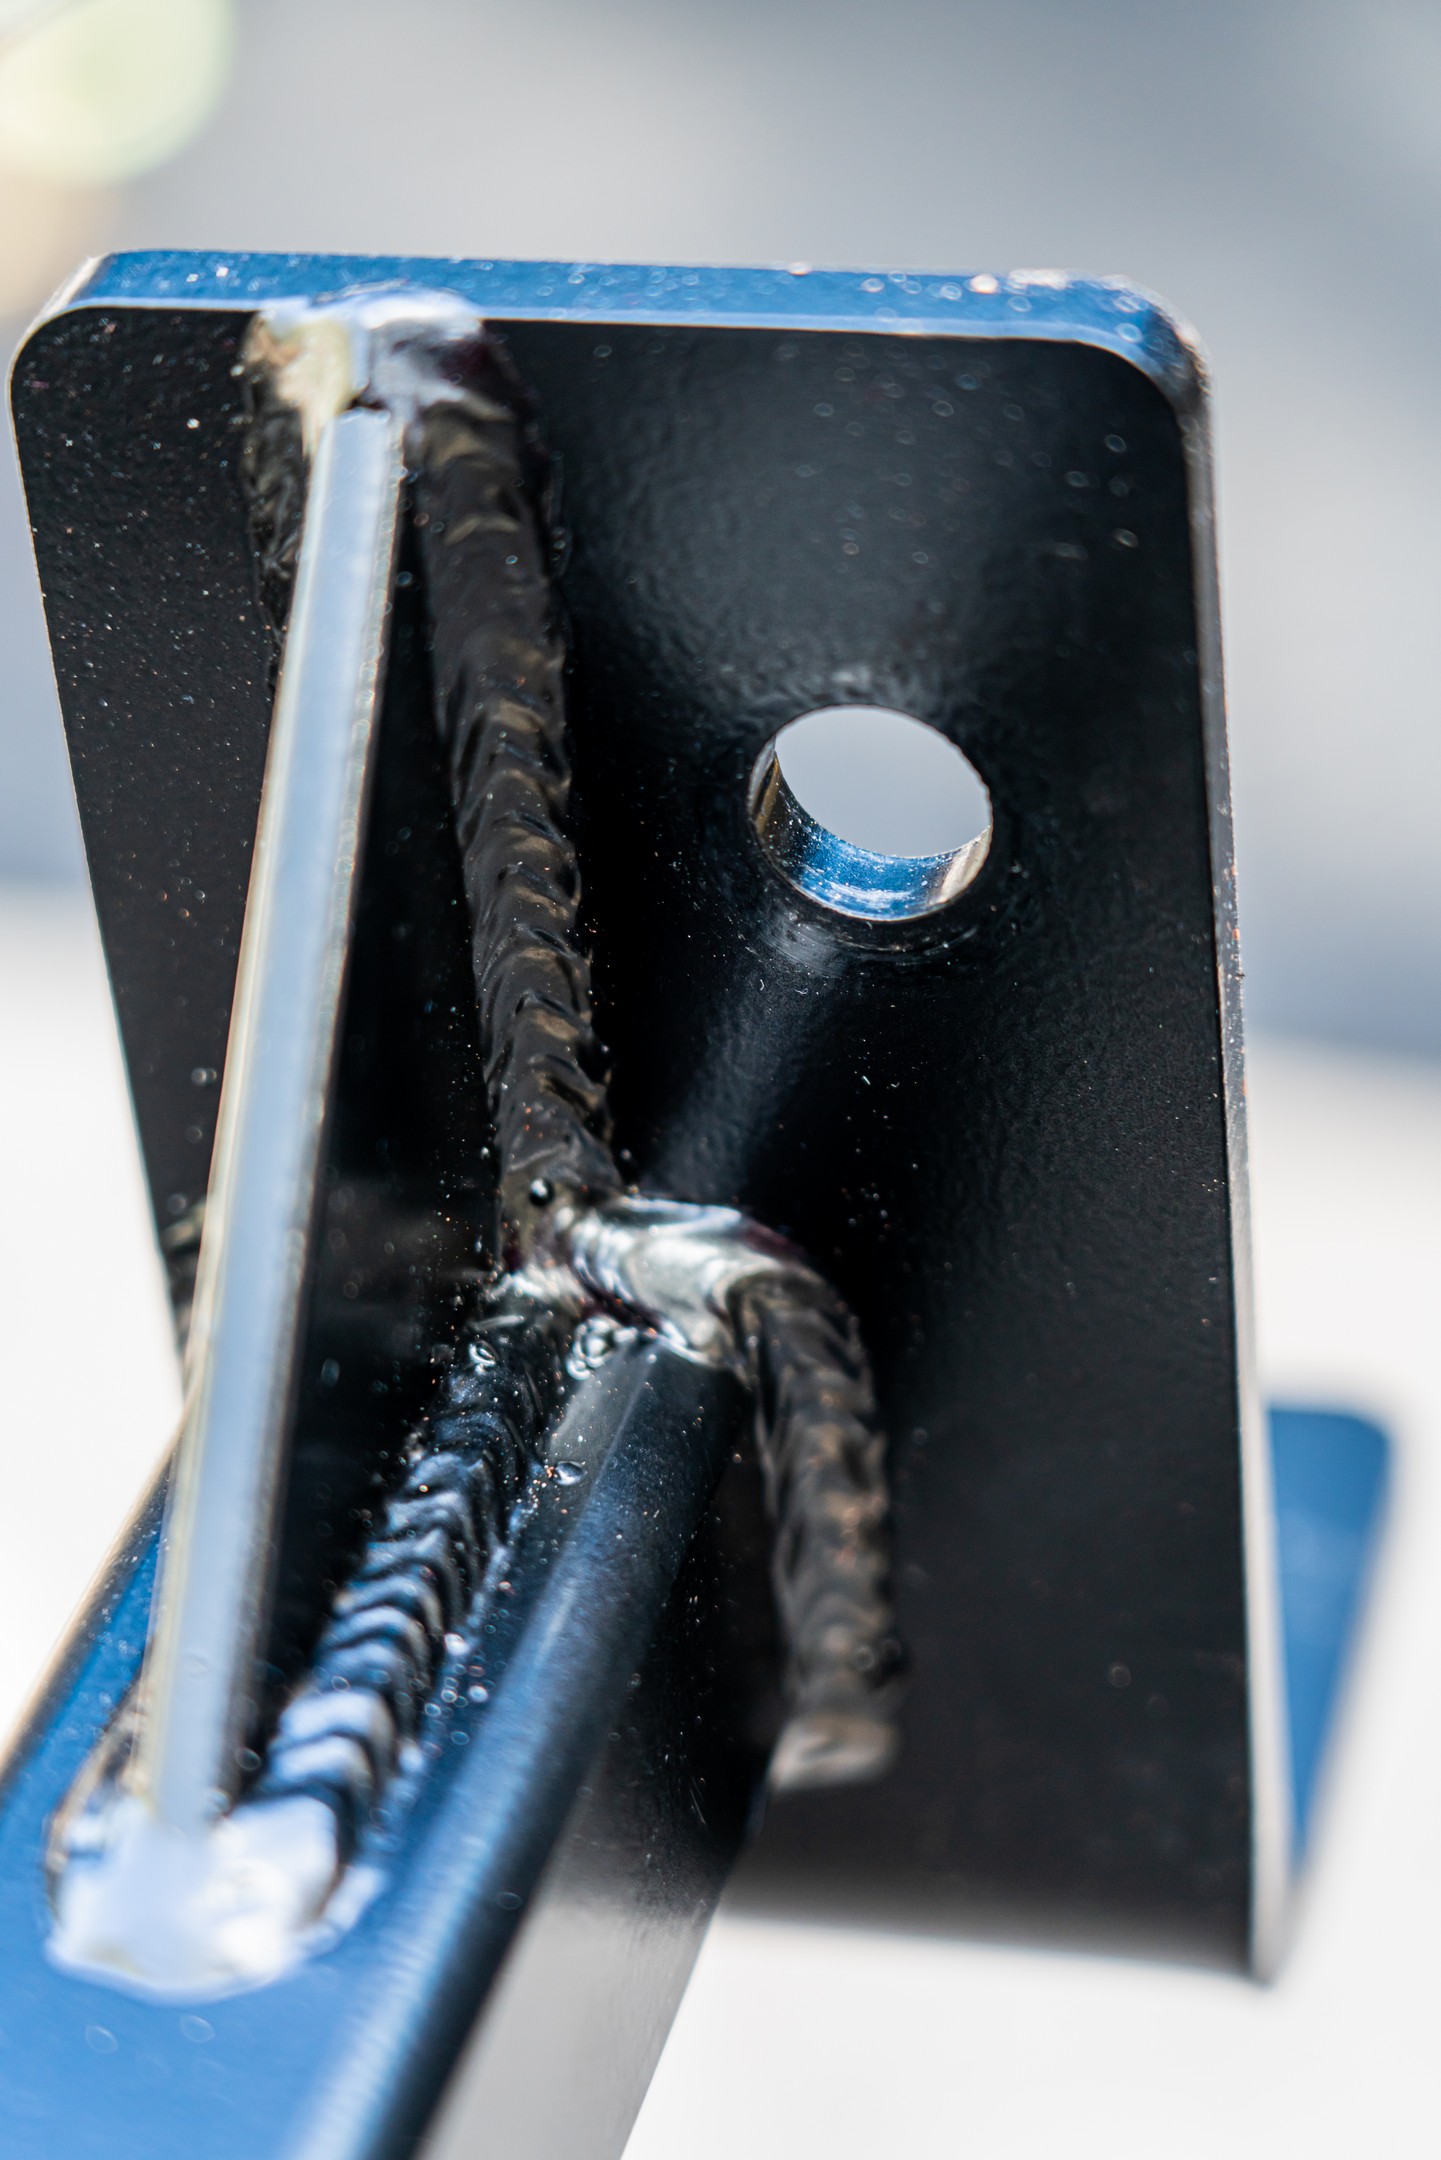
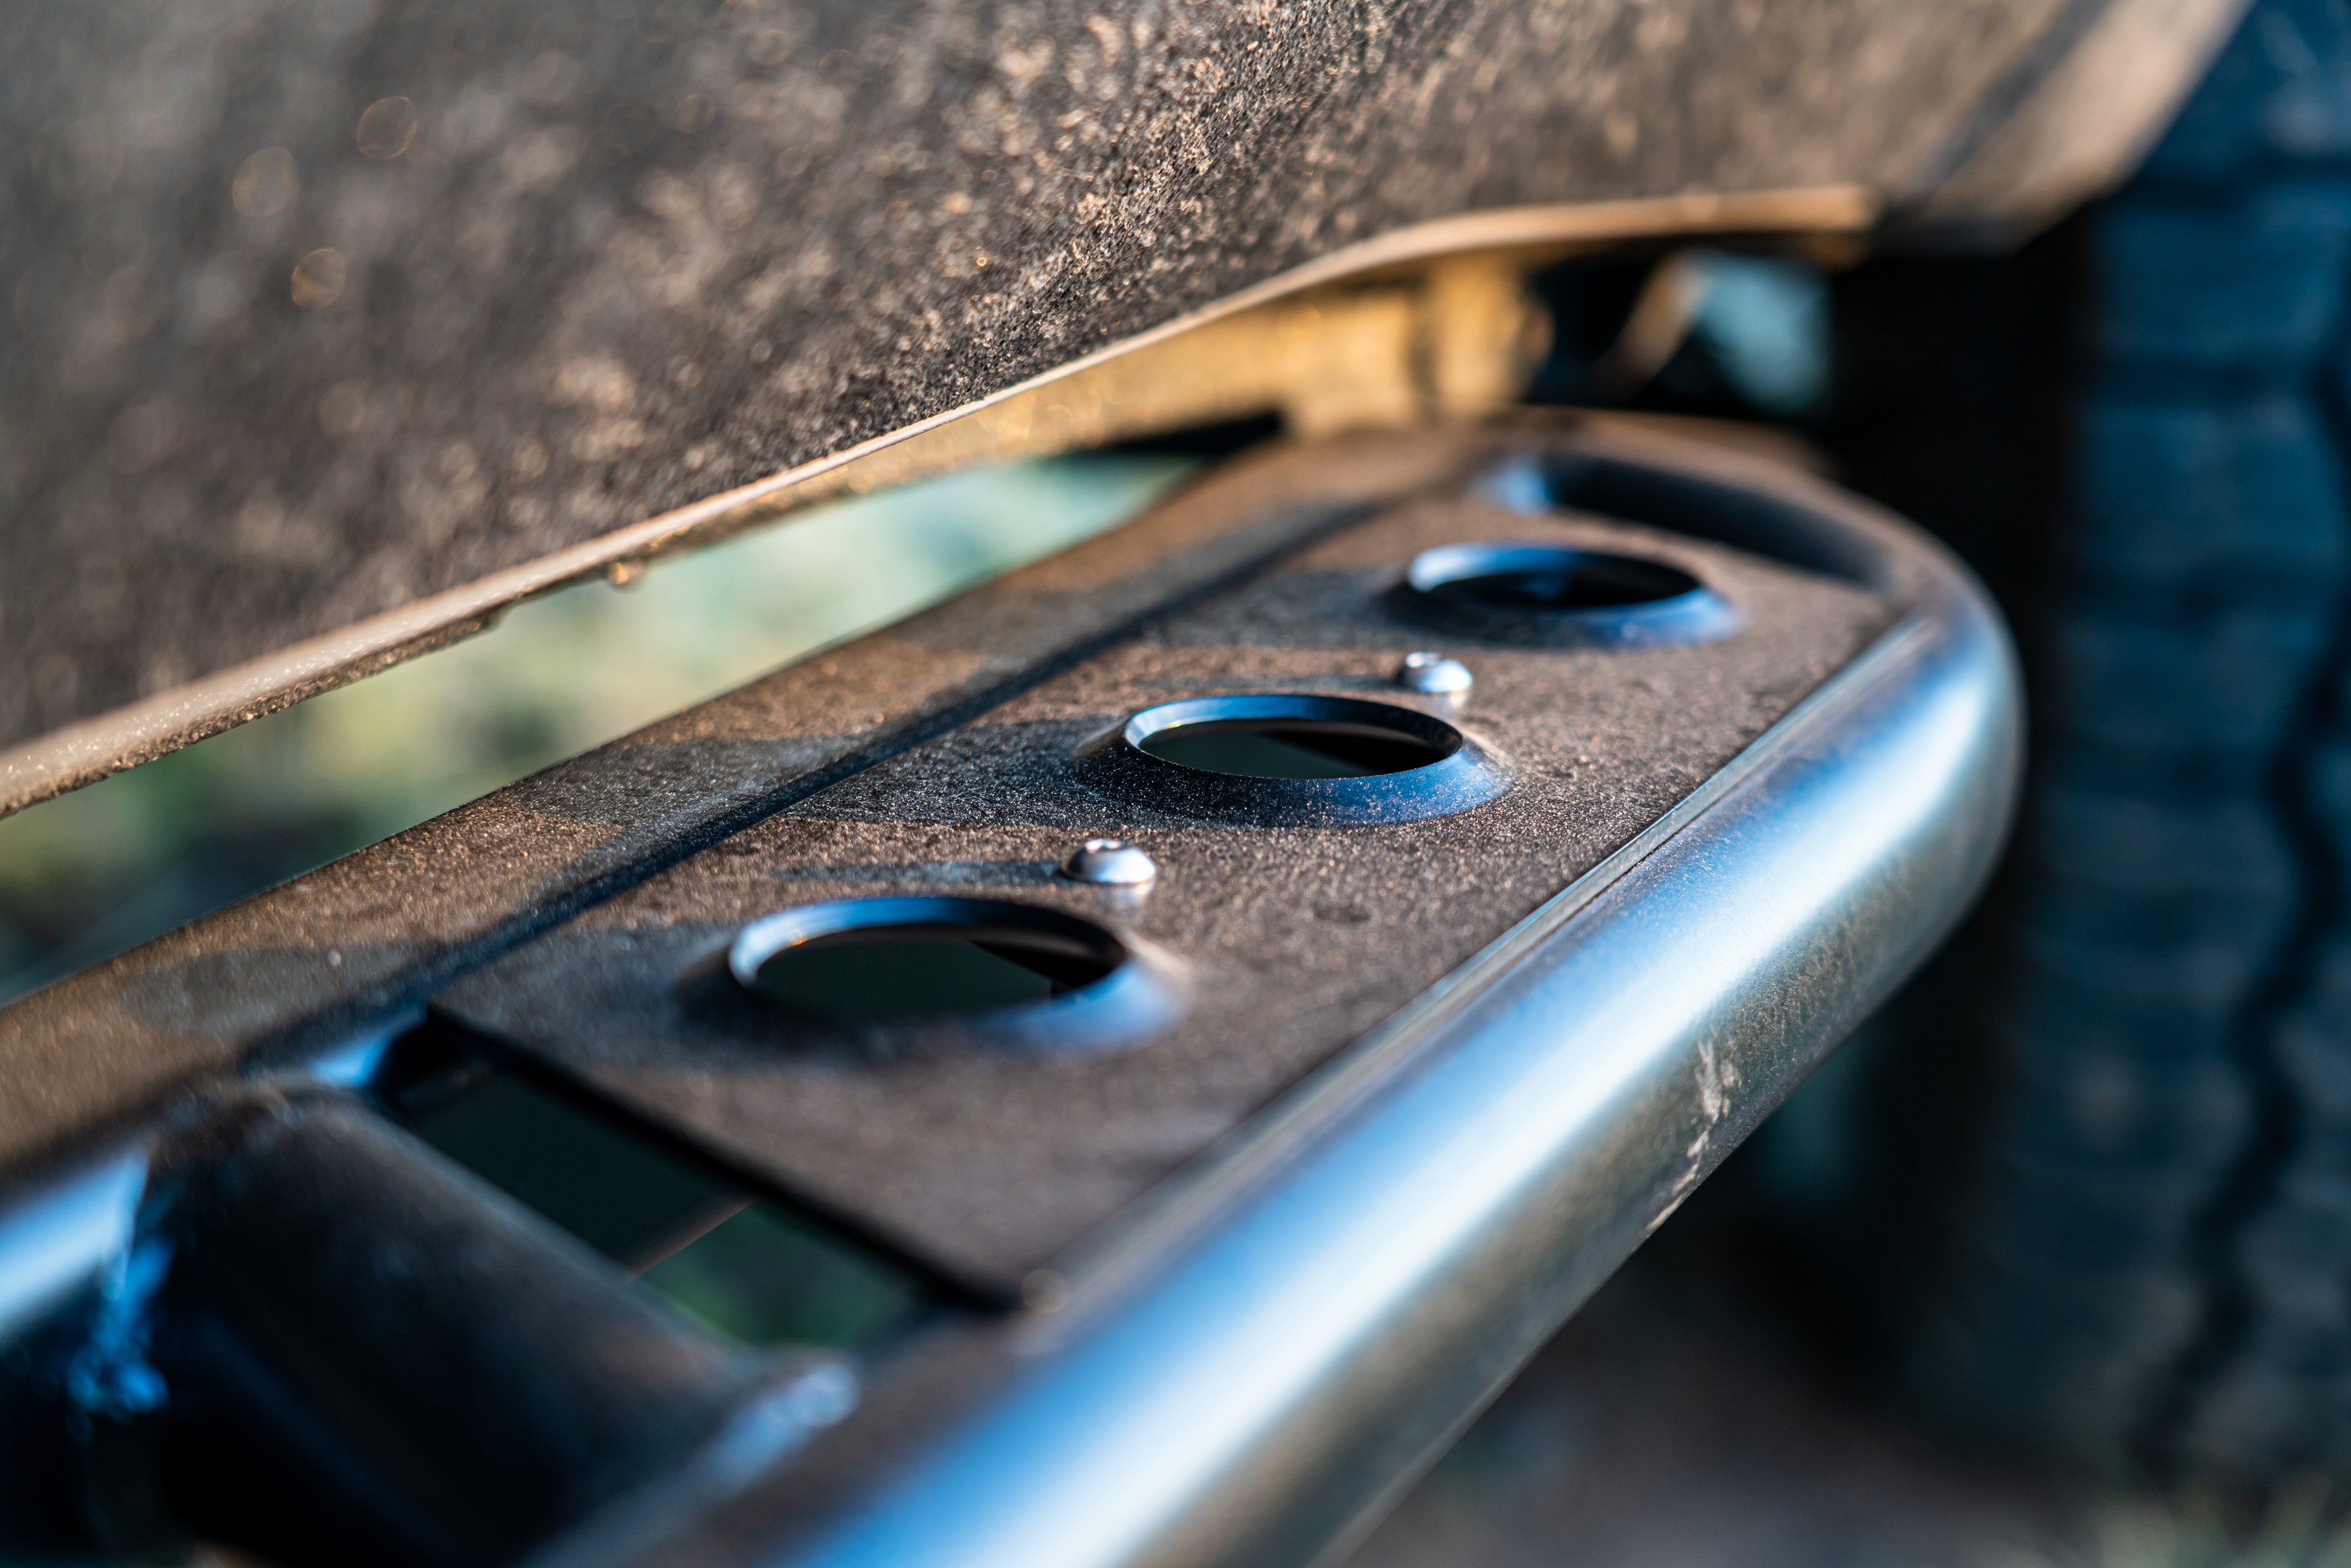
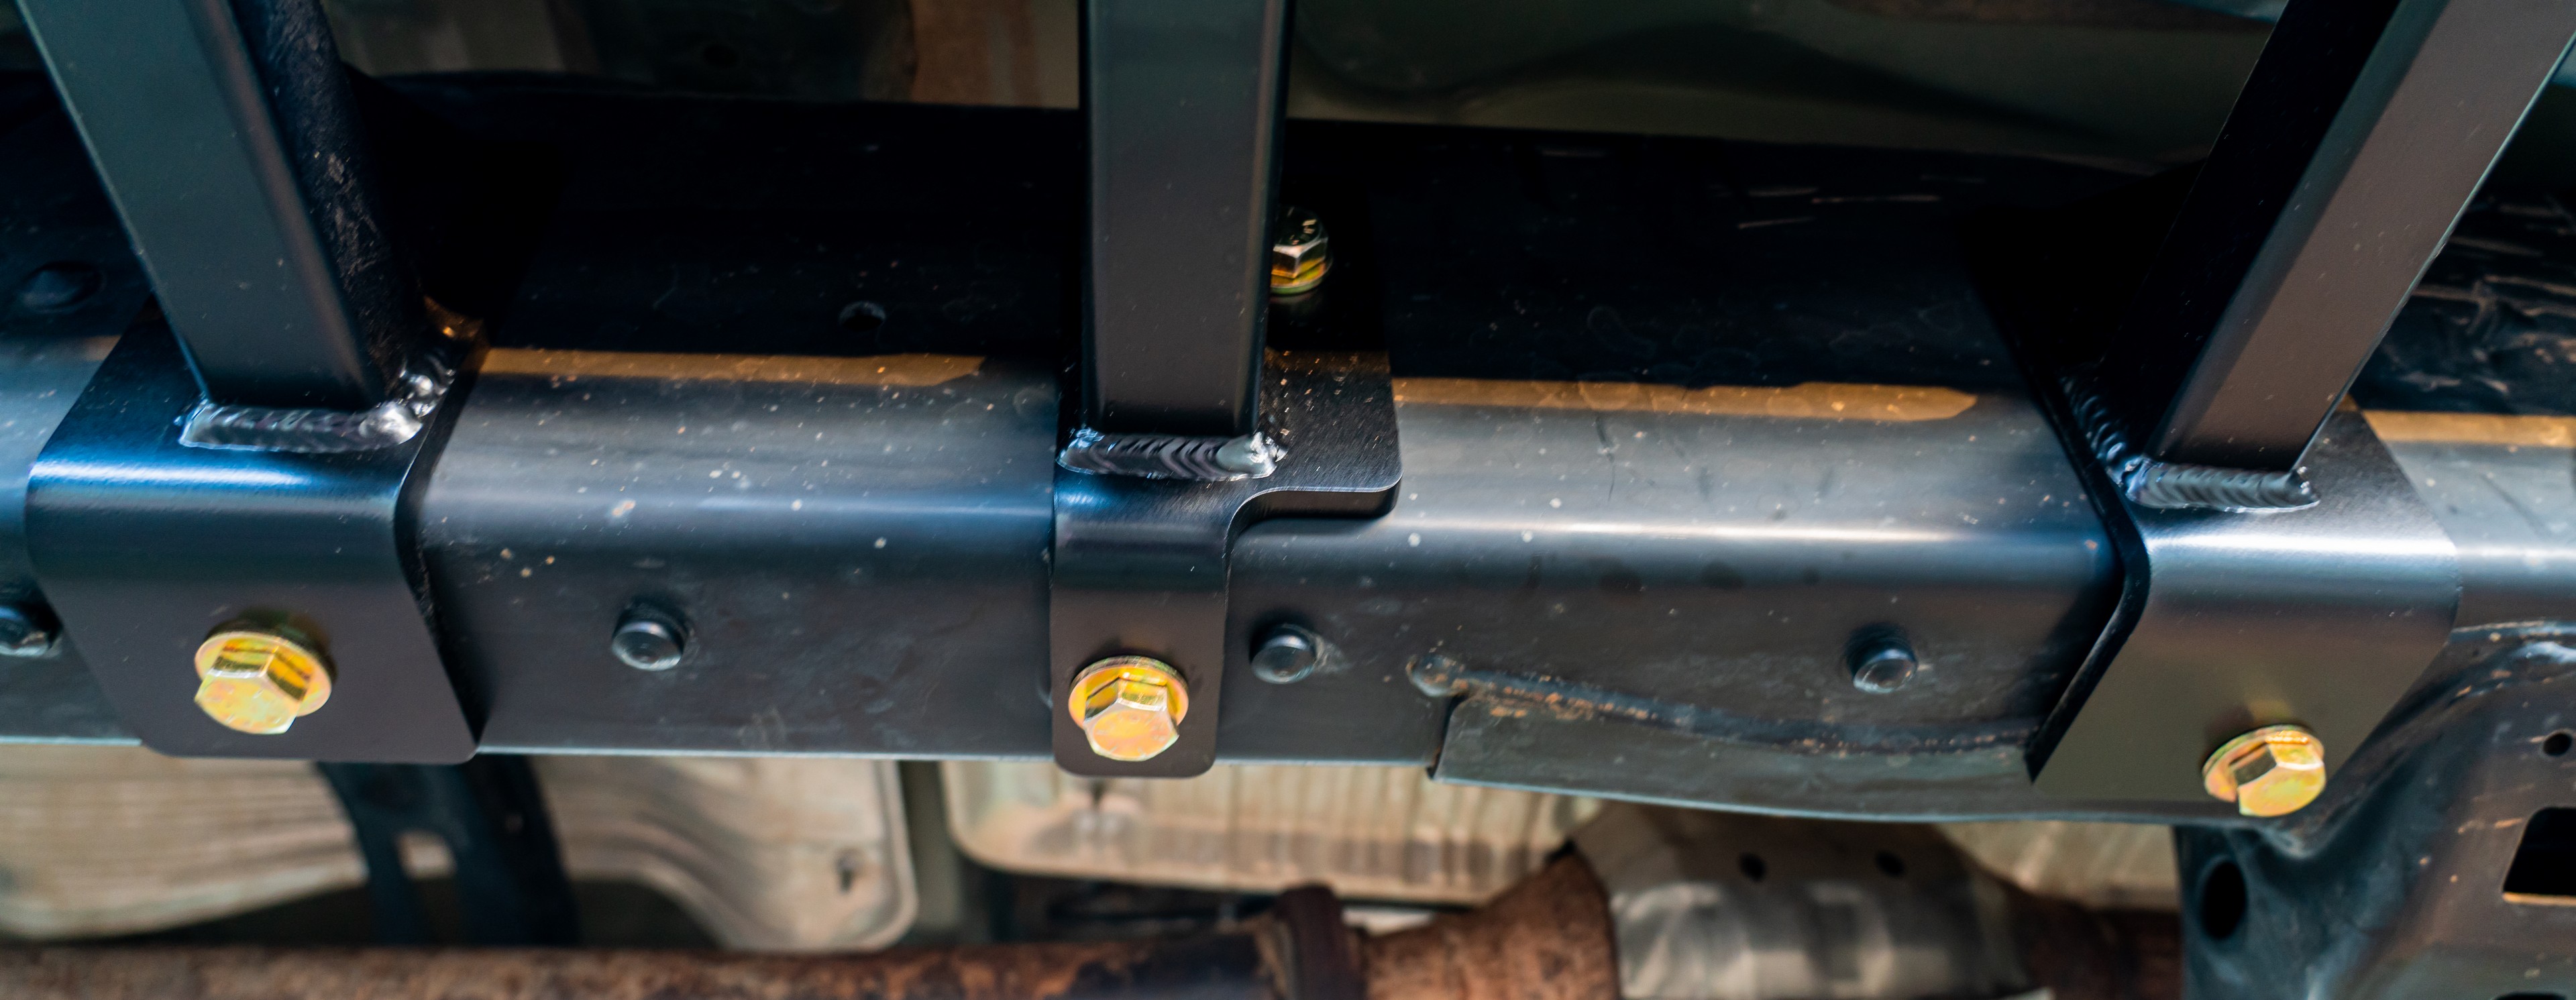
It was no surprise then, that the White Knuckle sliders contained in this package had a flawless finish, and while hunting for a scratch I took a few minutes to appreciate the beautiful welds (impeccable stack ‘o dimes) and overall quality and craftsmanship.  Truly, seeing is believing, and you can really see the attention to detail in White Knuckle’s products.  A friend and I were able to knock out in the install in a couple of hours and we ran into no issues in the process.  The White Knuckle sliders utilize factory holes and require you to drill a few holes in the Tundra frame, and this the only place we deviated from the instructions only to use a stepper bit instead of several progressively larger HSS-style bits as the directions recommended.  After applying several coats of spray paint to the exposed steel in the frame, bolting the sliders up was as easy as it gets.

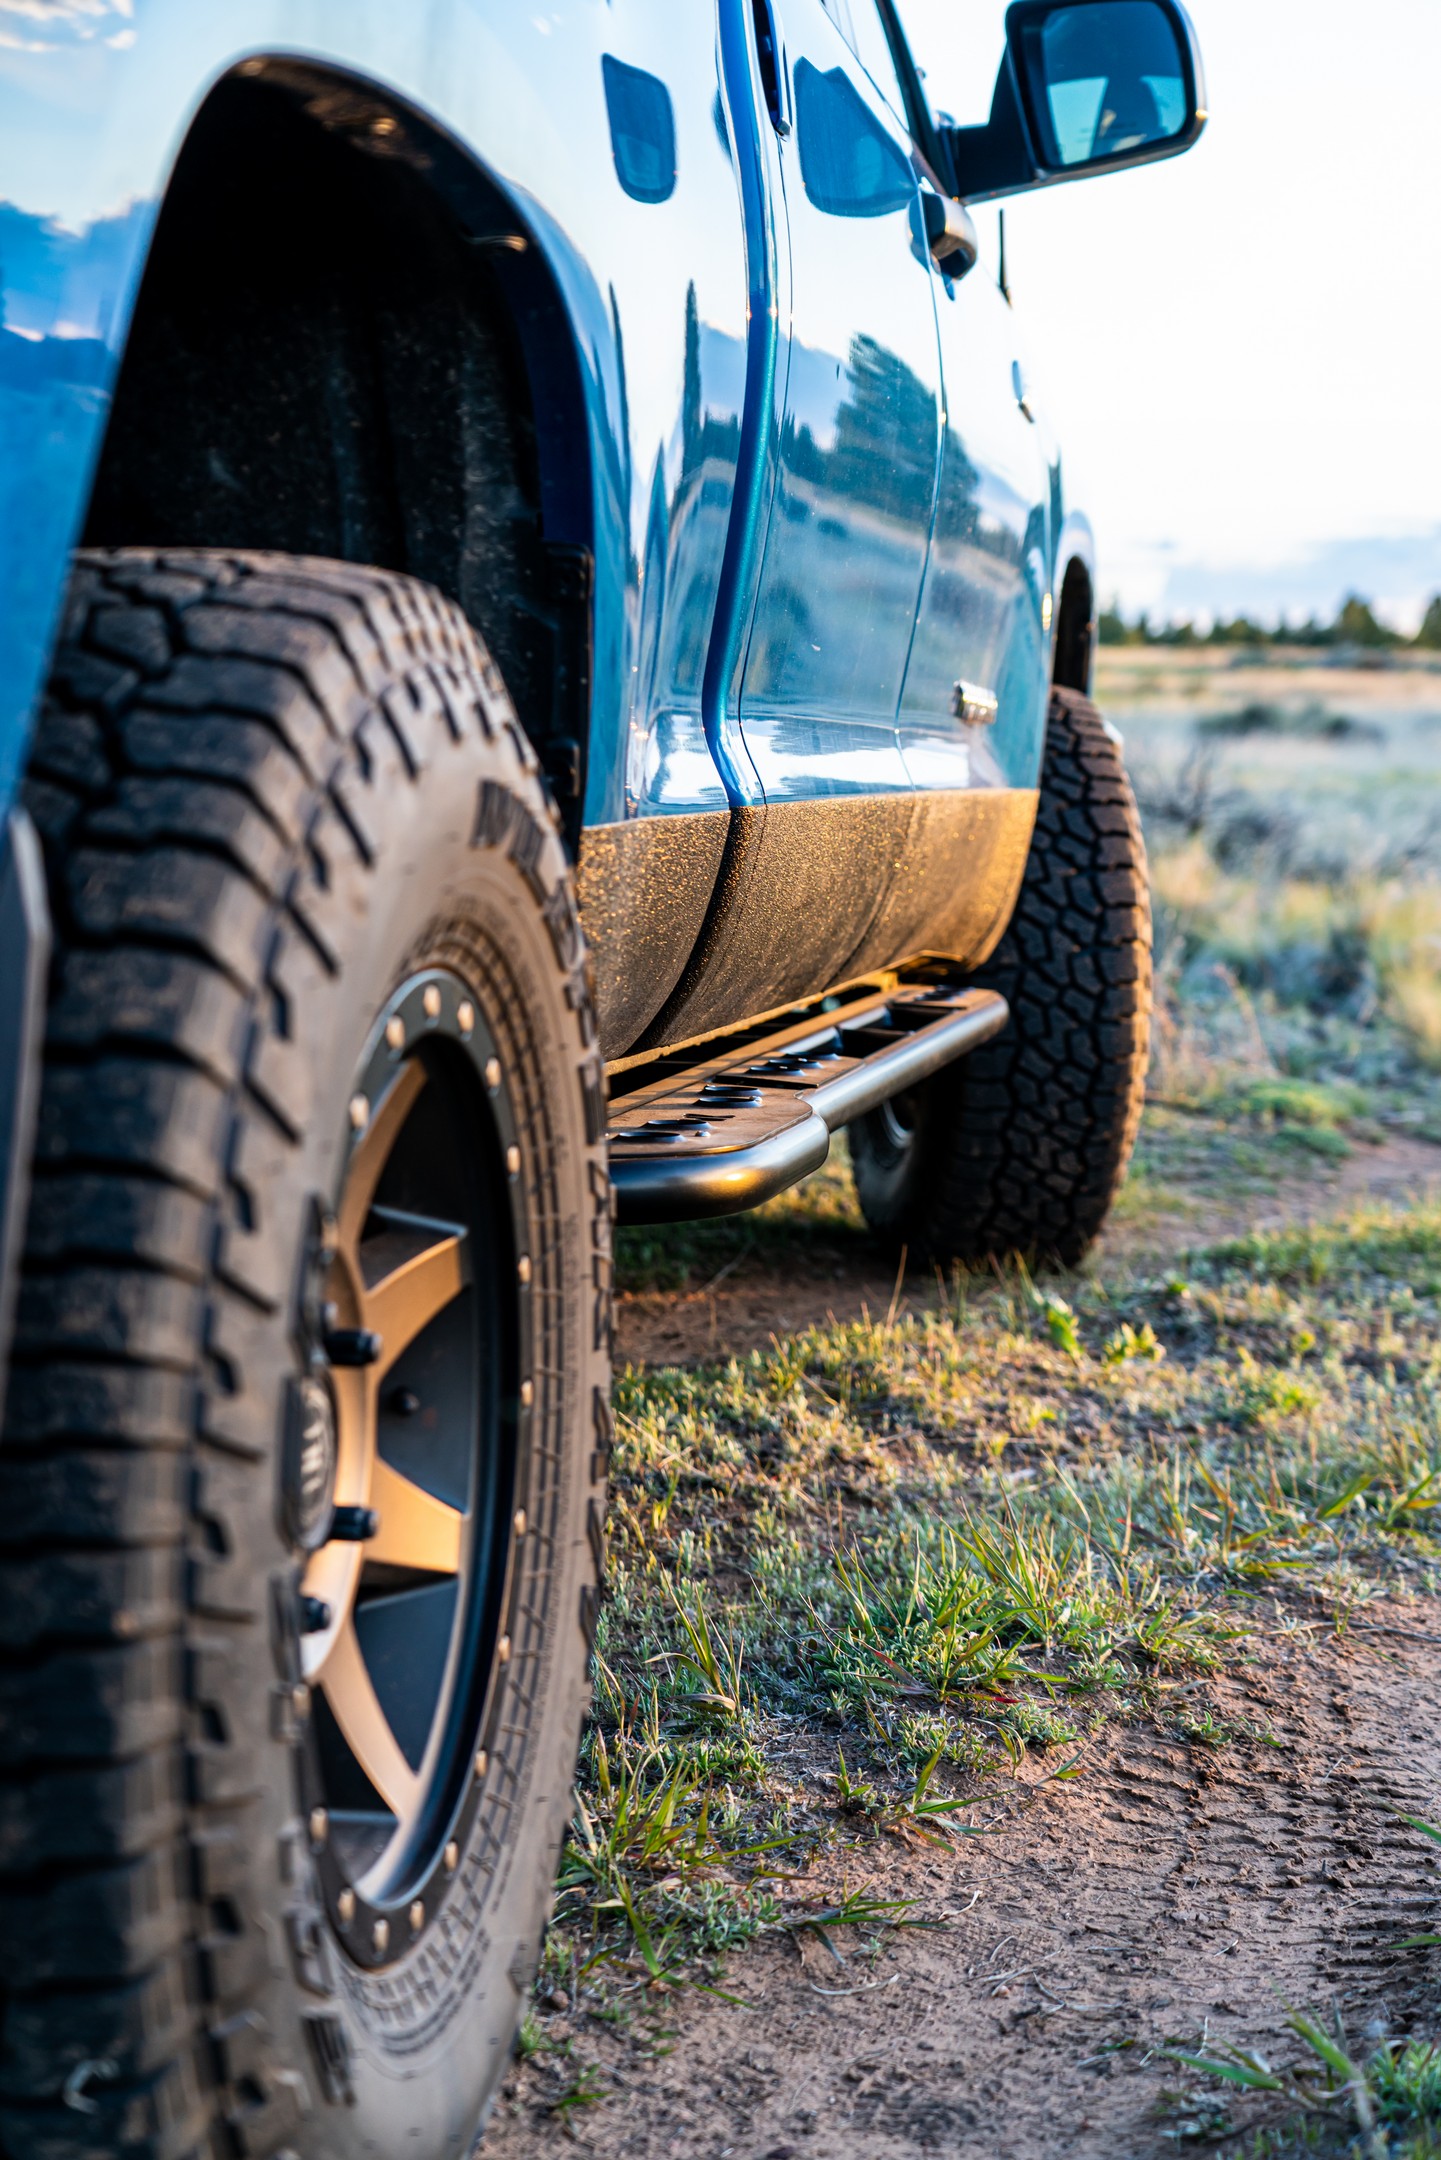
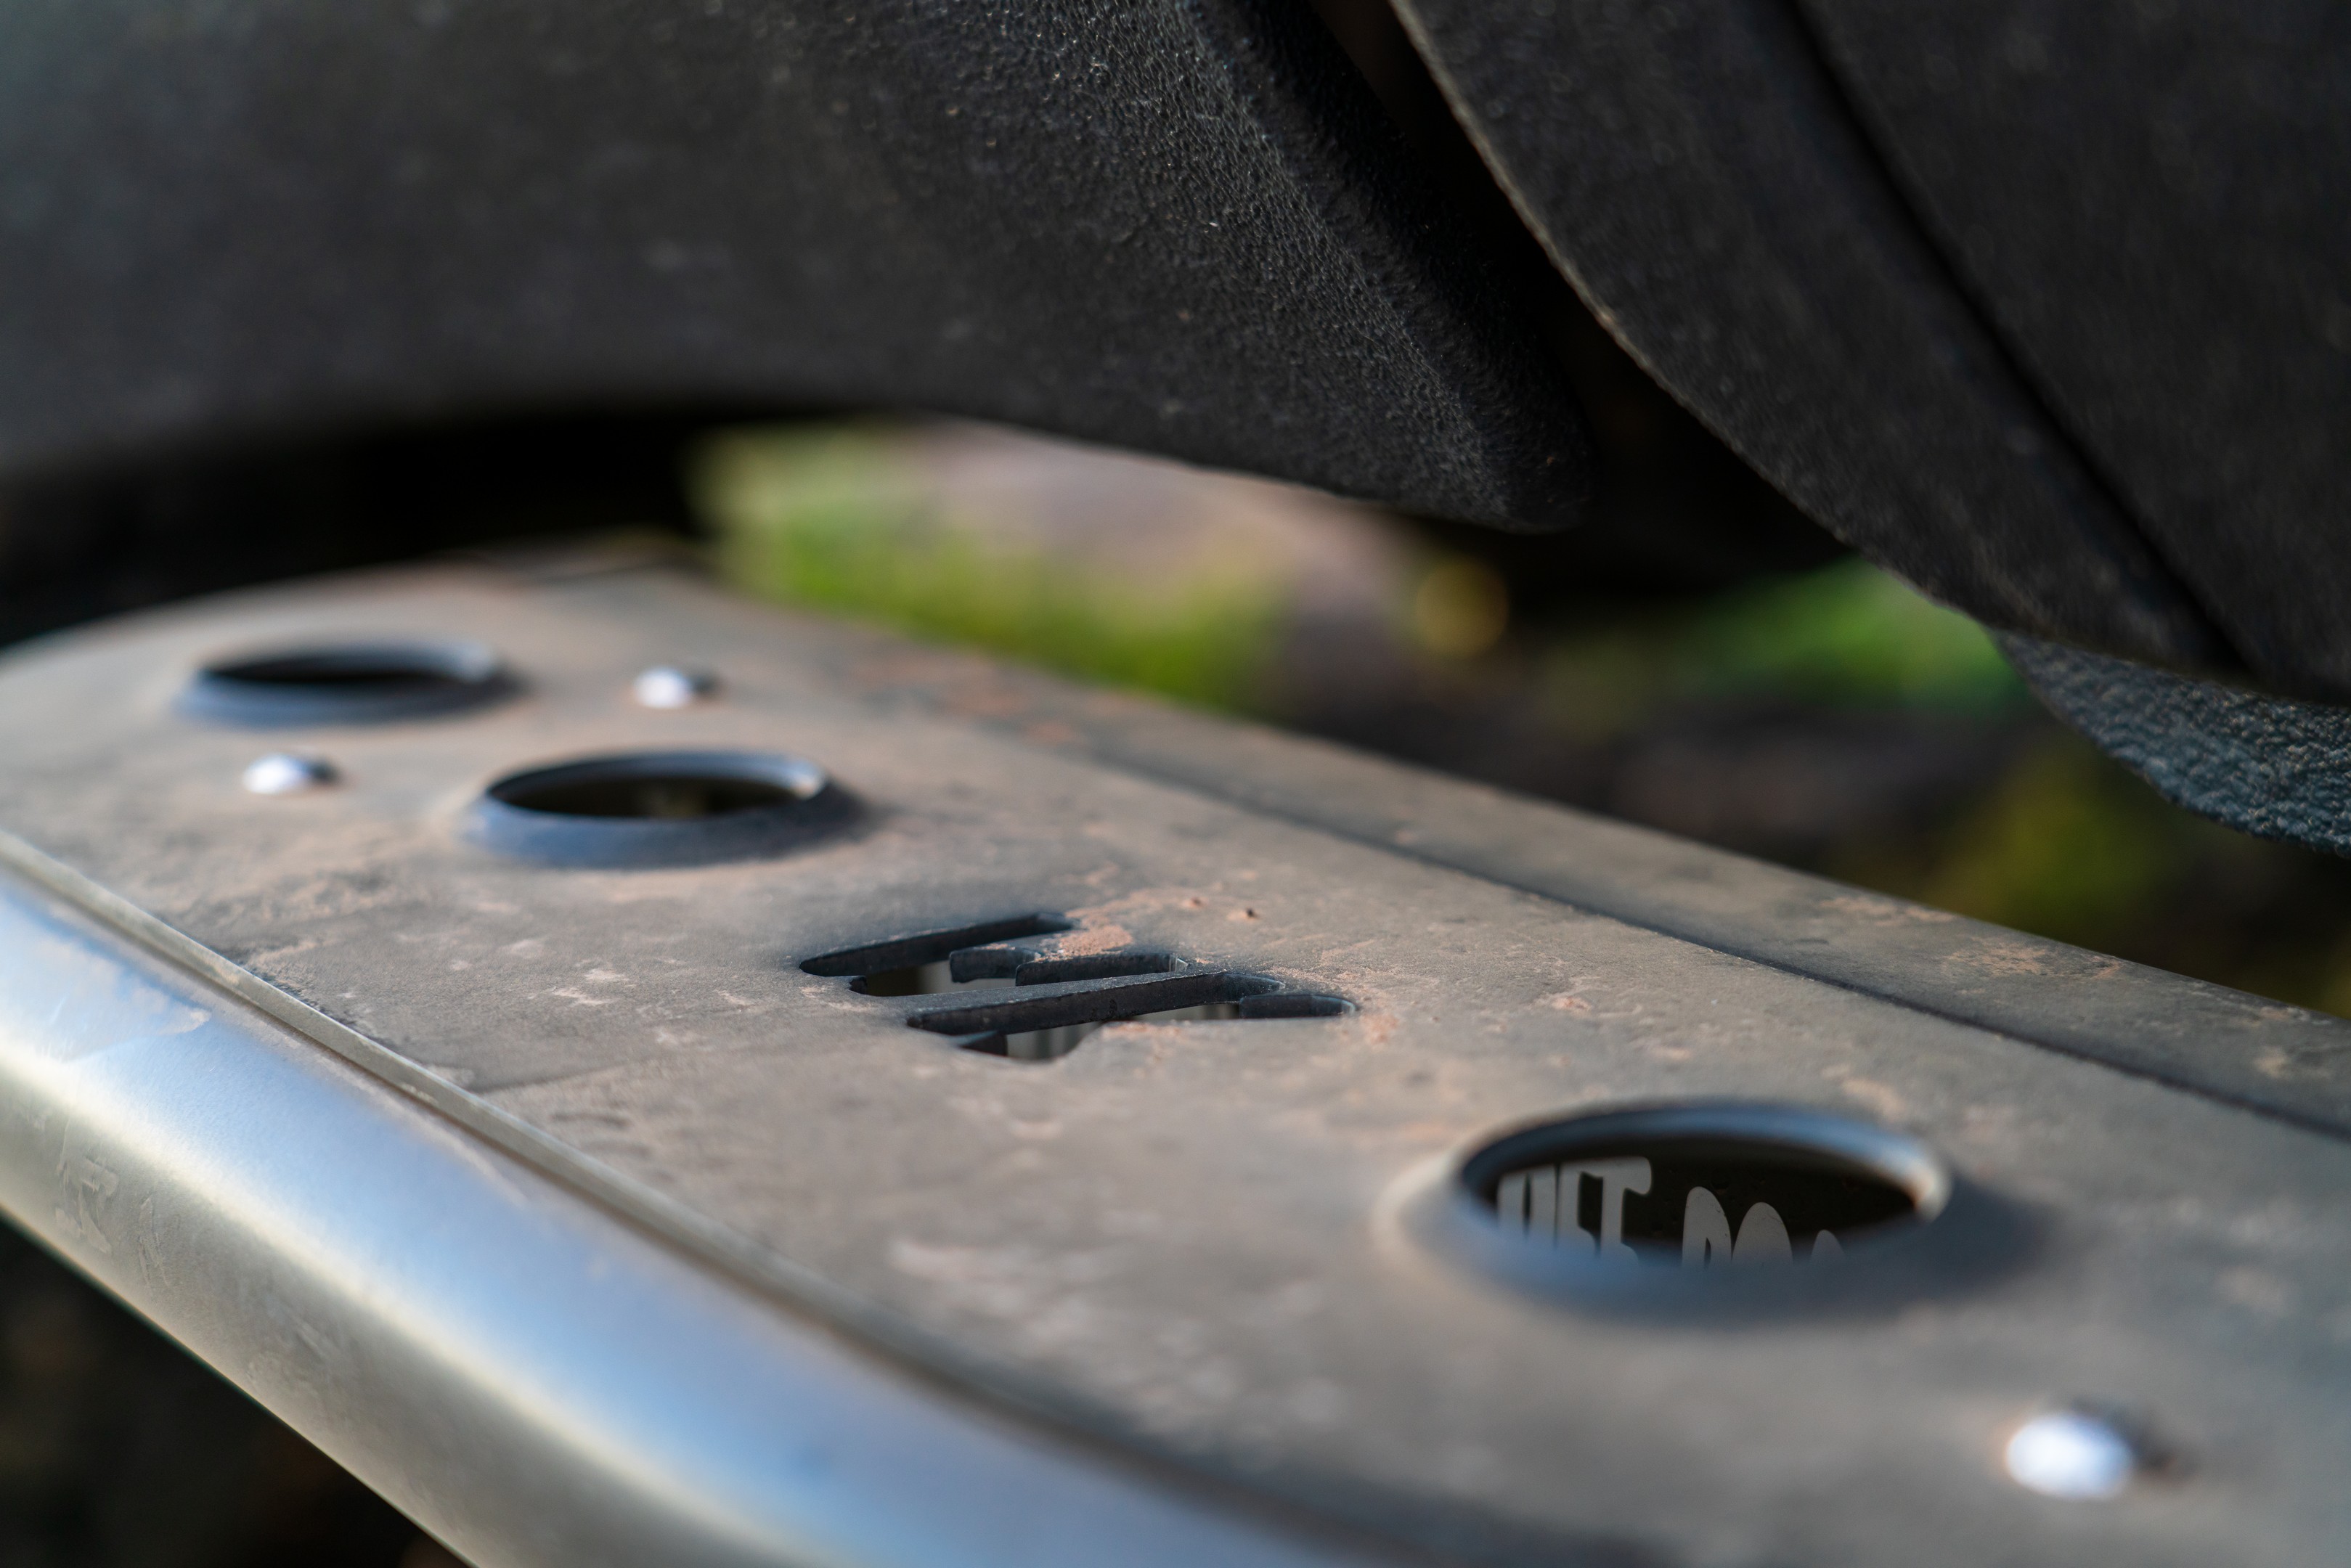
With these beefy sliders installed, the first thing I did was pick up one side of the truck with a jack and the sliders handled this task with ease.  I haven’t had the truck fully supported by the sliders on an obstacle on the trail (yet), but I have no doubt that they’ll handle whatever I throw at them.  The top plates are strategically placed to serve as a more secure step, and I really appreciate this fact as I have two-year-old twins, whose little feet could easily slip between in the inner and outer rail when they’re climbing in or out of the truck.  All said and done, White Knuckle Off-Road sliders are an outstanding product, and I’ll be using them on every project going forward.  Every part of the experience, from packaging, to install, to use, tells the story of a small American company that really takes pride in their work and makes a great product that is extremely well thought out.  If you’re in the market for rock sliders, you can’t go wrong with White Knuckle Off Road Products.

THAT CAP AND THAT RACK

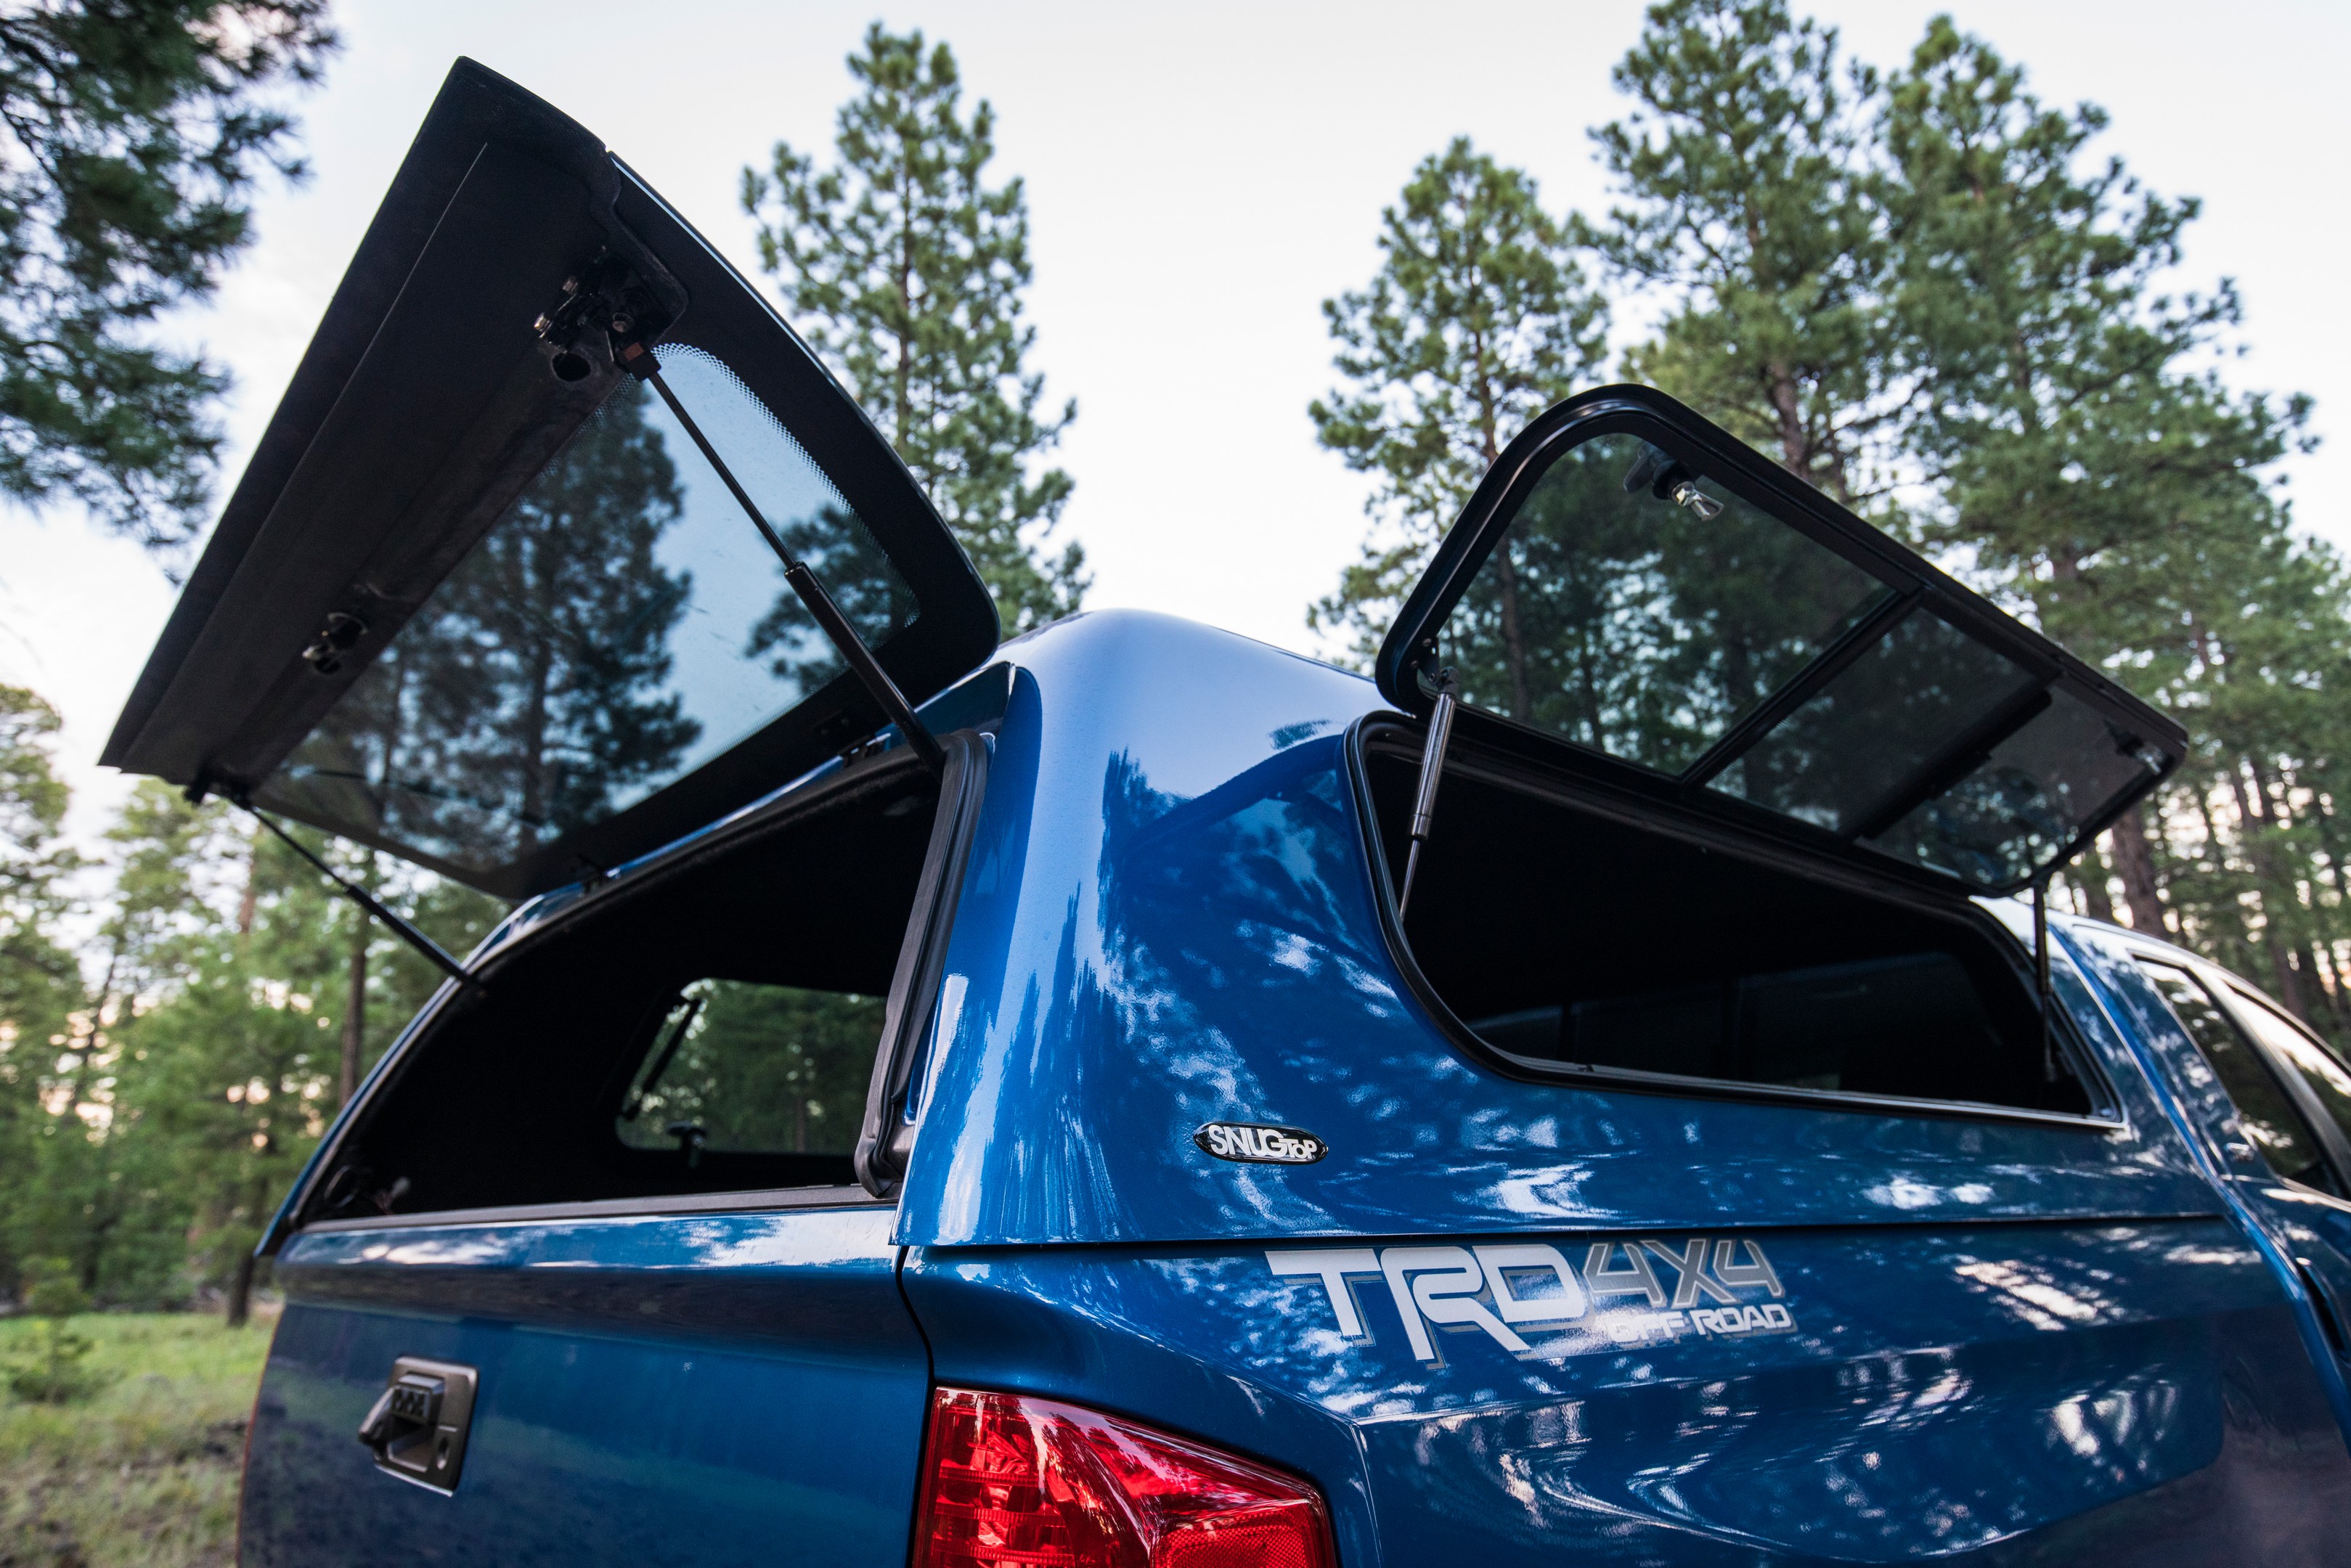
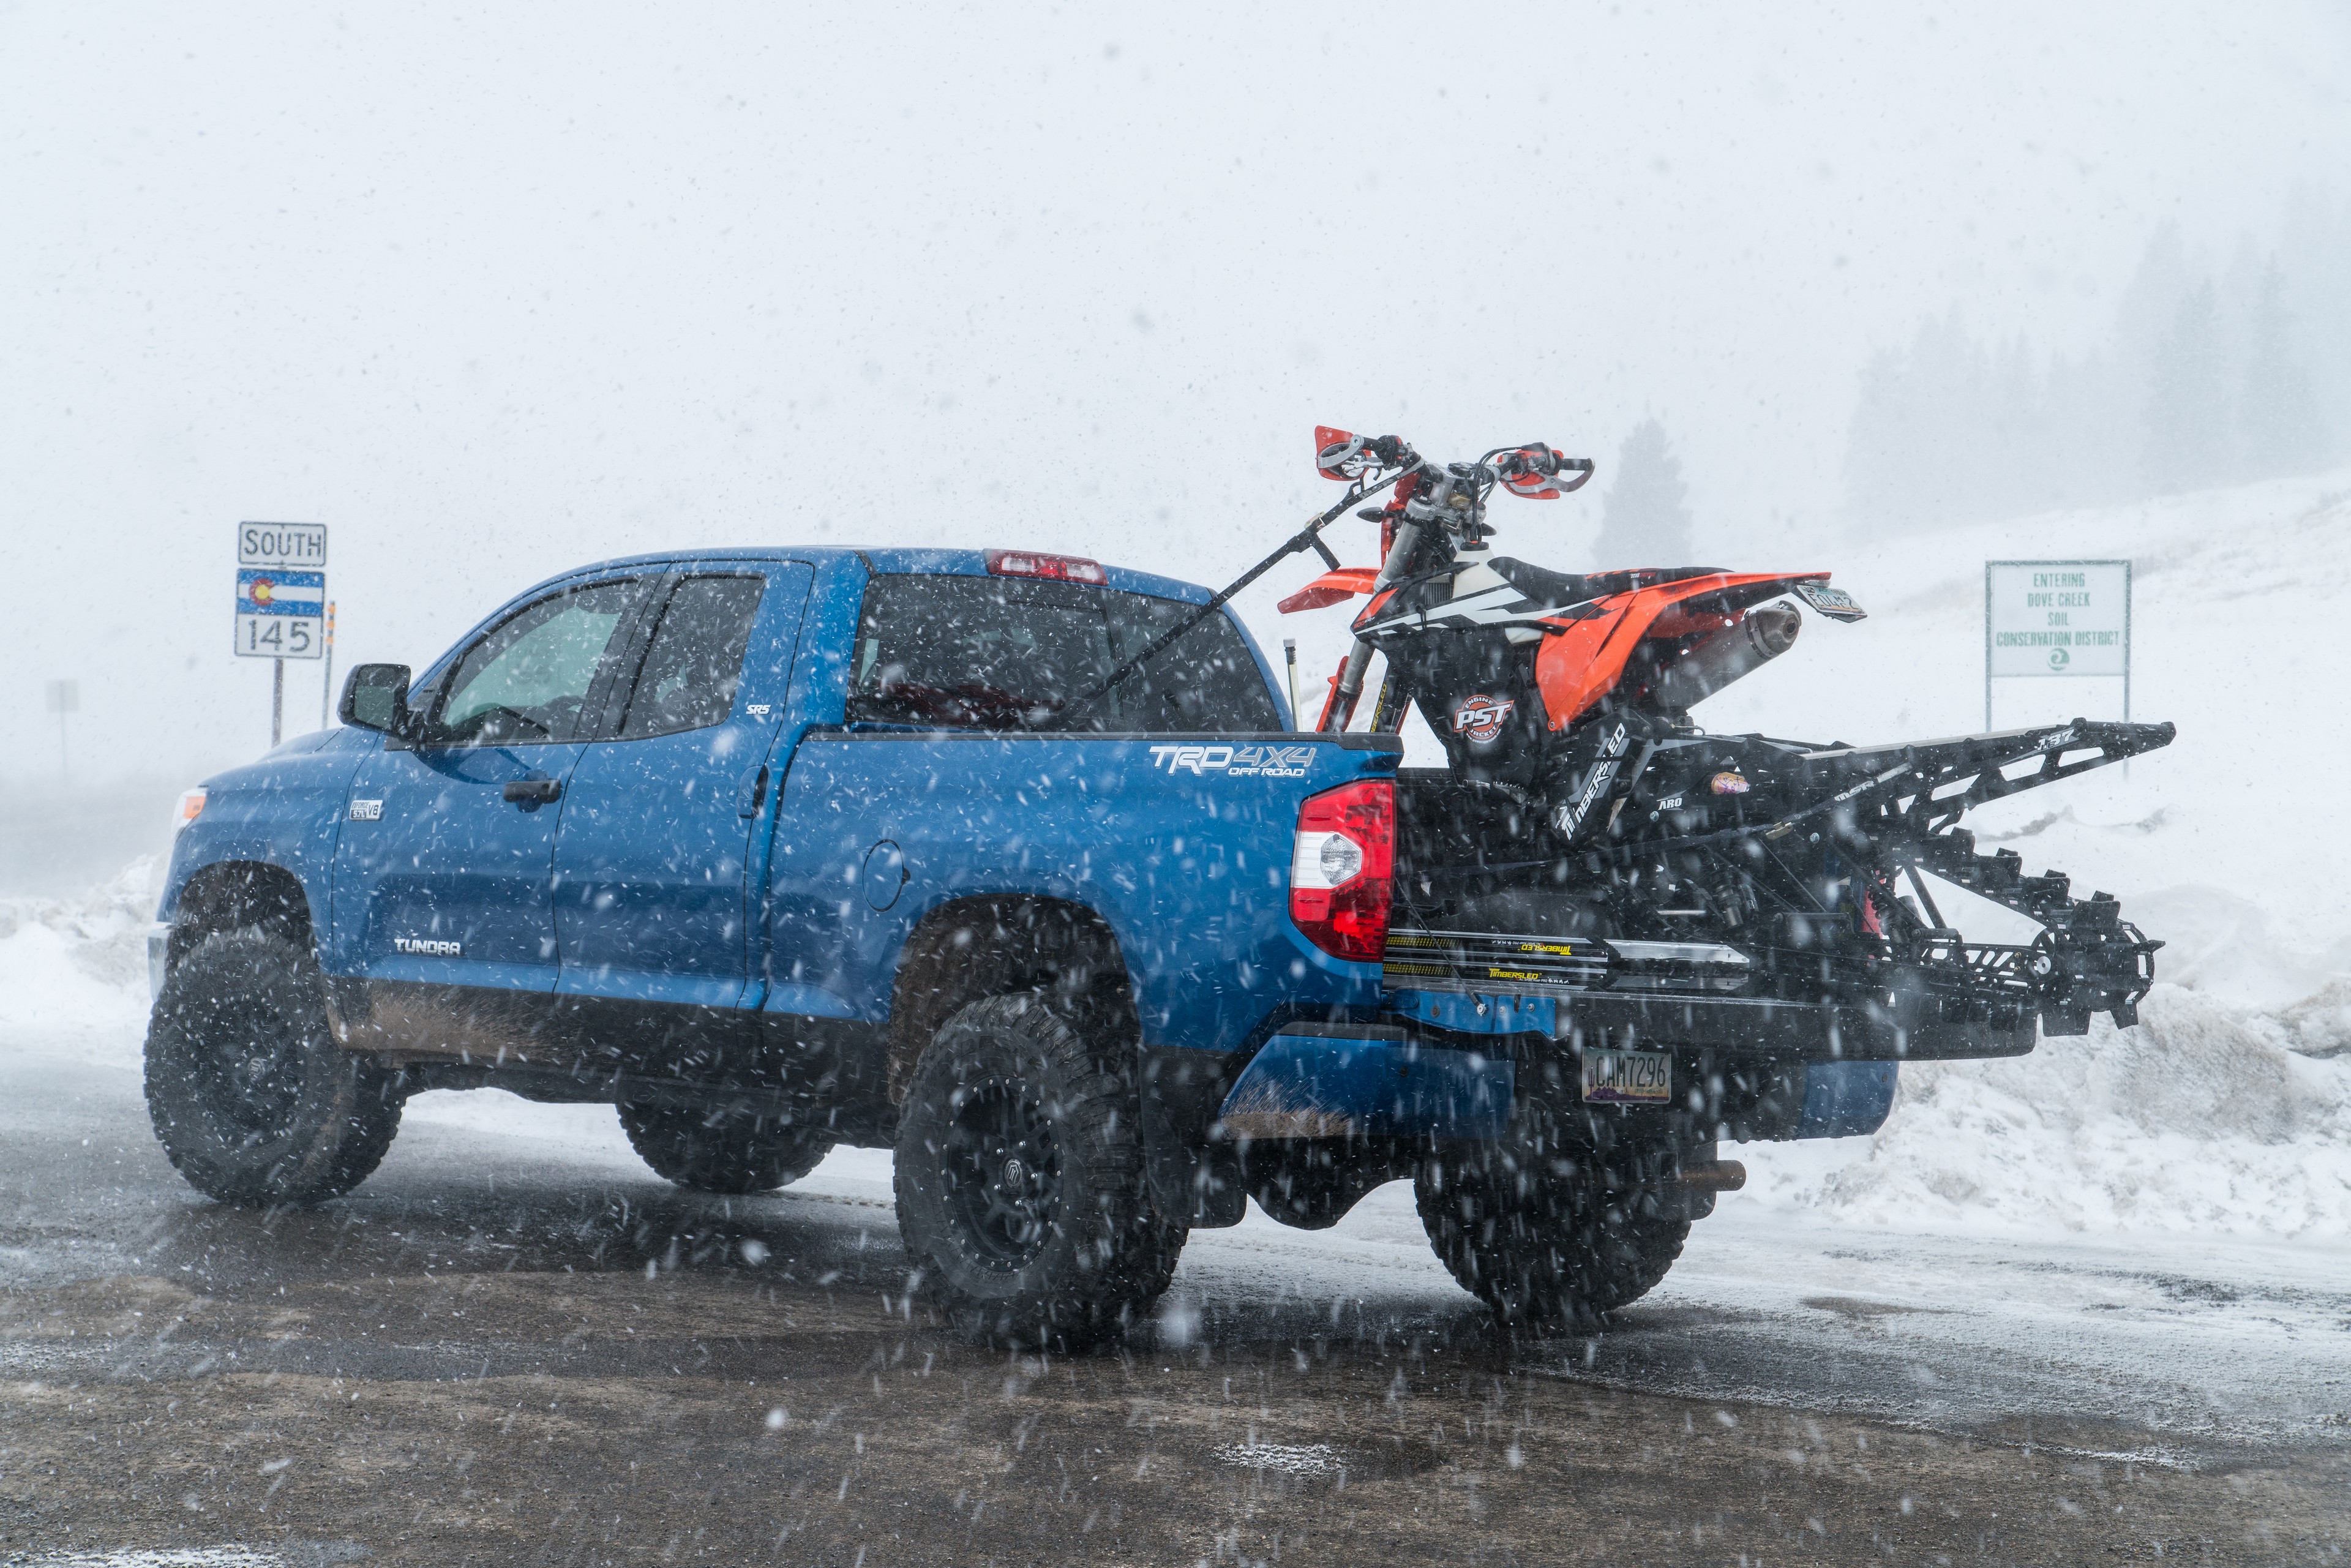
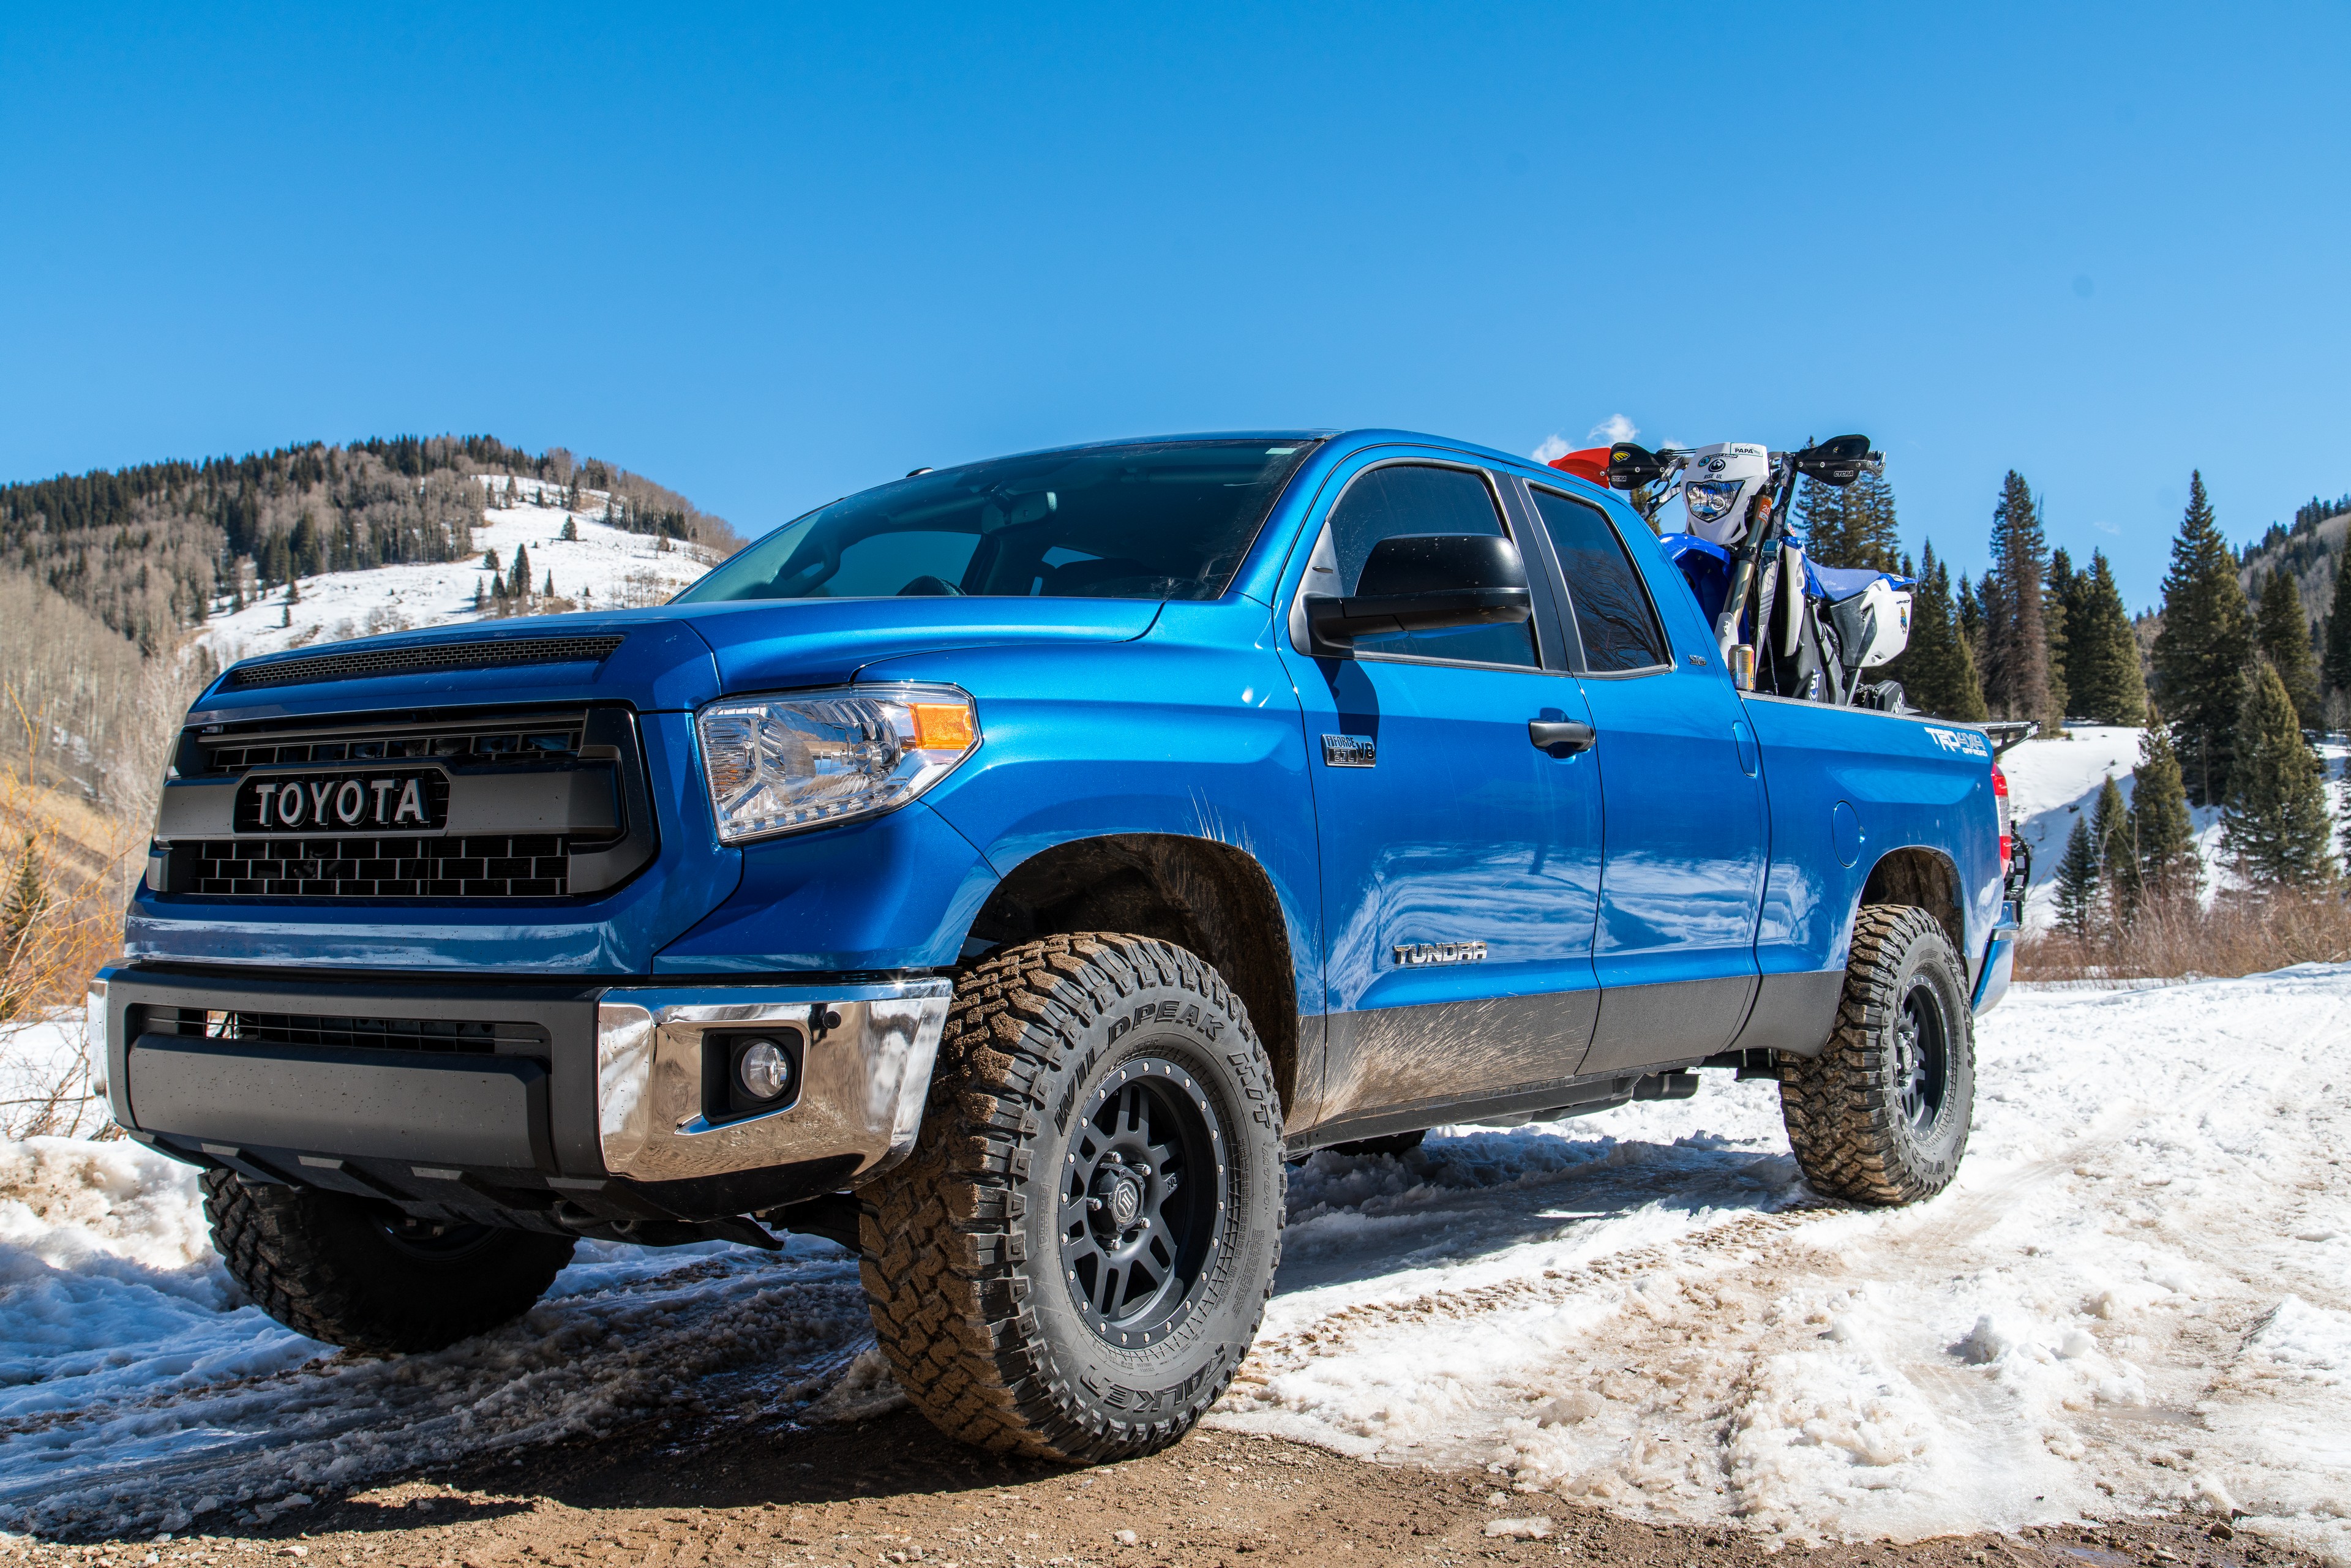
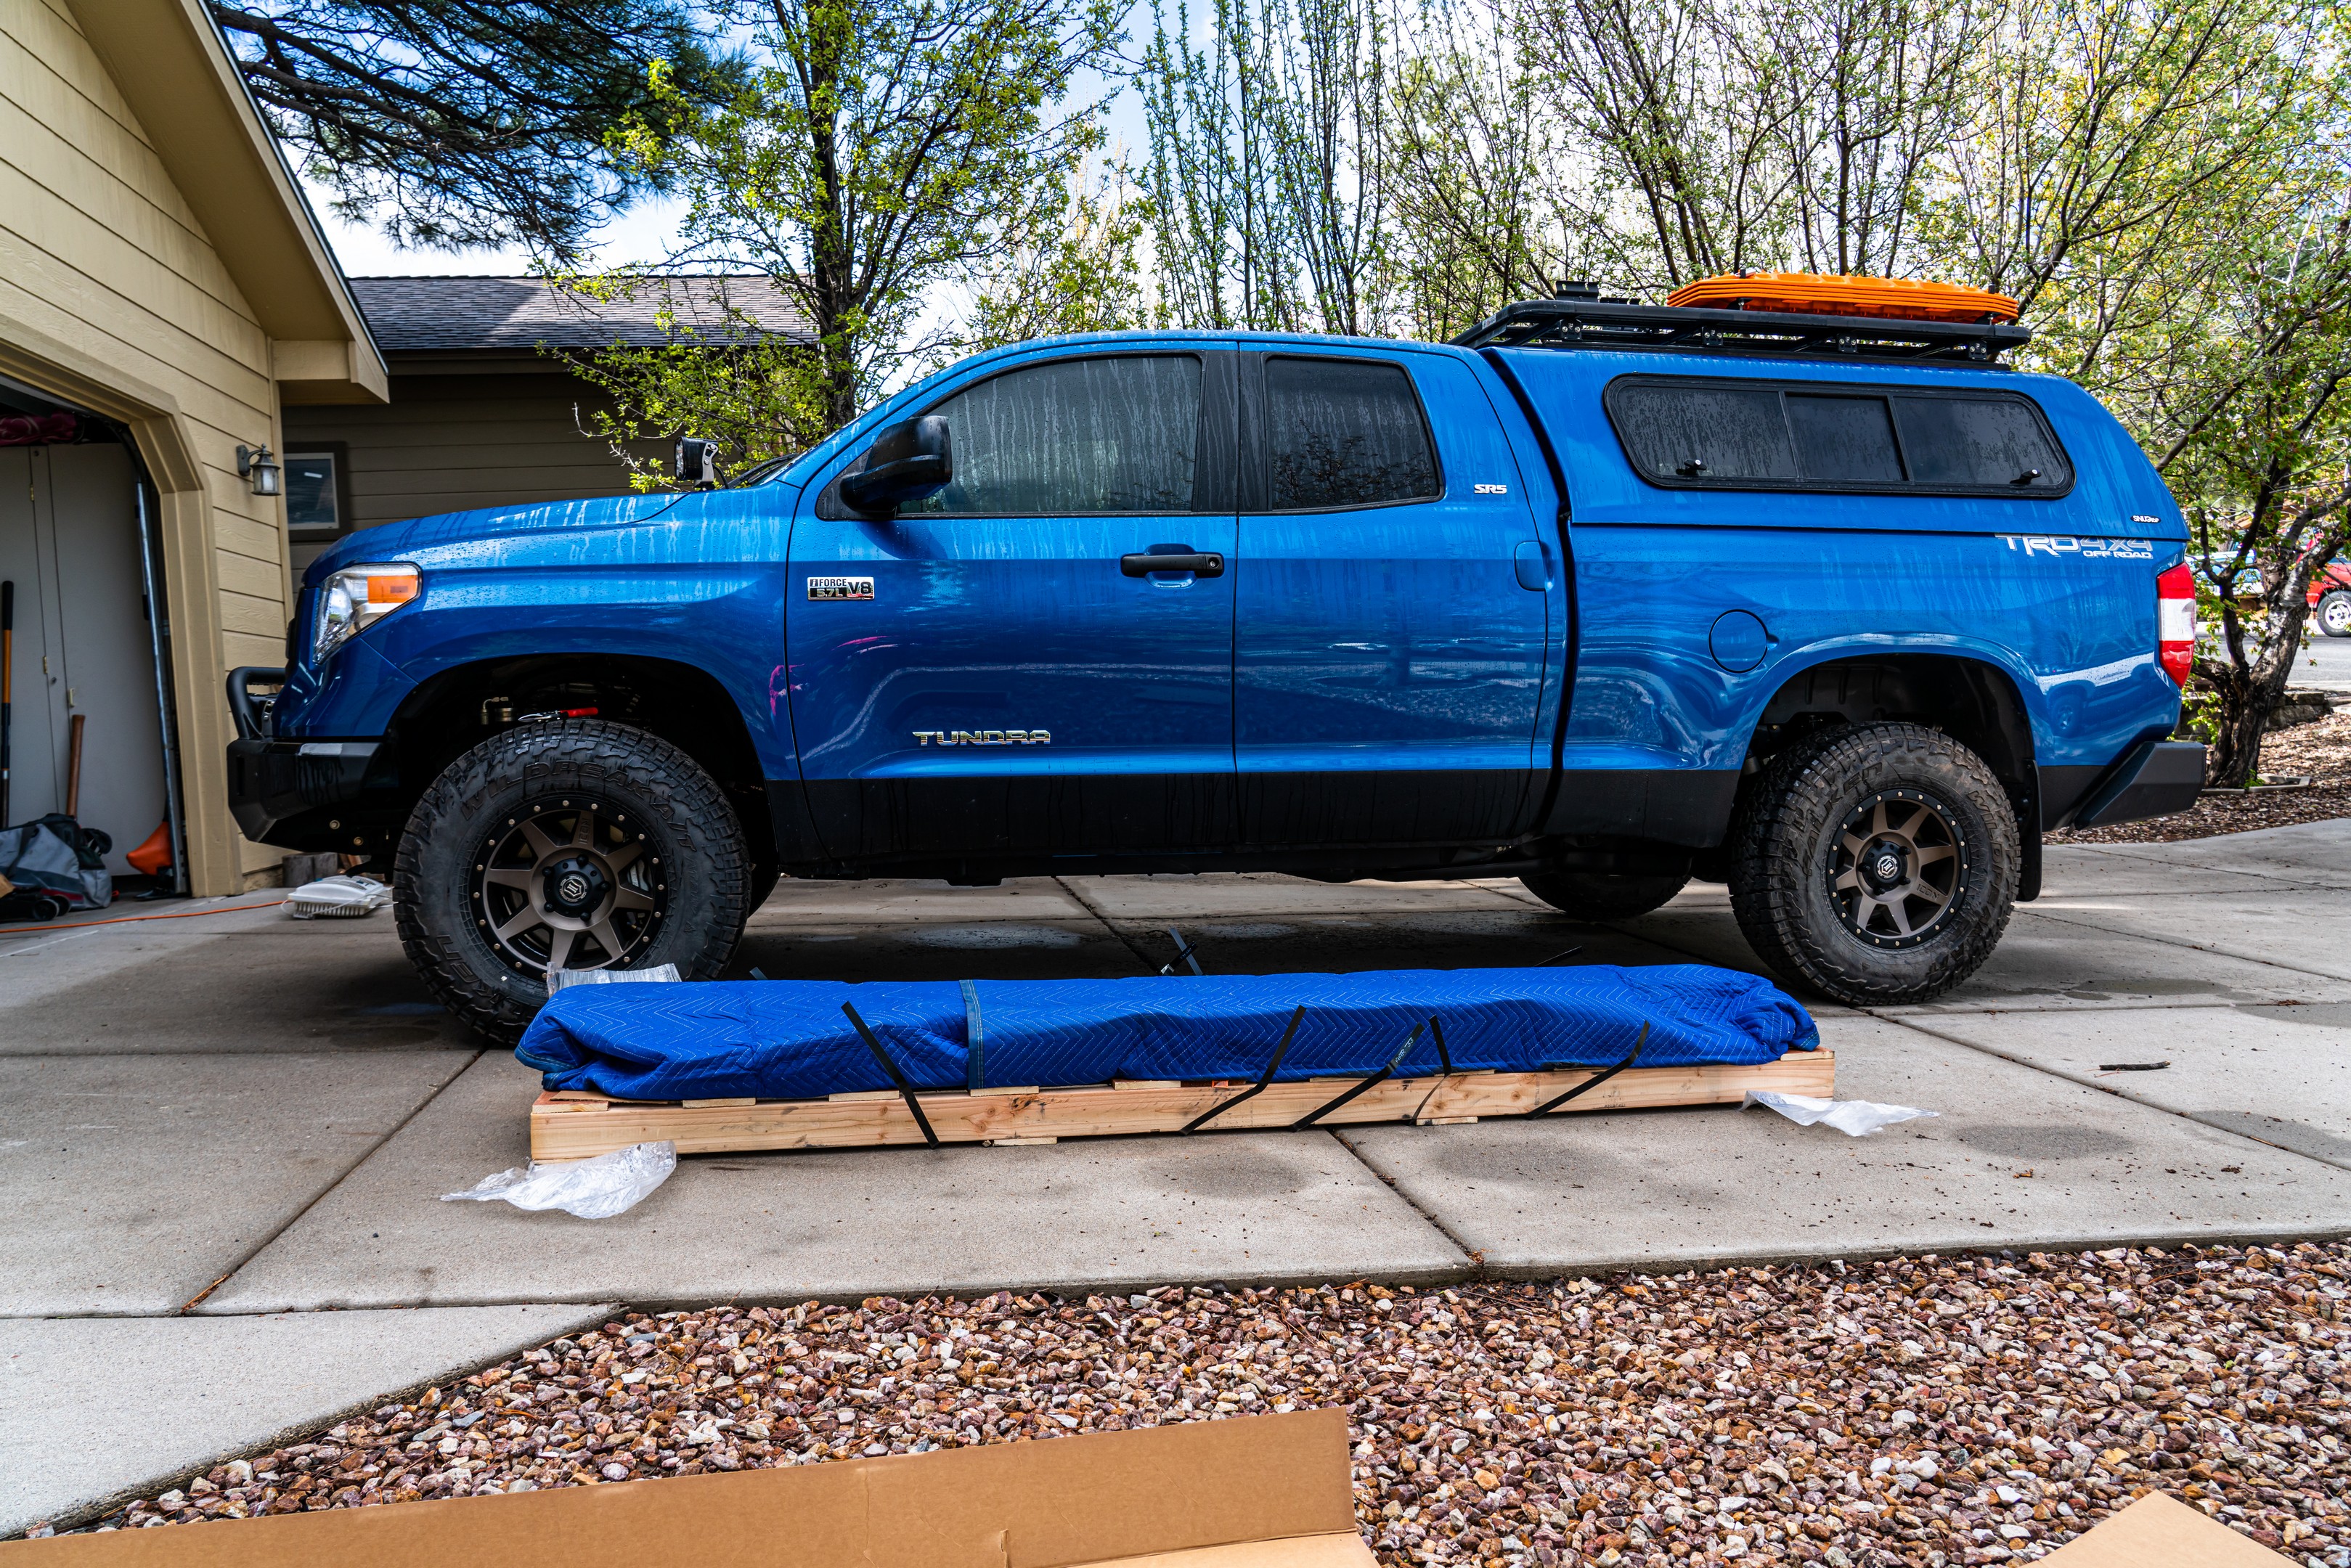
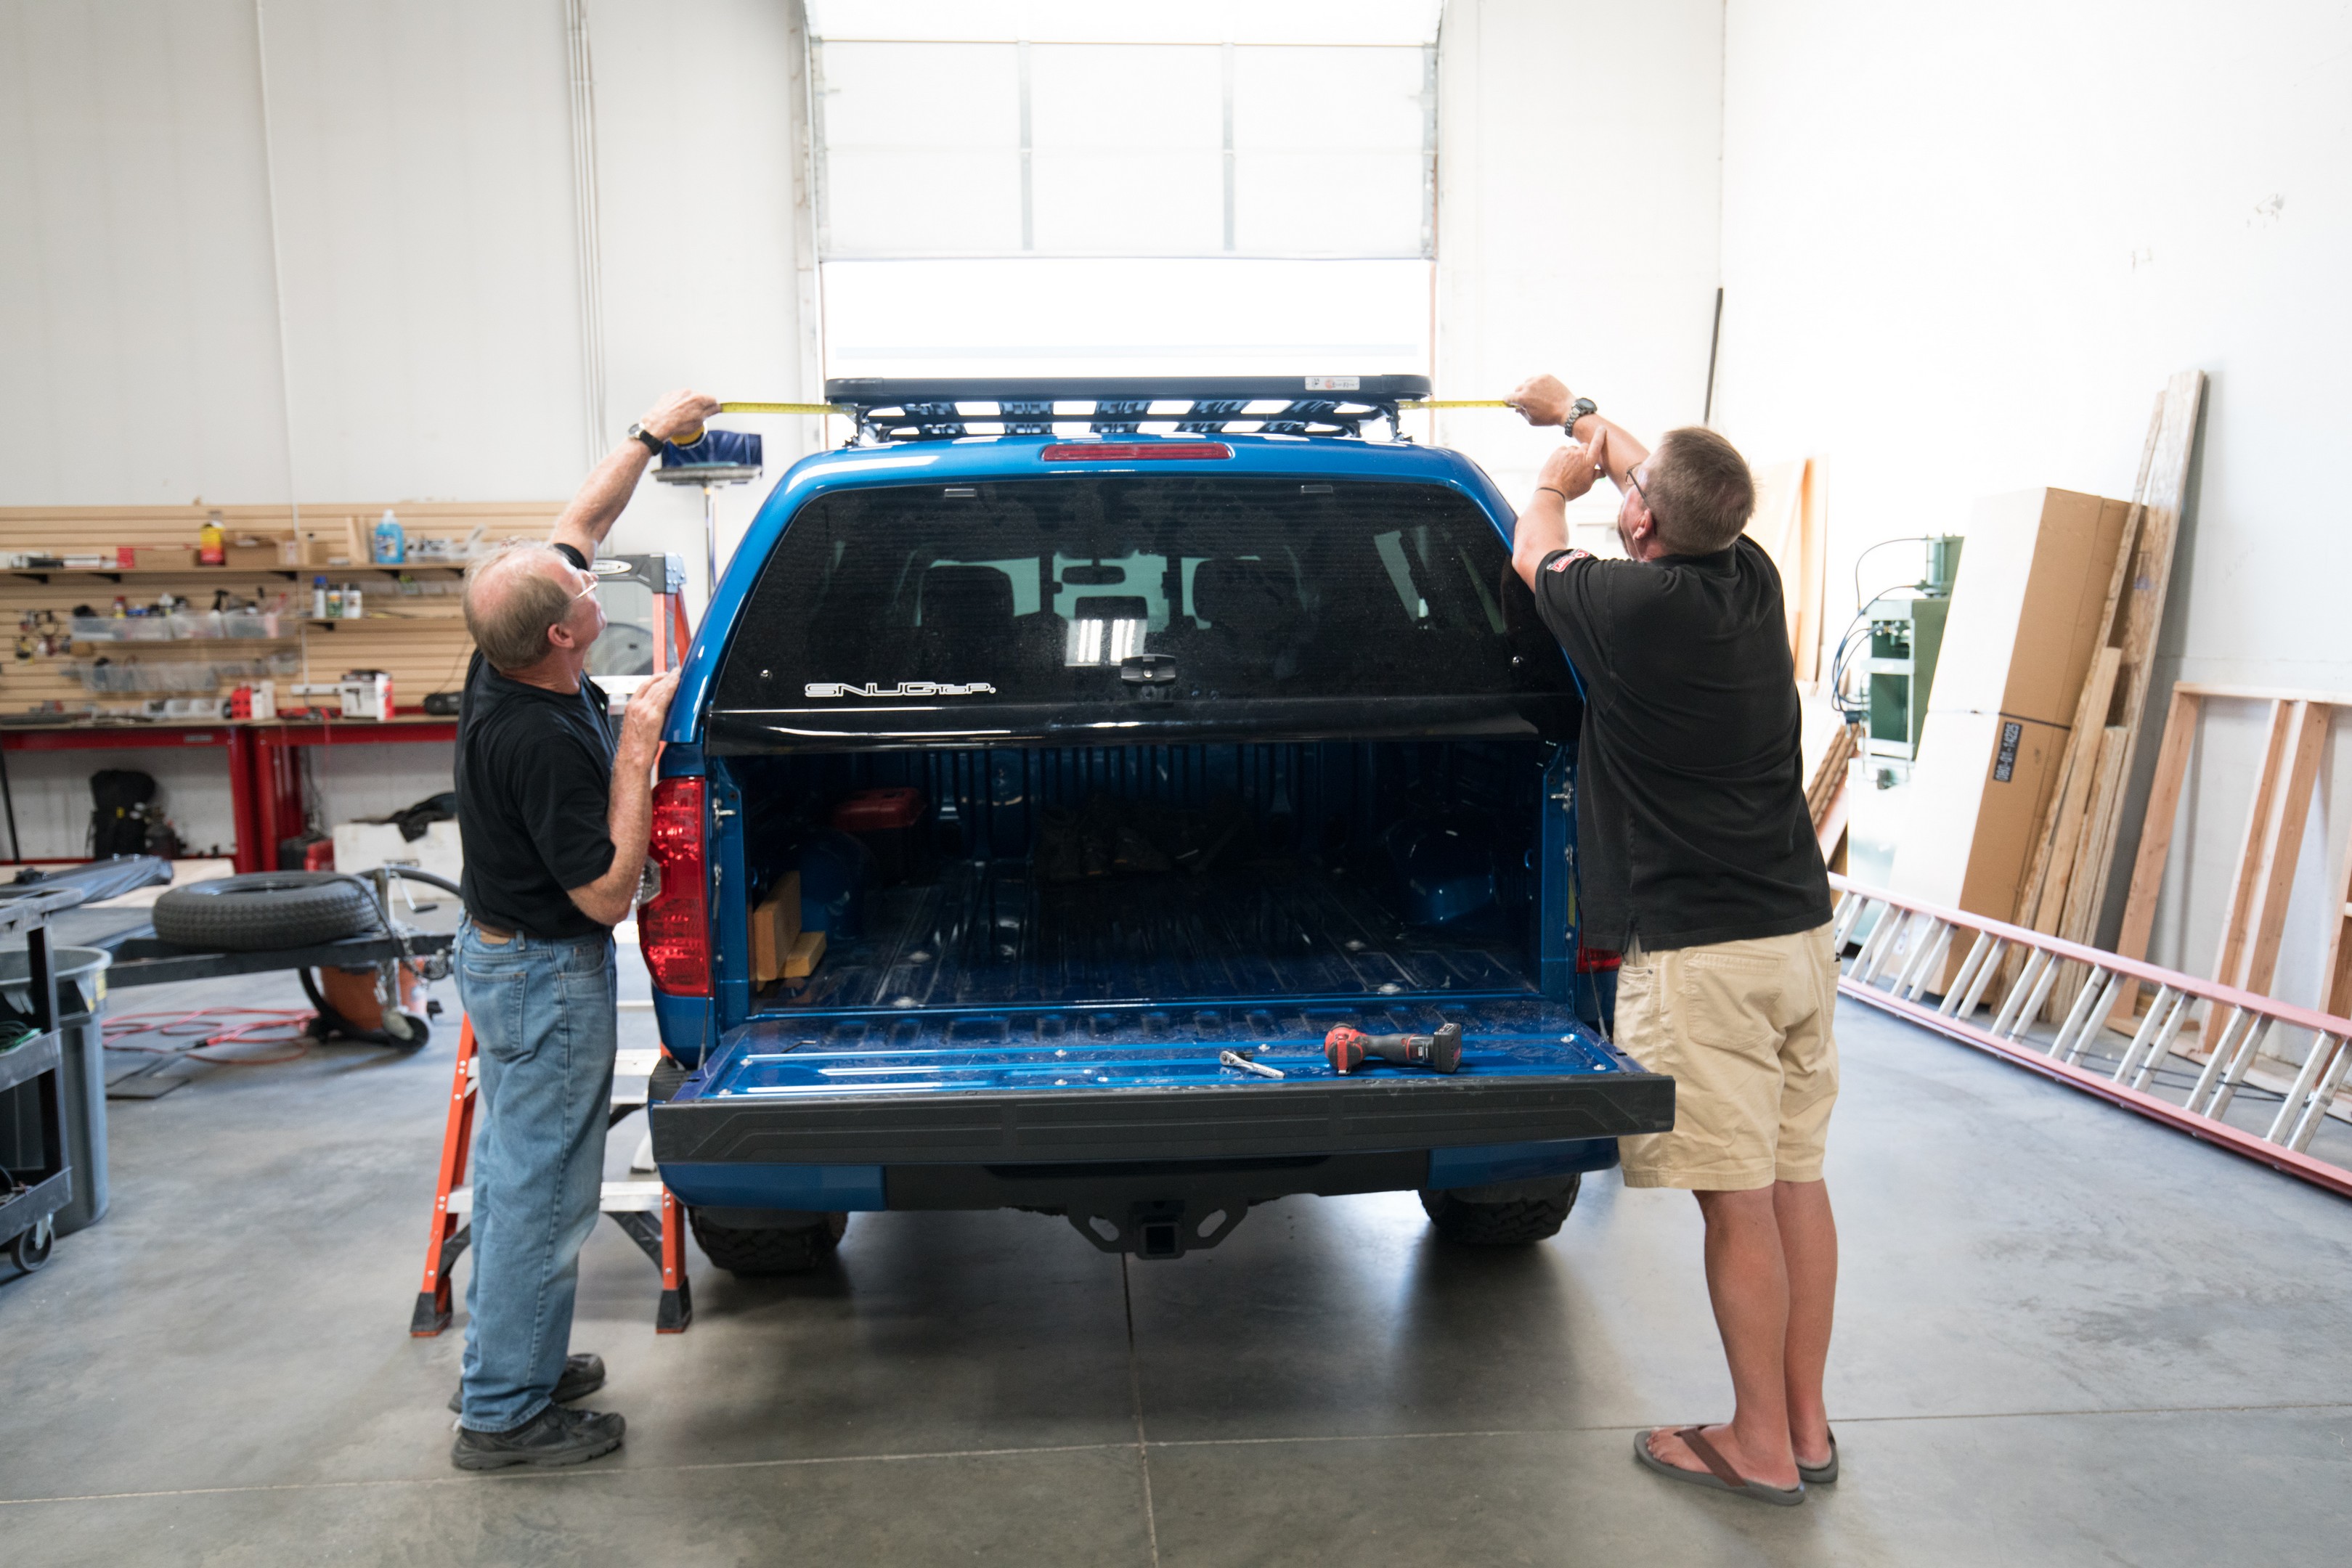
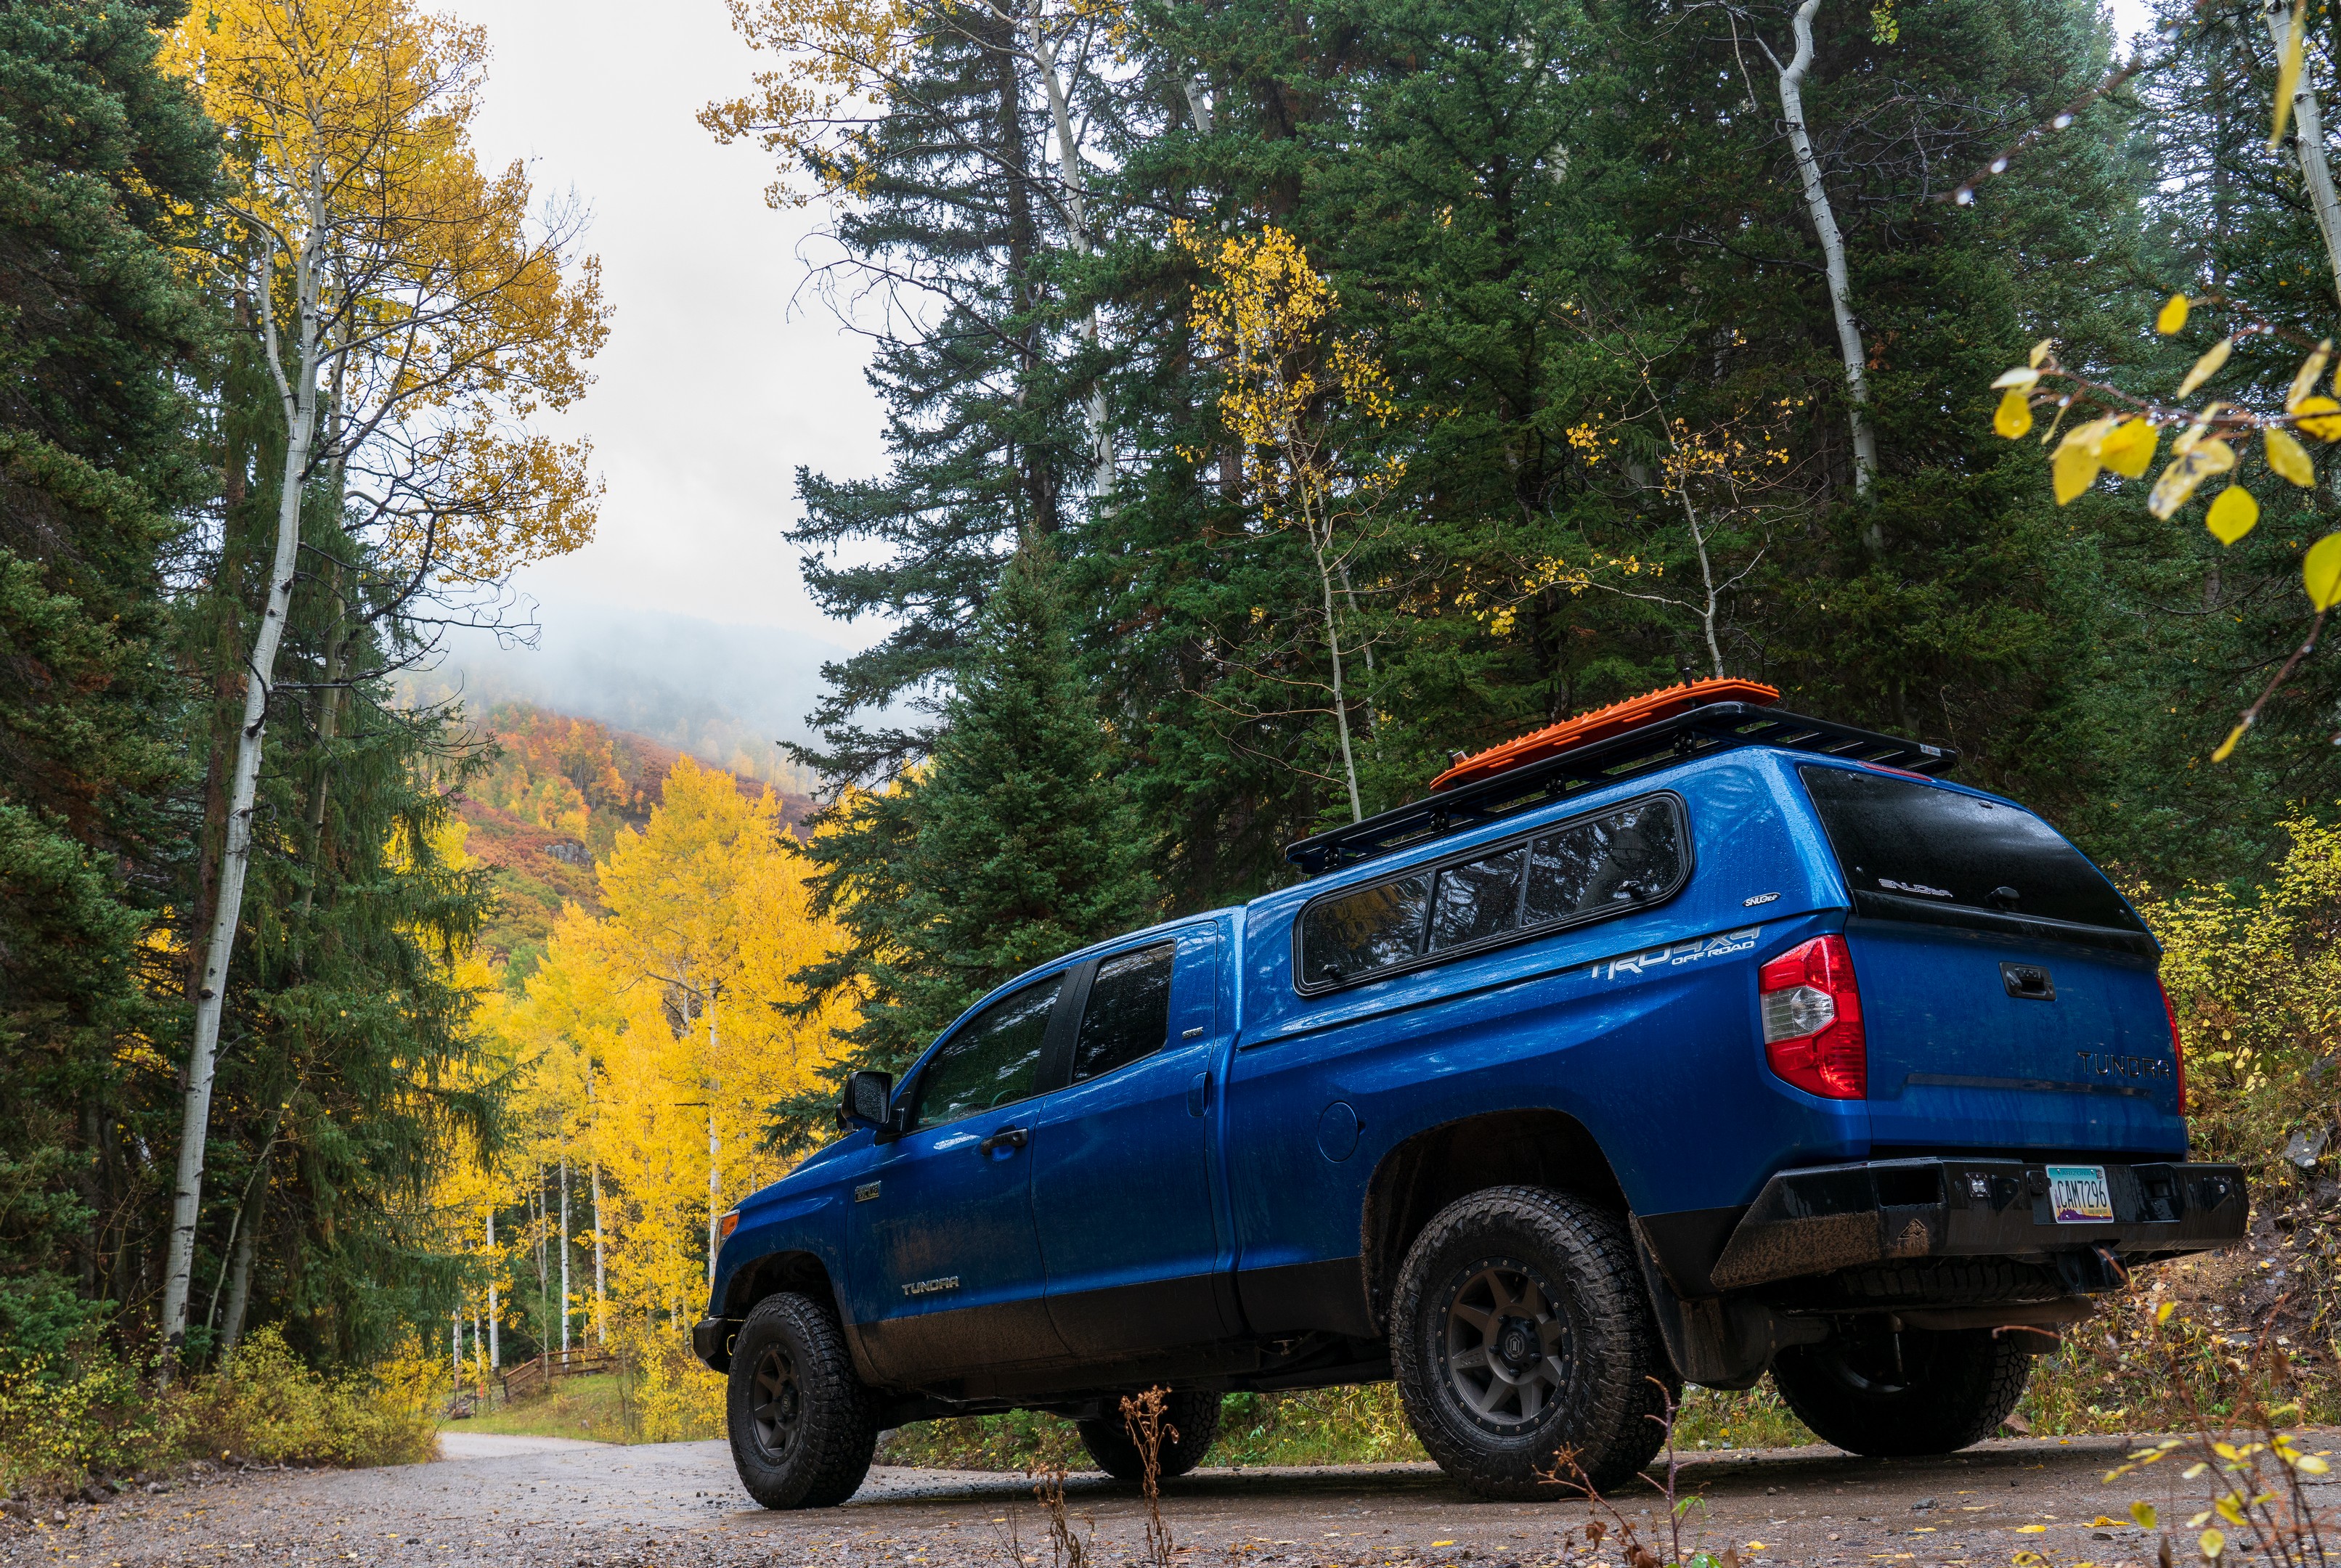
At the suggestion of someone who owns a Tundra nicknamed “Monster,” Project Tundra received a SnugTop Rebel truck cap last year.  Monster’s owner also happens to be in the business of importing the best roof racks around, and so Project Tundra received a K9 roof rack and supporting accouterments from Equipt Expedition Outfitters.  I chose the truck cap and roof rack path over a dedicated system such as a habitat, because I use my truck for so much more than adventure travel style trips, and as such I needed to be able to remove the truck cap with out using serious lifting equipment.  In a matter of minutes, I can have the truck cap off so I can carry dirtbikes or snowbikes, or do other truck things.  When the truck cap is on, it’s actually a very versatile option too.

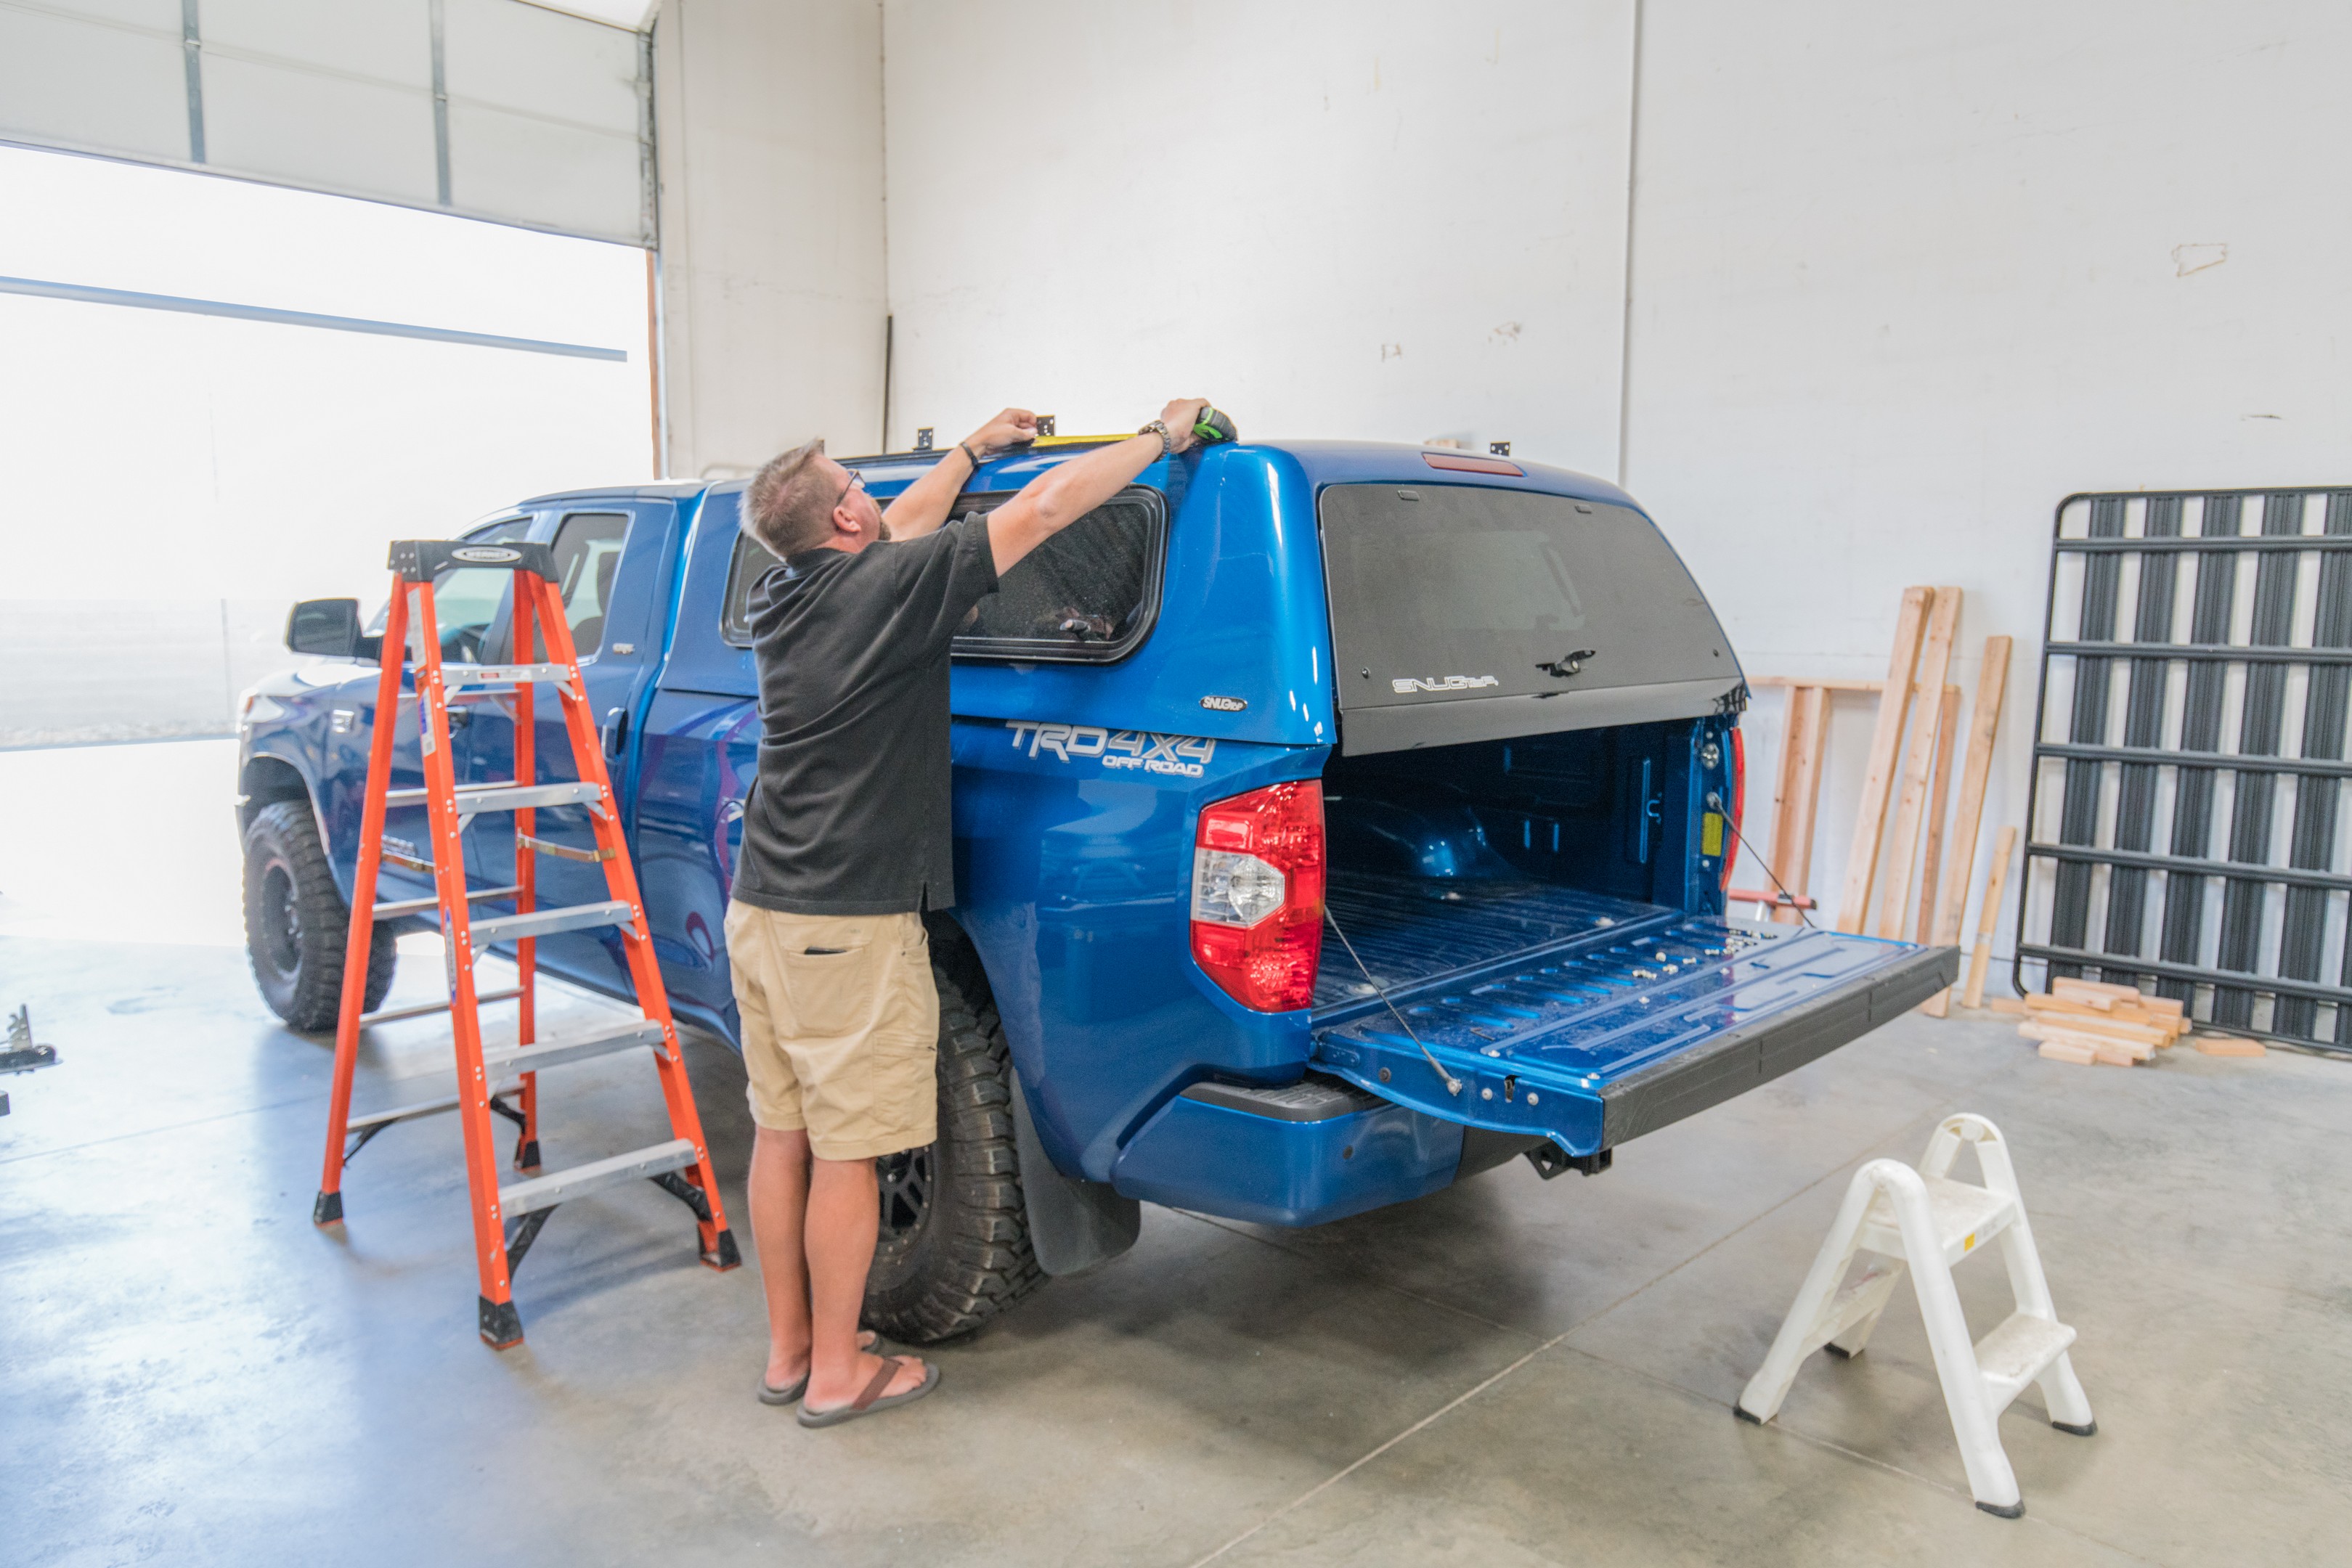
The SnugTop Rebel truck cap seals very well against the elements, which means that sensitive equipment that doesn’t like dust or other elements can safely ride in the back, and it provides more than 6.5 feet of sleeping space that I can dive into when I’m travelling solo.  The win-doors on the side allow for easy venting, and easy access to gear that’s not easily accessible from the back and the whole place locks up for easy to secure storage.  I don’t understand why truck caps aren’t more popular in the adventure travel industry.  I’d much rather have a securable, element-proof cover over my truck bed than a couple of bars to support an RTT and have to keep everything in tubs… But that’s just me.

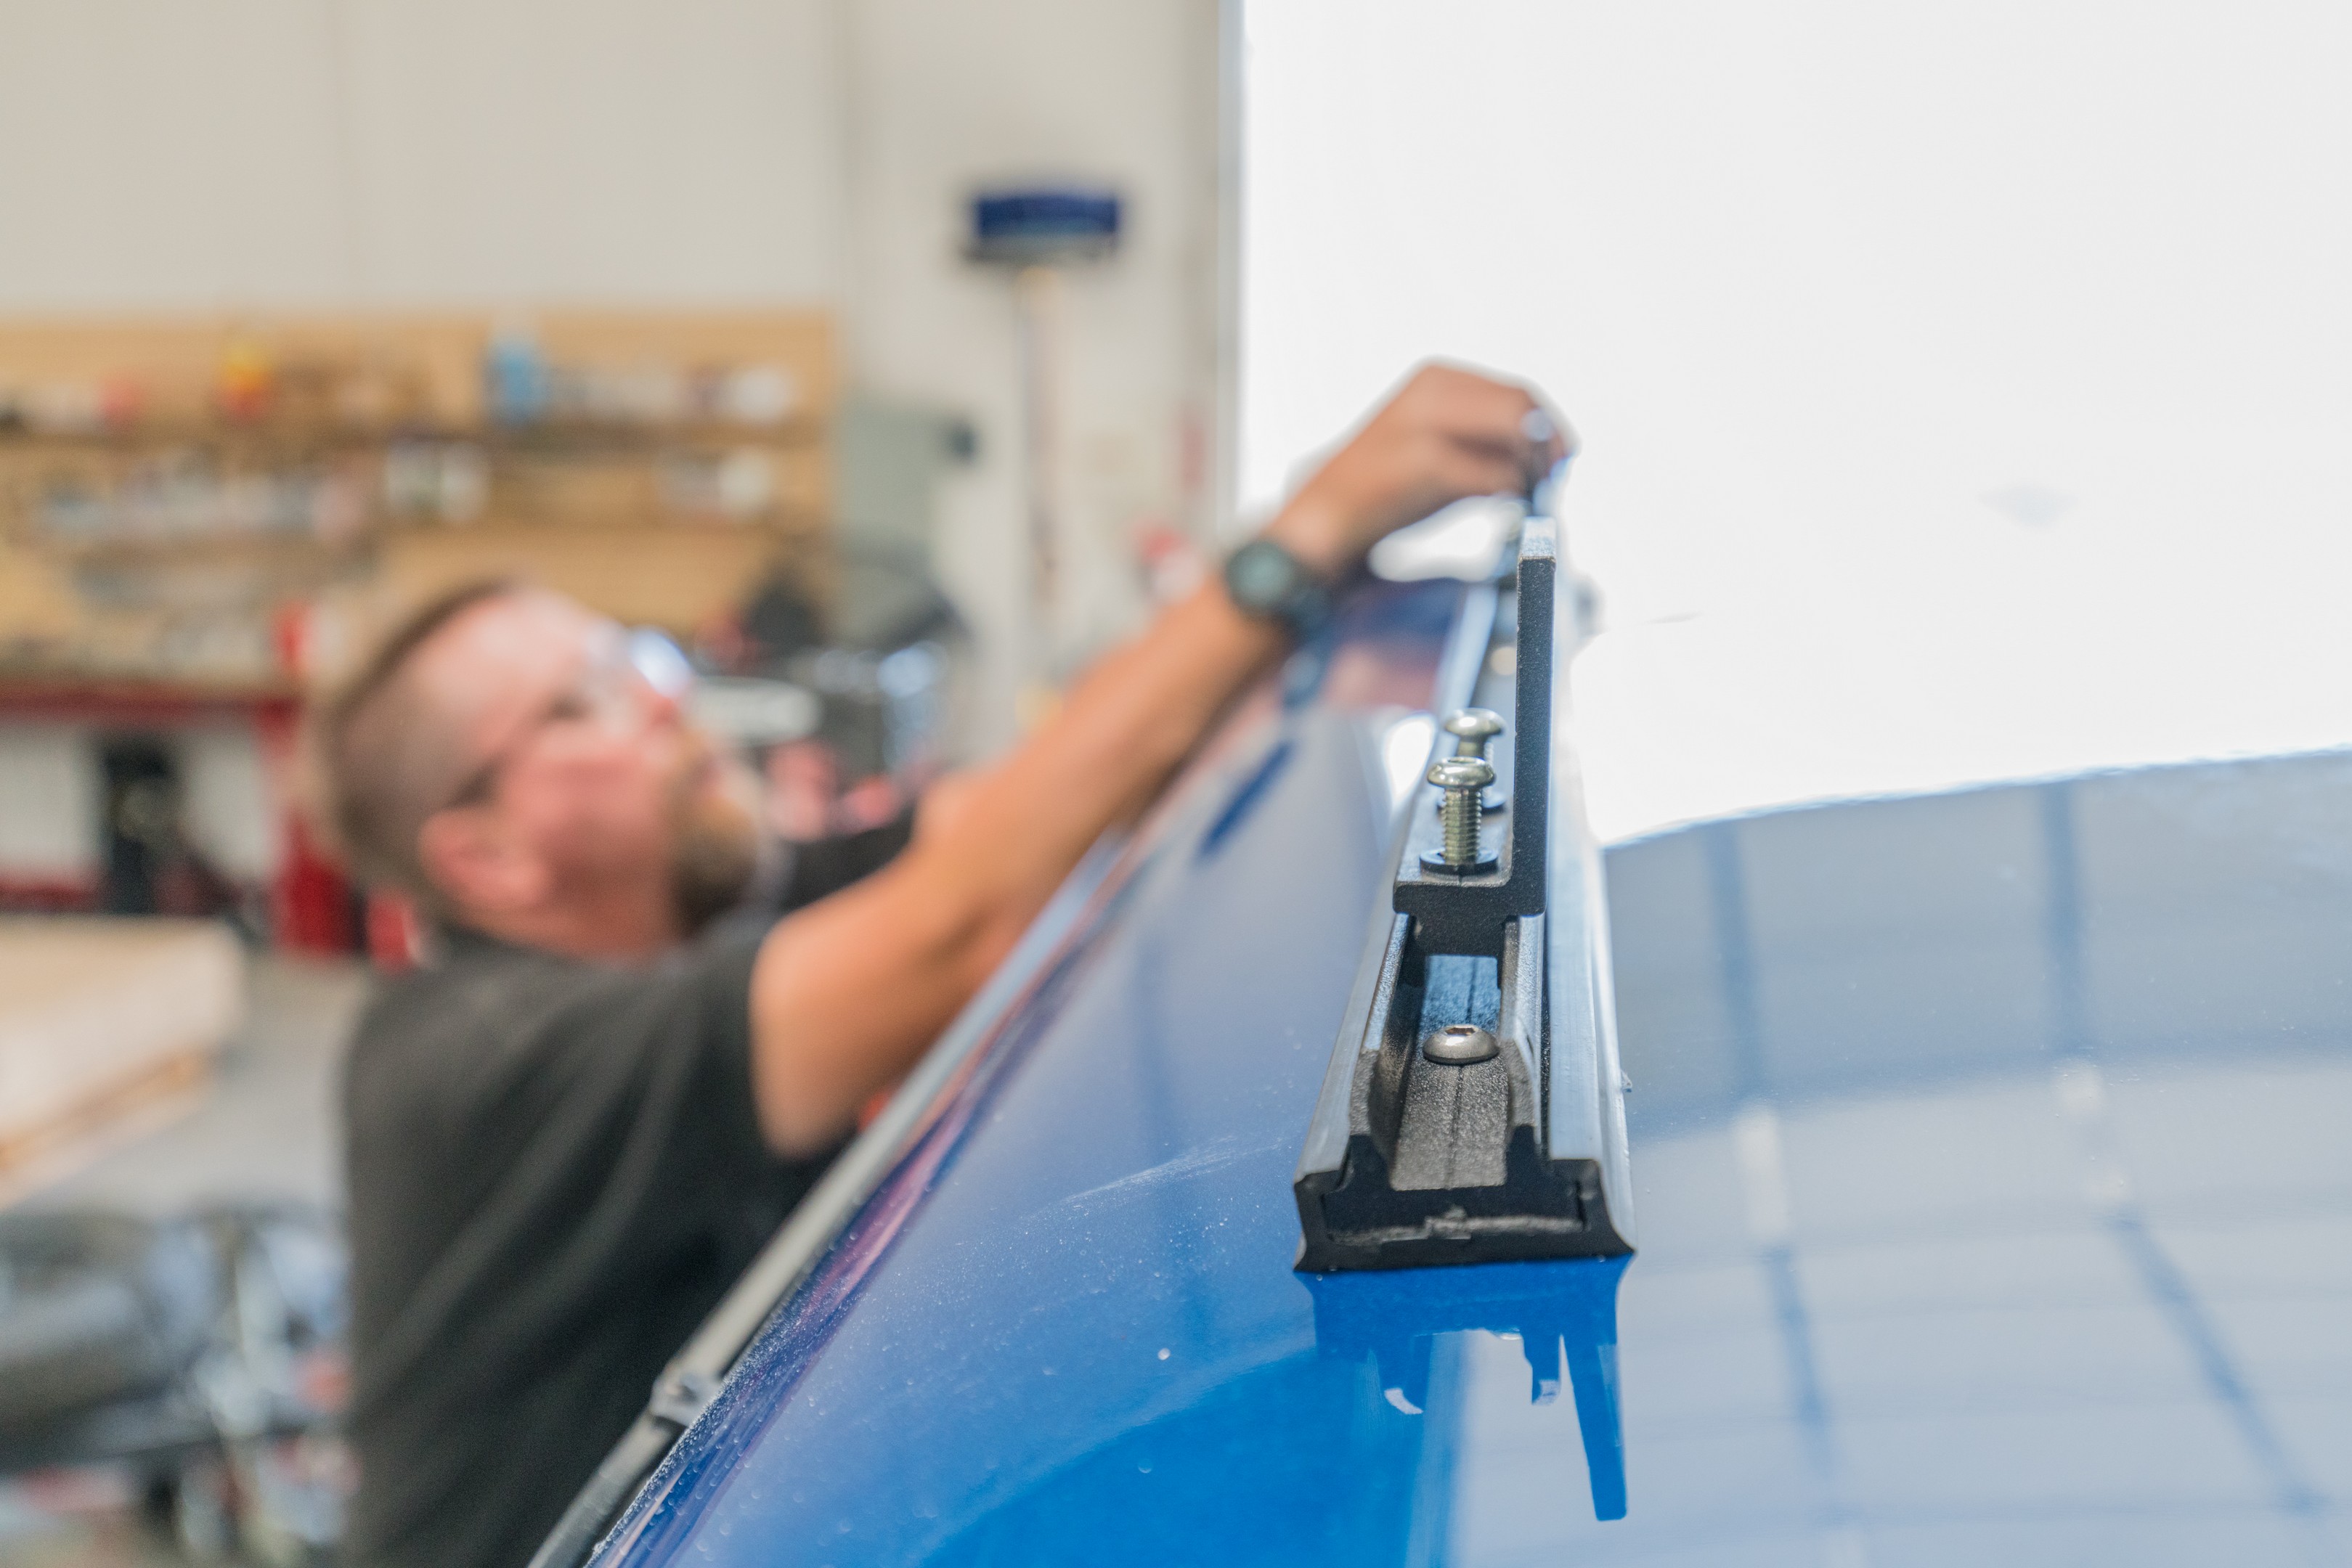
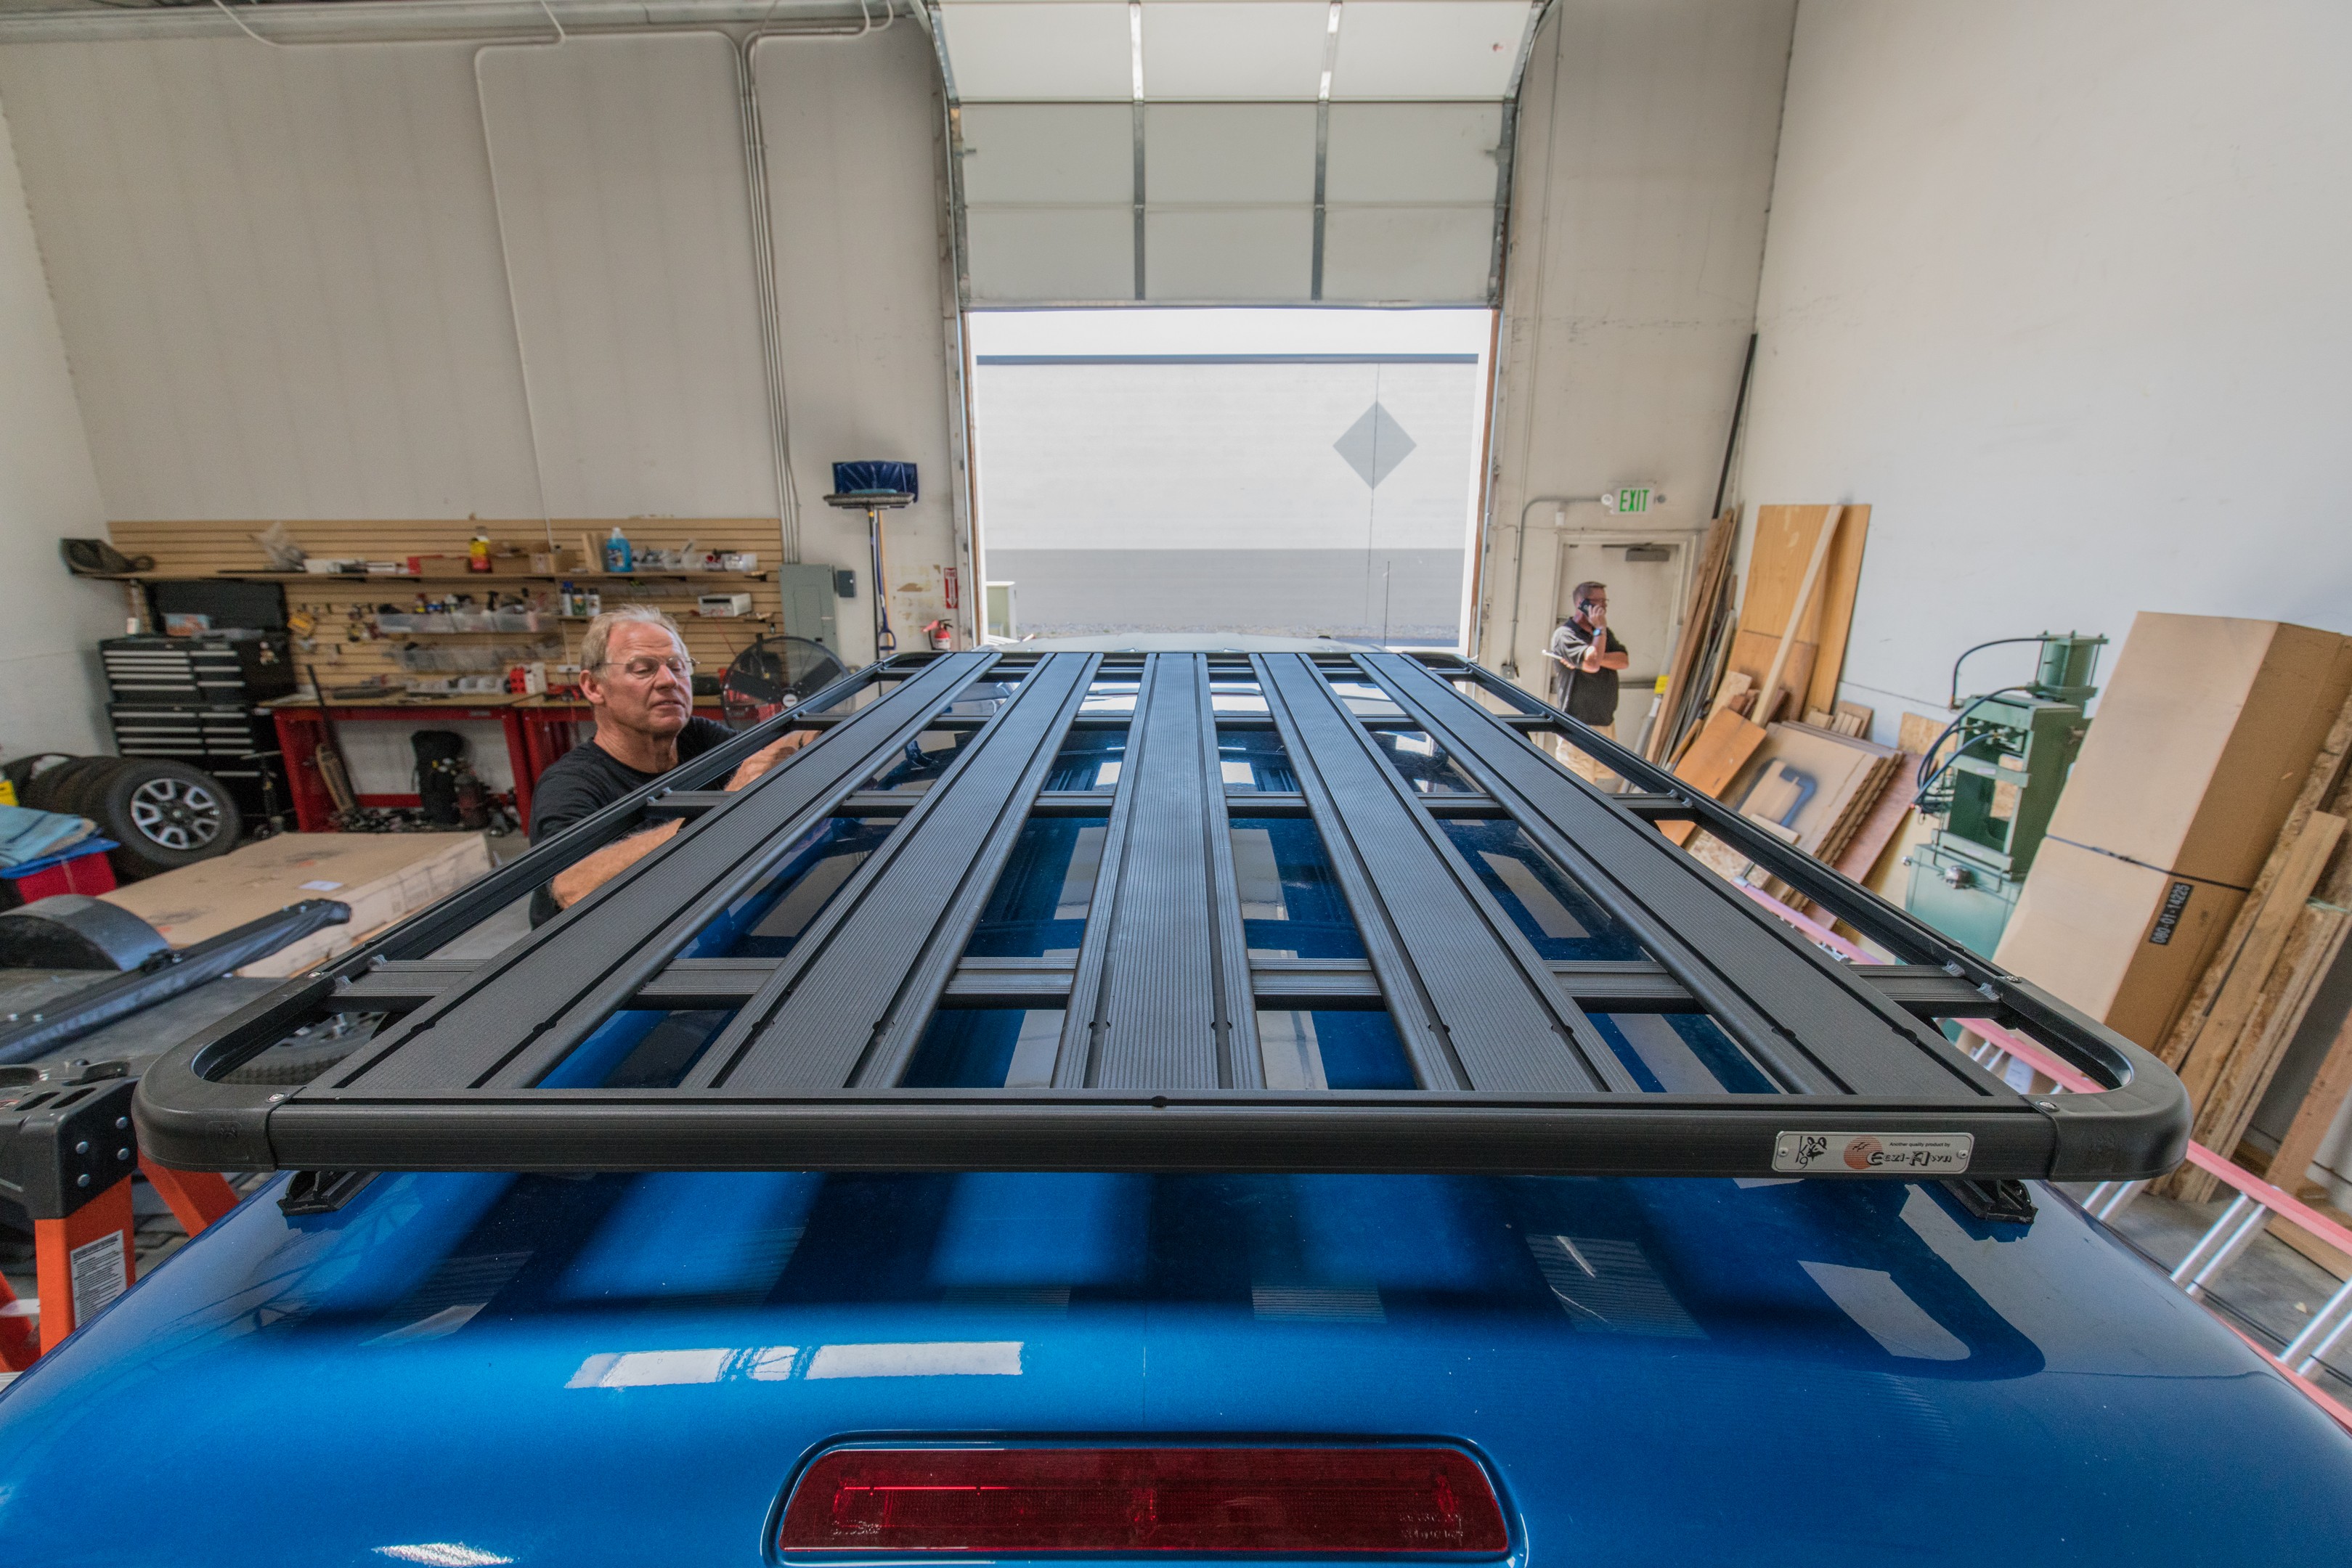
Project Tundra’s K9 roof rack is just as awesome too.  If you’ve never seen a Equipt’s Eazi-Awn K9 rack in person, you’ll notice that K9 racks are a cut above, starting with the tracks that the rack mounts into.  Where some other companies use a light duty steel, Eezi-Awn uses a lightweight, beefcake aluminum extrusion, that actually looks like it could hold onto a roof rack.  Where other companies use plastic towers, K9 racks have all alloy towers that link directly to the roof rack, which is a single piece – no bolts holding the works together here.  The roof rack has numerous tracks that will accept M8 or M6 hex head screws so you can mount all kinds of things on the top, or on the sides, or just about anywhere you need to position your gear.

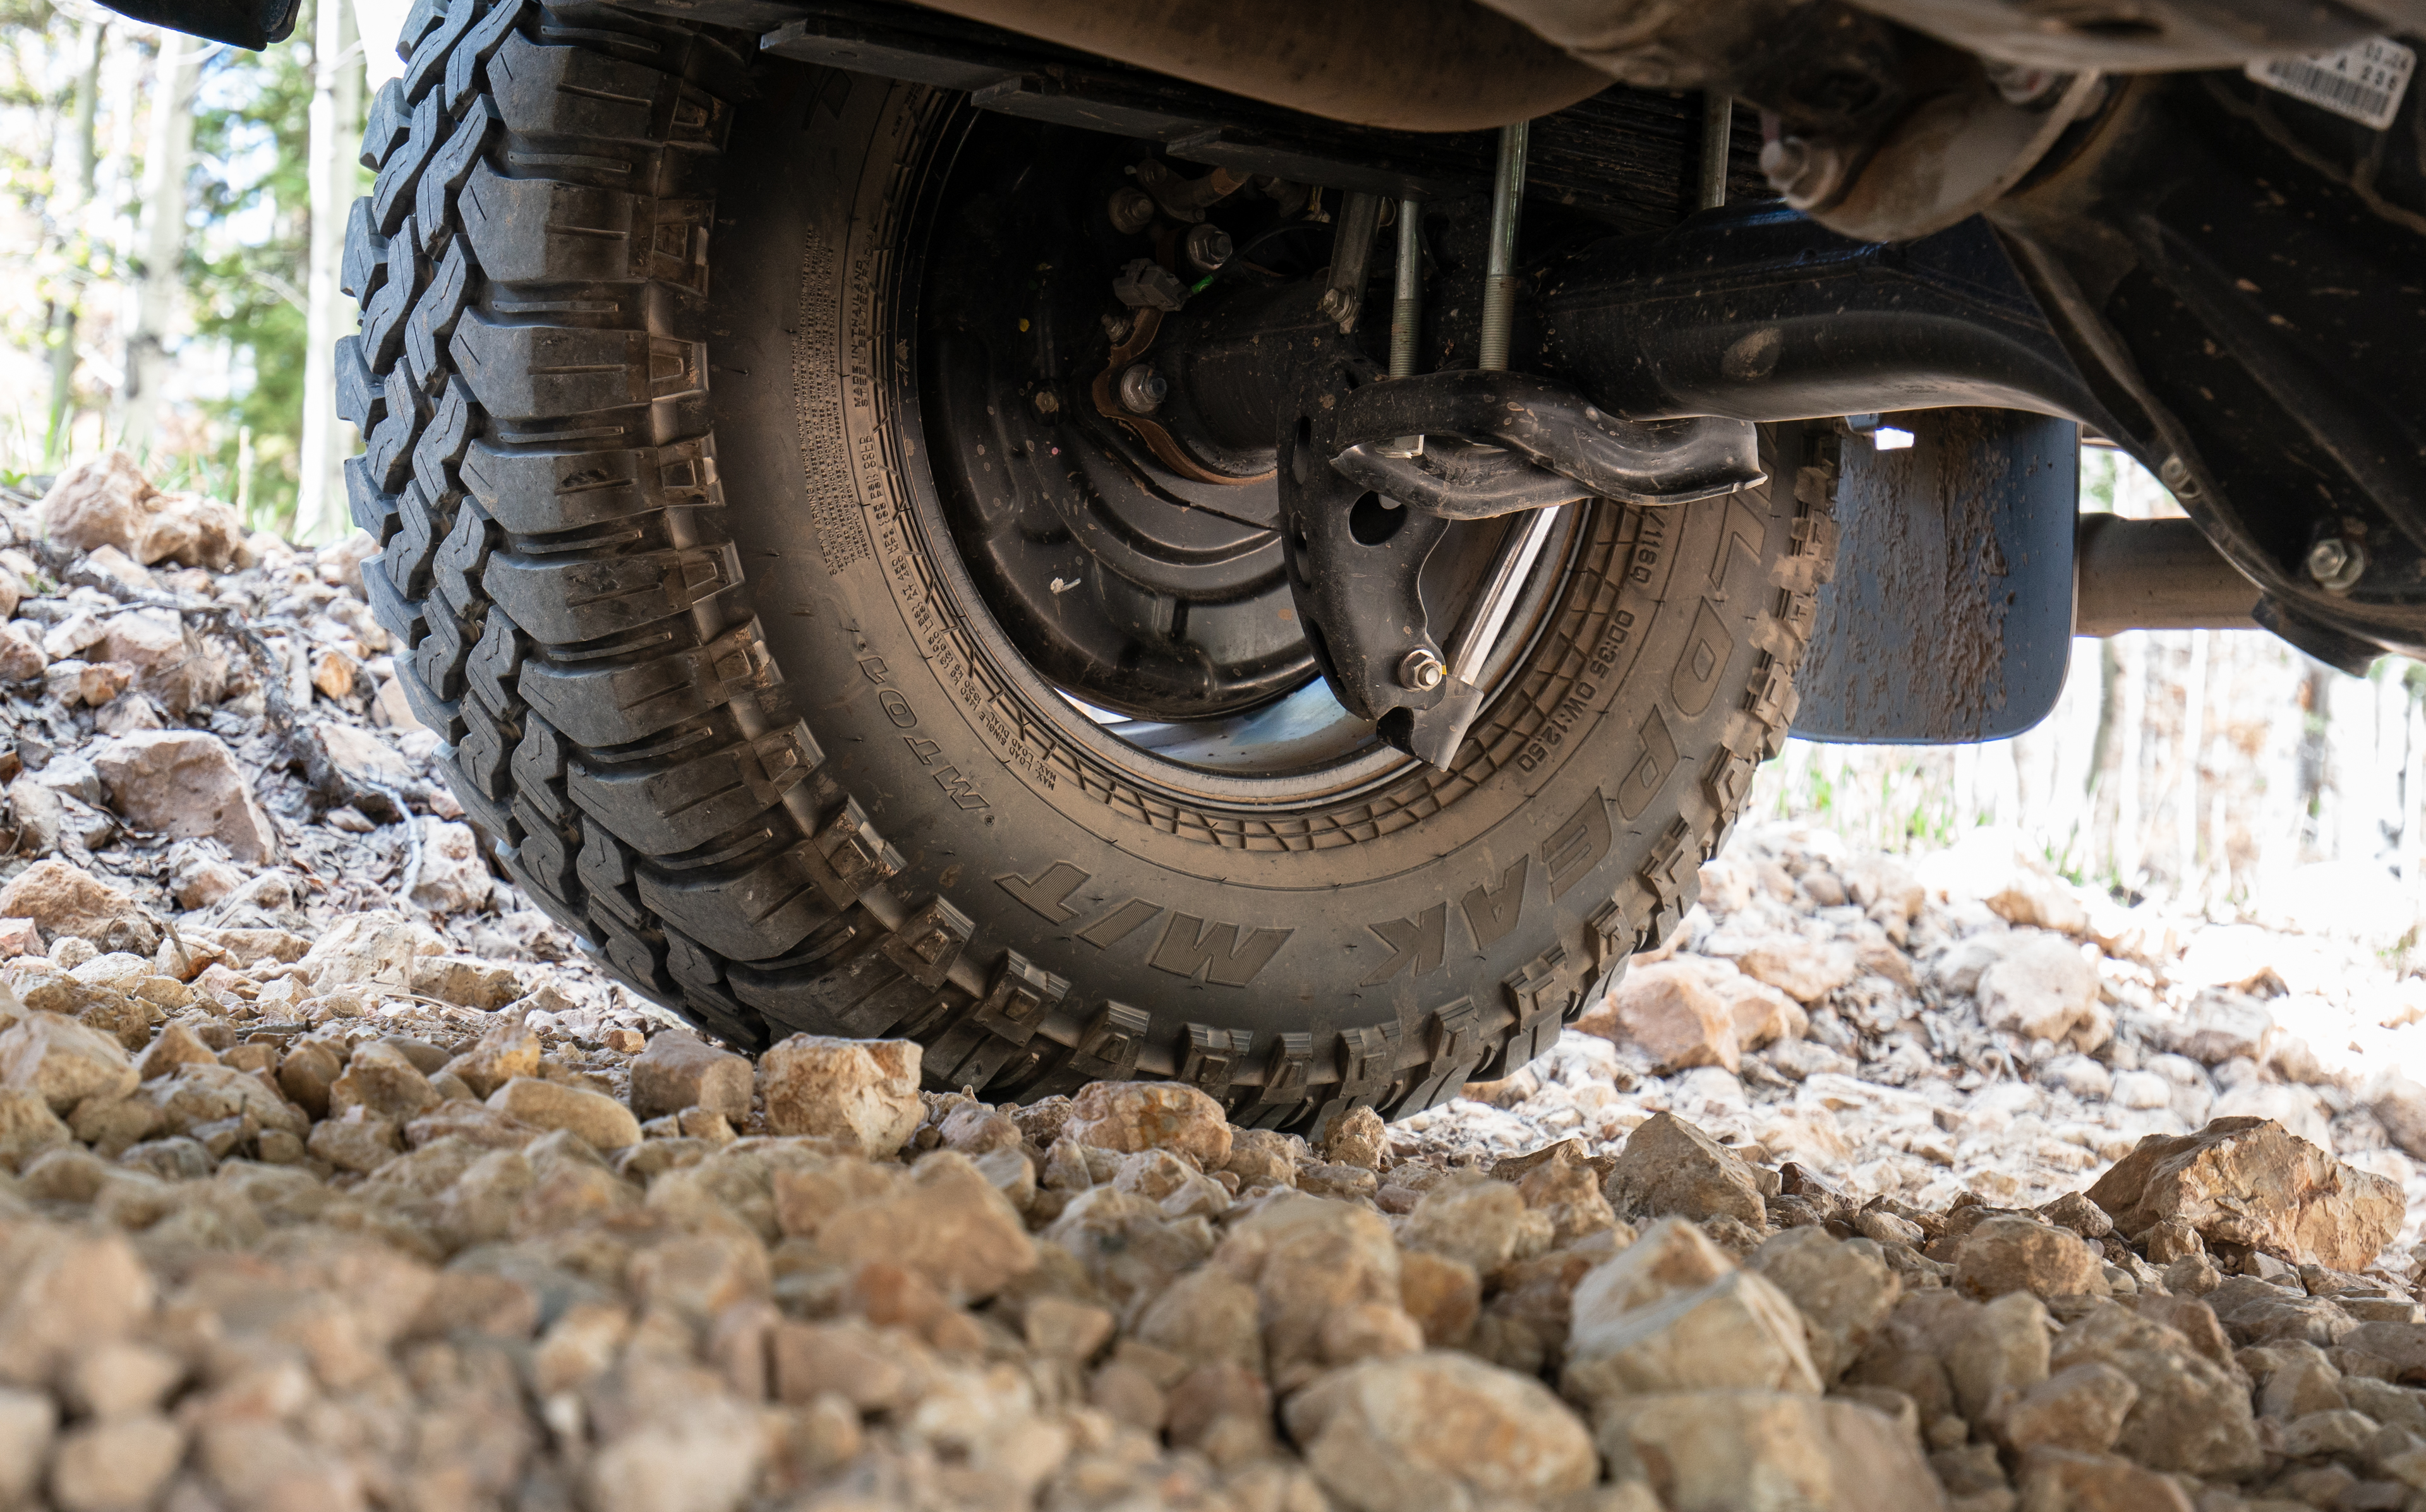
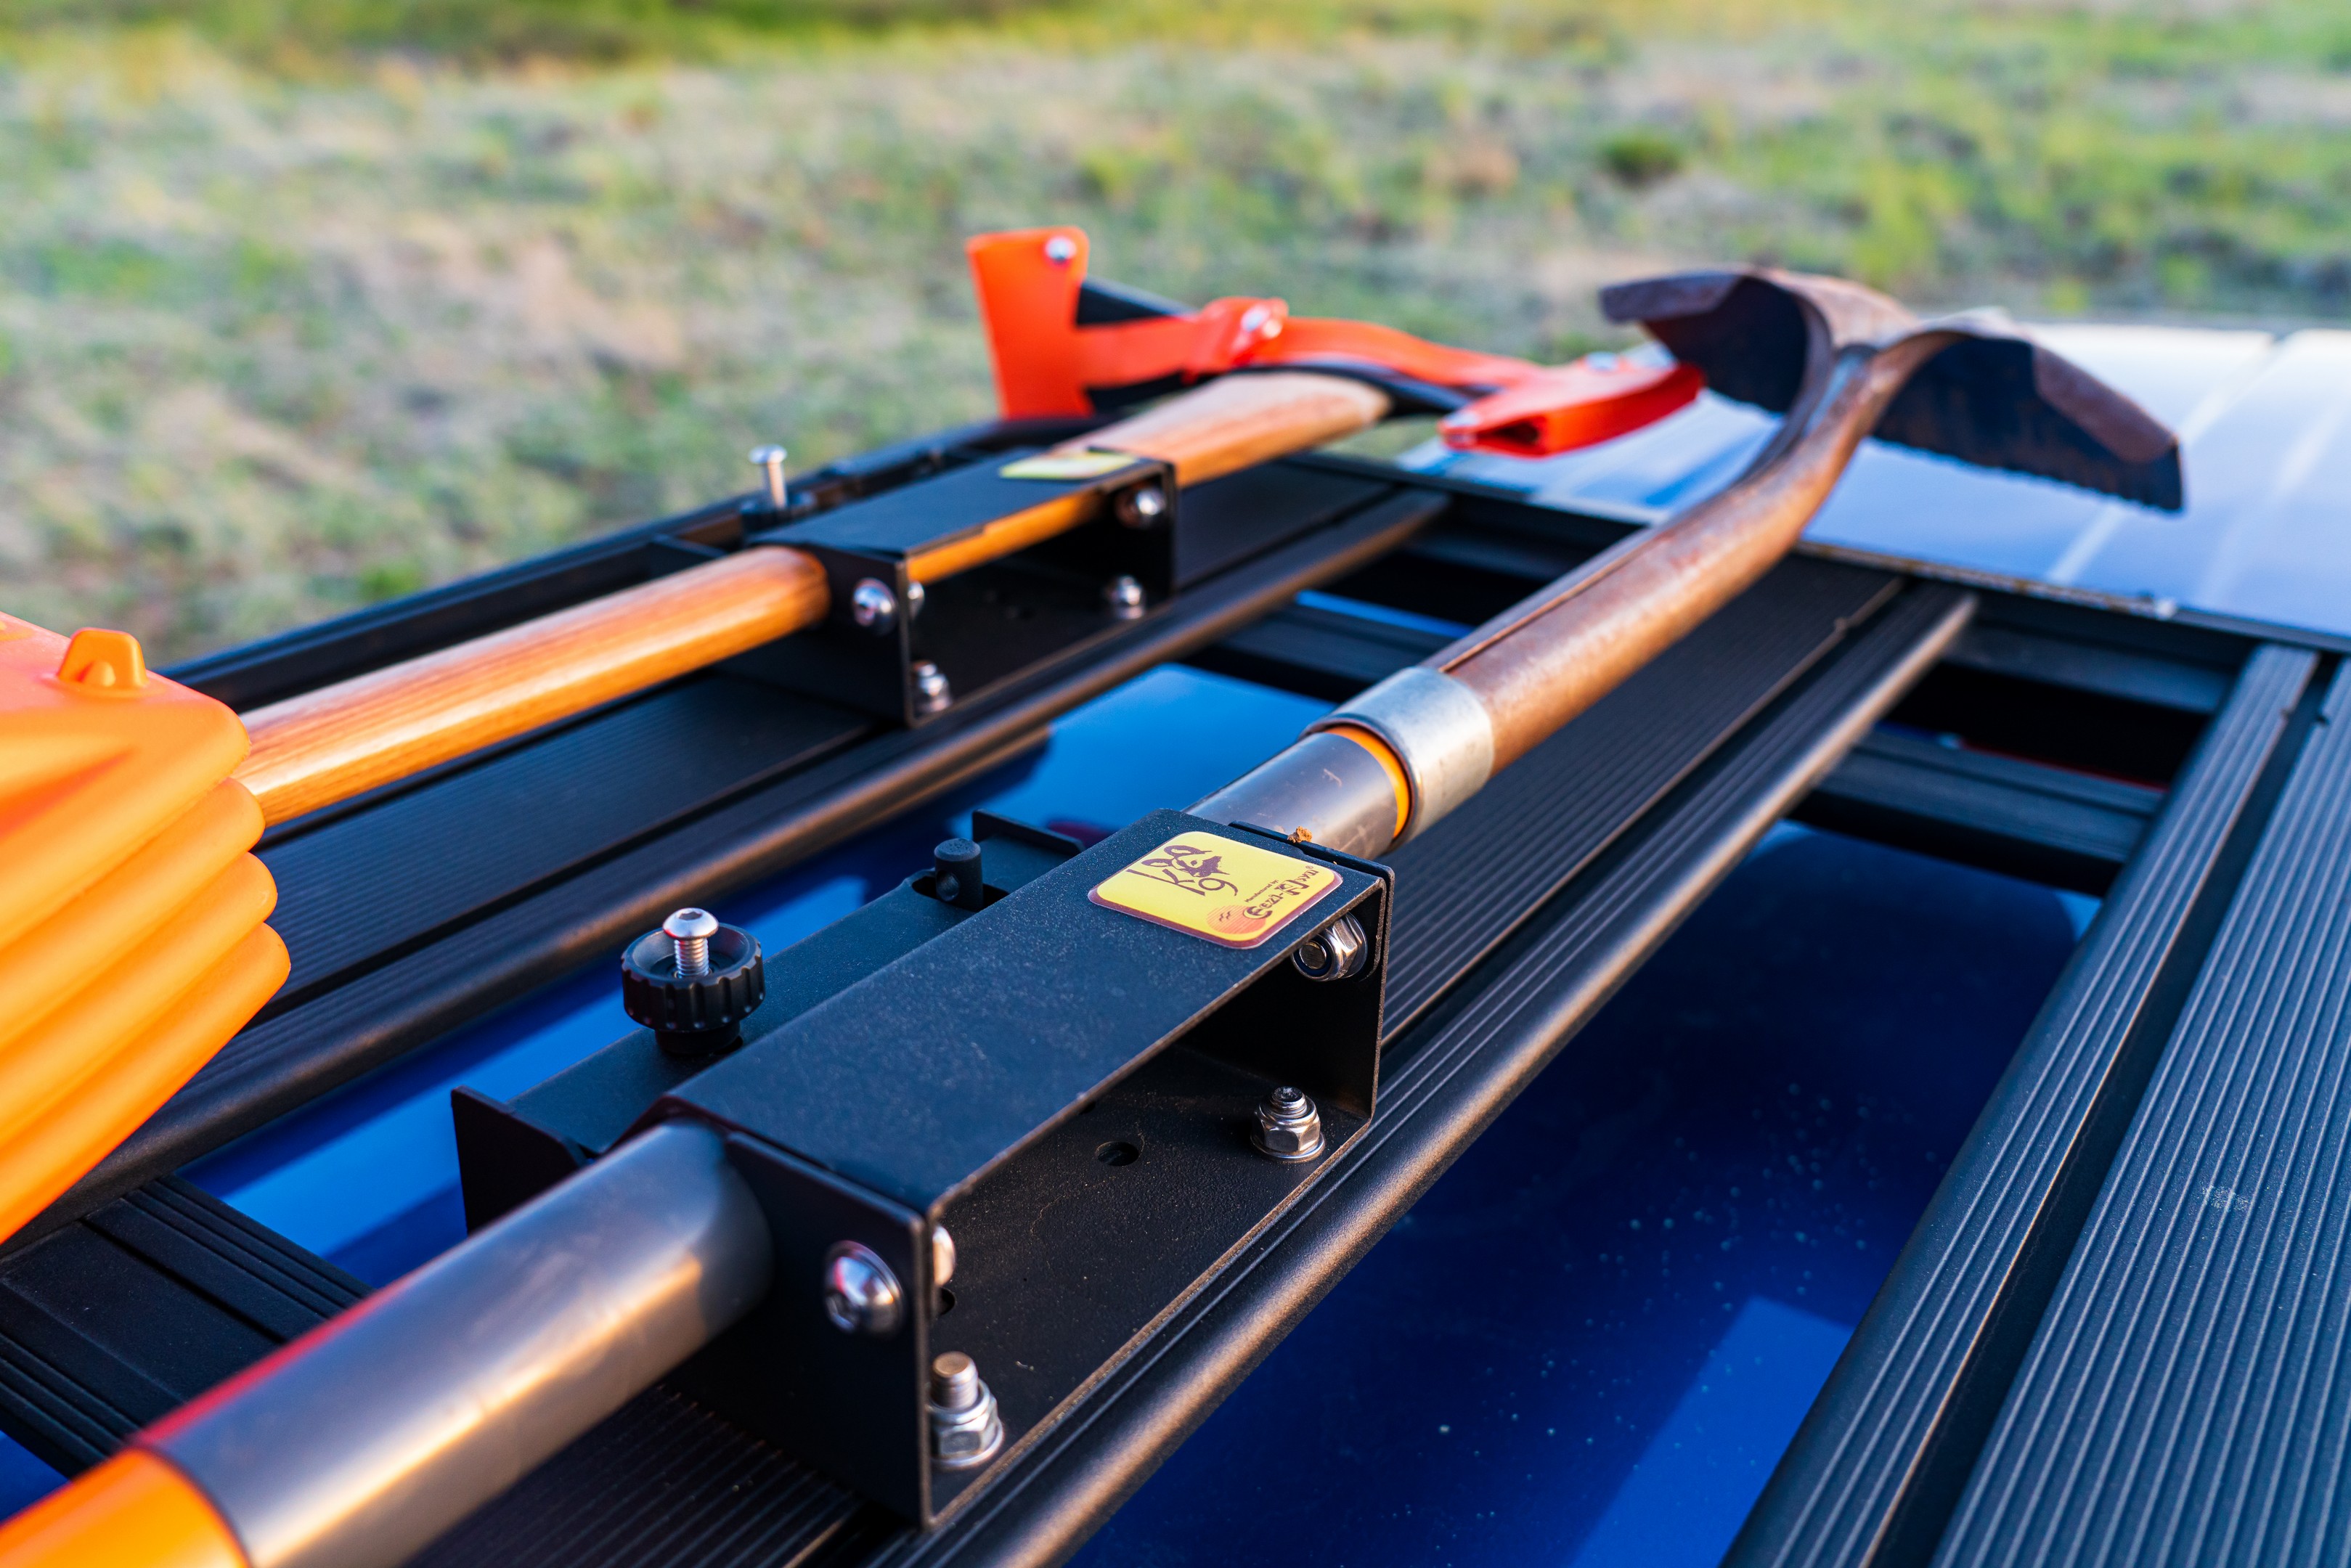
Standard loadout for Project Tundra’s K9 rack includes four MaxTrax, a shovel and Pulaski, and an Eezi-Awn Swift awning mounted on the passenger side.  This leaves half of the rack for mounting whatever else needs to be carried, from inflated SUPs to firewood, to a saw, or a ladder, or any other big bulky thing – the K9 rack can securely and safely carry it.  I will point out that I’m not going to carry a spare up there, mainly because you can tuck a 35-inch spare into the factory location on a Tundra, and I want to keep the center of mass as low in the truck as possible.  I’ve carried all kinds of things on that rack, and I’ve never once found myself wanting for a mounting option.  From quickly cam-strapping something around the bars, to taking the time to install eye bolts, the rack can be configured any way you want it – and that’s the real beauty of it.  I’ve certainly used and abused the rack in the time that I’ve had it, and I haven’t even noticed so much as a bolt coming loose – and I’ve seen other racks fall apart or even fail on the trail.

ONWARD

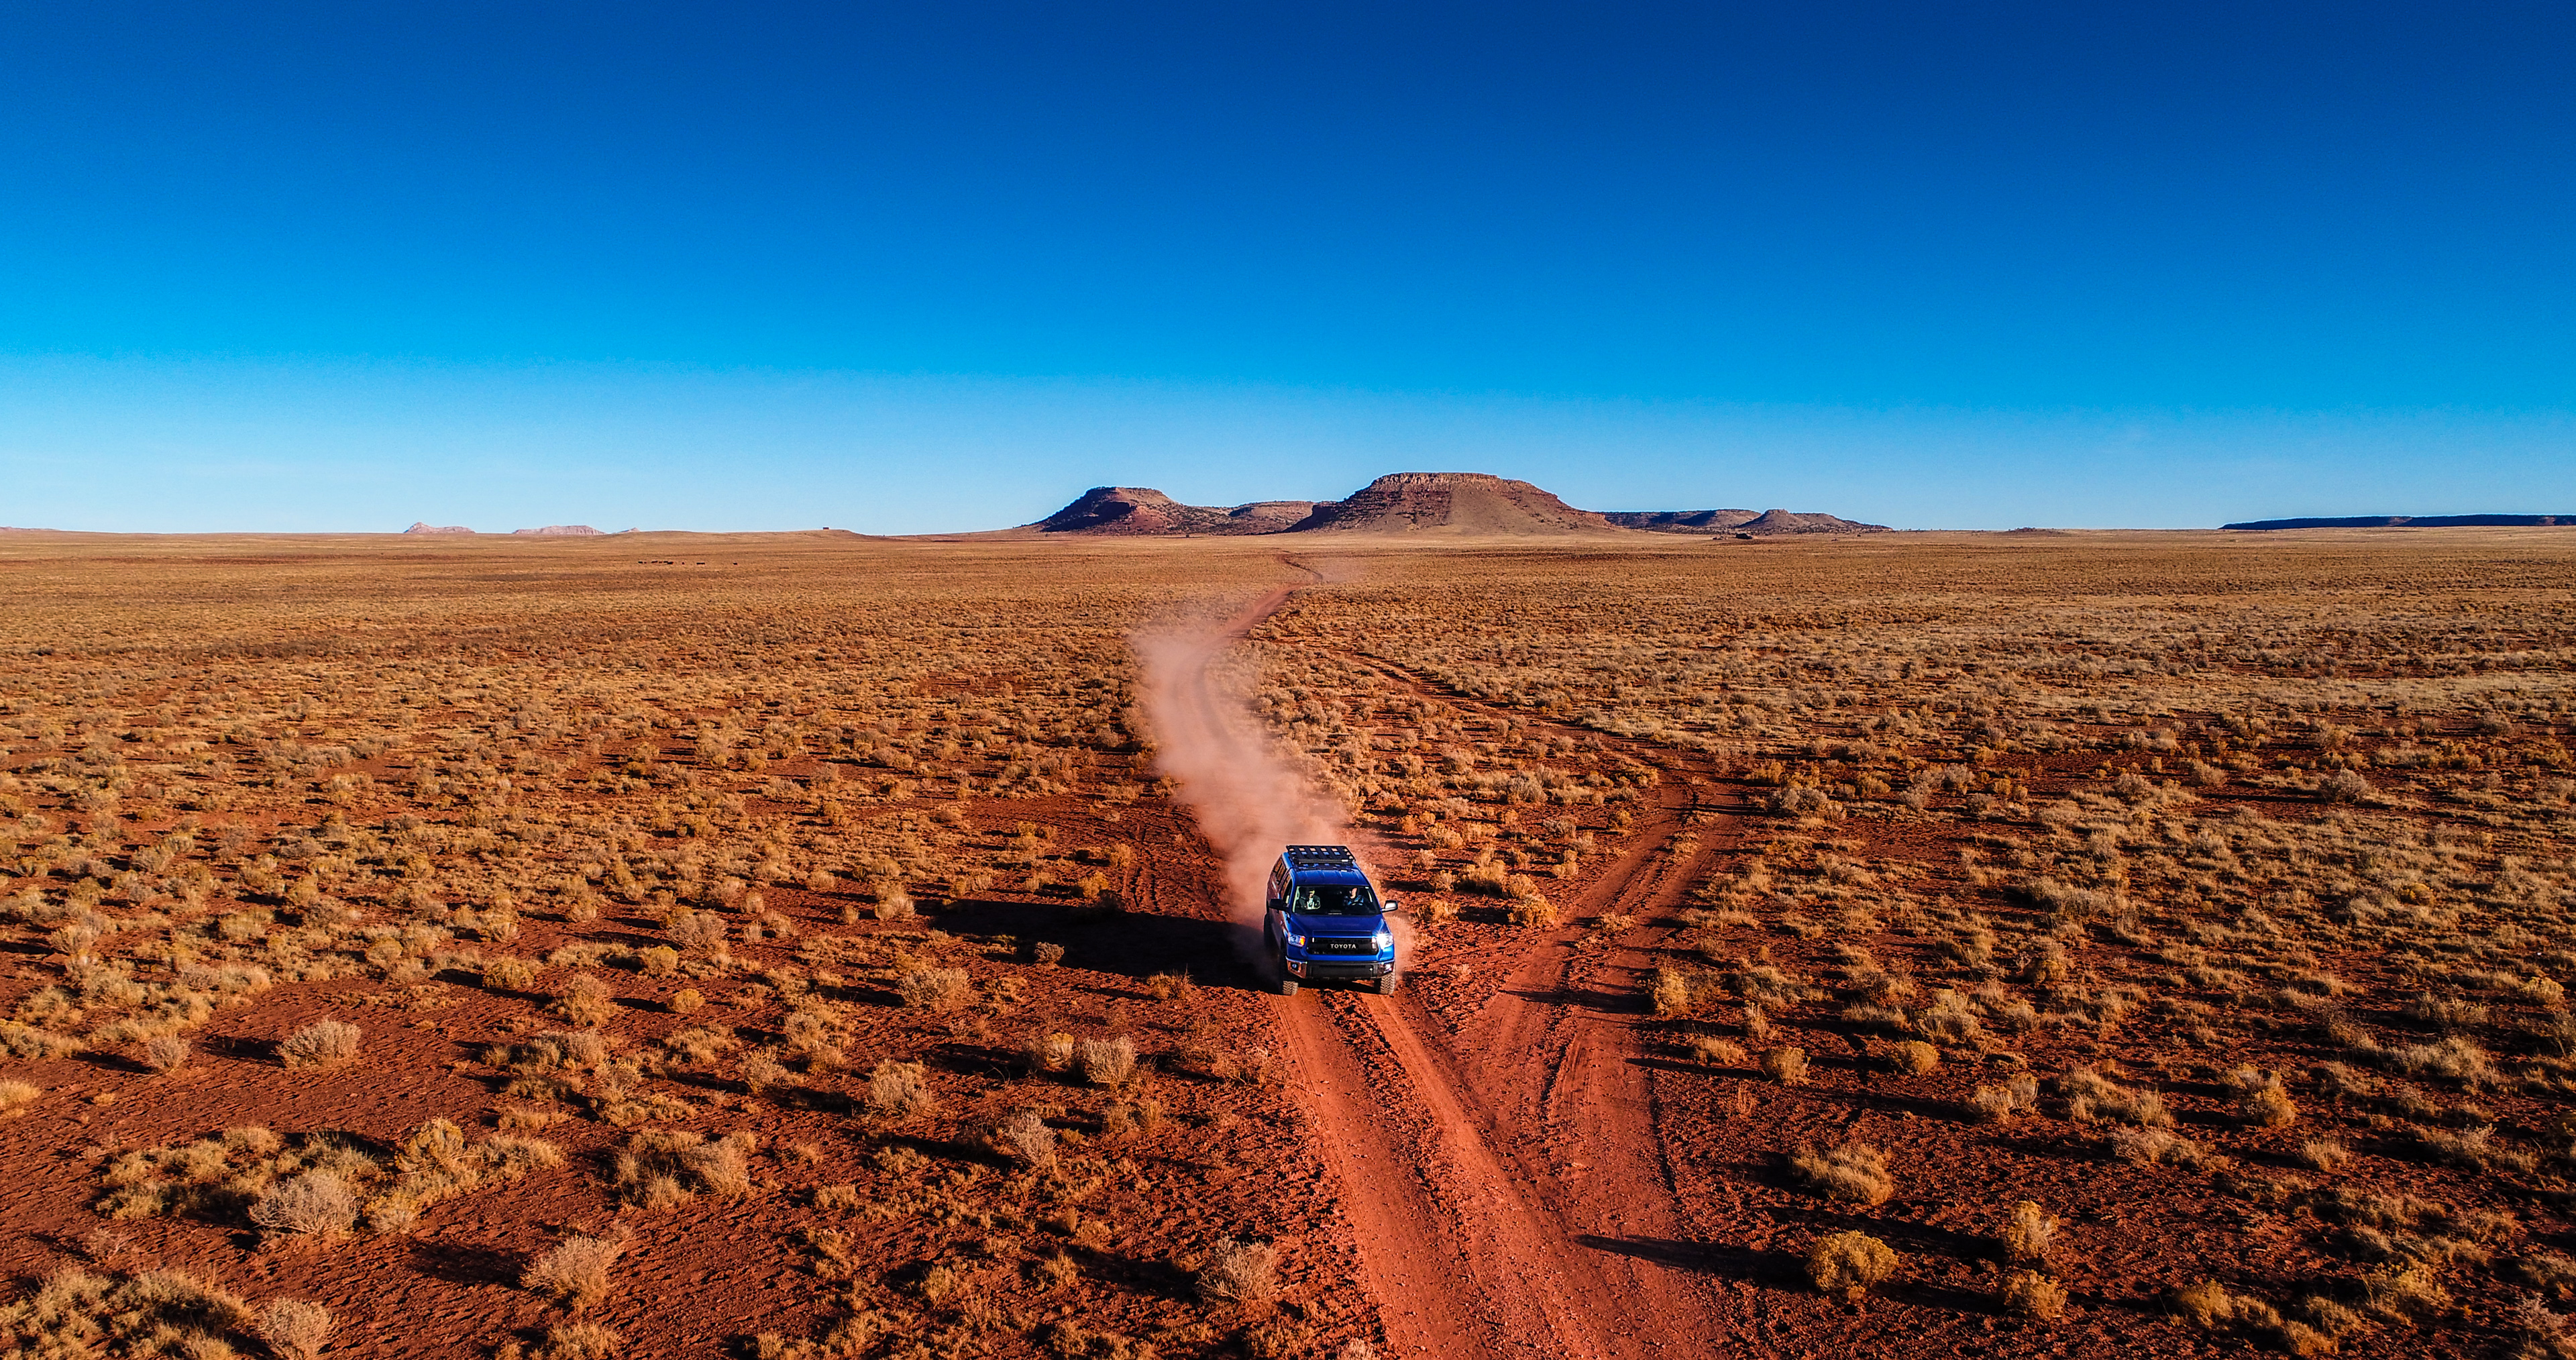
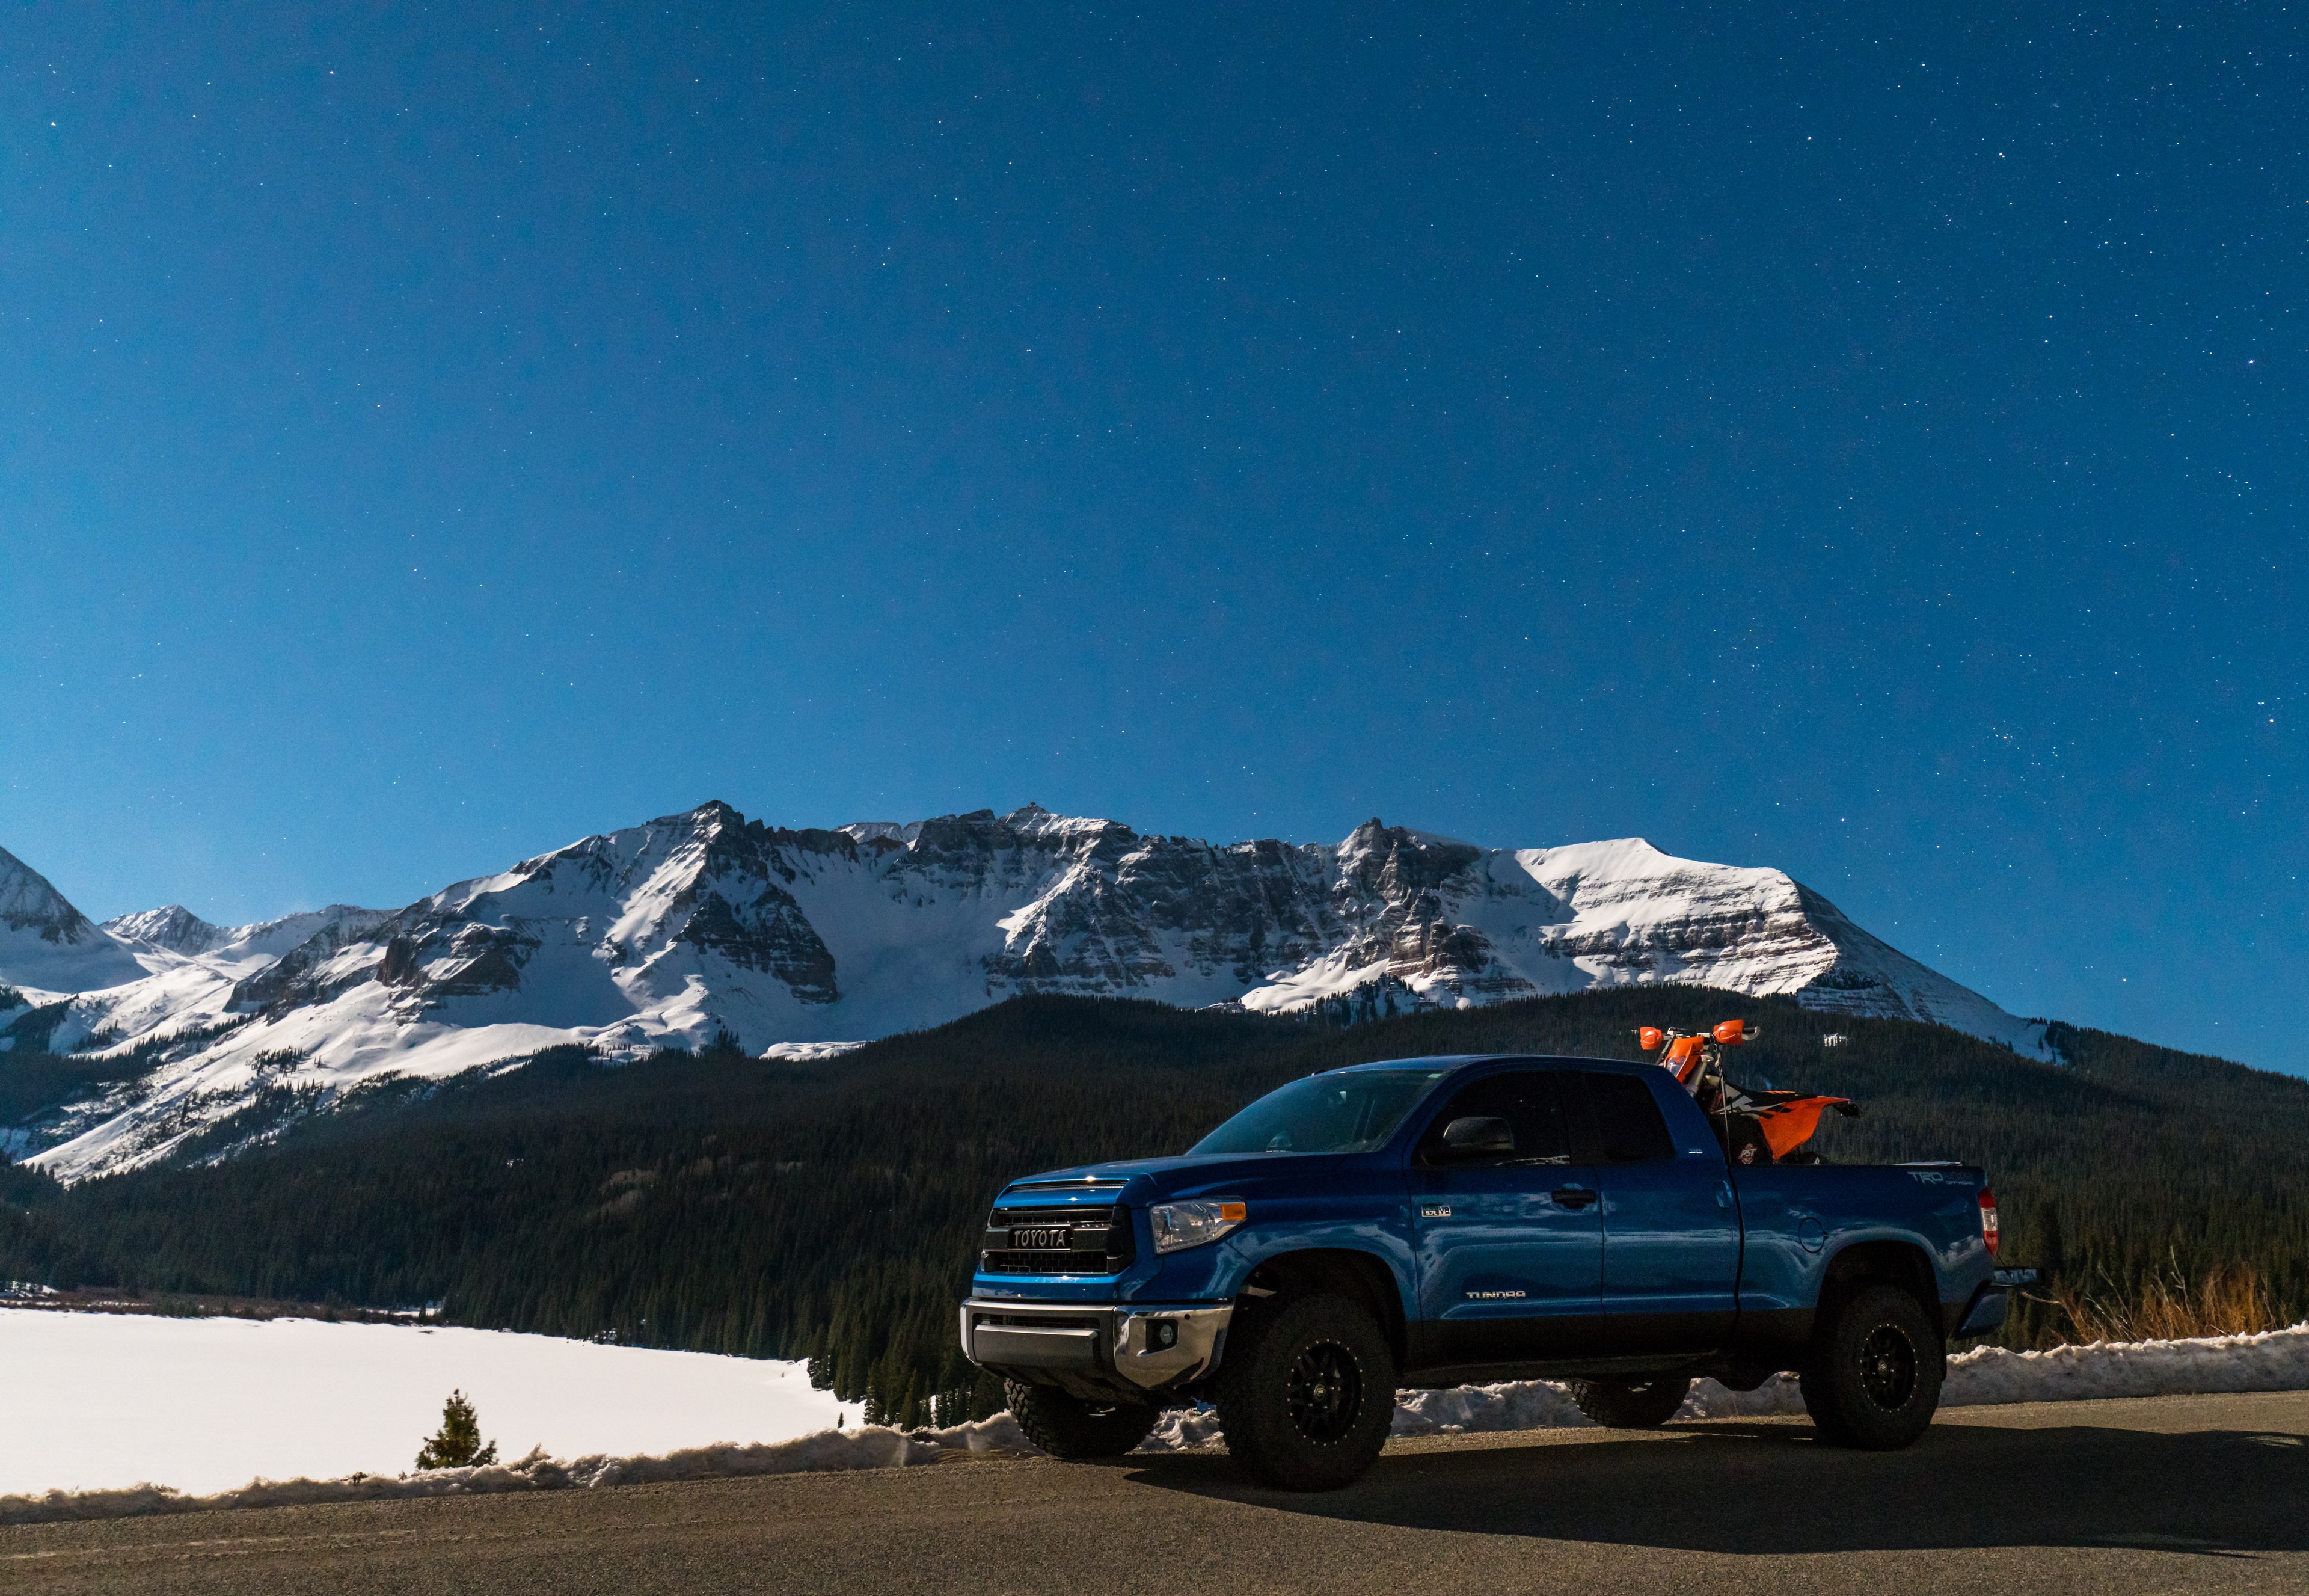
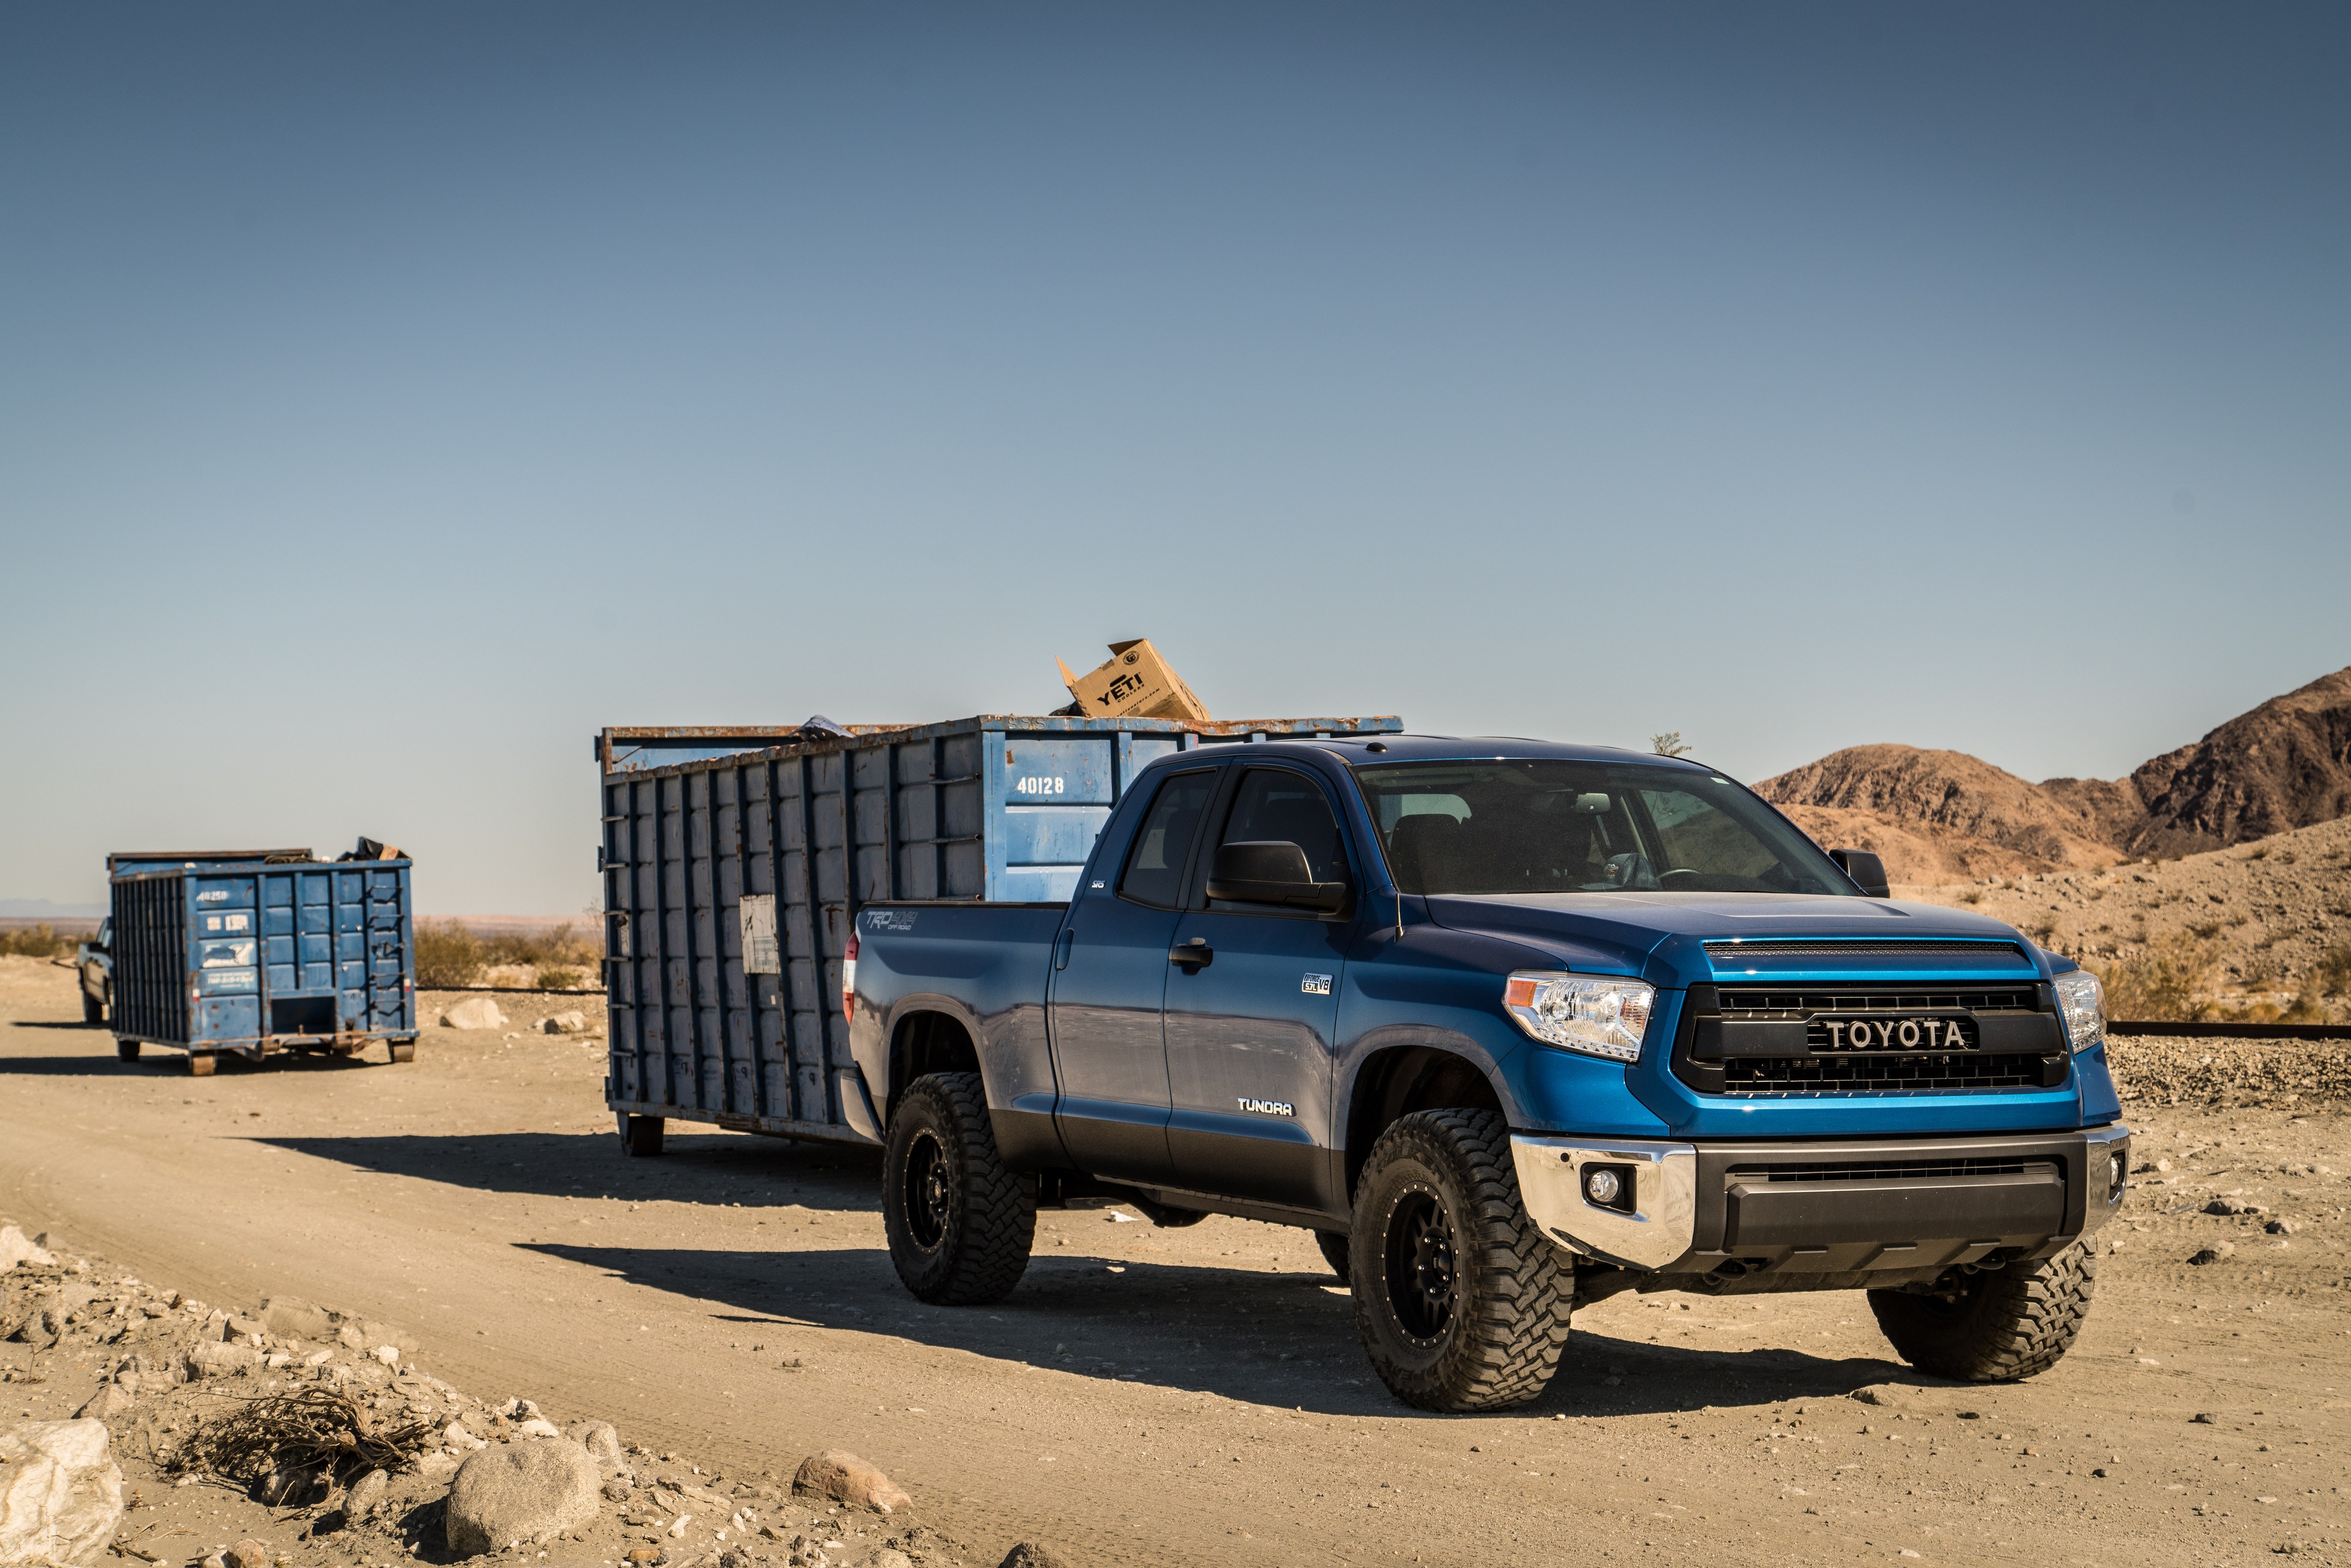
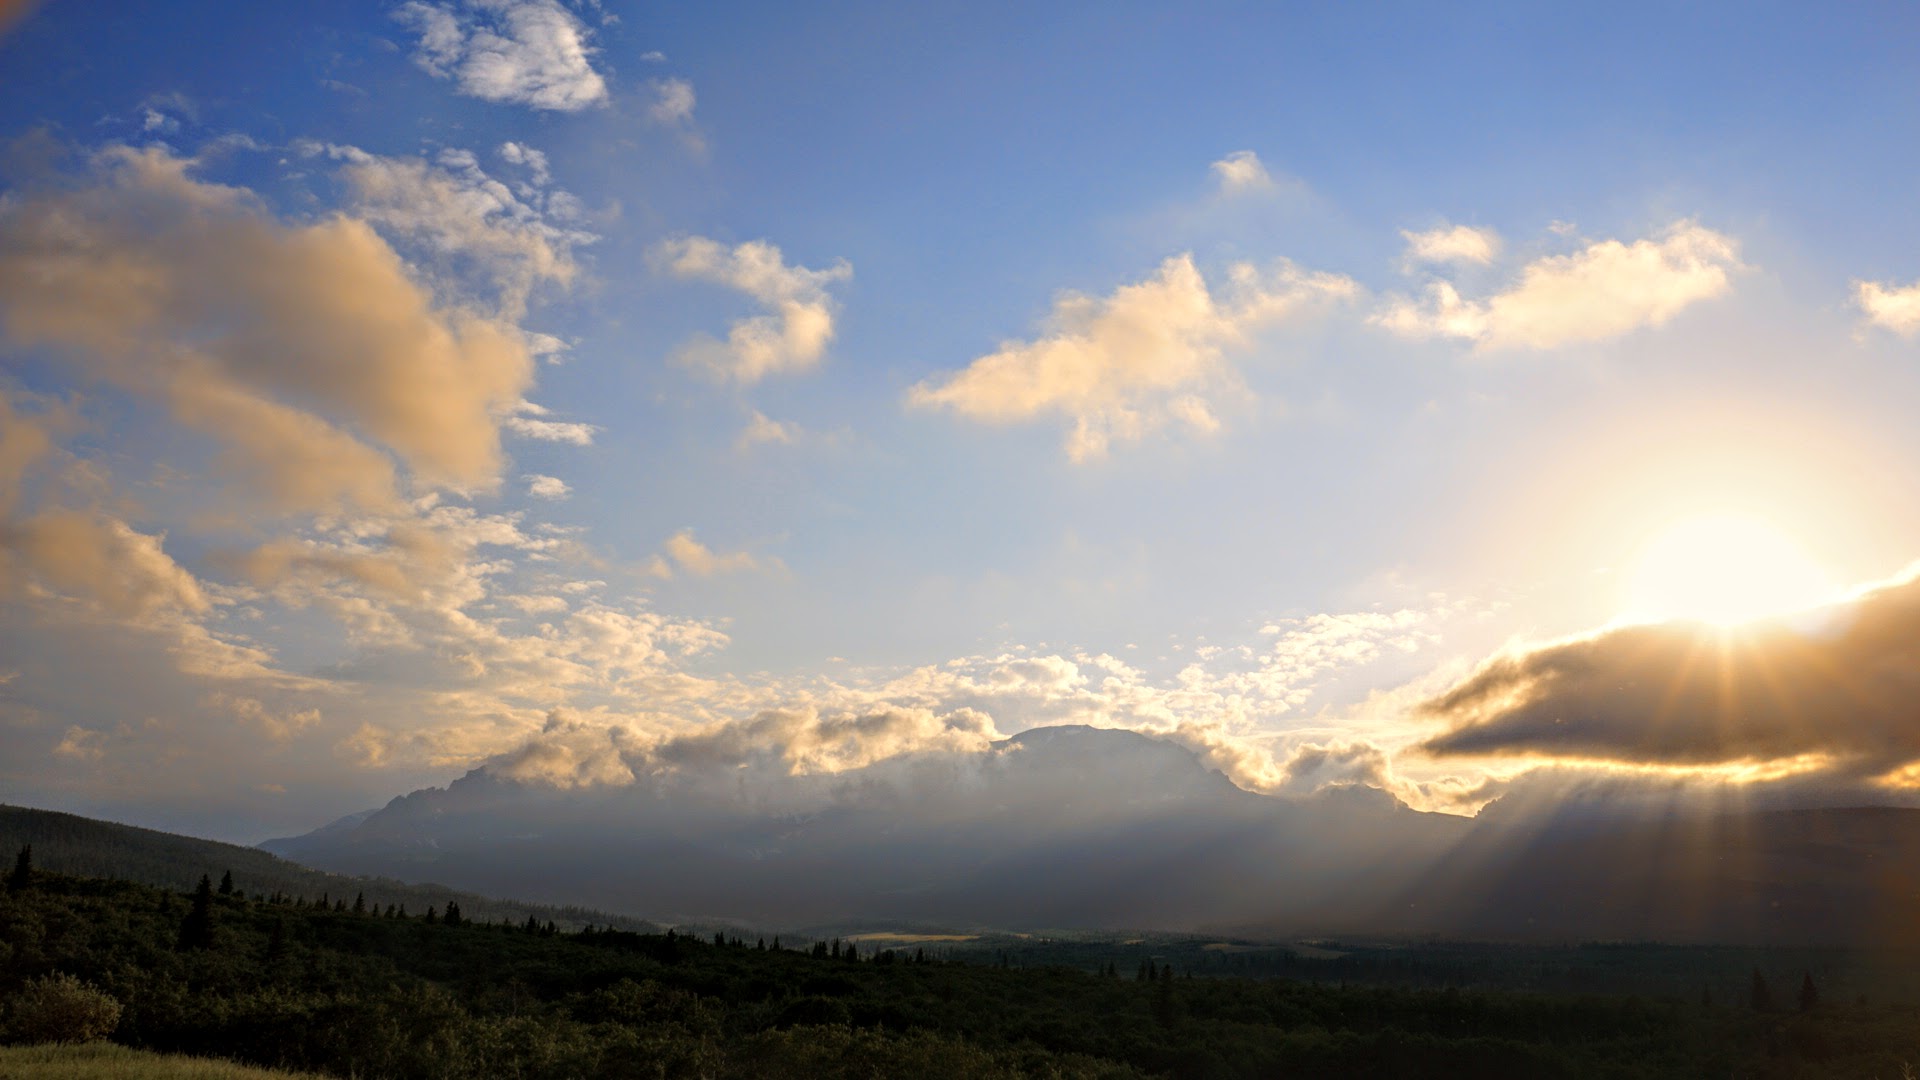
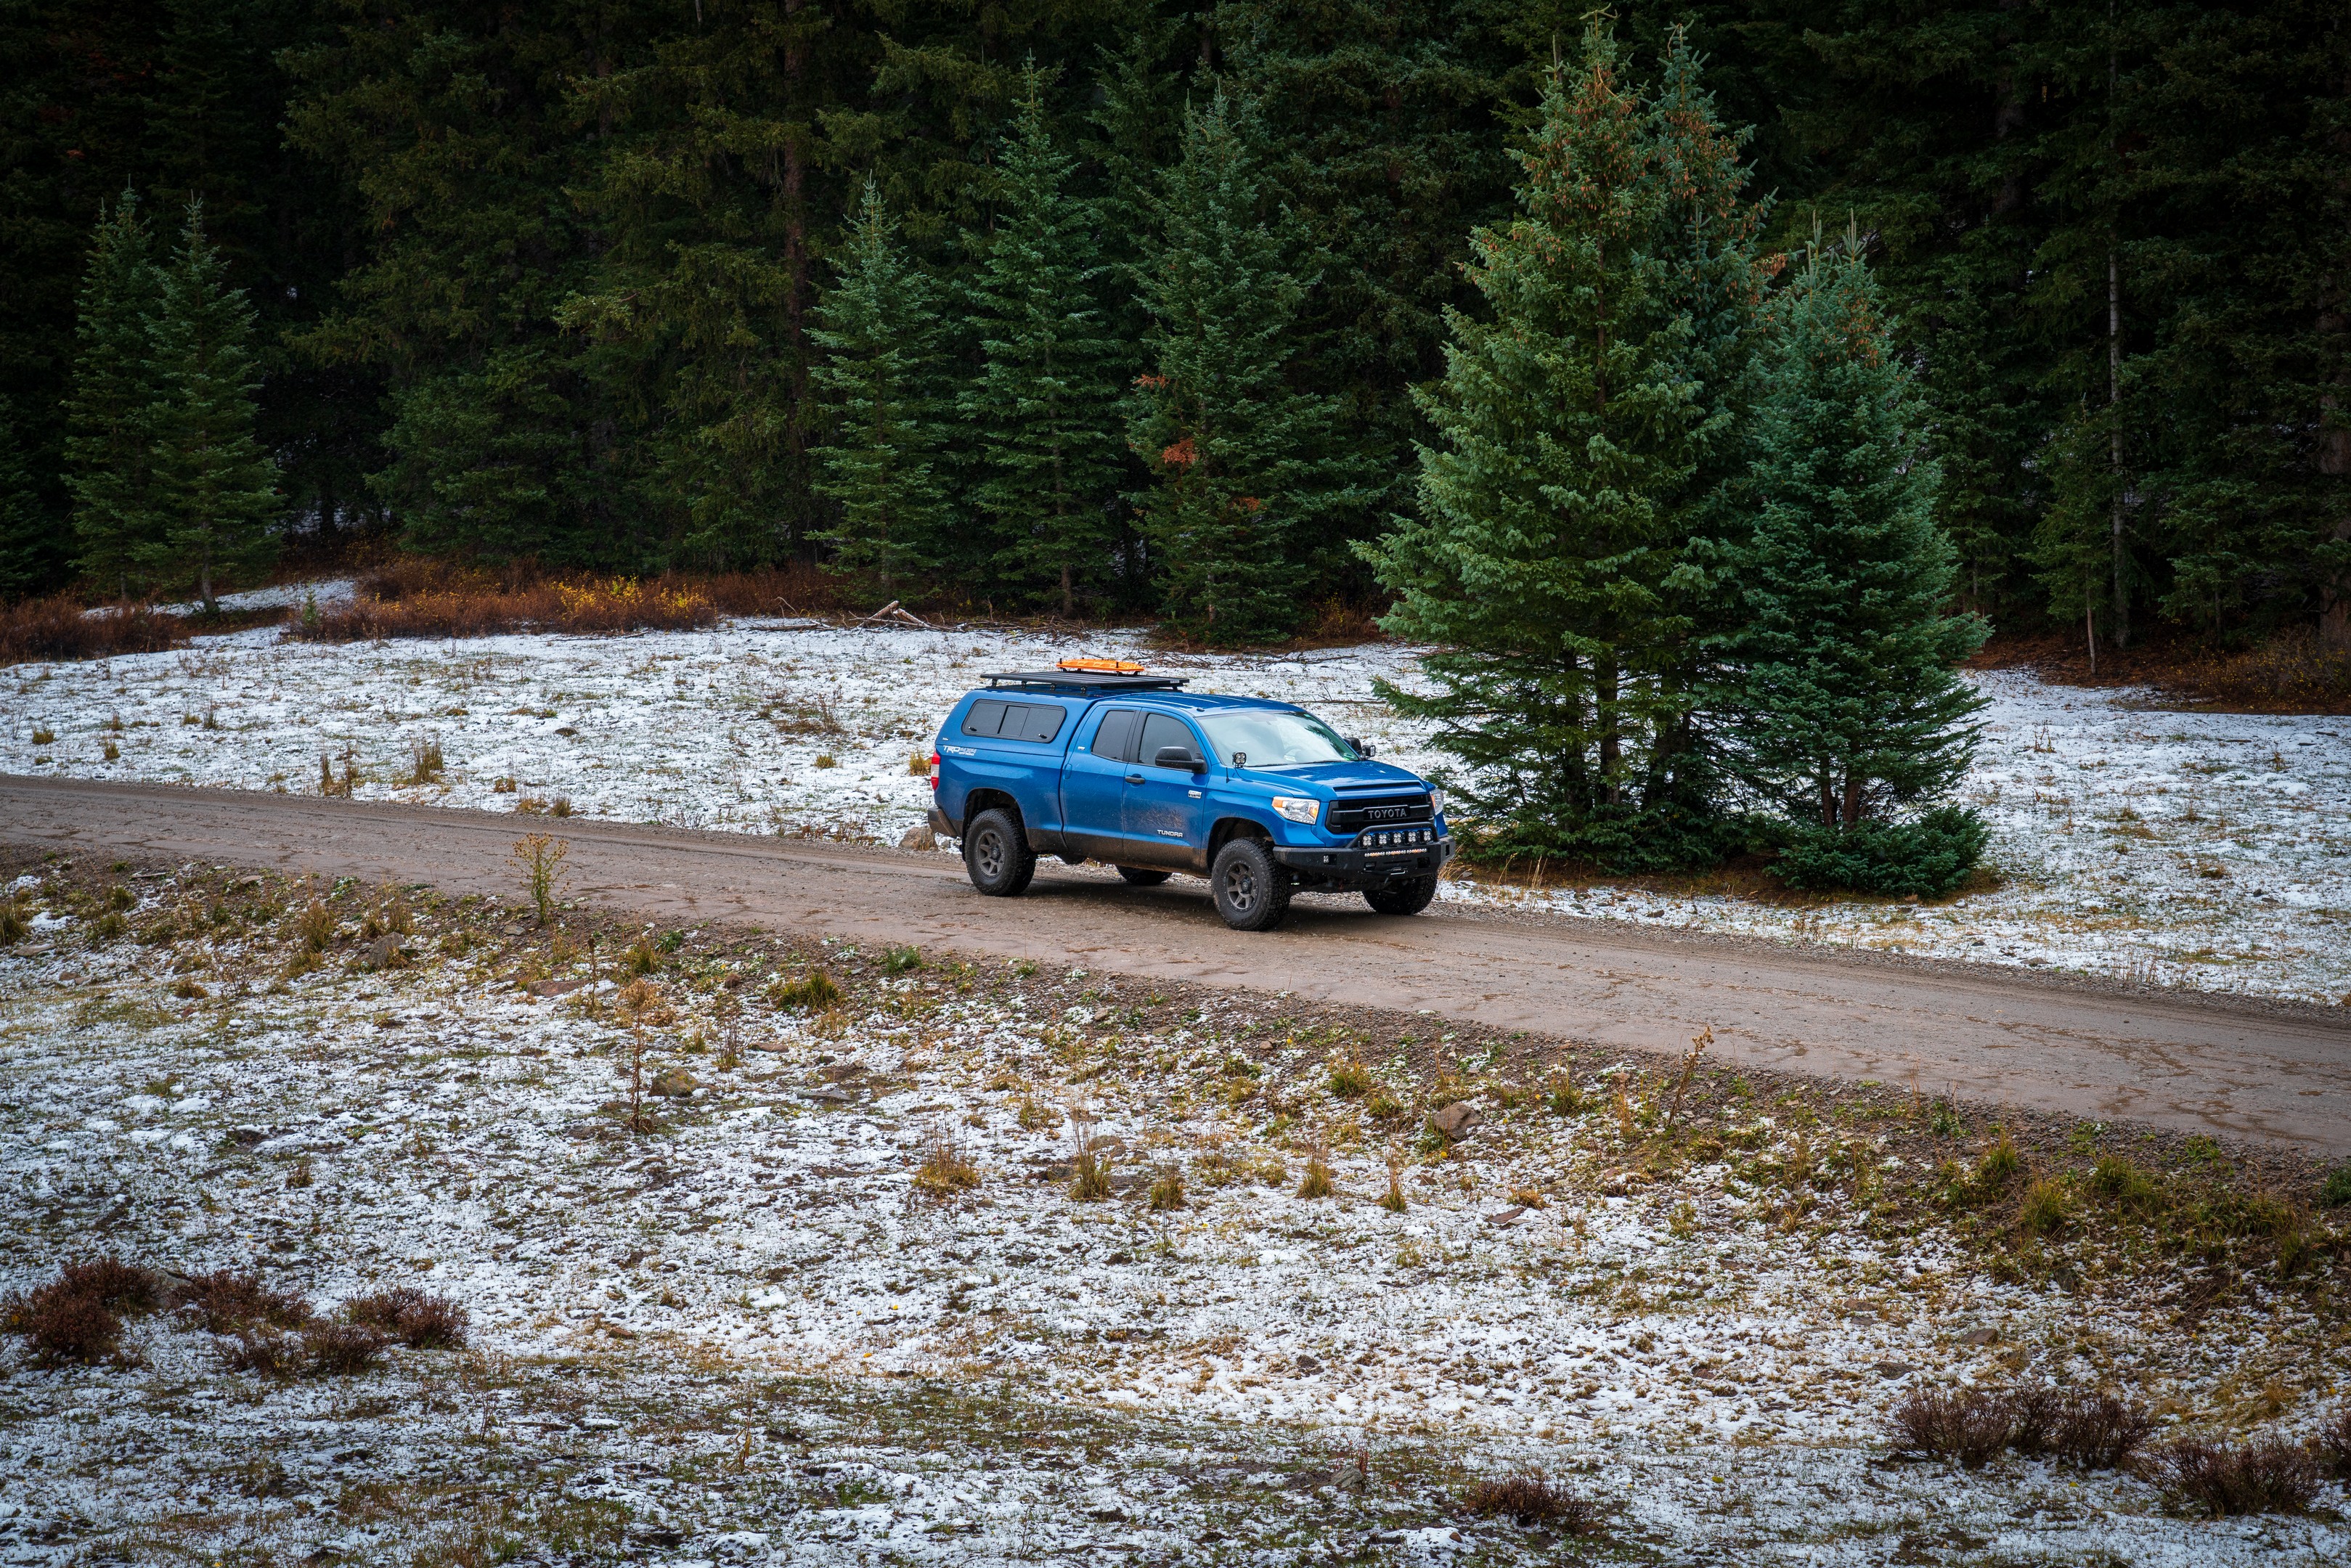
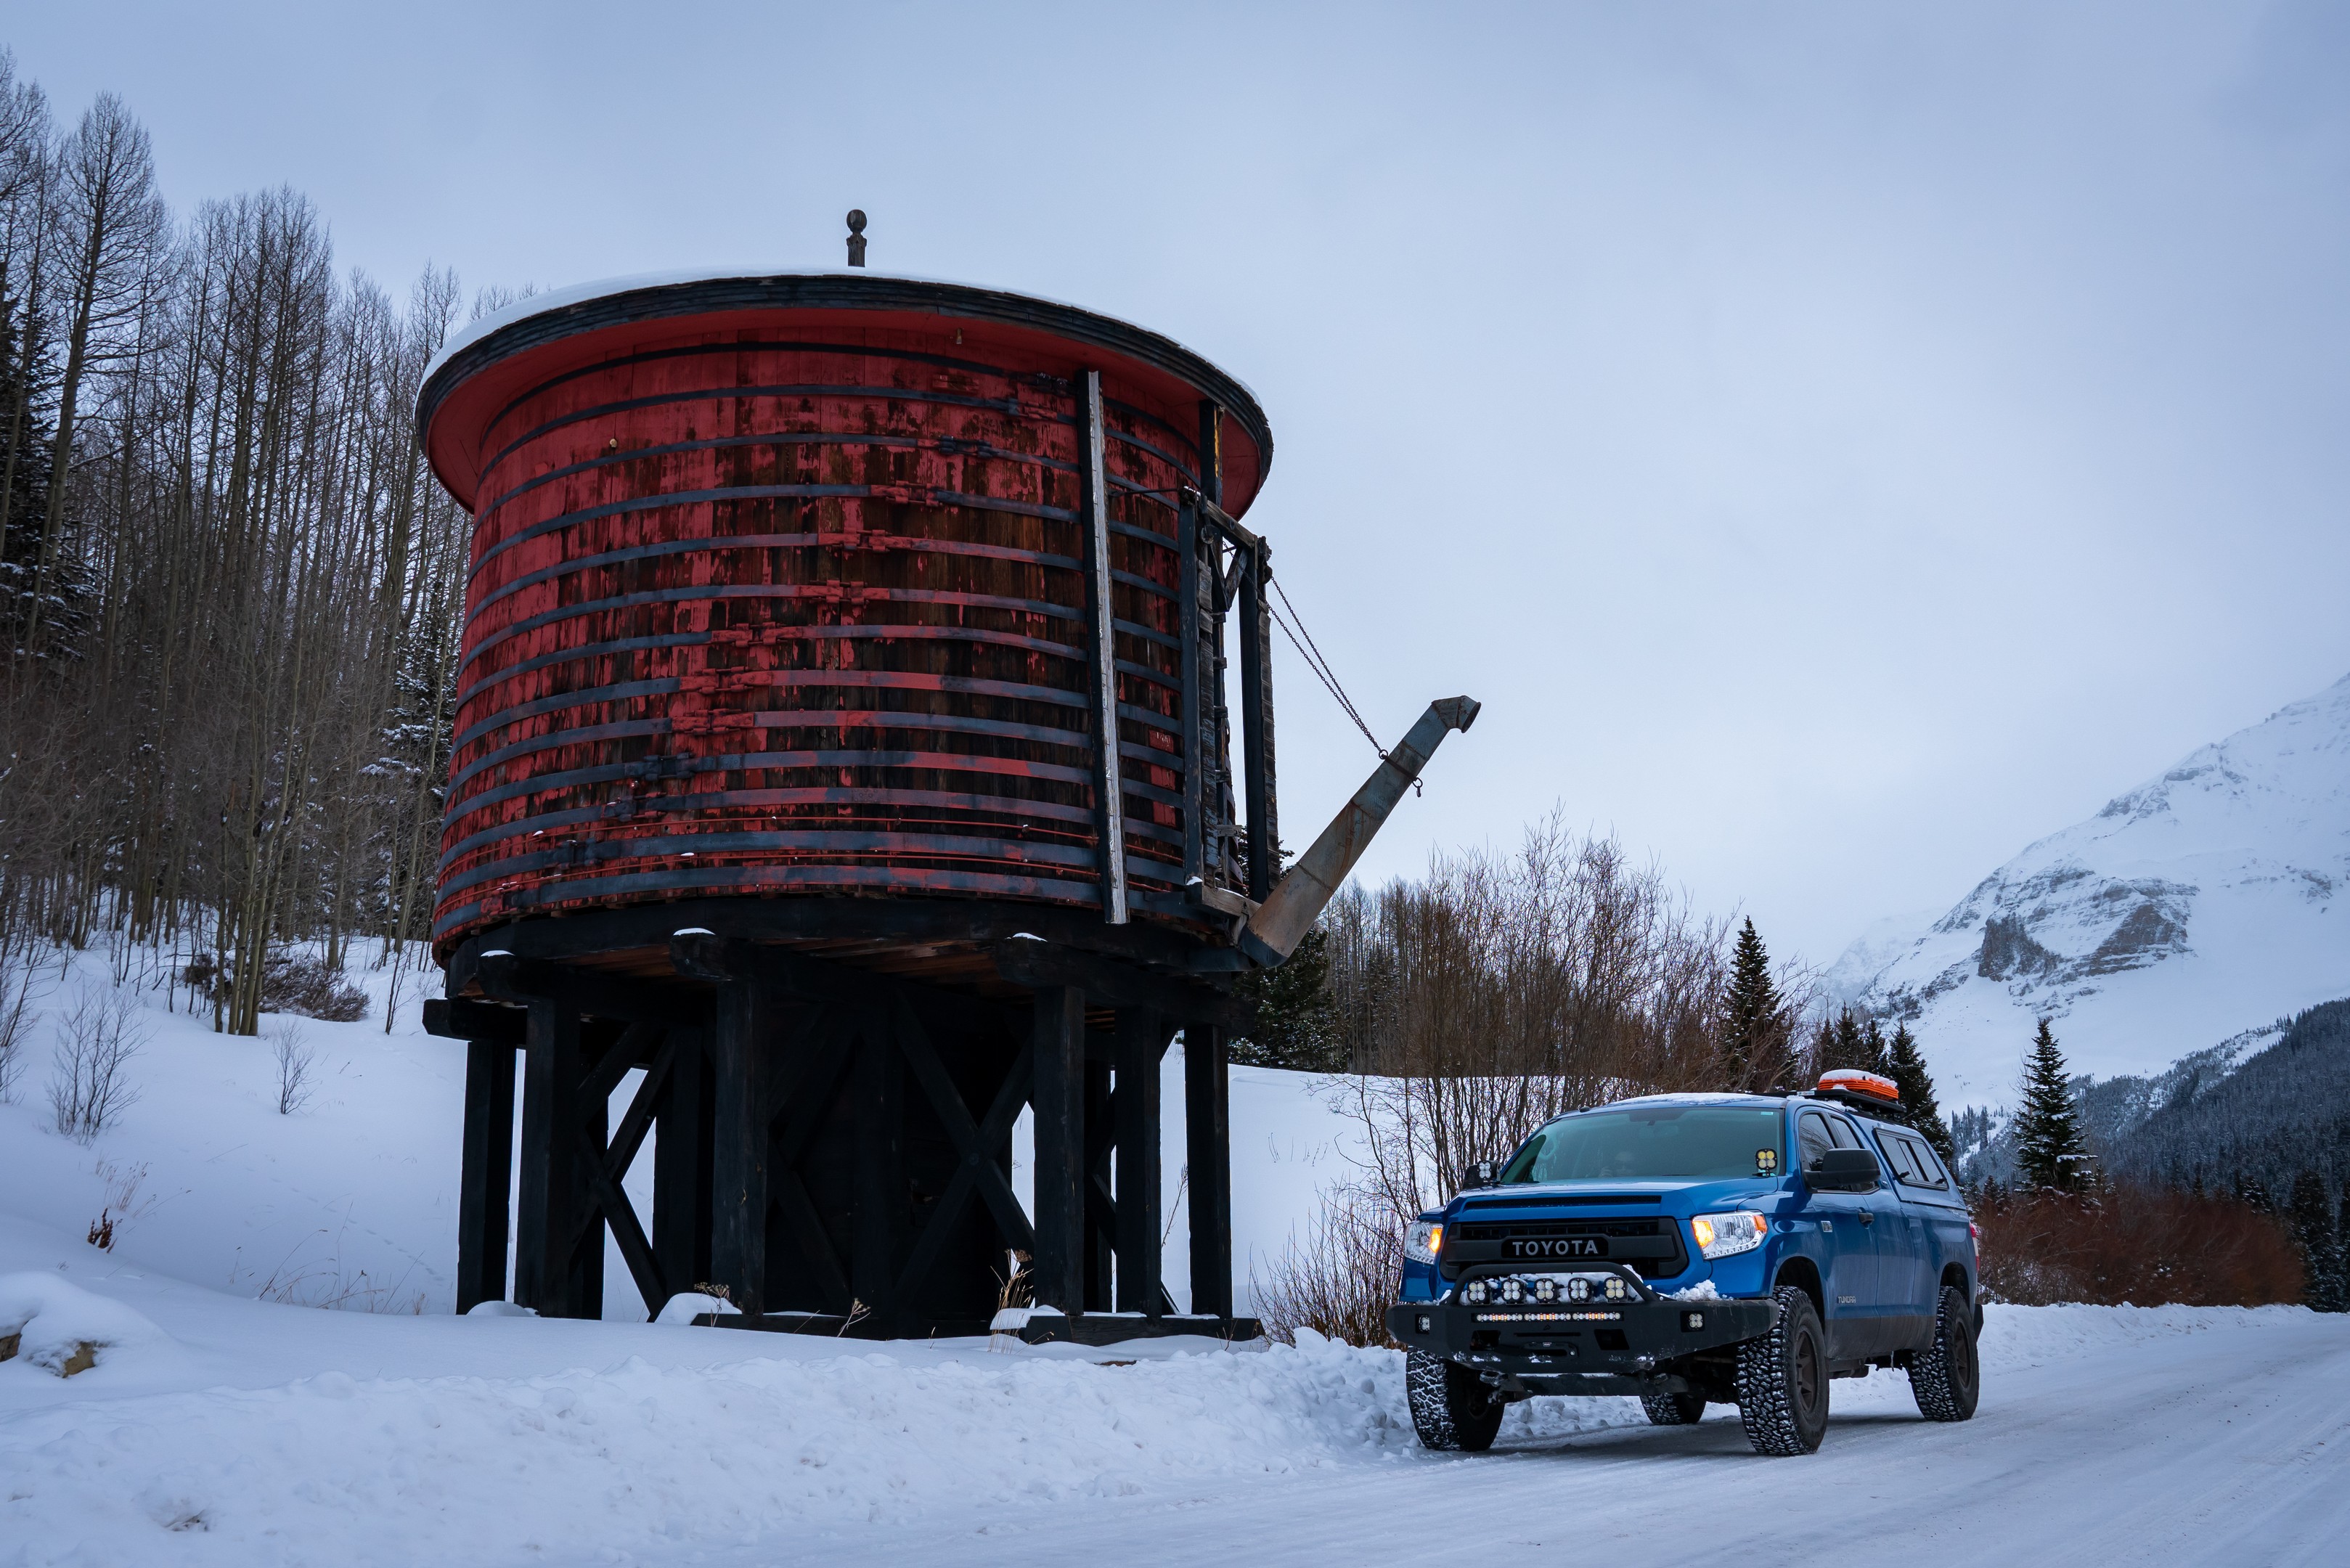
In it’s current form, Project Tundra is an extremely versatile rig and I’m extremely happy with what I can do with it.  From loading the truck up with toys and the family for long vacations to quick evening go-fast trips to the important places just to watch the sun set, Project Tundra does it all, and does it all well.  This past winter, we took on record snowfalls in the Colorado Rockies, and then in the middle of summer took on the remnants of that same snow.  We’ve hauled all kinds of tools and toys and enjoyed the deserts of the Southwest, and so many other great places.

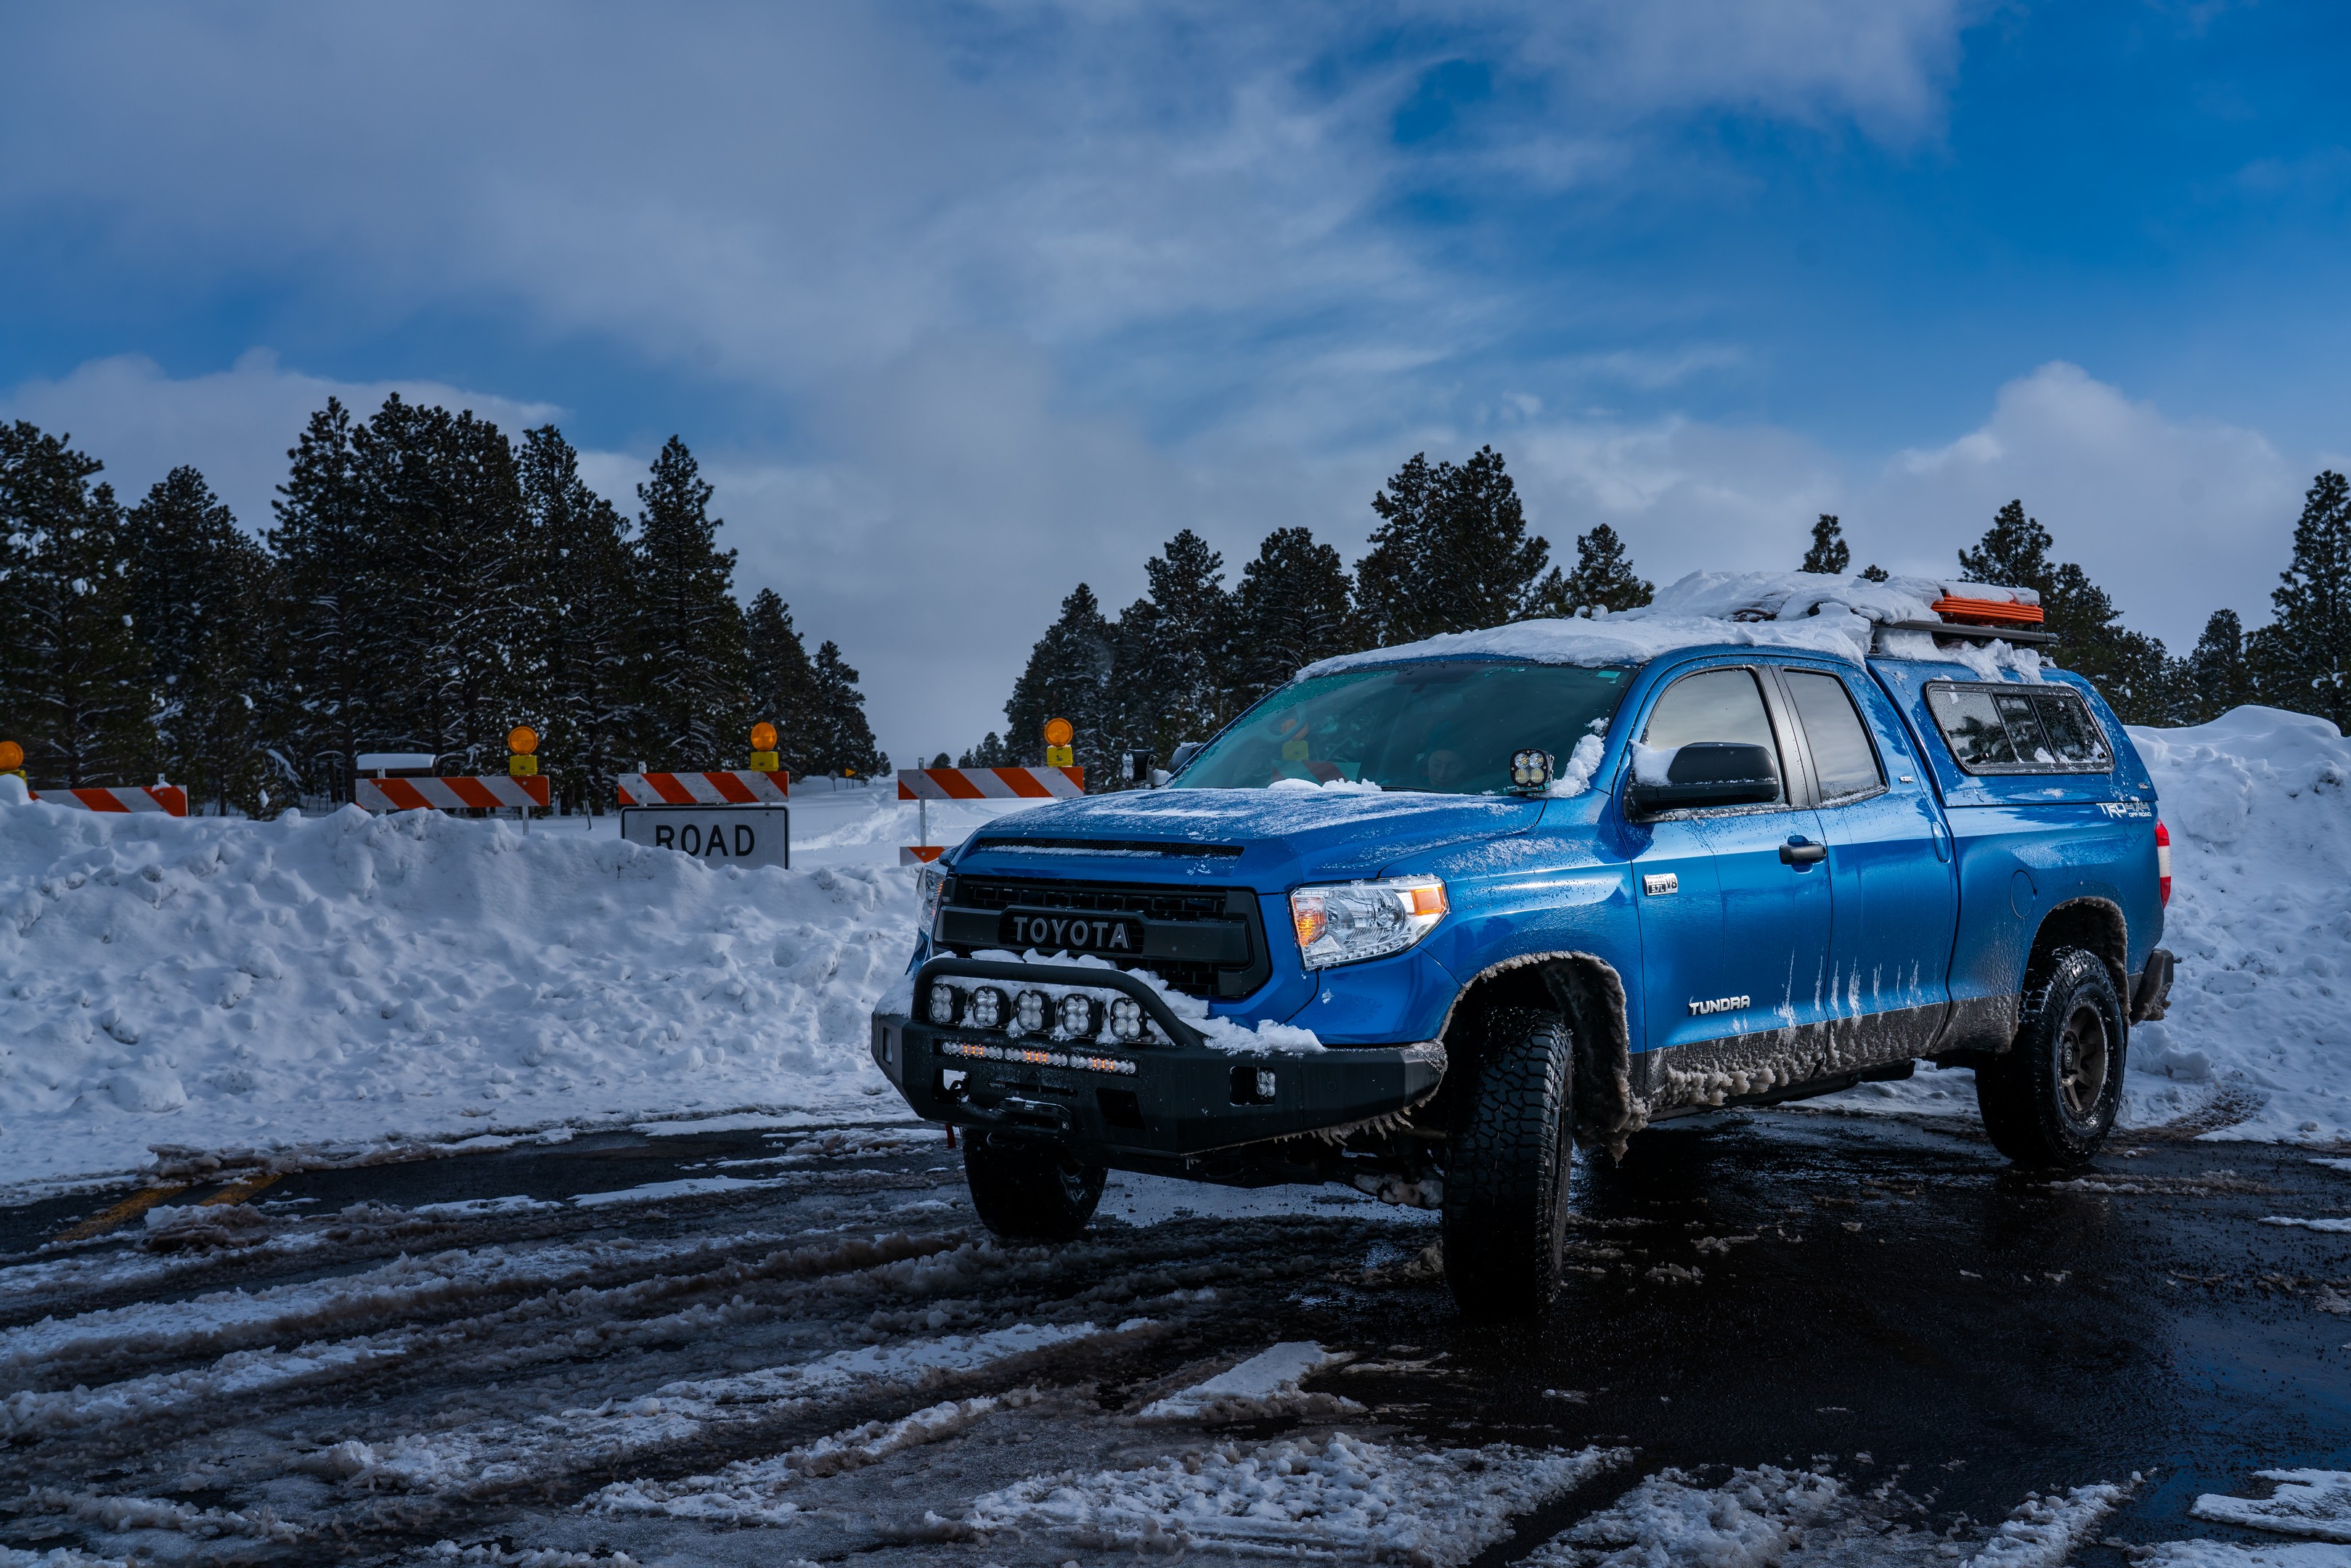
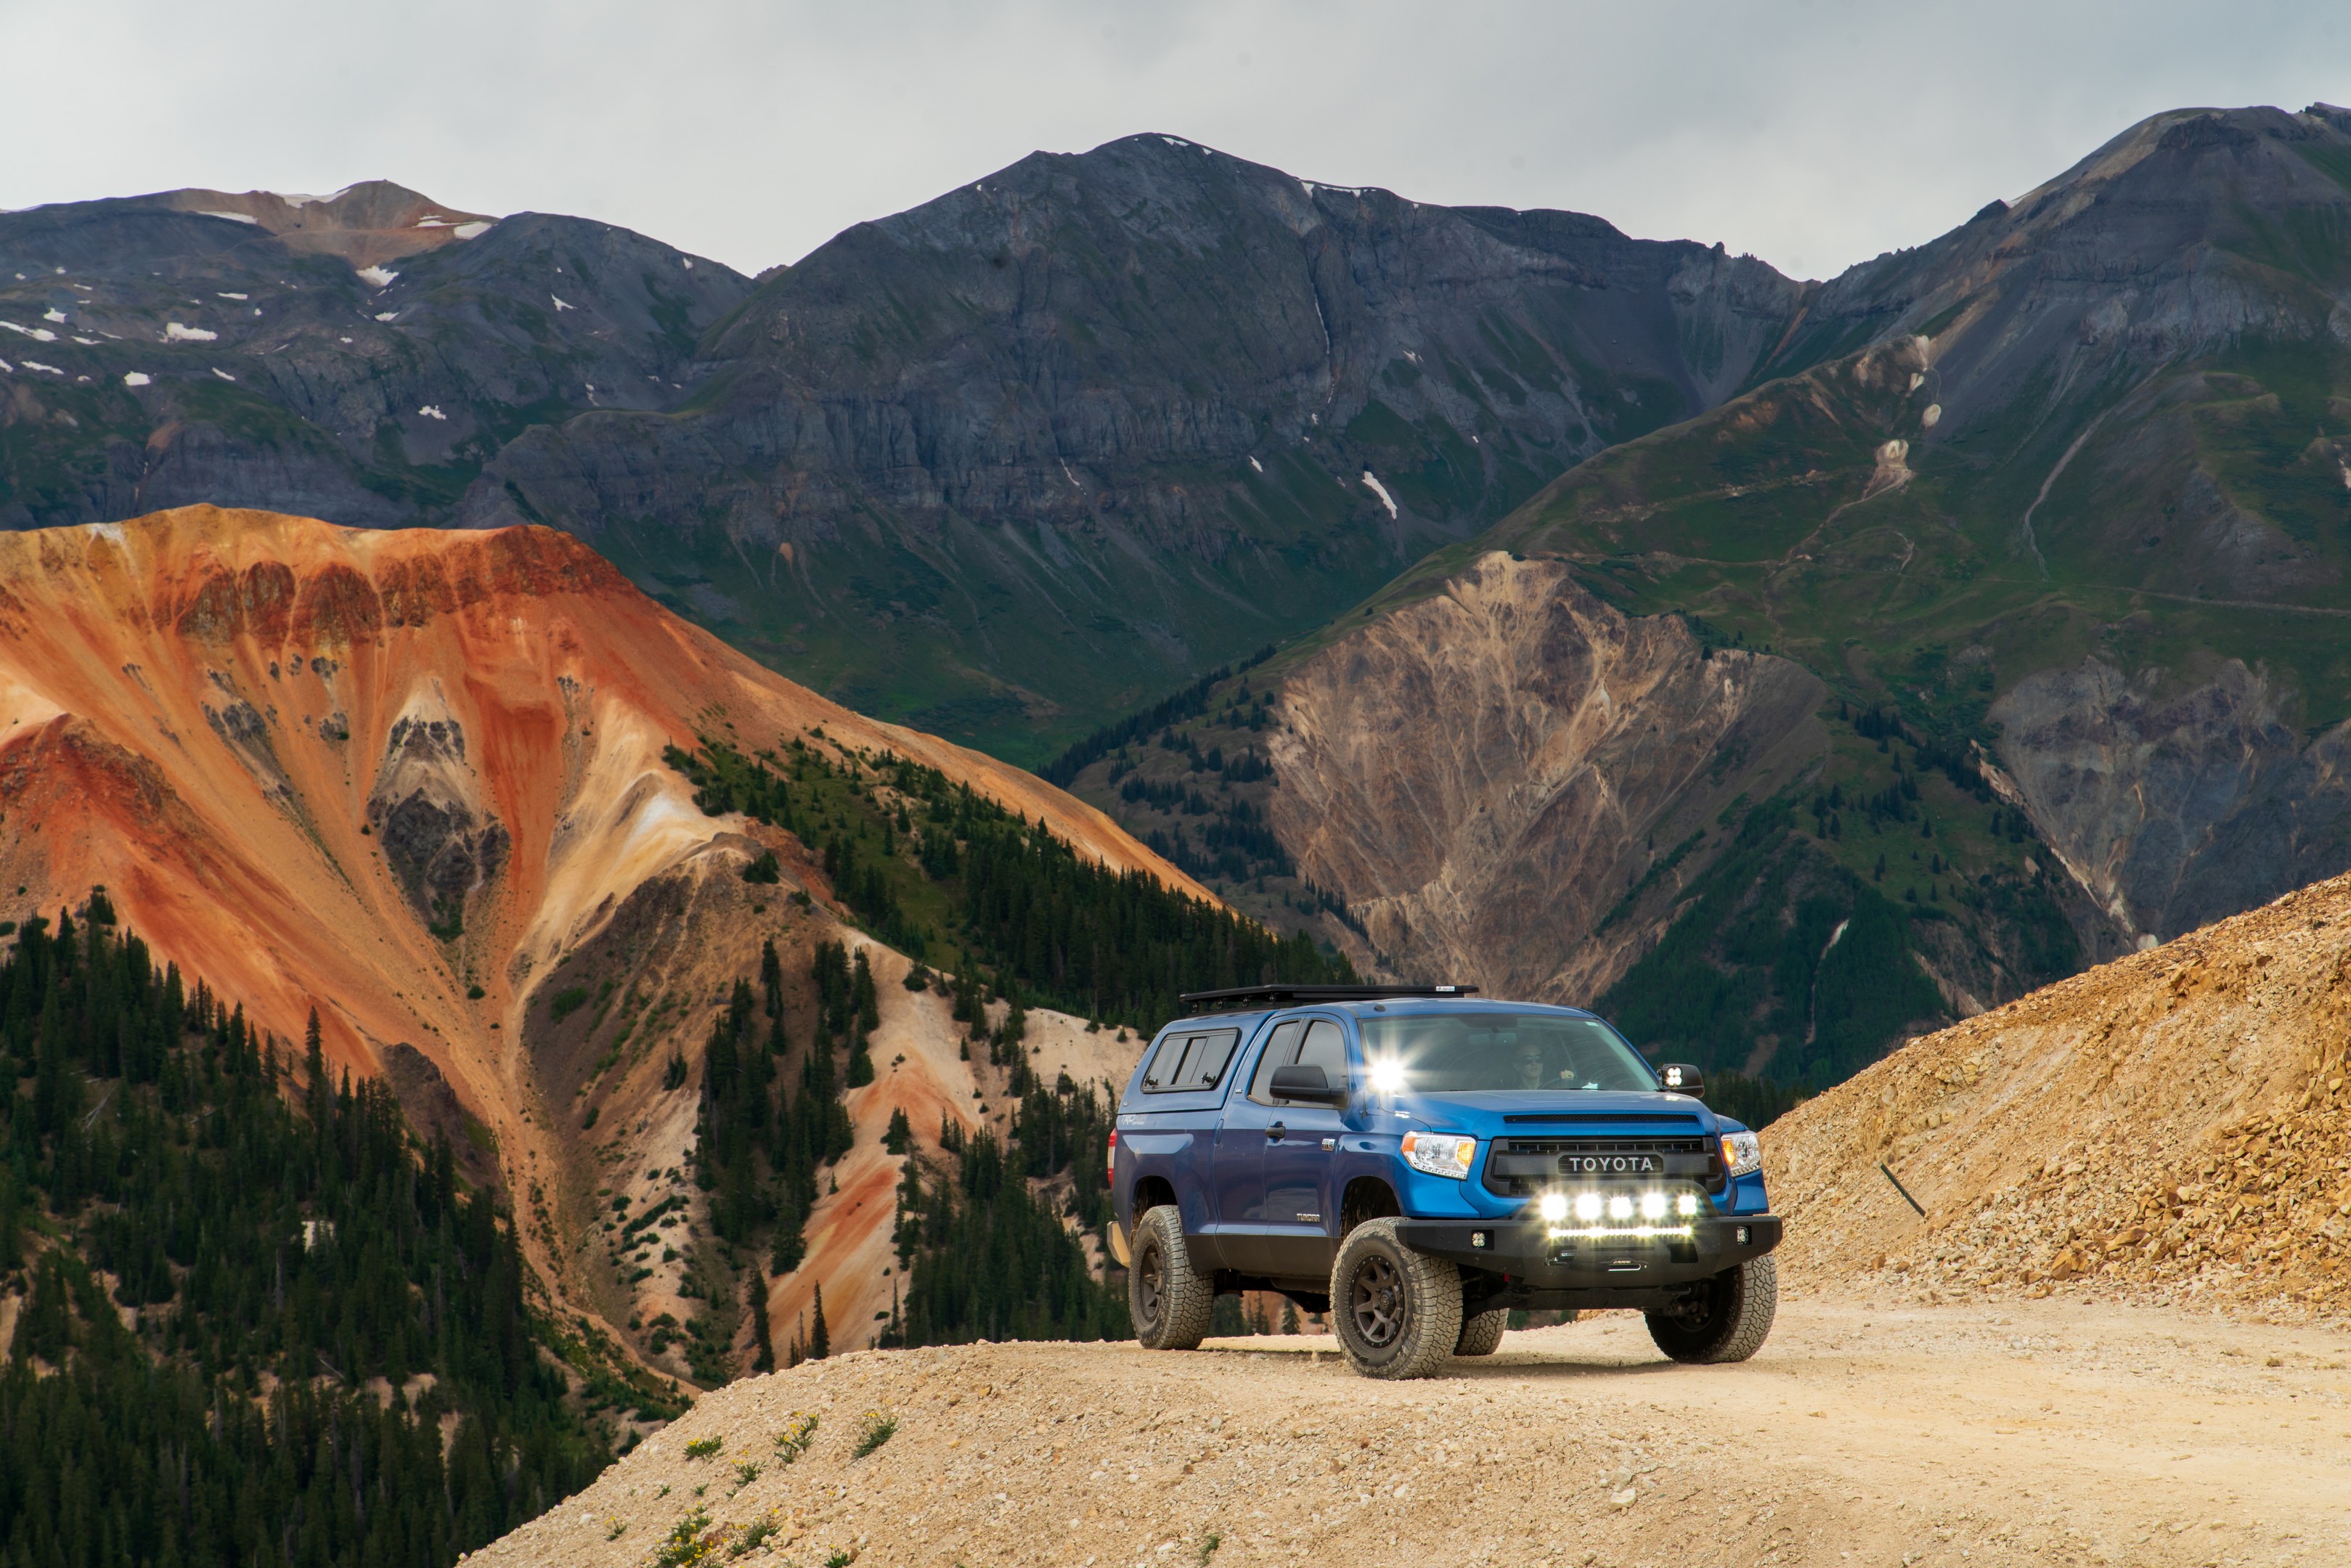
I have to say that I feel incredibly fortunate to get to do the things that I do with Project Tundra.  This whole process has created an awesome vehicle (pun intended) to get to spend time outside with good friend and family, and this whole processing of building this rig has introduced me to so many awesome folks and provided many memorable experiences that I am quite thankful for.  I hope that these articles have been helpful in someway to you, whether that’s a serving of inspiration while you’re working through the daily grind or whether you’re looking into building a new rig or playing with your current setup!

Full Disclosure: Warn, White Knuckle Off-Road Products, Equipt Expedition Outfitters, and Snugtop provided equipment to the author at no cost for the purpose of this review on American Adventurist.

Project Tundra // Winter (Pre-OXW) Update

RXT Rear Suspension

Late last fall, Project Tundra received a pre-production set of ICON Vehicle Dynamics RXT rear suspension – and the change these RXT parts made to the vehicle’s performance was profound.  The RXT system is made up of a user-configurable, Icon leaf spring pack that replaces the OEM Toyota leaf pack. Also included are Tundra specific shocks with increased travel, and a hydraulic bump stop kit.  Taken as a whole, these parts all work together to make your rear suspension next level.  Project Tundra already has the hydraulic bump stop kit, but adding the RXT leafs and shocks made a huge difference in the way the truck performs.  The best part about the RXT kit is that it can be configured to your specific truck and the amount of additional weight you have in your truck bed, so the end result is a system that will deliver much better performance than a one size fits all solution.  Here’s how it all works.

The RXT leafs for the Toyota Tundra can be configured in three ways all depending on how much additional weight is over your truck’s rear axle, or how much lift you want.  The leaf pack comes configured from ICON to handle an additional 250 pounds of payload while providing about 1.75 inches of additional lift.  If you swap out the third leaf in the RXT leaf pack with the provided additonal leaf, the pack will handle an additional 500 pounds of payload and add 3 inches of lift.  Finally, adding the additional leaf to the pack will provide 750 pounds of carrying capacity and add 4 inches of lift to the rear of an unladen Tundra.

I opted for the + 500 pounds option on Project Tundra, as two dirtbikes or our typical gear loadouts with the truck cap and roof rack come in around this mark.

Installing the leaf packs is easily done in the driveway on an afternoon with basic tools and an extra set of hands.  The first thing you’ll need to do is choose what configuration you want the leaf pack in, and then make any desired changes prior to mounting to the vehicle  A couple of C-Clamps will help you keep the packs from disassembling themselves when you loosen the locating bolt, and otherwise the process is well covered in the instructions.  With the packs configured as desired, lift up the back of the truck SAFELY and swap the packs out.

The other part of the RXT equation are the shocks which provide additional stroke over the 2.5 VS CDCV units that we’ve been using.  ICON offers three levels of shocks, named with their Stage-Number convention.  Stage 1 shocks offer vehicle specific valving, Stage 2 adds the CDC Valve, and Stage 3 adds Omega-level shocks that feature rebound and compression damping.  All RXT kits include the hydraulic bump stop Kit – another system we’ve absolutely loved having on Project Tundra.

As I mentioned in the last article, the performance difference realized by installing the IVD suspension on Project Tundra was huge, so the bar was already set quite high when the RXT parts arrived.  The RXT suspension makes a night and day difference over stock leafs or even an add-a-leaf – especially when you’re carrying any kind of weight.

Speaking of the Icon 2.5 VS CDCV shocks I took off the vehicle, I’m happy to report that after a year of use all over the Southwest the shocks are still in great shape and still fully functional.  Yes, there is pitting on the lower shock mounts and the aluminum bodies aren’t as shiny as new, but this wear has been earned from logging thousands of miles bombing around off-road and on wintry roads.  It turns out flying rocks are an equal opportunity destroyer, so I don’t care whose shock you have – pitting and aluminum oxidation are going to happen.  What counts is that all of the ICON shock shafts look great, and all of the seals are holding tight – so these shocks still have plenty of life left in them before they get rebuilt.

The RXT suspension has handled every type of terrain I’ve pointed it at so far with performance that’s perfectly matched to the front end, which is to say that the back end has now been turned up to match the front end.  The ability to set the leaf pack up for your specific vehicle depending on what you do with your truck and how much weight you carry combined with the damping adjustment from the CDCV and Omega level shocks make the RXT system the choice for Tundra rear suspension.


LINE-X

Spray-In truck bed liners are hands down the best way to project your truckbed from sharp tools, ski edges, car parts, the occasional steel-fab project, and everything else life throws at your truck bed.  The problem is that the OEM spray in liners leave a lot to be desired, which is why I took a trip to San Diego before SoCal Desert Rendezvous to make an appointment at Line-X of San Diego.

At Line-X of San Diego, Dallas and Chris applied their years of experience in truck bed coatings to come up with in a spray in bedliner application for Project Tundra that was exactly what I was looking for.  In addition to protecting the sheet metal, I wanted to do a few custom things that would make the bed of project Tundra better suited to my needs.  First up, I pulled off the stupid plastic caps that run around the bed rails of the truck.  These pointless pieces of plastic exist only to trap dirt and dust, and when sandwiched with a load (like a truck cap) become plastic backed sandpaper that wears on your paint and in no time at all, starts wearing on bare metal.  Taking the plastic caps off also allowed Dallas and Chris to do a true over the rail bedliner, providing extra protection to the bedsides from the truck cap and from me when I’m loading heavy things over the sides of the truck bed.

With all of the holes in the bed rails covered, we then turned our attention to sealing up all of the drain holes in the truck bed to make the thing as dust proof as possible.

Line-X is also a great thing to spray on your truck’s rocker panels to protect them from rocks and other road debris that are constantly tossed up by your tires.  I sprayed the rocker panels on my Tacoma, and it’s held up great to hundreds of thousands of miles of dirt and rocks.  Again Dallas and Chris applied their expert hands and took the time to remove the plastic wheel well trim so that they could tuck the Line-X under the plastic bits once installed – a detail that will only serve to help lengthen the lifespan of Project Tundra’s sheet metal.

Chris and Dallas devoted an entire day to applying Line-X to Project Tundra, and the results of their attention to detail and skill speak for themselves.  Project Tundra’s bed and rocker panels are now armored-up to handle hundreds of thousands of miles of dirt and rock, and all of the gear hauling I can throw in the truck bed.

ABOUT THOSE HUB CAPS

I’ve had a couple of the hub caps on my ICON Alloys Six Speed wheels break, and when I called Icon to asking about buying new hub caps, I was really happy to hear that they’ve redesigned the caps to fix this very issue.  The new hub caps are screwed together (the old design was a snap-fit) and I do not expect to see any failure or issues from this new design.  I need to give ICON props for revising and continuously improving their products, rather than simply selling more copies of an imperfect design.

LET THERE BE LIGHT

Yes, Project Tundra will be getting fully armored – but as with any good thing, it takes some time.  So in the mean time I’ve been working with Pelfreybilt Offroad to design brackets for the Tundra’s A-Pillars and stock front bumper, so that I can add some light while I’m waiting for my armor to arrive.  With a bit of time spent in Solidworks, I’ve developed A-Pillar brackets for the Tundra that will hold an XL 80, as well as brackets that will allow me to run a Baja Designs 30” S8 light bar in the stock bumper.

Project Tundra will be receiving it’s armor soon, so I’ll leave this update with a photo I took of what’s to come.  Stop by and see us at the American Adventurist booth at Overland Expo West (PS1) and say hi!

Full disclosure:  ICON Vehicle Dynamics provided the RXT suspension for review and testing purposes at no cost to Chad de Alva or American Adventurist.  Line-X of San Diego installed their products free of charge.


BTB: Equipt Expedition Outfitters

Editor’s Note:  Over the last year, we’ve dropped in on a number of companies in the adventure travel industry to see what life is like behind the Employees Only doors at the companies that make and sell the products we use day in and day out.  Over the winter we’ll be sharing our experiences with you so if you can’t get out and play, we’ve got some cool new content to tide you over until the springtime.

Apparently there’s some big thing happening with the sun and the moon today, but despite the fact that thousands of people are positioning themselves along a very specific path across the country, I’m slightly more focused on getting to a certain address in Salt Lake City, Utah.  My destination is Equipt Expedition Outfitters, and I’m going to spend a few hours learning all about the one of the most well-known and respected companies our industry. Many folks know Equipt Expedition Outfitters because they know Paul May.  But I have a confession to make: I don’t know Paul very well. I’ve certainly had the chance to chat with the man over the years at Overland Expo, where I’ve appreciated his hospitality (the man knows how to make a proper drink), but I’m honestly feeling like I’m not the most qualified guy to be writing the profile on a company whose Founder and Owner is so well known.

Pulling into the parking lot, the first thing that you fixate on are the rigs.  Just like that feeling you get pulling into a Rendezvous, Overland Expo or walking into SEMA for your very first time, you can’t help but feel just a little bit giddy parking next to these well-built, and more importantly well-traveled rigs.  On this Monday, the Equipt crew is just getting back from “product training” (Read: A weekend adventure with friends and family trying out new gear and learning more about current gear.) so there’s plenty of that familiar Utah dust on the rigs in the parking lot.

Step through the front door and you’re greeted with a showroom full of awesome gear.  Pictures of vehicles in epic locales cover the walls and unique decorations hold down the shelves – this is clearly the haunt of people who love to travel and explore.  I’ve barely had a chance to walk through the showroom when Raquel Donati (Equipt’s VP of Sales & Marketing) ushers me back into the warehouse, nicknamed “Big Toy Room” because it is also the place where you can play with nearly every product that Equipt sells.  But playing with things can wait – I’m here to learn more about the company, so Raquel and I sit down so she can bring me up to speed on everything Equipt.

Equipt Expedition Outfitters is the exclusive US Importer of Eezi-Awn, National Luna, Alu-Box, Escape Gear, and Kariba.  They also sell a number of other choice brands like TrekPak, MaxTrax, and Four Wheel Campers.  As Raquel puts it, “Equipt is a one-stop shop—you can find pretty much anything you need here, but regardless of how robust our product selections are, we are still highly selective about what partners we bring aboard, and which products we will carry. Our motto is Built Better, and that sentiment is the backbone of Equipt. We only offer the very best selection of gear, stuff that has proven to stand the test of time. There may be lighter options or something cheaper out there, but if you want gear that you can trust around the globe and back again, this is where you’ll find it.”

Equipt is the result of Paul May’s chance backcountry meeting with Eazi-Awn founder Jack Stuhler in the Utah desert circa 2004, where a common love for the outdoors and overlanding solidified an opportunity for Paul to become the exclusive Eezi-Awn importer in the states. Over the last 12 years, Paul has grown Equipt into the company that it is today.  I find that I really appreciate Paul’s approach to doing things, which is also something Lola Barron the Fulfillment Specialist, points out to me:  over the thousands of feet of space, there are tons of products setup so customers can come and put their hands on actual products before they buy them.  Playing with the products on the company’s rigs is also something that the crew is happy to entertain, and as long as you’re okay with getting a little dusty, you can check out real gear to your heart’s content.

Kristin is Paul’s niece and Equipt’s Chief Everything Officer and she tells me that over the last eleven years of working at Equipt, she has come to recognize the value of a relationship-based sales approach.  Customers come back to Equipt time and time again because they know that Equipt and the brands that Equipt sells stand behind their products and will go above and beyond to take care of their customers.  Integrity is also a key piece of the business model here, and I can’t think of a better way to relate that then when Paul told me that Equipt doesn’t put product on sale.  Equipt’s approach is to offer their best price to everyone, everyday.

Back in the shop, Paul is working with Craig to install a K9 Rack on Project Tundra.  These two work together like old friends and it’s clear to me that Paul spends time wearing many different hats for the company.  While the guys are putting holes in my truck, Raquel is showing me some gear from Eezi-Awn and talking about what it’s like day in and day out at Equipt.  She explains it like this:  “We have what big companies strive for.  As a small company, we do this to support a lifestyle, not to make business our lifestyle.”  As if I needed any more convincing that what Raquel is telling me is the truth and not canned-PR tripe, a bottle of champagne and some eclipse glasses suddenly materialize – because there is something pretty damn cool happening in the sky today.

The whole Equipt crew stops what they’re doing and meets out back behind the warehouse.  The eclipse is nearing it’s greatest occlusion of the Sun, and so bottles are uncorked, and eclipse glasses are donned.  It’s 11-something O’Clock on a Monday morning, and I’m watching a group of folks who are clearly happy to be together and happy in life take a minute to experience something that doesn’t happen every day.  It’s clear to me that what Lola told me is true as well – the folks at Equipt have a great time working together.  Craig is a retired electrician, but he’s here because he wants to work with Paul and the crew at Equipt.

Coming into my morning with Equipt, I have to say that I had expectations, because so many different folks over the years have told me what an outstanding guy Paul is.  While I will say that Paul is everything I’ve been lead to believe, I can tell you that he has also built a great team and a company at Equipt Expedition Outfitters.  Everyone who works at Equipt is exactly who you would want to spend time around a campfire with – and as it turns out campfire time is a big part of product training and testing.  A company can tell you a thousand tales of why they are the best or how serious explorers rely on their gear in extreme conditions, but when every single person who works at the company enjoys their work as much as the crew at Equipt does, you’ve found a great company to do business with.  Oh, and happening to sell really awesome gear helps too.

Learn more about Equipt Expedition Outfitters by visiting them at equipt1.com, or give them a call at +1 866-703-1026.  The folks at Equipt are all great people who are more than happy to chat about whatever project you’re working on, and share their expertise on everything from gear you need for the trip of a lifetime or weekend getaway, to where to find outstanding BBQ in SLC.

Equipt has been a long running sponsor of Expediton Overland, and on January 20th, 2018 at 7pm they’ll be hosting the Season 3 Wrap Party at Equipt HQ in Salt Lake City. Head here to sign up for an invitation and get the details.


Project Tundra // Suspension

Back in May, I installed some things on Project Tundra and something weird started happening.  I started getting this muscle soreness whenever I would drive the truck, and the problem seemed to be exacerbated by driving on dirt roads—especially when driving in a spirited manner (If I’m being honest, it happened on paved roads too….especially the twisty-windy ones.)  After seeking the help of various medical professionals with no luck, I took my problem to Google.  Rabbit holes were explored; but to no avail.  Months later, I can only conclude that I’m suffering from the thing that I hope has afflicted everyone who drives a vehicle off road:  Soreness of the face from too many Grins Per Mile.  And I put the blame squarely on the Icon Vehicle Dynamics (IVD) suspension for making my face hurt from grinning so much.

Not only has the raw enjoyment of the truck increased by installing IVD suspension, but the real world performance has improved considerably as well.  As a quiver-of-one vehicle, Project Tundra does everything from long hauls on America’s interstate system, to frequent trips on our favorite dirt roads.  Therefore, the truck’s suspension system needs to keep the vehicle rubber side down while dodging exploding semi-truck tires at 80 MPH in Utah, and soak up washboarded dirt roads in Arizona so that passengers can still play Jenga in the back seat.

Off the dealers’ lot, the stock TRD suspension is respectably capable—but there’s certainly room for improvement.  The folks at Icon Vehicle Dynamics have spent hundreds of man-hours developing suspension products specifically for the Toyota Tundra, and all of this R&D time enables them to suggest specific parts based on how you’re going to use your rig, and what you’re going to carry with it.  After talking about the end state of project tundra and how it would be used, IVD came up with a selection of parts that would make the Tundra perform like a magic carpet over a wide range of loads and roads.

PARTS OF THE PUZZLE

We were fortunate to get our hands on Icon’s new 3.0 Series coilovers and billet Upper Control Arms (UCAs) sporting the Icon Delta Joint for the front end of Project Tundra.  The 3.0 coilovers take the proven performance of the 2.5 Series coilovers and turn everything up to 11.  Everything on the 3.0’s is massive, as are the performance gains they provide over monotube shocks in every metric.  You can’t help but call the stock TRD-stickered Bilstein units ‘cute’ when they’re placed side by side with the 3.0 Series coilovers.  Installing a larger coilover assembly requires installing an aftermarket Upper Control Arm (UCA) that will clear the new coilover, yet this also provides real performance gains for suspension performance.

Icon’s Billet UCA’s with the Delta Joint give Project Tundra more wheel travel in the form of droop travel and the Delta Joint is far stronger than the stock ball joint.  Additional droop travel allows the tires to better stay in contact with the ground as the suspension (and thus tire) is what falls into a hole instead of the whole vehicle, keeping the vehicle more level.  The Delta Joint is a new product from IVD that combines the durability of a ball joint with the range of motion of a uni-ball.  The Delta Joint provides the benefits of both types of joints, and I’m quite eager to see how they hold up in the long run.  The UCA’s also allow for camber and caster adjustments, which can be used to help clear larger tires or dial in additional positive caster to tweak handling performance.

OUT BACK

To keep up with the front end, Icon provided us with their leaf expansion pack, hydraulic bump stop system, and VS 2.5 Series PBR Rear shocks with CDCV.  The leaf expansion pack provides ~1.5 inches of lift to the back of the truck and maintains the load carrying capacity without making Project Tundra ride like a dump truck.  The pack is installed between the stock main and overload spring so that factory towing and load characteristics are retained, and lift and comfort are added.  Icon has something spring related on the horizon that will be of great interest to the overland / adventure travel community and we will be updating this article as details emerge.

The hydraulic bump stop system was added to help keep the rear of Project Tundra in control, especially while carrying the additional loads that overland-style travel typically places on a vehicle.  Toyota’s stock bumpstops are about as soft as a lacrosse ball, and they instantly release all of the energy compressed into them right back out which can cause the back to the vehicle to kick or step out.  The bump stops provide bottom out control and are speed sensitive so that they can soak up big hard hits without limiting articulation and slow speed suspension movements.

Rounding out the system are Icon’s 2.5 Series shocks with Vehicle Specific (VS) valving, and the Compression Damping Control Valve (CDCV).  VS valving is the result of spending hours playing with shim-stacks, pistons, and other suspension variables to create a shock tuned specifically to the Toyota Tundra.  The CDCV allows me to dial in the amount of compression dampening we want in all of the shocks on project tundra, so we can crank up the compression for better road handling and big hits, and back it off for a more compliant ride when we’re going slow and doing technical trails.

WHEELS AND TIRES

When combined with Icon’s suspension system, a set of Icon Alloys Six Speed wheels allows project Tundra to clear a true 35 inch tire. These 17 x 8.5 inch wheels were developed with a specific +25mm offset that allows for lock-to-lock steering throughout the range of travel from full stuff to full droop. We wrapped our shiny new Six Speed wheels with Falken Tire MT01’s and A/T3Ws. Keep an eye out for a long term test on their tires, and we’ll be talking all about wheels and tires in a future Project Tundra article.

INSTALL

Installing all of these parts on Project Tundra took two days over the course of a weekend, and with the exception of an air chisel, no real specialized tools were required.  On Saturday, Chazz Layne and I were able to install everything on the front end with no real visits from Mr. Murphy.  You do have to cut a factory bumpstop to clear the new 3.0 Series coilover, and rather than take a corner off as the directions suggest, I opted to cut the whole bumpstop off, so that I could weld the bumpstop back on if I ever needed to in the future.  Likewise, you need to trim the ends of the swaybar, but I just opted to remove mine.  (DISCLAIMER:  AA and IVD can’t be held responsible for what you do to your truck…+LEGAL WORD VOMIT AS NEEDED)  We also had to elongate a hole on the reservoir mounting bracket, but other than that, everything was a bolt on installation easily completed in a leisurely day in the shop while stopping frequently to take photos.

On Sunday, I tackled the back end by myself, and here’s where you’ll need that air chisel I was mentioning.  The factory bump striker plates are riveted to the frame, so you’ll need to grind / chisel these mounts off so you can install the IVD mounts.  Installing the shocks is straightforward and took me maybe five minutes in total.  Installing the leaf expansion pack is also a pretty easy process, especially if you remove the leafs from the truck and use a jack and some planning to help haul your axle around.  With everything installed and properly torqued, the next thing to do is get the truck aligned.

SHAKEDOWN

Backing out of the garage, the difference was obvious, and things only got better from there.  The installation was done the week before Overland Expo West, and over the course of this summer I’ve taken project Tundra all over the Southwest, driving on everything from desert freeways to Colorado passes.  In every type of terrain, at high speeds and at low speeds the suspension has soaked up and confidently handled everything I’ve pointed the truck at.

Even when loaded down with the family and toys for a long weekend of play, the truck still had outstanding handling and performance.  While the addition of cargo weight obviously sags the suspension out just like it would any vehicle, being able to add compression dampening with just a few clicks helps keep the truck’s handling in check when loaded with gear.  Where a monotube shock valved for a lightly loaded truck would blow through it’s travel when saddled with additional weight, the IVD suspension keeps things in in control with a few additional clicks of compression dampening.

IT’S TIME TO REDEFINE ADVENTURE TRAVEL / OVERLANDING SUSPENSION

Just like any other sport or industry, the overlanding / adventure travel industry has its stigmas about what constitutes suspension perfection and about a million other ‘best options.’ Well, stigmas were meant to be broken.  If folks didn’t bother to break the mold and try something new, innovation wouldn’t be a thing, which is why I’m so glad that Icon Vehicle Dynamics is pushing their suspension into our industry.  Call it desert racing suspension or whatever you want, the fact of the matter is IVD’s suspension systems are brilliant for how we use our vehicles.  I’ve logged hundreds of thousands of miles on Australian-made monotube shocks, and while those systems work well and are certainly an upgrade from any stock suspension, they’re not on the same level as Icon suspension.

Going with a top shelf system from Icon Vehicle Daynamics is certainly going to cost more than a monotube shock setup—but this is an upgrade where you get what you pay for.  I know that conventional thinking in the industry would steer folks to stick with the tried and true, but I’m a big fan of tinkering, and trying new things.  Going with ‘desert racing suspension’ has worked out quite well for me and project tundra.  The performance (and safety) gains are night and day, and I don’t see any reason why these components wouldn’t last as long, if not longer with proper maintenance than anything else out there.  And besides, having suspension that can handle the occasional surprise whoop section or occasional airing out of the tires happens to be a hell of a lot of fun.

Full Disclosure: Icon Vehicle Dynamics, Icon Alloys, and Falken Tires generously contributed products for this build at no cost to Chad de Alva or American Adventurist. That said, American Adventurist staff members have been using and abusing IVD products for over a decade with zero trail failures in the some of the harshest terrain in North America.