
When I heard the news that Kawasaki had discontinued the venerable KLR650, I was pretty bummed. As a KLR rider myself, I was always a big fan of the platform but it seemed that time and emissions standards had finally caught up with my favorite old school thumper. Honestly, it had been in production virtually unchanged since 1987 (with a mid-lifecycle refresh in 2008) so an overhaul and redesign was long overdue in my opinion.
Thankfully, after a two year hiatus, they’ve redesigned it and much to my surprise, they didn’t ruin the original recipe. Luddites will malign changes like EFI, ABS and heated grips, but it’s still a basic, affordable adventure bike with a reliable 652cc thumper engine – and that’s a GOOD thing.
Changes are numerous in this redesign, while mostly subtle and well thought out. But make no mistake, this bike is still all about durability and ease of maintenance in the field.
Whether it’s traveling long distances or making the daily commute, this adventure-hungry, on-and off-road machine has a long history of versatility and toughness required for most any adventure. My 2008 was a beast (see it HERE) and this remix of an old favorite has me SERIOUSLY thinking about getting another KLR!
There will be two standard 2022 KLR650 models, one with ABS and one without, as well as two travel-ready models with some cool factory options, the KLR650 Traveler and the fully loaded KLR650 Adventure.

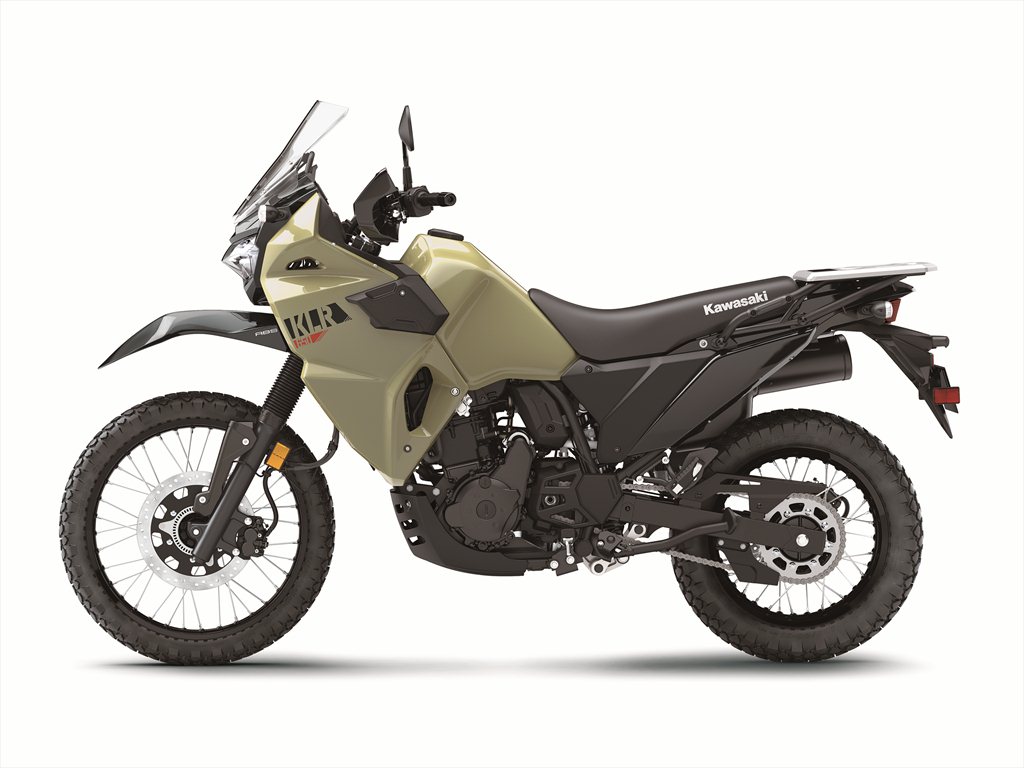
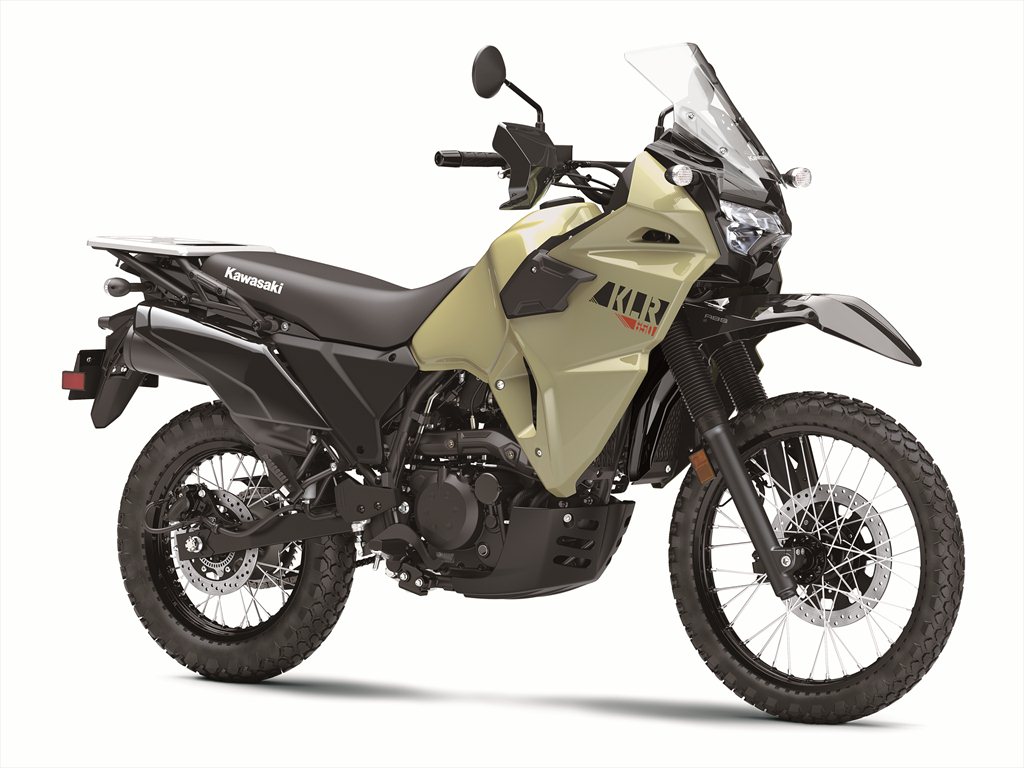
KLR650 ABS 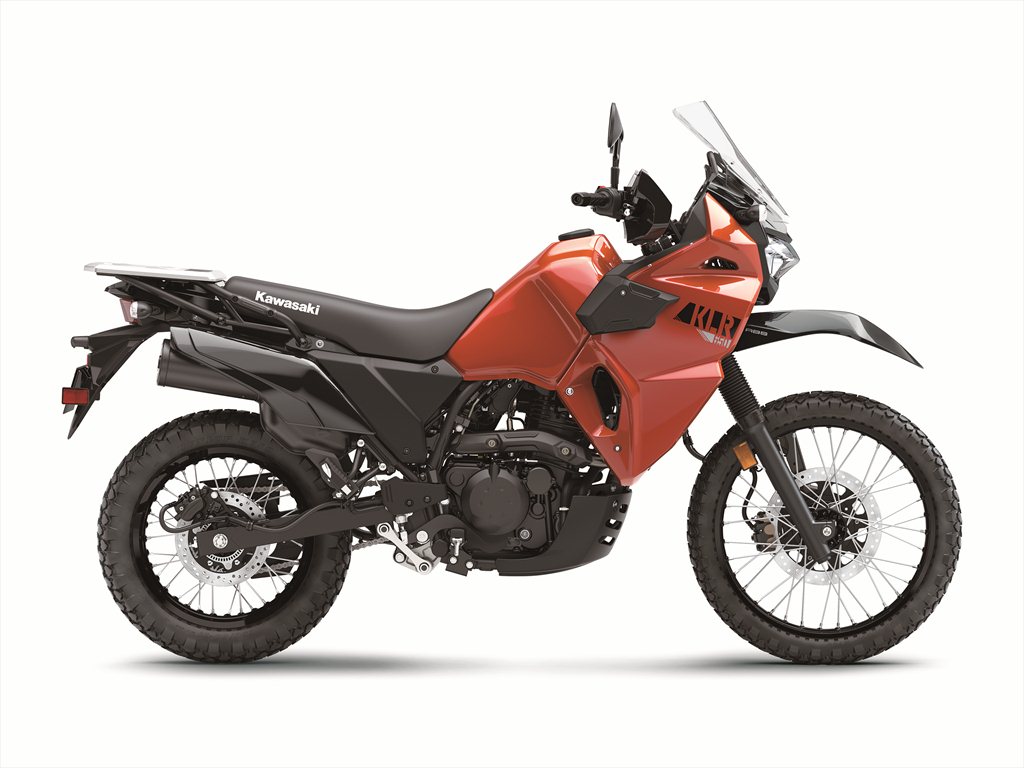
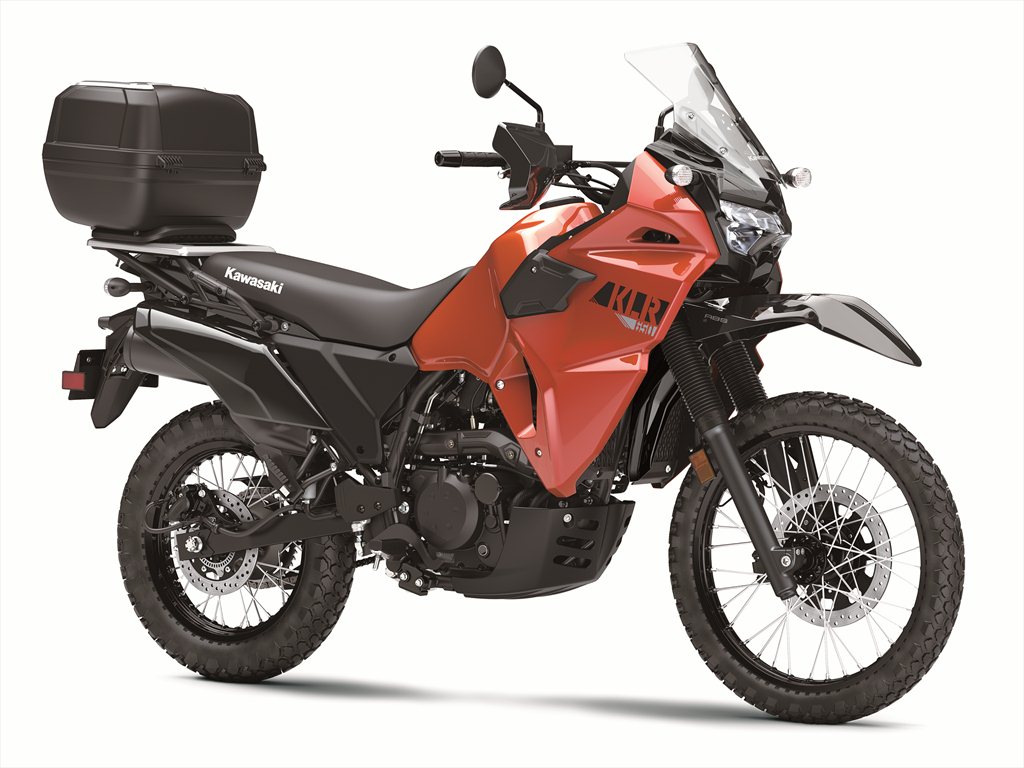
KLR650 Traveler 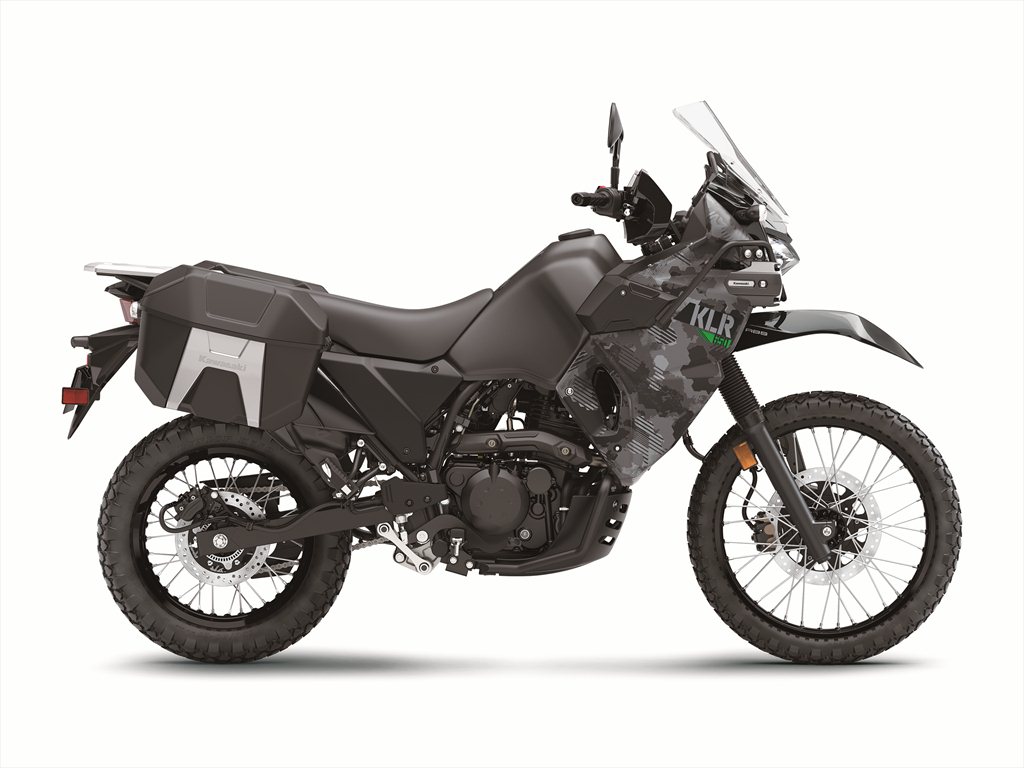
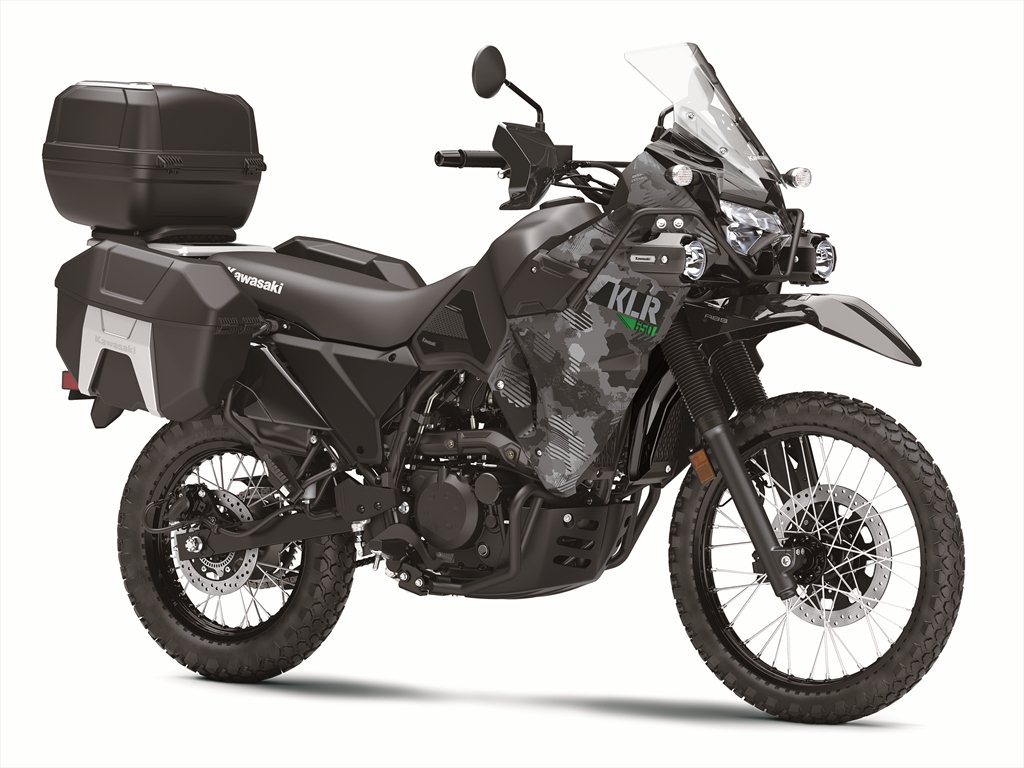
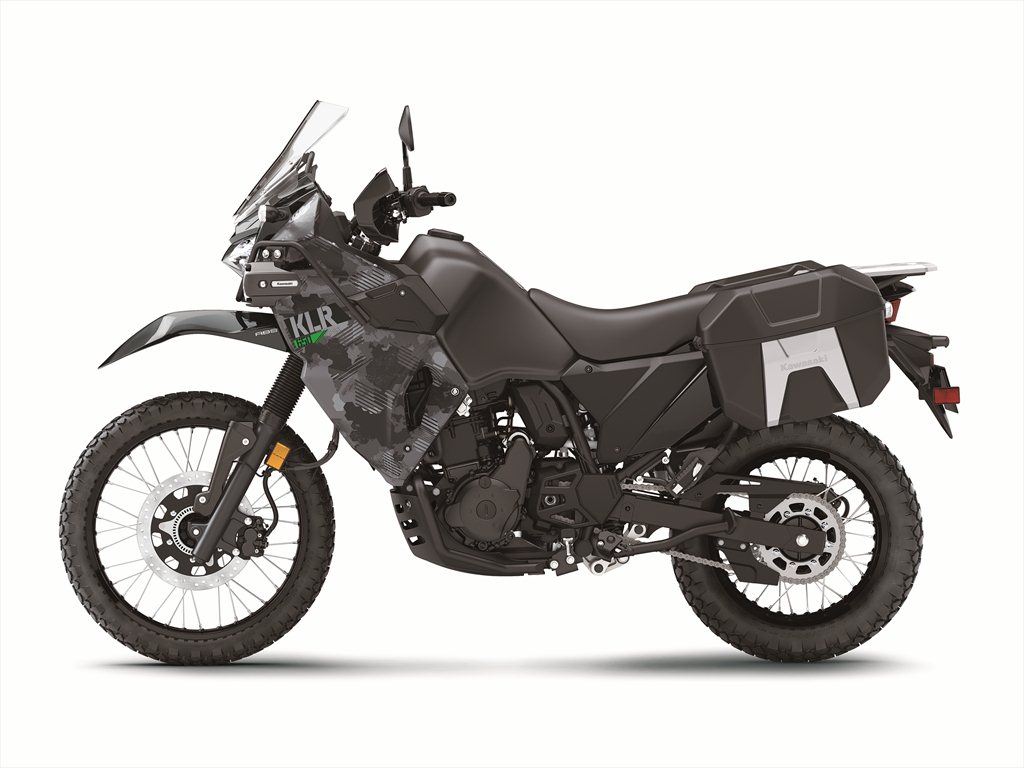
KLR650 Adventure
The all-new 2022 KLR650 receives the addition of a tried and true Keihin fuel injection system to the 652cc single-cylinder engine which results in increased reliability in cold weather and at altitude along with better fuel efficiency. A new multi-functional digital instrumentation panel with a fuel gauge is paired with a new fuel tank design with greater useable volume. Numerous parts have been updated for increased riding confidence when carrying luggage, reduced vibrations, and increased generator capacity, contributing to the improved performance and ride comfort that riders will appreciate.
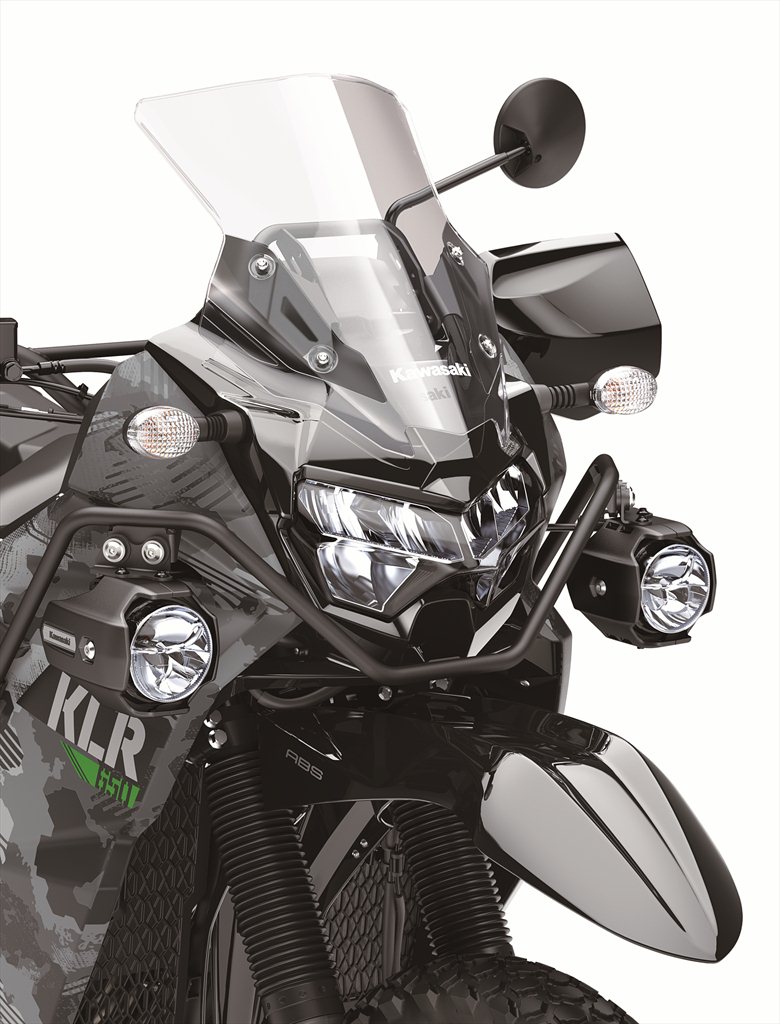
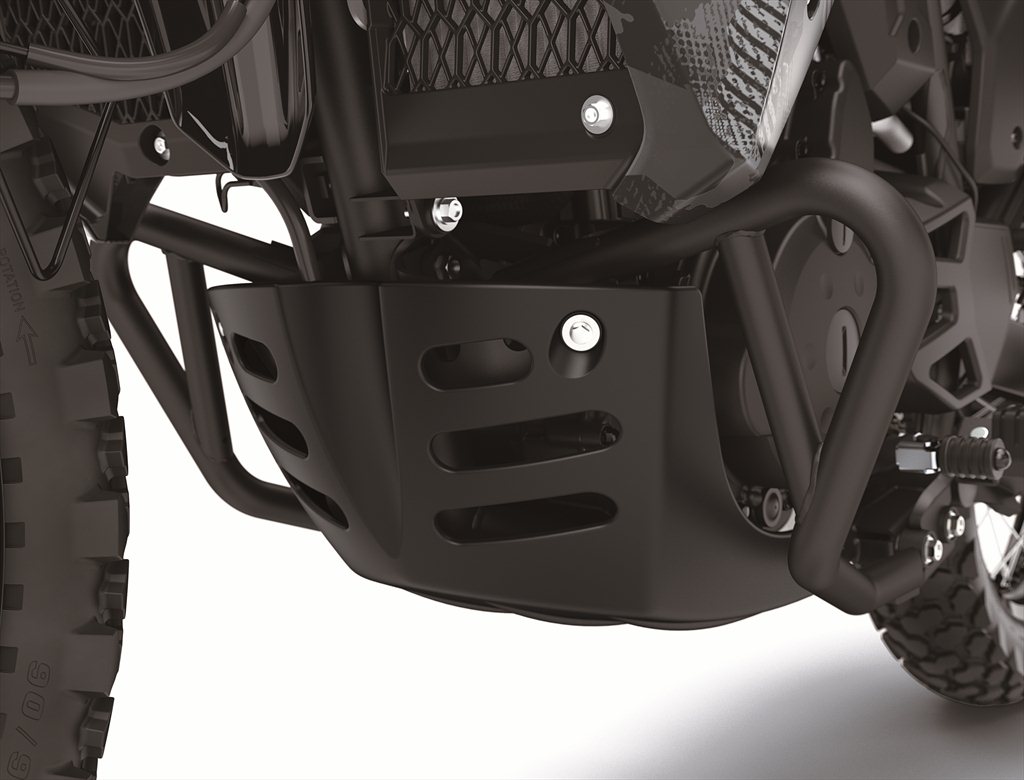
The all-new KLR650 features a new LED headlight, is available with optional ABS, provides a terrific riding position for all-day riding comfort and boasts plenty of carrying capacity. For 2022 the KLR650 motorcycle will also be available in two new special editions featuring a number of Kawasaki Genuine Accessories including side cases, engine guards, LED auxililary light set, and more.

2022 KLR650 HIGHLIGHTS
- NEW Fuel Injected 652 cc Single-Cylinder Engine
- NEW Multi-Functional Digital Instrumentation With Fuel Gauge
- NEW LED Headlight
- NEW Bodywork including fuel tank
- NEW Larger Front Disc And Optional ABS
- NEW Greater Wind Protection
- NEW Increased Carrying Capacity
ENGINE UPGRADES
- NEW Fuel Injection
- NEW Revised Cam Profiles
- NEW Exhaust Pipe Diameter
- NEW Updated Clutch
- NEW Increased ACG Output
- NEW Low Maintenance Battery
- NEW Lightweight Starter, Ignition Coil, And Evaporator Canister
- NEW Honeycomb Catalyzer
The KLR650 is powered by one of the most well-known, reliable, and trusted engines in the motorcycle industry. Its liquid cooled, four-stroke, 652 cc single-cylinder engine features a DOHC cylinder head and produces a flat power curve that lets you navigate challenging roads and cruise at freeway speeds . As stated earlier, the 2022 model is now equipped with Keihin fuel injection, which, combined with the fuel tank’s greater useable volume, contributes to an increased range between fuel stops, an important consideration for us long range nomads.


Starting the KLR650 has never been easier thanks to EFI, especially at high altitude or in cold conditions, and its reliability and performance have been increased. A 10-hole fine-atomizing injector sprays 60 µm droplets, which contributes to efficient air-fuel mixing for efficient combustion. Revised intake and exhaust cam profiles improve mid-range power and torque characteristics. A stronger cam chain guide material and shape add to the increased reliability.
The exhaust pipe diameter has been reduced by 7.7 mm to improve mid-range torque characteristics to better suit everyday riding. An oxygen sensor provides feedback to the fuel injection system, contributing to cleaner exhaust emissions and increased fuel efficiency.
Several updates have been made to improve shifting feel and reduce weight. In the clutch and transmission, the clutch release bearings were changed from ball to thrust-needle bearings, the gear dogs and shift fork have been revised on third gear, and a new finishing treatment is now used for fourth and fifth gears.
A new sealed battery adds to the convenience and is significantly lighter than the previous battery. The starter, ignition coil, and evaporator canister have all been revised and are now lighter than on previous models.
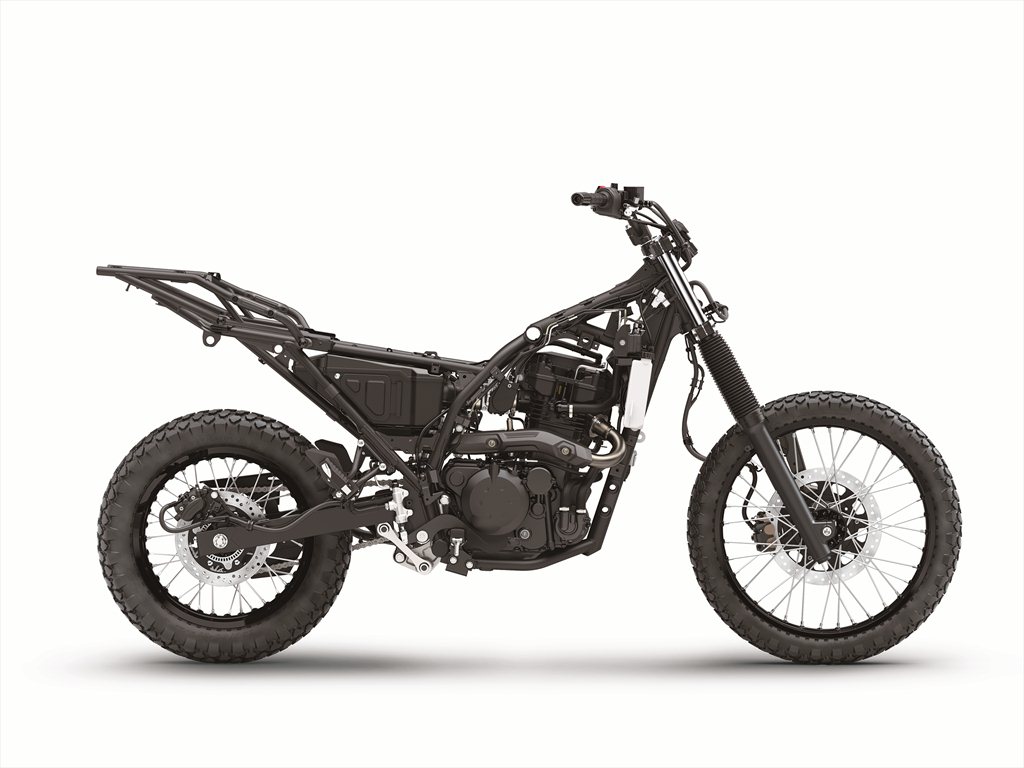
CHASSIS
- NEW Rear Frame
- NEW Swingarm
- NEW Larger Swingarm Pivot Shaft
The motorcycle’s proven, high tensile, semi-double-cradle frame receives several updates on the 2022 model. The updates now include a rear frame that is integrated with the main frame to increase torsional rigidity for a more composed ride and a 30mm longer swingarm with a 2mm larger diameter swingarm pivot shaft that also contributes to better handling.
SUSPENSION & WHEEL UPGRADES
- NEW Front and Rear Suspension Settings
- NEW Larger Front Brake Disc
- NEW Thicker Rear Brake Disc
- NEW Optional ABS Models
- NEW Stronger Rear Wheel Rim Material
- NEW Larger-Diameter Axle Shafts
Both front and rear suspension settings complement the new frame to help provide a more planted feel. In order to meet the demands of both on and off-road riding, 41 mm front forks with 200 mm of suspension travel handle the suspension duties up front and add the rigidity needed for superb performance. Firm fork springs provide excellent bump compliance and bottoming resistance while also reducing front-end dive under heavy braking.


An adjustable Uni-Trak system with 185 mm of suspension travel can be found on the rear and complements the front fork settings,offering progressive rear suspension action while contributing to a low center of gravity. Firm rear shock settings help resist bottoming in rough terrain and accommodate heavy loads. Rear spring preload and rebound damping adjustments allow riders to fine-tune suspension settings to suit the riding conditions and rider’s preference. The front fork and rear shock settings complement each other for light, sharp handling on smooth roads while providing the capability needed off-road.
Complementing the KLR650 motorcycle’s more powerful engine is a larger 300mm front brake disc that delivers more substantial braking power. The disc shape has been changed from a petal-type disc to a round disc. On the rear brakes, the disc has been thickened to provide better heat dissipation when under heavy braking. Similar to the front, the back disc shape is now round. Models with and without ABS are now available and the ABS offers additional rider reassurance when riding on low-friction surfaces.

The KLR650 comes equipped with a 21” front wheel and 17” rear wheel that allows riding to be continued even when the pavement turns to dirt. A stronger material can now be found on the rear wheel rim, delivering improved torsional rigidity and increased durability. The front and rear tires are tube types, making it possible for the rider to carry out any necessary roadside repairs. A larger-diameter front and rear wheel axle contribute to both durability and handling.
EVOLVED ERGONOMICS
- NEW Fine-Tuned Handlebar And Footpeg Positions
- NEW Rubber Mounts On Handlebars And Footpegs
- NEW Fuel Tank Design With More Useable Volume
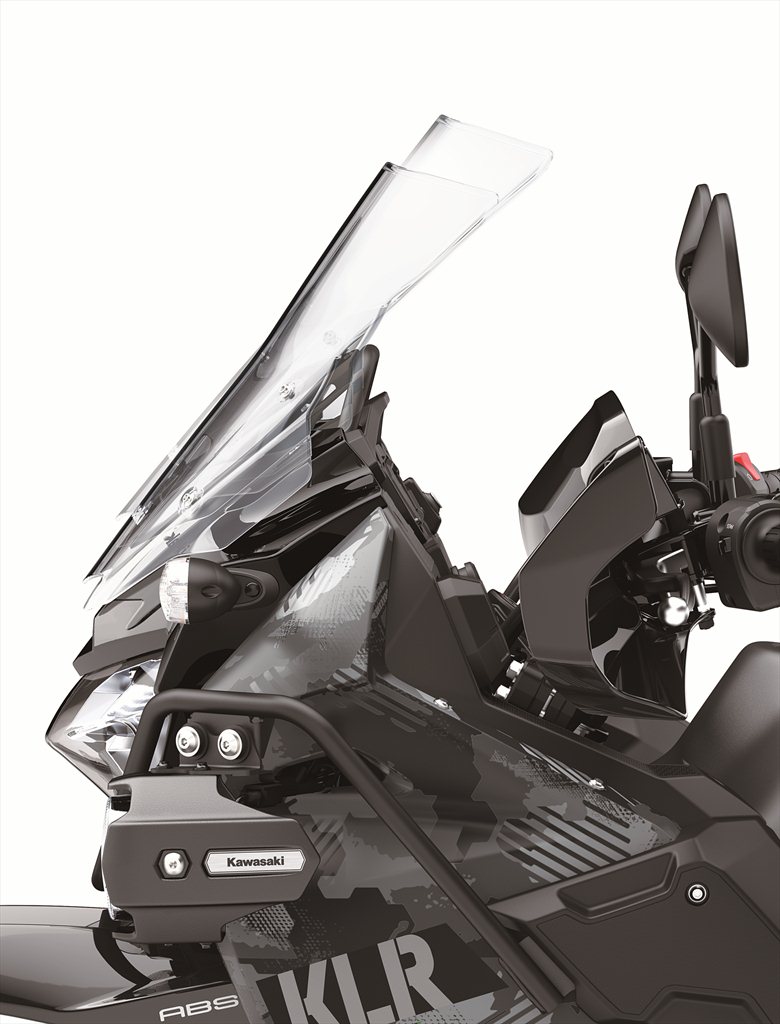
- NEW Taller Windshield For Increased Wind Protection
- NEW Seat Design And Materials For Improved Comfort
- NEW Pillion Grab Bars For Passenger Comfort
- NEW 30 mm Shorter Side Stand
The KLR650 has long been known for its comfortable, upright riding position, and for 2022 it has been fine-tuned to deliver a stress-free position for a longer adventure. One significant improvement has been the reduction of vibration from parts that come in contact with the rider, further contributing to comfort when on long rides.


Fine-tuned handlebar and footpeg positions have each been moved 10 mm outwards to provide adjustability and put the rider in a slightly more relaxed position, to support longer hours in the saddle for those “Iron Butt” rides across state lines. The handlebars and footpegs are now rubber-mounted, reducing vibration for improved comfort. A new fuel tank design has been fitted to the KLR650 chassis, offering a natural fit with the rider’s knees for comfort and increased controllability. While the volume of the new fuel tank remains the same, the useable volume has been increased through redesign and a new fuel pump that draws from the very bottom of the tank, contributing to a longer cruising range.
Aiding the rider up front, a new windshield can be found, which is now 50 mm taller for better wind protection and features two-position bolt-on adjustability that allows windshield height to be conveniently increased a further 30 mm. The seat shape and cover have been revised and the optimized urethane thickness and firmness all contribute to increased ride comfort. Under the seat, rubber dampers have been added to further isolate vibrations and aid in rider comfort. Passenger grab bars have been reshaped, improving passenger comfort for the occasional two-up ride. The side stand has been shortened 30 mm, making it easier to deploy when on the bike.
BODYWORK & STYLING
- NEW Shroud, Side Cover, And Tail Cowl
- NEW Bright LED Headlight
- NEW Tail light And Turn Signal
- NEW All-Digital Instrument Panel
- NEW Longer Mirror Arms
The KLR650’s robust design reflects the bike’s capabilities for a no-nonsense adventure. New colors and modern styling includes a protector-equipped shroud design that contributes to a functional and rugged look, while a new side cover design and tail cowl tie the new package together.
A new bright LED headlight illuminates the way when the ride continues past sunset and also contributes to the intended adventure styling makeover. In the back, a revised taillight and turn signal design can be seen while rearward field of vision has been improved thanks to longer mirror arms.


An all-digital instrument panel offers information at-a-glance through a large display and easy-to-read LCD screen with white backlighting. The instrument panel features a speedometer, odometer, dual trip meters, fuel gauge, clock, and indicator lamps. The narrowed-down display list prioritizes visibility of the speedometer and fuel gauge. Imagine, a KLR with a fuel gauge!

ACCESSORIES
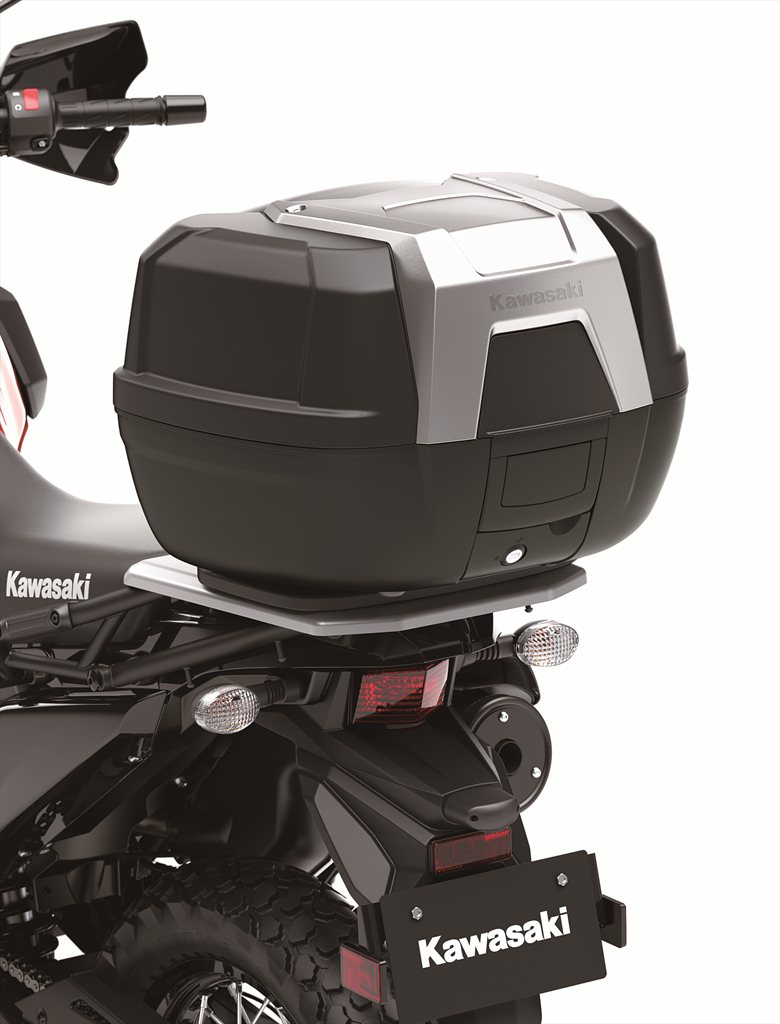
A number of Kawasaki Genuine Accessories (KGA) will allow riders to personalize the looks of their KLR650 and offer added comfort and convenience. Kawasaki accessory side cases and top case were developed to provide a clean look with their well-matched design.
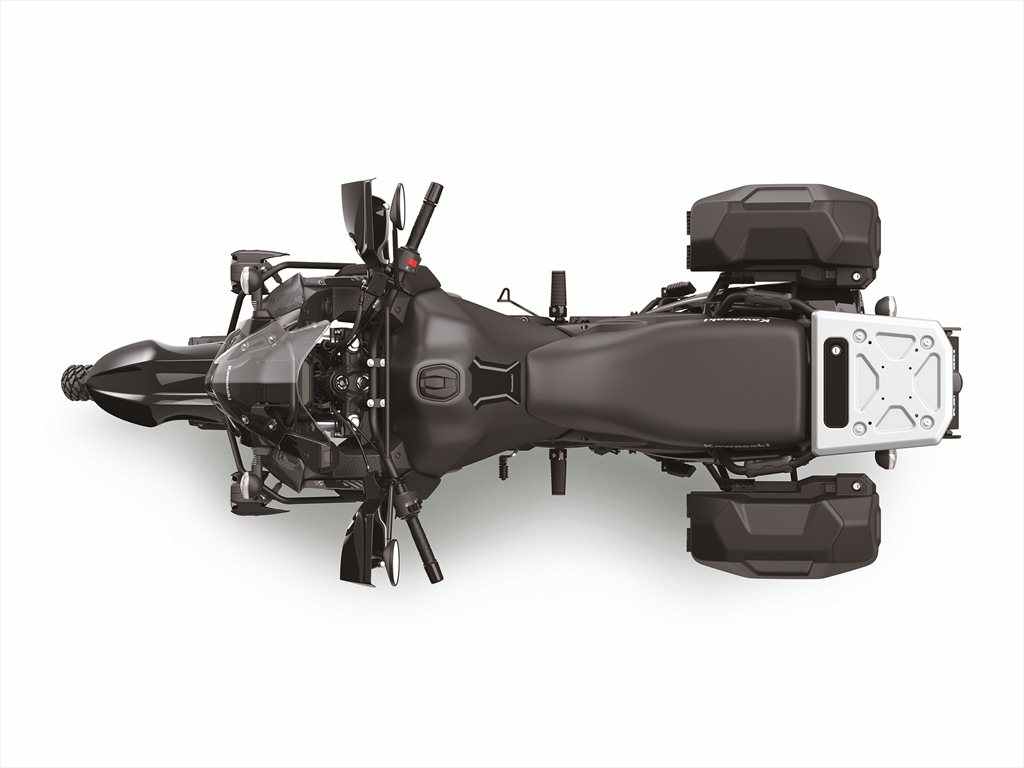
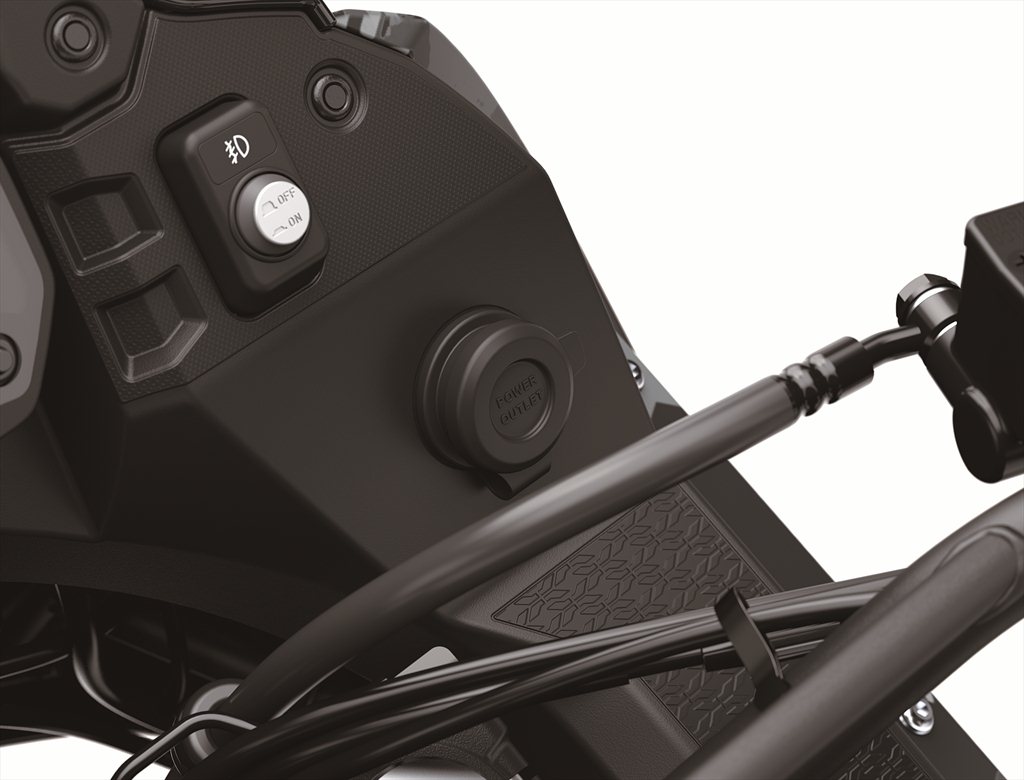
The side cases feature a top-opening design that makes it easy to add and remove items when they are mounted on the bike. The side cases easily clip onto their mounting brackets for a secure fit. The top case is large enough to accommodate an off-road style helmet. Improving convenience, side cases and the top case can be fitted with a one-key system. Complementing the accessory luggage, a larger aluminum rear carrier offers improved carrying capacity. In addition to its exclusive luggage, accessories include grip heater set, LED auxiliary light set, engine guards, DC power outlet, and USB socket.
SPECIAL EDITIONS
Also new for the 2022 KLR650 are two model variations that feature factory-equipped accessories and both come standard with ABS. The KLR® 650 ADVENTURE model comes equipped with factory-installed side cases, LED auxiliary light set, engine guards, tank pad, and both DC power outlet and USB socket and is available in the Cypher Camo Gray colorway. This model is designed for the adventurer who is looking for increased carry capacity and convenience. The KLR® 650 TRAVELER model features a factory-installed top case and both DC power outlet and USB socket and comes in Pearl Lava Orange colorway.
COLORS
The 2022 KLR650 base model is available in Pearl Sand Khaki and Pearl Lava Orange. The KLR650 ABS is available in Pearl Sand Khaki. The KLR650 TRAVELER model is available in Pearl Lava Orange, and the KLR650 ADVENTURE model is available in Cypher Camo Gray.


I WANT ONE! HOW MUCH WILL IT COST TO RIDE A KLR?
KLR650 – $6,699
KLR650 ABS – $6,999
KLR650 TRAVELER – $7,399
KLR650 ADVENTURE – $7,999
ABOUT THE BRAND
Kawasaki Heavy Industries, Ltd. (KHI) started full-scale production of motorcycles over a half century ago. The first Kawasaki motorcycle engine was designed based on technical know-how garnered from the development and production of aircraft engines, and Kawasaki’s entry into the motorcycle industry was driven by the company’s constant effort to develop new technologies. Numerous new Kawasaki models introduced over the years have helped shape the market, and in the process have created enduring legends based on their unique engineering, power, design and riding pleasure. In the future, Kawasaki’s commitment to maintaining and furthering these strengths guarantees new legends like the reborn 2022 KLR650.
Kawasaki Motors Corp., U.S.A. (KMC) markets and distributes Kawasaki motorcycles, ATVs, side x sides, and JET SKI® watercraft through a network of approximately 1,100 independent retailers, with close to an additional 7,700 retailers specializing in general purpose engines. KMC and its affiliates employ nearly 3,100 people in the United States, with approximately 260 of them located at KMC’s Foothill Ranch, California headquarters.
Kawasaki’s tagline, “Let the good times roll®”, is recognized worldwide. The Kawasaki brand is synonymous with powerful, stylish and category-leading vehicles. Information about Kawasaki’s complete line of powersports products and Kawasaki affiliates can be found on the Internet at www.kawasaki.com.

FULL DISCLOSURE: American Adventurist is not affiliated with or sponsored by Kawasaki. We just like motorcycles!