All-Purpose Scout 80 Build

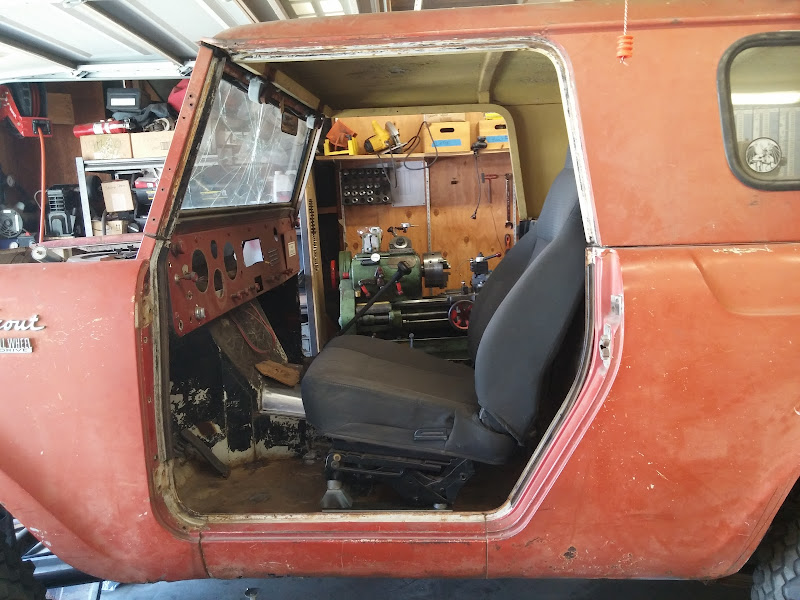
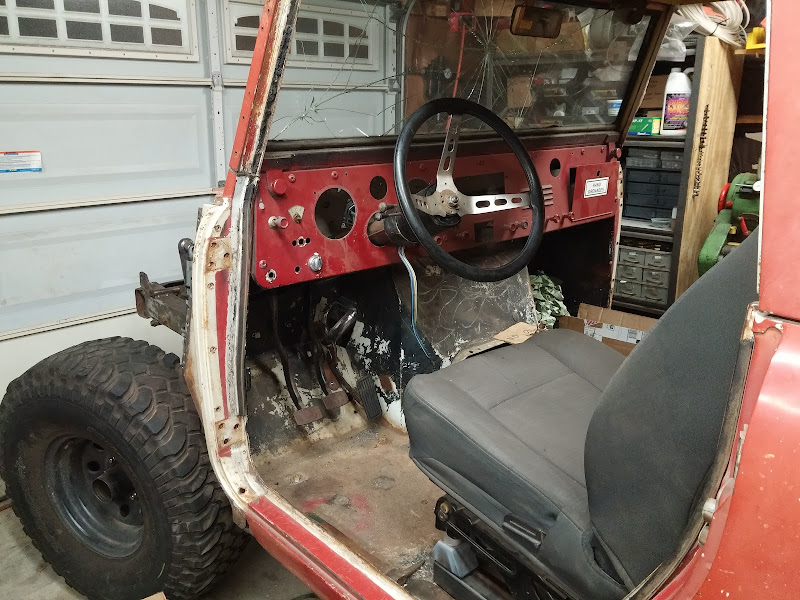
Hmm, looks like someone shot holes in the bottom of my truck, I'm picturing the scene from the Top Gear Africa special where the guide shoots the floors of the cars to drain out water after a stream crossing :)
2015-05-01%252016.18.42.jpg


That one looks about 9mm, there have got to be a half dozen .22 sized holes. All in the floor, my work today is going to be patching all of them :)

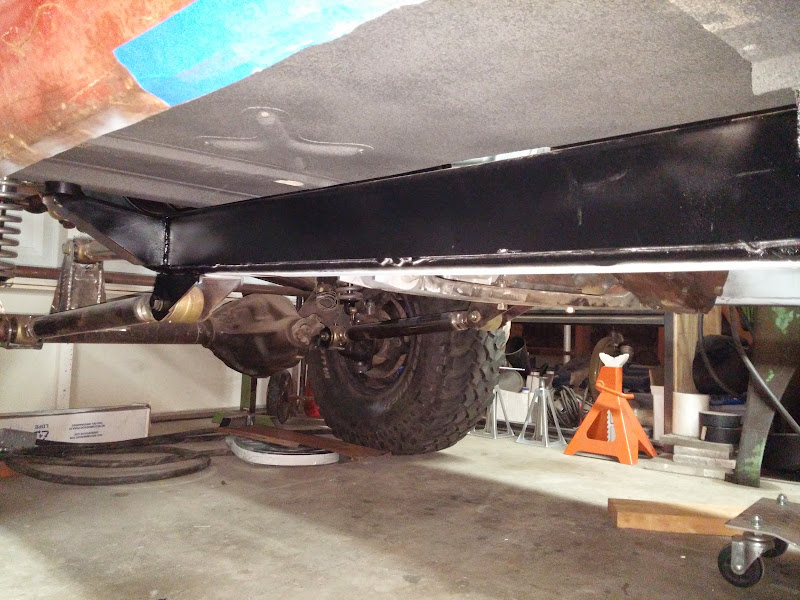
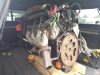
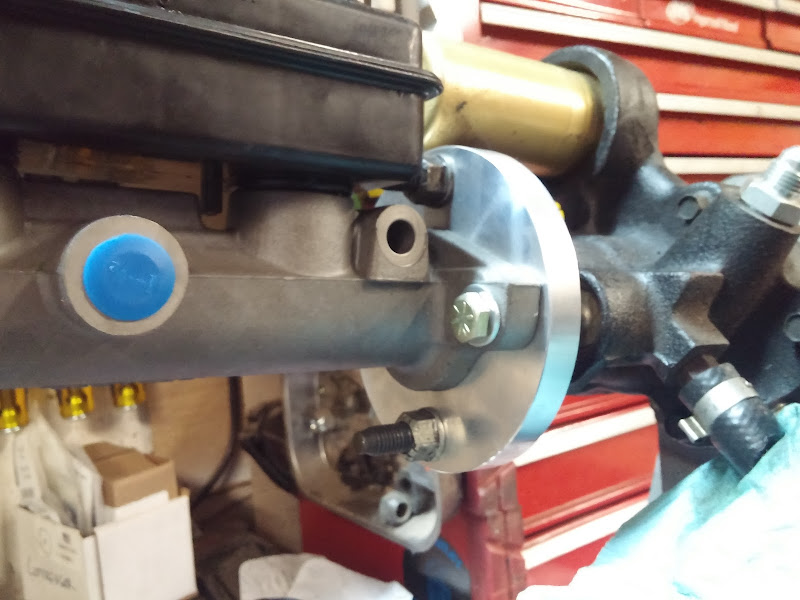
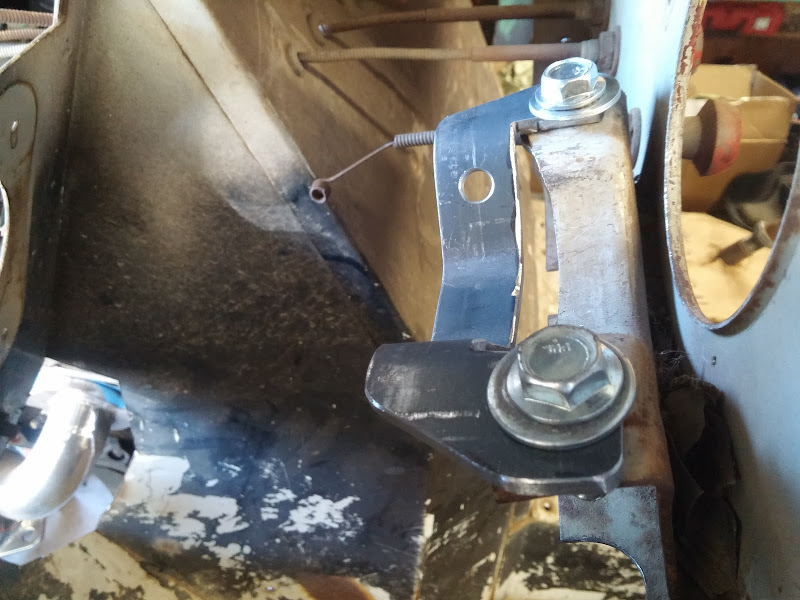
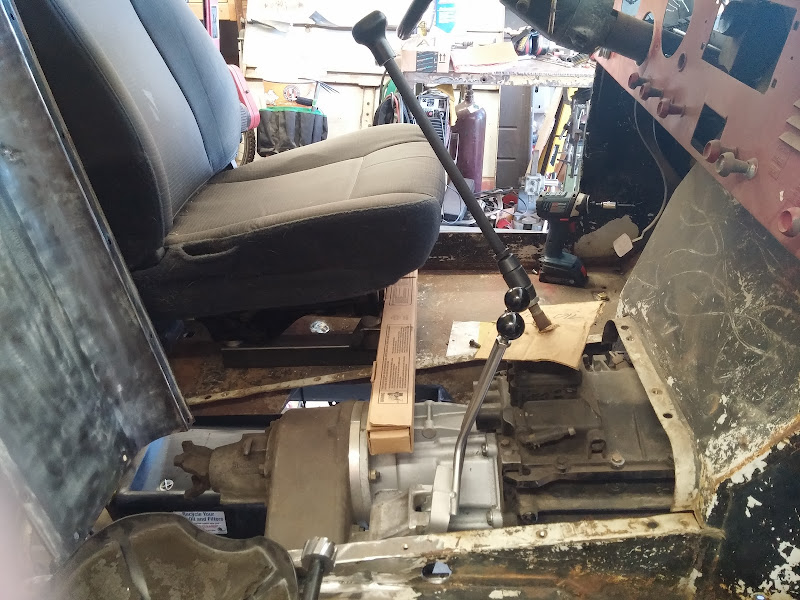
No, that jack isn't holding up the body, just acting as a stabilizer.

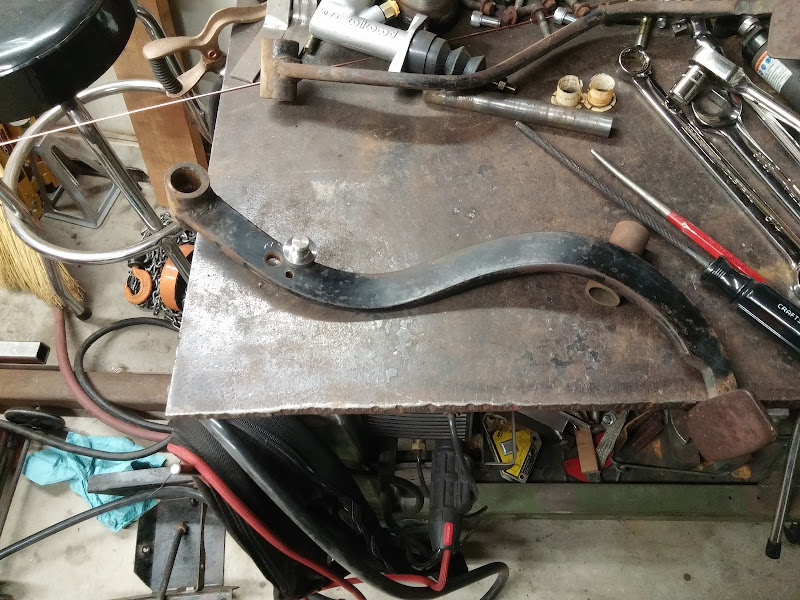
The last few weekends have been spent getting the floors cleaned up, holes welded and generally prepped as well as I can for paint. Lots of time with these, as well as some air tools. You can never have too many grinders.
2015-04-29%252019.45.21.jpg


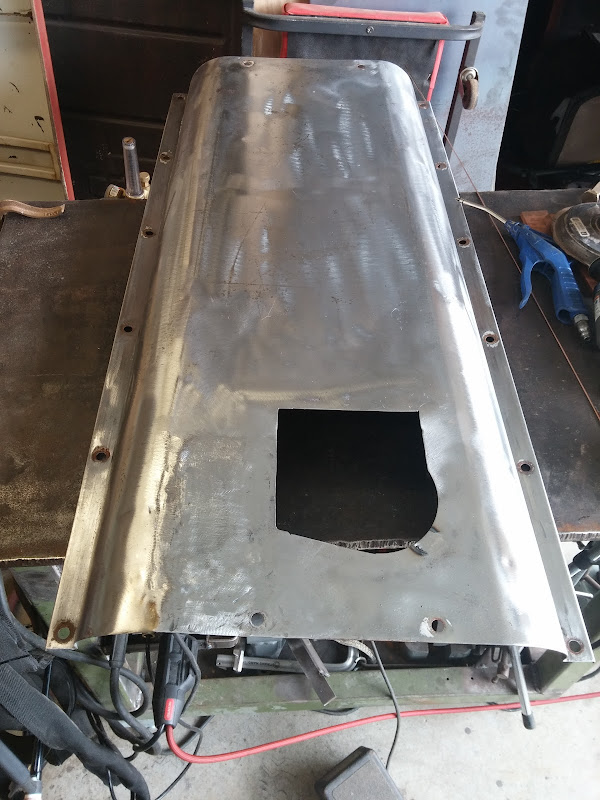
You can see the 'before' condition above, here's the after (with more bullet holes):
2015-05-01%252016.19.14.jpg


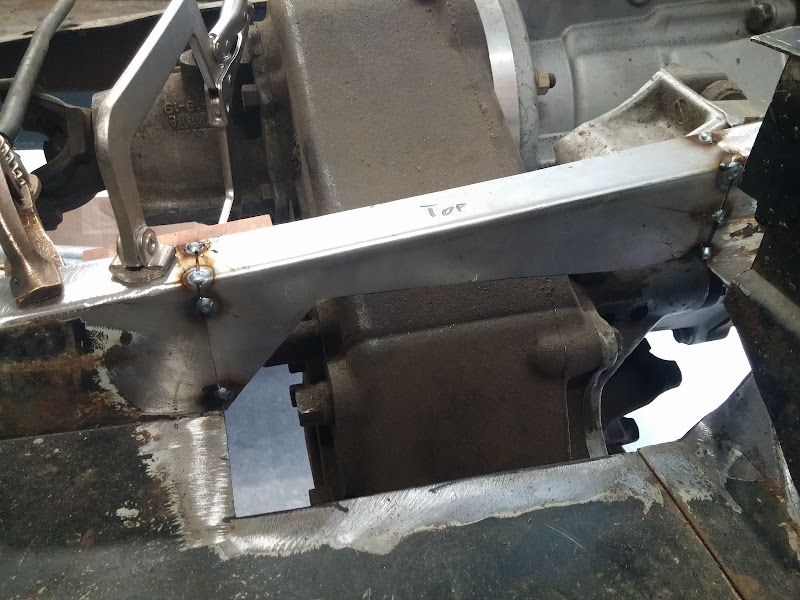
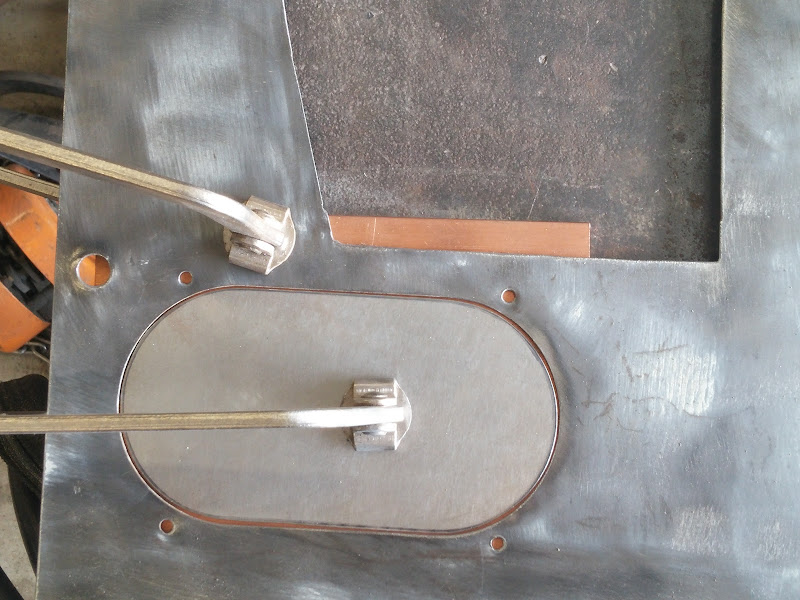
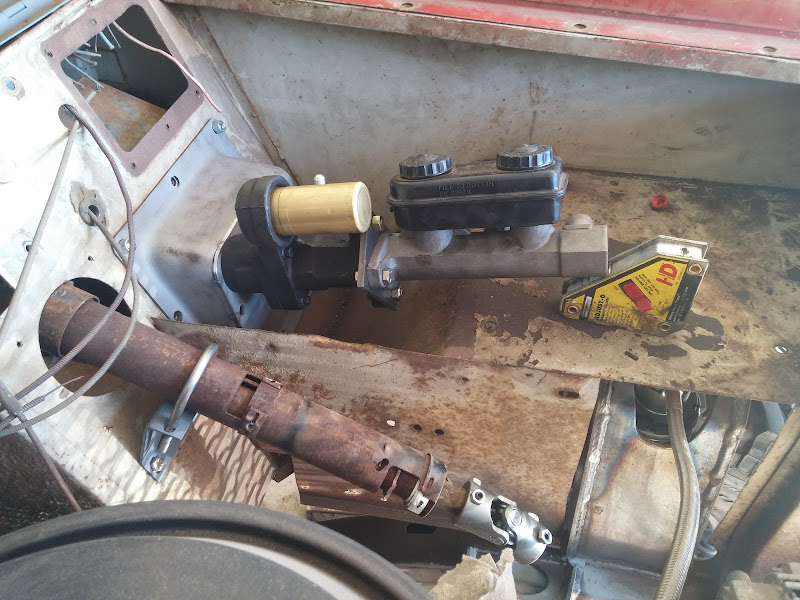
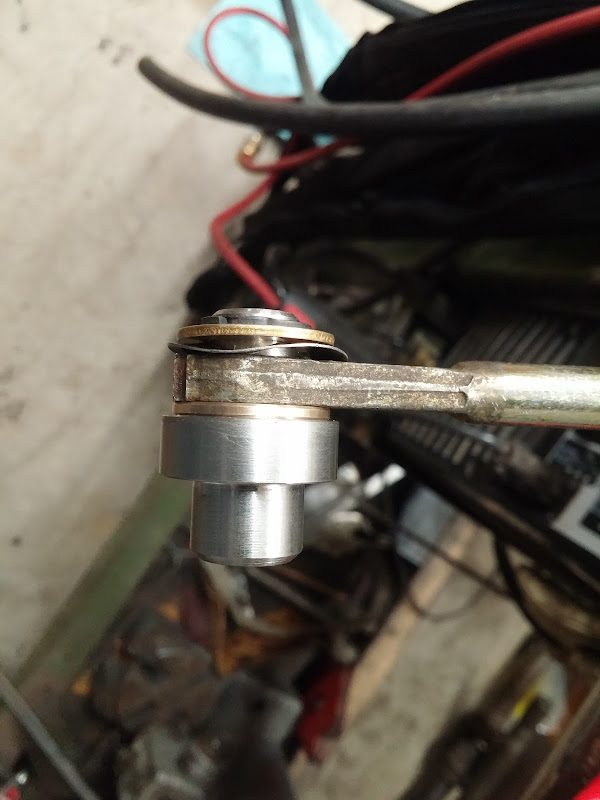
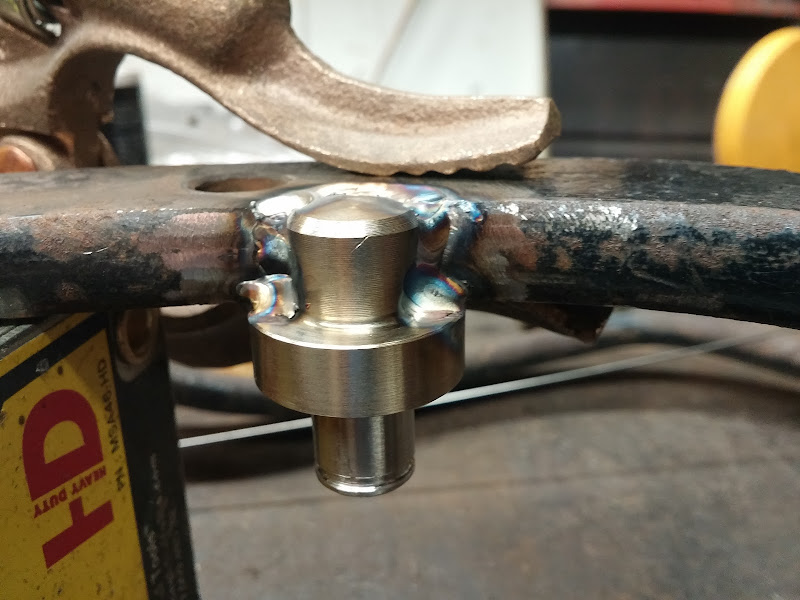
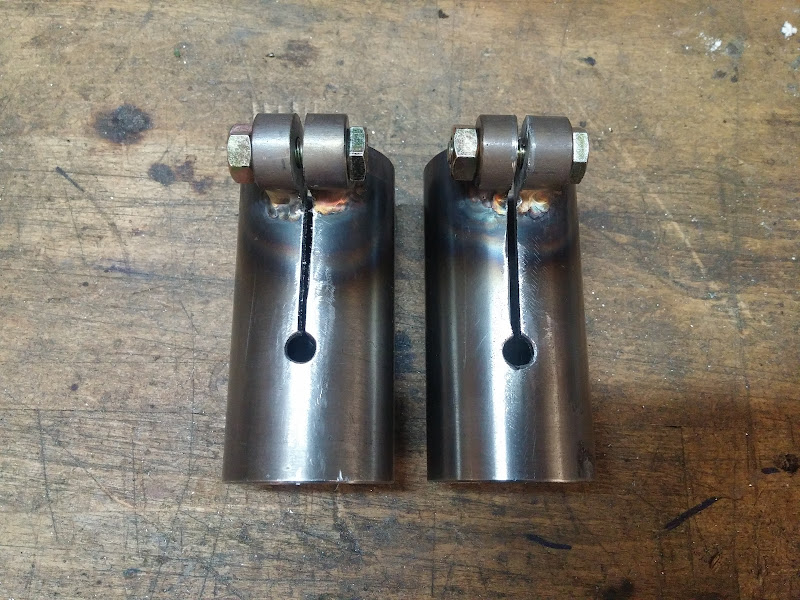
I made up a little tool to make welding up holes easier, its a switchable magnet that holds a 1/4" thick piece of copper against the panel. Worked out really well, it is strong enough I could stick it under the bed and do my welding from above. I'm doing all of this solo so this worked way easier than one of those welding spoons you have to hold.
2015-05-02%252015.33.36.jpg


Same process under the bed, then a few coats of Eastwood Rust Encapsulator
2015-04-26%252014.50.43.jpg


And the end result of all this work, 2 coats of Lizardskin Sound Control sprayed under the bed.
2015-05-03%252020.43.37.jpg


I used a generic undercoating (schutz) gun, my buddy gave it to me after he sprayed bedliner with it. Took a little adjusting to get the air pressure and nozzle settings right but it worked out pretty well. The Lizardskin stuff is nice to work with, cleans up with water and doesn't really have a smell to it. Painting under the truck sucks, I was glad I bought a tyvek bunny suit with a hood to keep the spatter mostly off of me.

I'll re-mask and spray the floorboards this week, then the body goes back on the frame this weekend.
 
Fantastic build! Love it when someone with talent takes their time to revive an otherwise dead classic like this.

My favorite quote from your commentary:

I played with CAD (cardboard aided design)

...got to pass that along to my dad.
 
Fantastic build! Love it when someone with talent takes their time to revive an otherwise dead classic like this.

My favorite quote from your commentary:


...got to pass that along to my dad.

Thanks! I'll have to pass that on if I find anyone with talent around here :) This is by far the largest project I've ever undertaken, and most of the "skills" were learned on the job so to speak.

I'm a mechanical engineer, probably as comfortable as anyone using real CAD (Solidworks) for design work, but sometimes its just easier (and more satisfying) to play around with cardboard for a bit.
 
wow you are an artist. Where did you find the time to learn how to do that stuff. the truck is beautiful dn I bet we wills in magazine some day.
 
Well time for another long overdue update, this time I have a good excuse though :)

2015-05-21%25252012.55.24-1.jpg


My wife and I had out first child, a healthy baby boy named Ethan. I took a month off of work, and I've managed to sneak some garage time in when the wife and baby are napping throughout the day.

I finished up work on the floors with the same lizardskin coating under the passenger compartment floor boards, as well as painting the frame where I am finished welding. The body is set back down on the frame and the truck is back to being a roller.
2015-05-12%25252021.09.20.jpg


To finish off the floors I needed to fill in this gap I cut out to clear the transfer case.
2013-12-15%25252017.52.54.jpg


Played with cardboard until I had a shape that I was happy with, then transferred the design to metal and used my buddy's brake at his house to make the bends.
0519151656a.jpg


0606151219.jpg


First piece tacked in
0613151651.jpg


0613151719b.jpg


The second (more complicated) piece didn't work out exactly like I planned, I didn't account for the metal shrinkage at the bend quite right, so I wounp up modifying it a bit but I'm still happy with how it came out. I still need to finish weld this in and grind it down smooth.
0618151223a.jpg


Next I cleaned up the transmission tunnel cover, opened up the shifter hole to fit the NV4500 shifter tower, and welded up the stock transfer case shifter hole. The transmission shifter is roughly in the same place as the stock one, but the t-case shifters will be quite a bit further back. I am still working out exact placement and will have to cut a new hole once I get that sorted out.

0609151128.jpg


No more transfer case shifter hole. You can see i used a big piece of copper as a backer, really makes work like this pretty easy. I tig welded up the patch panel, makes for less weld to grind down after the fact.
0611151505.jpg

0612151445a.jpg


0612151446.jpg


Found a nice big Hurst shifter boot that covers the transmission shift tower, and the rest of the transmission and t-case fit nicely under the cover so I didn't have to modify it too much more.
0612151447a.jpg


To finalize t-case shifter location I wanted the seats to at least be mocked up into place. The seats I'm using are from a TJ Rubicon unlimited, and have a nice fold forward feature that should make getting into the back seat easier, so I wanted to keep the bases intact. This means cutting out the stock seat bases, and making some quickie mock up bases to let me play with height and position.
0618151134.jpg


0618151134a.jpg


I'm going to cut out the bulkhead behind the seats, but I think with the seat flipped forward access won't be too bad, and I also can use the area behind/under the seat for storage.
0616151201.jpg


Next steps - build some transfer case shifters & finish the floor mods, then pull the drivetrain for finish welding of more brackets on the frame, some firewall modification needed to clear the exhaust manifold, and pull the axles to finish weld the suspension brackets and re-gear. Then I'll actually be dropping the drivetrain back in for the (maybe) last time, and start plumbing and wiring.
 
Something cool showed up at work today:
0708151141a.jpg
 

Attachments

  • 0708151141a.jpg
    0708151141a.jpg
    150.7 KB · Views: 124
Finished mocking up the seat position, shifter and got the Suburban Tilt steering column into place, driving position feels pretty good. Still need to make mounts to bolt down the column and make the seat mounts, I want to tie those into the cage so that may come a ways later. I might shorten the shifter just a bit:)

0628151628.jpg


Modified brake mounting plate to tilt the hydroboost/master cylinder up enough to clear the top of the inner fender.

0708152202.jpg


0702151612e.jpg


I'll use a spindle nut with a modified socket to bolt the HB unit to the mounting plate, so that if I ever need to remove it in the field I'll have the tool with me, rather than using the stock large square nut that came with it.

0708152142.jpg


This past weekend I had a good chunk of time to work so I pulled the old TBI 350 with the help of a friend, and took a first stab at fitting the 5.3. As expected the passenger side motor mount bracket on the frame hits the AC compressor, I had planned to re-make this side anyways. Overall it looks like it'll fit pretty well in the same location as the old motor. I'm hoping to have time to fab the new motor mounts this weekend and get the motor bolted in, then I can start figuring out what'll work for exhaust manifolds.

0718151557.jpg


And lastly a bad shot of the truck at ride height. I pulled the springs that were making it sit high in the front, and am just running a single spring and using the adjuster to set height. Doesn't have the stupid bro-truck stance anymore :)

0718151710a.jpg
 
Ugh, I feel like these updates suck lately, but as some of you know babies are a bit of a time sink.

Motor is in and bolted up to the transmission. I built new motor mounts, the drivers side matches the location of the existing frame side motor mount (for the old TBI 350), the passenger side is more like a normal LS motor mount to clear the AC compressor. I didn't like the original mount I'd built off the frame on that side anyways, so it was an opportunity to re-make it better.

0801150959.jpg


Been using the TIG welder everywhere I can, I'm no pro but I'm happy with how these turned out.
0731152200c.jpg


I got sick of dealing with the inner fenders, so I made them removable. I thought this was going to be trickier than it was, I really should have just done this years ago. I drilled out the spot welds along the 3 seams, and then cut the outside surface of the inner fender (which is 1 piece) at the seam along the line of the firewall. I will weld nuts to the backside of the seams and bolt through the spot weld holes to reattach. I'll probably build the new core support to also support/locate the ends of the fenders and grille.

A tip - if you cant easily find the spot welds, sanding off the paint along the seam will make them stand out pretty well.

0809151158.jpg


Another plug for the Rotabroach cutters, they do such a clean job on sheet metal. I've used my small set enough by now to justify spending the money for the larger set to replace all of the hole saws I used to use.

0809151228.jpg


0809151159a.jpg


Inner fender
0809151229h.jpg


Clearance issues:
I'm not sure the stock truck AC compressor (specifically the tensioner) is going to work out, it hangs down lower than the crank pulley and might get friendly with my panhard bar. I need to make time to cycle the front suspension and make the decision, it should be simple to relocate the AC compressor (Novak makes a nice looking kit that uses the old style AC compressor: Air Conditioning Compressor Relocation - Novak Conversions).

The passenger side motor mount needs to move forward a bit more, the header flange just hits it. Not a big deal, I can move the mount forward and inch easily and have lots of clearance.
0809151159b.jpg


The firewall needs clearance on both sides, as expected. The SBC I had used rams-horn exhaust manifolds that were a bit lower profile. Not really a big deal, and a whole lot easier to do without the stupid fenders in the way.

Drivers side is the worst
0809151226.jpg


Passenger Side
0809151159c.jpg


Current plan is to make enough clearance for the header tube plus a heatshield. Not sure if I want the heatshield mounted to the header (like this stuff Thermo-Tec : Stainless Steel Clamp-On Heat Shield) or to the firewall (https://www.designengineering.com//...ier/floor-tunnel-shield-ii-heat-sound-insulat).
 
Another lame update, whatever. I've been sneaking in time when I can find it, sure doesn't feel like much progress though.

Moved the passenger side motor mount to clear the header.
0927151138f.jpg


Made clearance for the headers in the firewall. The pictures make it look like its closer than it really is, I was aiming for 1"+ of air space around the headers. The firewall will get the same sound + thermal coating as the underside of the truck, plus a layer of heat shielding (Aluminum w/ fiberglass backing stuff from DEI).

0927151138a.jpg


0927151137d.jpg


Checked for clearance at full bump with the new motor - turns out the LS series engines use a larger diameter crank pulley than a TBI 350, but I still have clearance. Also looks like the front driveshaft will clear the oil pan and starter just fine, and the deep truck oil pan clears the front diff too. It hangs down more than I'd prefer but I can swap it out for a lower profile pan later on if it bugs me or becomes an issue.
1011151653f.jpg


I finished up the master cylinder mount, and machined a post for the hydroboost clevis to attach to. Trying to preemptively cut out any sources of rattles so I designed it to have a wave spring to preload the parts together.
1013152101.jpg


Where the post gets welded into the brake pedal:
1013152144a.jpg


Not entering the pretty welds post just yet :) First time welding stainless to mild steel, turned out OK.
1101151735a.jpg


In case anyone's wondering, McMaster P/N 1281N24 is a dead ringer for the brake and clutch pedal bushings.

I machined an adapter for the master cylinder to the hydroboost unit, only need this because the HB unit is clocked up so the accumulator clears the inner fender and steering column.
1104150606.jpg


1104150606d.jpg


I have an idea of how I want to build the steering column mounts, which will be the next project. It'll be nice to be able to steer the truck if only to move it around the garage.

I'll be tackling the Engine wiring & plumbing soon, and sending the ECU out to get VATS and emissions removed and get it set up to run stand alone. I have some plans for the engine harness that should be simple and clean, will share that soon hopefully.
 
I got the brake pedal mods finished up, rebuilt the main pedal pivot with the above mentioned flanged bushings from McMaster, and got it all bolted into the truck. This let me figure out where the gas pedal wanted to be, and modify the Silverado Drive by Wire pedal to work. I used measurements off my DD Tundra to figure out where the pedal should be in relation to the brake, and it worked out pretty well. The brake and clutch pedals are in the stock location, adn there's still room for a dead pedal space to rest your foot - depending on how I build the cage this may get compromised a bit).

1115152120.jpg


1115152120b.jpg


I bent up a bracket that adapts the GM (Suburban?) tilt steering column I have to the stock scout mounts. I think I will reinforce this by tying into the brake pedal mount, but it works for now.

1114150950.jpg


1114150958.jpg


Cut the Borgeson steering shaft to length and got it instsalled, its nice to be able to steer the truck around, even just for moving it around the garage. Also, I may have sat in the seat and made Vroom noises for a while.

1114152034a.jpg


Next up was tackling the engine wiring harness. I went back and forth about sending it out or buying a pre-made harness, but in the end just decided to tackle it myself.

A few nights in the garage after the kiddo went to sleep got me from this

1114152142.jpg


to this

1120151552.jpg


to this

1202152030d.jpg


I used split braided loom (LINK), with self-fusing tape (LINK) to tie up the branches (the gray stuff - doesn't stick to the wires).
1130152158.jpg


I'm happy enough with how it came out, and glad I did it myself - I have a much better understanding of what everything is and where it goes on the motor.

I used a lot of info on Brendan's website to sort out the loom, and had him program the ECU to remove VATS & emissions stuff, so I'll leave him a plug here: LT1 Swap

I think the easiest place to mount the ECU, engine fuse block and body fuse blocks will be the tops of the fenders, so I worked on making the inner fenders that I cut off able to be bolted back on :) I tacked weld nuts to the back side of the relevant flanges on the firewall & inner fender, and used button head cap screws to bolt it back in place, since they'll be visible in the cab of the truck.

1205151123.jpg


1205151124a.jpg


1205151124b.jpg


Got the main parts of the fuel system sorted out. Bosch 044 fuel pump, with a 100 micron pre-filter and a 10 micron Aeromotive filter after the pump.
1128152052a%25257E2.jpg


Adapters for the push-on connectors at the fuel rail to AN fitting ends. I'm going to try using color coding to dummy proof the fuel lines - Blue/Red = Pressure, Black = Return.
1128152058.jpg


I'm just going to run off of 1 of the saddle tanks for now, with eventual plans to use the saddle tanks as reserve fuel capacity and run off a main tank between the frame rails.

I'm pushing to fire the motor up before the end of the year, so I'll be working on building the engine fuse block next up.
 
Some info on the electrical work to get the engine running:

I laid out the electrical panel on a piece of wood just to make moving things around easier - eventually this will be replaced with a piece of aluminum. Mounting everything to the firewall will let me keep the inner fenders removable for access to the engine (thanks for the idea Brennan).

0102161441.jpg


Everything needed for the engine to run is handled by this small fuse/relay block (LINK). It uses Metripack 280 series terminals just like the Bussman RMTR, but packages nice for the few circuits I need for the engine to run. I'm still debating keeping this fully separated from the rest of the truck's wiring system or integrating it into one of the two RMTR's you see mounted there.

I documented the fuse block here if anyone's interested. Its a little different from other 'standalone LS engine fuse block' schematics I've found since i'm using a separate relay for switched power, rather than building it into the engine fuse block, but in case its useful to anyone else here it is: https://drive.google.com/open?id=0B7rHOs9SMik3Um5DNnQ1SHRPeTQ

0103162029.jpg


Main switched relay is a Bussman 37702 (LINK) which feeds the two bus bars at the top (one is Constant hot, one is ignition switched).

All of the wiring passing through the firewall will run through a weatherpack bulkhead connector (LINK) next to the electrical panel, to the back side of the dash. The dash wiring will all be terminated into connectors so that its not a rats nest of spade plugs and everything is easy to remove and replace.

Other minor work done was fitting the transfer case shifters so that I can figure out where to cut the opening in the transmission tunnel cover.
0214161156d.jpg


Next step is getting the cooling system sorted - I need to order the radiator i plan to use (Griffin Direct Fit Radiators 8-00009-LS), build some mounting/shrouding for it and get hoses sorted out. A friend found the above LS swap radiator from Griffin that's similar size to the popular 26x19 universal radiator, except about $100 cheaper and with a year warranty instead of 30 days! Good find!

I'm also patching up the header clearance holes in the firewall, then I'll pull the motor back out, clean up, paint and insulate the firewall, and get the clutch sorted out so that the engine can go back in for good.
 
WAY overdue update.

I am working on it, I swear, everything just takes so much longer these days.

Closed up the holes in the firewall where I had to make clearance for the headers, and got the transfer case shifters mounted and the hole cut in the trans tunnel cover. I have to say I really being able to remove the whole top of the trans tunnel, good design for serviceability on these trucks.

Driver side mocked up
0217162105a.jpg


Passenger side welded in
0221161223.jpg


0221161222.jpg


Built a tube bender using arms bought from SpeedMonkey here on Pirate, takes Pro-Tools 105 dies. It works really nicely, Air/Hydro is pretty nice to have when working by yourself in a small shop, and I like not having to have it bolted down taking up floor space.
0319161941.jpg


Used the new bender to make a hoop to support the radiator, so that it isn't tied to the inner fenders. Ideally I'd like to be able to drive the truck without any bodywork on the front. You know, for those mad max reenactments.

I am using a Griffin 8-00009-LS radiator (https://www.summitracing.com/parts/gri-8-00009-ls) meant for a LS swap in a Chevelle. Brennan (Mieser) gets credit for the find - its about the same size as the popular 26x19 universal rad, except it comes with mounting flanges on the sides welded on and has a 2 year warranty rather than the 30 day warranty the universal 'racing' radiators have. Oh, and its $100 cheaper.

Of course to fit where I want it, I promptly voided the warranty by lopping off a corner to make some more clearance to the steering box. But all in all it fits well and I think will give me plenty of cooling capacity.

Made brackets that bolt to the radiator bracket to pick up the bushings I'm using to isolate the radiator.
0306162111a.jpg


Bottom of the radiator hoop mounts to the frame using a pinch bolt arrangement
0510162049c.jpg

0510162129.jpg


Hoop in place
0510162130b.jpg


Lower tabs mocked up - you can see my mockup bracket I built to hang the radiator in space while I was building mounts, this was pretty handy
0611161736.jpg


Finally upper tabs in place, and the radiator bolted in the car for the first time. The long brackets will get some gusseting to help with the weight of the radiator full of coolant.
0611162059a.jpg


I will tie the inner fenders into the frame using some bushings, and will also probably have a crossbar at the top that ties into the radiator hoop (with bushings) so that the nose of the body is well supported. I cut out the stock front body mount (part of the core support that tied the bottoms of the inner fenders together) to make room for the crank pulleys, which led me to extra work to make sure everything is supported.

Next steps are to finish up the suspension (bump stop mounts, lower coilover mounts) and start working on cleaning up and finish welding as much as I can for the engine compartment. It'll get the same sound deadening treatment as the underside of the body, as well as some additional heat insulation.
 
Got the radiator mounts fabbed and tacked in, including gussets for the longer tabs.

0621162115.jpg


The bottom on the drivers side is TIGHT - downside to using an inside-the-frame steering box I guess.

0621162115b.jpg


I confirmed that the corner I'd cut off the radiator previously gives me enough clearance to the steering box, so I brought it in to work and had our welder tig weld in the patch panel. He does nice work, wish I could claim this as mine.

0616161315a.jpg


On to the bump stops.
 
The seats I'm using are from a TJ Rubicon unlimited, and have a nice fold forward feature that should make getting into the back seat easier, so I wanted to keep the bases intact. This means cutting out the stock seat bases, and making some quickie mock up bases to let me play with height and position.
0618151134.jpg


I'm going to cut out the bulkhead behind the seats, but I think with the seat flipped forward access won't be too bad, and I also can use the area behind/under the seat for storage.
0616151201.jpg

Love the seats! When you're done, please provide some feedback in the 80/800's Seat Survey.
 
Back
Top Bottom