You are using an out of date browser. It may not display this or other websites correctly.
You should upgrade or use an alternative browser.
You should upgrade or use an alternative browser.
'64 Chevy II Wagon
- Thread starter OverlandMike
- Start date
Last weekend I ran a bunch of tests. Good compression, no leak down in the cylinders, no exhaust gas in the coolant (which indicates a head gasket). The knock was fairly loud until you took off the #6 plug wire, then it almost goes away until you rev it a little. When I pulled off the oil filter to drain it, I saw flakes so I figured it's in the bottom end, likely a spun bearing.
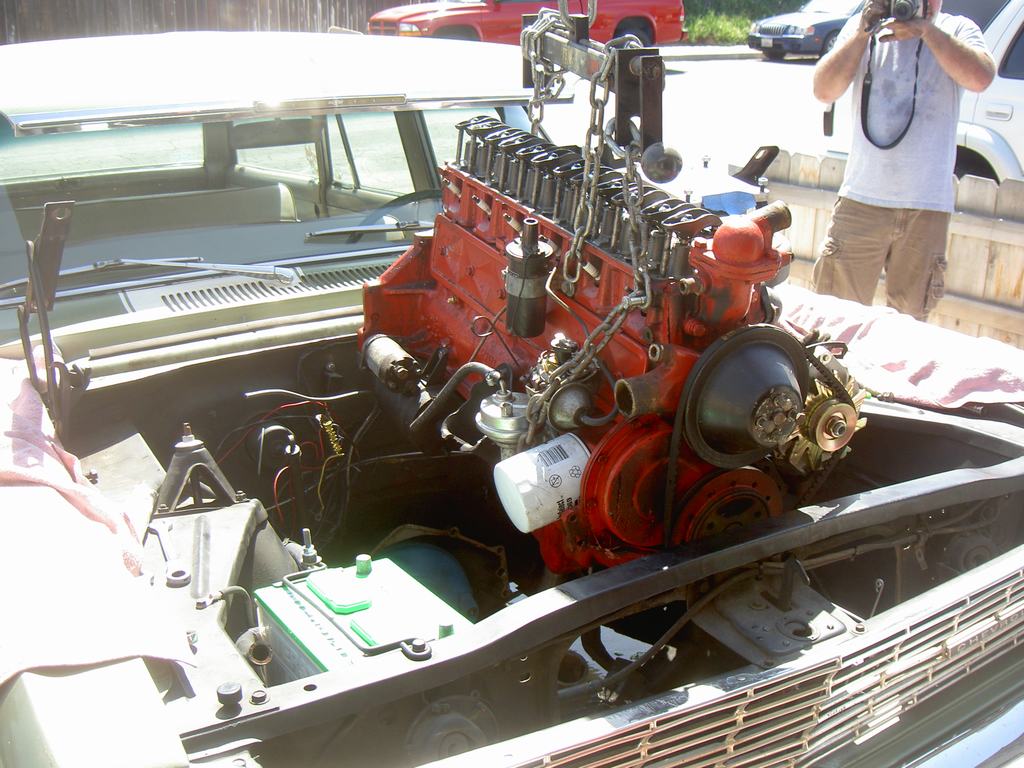
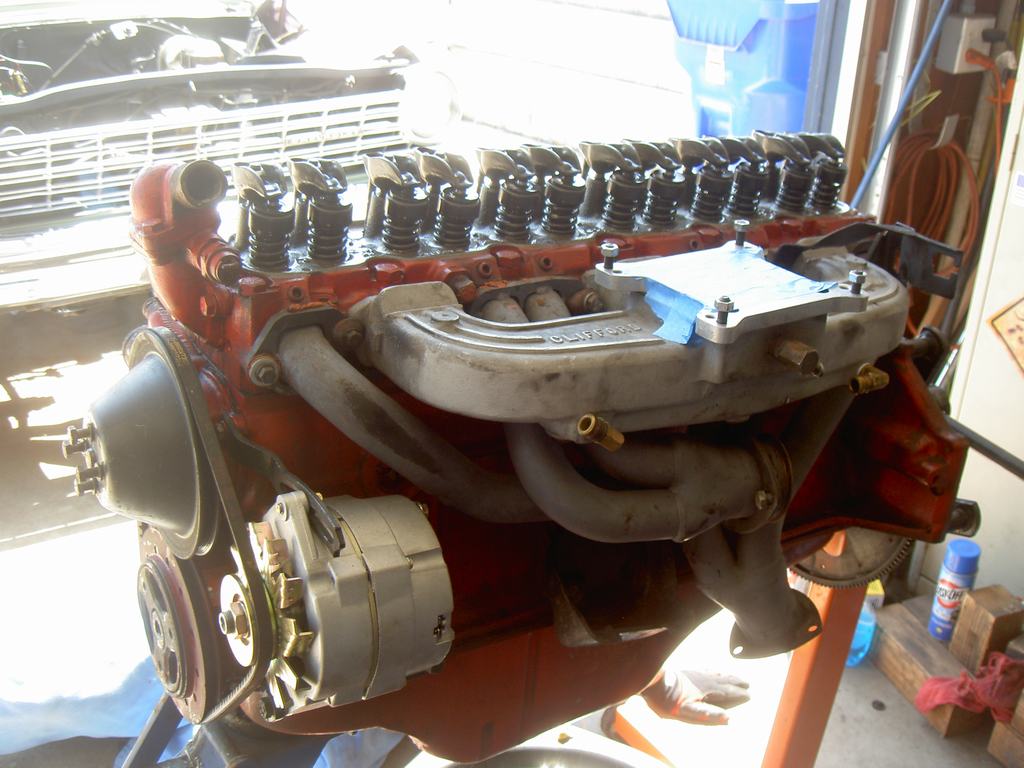
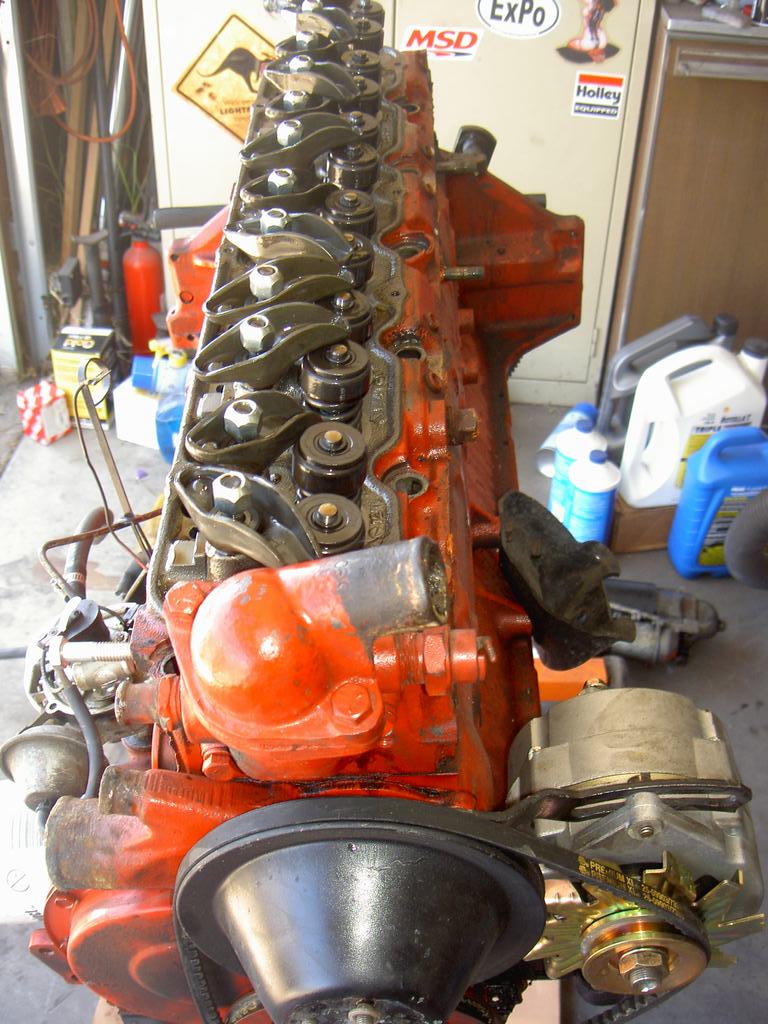
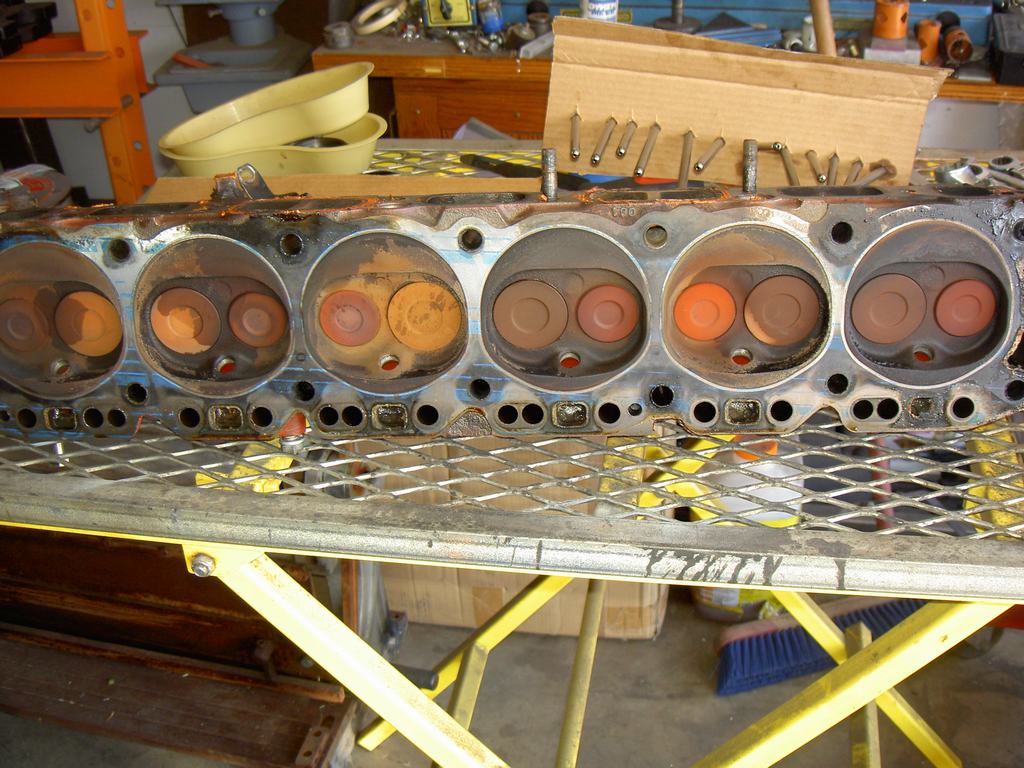
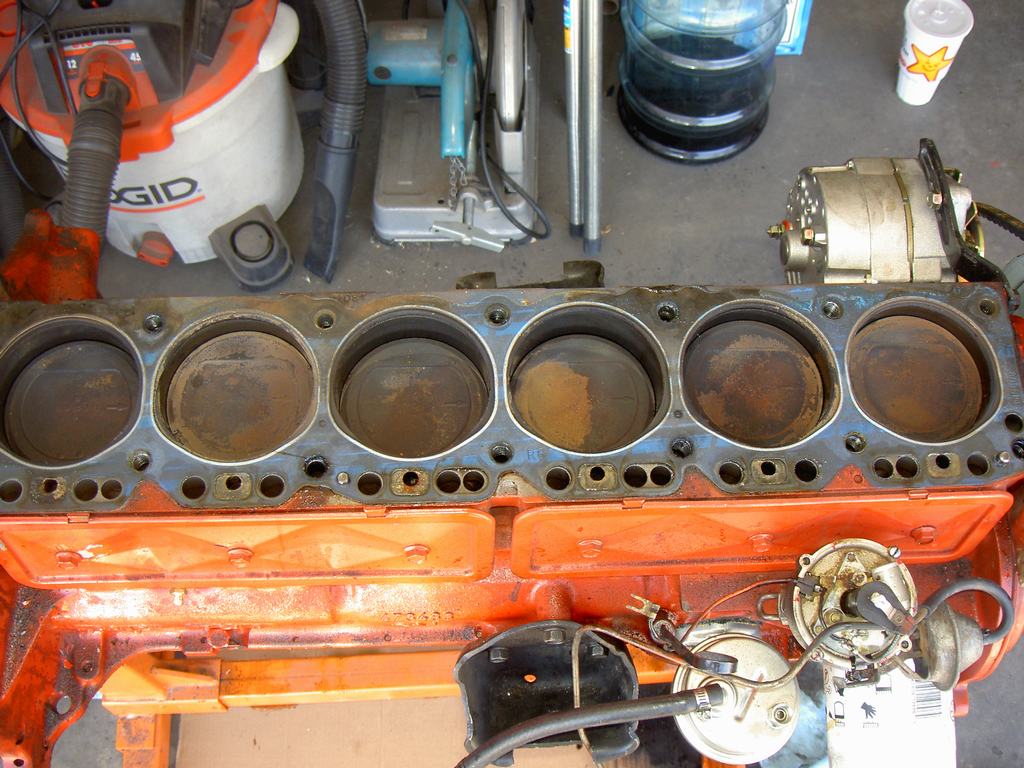
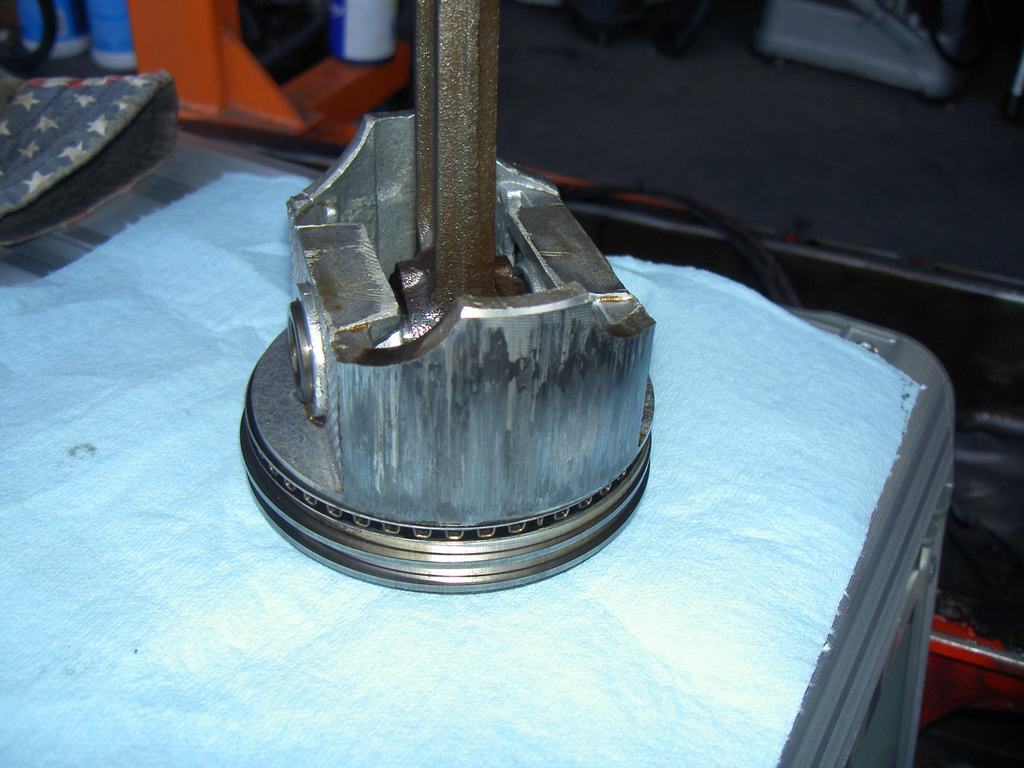
So this weekend, after rearranging my garage, by buddy and I pulled the engine and start checking inside. Pulled the rod cap off #6 and all looked good. Pulled the cap off #1. It looked good too. Hummm.... I then pushed the piston away from the crank and that's when I figured out the problem. It seems like the piston heated up and the wrist pin became tight on the piston, not rocking easily. I verified with #1 how it should feel, nice and smooth, easily rocking on the piston. Pulled out the #6 piston and saw the grooves in the skirt of the piston. Checking the bore size, it looks like it's .010 bigger than the rest due to wear from the piston.
Now it's figuring out the cost between having this short block rebuilt or buying one done. Going to talk to the engine building company and see what they can do to help me. Just so its' known, it does not look like this was caused by anything the builder did. I think it was from the PO and installer who did not change the radiator cap when they did the coolant recovery system. I think it go hot and was pushing out the coolant into the tank but it was never allowed to get sucked back. By not having gauges, I never saw the temp go up. Here's some pics from today.


How's the buzzin' half dozen project proceeding?
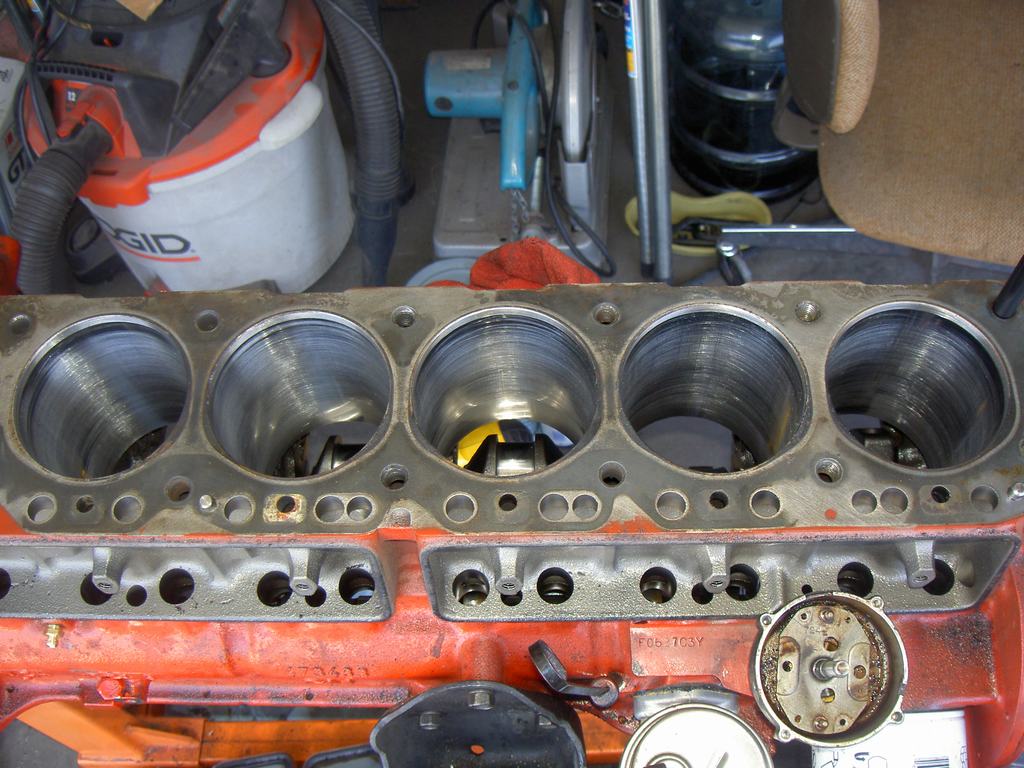
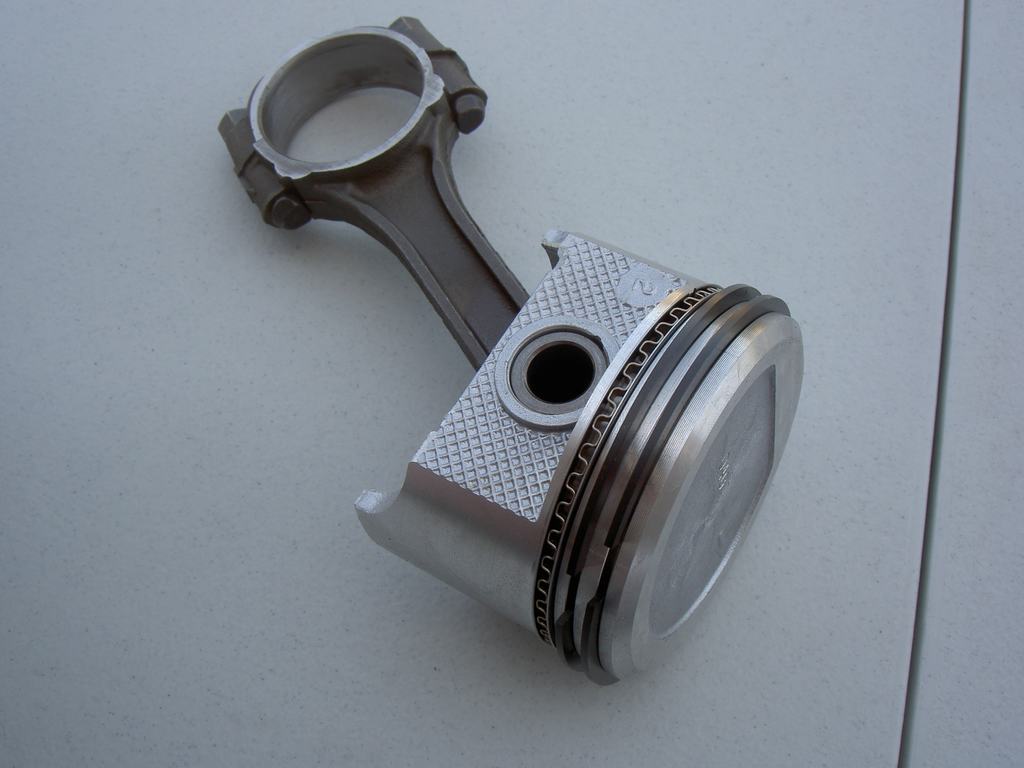
Well in the famous words of Jerry Garcia... What a long, strange trip its been. I have to say this has not only been a learning experience but one to test my patience. Moving forward I was able to barrow a proper bore gauge and found all the cylinders within .001 of spec for .040 over. I ordered up another set of pistons since trying to get a single piston was going to take weeks but a set I was able to get the next day. Go figure. New rings and con rod bearing. I had the head checked out and my buddy and I did a valve job just to clean things up. I also decided to put head studs in, for that just in case feeling. This proved to be a smart move.
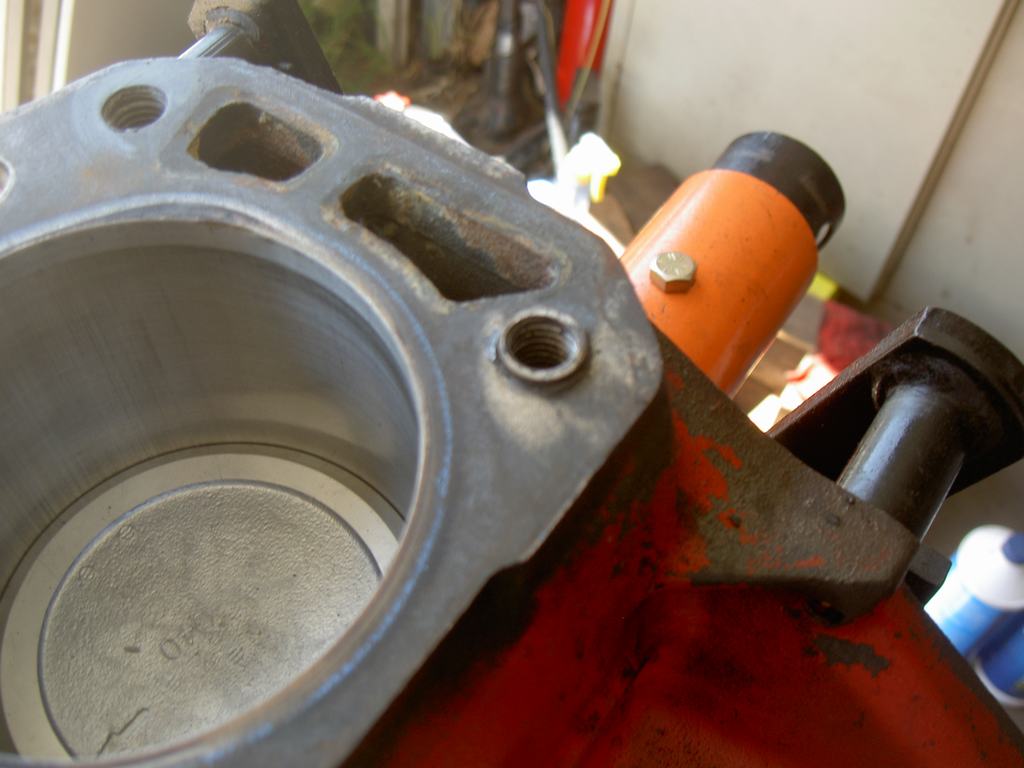
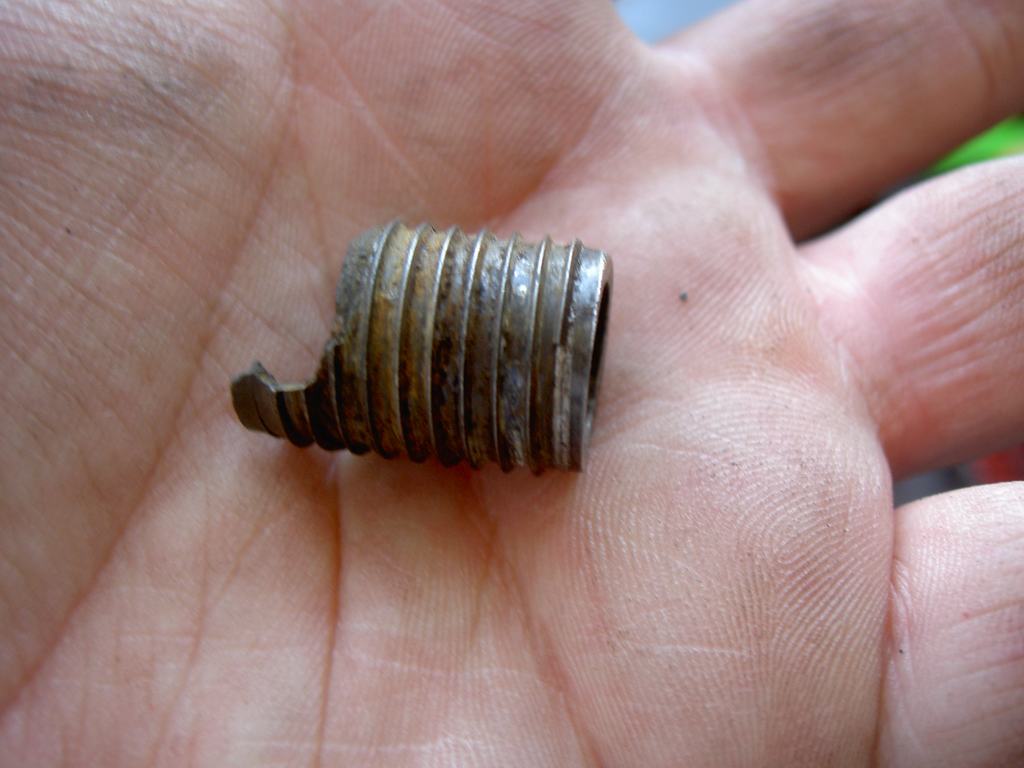
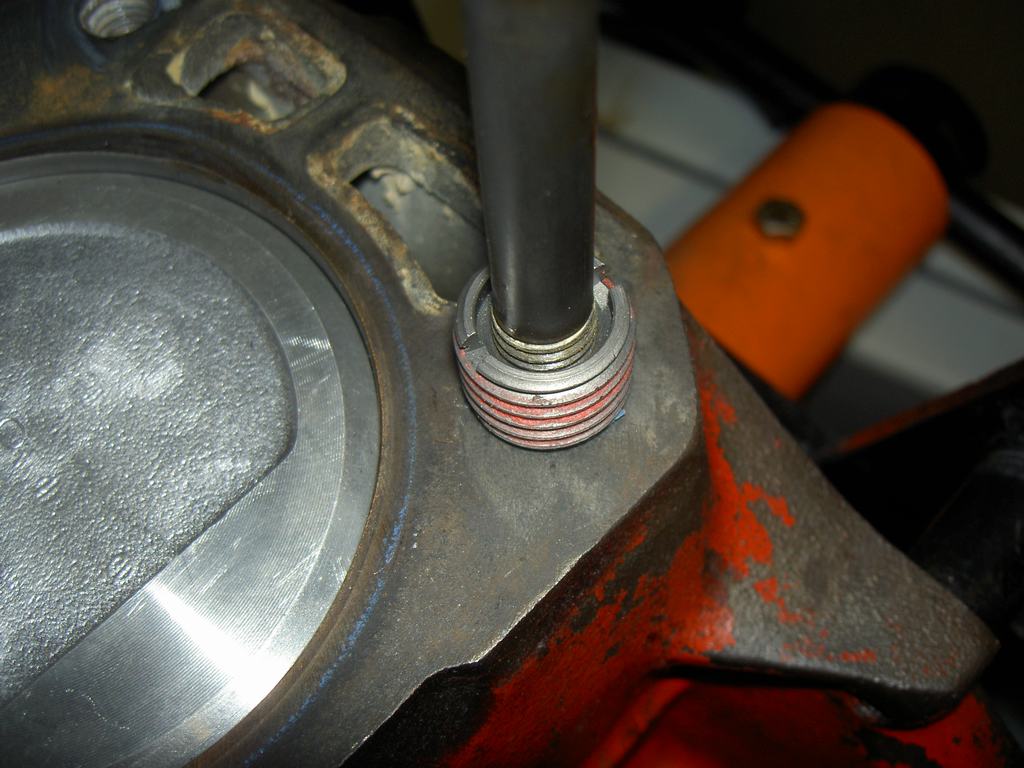
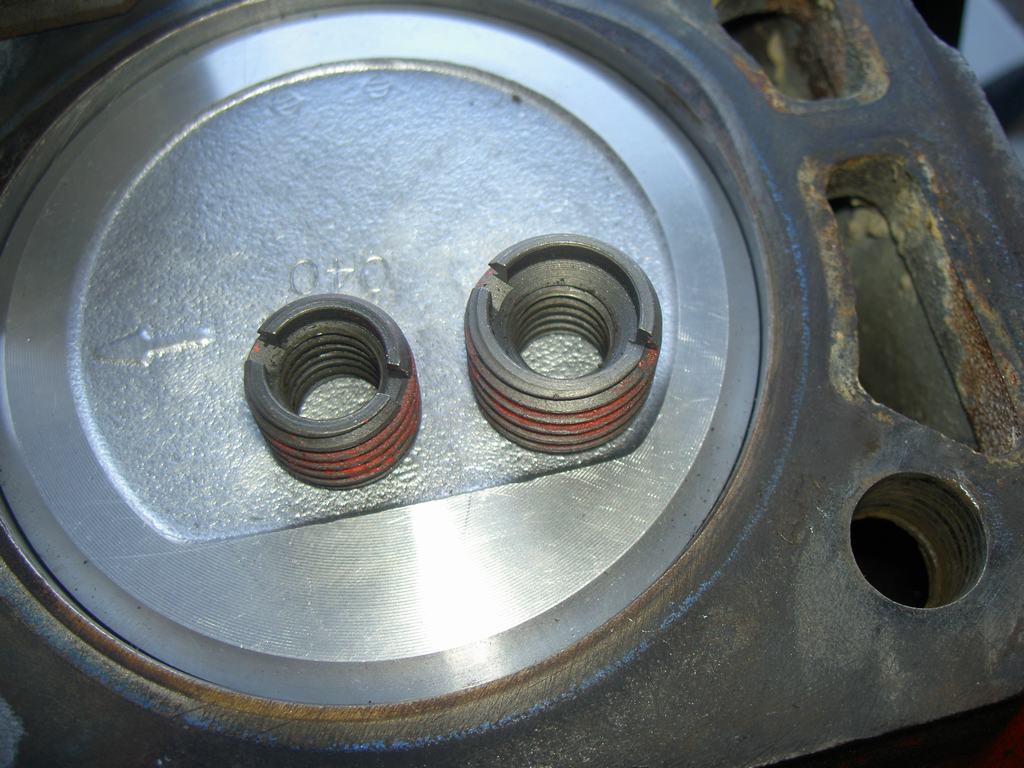
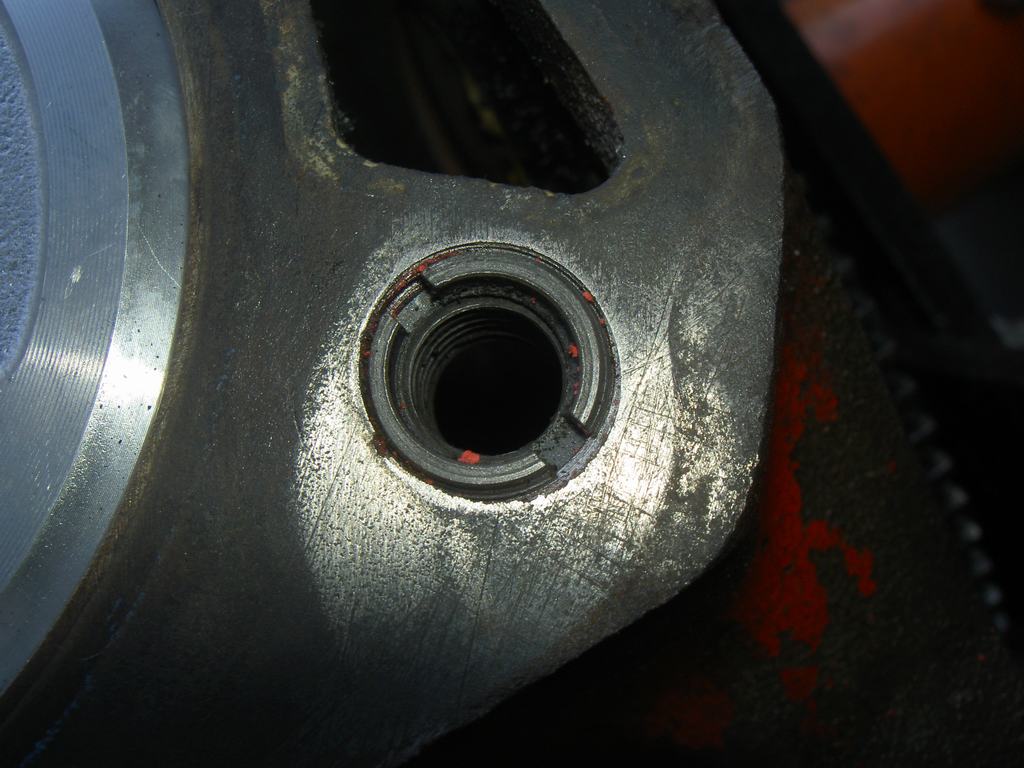
As I was getting the short block back together, I had originally noticed that the left rear corner head bolt hole in the block had this "ring" sticking up. No knowing enough about this series of engines, I figured it was some locating point for the head gasket. Well I was sure wrong about that. After finding the head gasket did not sit over this, I carefully ground this flush with the head. I proceeded to install the head and start the step torquing. Things were going well until I got to 75 ft/lbs. This spot felt "soft" and would not torque. Well crap! Pull the head off and sure enough that ring was back. Figured out it was an insert that was pulling out of the block from a previous repair. Pull what was left of it out and I have no idea what type this was originally but it wasn't the right type as it had already pulled out prior to my dis-assembly the first time. Now I have to fix and already "fixed" hole. This presented it's own challenge as there are only a few inserts designed to fix a fixed hole. I ended up using an E-Z LOC insert. For this I needed to drill and tap the hole, which doing free hand is a challenge. Drilled and tapped, I put the head stud in and tried to fit the head. It would not line up on the dowel pins. I checked the stud and found side to side I was dead on but fore and aft, I was 1* off! One freakin' degree. With a 4" stud, this equated to about 1/16" or so. Crap! Posting up on an Inliner engine forum, I asked if I could open that hole up in the head slightly. Everyone seemed to agree it was fine to do so with an adjustable reamer, I opened it up a little. Success!!! I was able to fit the head and continue to assemble the engine. Nice thing with the head studs is, the insert is only taking vertical torque loads and not dealing with rotational load of torquing it. This should help prevent it from pulling out. Lots of new stuff installed and painted up the engine.
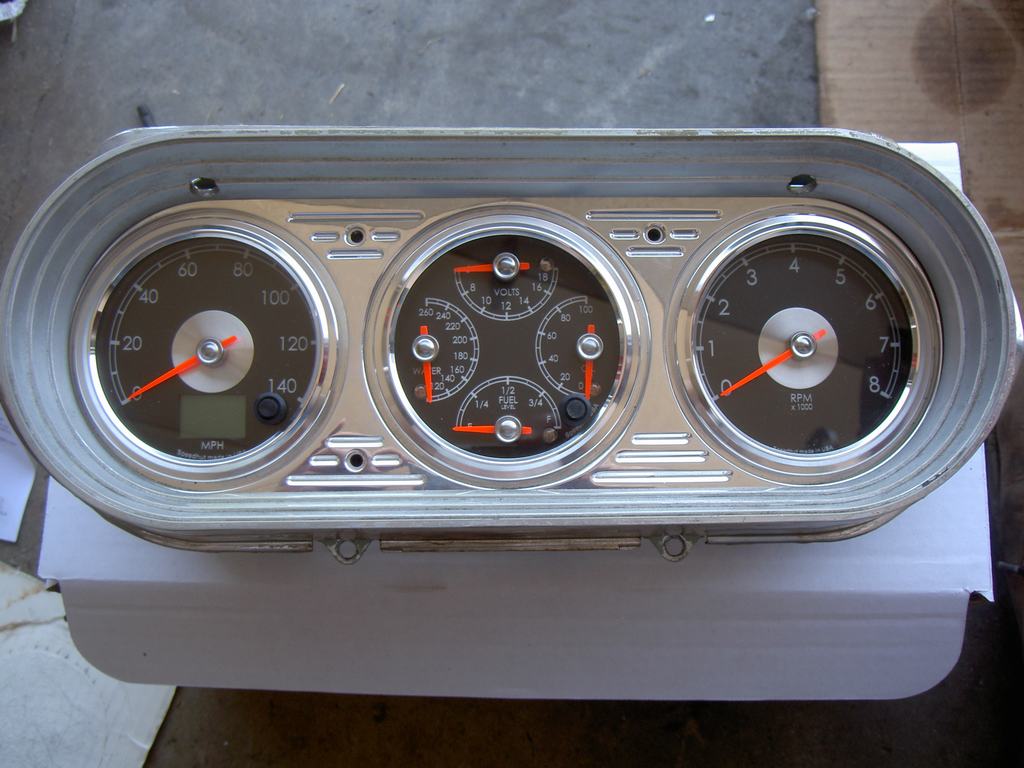
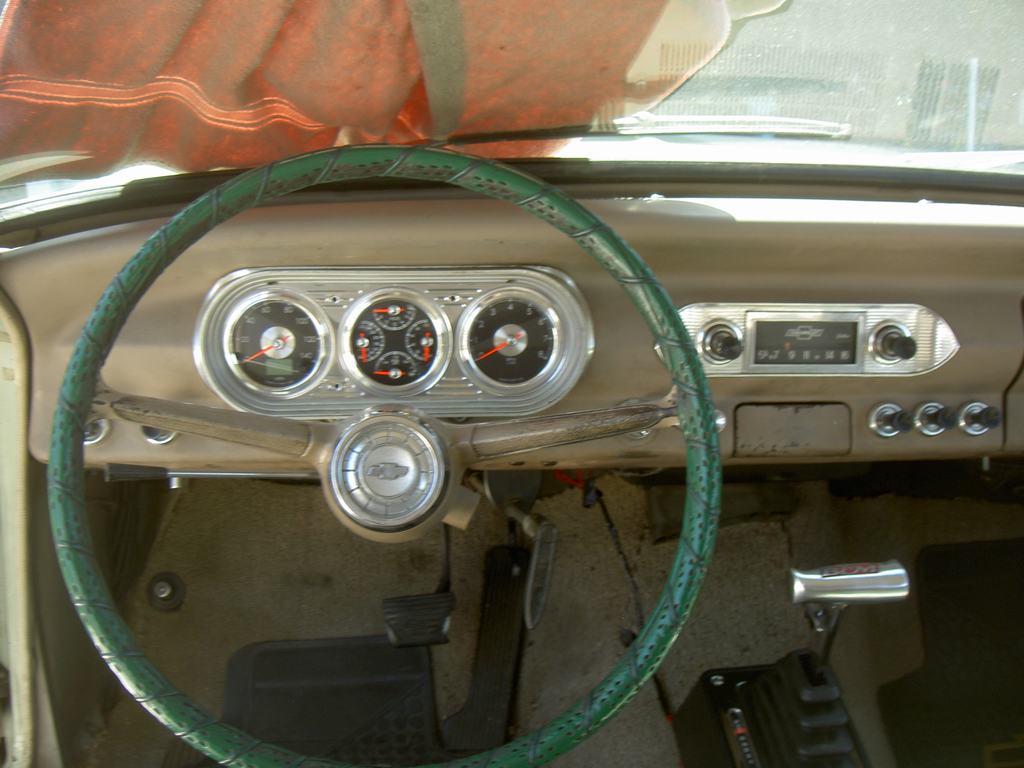
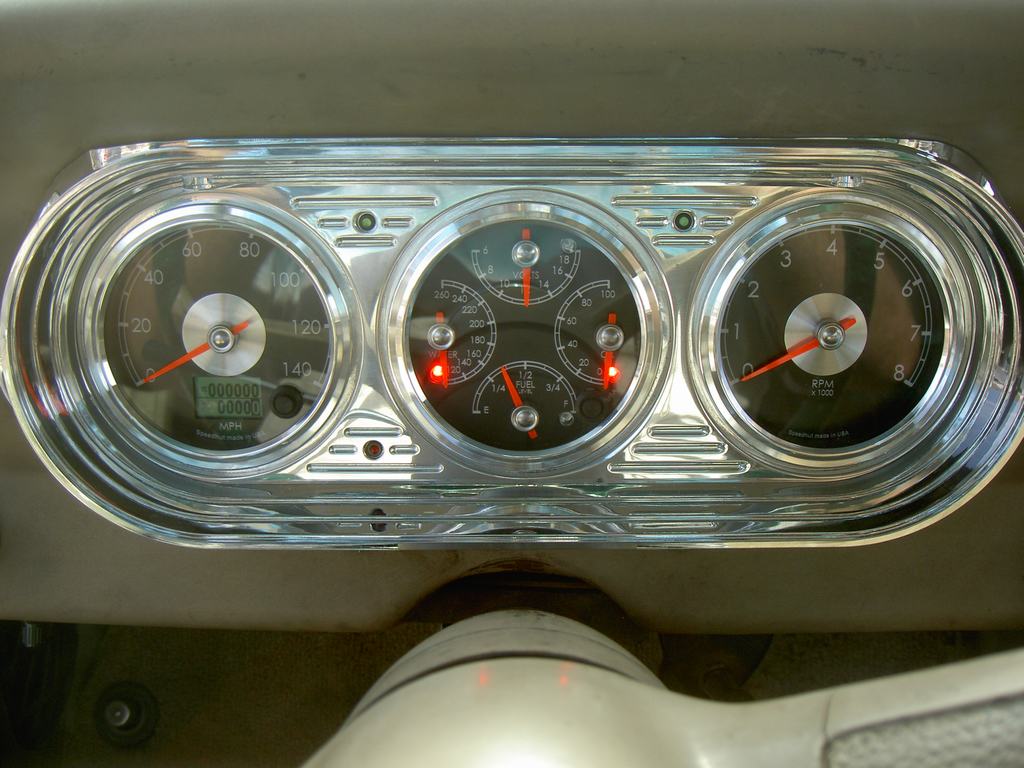
This past Saturday by best friend and I got the engine installed back in the wagon. This took a little bit of work and if I had to do it again, I would remove the forward cross member in the engine bay. It was tight working past it and not hanging up on the trans dropping it all back in. We get it mounted up and the exhaust reconnected. We worked on redoing the engine compartment wiring and completely redid most of the dash wiring with my completely new gauge setup I had custom built by Speedhut. Gauges came out awesome and have a very factory look to them. I had gotten these the week before the engine went south and had I had them installed, I likely would have caught the problem before damage occurred. Oh well. With all the wiring (and fixing a bunch of hack wiring from before), Saturday ended up being a 12 1/2 hour day. It is not finished and I still have a lot of work to do before it will be running.
While I had the engine out, I decided to redo the engine compartment brake lines which led me to replacing the booster and master cylinder as the universal one didn't really fit right and performance of it was so so. I ordered up a Nova specific one but it didn't come in, in time. I still have a couple weeks or so of work but a least it's moving forward. That gets me up to day but I know, where's the pics? Here's what I have off my camera at the moment. Enjoy.
Light hone of the cylinders
New piston and rings
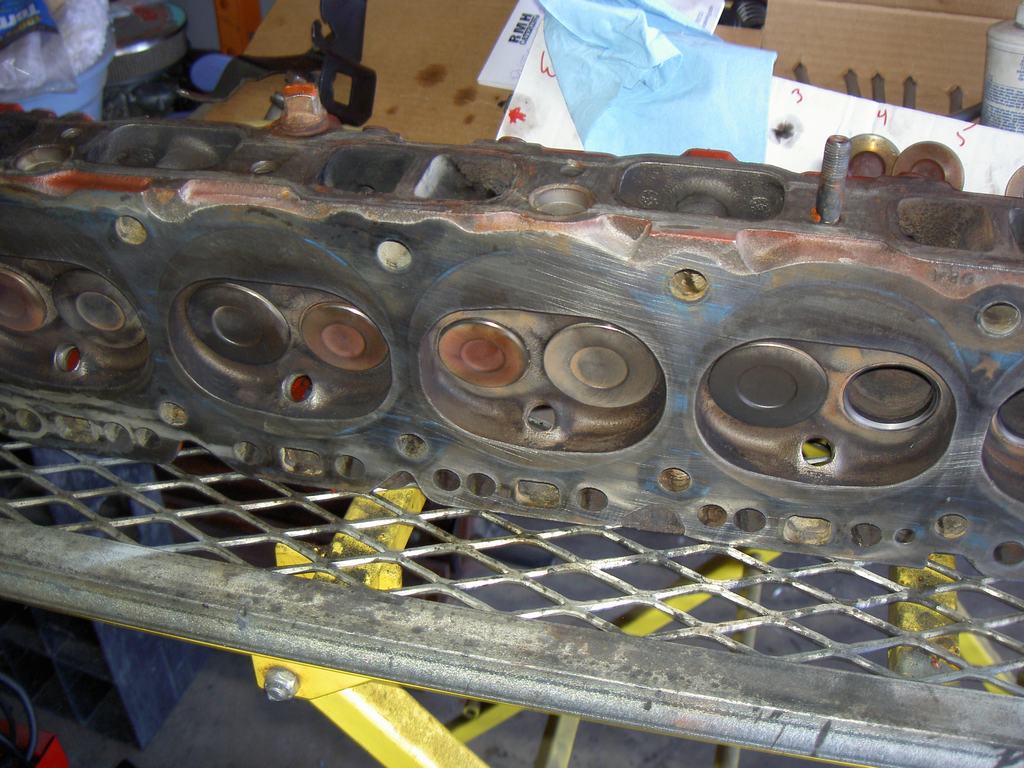
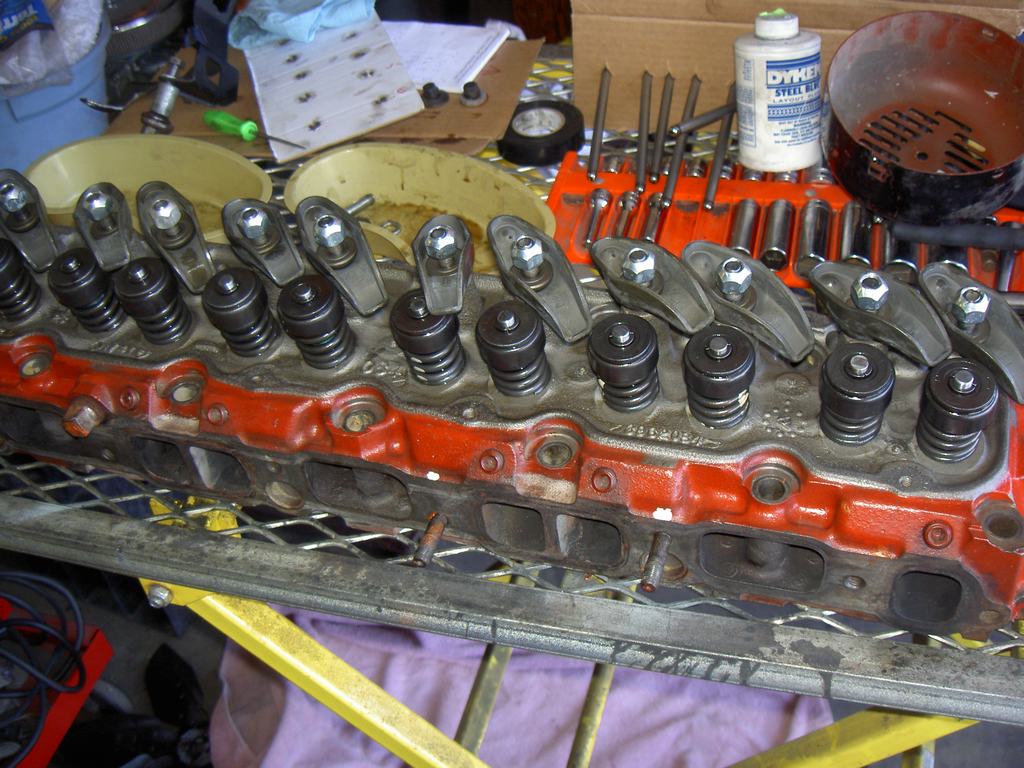
Cleaned up the head and reassembling it
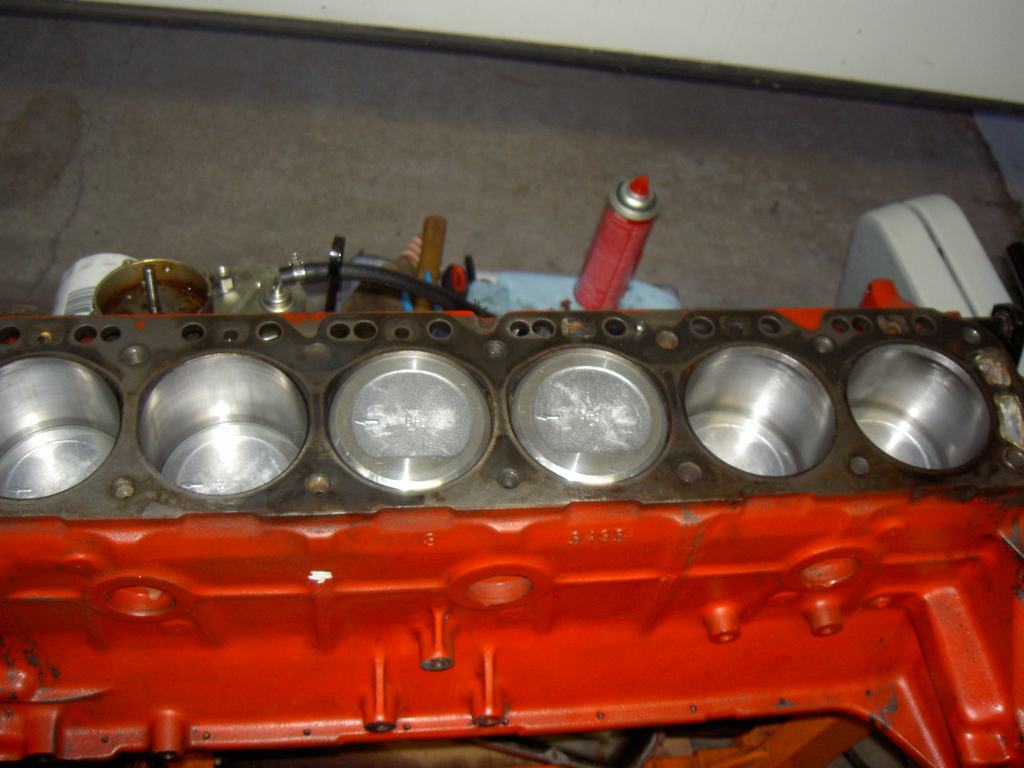
Pistons installed
Old insert pulled out, what it looked like and the E-Z LOC replacement (none installed though)
New gauges (temp installed in the old bezel as I ordered a new replacement)
As I was getting the short block back together, I had originally noticed that the left rear corner head bolt hole in the block had this "ring" sticking up. No knowing enough about this series of engines, I figured it was some locating point for the head gasket. Well I was sure wrong about that. After finding the head gasket did not sit over this, I carefully ground this flush with the head. I proceeded to install the head and start the step torquing. Things were going well until I got to 75 ft/lbs. This spot felt "soft" and would not torque. Well crap! Pull the head off and sure enough that ring was back. Figured out it was an insert that was pulling out of the block from a previous repair. Pull what was left of it out and I have no idea what type this was originally but it wasn't the right type as it had already pulled out prior to my dis-assembly the first time. Now I have to fix and already "fixed" hole. This presented it's own challenge as there are only a few inserts designed to fix a fixed hole. I ended up using an E-Z LOC insert. For this I needed to drill and tap the hole, which doing free hand is a challenge. Drilled and tapped, I put the head stud in and tried to fit the head. It would not line up on the dowel pins. I checked the stud and found side to side I was dead on but fore and aft, I was 1* off! One freakin' degree. With a 4" stud, this equated to about 1/16" or so. Crap! Posting up on an Inliner engine forum, I asked if I could open that hole up in the head slightly. Everyone seemed to agree it was fine to do so with an adjustable reamer, I opened it up a little. Success!!! I was able to fit the head and continue to assemble the engine. Nice thing with the head studs is, the insert is only taking vertical torque loads and not dealing with rotational load of torquing it. This should help prevent it from pulling out. Lots of new stuff installed and painted up the engine.
This past Saturday by best friend and I got the engine installed back in the wagon. This took a little bit of work and if I had to do it again, I would remove the forward cross member in the engine bay. It was tight working past it and not hanging up on the trans dropping it all back in. We get it mounted up and the exhaust reconnected. We worked on redoing the engine compartment wiring and completely redid most of the dash wiring with my completely new gauge setup I had custom built by Speedhut. Gauges came out awesome and have a very factory look to them. I had gotten these the week before the engine went south and had I had them installed, I likely would have caught the problem before damage occurred. Oh well. With all the wiring (and fixing a bunch of hack wiring from before), Saturday ended up being a 12 1/2 hour day. It is not finished and I still have a lot of work to do before it will be running.
While I had the engine out, I decided to redo the engine compartment brake lines which led me to replacing the booster and master cylinder as the universal one didn't really fit right and performance of it was so so. I ordered up a Nova specific one but it didn't come in, in time. I still have a couple weeks or so of work but a least it's moving forward. That gets me up to day but I know, where's the pics? Here's what I have off my camera at the moment. Enjoy.
Light hone of the cylinders

New piston and rings

Cleaned up the head and reassembling it


Pistons installed

Old insert pulled out, what it looked like and the E-Z LOC replacement (none installed though)


New gauges (temp installed in the old bezel as I ordered a new replacement)


Awesome! Thanks for the update......those gauges are sweet!
Awesome! Thanks for the update......those gauges are sweet!
Yeah, everything you need to see and no idiot lights. Love it.
Yeah, everything you need to see and no idiot lights. Love it.
Actually the cool thing about these, each of the ones in the quad gauge have programmable warning lights. I can set them to turn on with a low and/or high value outside of the fuel, which is low only.
I have two other old trucks that I am going to put Speedhut gauges in as well. Got a three set in the Dodge and I love I can configure how I want them to look, lighting color, etc.
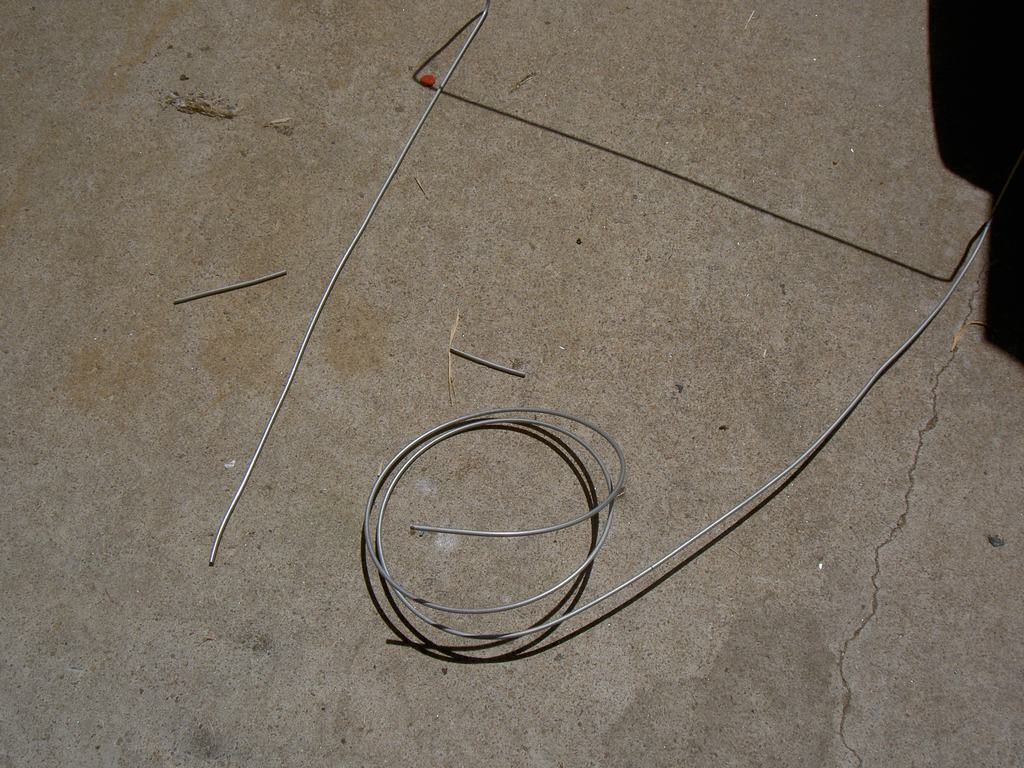
For those following along, it was another long weekend of work. Making headway but there are just so many details to take care of, it seems like it never ends. I finally uploaded more pics, which everyone likes. A good deal of Saturday was spent making brake lines. I started with a 25' roll of line and have about 4' left. Two of the lines were almost 10' long with close to a dozen bends. Lots of time spent measuring. Overall it went well but honestly the hardest line was one that was about 3" long. I also swapped in a automatic style brake pedal versus the original manual pedal. Got the power brake booster setup as well. Also buttoned up the dash for what I hope is the last time. I installed the new HEI distributor, plugs and wires. I still need to finish up the throttle and trans kick down linkage and finish the cooling system.
Some of these pics go back to previous weeks/weekends but I just got around to posting them. Hope you enjoy.
Same internal thread size but different outer size. I used the smaller of the two, since the water jacket was so close to the edge of it.
Installed
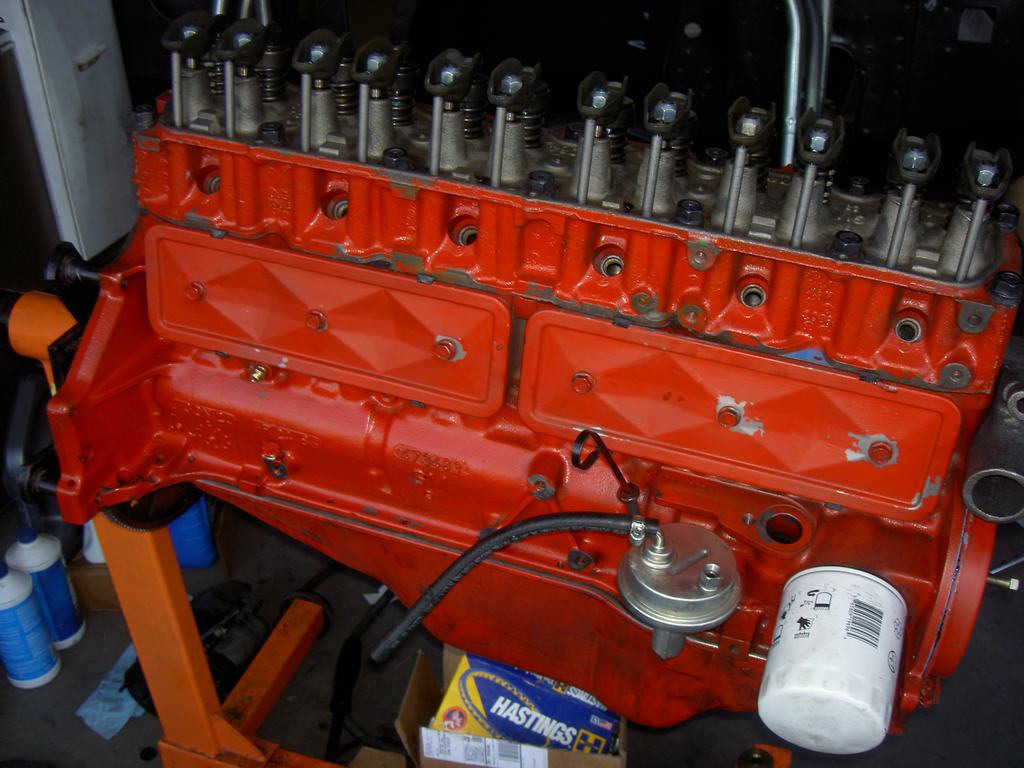
Head back on and getting ready for paint
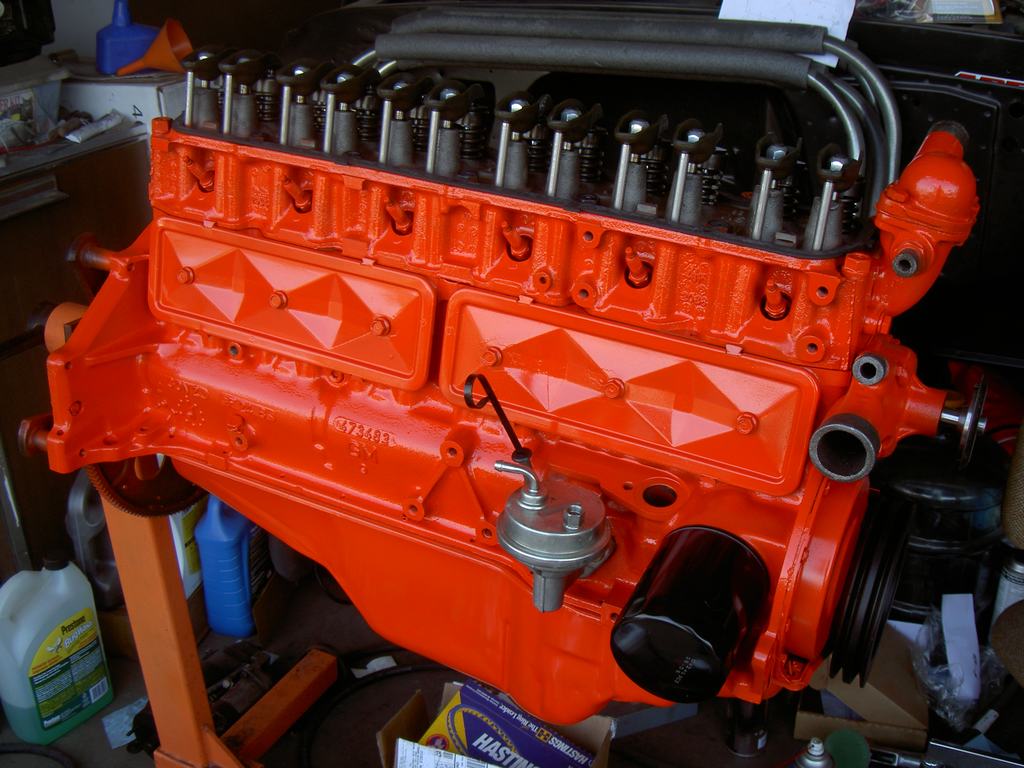
Fresh paint.
New water pump, t-stat and harmonic balancer
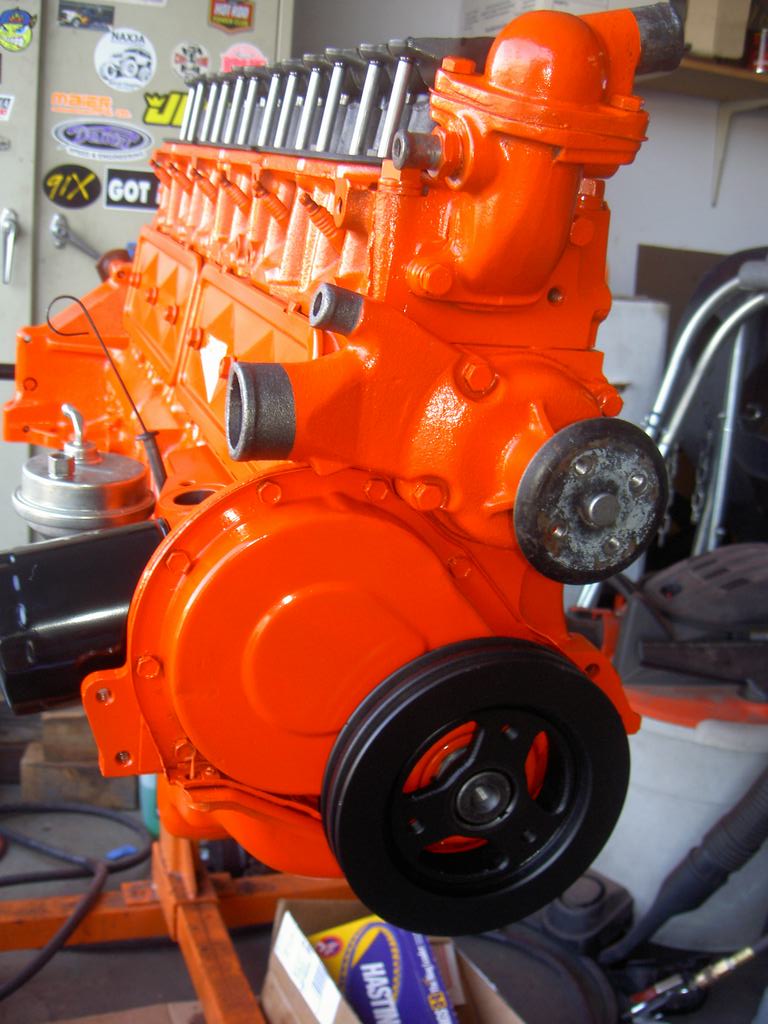
More parts installed
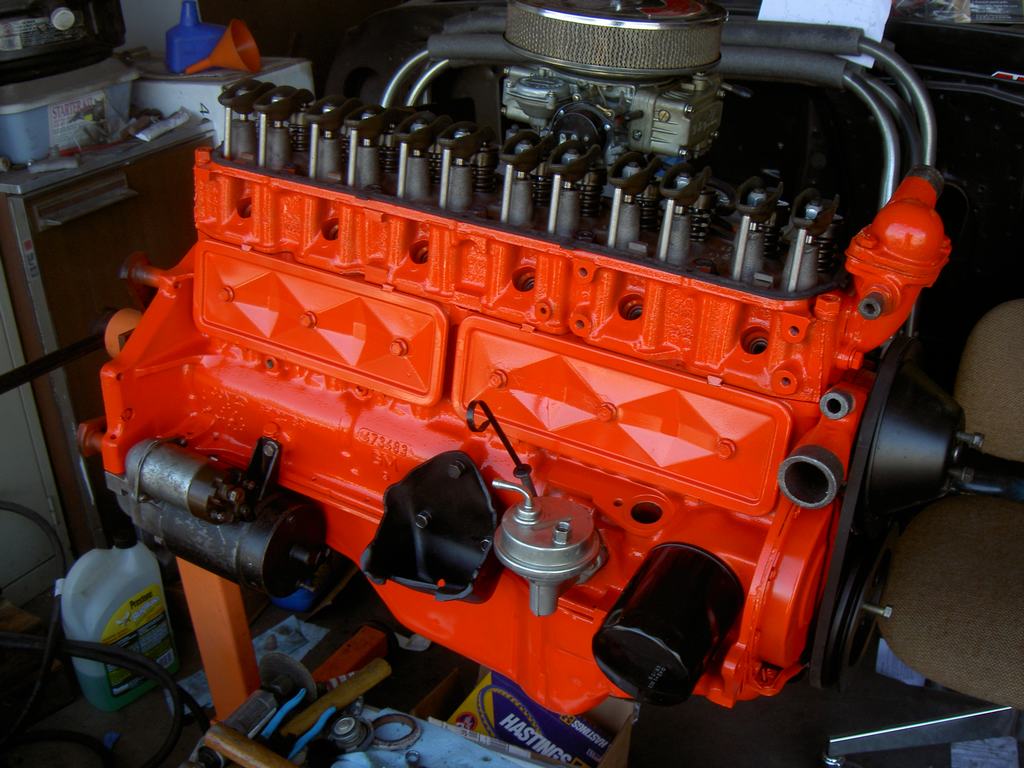
Intake, headers and alt. installed
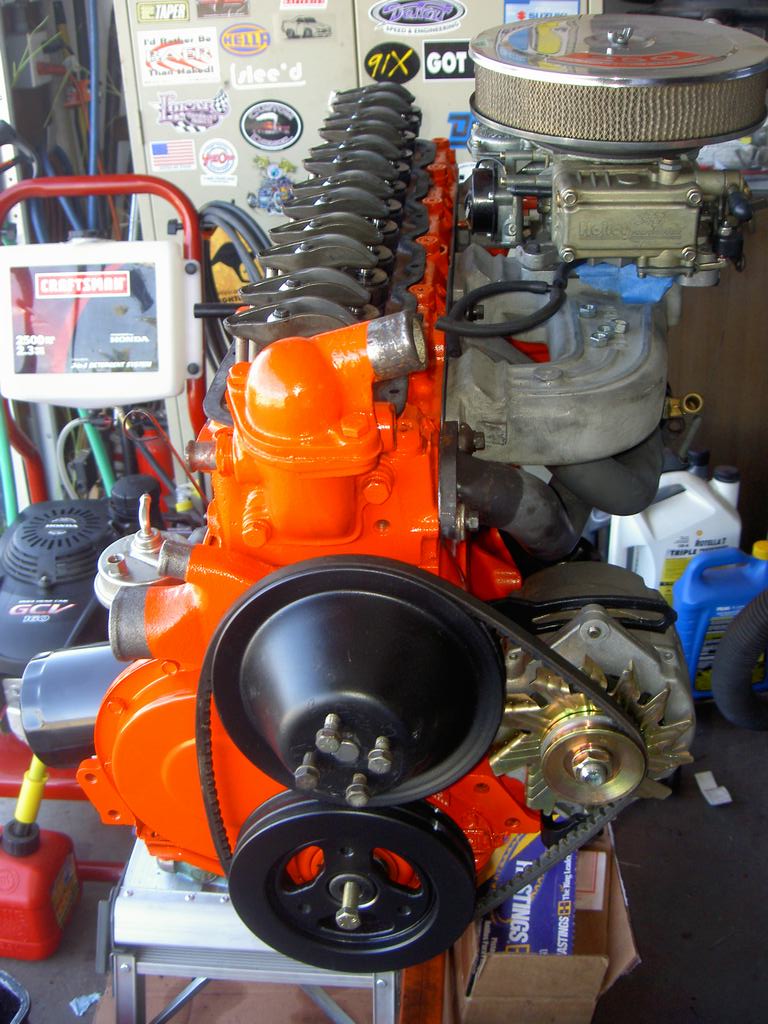
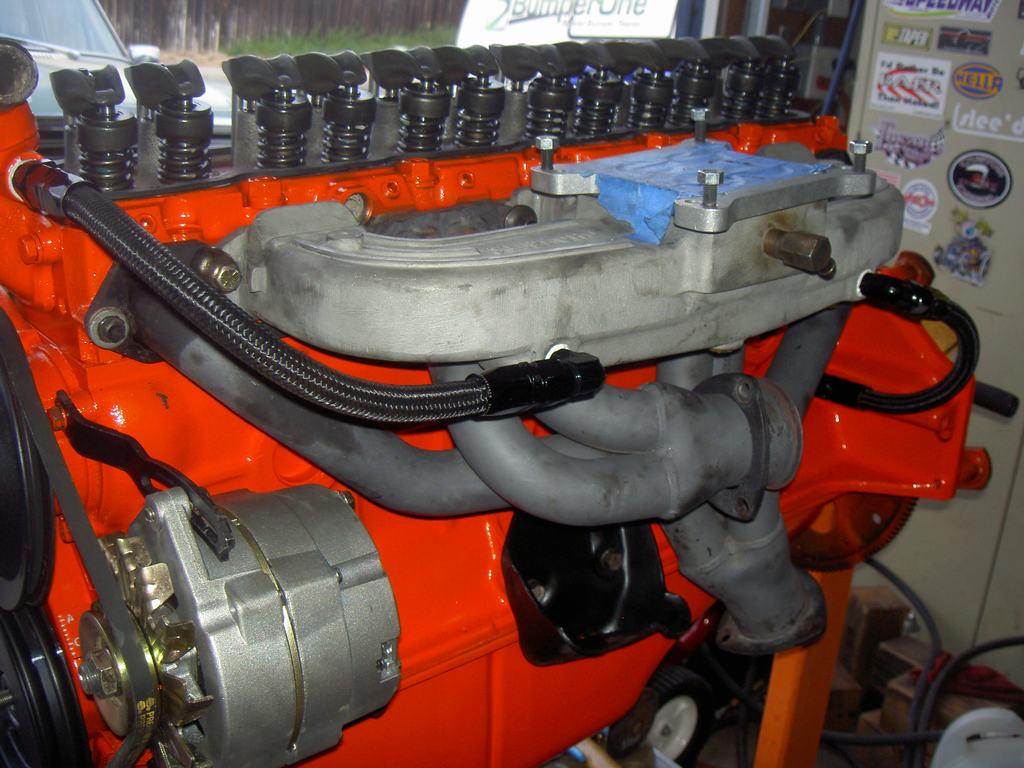
I didn't like the way I had hoses crisscrossing the top of the engine for the heated manifold connections so I used AN fitting and braided hose
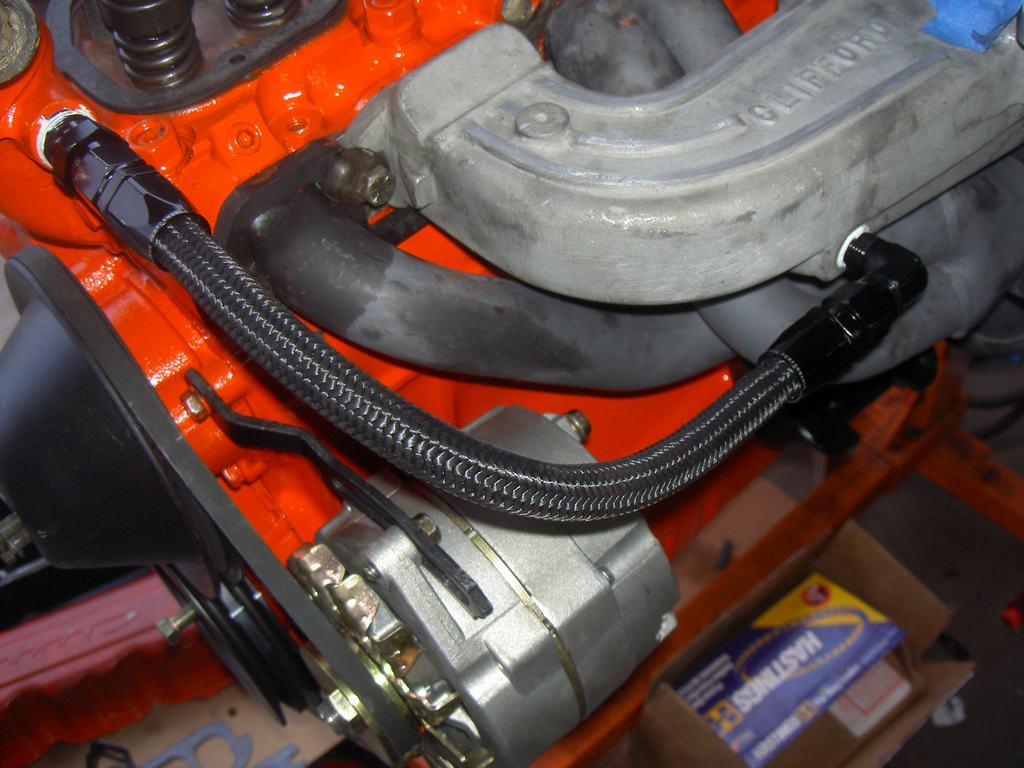
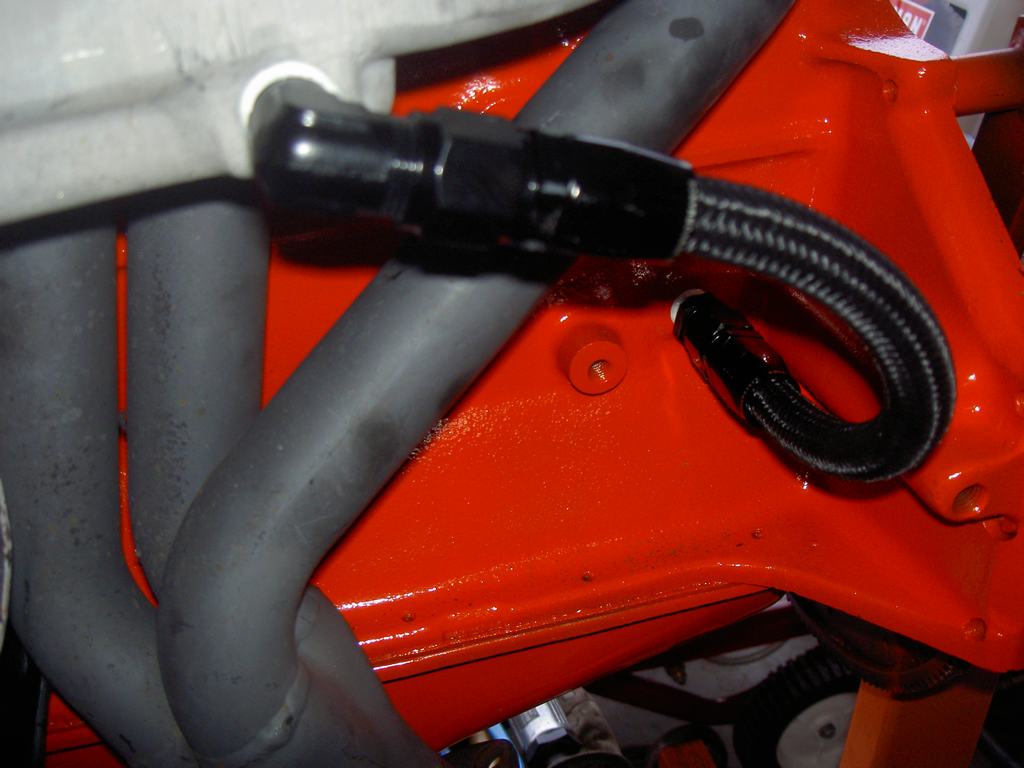
Much cleaner
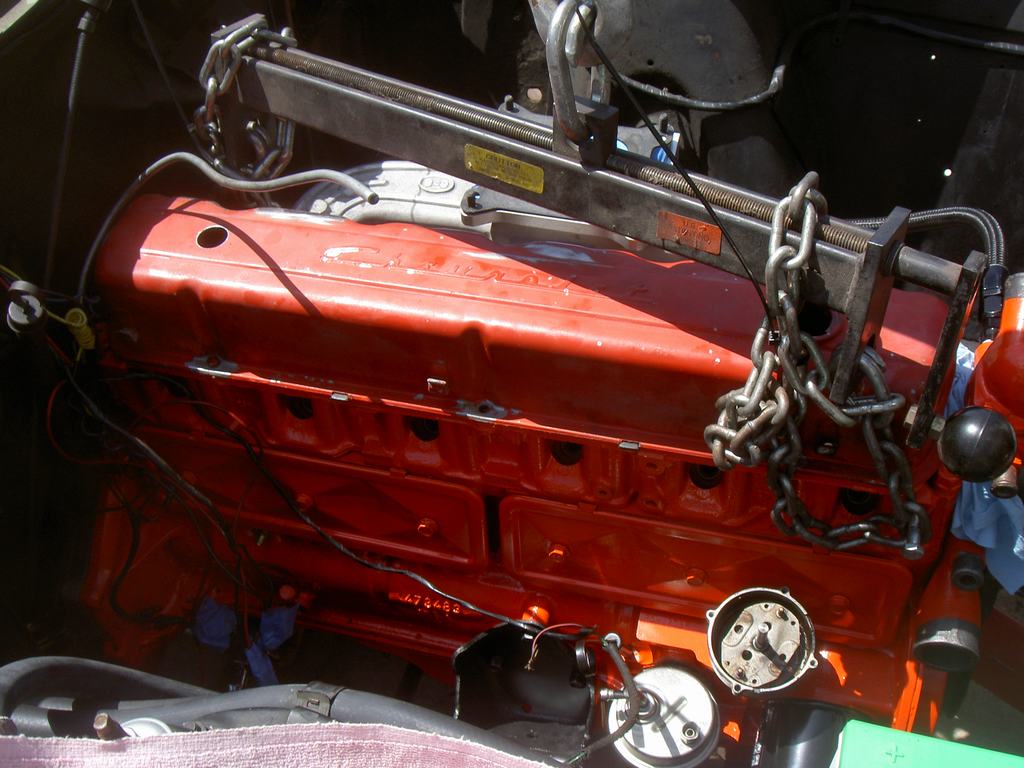
Engine dropped back in
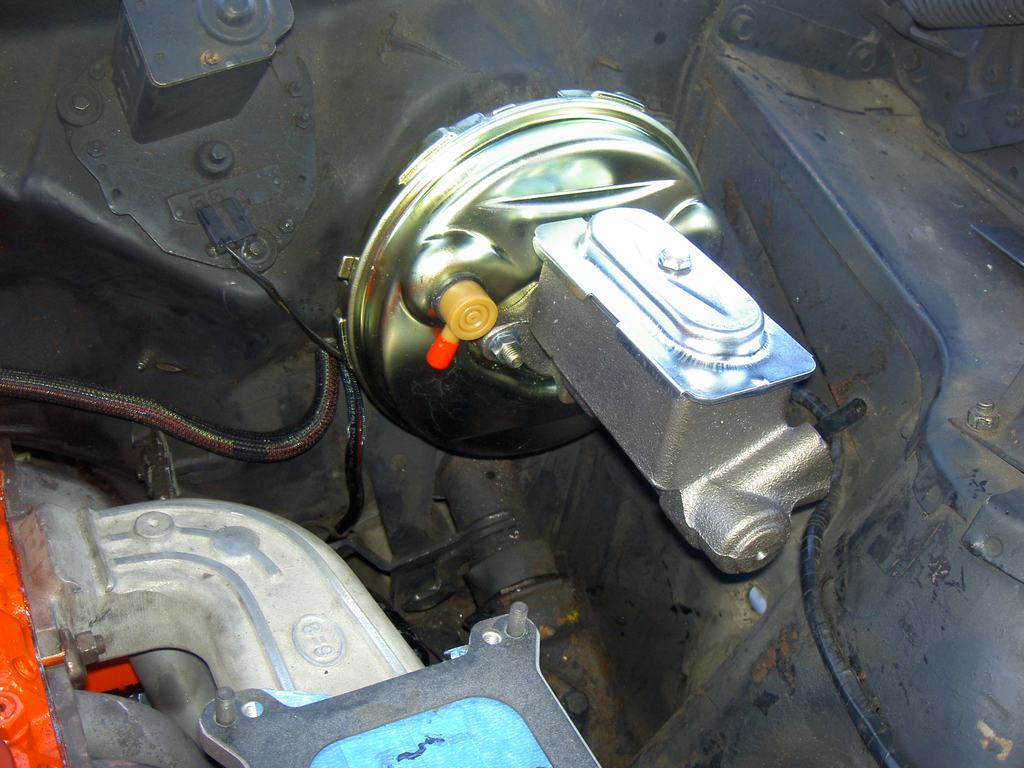
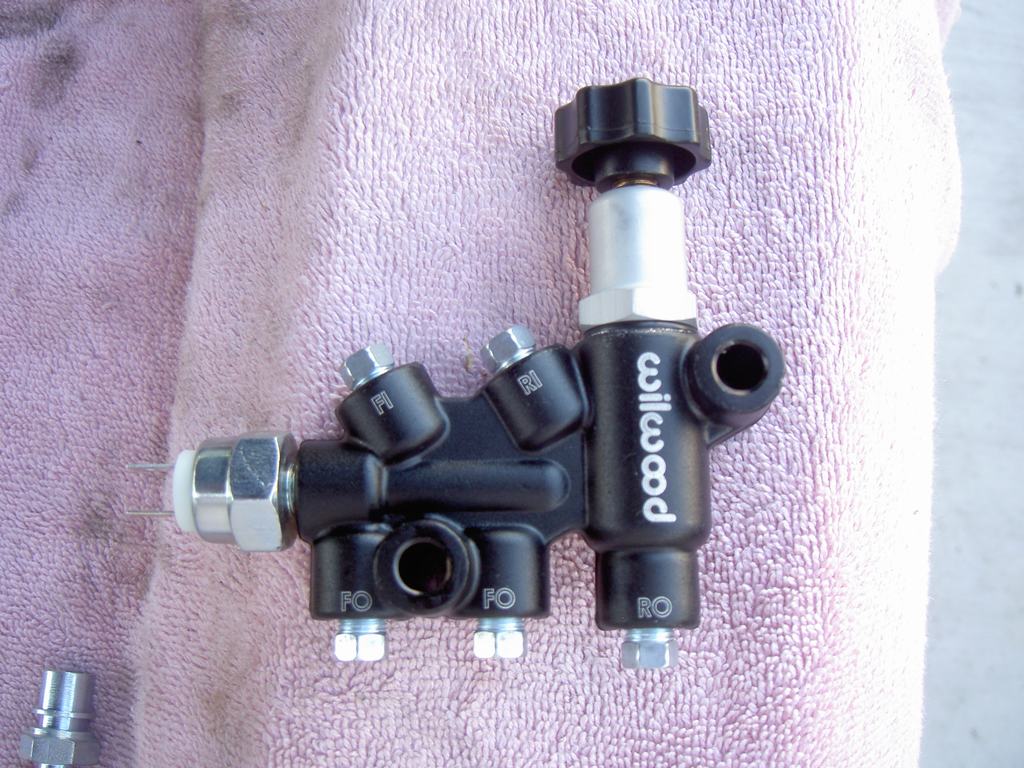
New booster and adjustable prop valve
Coiled brake line that I first have to straighten and then bend
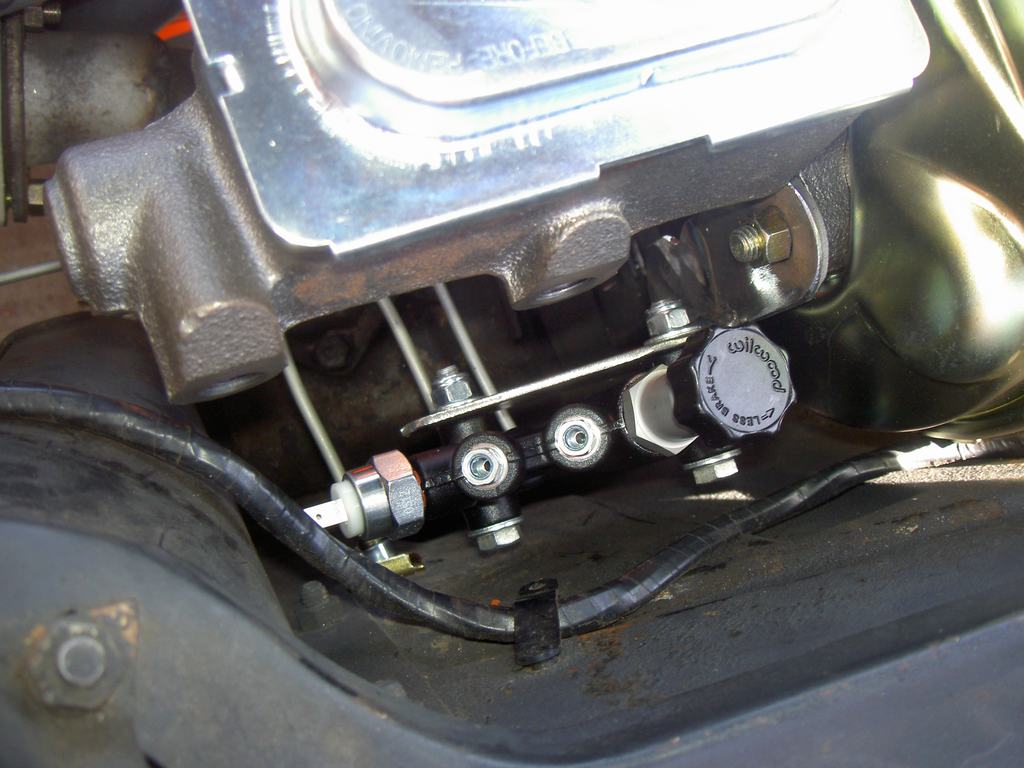
Prop valve mounted, had to build the bracket
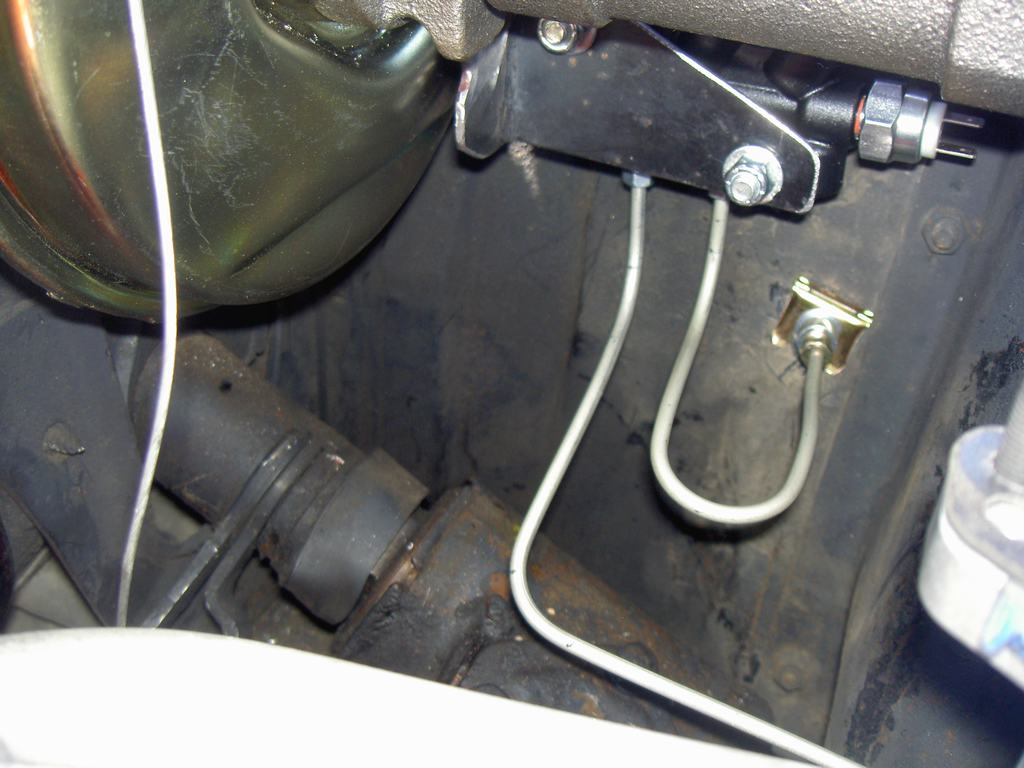
Lines bent and installed...
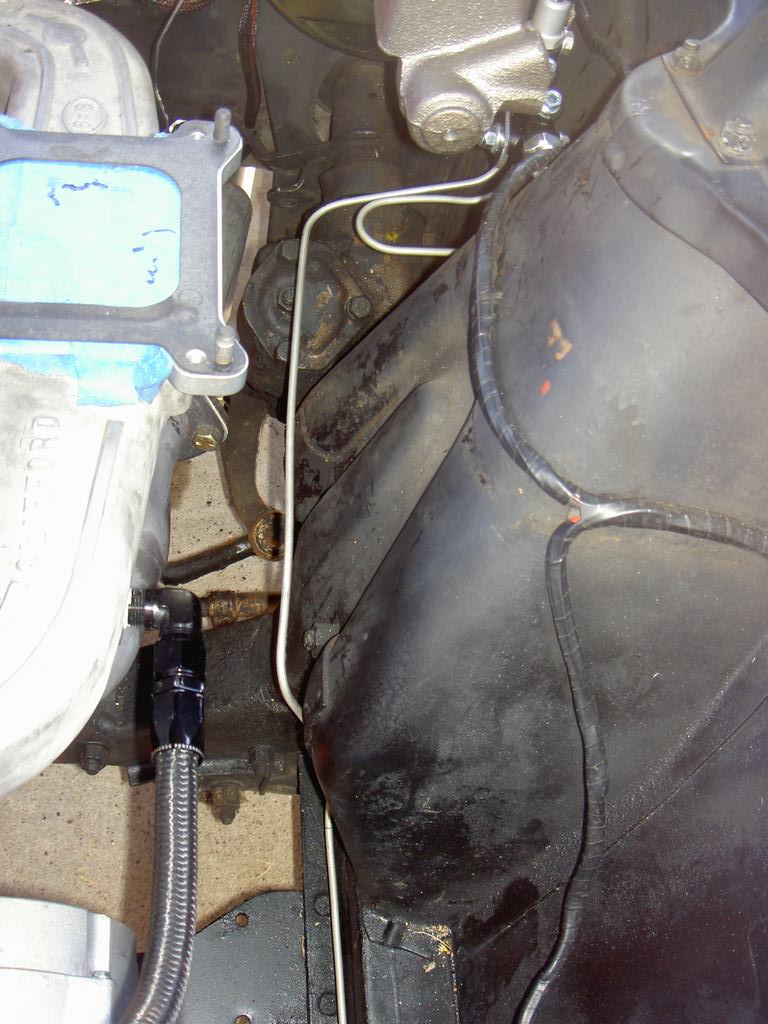
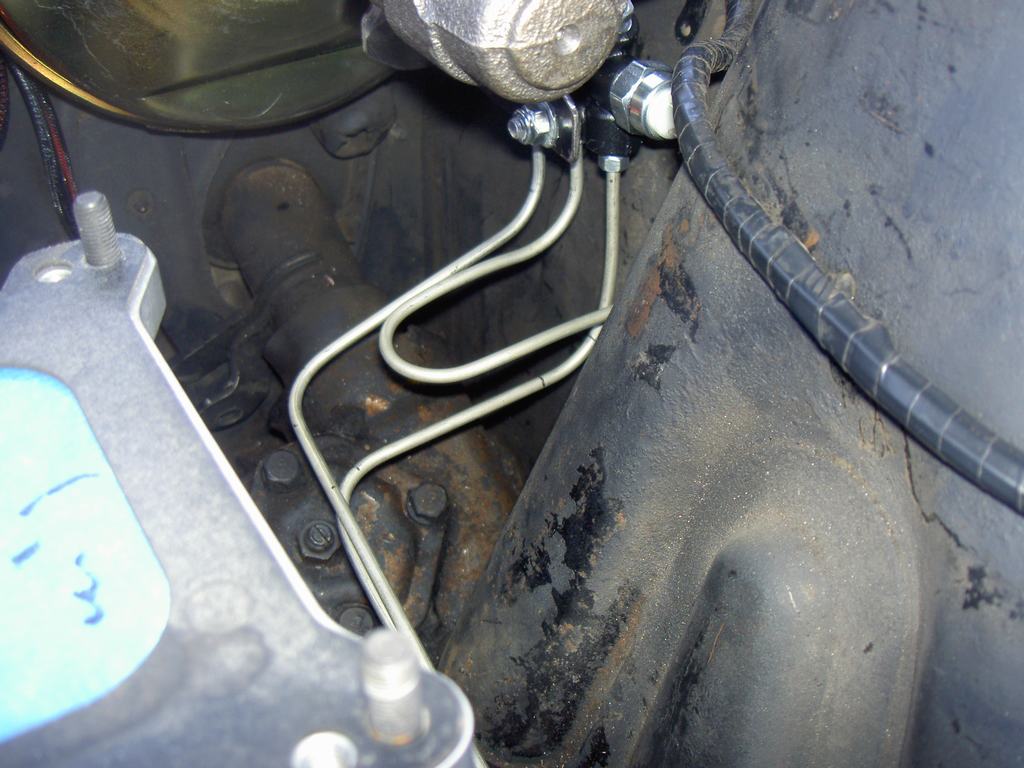
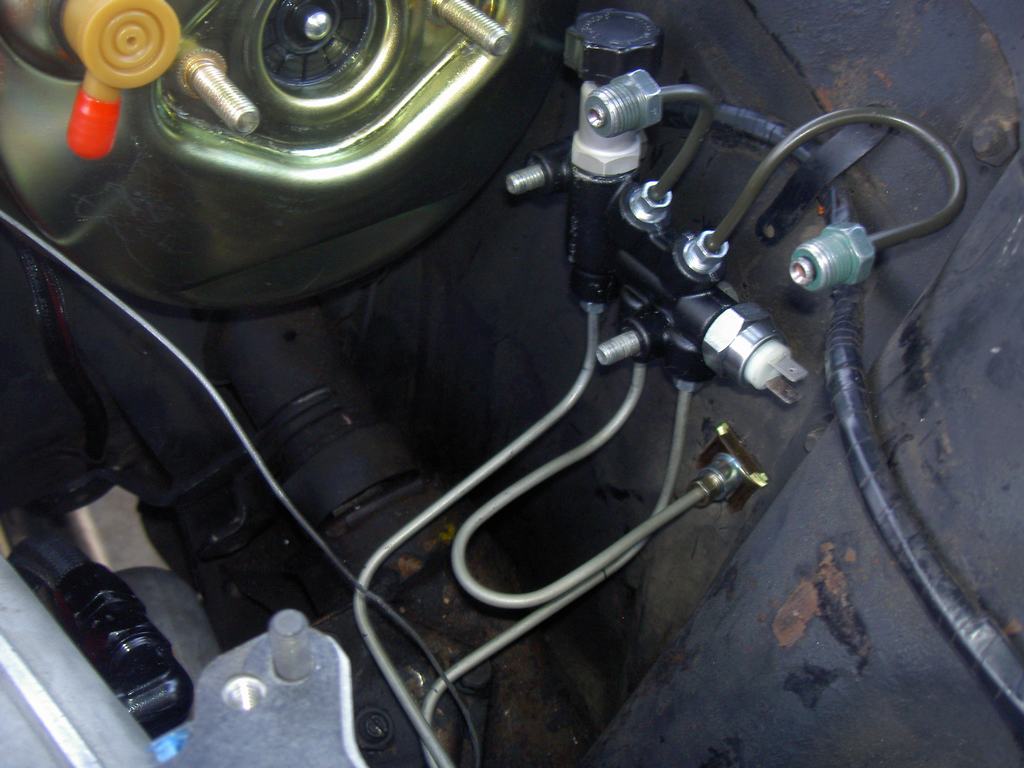
Gauges in new bezel, wired up and turned on
New HEI, plugs and wires
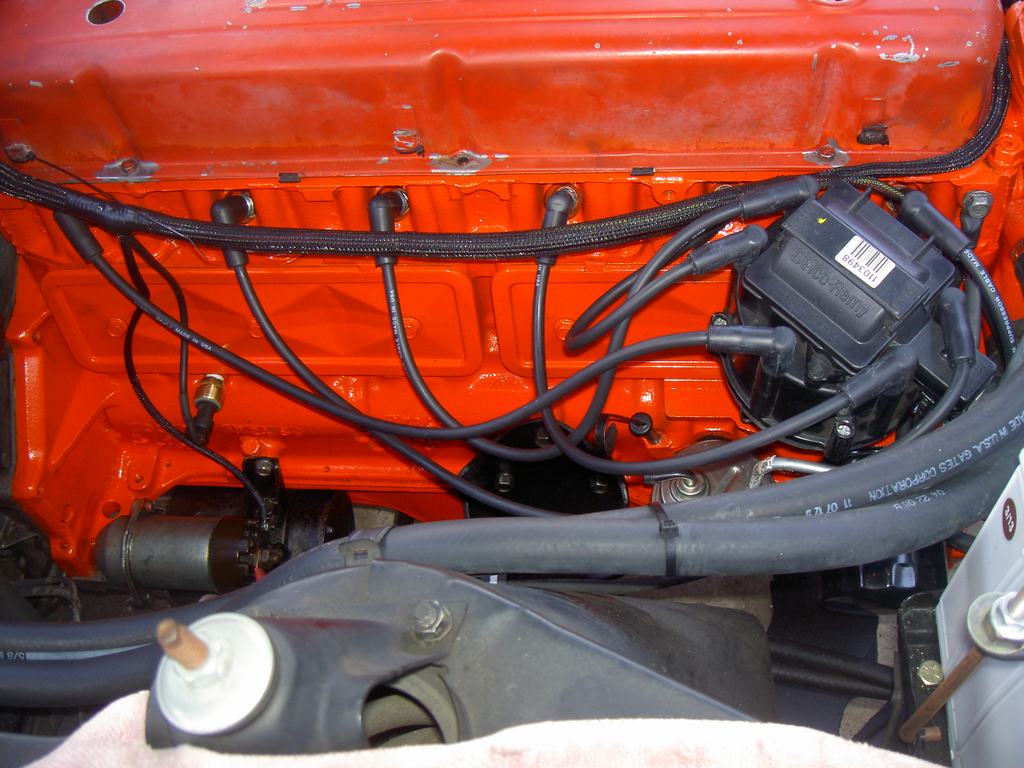
That brings me up to date. More to follow...
Some of these pics go back to previous weeks/weekends but I just got around to posting them. Hope you enjoy.
Same internal thread size but different outer size. I used the smaller of the two, since the water jacket was so close to the edge of it.

Installed

Head back on and getting ready for paint

Fresh paint.


New water pump, t-stat and harmonic balancer

More parts installed

Intake, headers and alt. installed

I didn't like the way I had hoses crisscrossing the top of the engine for the heated manifold connections so I used AN fitting and braided hose


Much cleaner

Engine dropped back in

New booster and adjustable prop valve


Coiled brake line that I first have to straighten and then bend

Prop valve mounted, had to build the bracket

Lines bent and installed...


Gauges in new bezel, wired up and turned on

New HEI, plugs and wires

That brings me up to date. More to follow...
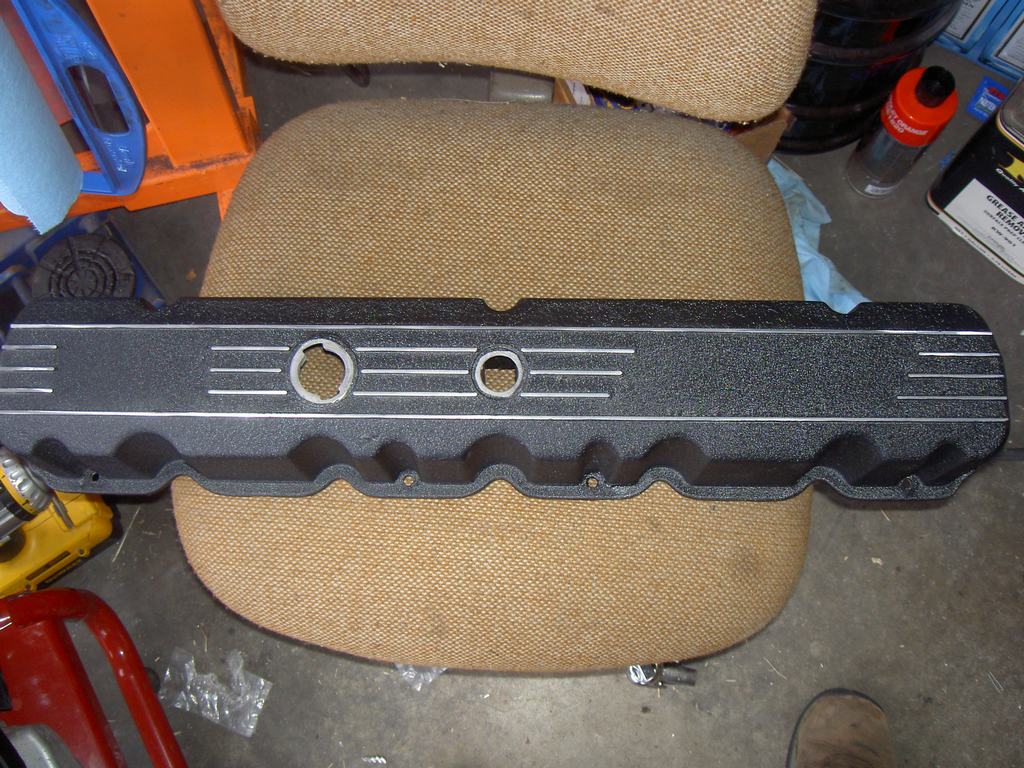
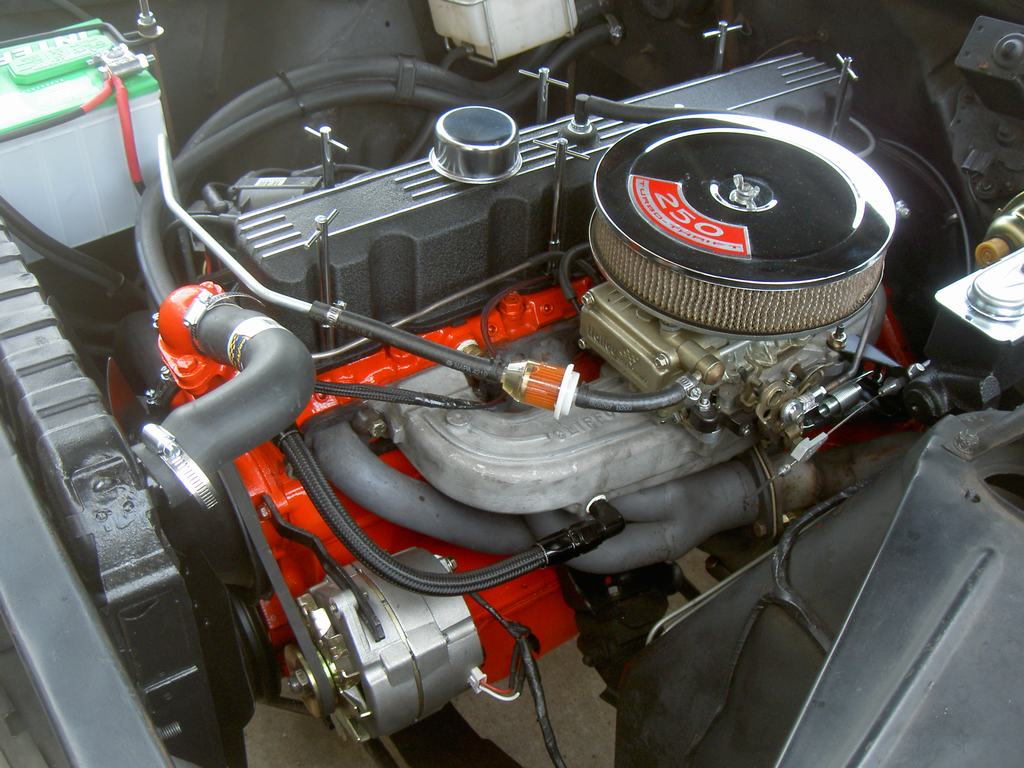
Okay, another update. IT LIVES!!!! I haven't driven it yet but I got it fired up and so far things are looking good. Some minor tweaking is need but I think it should be on the road this weekend. I got my valve cover back from powder coating and am really happy how it turned out. I did a wrinkle finish, like old school and sanded off the top of the fins. Very happy! Well, everyone love pics so where I go...
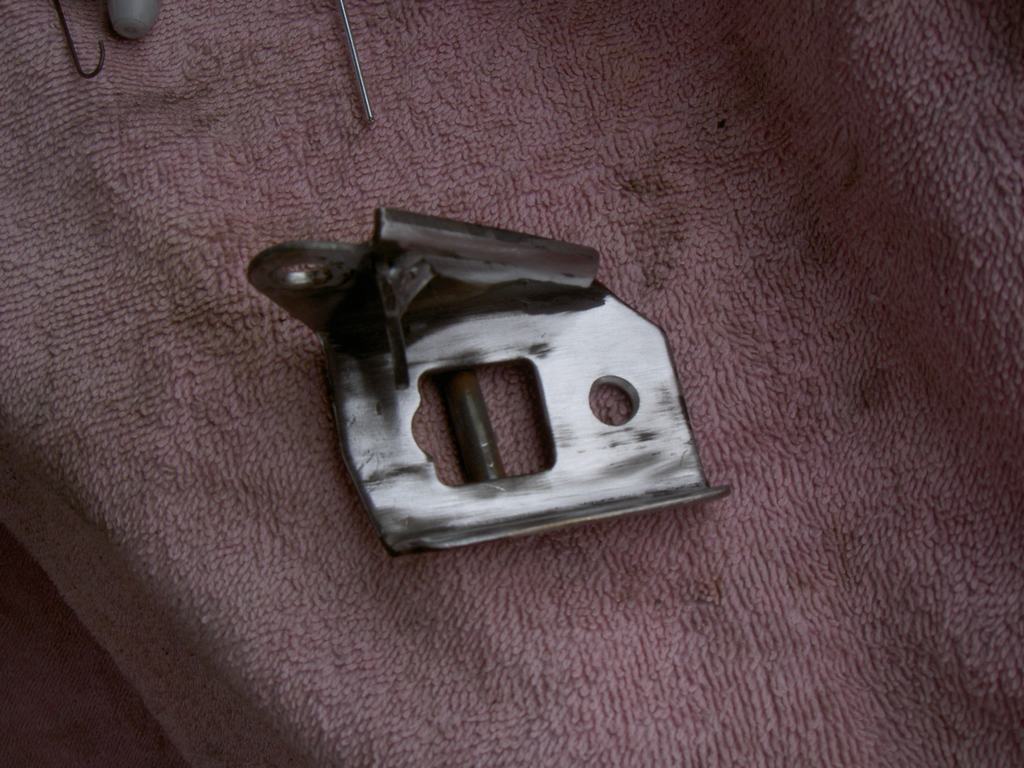
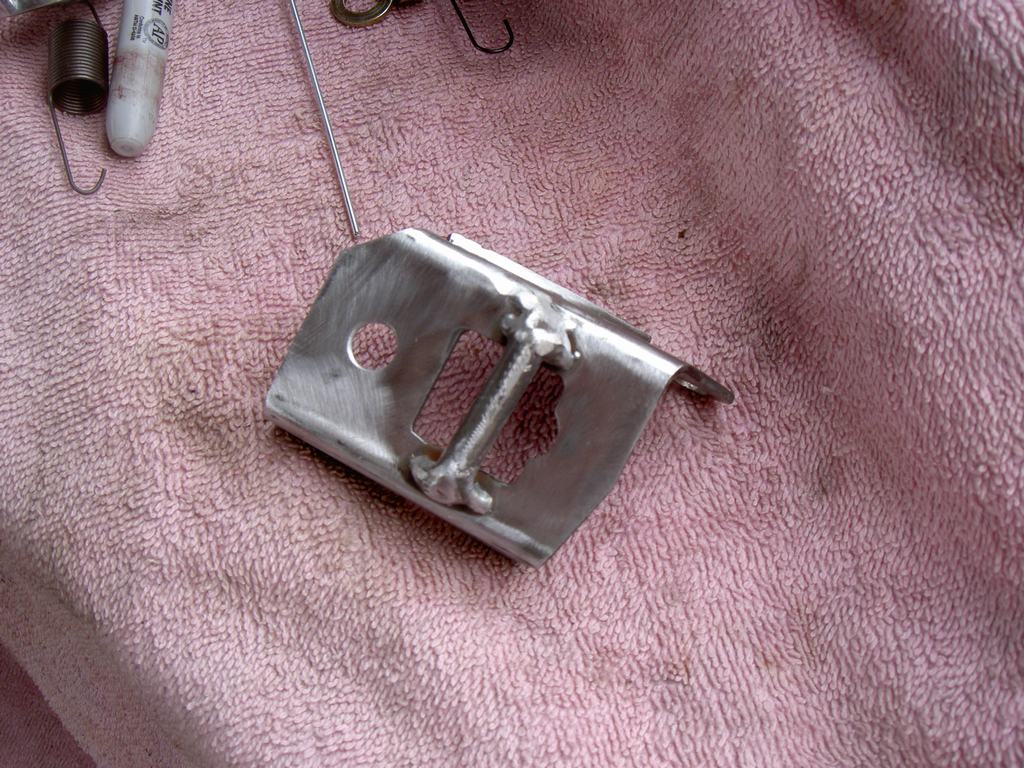
Bracket I made from hacking up another bracket. This is for the Lokar kickdown cable and return springs. I am happy with how much cleaner I was able to get all of this setup versus how the PO had it.
Valve cover fresh from powder coater
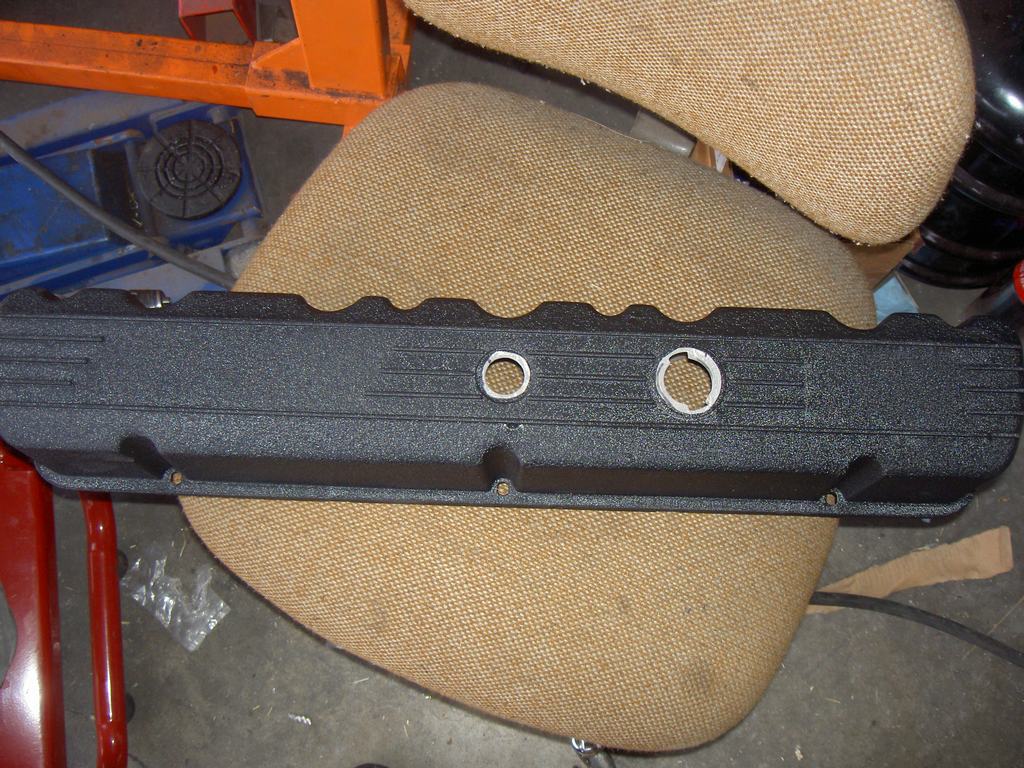
With the fins sanded and installed
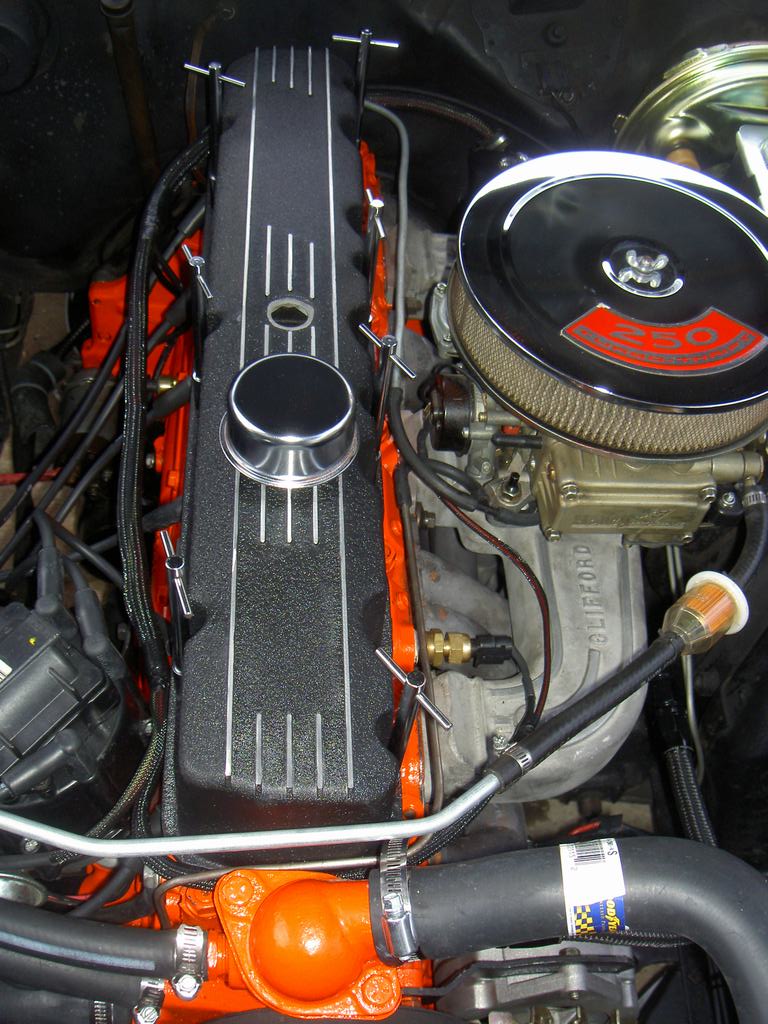
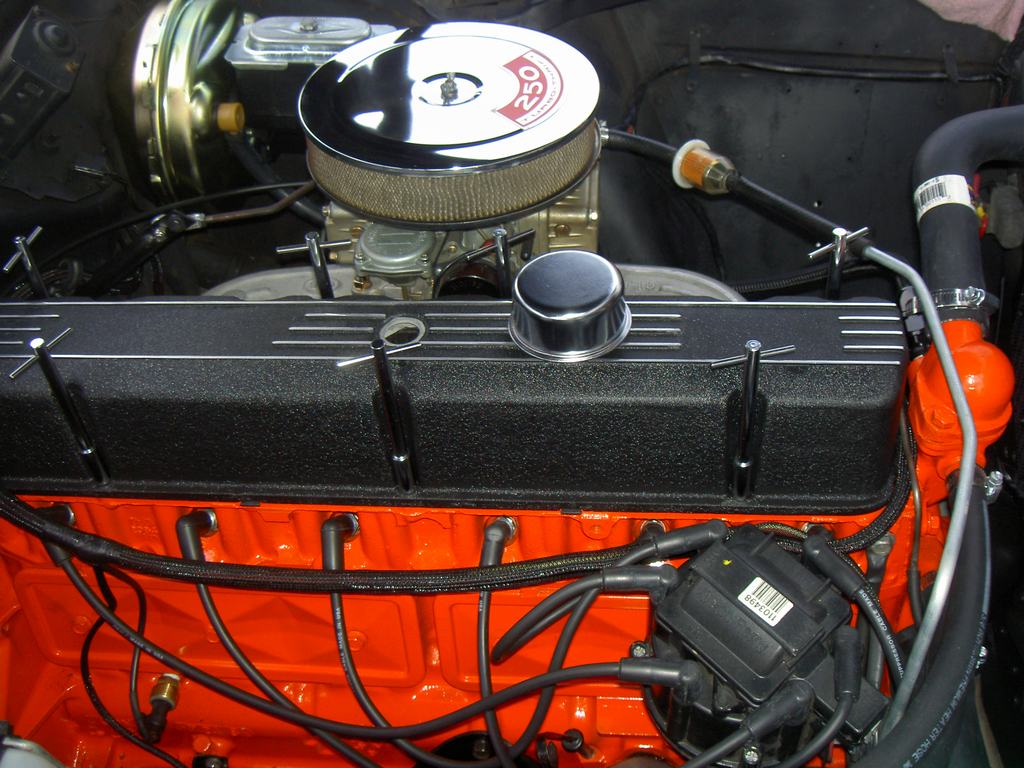
Wiring bundled up, PCV valve installed and engine ready to go
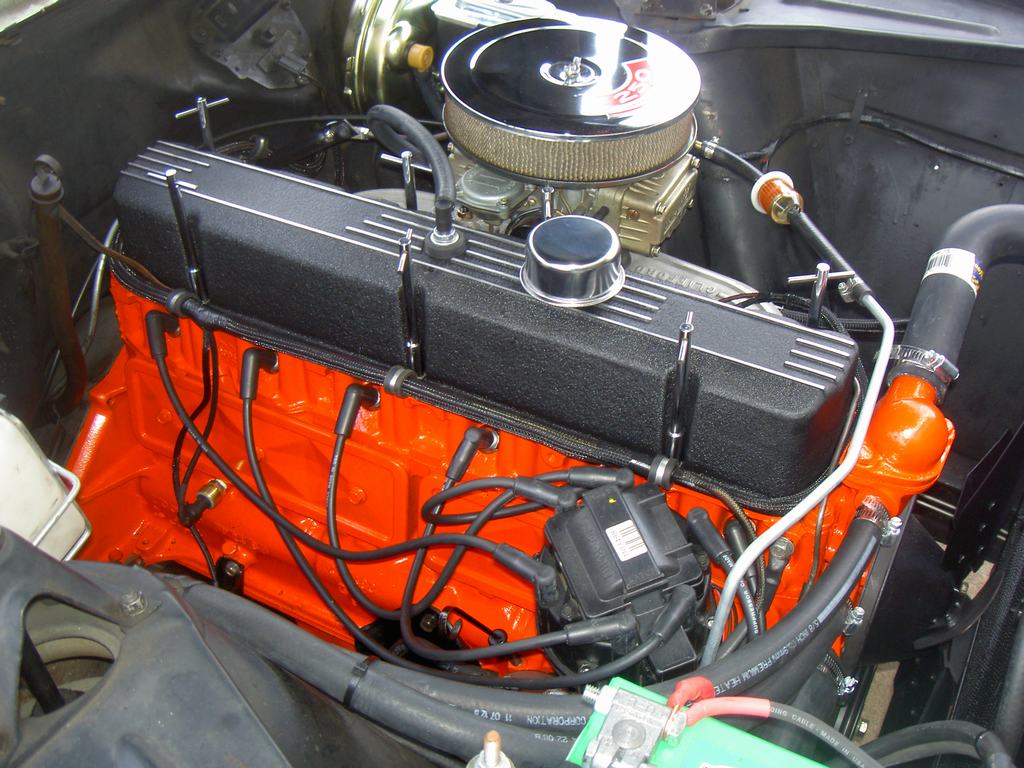
If you can see it, that bracket I made is installed on the rear of the carb stud, with the return spring and cable hooked to it.
I'll post up how it runs and drives once I get that done.
Bracket I made from hacking up another bracket. This is for the Lokar kickdown cable and return springs. I am happy with how much cleaner I was able to get all of this setup versus how the PO had it.


Valve cover fresh from powder coater

With the fins sanded and installed


Wiring bundled up, PCV valve installed and engine ready to go

If you can see it, that bracket I made is installed on the rear of the carb stud, with the return spring and cable hooked to it.

I'll post up how it runs and drives once I get that done.

IME Holley's work fine with the return spring placed there, but it tends to accelerate the wear in the throttle shaft bore of the throttle plate die casting. Better is if you can orient the springs to directly oppose the throttle linkage, though it is nowhere near as sanitary looking.
I know, I know, where was I BEFORE you went to all of that work. Conejo Carb in the NP/TO area, if still in business (& Pacific Carb in Vta. if they are gone), can bush the shaft bores should they be worn or start to wear.
I know, I know, where was I BEFORE you went to all of that work. Conejo Carb in the NP/TO area, if still in business (& Pacific Carb in Vta. if they are gone), can bush the shaft bores should they be worn or start to wear.
Scenic WonderRunner
Adventurist
I finally figured out what is wrong with photobucket. They do not recognize anything below Windows 8 now. After a chat with their headquarters.
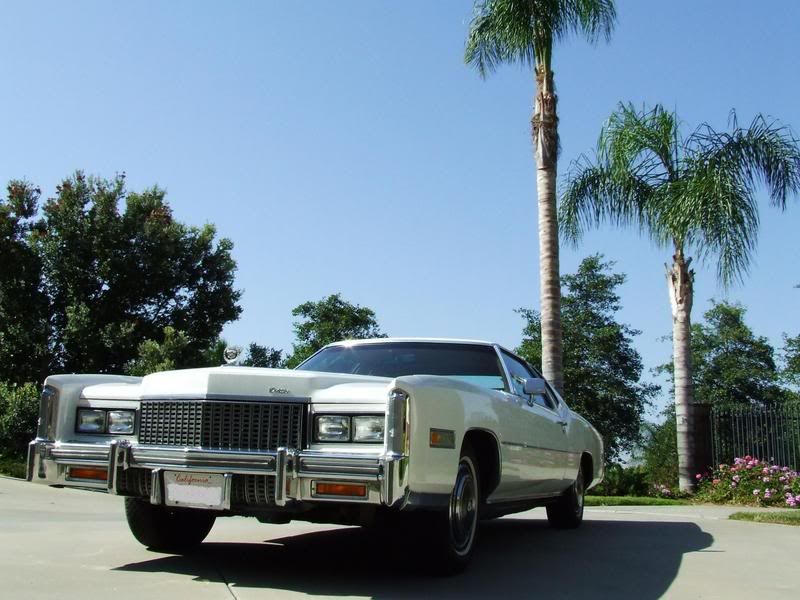
So Once again.....my 1976 Cadillac El Dorado. I hope it works this time!
Great Job on your Totally Awesome Ride Mike! Keep Going!
.
So Once again.....my 1976 Cadillac El Dorado. I hope it works this time!
Great Job on your Totally Awesome Ride Mike! Keep Going!

.
Last edited:
I'll post up how it runs and drives once I get that done.
Well? You've left us hanging long enough!

Well? You've left us hanging long enough!
Right?
What? A smoky burnout? That would just be a childish display of immaturity and I would never condone such an. .....ah heck I can't keep a straight face while I type this. ....do it!
Hahaha!!!! You guys are funny.... Not sure I need to reduce the life of my brand new tires.
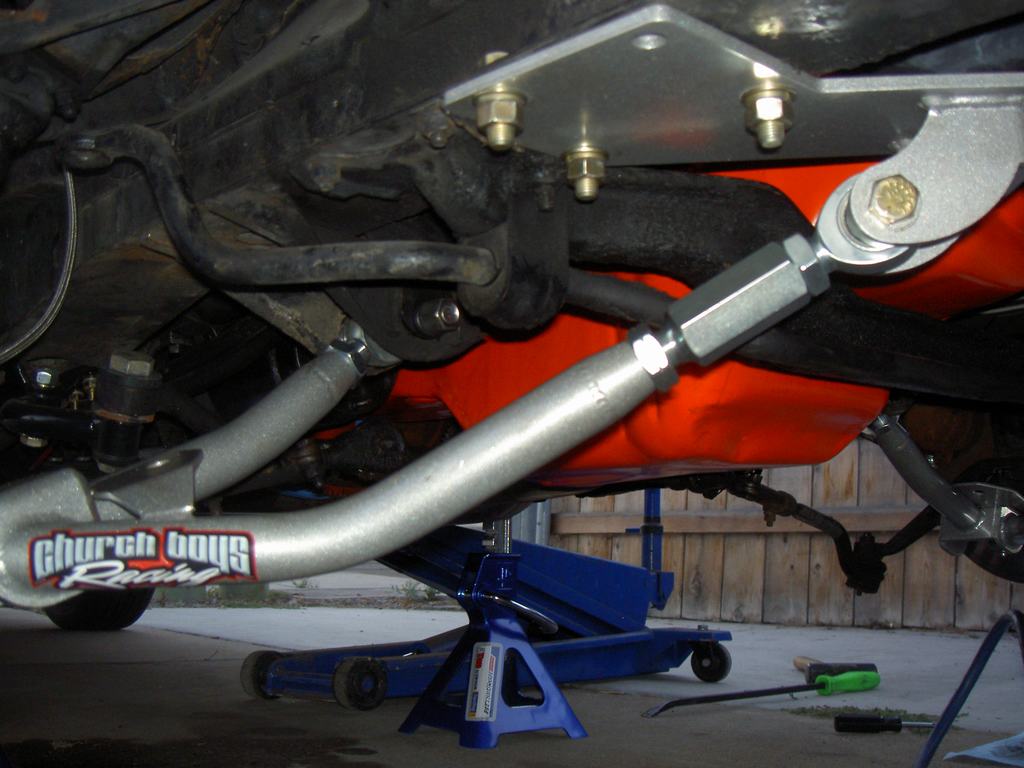
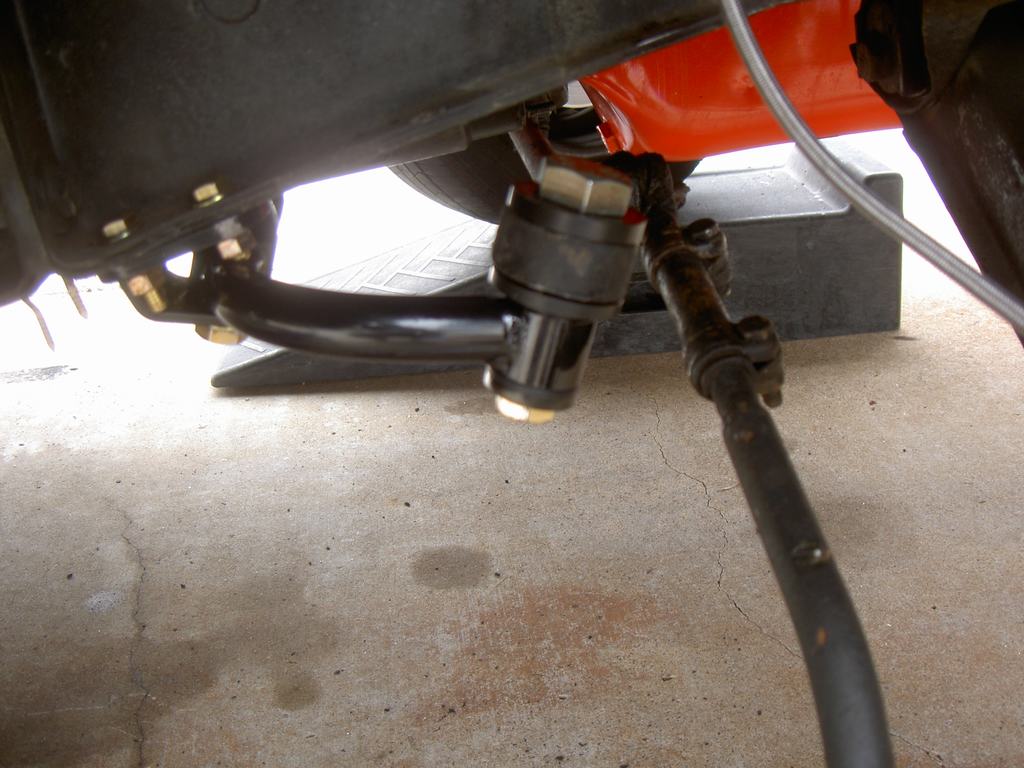
I did put some new Church Boys Racing lower control arms on. Made a world of difference in the handling/steering. I also installed a CPP idler arm setup which helped with the wondering of the steering.
Overall it has been running well. I have solved about 90% of the issue of running hot while at idle. I think the last step is to move the transmission cooler, which I think is causing a heat soak issue. Downside is that coming back from our last cruise, we found the heater core was leaking inside so now I have to take that all apart and fix. I have it bypassed for now. Gotta love old cars... if it's not one thing, it's another.
I did put some new Church Boys Racing lower control arms on.
 Made a world of difference in the handling/steering. I also installed a CPP idler arm setup which helped with the wondering of the steering.

Overall it has been running well. I have solved about 90% of the issue of running hot while at idle. I think the last step is to move the transmission cooler, which I think is causing a heat soak issue. Downside is that coming back from our last cruise, we found the heater core was leaking inside so now I have to take that all apart and fix. I have it bypassed for now. Gotta love old cars... if it's not one thing, it's another.
