Hoplite, a 2022 Power Wagon Build.

Etoimos

Adventurist
Towards the end of 2021 it became apparent to me that while my current Jeep Gladiator was a really cool truck and it did great when off road, it had a few short comings that were just to big (or should I say to small??) to over look.

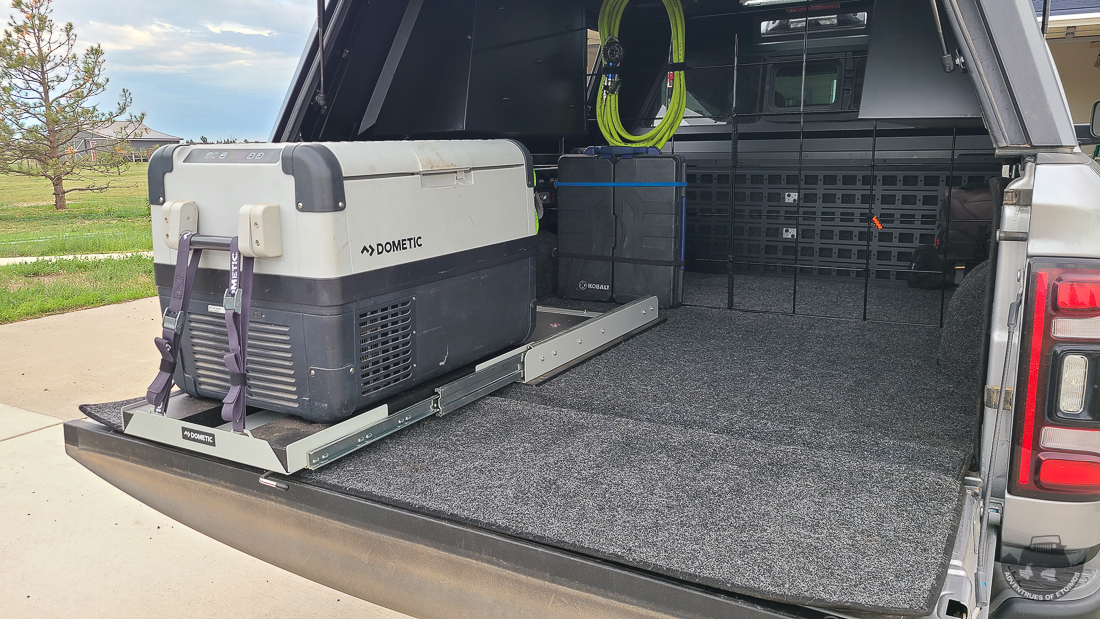
The first concern was that it was just to small. The interior was so tight I could almost touch the passenger door while driving. With the wife, kid and dog in the Gladiator, there was little room for anything else inside. That meant putting everything in the bed of the truck, and with the ACE Upper Decker, there was virtually no room in it either.

The interior of the new 2022 RAM Power Wagon is much more spacious with plenty of room for everyone. It also has more storage and creature comforts then the JT had as well. I’m loving the power rear window and auto up/down side windows (seriously, why are those not options on a $60k JT?) and my son Kiefer loves his new heated rear seat.

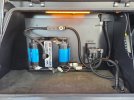
The other issues for me were the small fuel capacity and low fuel economy. I can deal with one or the other, but dealing with both when overlanding is a real pain. The PW actually gets a little less MPG, around 13mpg, then the JT did when daily driving and they both get about 10mpg when pulling the OGT Expedition 2.0 trailer. The advantage of the PW is the size of its fuel tank (31 gallons ) compared to the JT (22 gallons). An extra 90-ish or so miles can really make a difference when out in the middle of no where pulling the trailer.

Ordering a factory build​

The Power Wagon is the first vehicle that I have had built to order from the factory. With the almost non-existent dealer inventory and lack of options on them due to the chip shortages, I thought it made more sense to order the truck with exactly what I wanted on it. It also did not hurt that I found an out of state dealer that sold it to me for just over $10k off of MSRP. Below is what I ordered on Veteran’s Day of 2021:

BuildSheet-1100x676.png

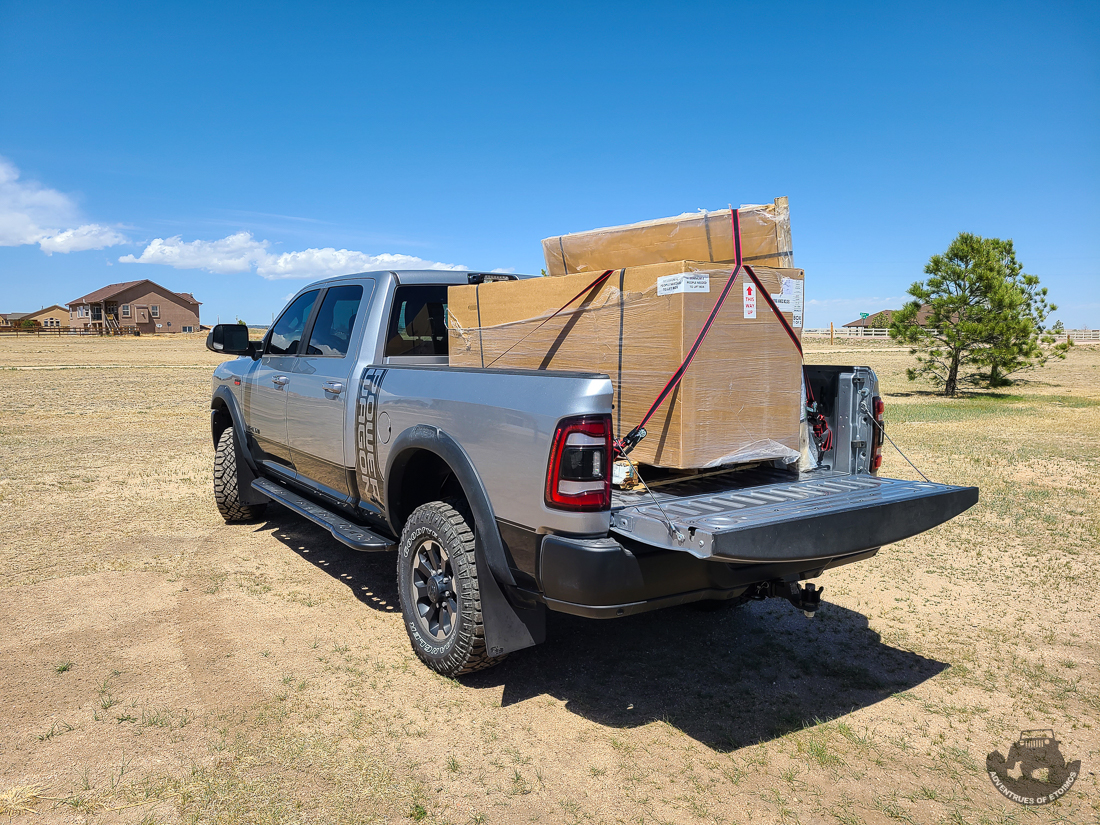
The truck was built on Jan 18th 2022 and I flew down to picked it up on Feb 11th. The final MSRP price when delivered was $70k and some change. My price from Mark Dodge was $59,669.

20220211_093107-1100x881.jpg

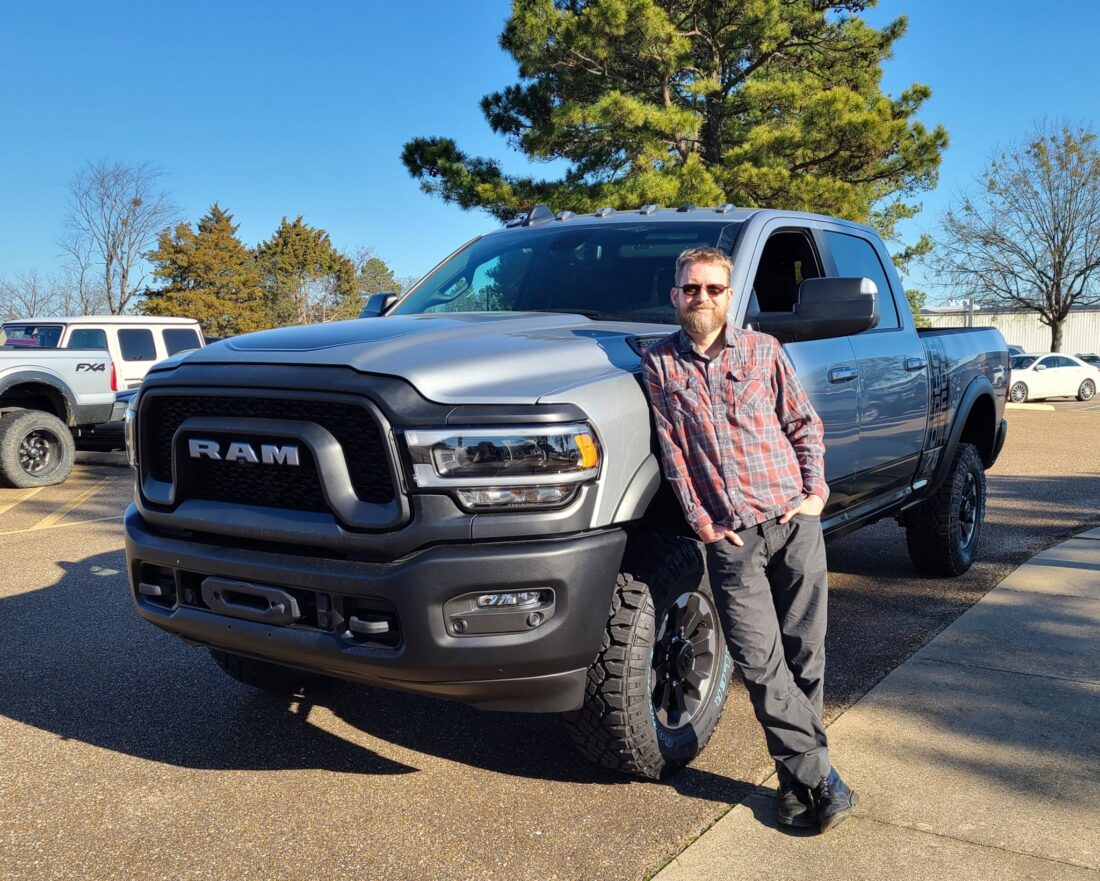
After visiting with family down in Arkansas I made the 863 mile single day trip back to Colorado. It took 14 hours and 2.5 tanks of gas. I averaged 12.5mpgs on that trip running about 80mph for long stretches of it... up hill and against the wind.

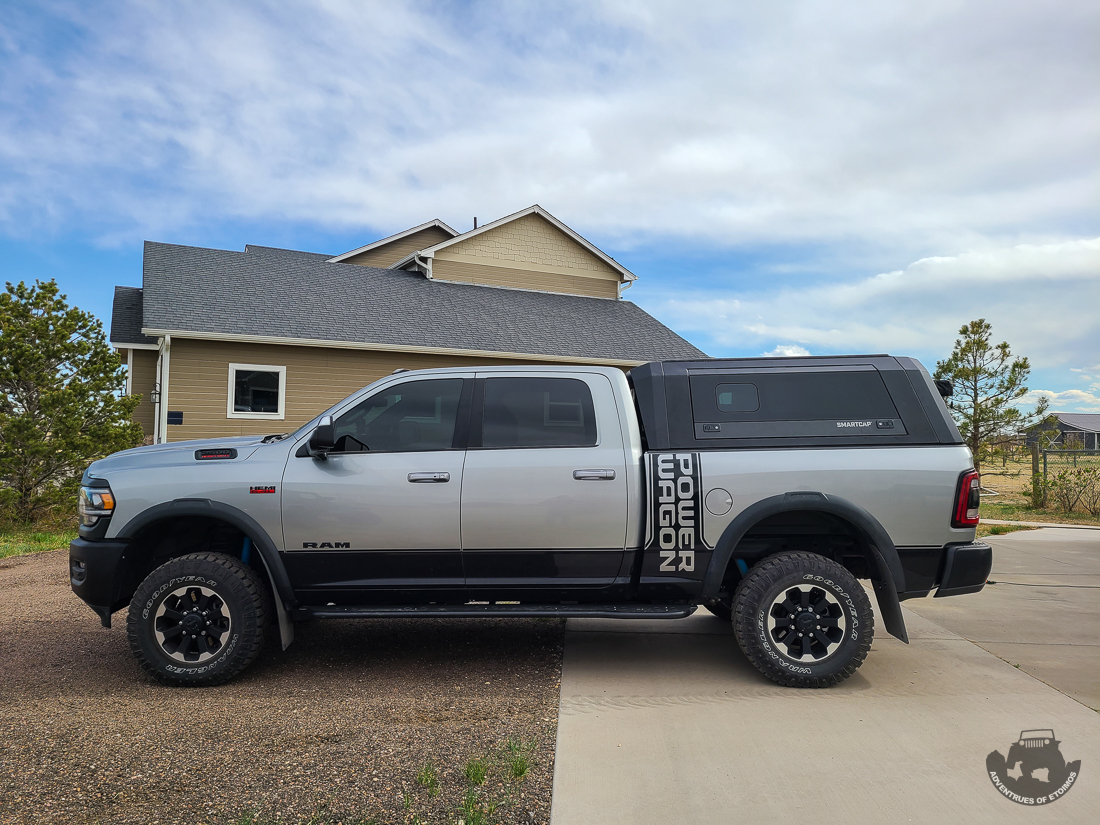
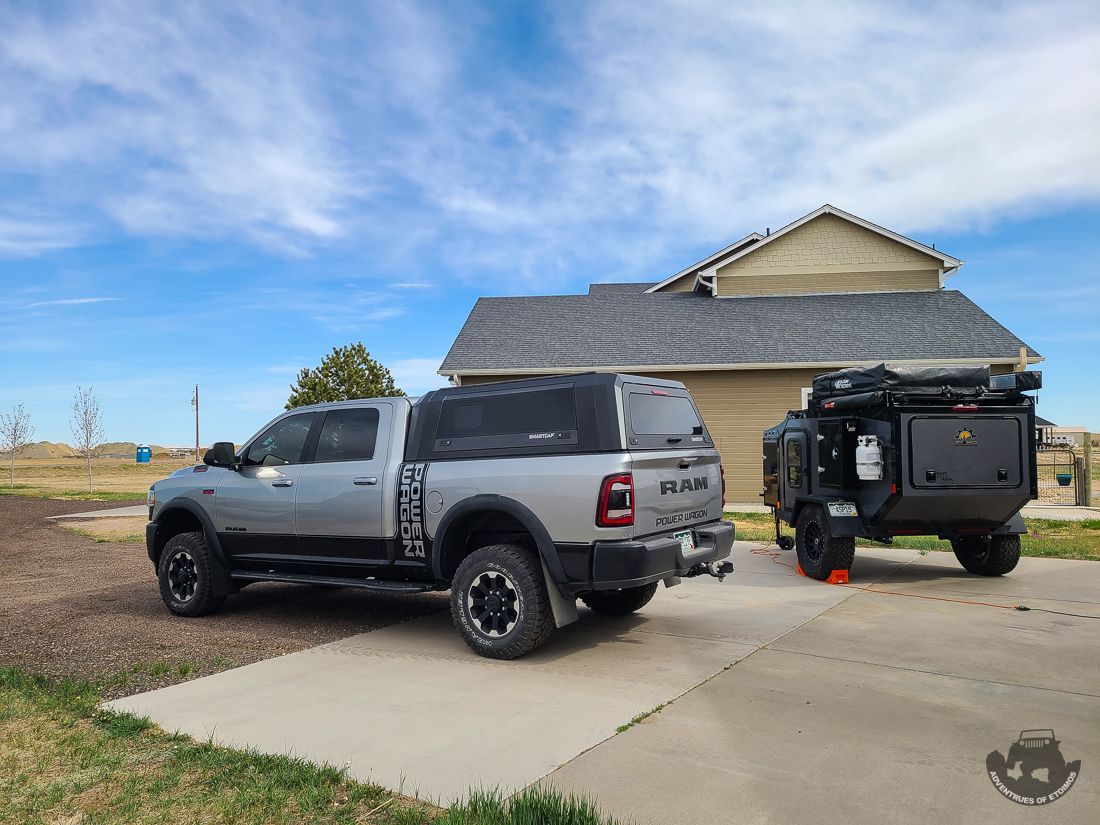
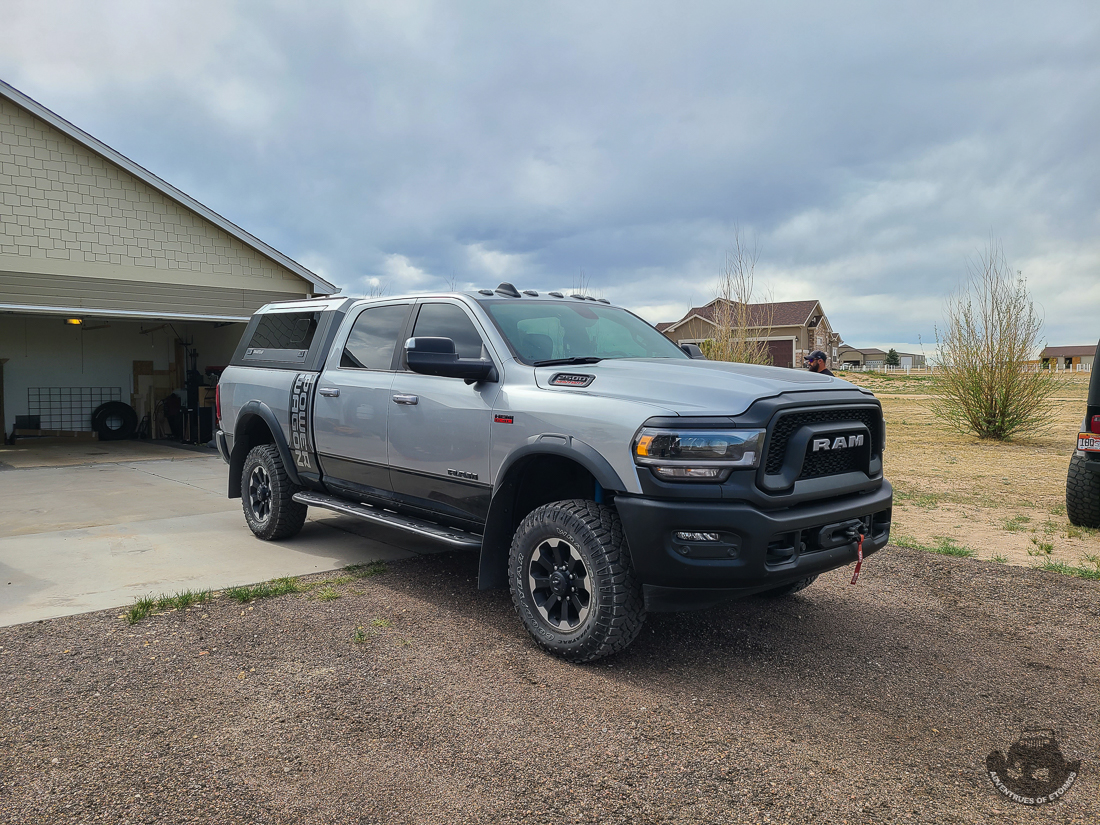
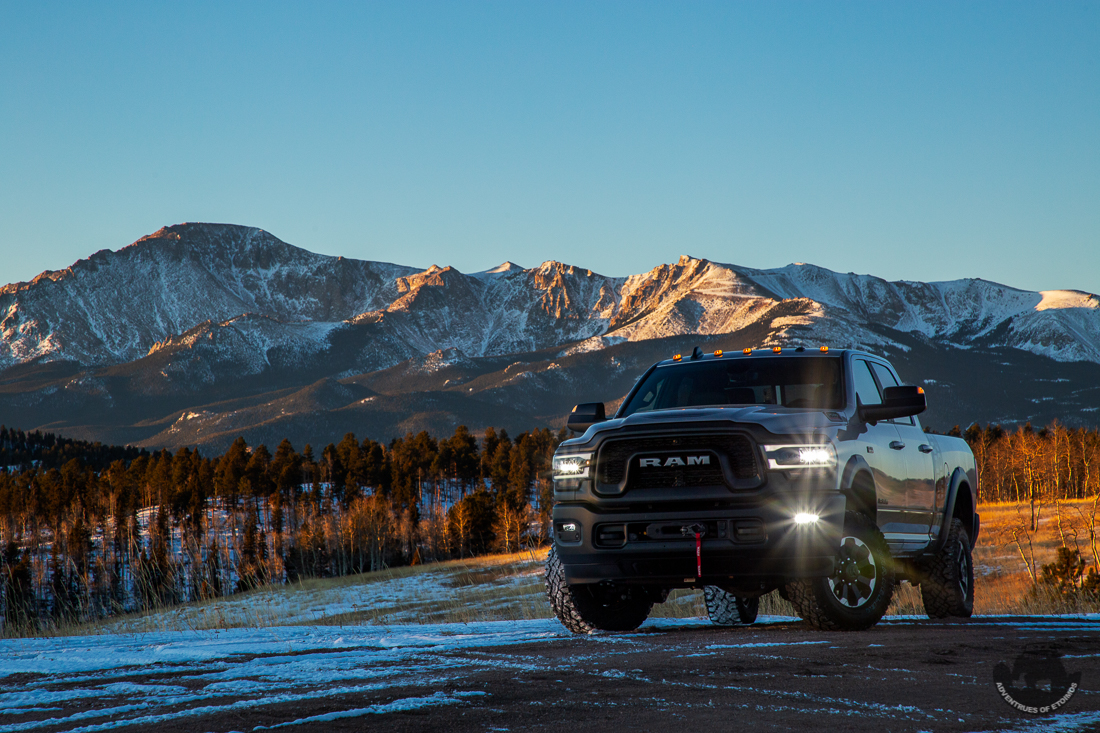
Here it is in stock form at home in Colorado…

PowerWagon-7236.jpg

Let the modifications begin!​

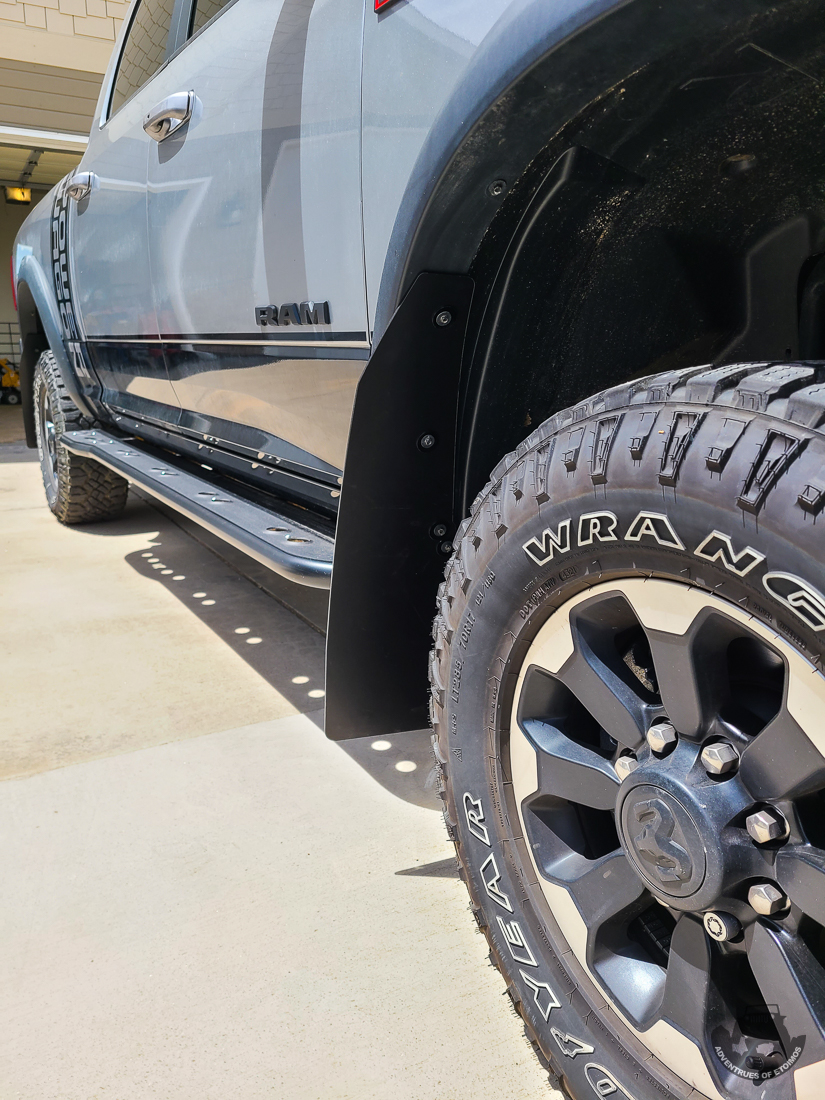
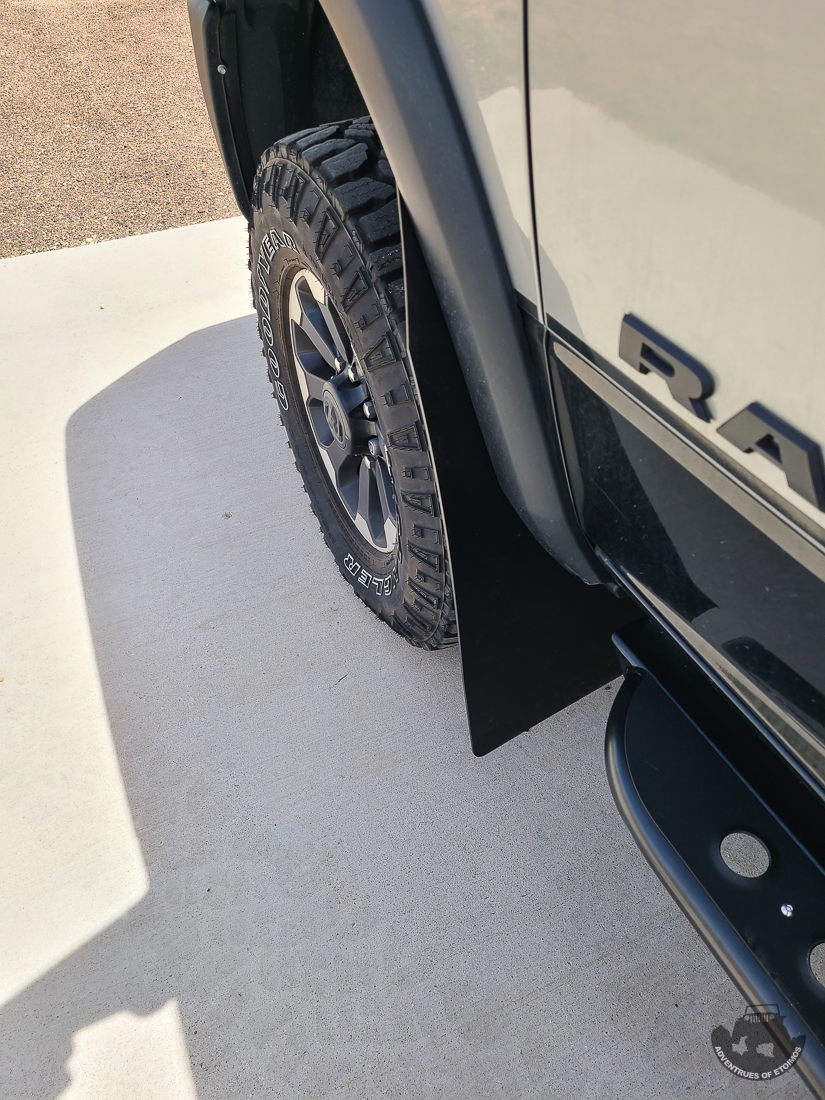
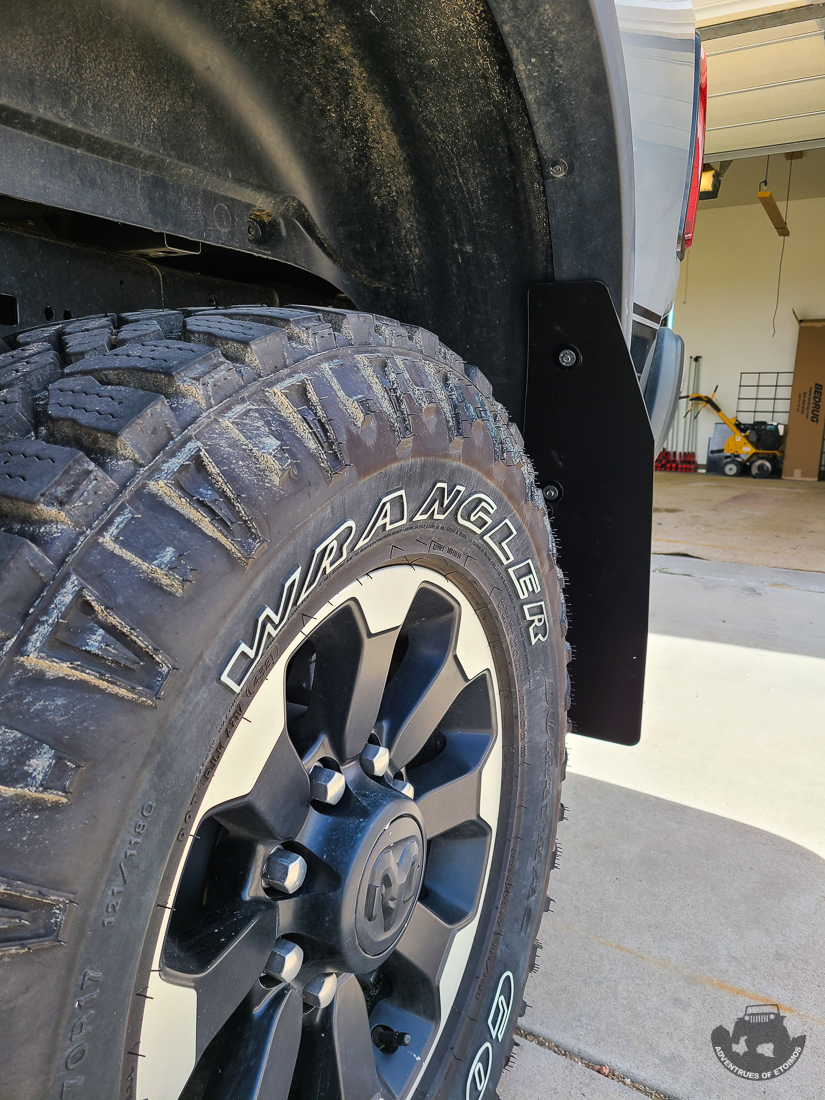
Rock Sliders and Mud Flaps​

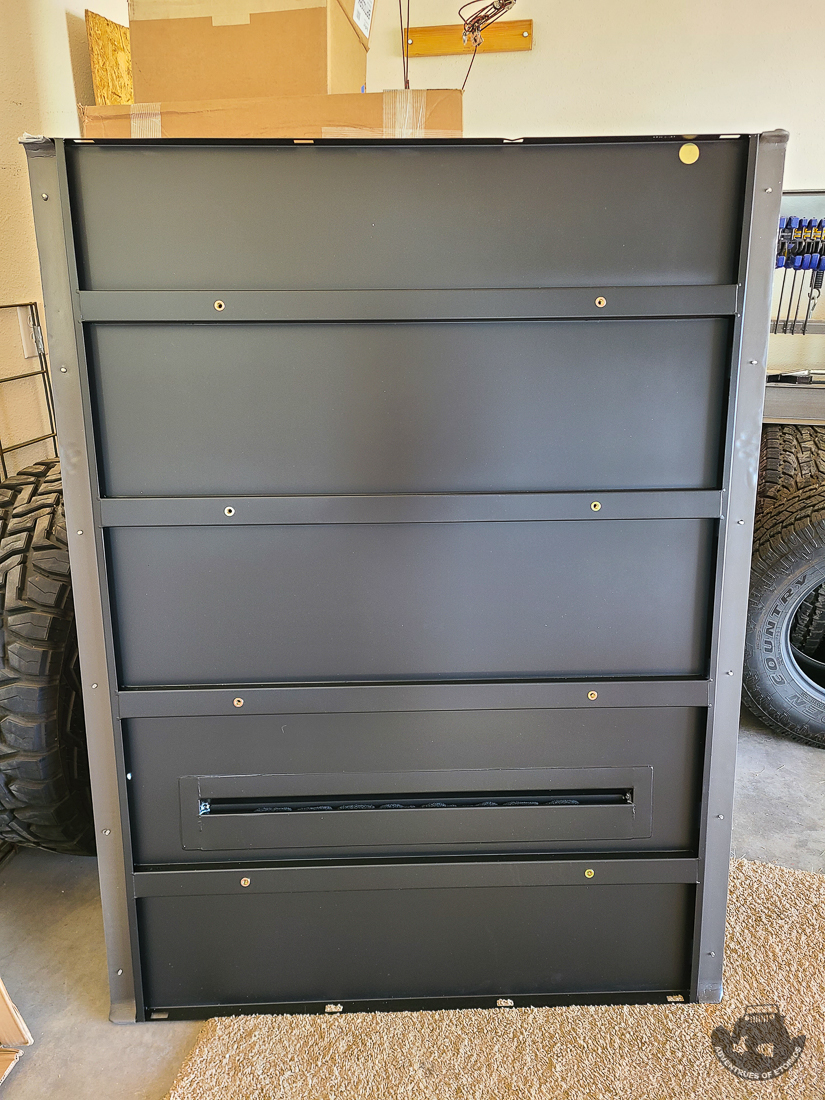
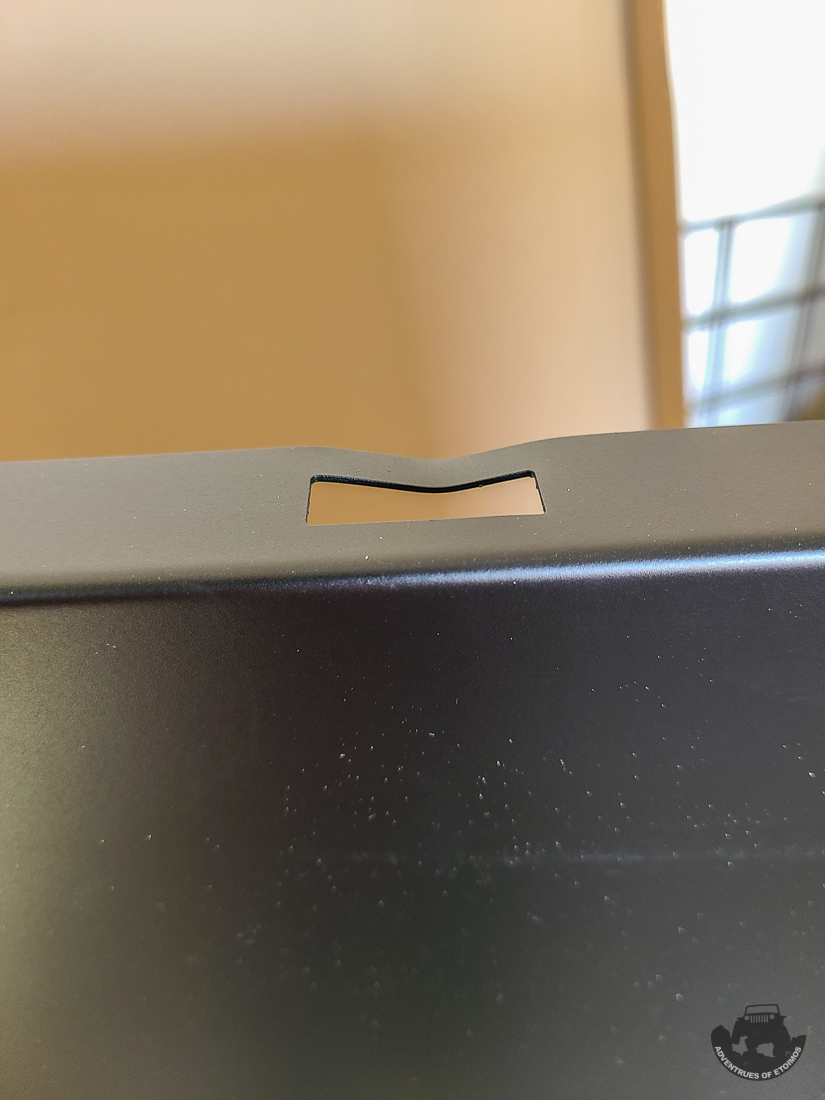
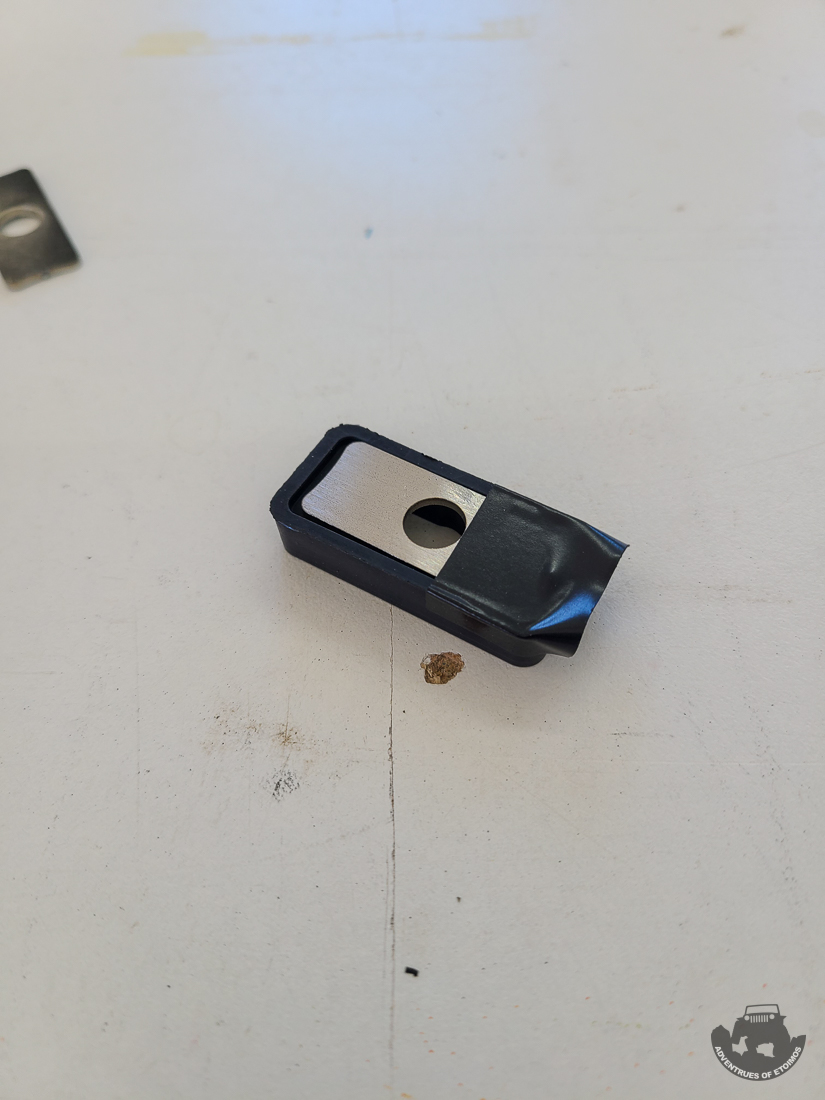
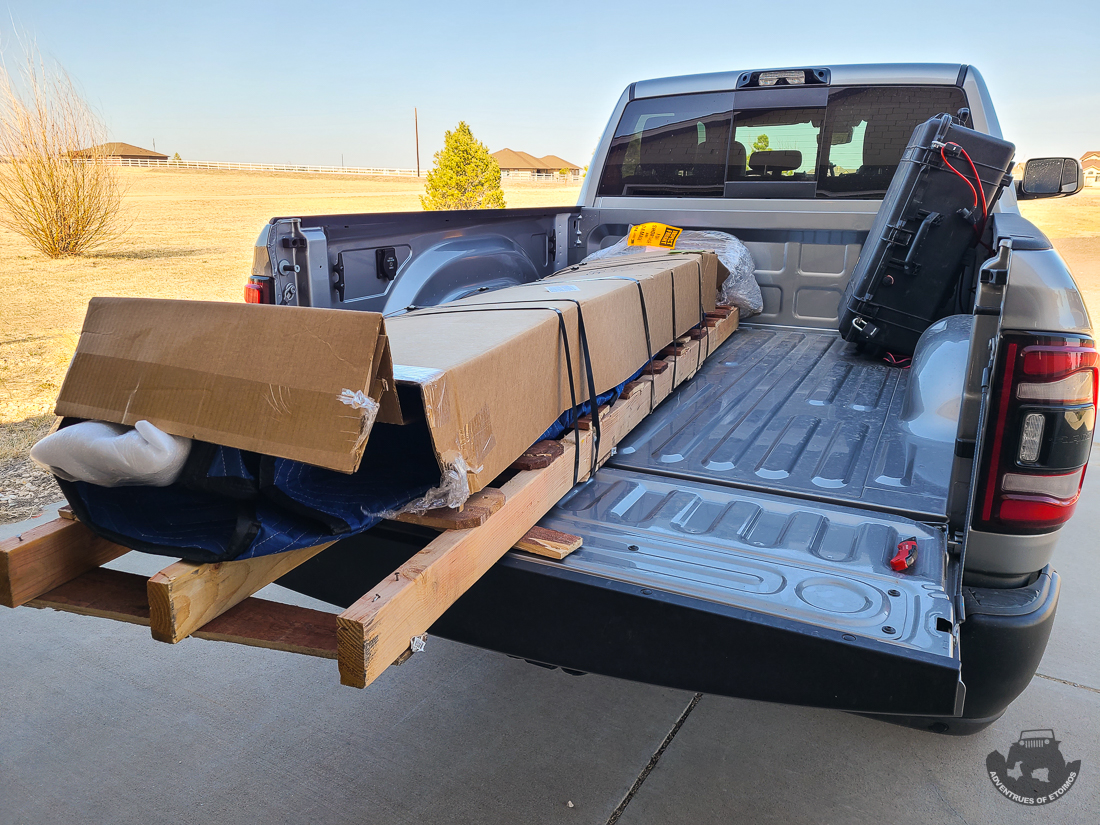
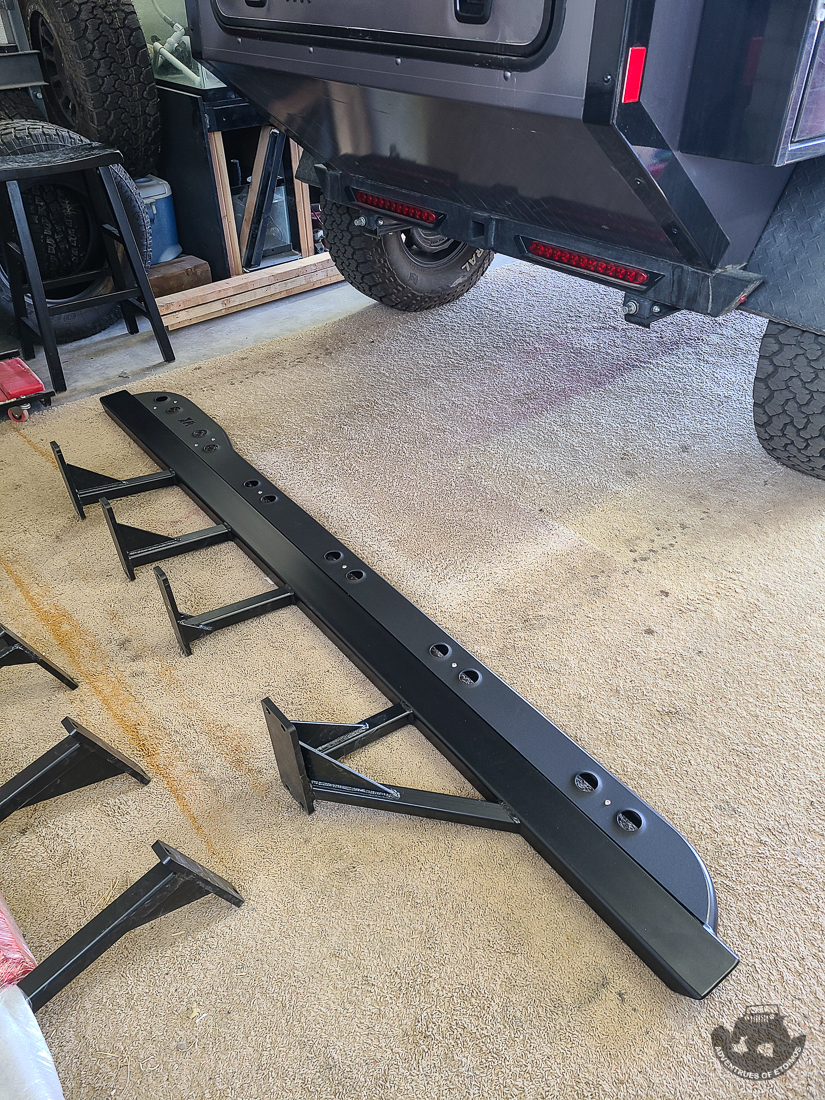
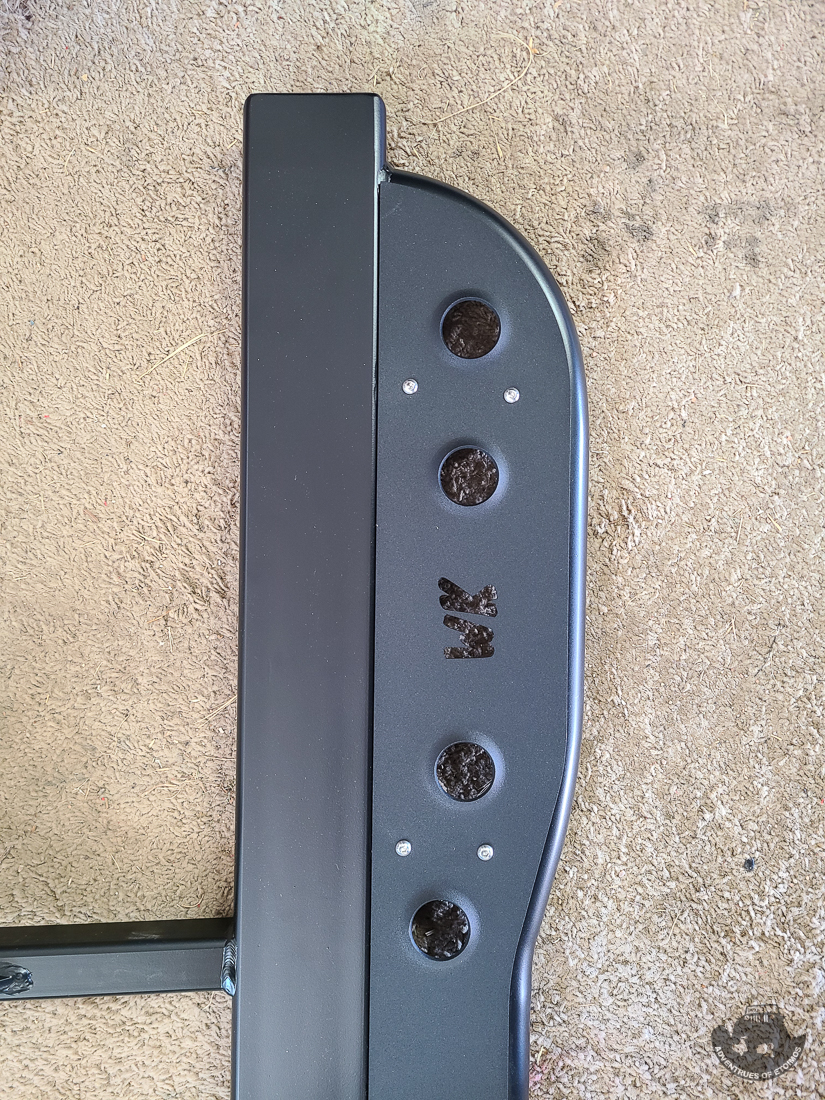
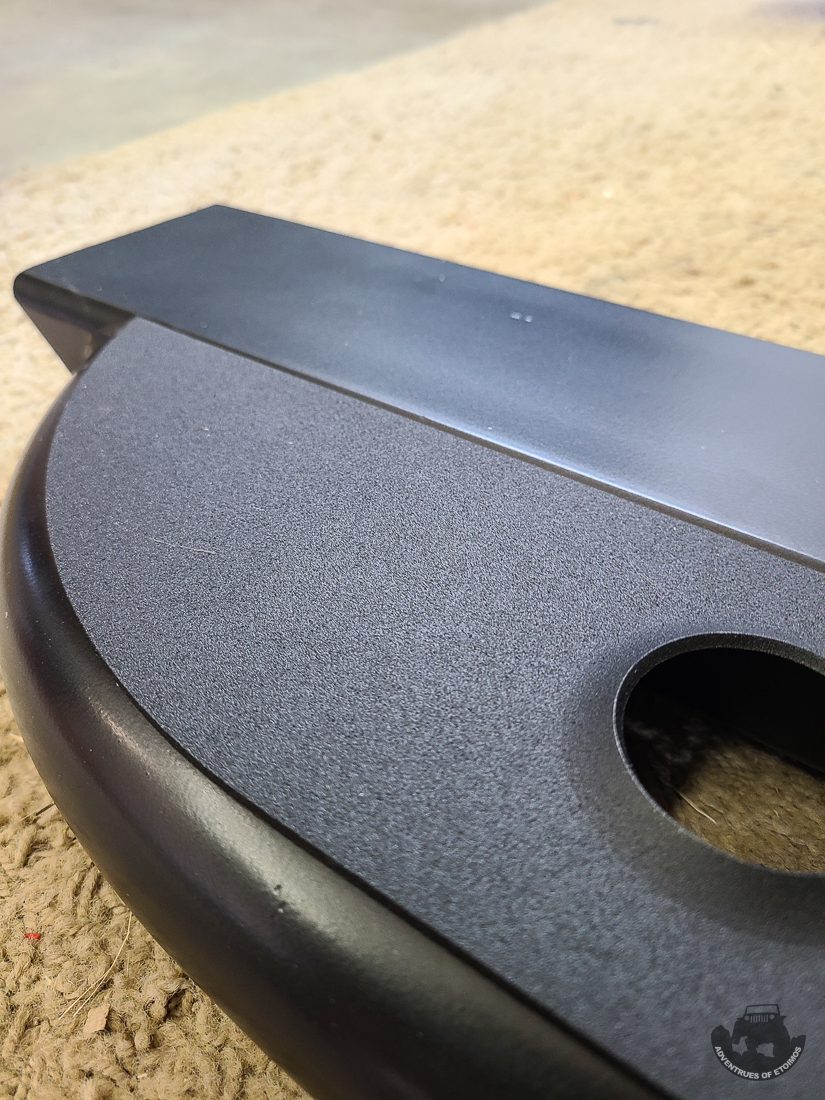
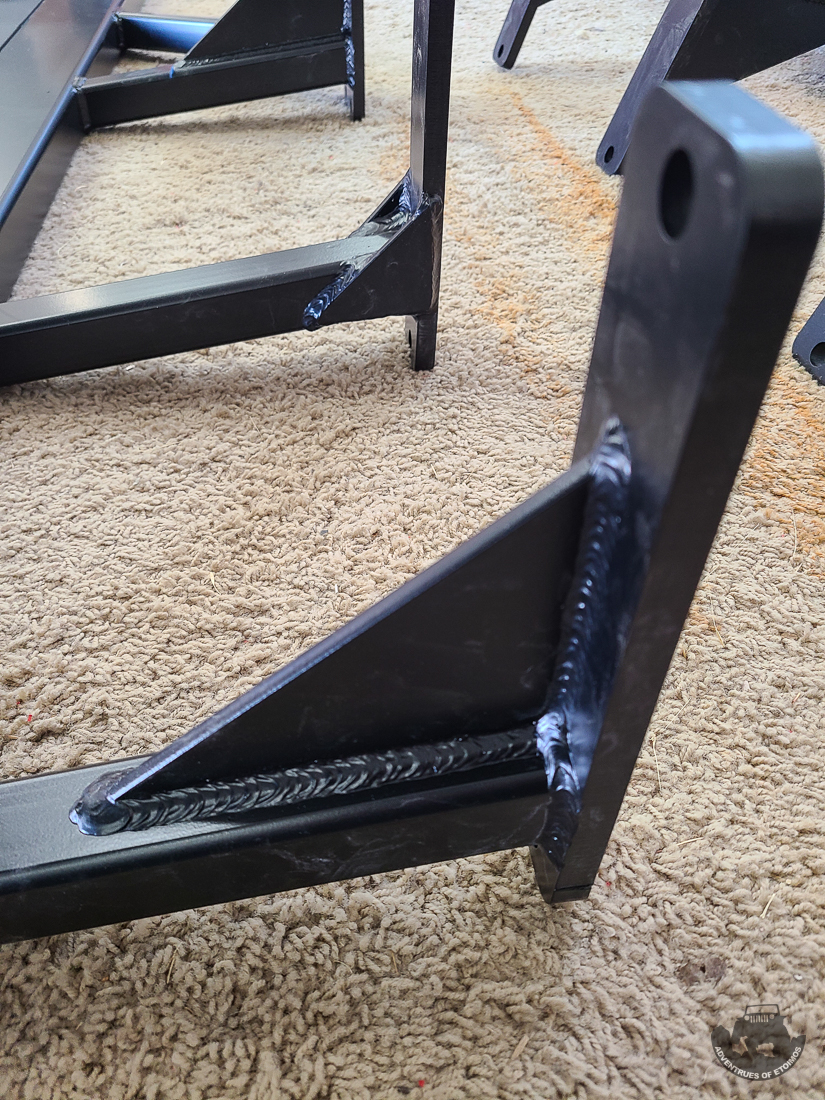
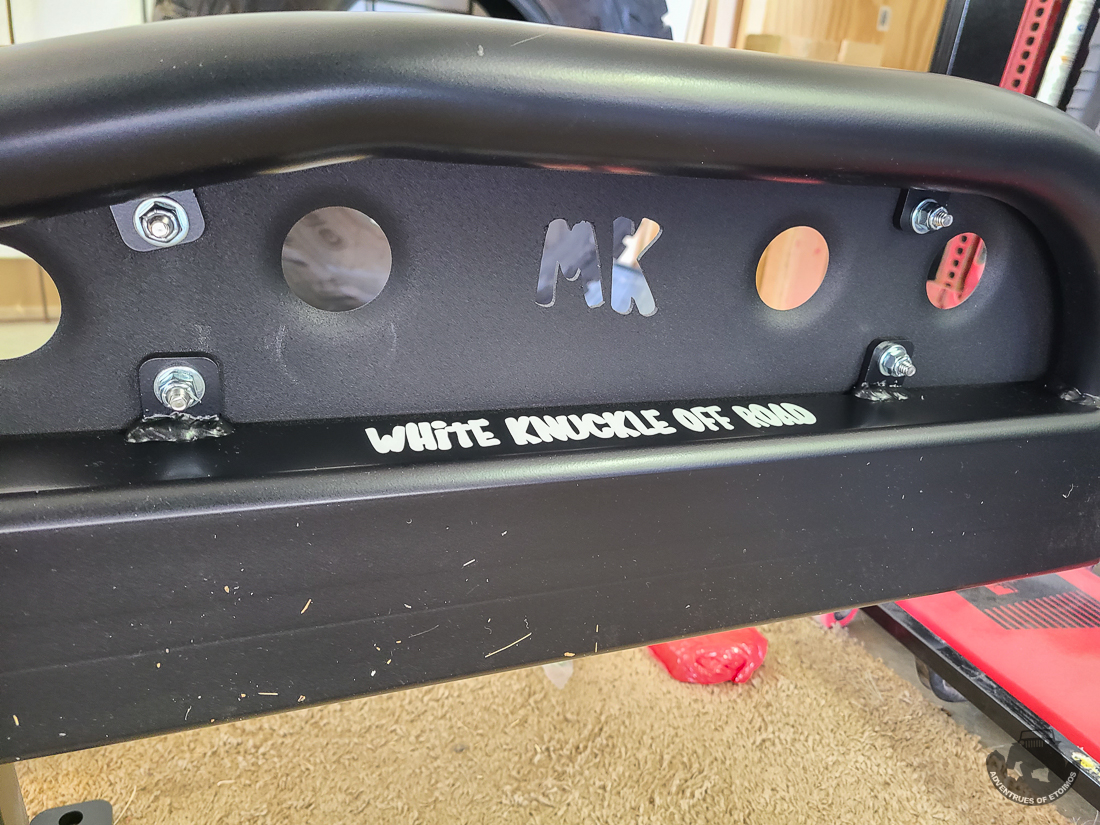
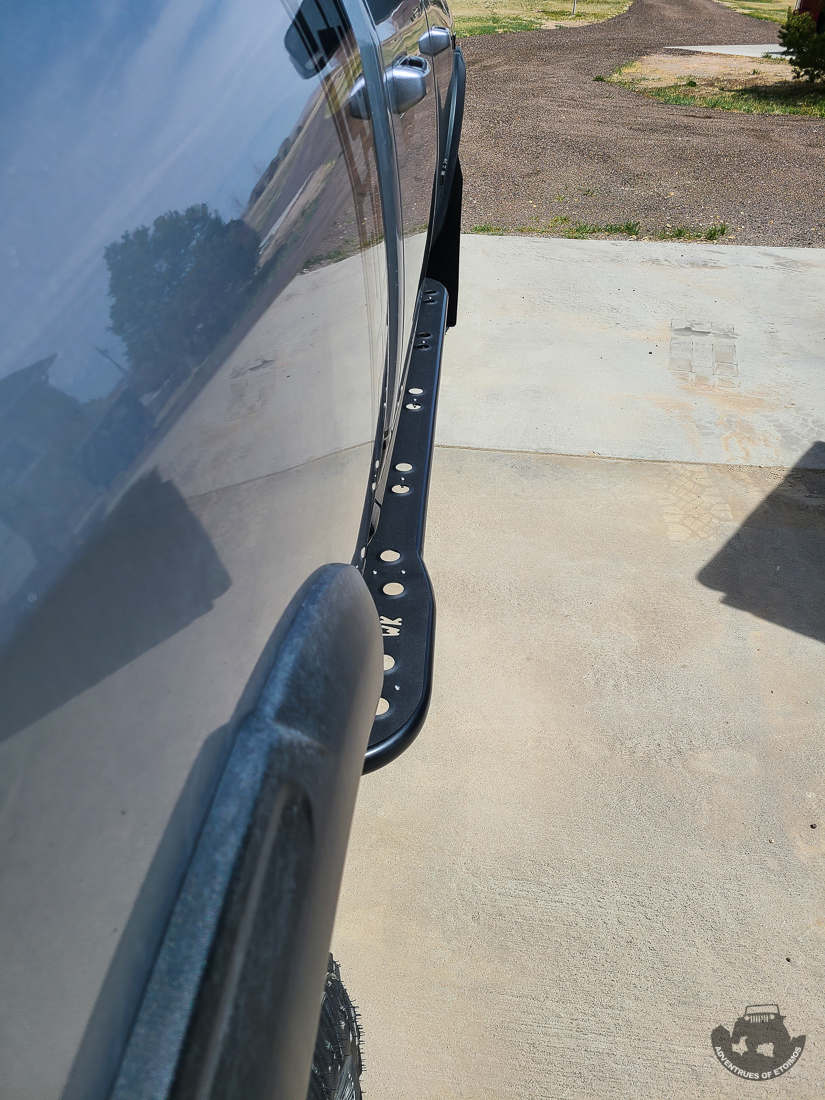
For those that don’t know, these trucks are heavy. 7280 pounds heavy in fact! Mine weighed 4340lbs on the front axle and 2940lbs on the rear axle in stock form. Add in all the mods and gear I’ll be carrying when out exploring and it was obvious that only some heavy duty rock sliders would do. Enter White Knuckle Off Road. White Knuckle offers their sliders in either .120 or .188 DOM tube thickness depending on your intended use of the the sliders. Since I would not purposely be doing any real rock crawling, I decided to go with the .120 DOM tubing to save a little weight while still giving me plenty of protection. I also opted for the full top plate and ordered the extra wide versions off of their secret menu.

WKSliders-162947.jpg


WKSliders-172445.jpg


WKSliders-172515.jpg


WKSliders-172500.jpg


WKSliders-172534.jpg


WKSliders-172632.jpg


WKSliders-132607.jpg


WKSliders-132558.jpg


WKSliders-132620.jpg

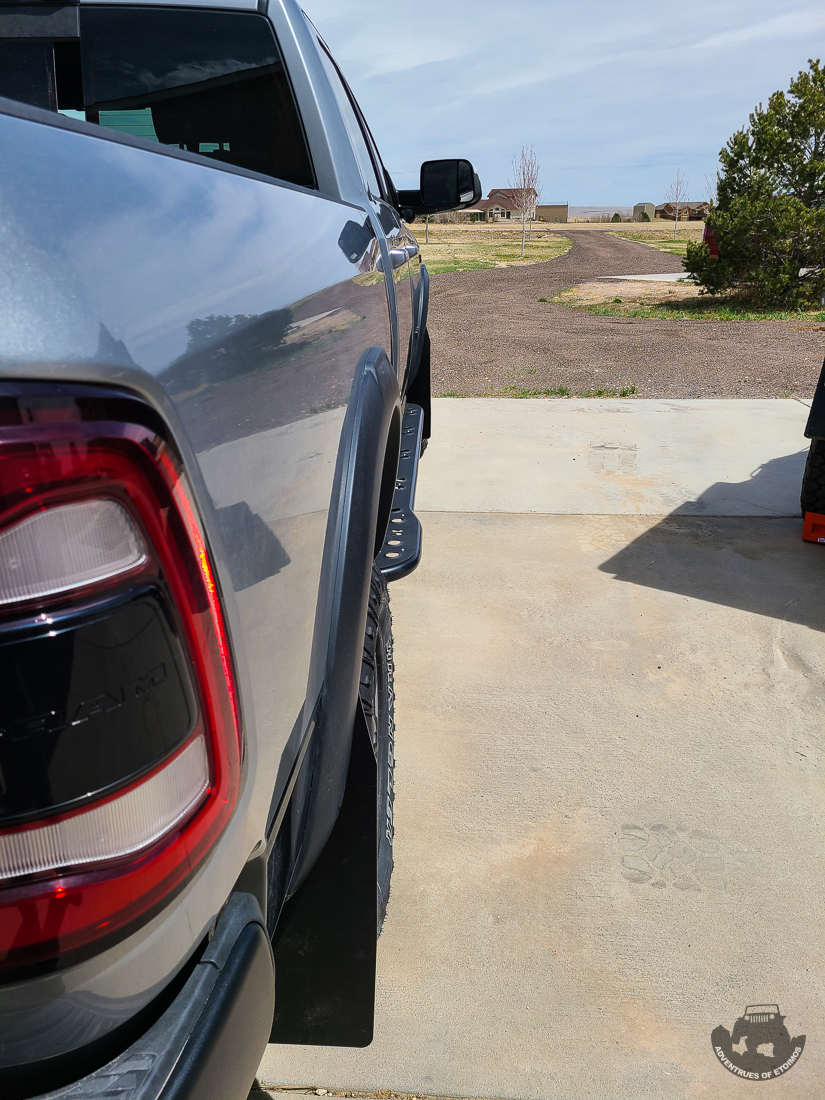
You will also notice in those photos and the ones below that I installed some Rok Blokz XL mud flaps as well. I ran these on my Jeep Gladiator and they held up very well to rock crawling. The main reason I have them is to help keep rocks from being thrown up onto the front of my OGT trailer. They should also help to preserve the powder coating on the sliders a little bit.

RokBlokz-132515.jpg


RokBlokz-132535.jpg


RokBlokz-132542.jpg
 

RSI SmartCap​

One of the things I did like about the ACE Upper Decker was that it enclosed the bed and kept most of the dirt and dust off of things. I knew I wanted that same benefit on the new truck, but in a larger more usable size. After looking at a couple of different bed toppers, it was clear to me that the RSI SmartCap was the only real choice. With its ability to hold 770lbs and the option for several different configurations of bins and side windows, it met all of my needs.

The cap comes flat packed in two very large boxes.

RSISmartCap-142028.jpg

The build and install was pretty straight forward and there were just two “tricky” parts on assembling it. Both were on the rear panel where getting the tabs to align with the slots was kind of a pain. One person had to lift up on the rear panel and at the same time push down on the side panel. The second person had to insert the hardware to lock it all into place. I did not get the built-in table, so my roof just has the eight rivnuts in it. Those will come in handing for mounting something down the road I’m sure.

RSISmartCap-153417.jpg

Some of the slots had a bend in them. At first I thought this was some type of damage, but the side panels had the “dents” in the exact same place. This makes me think they are from the manufacturing process. These did make it harder to insert the hardware into these slots.

RSISmartCap-153020.jpg

Speaking of hardware, when you take the hardware out of the front and rear panels, do your self a favor and take the black space pieces off and tape the silver metal plates to them. This makes things a lot less fiddly when you are holding the panels together and trying to install the hardware.

RSISmartCap-111922.jpg

While putting this thing together you will notice that they did not skimp on the details. They even cut the part names into the parts. Each panel is also paired to the others with a hand written set of numbers.

RSISmartCap-153127.jpg

Assembly is as simple as insert Tab A into Slot B and then bolt it down.

RSISmartCap-103035.jpg

The fully assembled SmartCap is pretty heavy. Two guys can pick it up off the floor, but would be hard pressed to lift it high enough to get on the truck… let alone have enough control to do it without damaging anything. I only had two buddies to help me, so we used my Jeep top/RTT hoist to lift it up and then backed the truck under it. That worked out great. We spread the load of the top across all eight M8x1.25 nuts in the built in rails.

RSISmartCap-144028.jpg

I’m really happy with how solidly it goes together and I think it looks great on the truck.

RSISmartCap-162722.jpg


RSISmartCap-162732.jpg


RSISmartCap-162754.jpg


RSISmartCap-171146.jpg


RSISmartCap-171129.jpg


RSISmartCap-171154.jpg

The window surrounds are very beefy. In fact, everything about the window is very nice.

RSISmartCap-182718.jpg

The half bins are much more stable then I thought they were going to be. I do wish the MOLLE panels in the half bins filled in more of space on the back walls.

RSISmartCap-182748.jpg
 

On Board Air System​

Every overland build needs an on board air system of some type, so I picked up an ARB twin compressor for those duties. The first step in building the system consisted of mounting the compressor in the passenger side RSI half bin and routing the cables and wires to the engine bay.
ARBcomp-194458.jpg

The wiring runs through a cable gland in the front corner of the half bin and then behind the BedRug and under the truck and finally to where the Switch Pros is mounted.
ARBcomp-194527.jpg

The ARB twin compressor required three wires going to the engine bay. One was to connect it to the Switch Pros and the other two were the positive and negitive wires to the battery. I chose to connect the ARB to the main truck battery instead of the house battery installed in the RSI for a couple of reasons. First, I did not want to run the house battery down via the compressor since its main job is to power the fridge/freezer. Secondly, the ARB really needs a good solid power source and I order the truck with dual alternators just for this purpose.
The three wires were all ran through more cable glands installed along the fire wall. On the driver’s side there was room to place them in the black plastic cover that runs along the back.
SwitchPros-155253.jpg

The wires go across the back, hidden under that plastic cover.
SwitchPros-165258.jpg

The passenger side does not have enough space on the plastic cover for the cable to exit, so I had to drill some holes in the firewall for them.
SwitchPros-165401.jpg

Cable glands were used on this side as well for a nice clean look. Unless you know these trucks, it is hard to tell these wires are not factory installed.
SwitchPros-155303.jpg

Again, all the wires are labeled for easy identification later on.
ARBcomp-154855.jpg

With the wiring all ran and the ARB Twin Compressor mounted in the passenger side half bin, it was time to finish up the on board air system with an ARB Air Compressor Pressure Control system. If you are unfamiliar with ARB Pressure Control system, it allows you to configure preset tire air pressures in an app and then inflate or deflate your tires by simply connecting a “whip” to each tire and then hitting a couple of buttons in the app.
PowerWagonBuild-165905-1.jpg

The mounting bracket they include did not work for my needs, so my hotrod building neighbor made me up a bracket to mount it to my passenger side half bin MOLLE panel.
PowerWagonBuild-174653-1.jpg

I then rounded up everything else I need to powder coat for this part of the build and hit them all with a satin black that is a very close match to the SmartCap.
PowerWagonBuild-180836-1.jpg


PowerWagonBuild-180952-1.jpg


PowerWagonBuild-161809-1.jpg

Here is everything put together and attached to the pressure control module.
PowerWagonBuild-171536-1.jpg

With all of the hardware mounted to the half bin, it was time to plumb everything up. This was done with parts from the Up Down Air system that I had bought for the Gladiator and never got around to installing on it.
PowerWagonBuild-094626-1.jpg

Of course, the BedRug had to be pulled back again to run the tubing up and into the bed of the truck.
PowerWagonBuild-184331-1.jpg


PowerWagonBuild-184907-1.jpg

The pressure control unit had to be tapped into the ARB compressor harness so that it turns on when the compressor does. For this I removed the pin from the connector and spliced the new wire into that and put it back into the connector.
PowerWagonBuild-192613-1.jpg

Schrader valves were installed at all four corners of the truck to get the air to each tire.
ARBcomp-194022.jpg

With everything plumbed it was time to connect the tires via the “whips” and see how the system did.
PWBuild-161042.jpg

There were a few leaks in my fittings up at the control module that needed to be taken care of. These leaks also showed me that quite a bit of moisture was being generated by the compressor. I am going to have to get an inline moisture trap installed at some point in the near future.
PowerWagonBuild-211939-1.jpg

How Well Does It Work?​

On my setup I can inflate all four of my stock tires from my Overlanding pressure of 20psi to my Daily Driving pressure of 36psi (I’m still fine tuning my daily pressure) in just a tad over 7 minutes. Deflating from 36psi to 20psi take about the same amount of time… if you trick the system a little. This system, at least on my truck, has a hard time deflating to the last psi. It will release some air which will drop it down to the target psi and stop. The pressure rises 1psi once the valve closes and this sets off a cycle of very small adjustments trying to deflate that last psi down to the target. What I have found best to do is set your target psi to 1psi less than what you really want. This way the system takes it down to your true target psi and you can turn the system off before it goes through that whole cycle mentioned above.
 

Solar, Electrical and Comms​

Solar​

One of the mods to be installed in the bed is a Dometic fridge and slide. I am also going to be installing some lighting in there to make things easier at night. All of this means I needed some type of power back there. Instead of adding more load to the trucks battery, I mounted a 100w solar panel on the top of the RSI SmartCap via a pair of 15 series aluminum profiles from TNUTS.
Solar-194824.jpg

The solar panel is connected to a Renogy Wanderer charge controller and finally to an Amazon 50Ah lithium battery, all mounted in the driver side RSI half bin. From there a line is ran inside the bed to the fridge when mounted. To secure the battery in the bin, I made some quick brackets from spare metal laying around the shop. They turned out pretty good but I’m thinking about remaking them with purpose bought metal so that the sizing is a little better. I also need to powder coat whichever set I decide to go with.
Solar-194657.jpg

Communication and Navigation Gear​

Getting the layout of all the Comms and Nav gear is important so that everything is easily seen, easily reachable and does not cutter up the interior of the truck too much.
Comms-0634.jpg

Up top I’m using a mix of some 67 Designs parts I had on hand and the Bullet Point RubiGrid for the phone holders. BP’s shortest arm worked well for the inReach mini. To power these I used a 12v to USB socket adaptor and bought some short charging cables to help keep things clean looking.
Comms-171351.jpg

A RAM Mount tablet mount from my Gladiator was modified to attach to the passenger seat frame.
Comms-171847.jpg

The mic holder for my Midland MXT275 GMRS Radio is the Bullet Point CB Radio Holder with their Xtra Long 20cm arm. The mic holder part works really well and has a padded surface on the inside that helps keep it rattle free. The other end of the arm is connected to a 20mm ball I pulled off of one of their phone holders. I mounted that directly to the stock tray in front of the middle seat over the hump.
Comms-142613.jpg

Installing the Midland GMRS radio consisted of ripping out the lower part of the center stack, the carpet and trim around the two driver side doors. I also removed the driver’s side rear seat, but that is not completely necessary for how I ended up installing it all.
The lower center stack consists of three parts; the lower panel which just clips in, the bezel that surrounds very thing that has two small bolts (8mm I think) and clips and finally the little cubby with the change holder in it (all clips).
Here are the bolt locations, and where my main radio unit is installed.
GMRS-142000.jpg

There are lots of orange clips holding the trim on.
GMRS-142121.jpg

The antenna wire is weaved to slits in my vinyl flooring to keep it up and under things so I don’t step on it all the time.
GMRS-140522.jpg

Next I removed the rear seat and door trim to run the wires. I’ve also pulled the vinyl flooring away from the under seat cubby. There is a hole in the front of the cubby you can pass the wire though and then a sealed hole in the bottom of the cubby to underneath the truck.
GMRS-135040.jpg


GMRS-135046.jpg

From there it was just a matter of routing the antenna wirer a few feet under the truck and up between the cab and cap to the 3db gain antenna mounted on the top of the RSI SmartCap.
On the other side of the truck is where I’m installing all of my WeBoost cell signal booster gear. This system has a fairly large module and rather small cable connections, so I decided to install it in the rear in-floor cubby on the passenger’s side since it could not get kicked or bumped in there. The cubby is made of three parts. First is the trim and lid, then the cubby liner, and finally the sound dampened cubby its self. I pulled everything out to do this install and it is kind of odd looking down at the rear floor of your truck and seeing the ground!
The WeBoost mount was mounted through the main cubby. I used some lock tight so that the nuts would not fall off going down the road.
WeBoost-194847.jpg

A cable gland allows for the antenna wire to exit the cubby while keeping the dust and water out of it.
WeBoost-194857.jpg

The WeBoost module uses a clip style mount that works really well.
WeBoost-194842.jpg

This is how the antenna cable looks passing though it.
WeBoost-195230.jpg


WeBoost-195251.jpg

Here is everything back in the truck with the interior wires ran through a notch in the trim for a nice clean install. The wires are then ran under the vinyl flooring and exit under the passenger seat at the floor vent. This install keeps feet from stepping all over the wires.
WeBoost-201549.jpg


WeBoost-201603.jpg


WeBoost-201611-rotated.jpg


WeBoost-201630.jpg

The WeBoost antenna wire follows a similar route as the GMSR setup to the top of the RSI on the passenger’s side where its antenna is mounted. The internal antenna is mounted with velcro on the passenger side floor center console.
PWBuild-173925.jpg

Switch Pros​

With some electronics installed and more planned for the future, it was time to address controlling them. For this I went with the Switch Pros eight switch unit. SDHQ makes a very nice 3D printed replacement panel for the Power Wagon that cleanly mounts the control panel just to the left of the driver’s left knee.
SwitchPros-155218.jpg

The wiring is ran through a cable gland installed in a hole I drilled in the firewall clutch cover.
SwitchPros-091805.jpg

The SDHQ Switch Pros engine bay bracket does a good job of tucking everything out of the way.
SwitchPros-095839.jpg


SwitchPros-095846.jpg

Based on some clean installs I saw on a few forums, I made a harness extension for the Switch Pros accessories wires and terminated them with Deutsch connectors. I also wired all of the grounds from the Deutsch connectors to a common ground wire. Since there are so many wires in a small area, each was labeled for easy identification later on.
SwitchPros-135306.jpg


SwitchPros-102110.jpg


SwitchPros-094314.jpg

At this point in the build I only have the ARB compressor and Comms (GMRS and weBoost) connected to the Switch Pros so I have quite a few extra switches to expand into.
 

Bed Modifications​

BedRug Classic​

I did not order the truck with the factory spray in bedliner as I knew I wanted to install a BedRug Classic. I had looked at the BedRug line of products online back in my Jeep days, but I’d never seen one in person. Now that I have one in the PW, I really don’t know why I never got around to installing these in the Jeeps. This thing is super nice and makes crawling around in the bed way more comfortable.
The install starts out by having you attach the sides and back to the bottom with everything turned inside out. It’s a little odd, so a large clear work area comes in handy. Then you have to attach all the velcro to it.
BedRug-174814.jpg

I did add extra velcro around the areas where I had to cut it to allow access to the bed tie downs. This helps keep things tight around those openings.
BedRug-185633.jpg


BedRug-194034.jpg

The BEDRUG also comes in handy for hiding wiring for other projects.
BedRug-194243.jpg

In addition to protecting the bed and adding comfort when you are messing around in there, I think it looks pretty good as well.
BedRug-194447.jpg

Icky Concept Side MOLLE Panel​

The next phase in bed build out was installing a driver’s side Icky Concept MOLLE panel. I’ve ran MOLLE panels from other companies in the past, but the Icky panels are by far the beefiest panels I’ve had. The press brake bends in them really add to their rigidity.
BedMOLLE-134746.jpg

The one downside to them is that you must drill into your bed to install rivnuts. Once you overcome that aversion, it really is not that bad and makes for a very solid panel.
BedMOLLE-130258.jpg


BedMOLLE-114446.jpg

One thing to keep in mind when installing the driver’s side panel is that the hole you have to drill for the front is very close to the fuel filler neck under the bed. One of the rear’s also comes close to hitting the under bed support frame member. On my install, the drilled hole actually was inside the U shaped support beam.
My plan was to mount my Hi-Lift jack to this panel like I had it mounted in my Gladiator. The differences in the MOLLE layout between that old panel and the Icky made it so that I needed a pair of the really cool Icky Concept MOLLE Backing Nuts. IC makes a Hi-Lift mount, but I already had a setup I used in the past and wanted to reuse it. This meant that I needed to drill a much larger hole through the center of the Backing Nuts.
BedMOLLE-141941.jpg


BedMOLLE-144045.jpg

With the hardware sorted, it was just a matter of mounting the jack to the panel.
BedMOLLE-144626.jpg

While held securely in place, the jack stuck out into the bed area too much and all those hard and rough parts of the jack was bound to destroy whatever rubbed against them. I also have plans on make a kennel area in the front of the bed for my dog and did not want him to hurt him self on the jack. So, I determined that the jack could actually be mounted behind the panel! This solved the problem of the jack sticking out into the bed and also made it where I could still use that panel for lots of other things as well. Win win!
BedMOLLE-194432.jpg


Dog Kennel​

I made this from a hog/cattle panel that my dad had laying around his property. The angle grinder make quick work of cutting it to shape and then rounding off the sharp edges.
PowerWagonBuild-135525.jpg


PowerWagonBuild-195244.jpg


PowerWagonBuild-161241.jpg


PowerWagonBuild-161252.jpg

Once it was all cut to shape and size, I dropped it off at a buddies business to be powder coated as it was too large for me to do in my shop.
PowerWagonBuild-194238.jpg

To make the hinges I used 550 cord to lash the door panel to the overall panel. The orange 550 cord zipper pull just right of center in the above photo is used to secure the door closed.
To attach the panel to the RSI SmartCap I used four stainless steel cable clamps. I powder coated these satin black to get rid of the shinny bits.
PowerWagonBuild-165934.jpg


PowerWagonBuild-173233.jpg


PowerWagonBuild-194252.jpg

Maximus really seems to enjoy having his own room in the truck now!
PowerWagonBuild-194448.jpg


PowerWagonBuild-194459.jpg

Icky Concepts Bulkhead Panel​

Installing the Icky Concept bulkhead panel was kind of a pain in the butt with the BedRug and Smart Cap already installed on the truck. I had to pull the BedRug away from the bulkhead so that I could install the rivnuts and that left little room to work in that area.
PowerWagonBuild-172449.jpg

The biggest pain was that the SmartCap came down to low for me to install the upper rivnuts. I had to loosen the cap’s clamps and then use my hoist to lift just the front of the cap up enough to get the required room to install them.
PowerWagonBuild-172435.jpg


PowerWagonBuild-172510.jpg

After that it was a quick job of putting the BedRug back in place and bolting the panel on.
PWBuild-184437.jpg

Dometic Fridge​

You might have noticed in some of the photos above that I also installed a Dometic fridge in the bed of the truck as well. It is mounted on a Dometic slide that will extend all the way out when the tailgate is opened. The slide was a Christmas gift many years ago that I never got around to installing in my Jeeps. It turned out that it was not the correct slide for the fridge that I had. My fridge would not sit all the way down into the slide’s tray. To solve this issue I cut up some 1/2″ Blatic Birch plywood and laminated them together. I recessed the screws and used wood glue to ensure they did not try and separate in the future. Once the glue had setup and they were sanded, a couple of coats of black paint made them blend in and protects the wood from getting wet. I also used a similar method of mounting the slide to the truck bed so that it would stay put.
PowerWagonBuild-120518.jpg

A self centering pilot bit made sure the holes drilled into the wood under the slide stayed centered with the holes already in the slide its self.
PowerWagonBuild-141657.jpg

The recessed bolts allowed the base to be bolted down tightly to the rivnuts drilled into the bed of the truck. At this point my bed has more holes in it than swiss cheese!
PowerWagonBuild-141729.jpg


PWBuild-184334.jpg


PWBuild-184343.jpg
 

Traditions​


Since I started off roading with my old Jeep Wrangler Rubicon, I have had a tradition of marking the trails and trips that I have done on the side of my vehicles. Since it was a tradition, it had to be down on the PW as well.
I engrave and cut these on my laser out of 1/4" black over silver acrylic. They have 3M adhesive on the back, so they are easy to remove it the time should ever come for that. The first step in the process is to find the best location for them and align everything so they are straight and level.

PWbuildTrailBadges-172522.jpg


Then it is just cleaning the area where they are going and sticking them on.

PWbuildTrailBadges-171108.jpg


PWbuildTrailBadges-171045.jpg


The acrylic is used in the sign industry and will not fade and stays attached to the vehicle for years.
 
SmartCap Lighting

Following in the footsteps of several other builds I monitor on various forums, it turned to HardKorr to meet these needs. Their clean interfaces and flexibility were the main reasons I went with them. For my build I ordered three 48cm (19") light bars for the main cap area and two 25cm (10") light bars, one for each side.

PWbuildCapLighting-184412.jpg


For anyone looking for the info, the cables on the 19" bars are 12" long and about 8" long on the 10" bars.

PWbuildCapLighting-184535.jpg


These light bars come with built in magnets for mounting. You can see them between the black squares along the center line at either end of the bar.

PWbuildCapLighting-203500.jpg


Four of the five bars that I order held really well via the magnets, but one of the 10" bars could barely support its own weight. I thought that was going to less than ideal in the offroad conditions I like to travel in, so I backed each bar with Velco. The Velco I had was a little too wide, so it had to be trimmed down to fit the width of the bar with a sharp razor blade.

PWbuildCapLighting-055508.jpg


With the bars all prepped it was just a matter of mounting them where I wanted them and then running the cables back to the electrical half bin. The light bars are designed to use a cigarette light for power, so I had to chop those off to hard wire them into the Blue Sea Systems fuse block that I installed during this processes.

PWbuildCapLighting-185539.jpg


I'm not 100% happy with some of the wiring, so I'll most like redo those parts when I have some more time. Otherwise, I'm pretty happy with the clean install and location of the controllers for each of the three sets of lights.

PWbuildCapLighting-183306.jpg


PWbuildCapLighting-183609.jpg


PWbuildCapLighting-183641.jpg


Below is a bunch of photos showing the lights in action...

Driver's side electrical half bin closeup.
PWbuildCapLighting-043512.jpg


Driver's side electrical half bin showing the amount of light spill.
PWbuildCapLighting-043532.jpg


Driver's side electrical half bin showing the white light setting.
PWbuildCapLighting-043726.jpg


Passenger side On Board Air half bin open.
PWbuildCapLighting-043559.jpg


Passenger side On Board Air half bin closed.
PWbuildCapLighting-043627.jpg


Main cap area lit in amber mode and the tailgate closed.
PWbuildCapLighting-043954.jpg


Main cap area lit in amber mode with tailgate open.
PWbuildCapLighting-044009.jpg


Main cap area in white LED mode with tailgate open.
PWbuildCapLighting-044436.jpg


And finally with the main area and a side opened up in amber mode.
PWbuildCapLighting-044315.jpg
 
Another part of the light install and general wiring clean was to shorten the Renogy temp probe cable and Blue Tooth module cables. The temp probe was pretty straight forward. I just had to cut the cable to length and terminate the new end with some Deutsch connector pins and put the original connector on those. the BT module was a different story. For it Renogy used an RJ11 (old style 6pin phone wiring) connector. It had been 20+ years since I had to terminate this kind of connecter in my Air Force days. I also no longer had the tools to do this type of work. A quick shout out to another local PW owner that is in the IT field solved the lack of tools issues and $3 on Amazon got me 50 RJ11 connectors. Since I was removing roughly 15 feet of excess cable and had all those extra connectors, I practiced getting a good connection a few times and checked my work.

PWbuildCapLighting-184554.jpg


PWbuildCapLighting-174214.jpg


Once I felt I had the skills not to F it up, I crimped the connector on the shortened cable and plugged everything back in. To my relief, both the temp probe and BT module worked and the cabling was much improved.
 
As with all builds, not everything works out as well has you hope they will. For this build, so far that has been the ARB compressor mounted in the RSI half bin. The weight of the compressor and the hard hits on the trails caused the stock RSI MOLLE panel to fail in multiple spots.

20230604_111753.jpg


20230611_110109.jpg


To fix this I had a new, solid 12 gauge steel panel fab'd up. It was a simple one bend L shaped panel that would rest on the bottom of the side bin. I laid out everything for the air system on this new panel and drilled all the mounting holes and then powder coated it satin black.

20230611_110122.jpg


20230611_070720.jpg


20230611_080508.jpg


20230620_151842.jpg


Using this thicker panel added a lot more weight and I was concerned that the SmartCap side bin would not be up to the task. So, I also had another panel fab'd up to support the weight from underneath and powder coated it..

20230620_084612.jpg


20230620_172052.jpg


20230620_175311.jpg


20230620_202135.jpg

It looks like it is not aligned with the bin above it, but it is.

With the fridge, dog crate and this support, a lot of the bed space is taken up. At least this support gives me a good place to attach things if I need to in the future.

You might have also noticed in those photos above that the air lines were redone with braided stainless steel lines and a manifold was installed as well. I had issues with the heat build up from the compressor causing the fittings on my air lines and hoses to come undone. With the SS lines and the manifold, enough of the heat is radiated away and so far it is all holding up well. I also took the time to clean up the wiring a little bit.

Airlines.jpg
 

Attachments

  • 20230623_155709.jpg
    20230623_155709.jpg
    995.1 KB · Views: 29
BEAUTIFUL Power Wagon and an amazingly well thought out build. Thank you for sharing it with all of us here!
 
BEAUTIFUL Power Wagon and an amazingly well thought out build. Thank you for sharing it with all of us here!
Thanks Dave. This is a pretty mild build compared to many out there, but over the years I've narrowed what I need for my overlanding. It also helps that all of my living needs are covered by my Off Grid Trailers Expedition 2.0 trailer seen in one of the photos above.. I do have a few small upgrades that I need to update this thread with though.
 
Back
Top Bottom