Baja Designs (BD) calls themselves The Scientists Of Lighting. While that title may strike you as the brilliant work of someone in the marketing department, ask anyone who has used their products and I’d be willing to bet that they’ll tell you their lights are the gold standard. A couple of years ago, I had the opportunity to check out a BD prototype light that used a laser to create light instead of the LEDs that have become the primary technology for vehicle lighting. Fast forward to today, and BD has created a series of laser lights that can project light orders of magnitude further than even BD’s most long-range focused LED lights. If you thought that quality LED spot beam lights could send the light out there, laser lights make your current spot beams look like flood lights in comparison. I’ve spent the last couple of months getting to learn the science behind how these laser lights work, and more importantly how they actually work in the dark places of our world.
 To understand how Baja Designs laser lights work, it’s helpful to have an idea of how LED lights work. LED stands for Light Emitting Diode, and this particular type of diode emits light as a result of current being applied to the diode, where lost energy from electron flow creates photons of light. LED diodes can be engineered using different materials to create different colors of light, which is how red/green/blue (RGB) LEDs are made. Getting the light output from the LED chip into a beam of usable light is done with the help of reflectors that aim the beam, and lens covers that can either refract the light to create a dispersed flood-pattern beam, or simply allow the light to pass through, creating a spot beam. Baja Designs’ approach to LED light design is very diverse in that many of their lights can be reconfigured from a spot light to a flood light, or a combo of both just by swapping the lens cover.
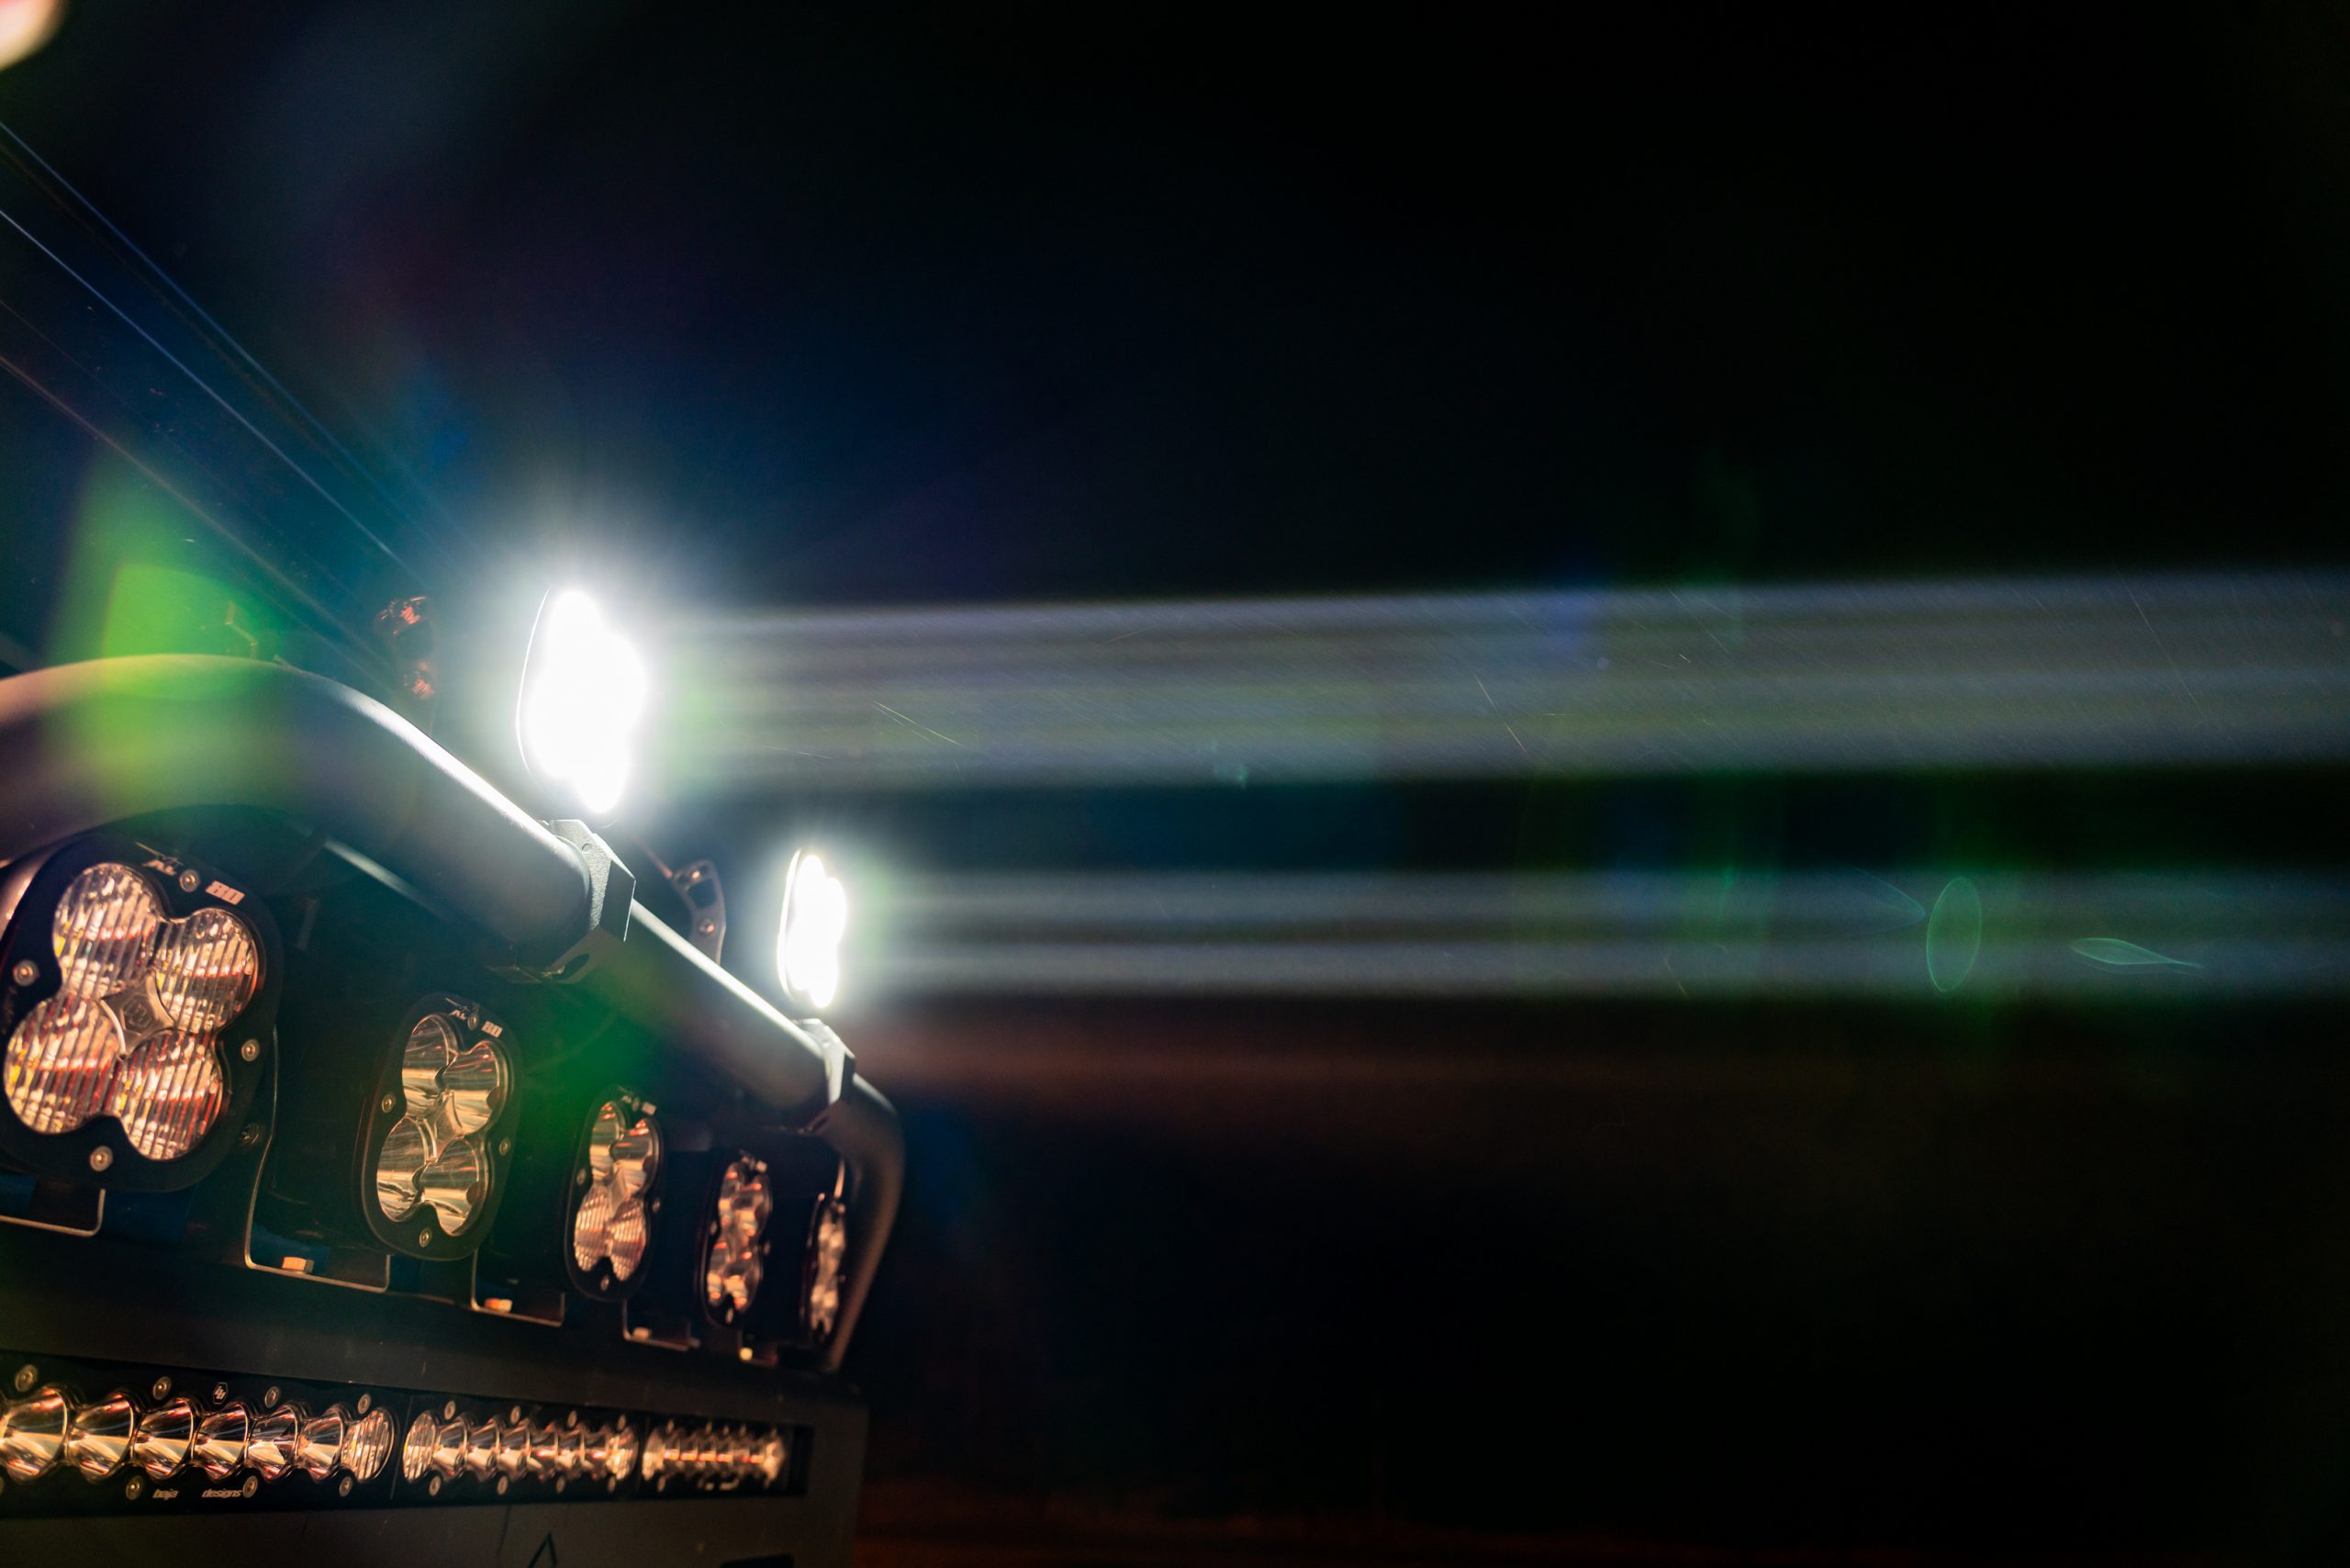
 A Baja Designs laser light works by using a pair of tiny semiconductor lasers that emit blue laser light onto a fancy material called a phosphor that reflects the beam and changes the blue light into a white light. Since the laser diodes are super-tiny to begin with, the spot-beam of light they emit onto the phosphor is tiny – smaller than half a millimeter. This tiny phosphor reflects a tiny beam of white light, and by using a similar reflector and spot-pattern lens cover, Baja Designs created a light that can shoot a hyper focused beam over incredible distances. And now you know why The Scientists of Lighting is a very apt title. Sorry for all of the tech talk, but it’s important to know that when BD says laser lights, they’re actually talking about light created from semiconductor lasers, and not just trying to put cool marketing terms on things. Laser lights are a thing – and seeing them at work is stunning.


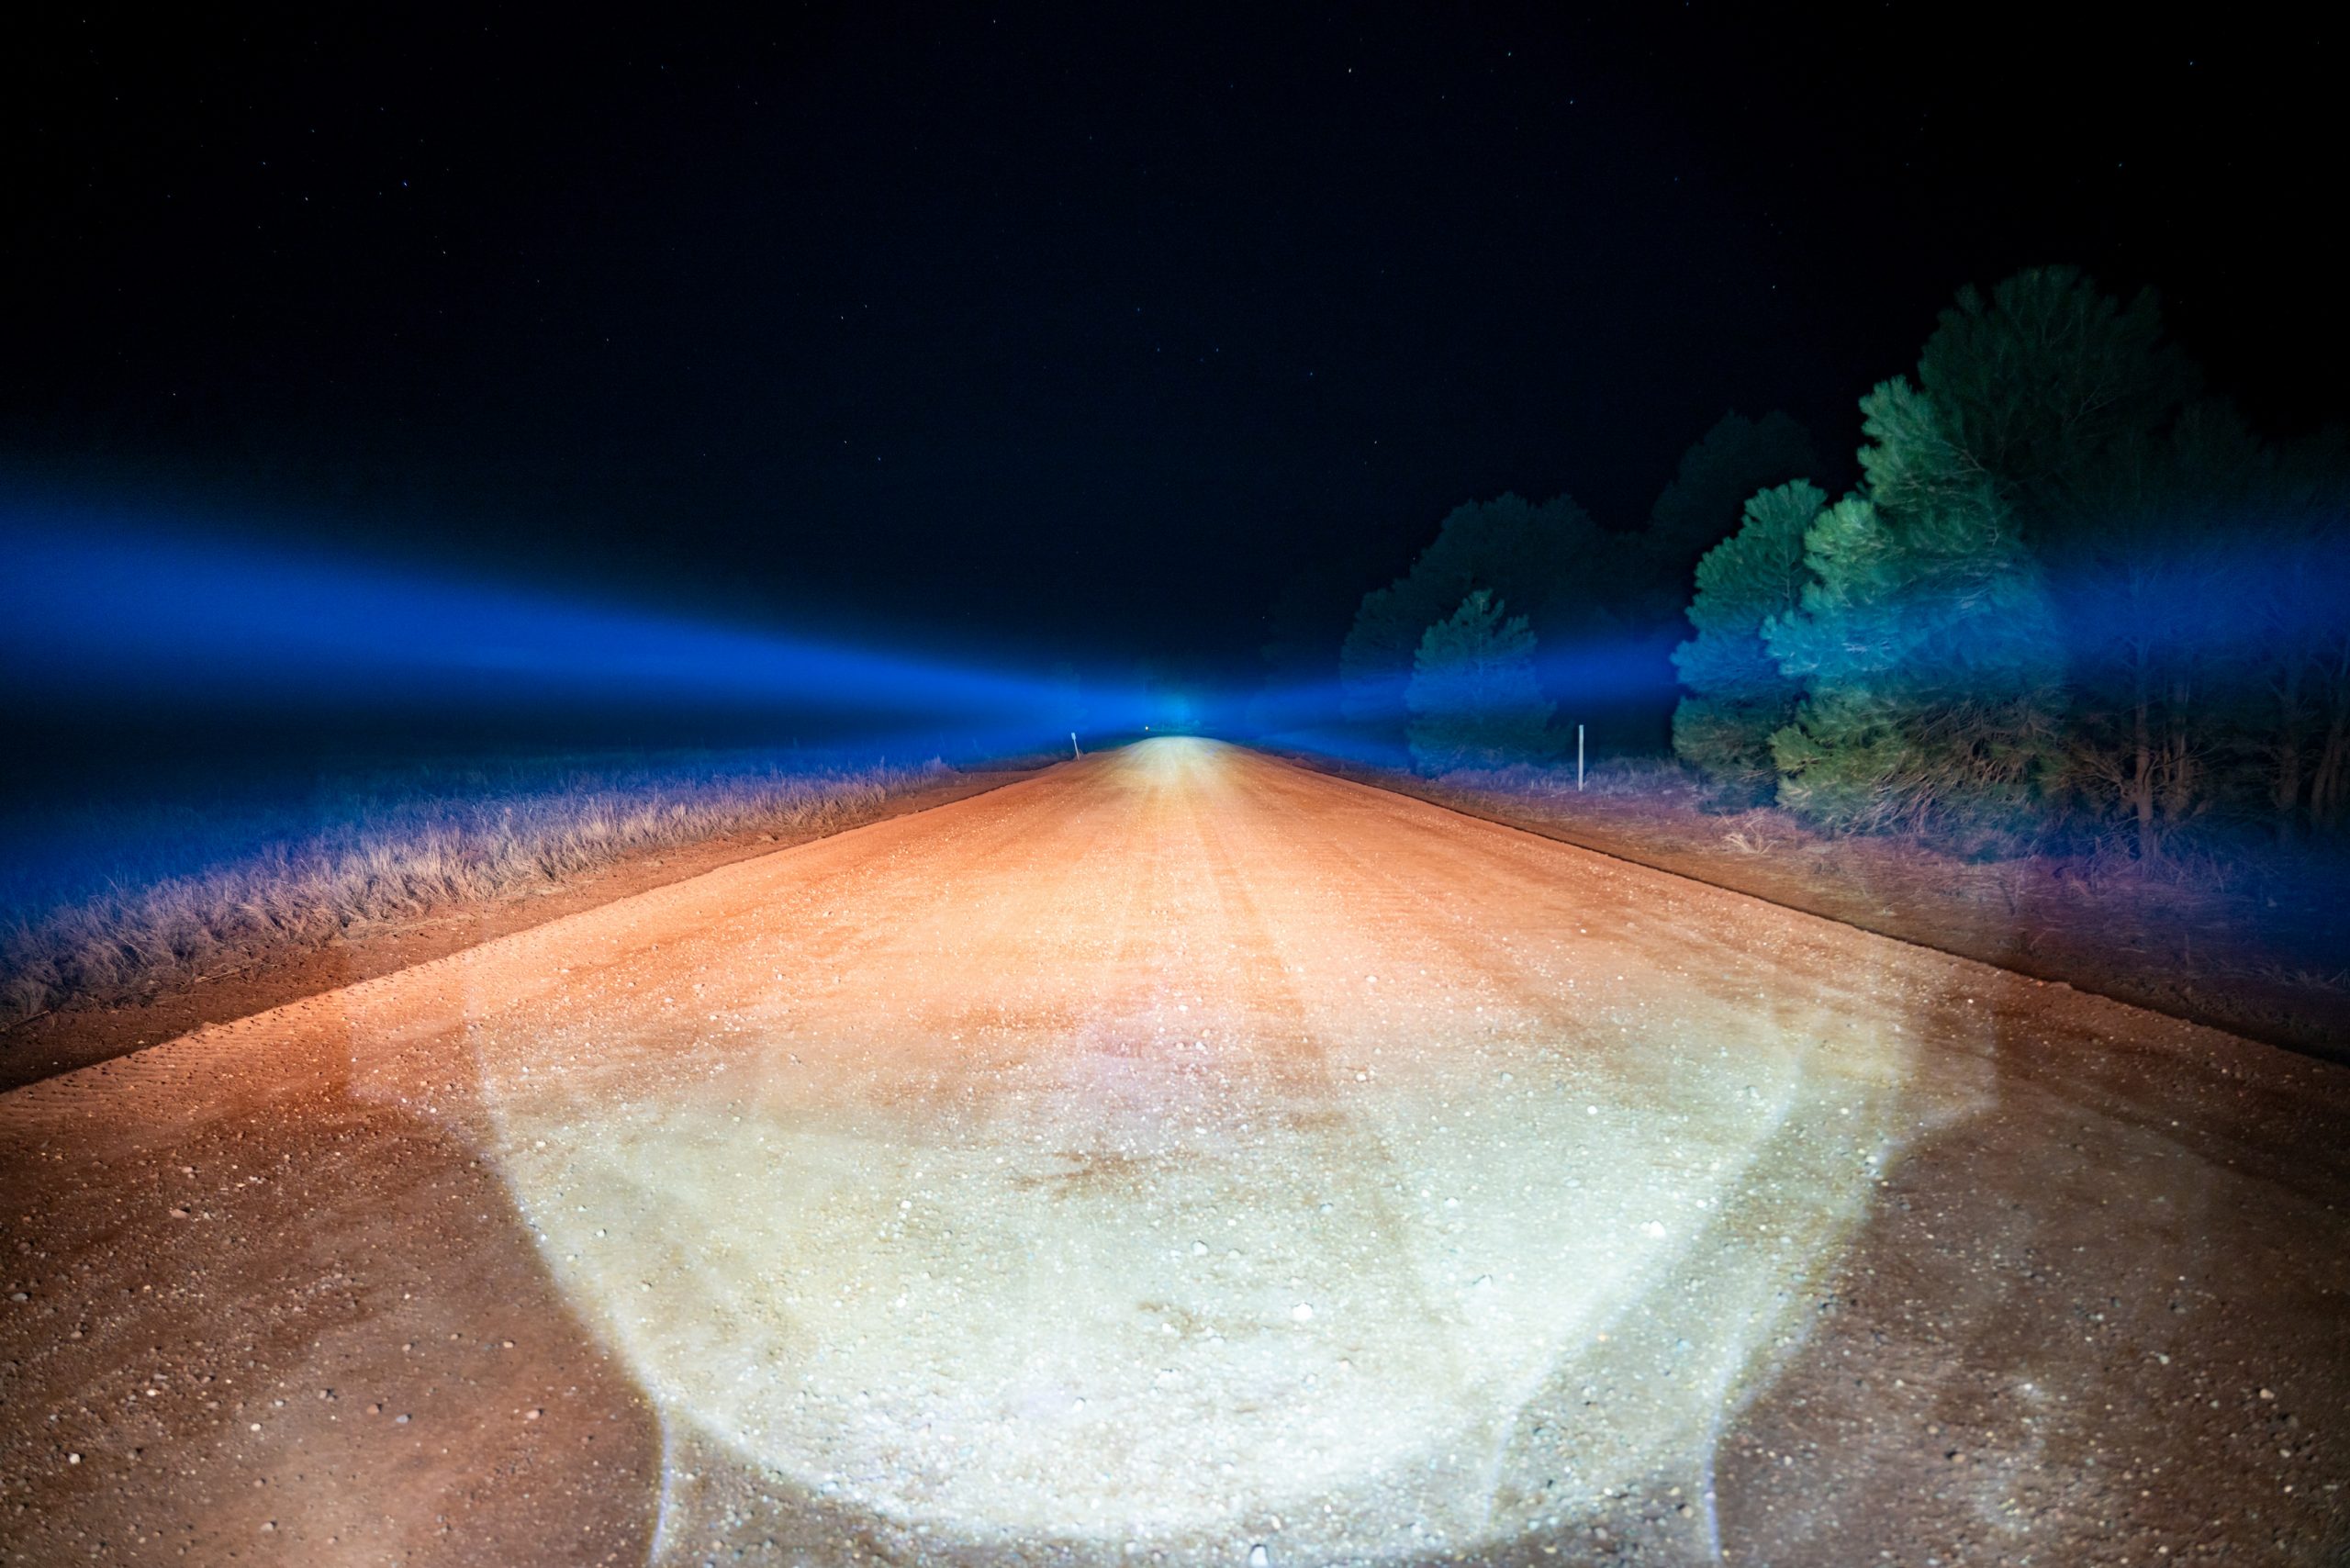
How do you avoid hitting something that you don’t want to hit while riding or driving at night? The answer is simple – you see the thing before you run into it. Whether that thing is an animal like a moose or a deer, an obstacle that you need to follow a specific line through, or just a bend on an icy road – when it comes to travelling at night, seeing is everything. The faster you’re going, the more ground you’re going to need to be able to react to any surprises that show up in the night. At 60 miles an hour, even thinking for a second will cost you nearly 100 feet of ground – so the further you can throw light in front of you, the sooner you can recognize the need to take action. If you’ve ever driven a vehicle with weak headlights and felt like you couldn’t see something in time to stop for it, you know exactly what it’s like to outrun your headlights. Yet, I don’t think that even an unlimited class trophy truck going at full tilt could outrun these laser lights.

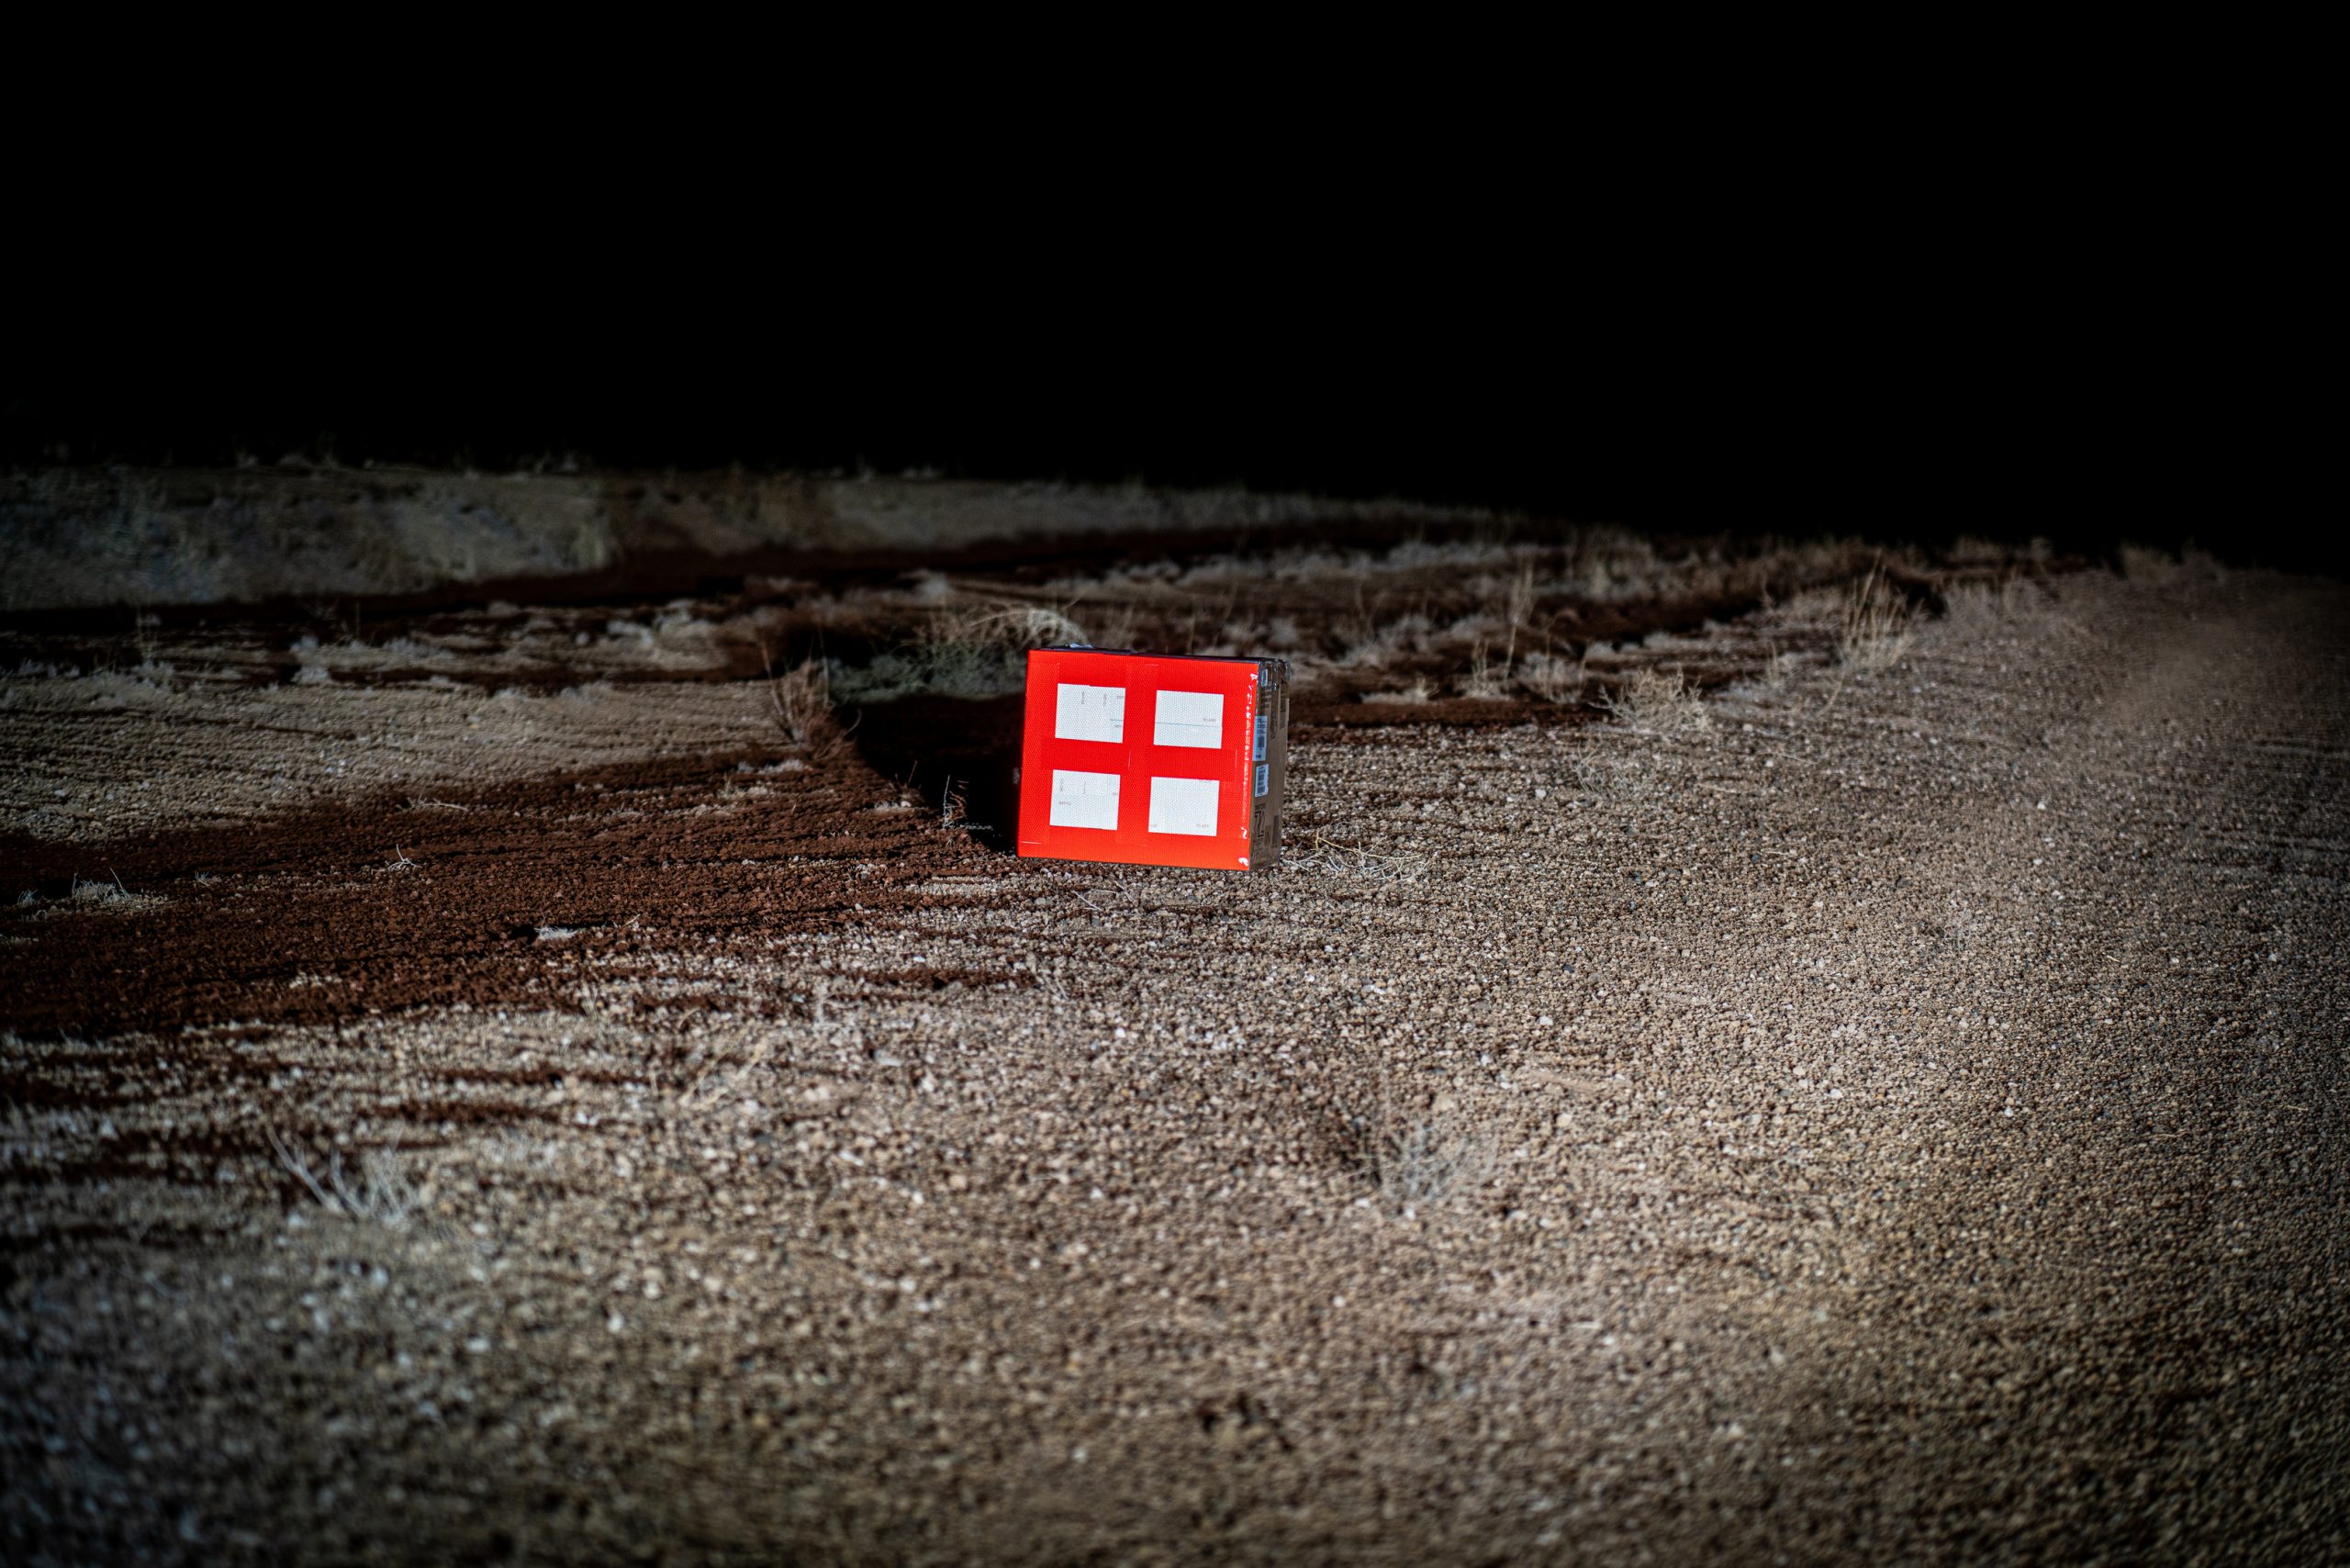
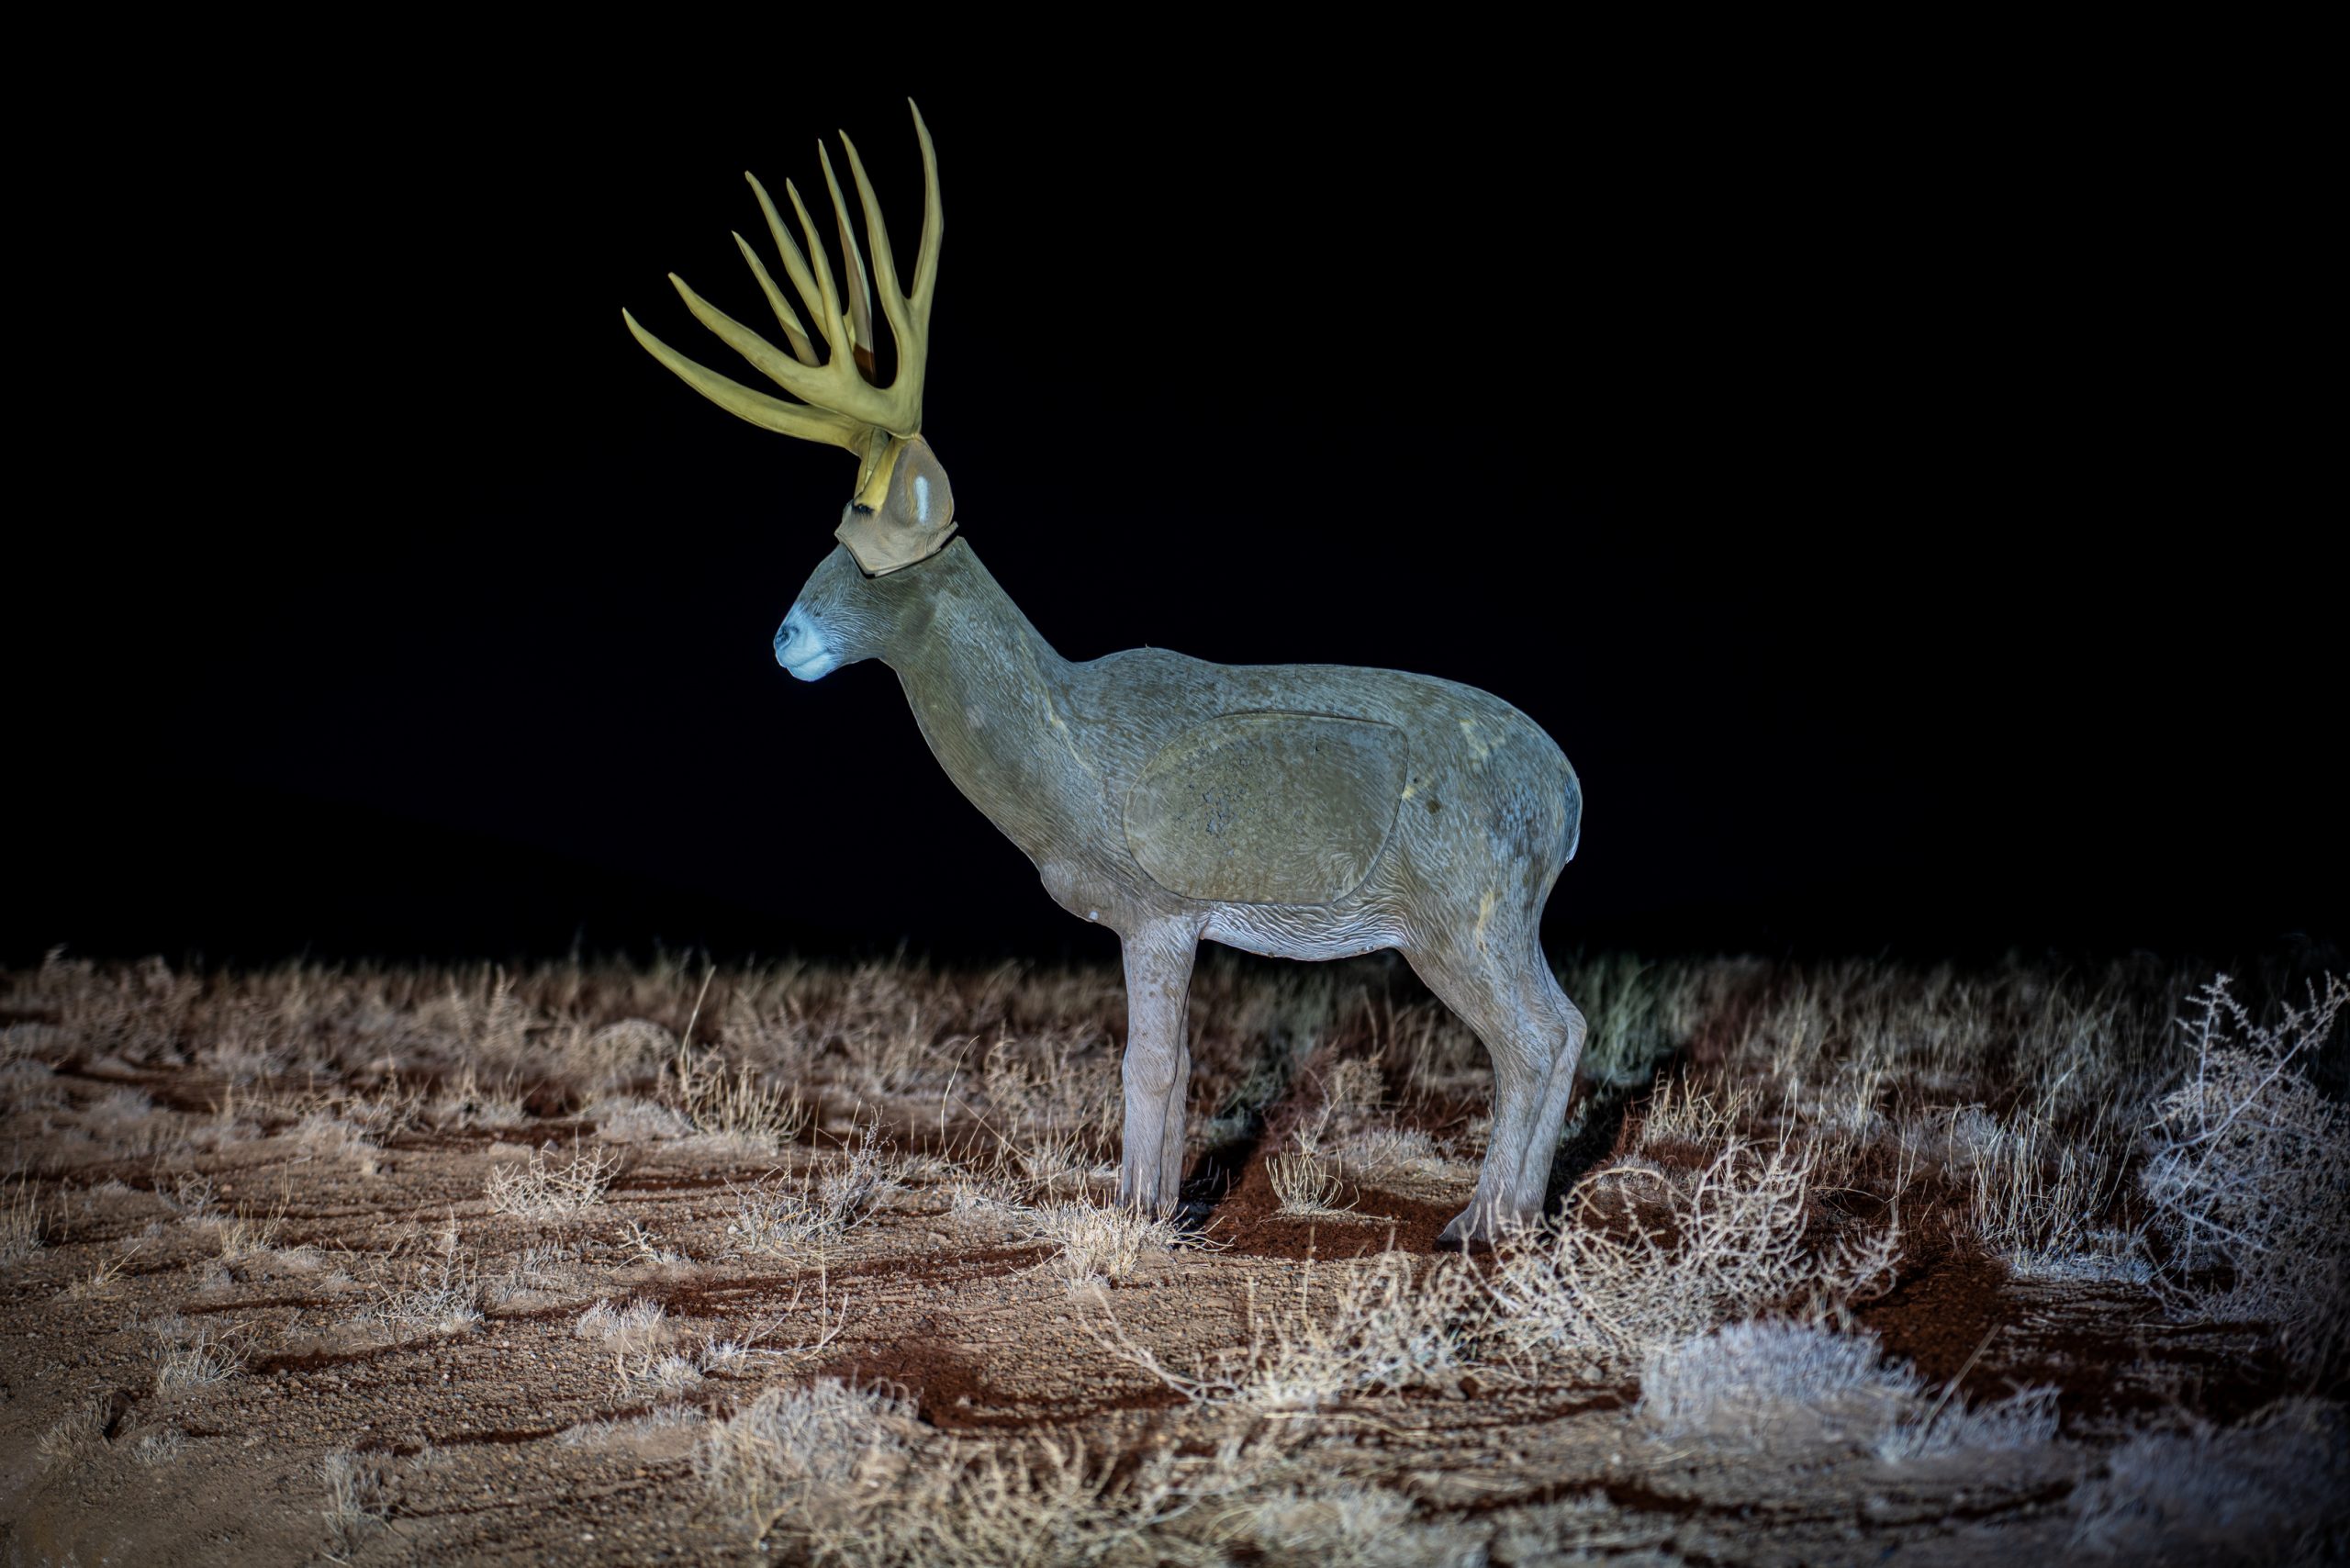
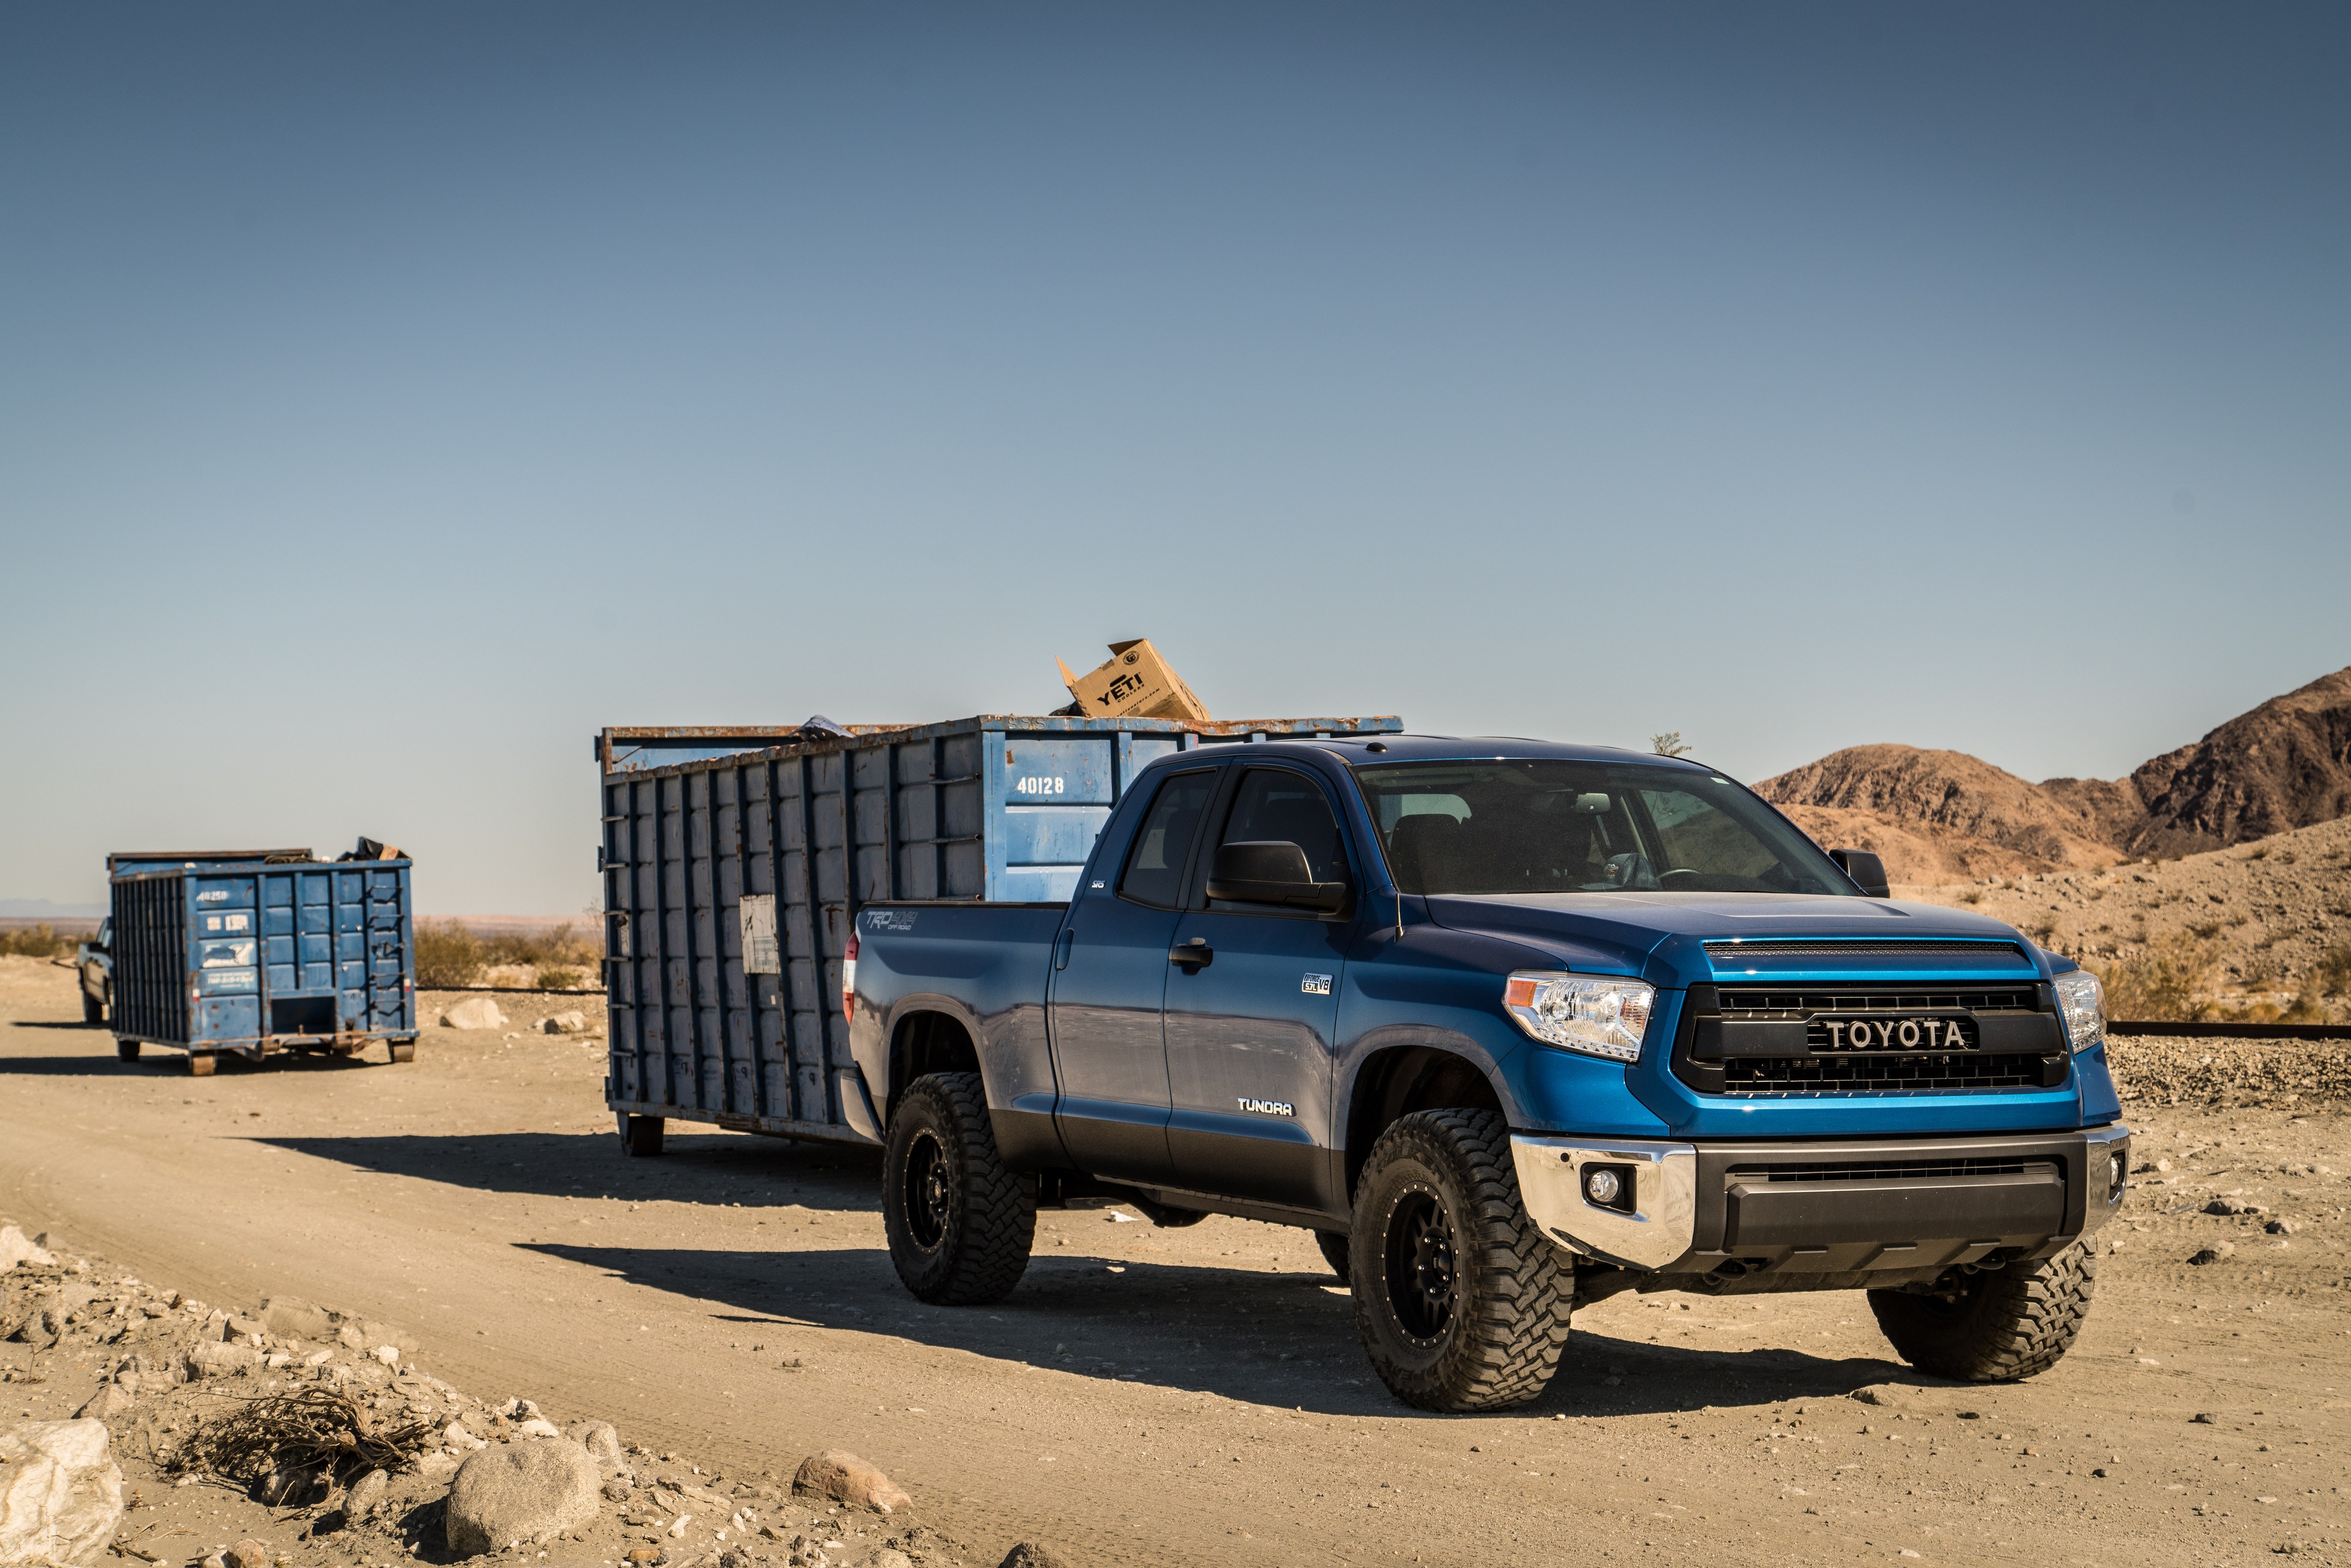
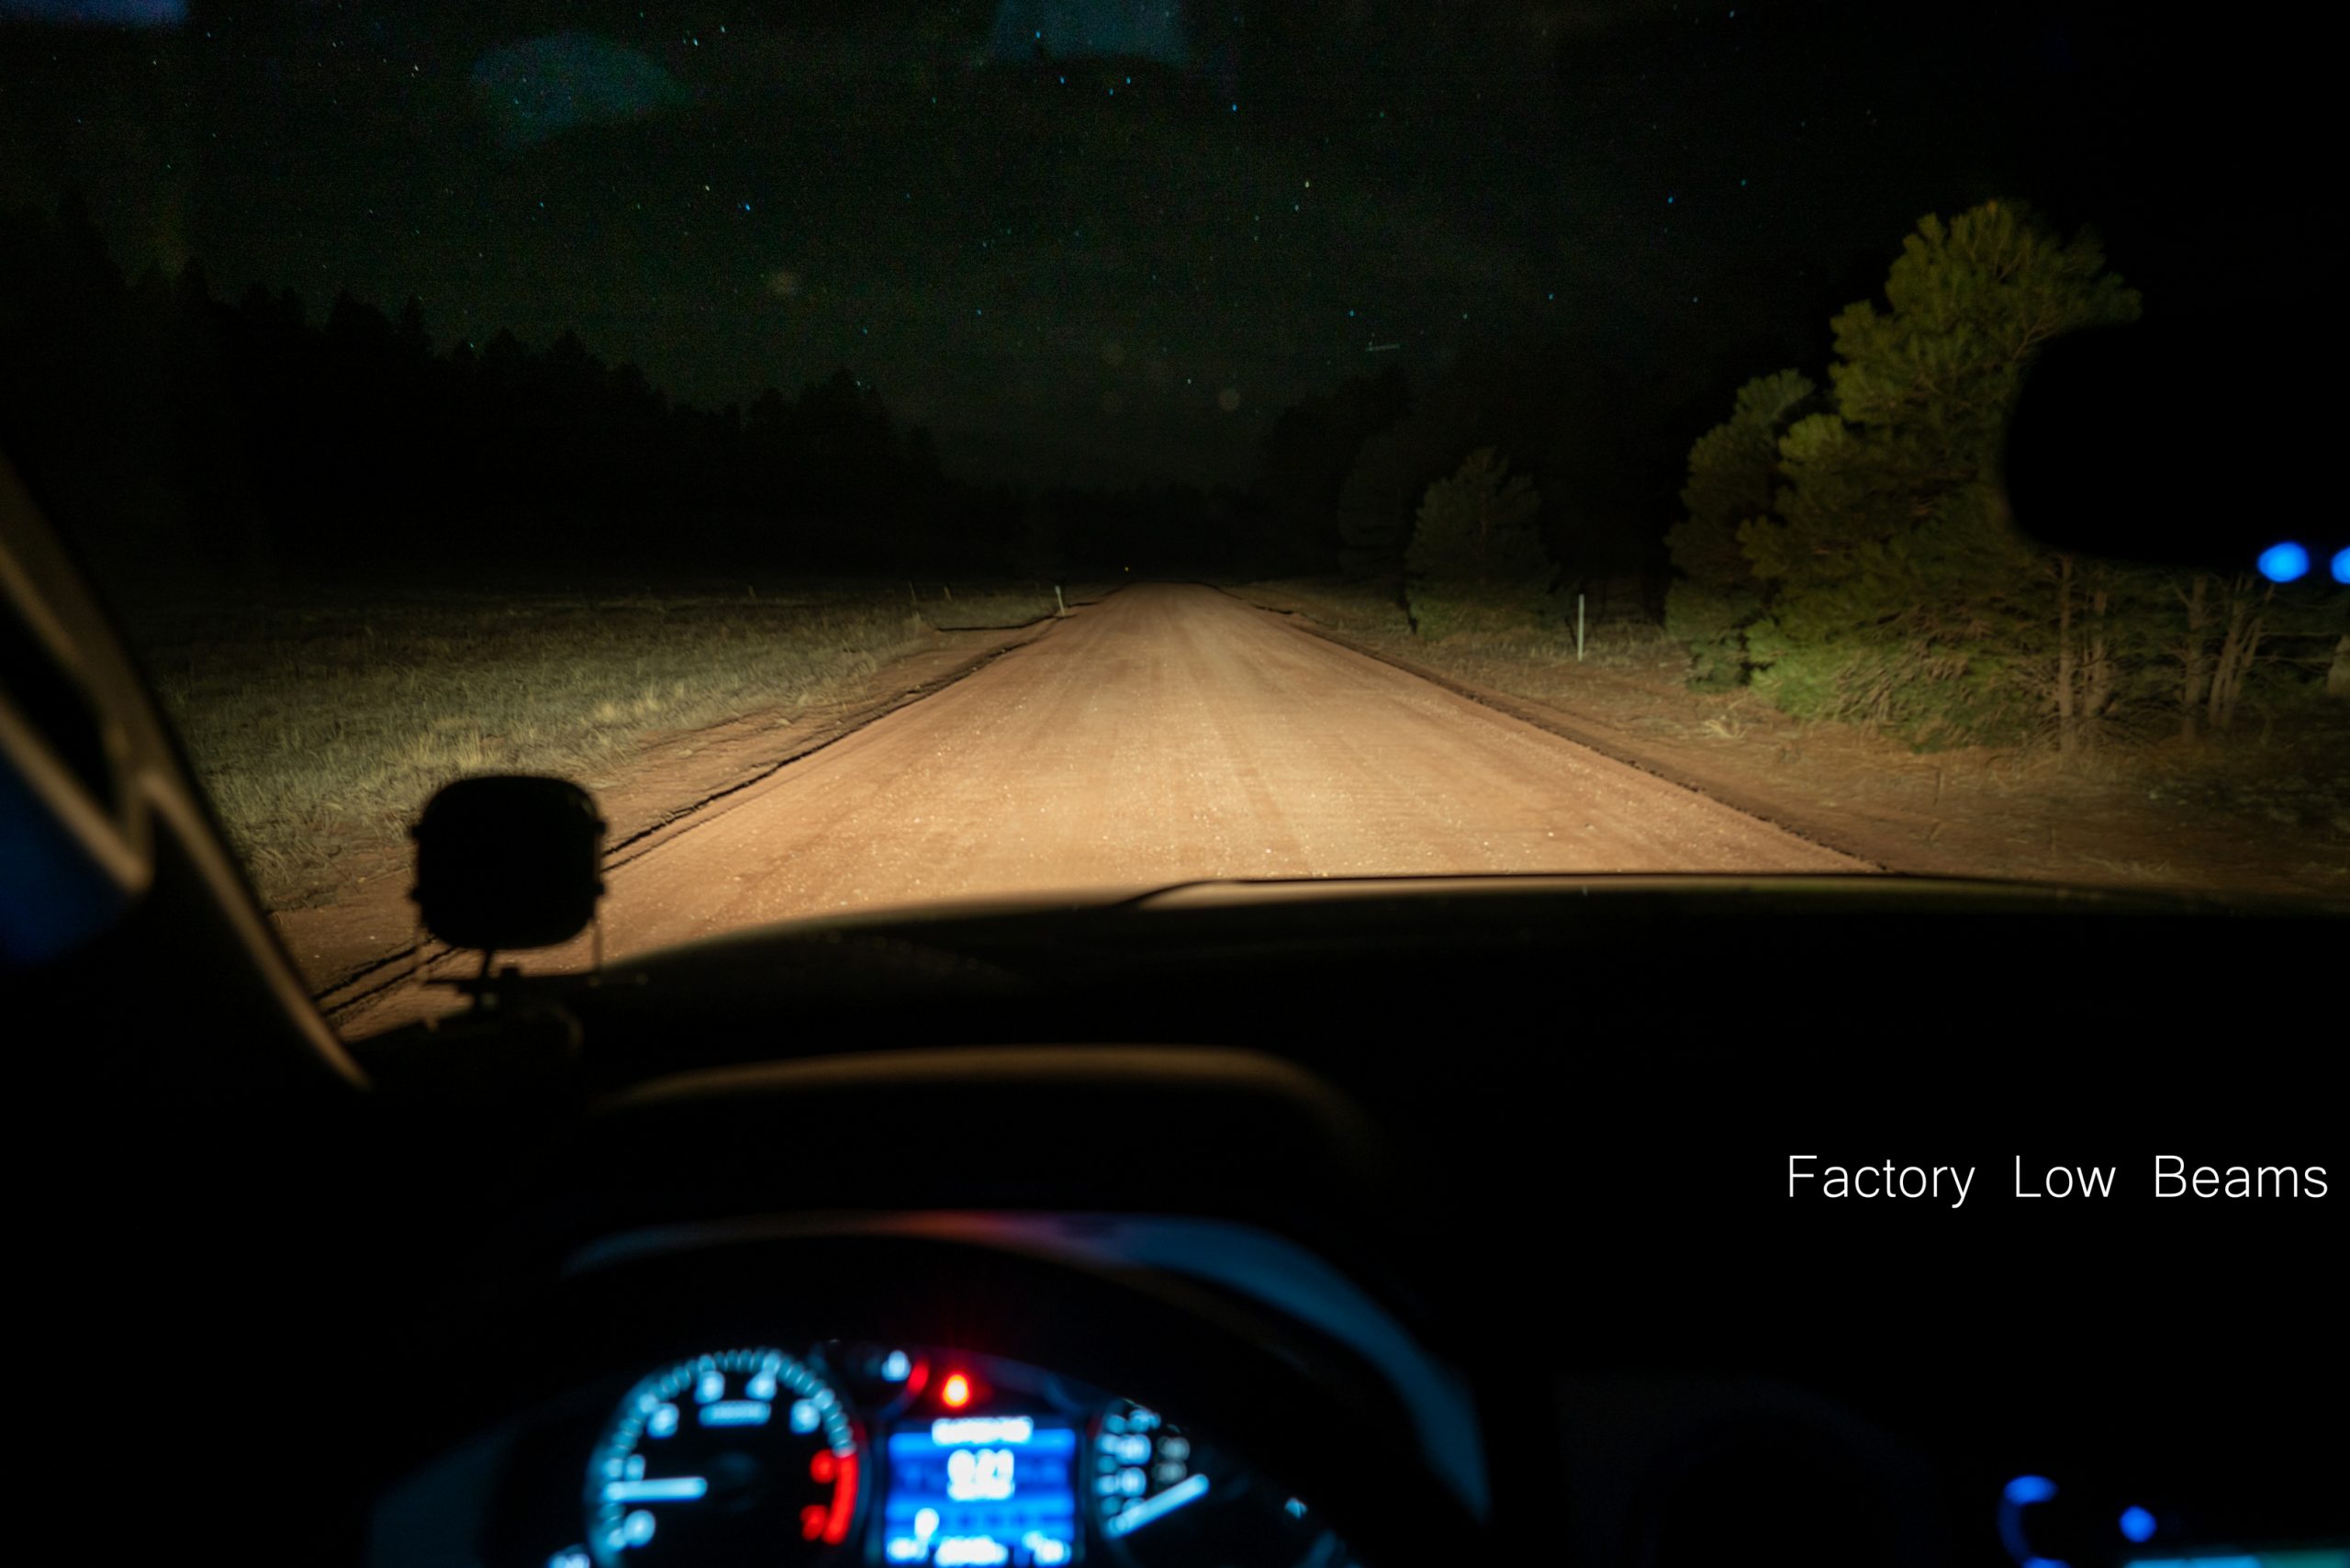
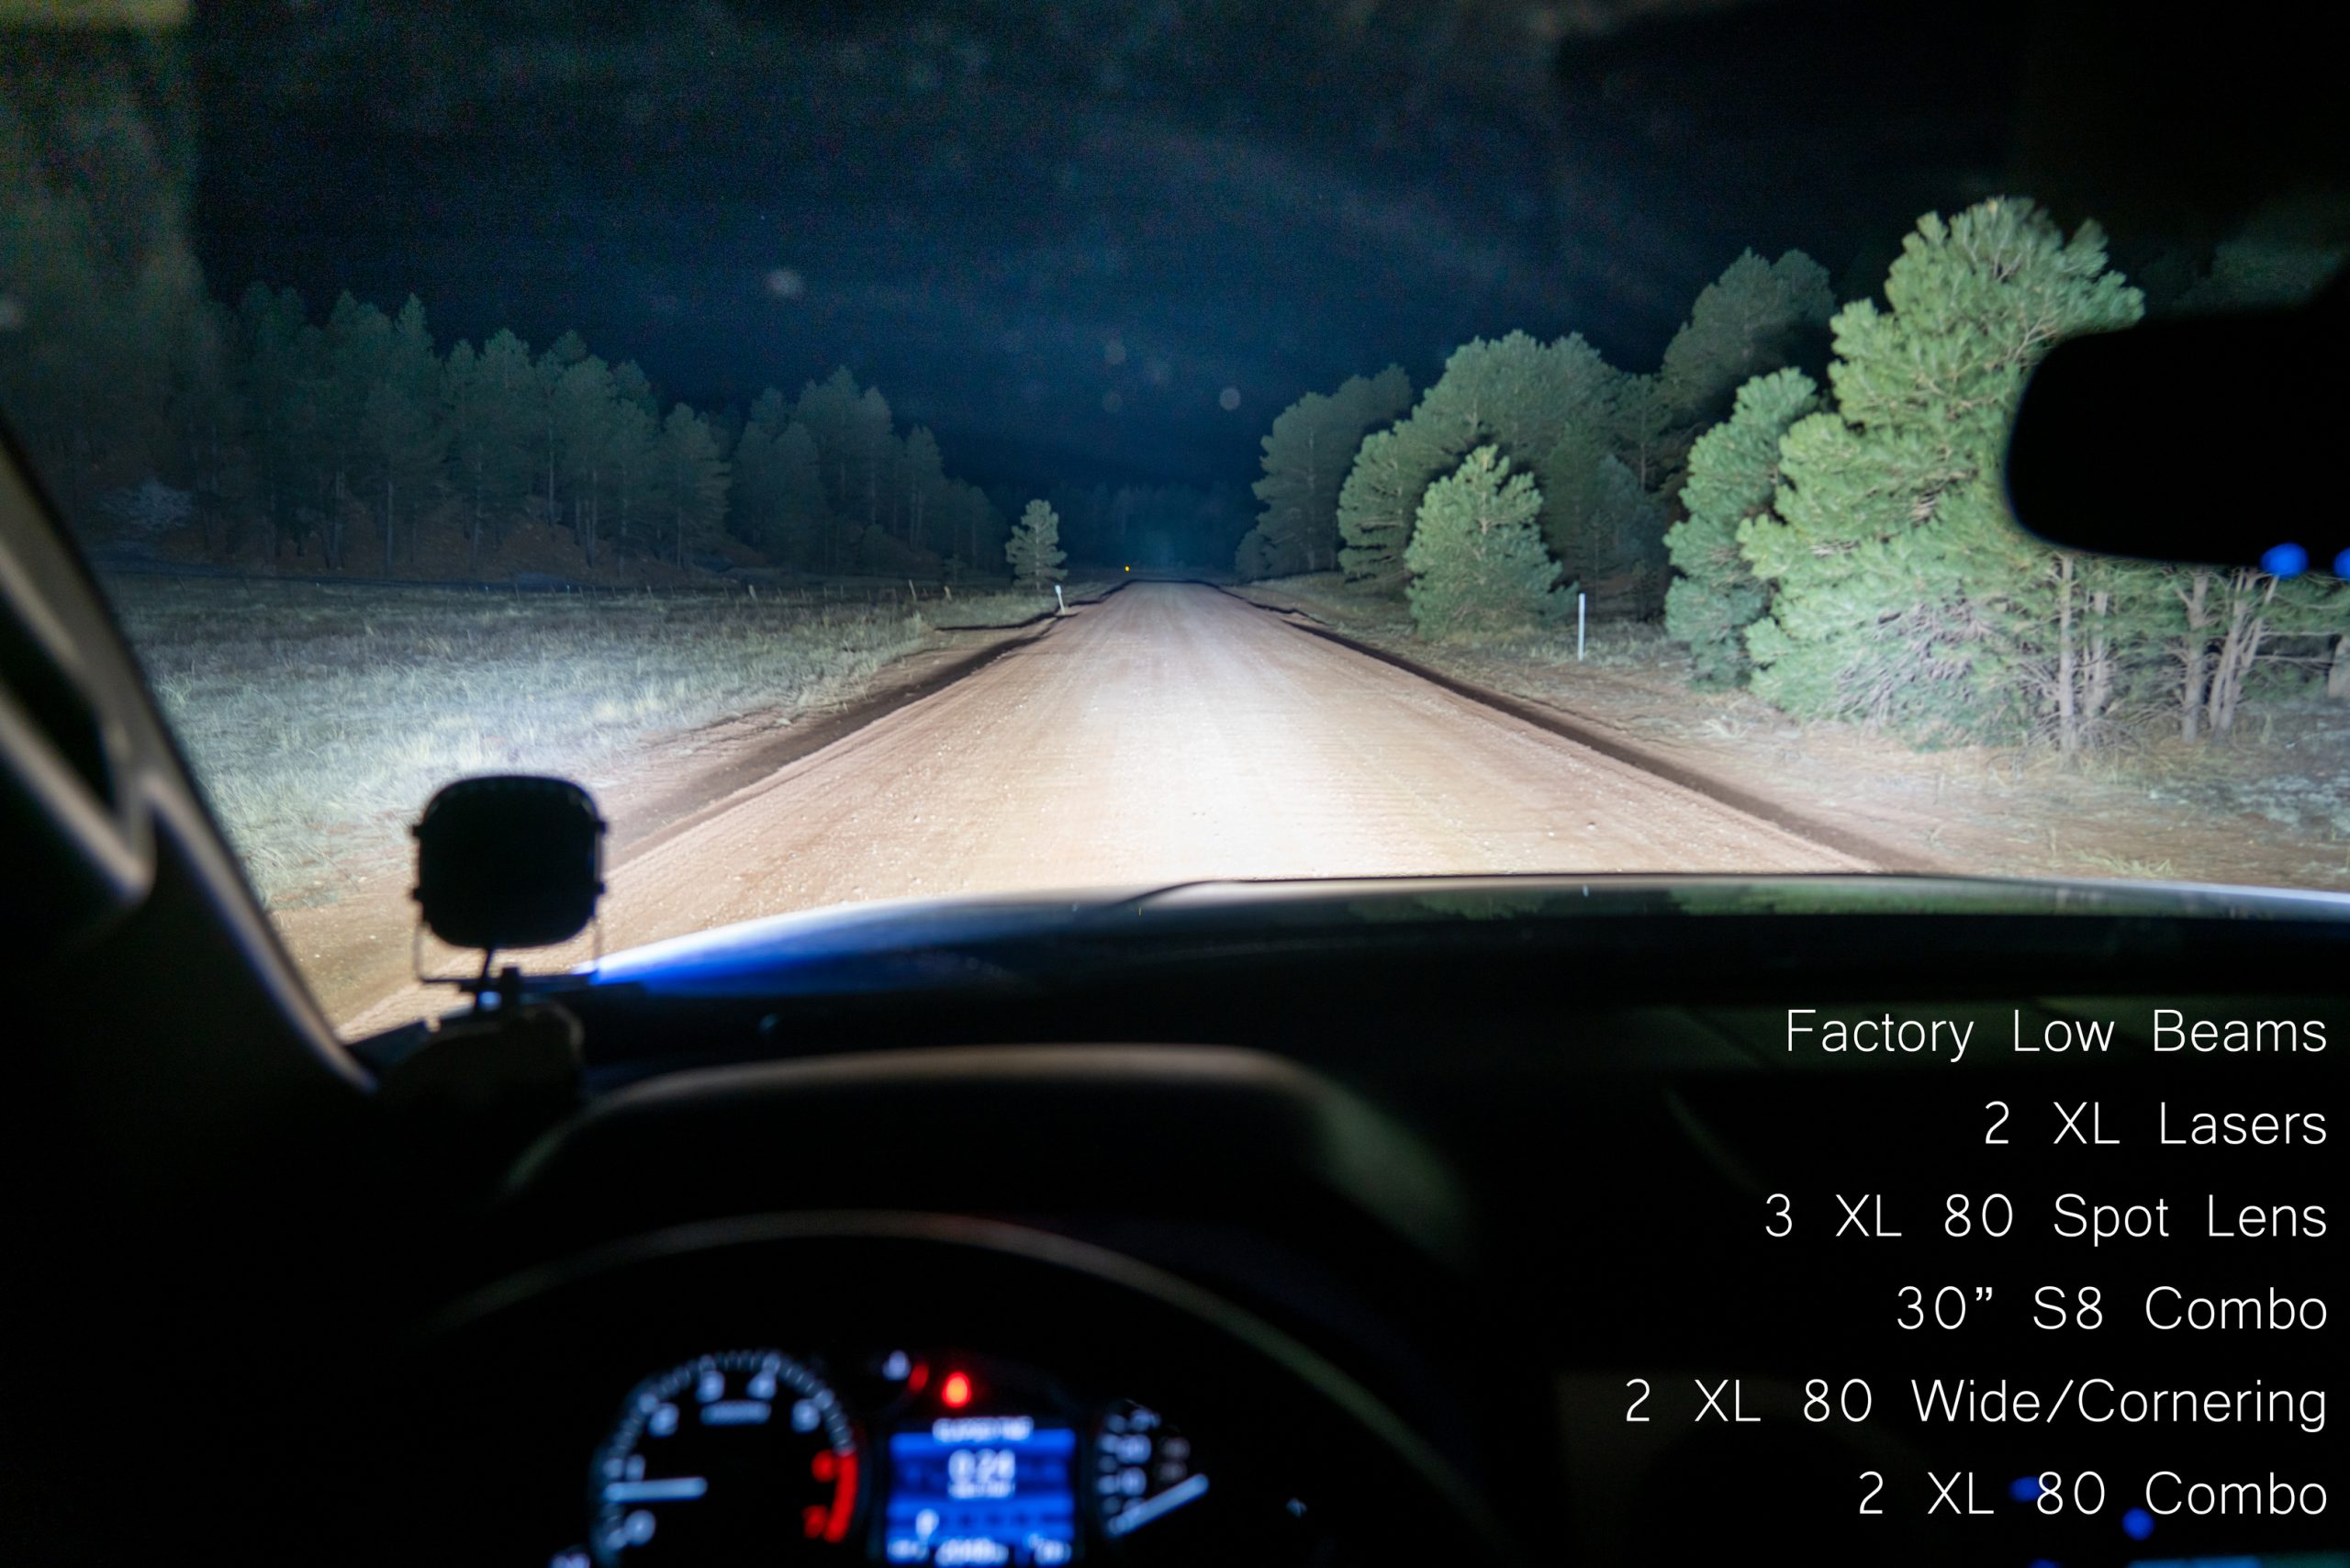
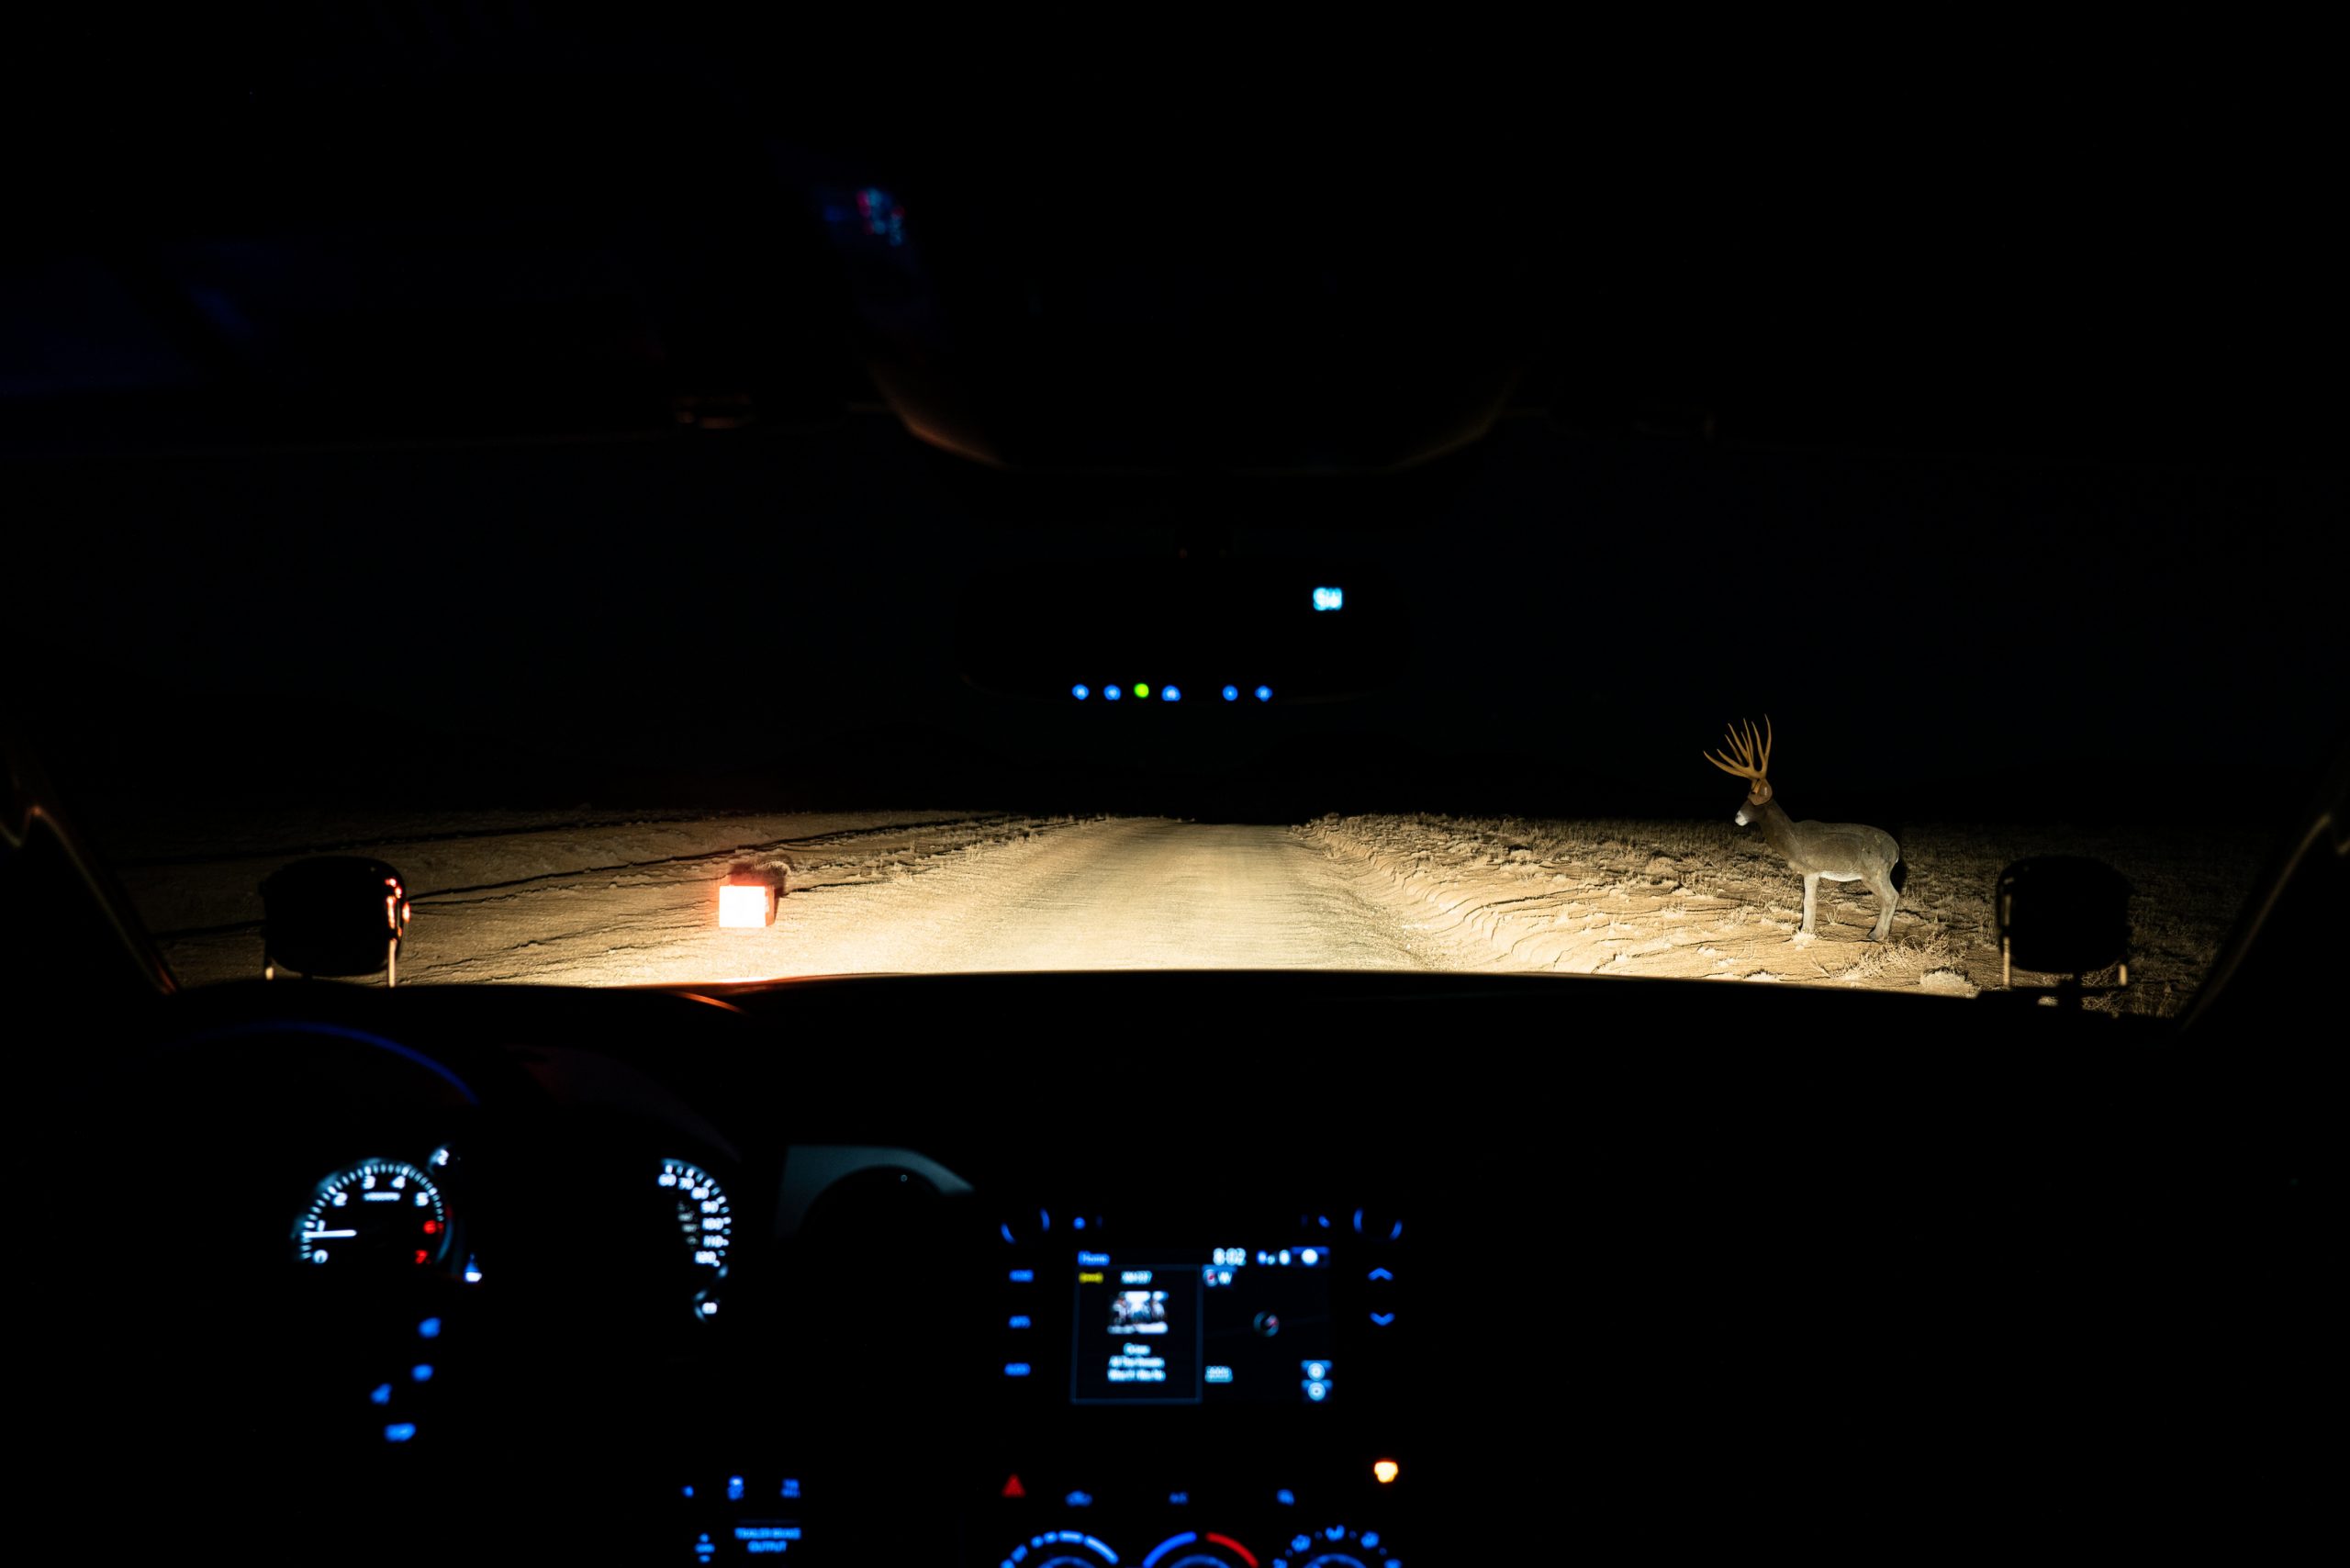 To quantify just how far laser lights will go, I cooked up a little test on a section of dirt road where I could measure just how far various lights on my truck could throw light. At one end of the road, I placed an object on each side of the road. On the right side I placed Booner, the comically proportioned 3D Archery deer target, and on the left side of the road I placed a box covered with DOT C2 reflective tape, which would be my ranging target. Then starting with my Tundra’s low beam headlights, I backed up until couldn’t see Booner anymore – only the reflective box I placed on the other side of the road, which I shot with a range finder to measure how far I was from the deer. I then turned on my high-beams (Toyotas have strong high beams) and repeated the process.
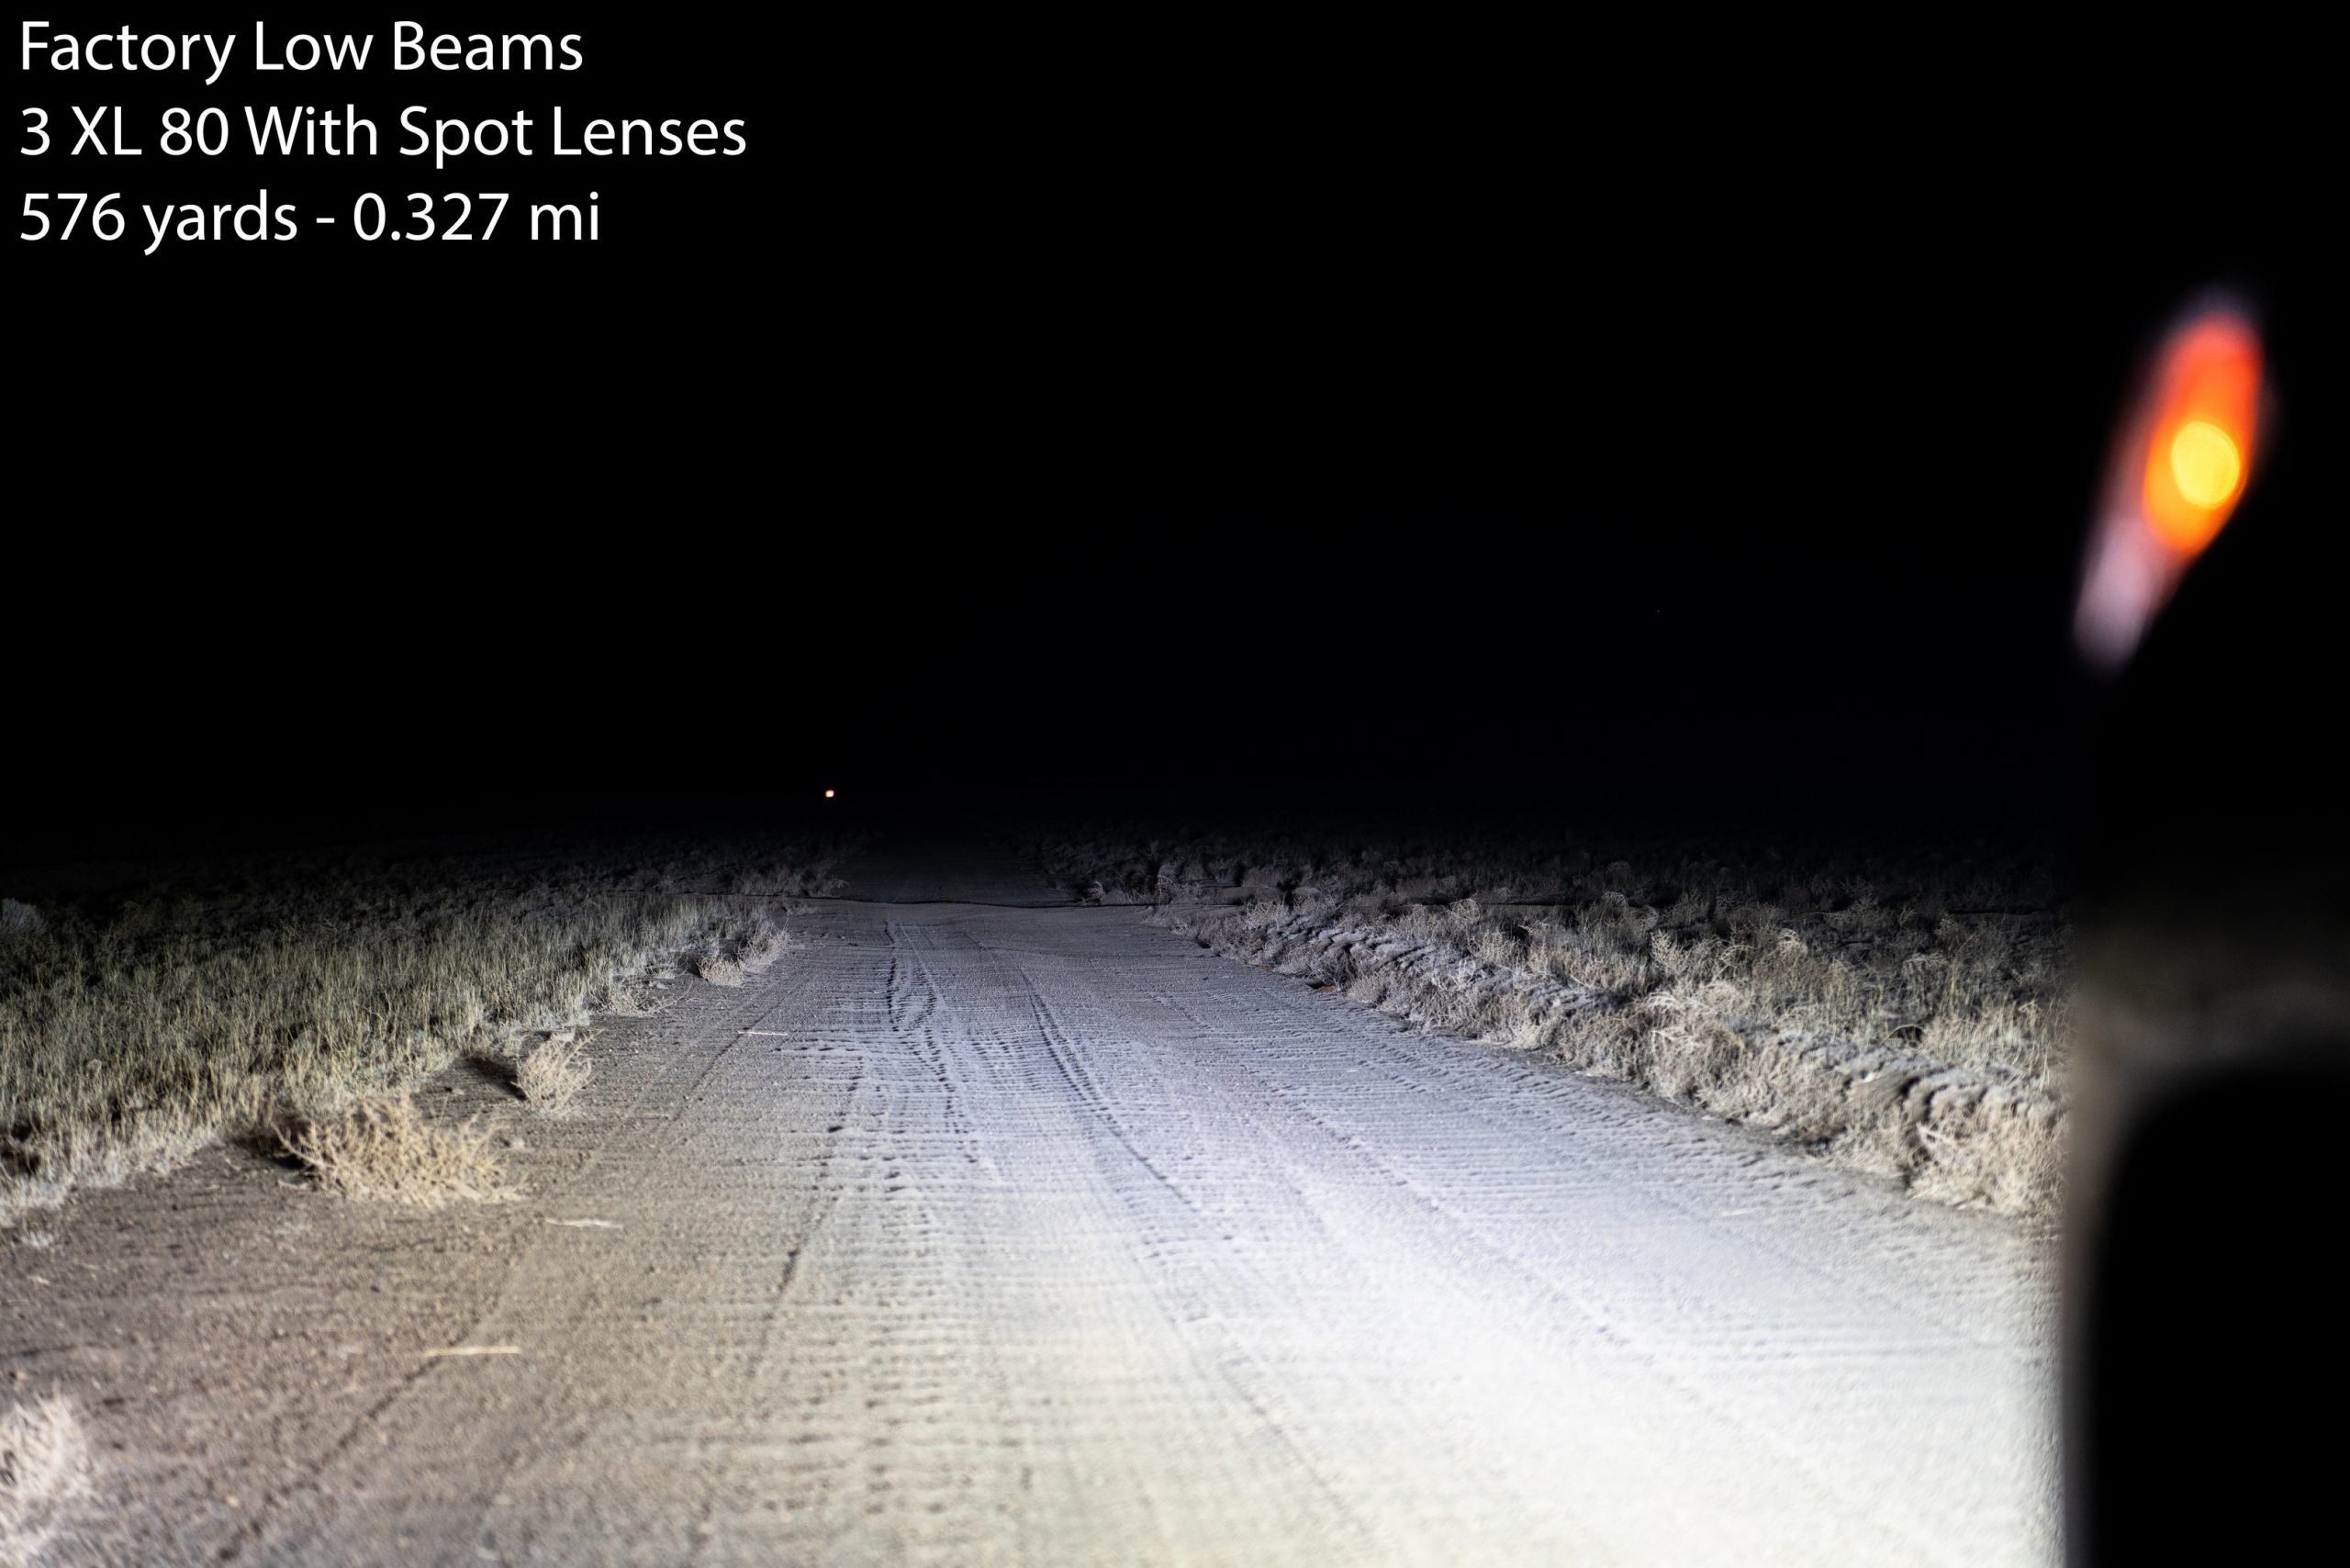
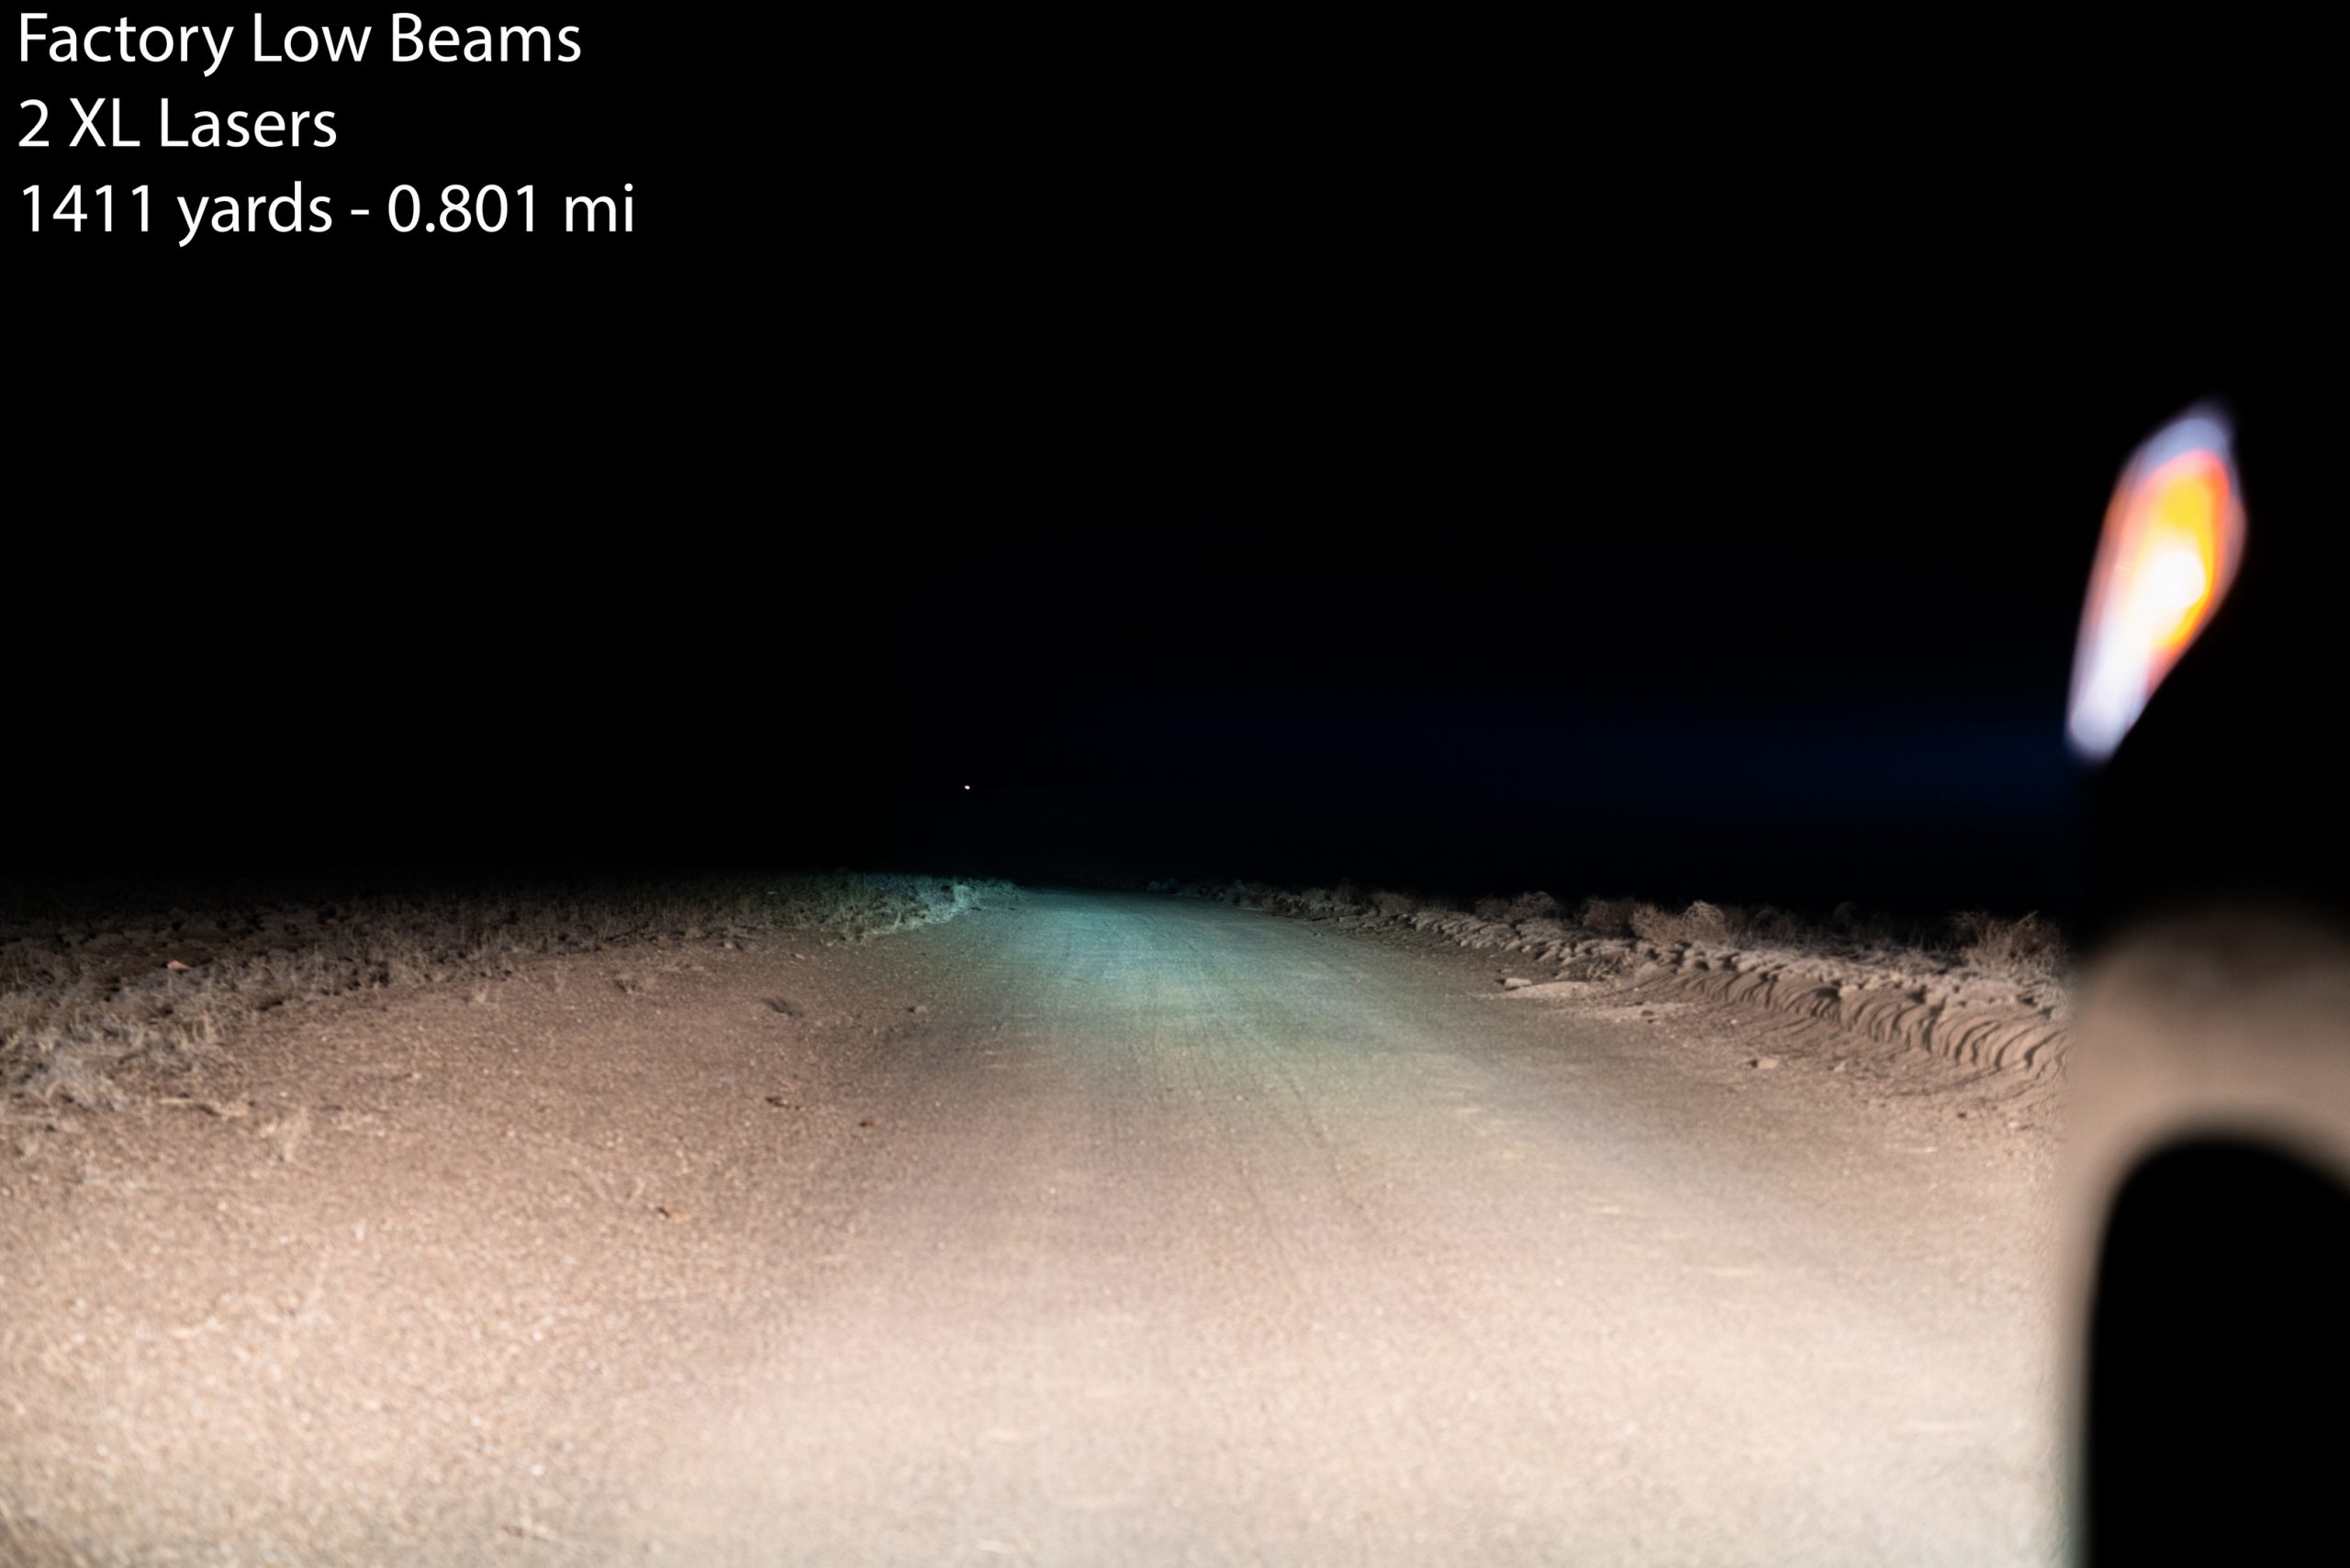
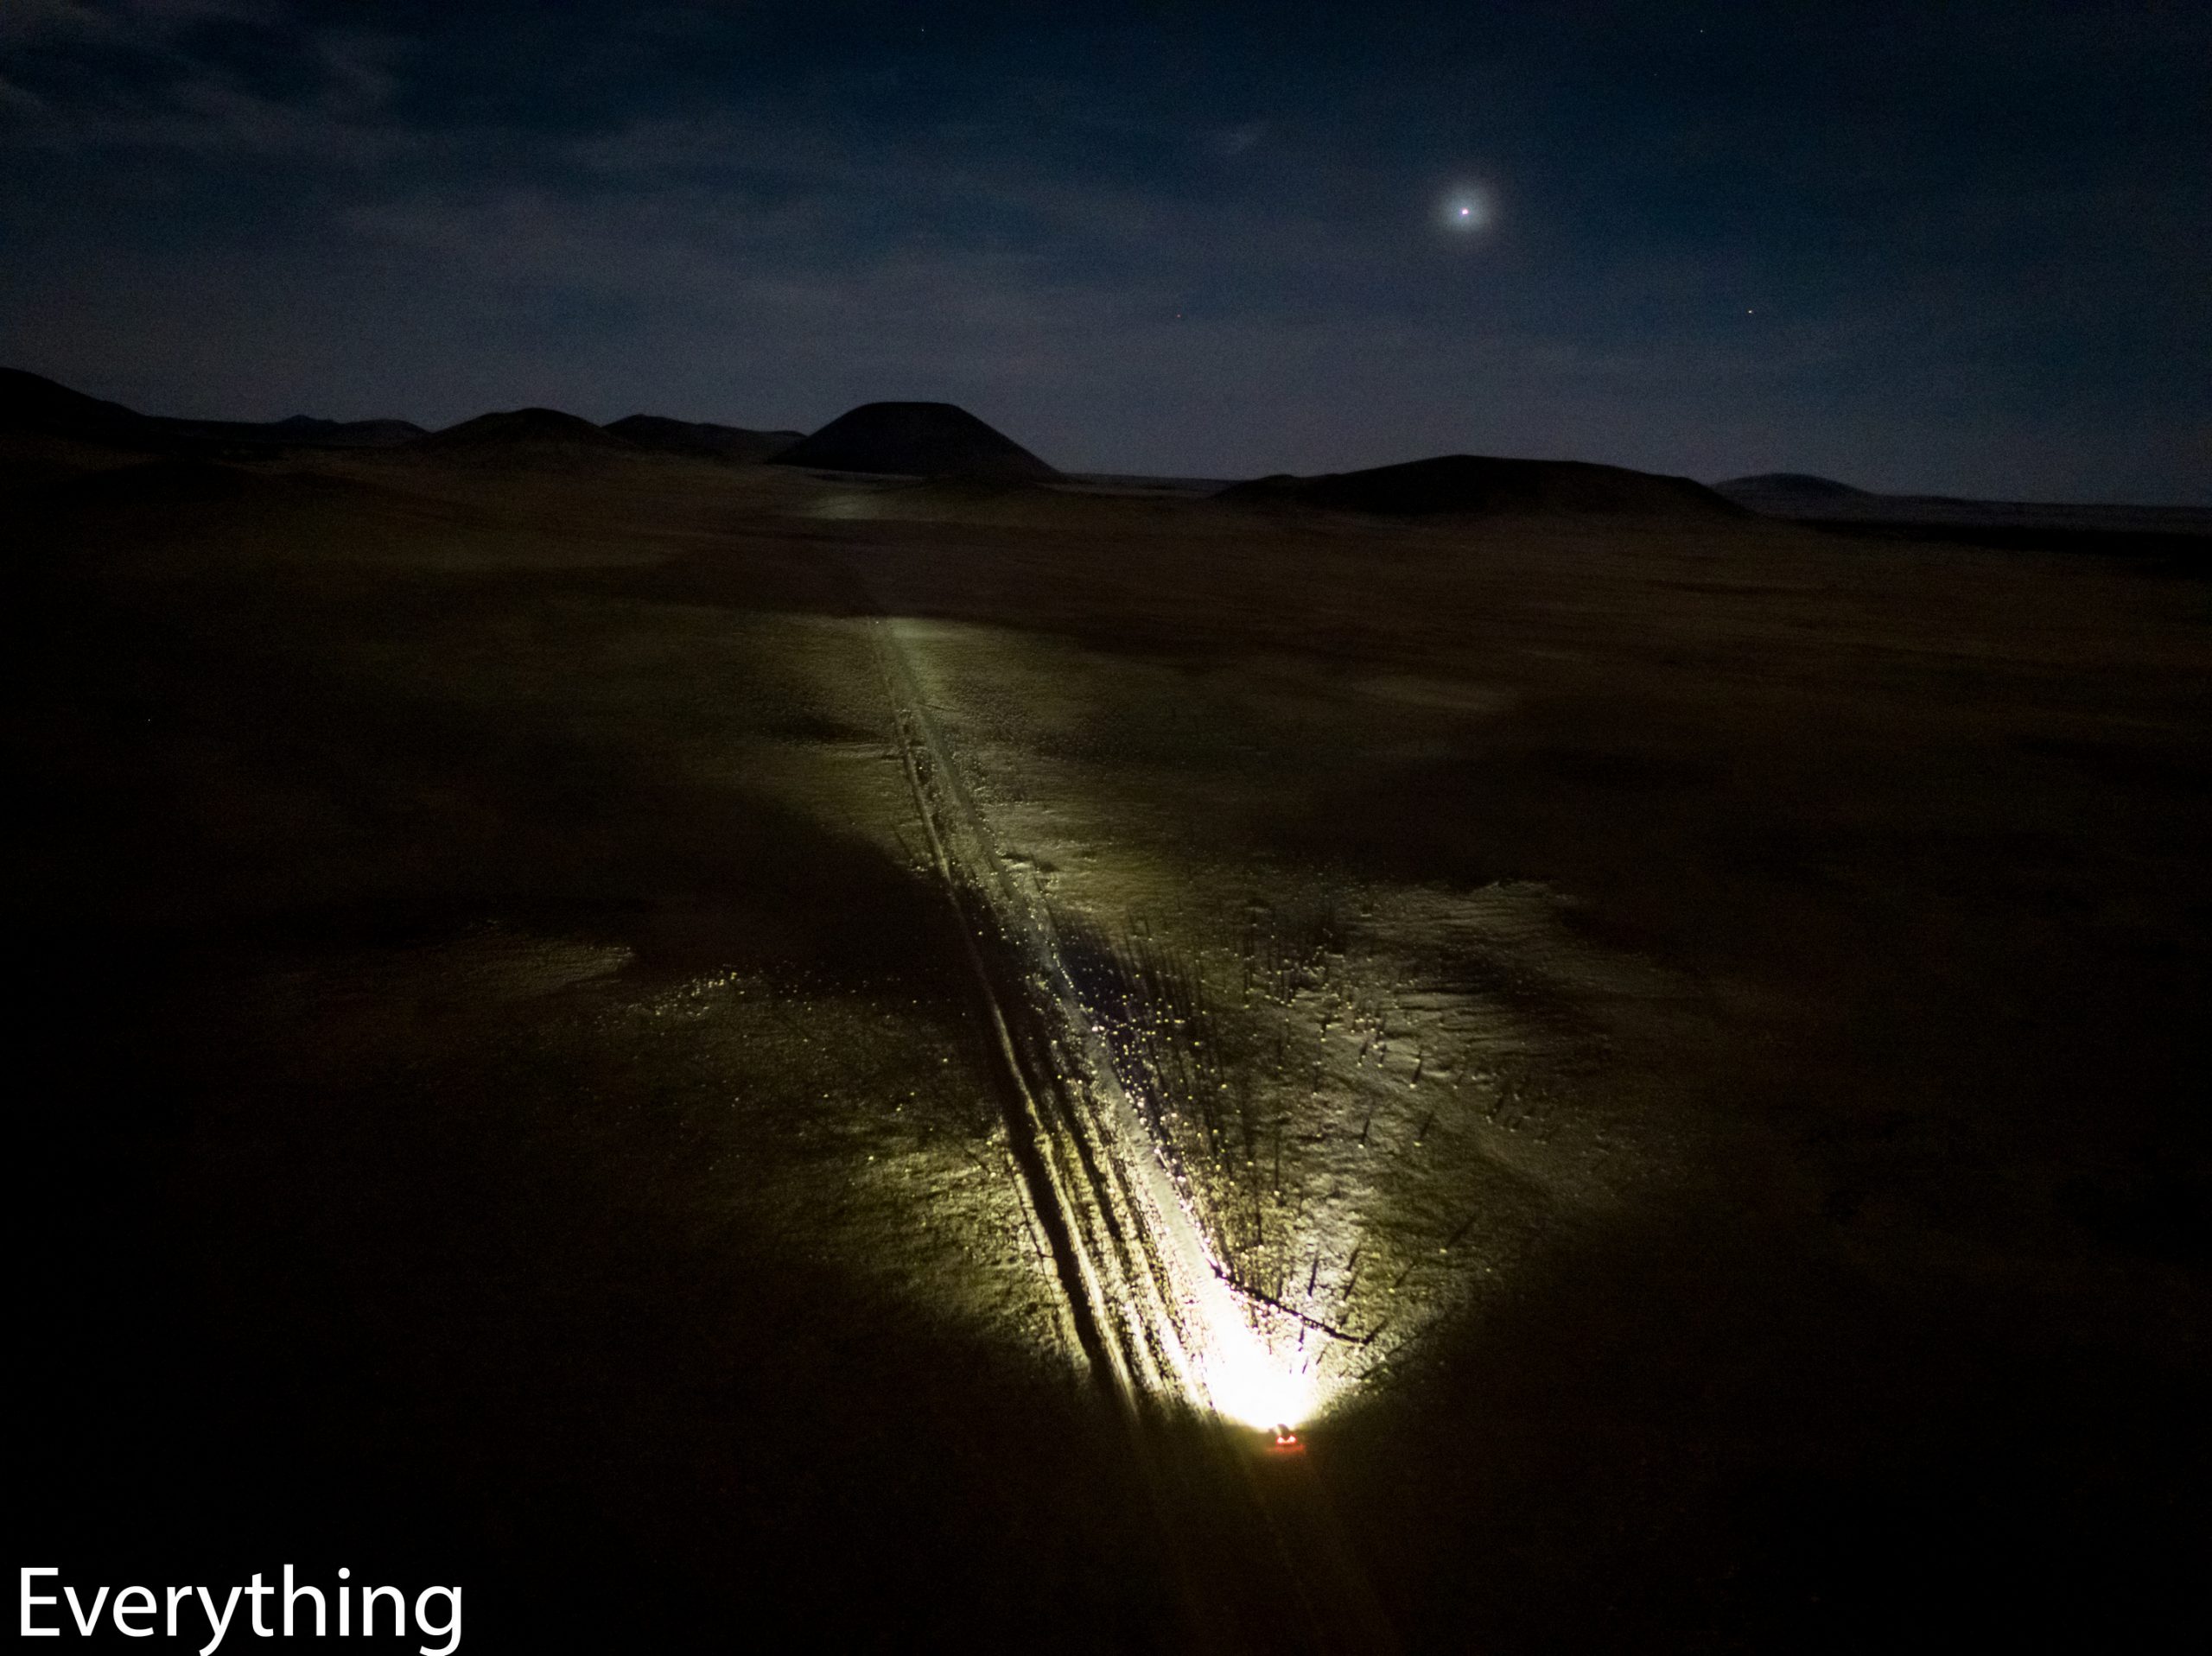
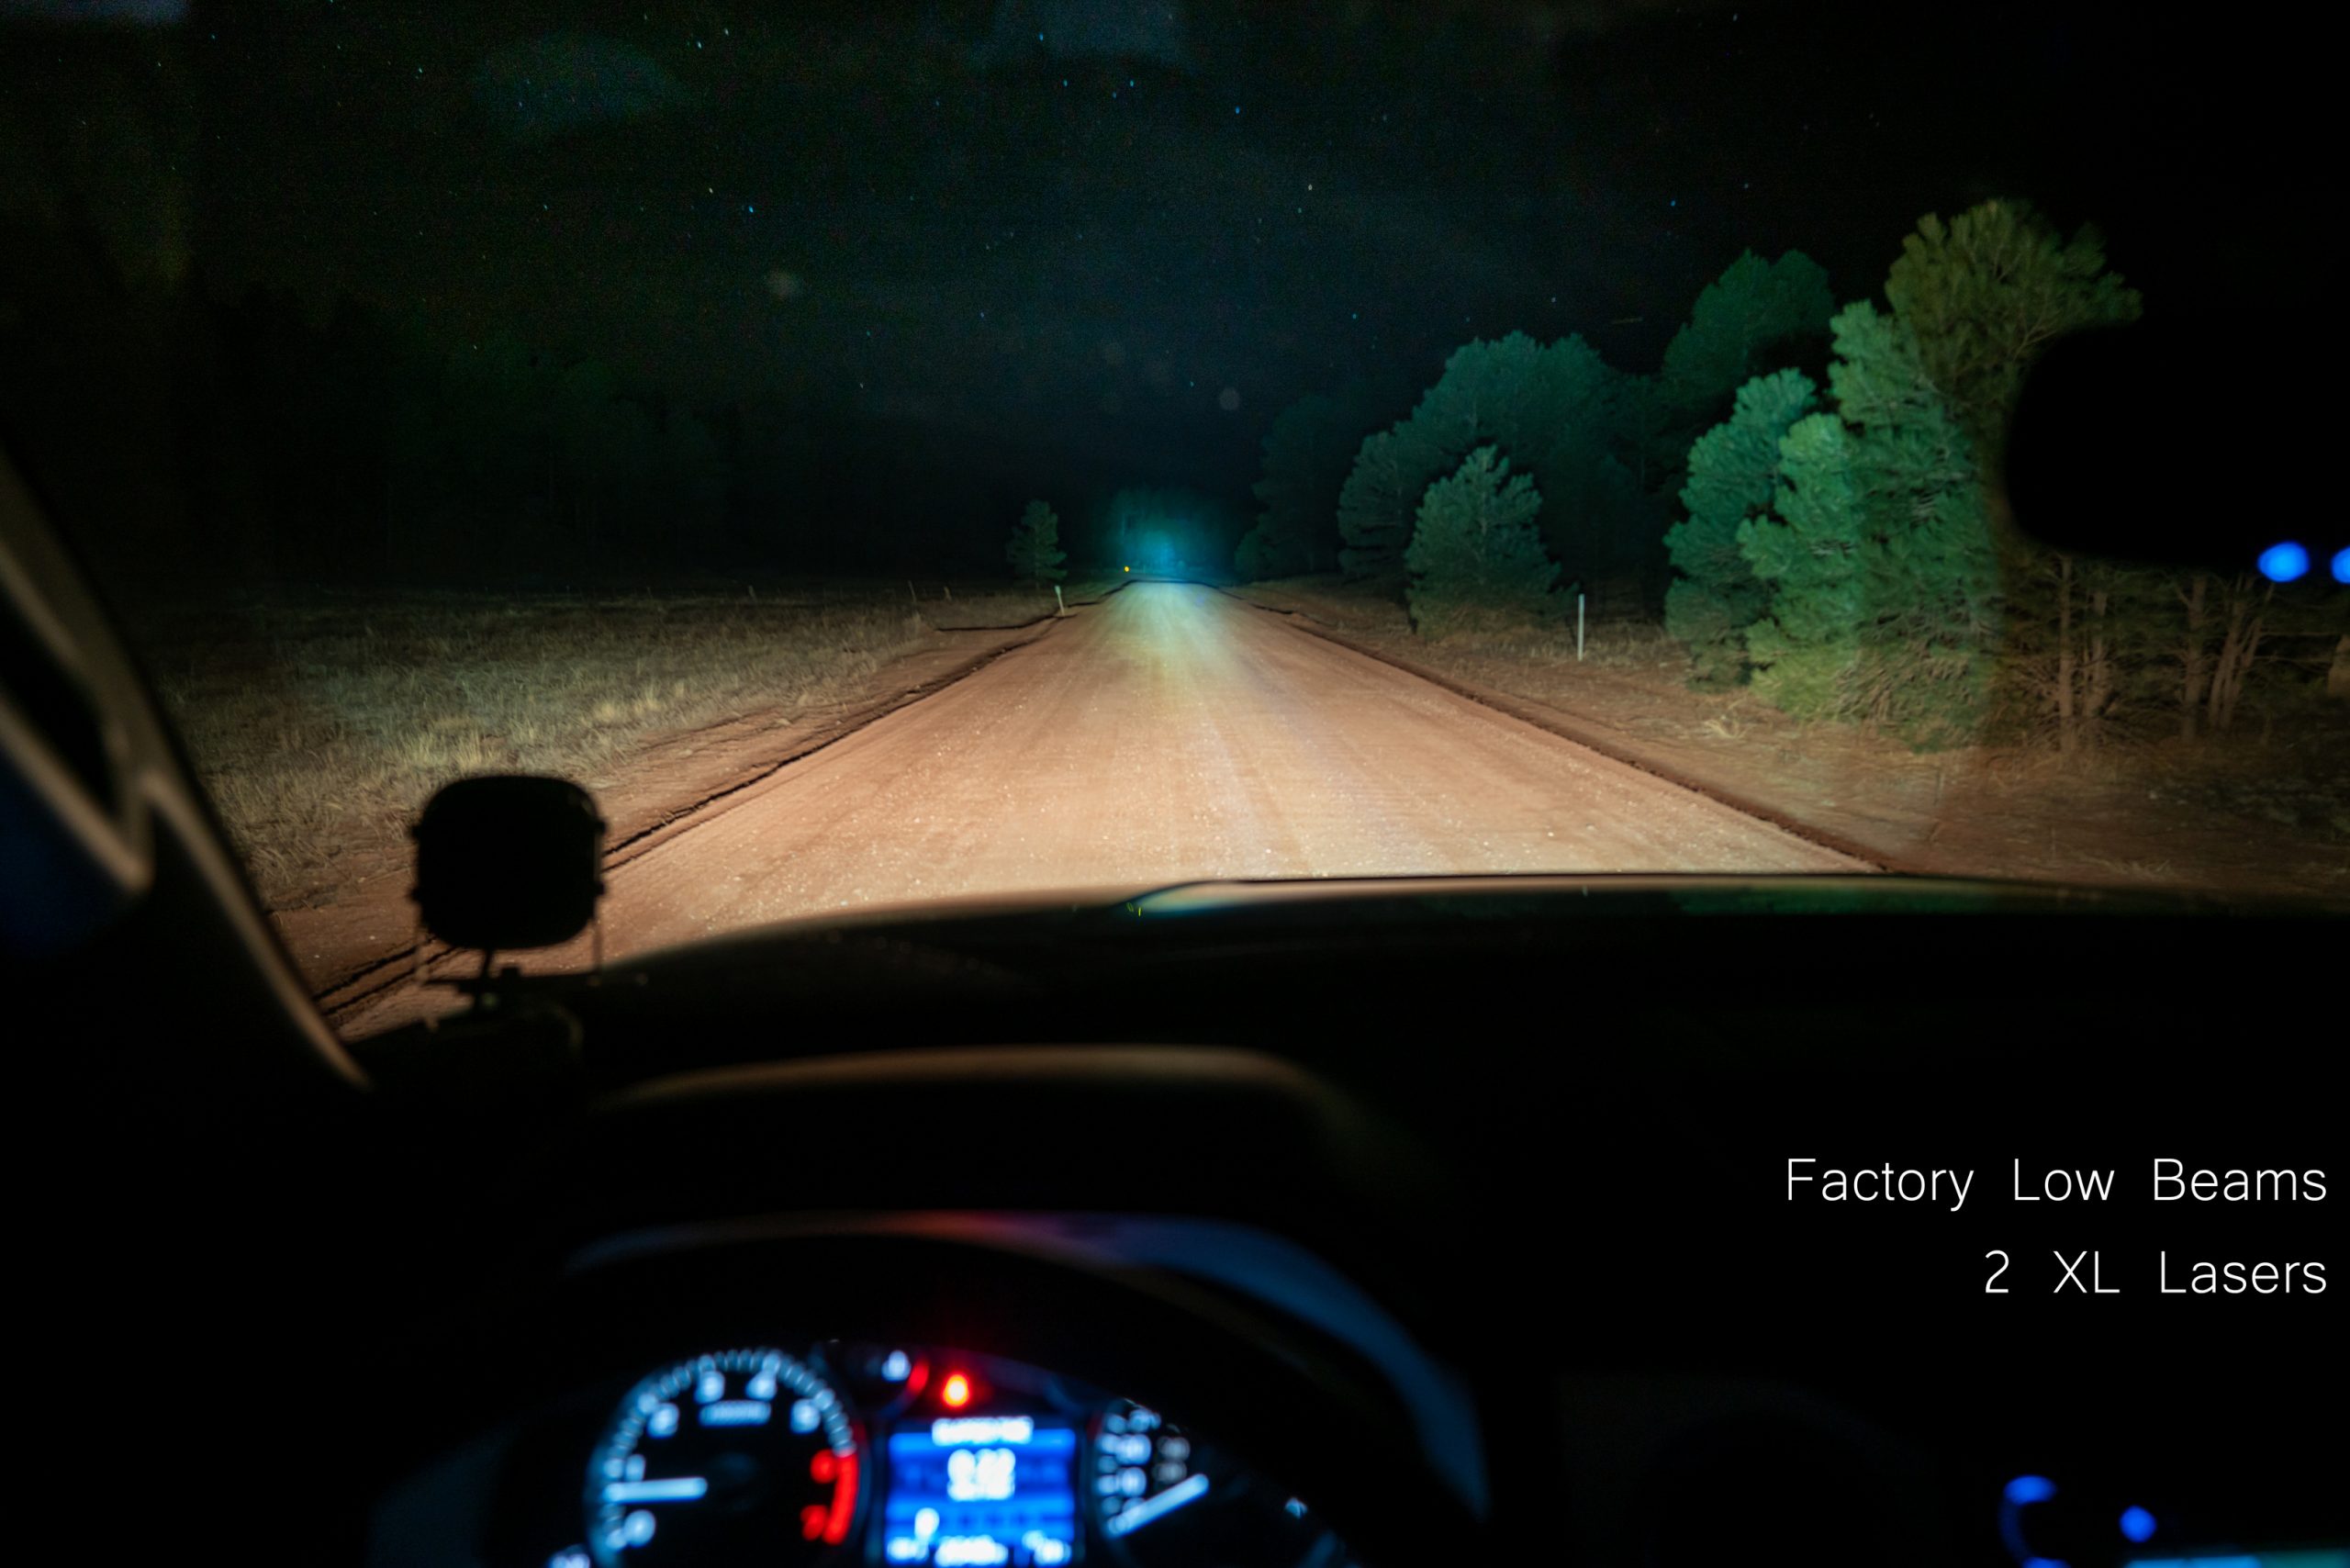
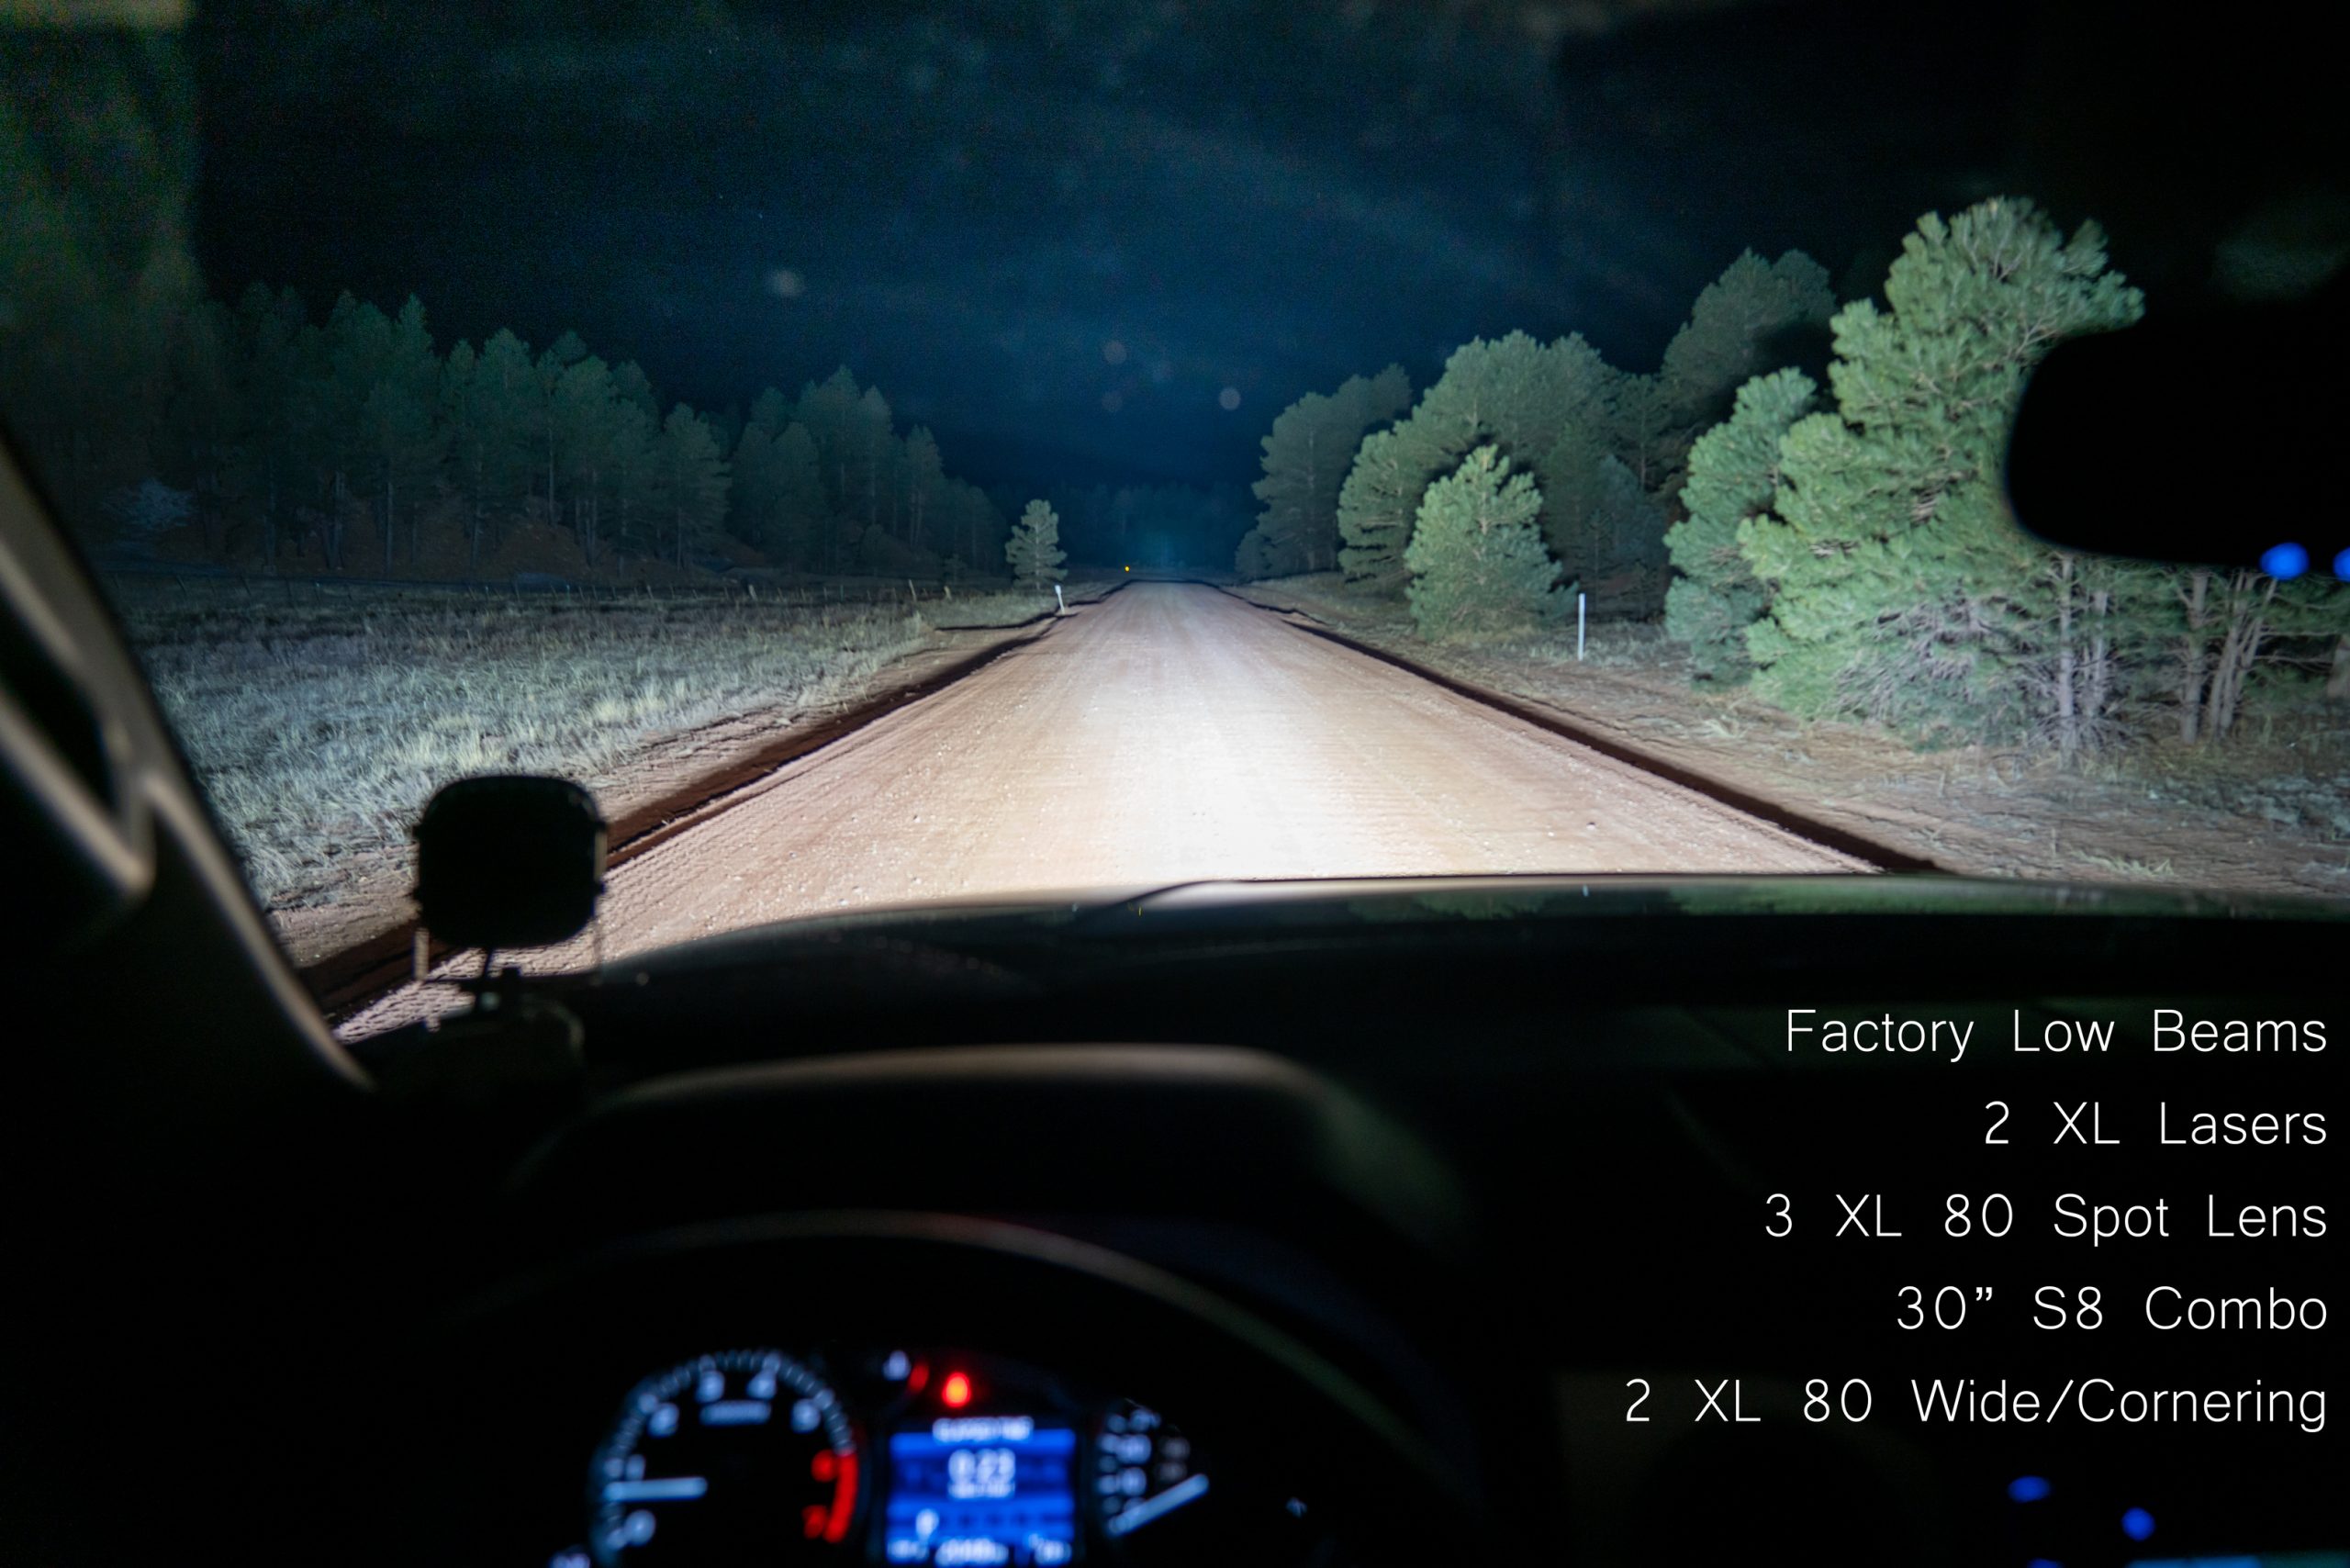
Next up were my regular LED BD XL 80 lights with spot lenses, and finally the two XL Laser lights. I then backpedaled as far down the road as I could go and still have line of sight on the box. I couldn’t see Booner with my naked eye at this distance, but if you look closely in the photo – you can see him at 1411 yards from the truck. Yet perhaps more impressive is that when you hold the shutter open for a few seconds you can see that the Lasers are actually throwing light on to the next hill down the road which is nearly two miles from the truck! Being able to see a deer at 902 yards out is pretty impressive, and at that distance I’ve got all of the time in the world to stop for Booner, or any other thing I don’t want to run into.


 Editor’s Note: Seeing the deer (Booner) in the images as compressed for website use is really hard. Uncompressed JPGs can be viewed here. Please view at 100%. – Chad
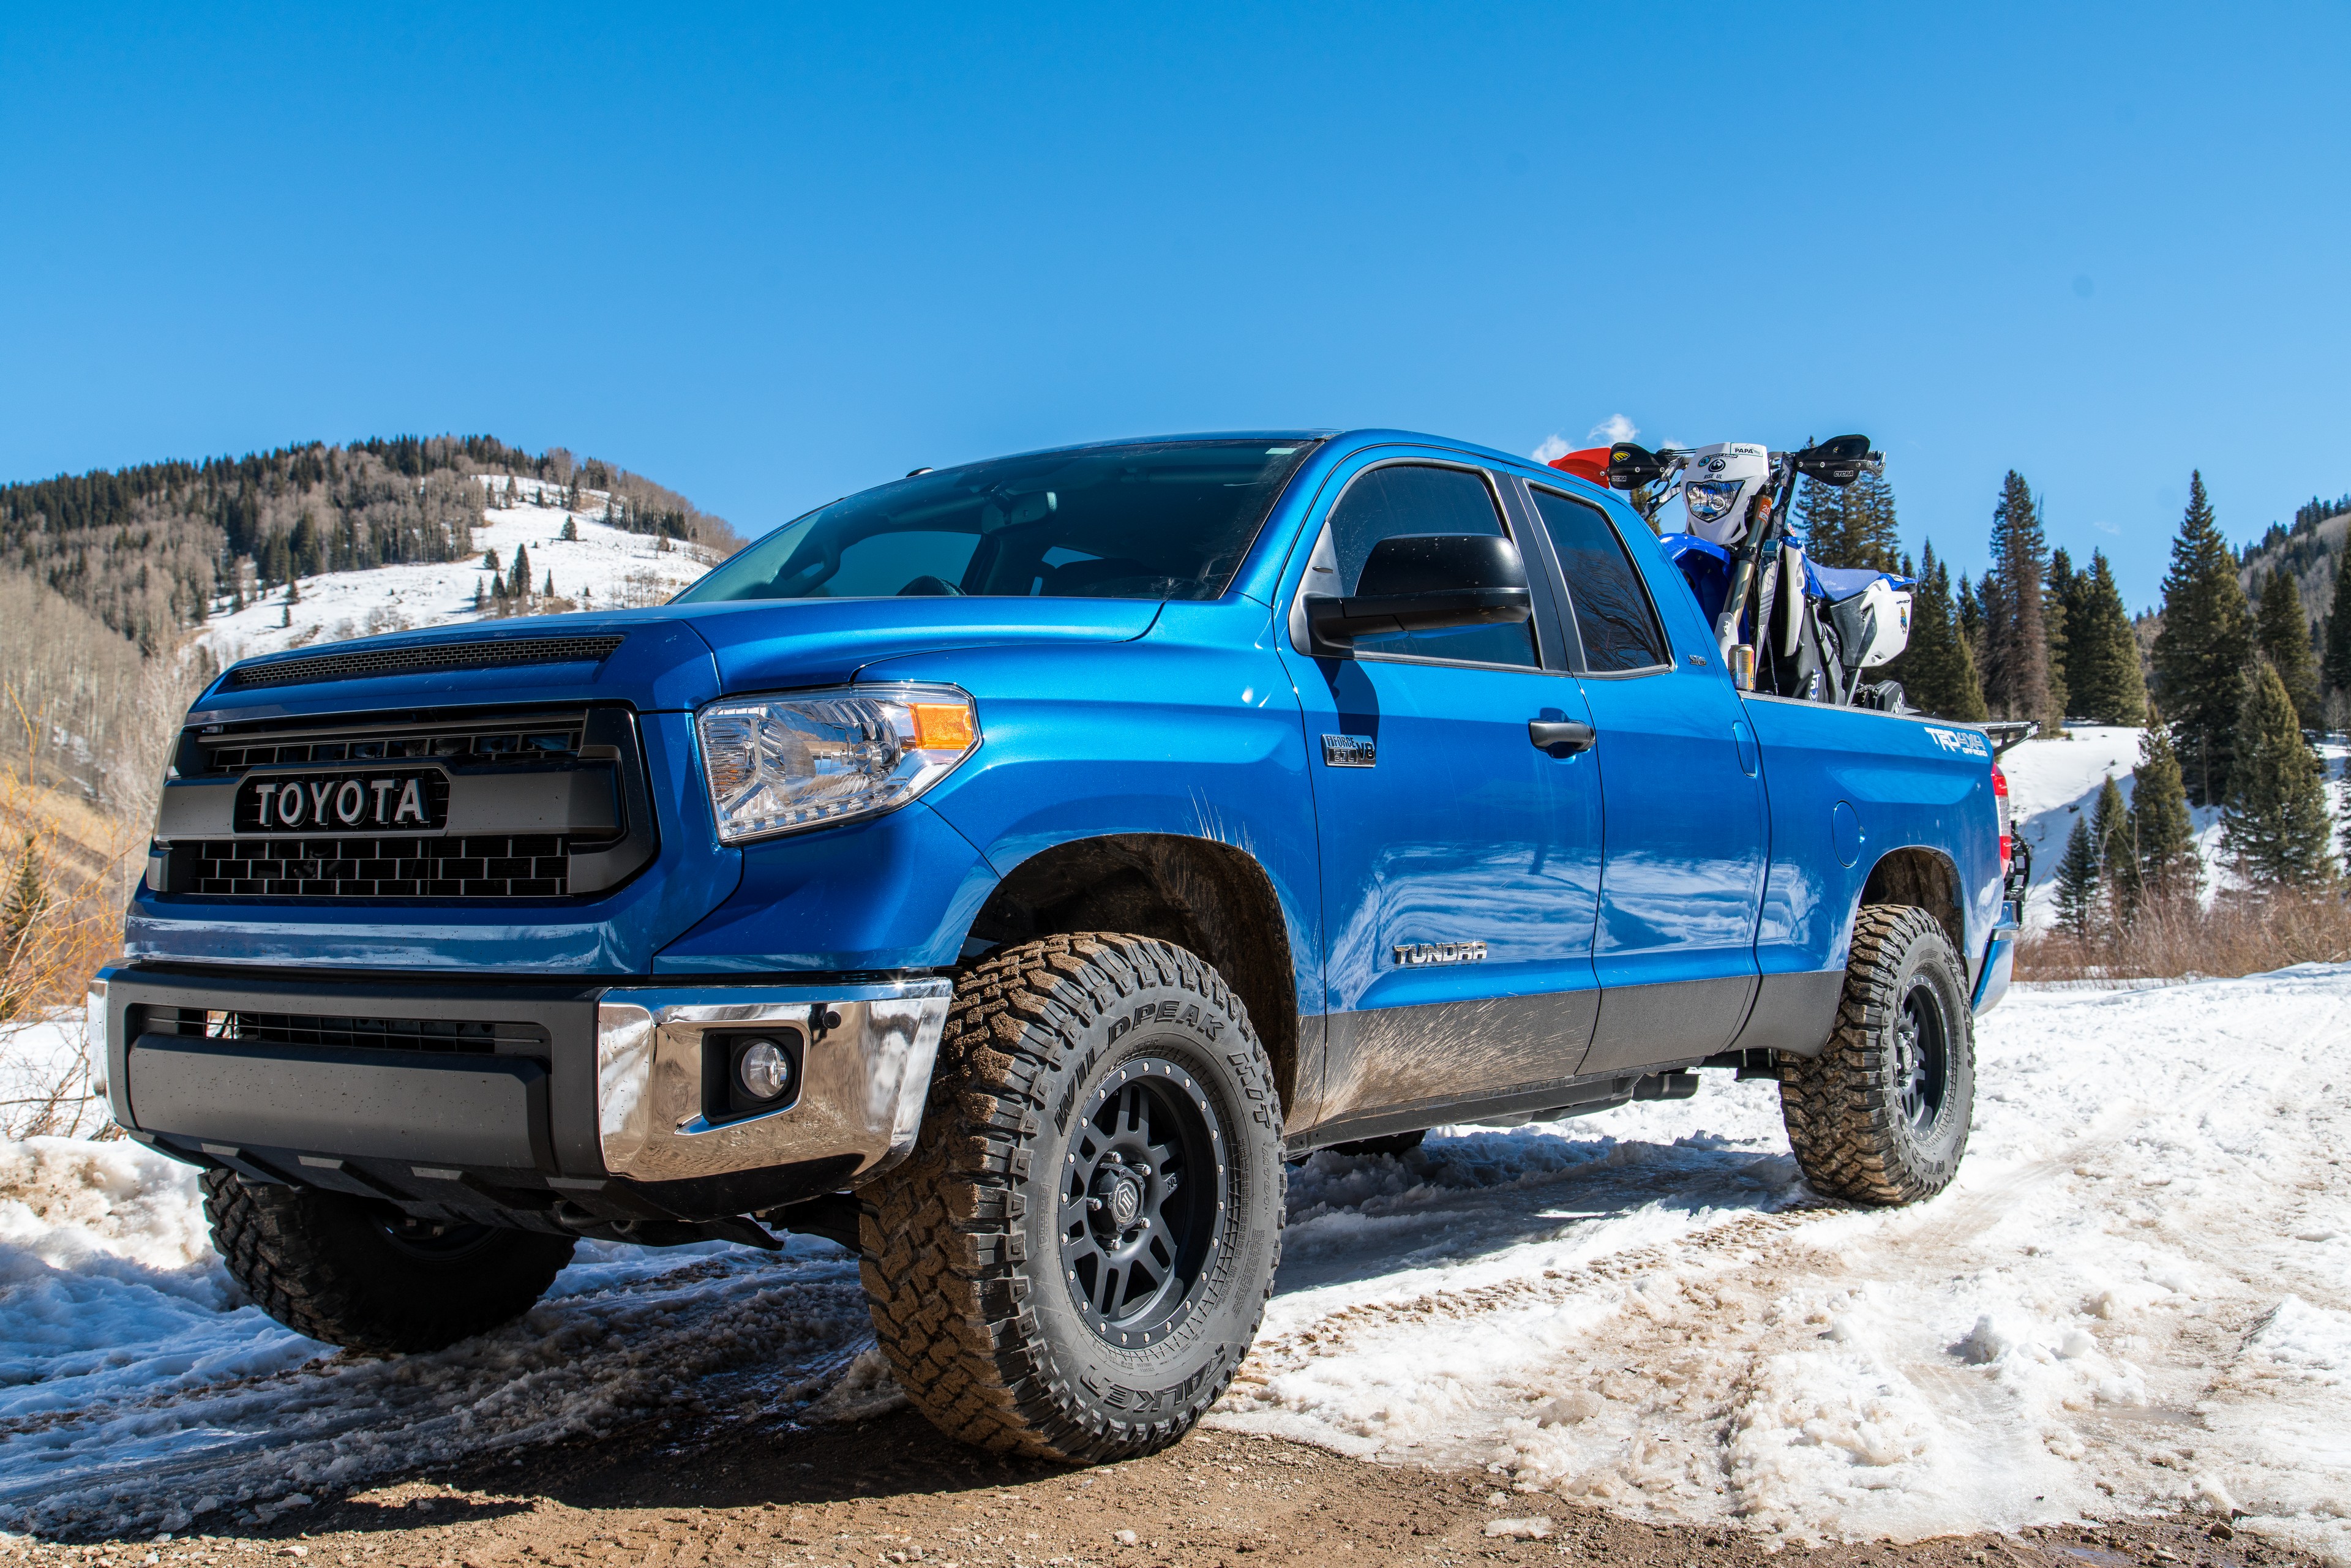
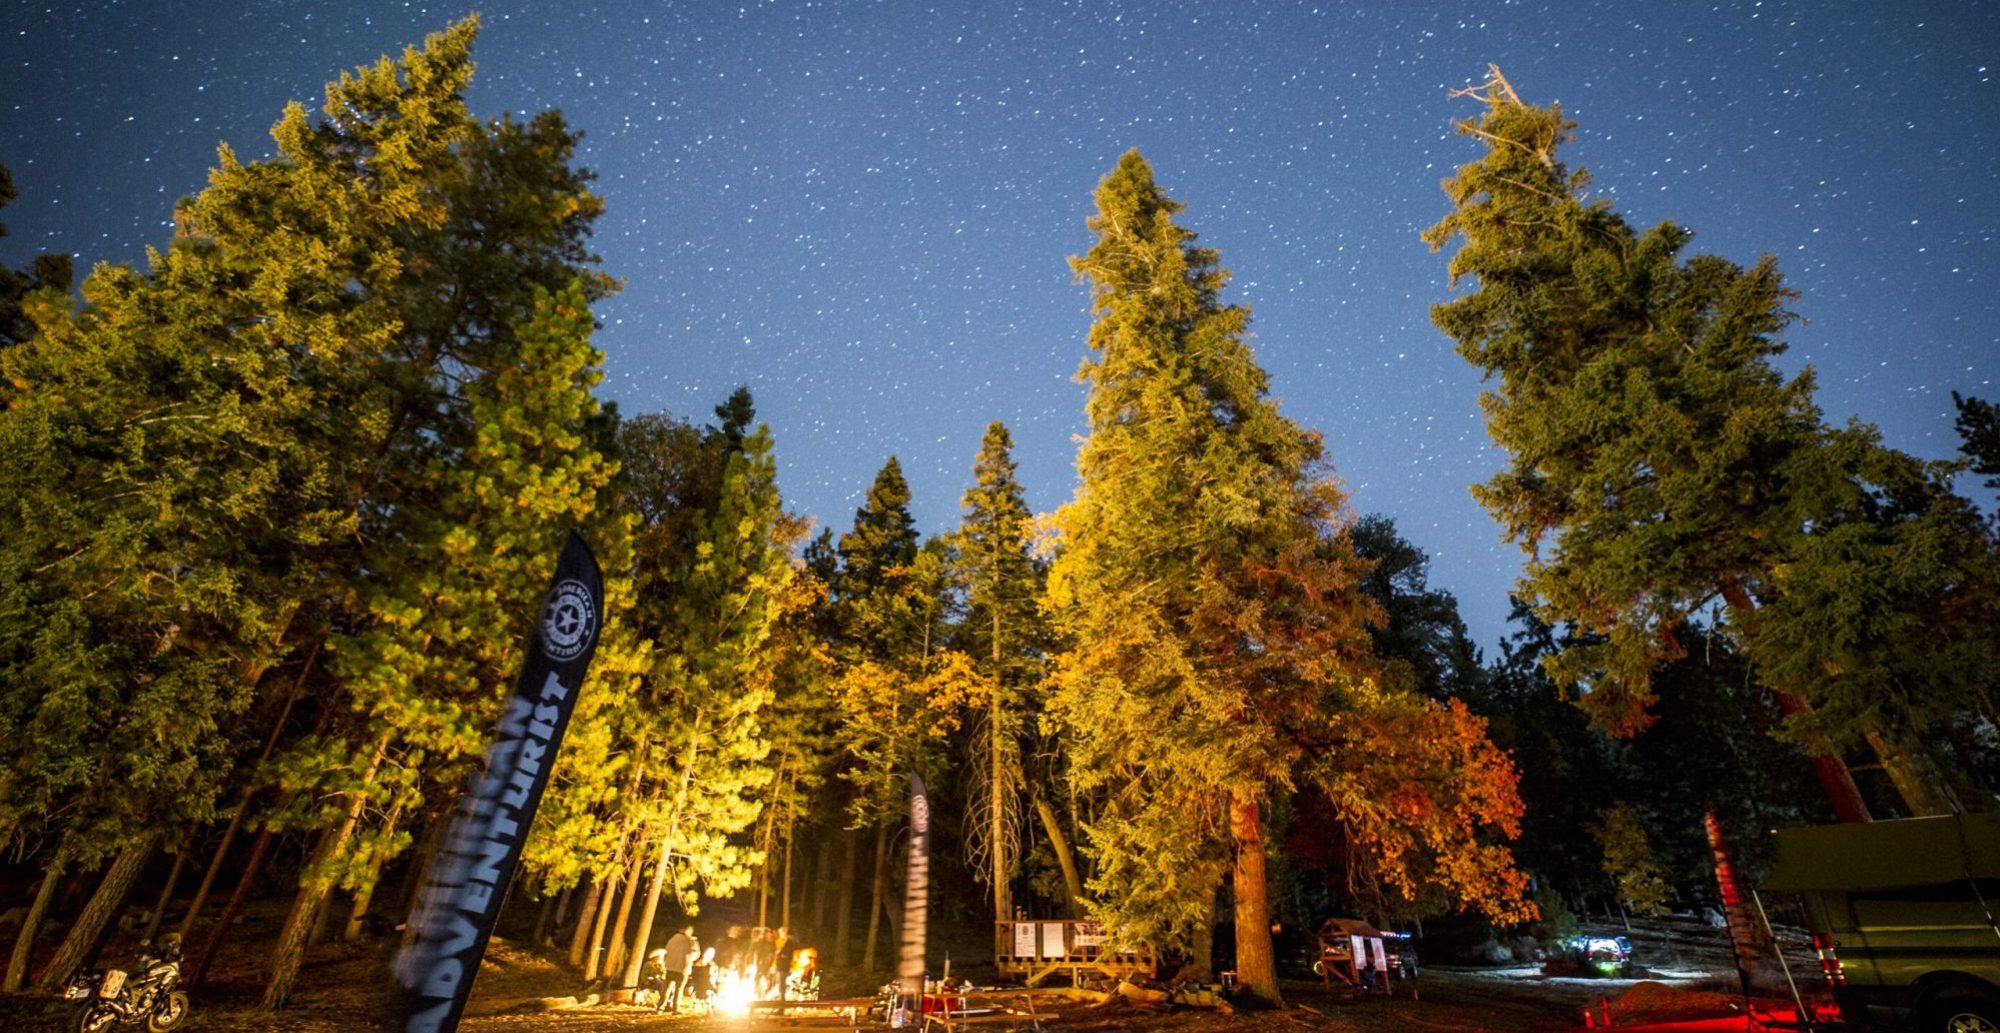
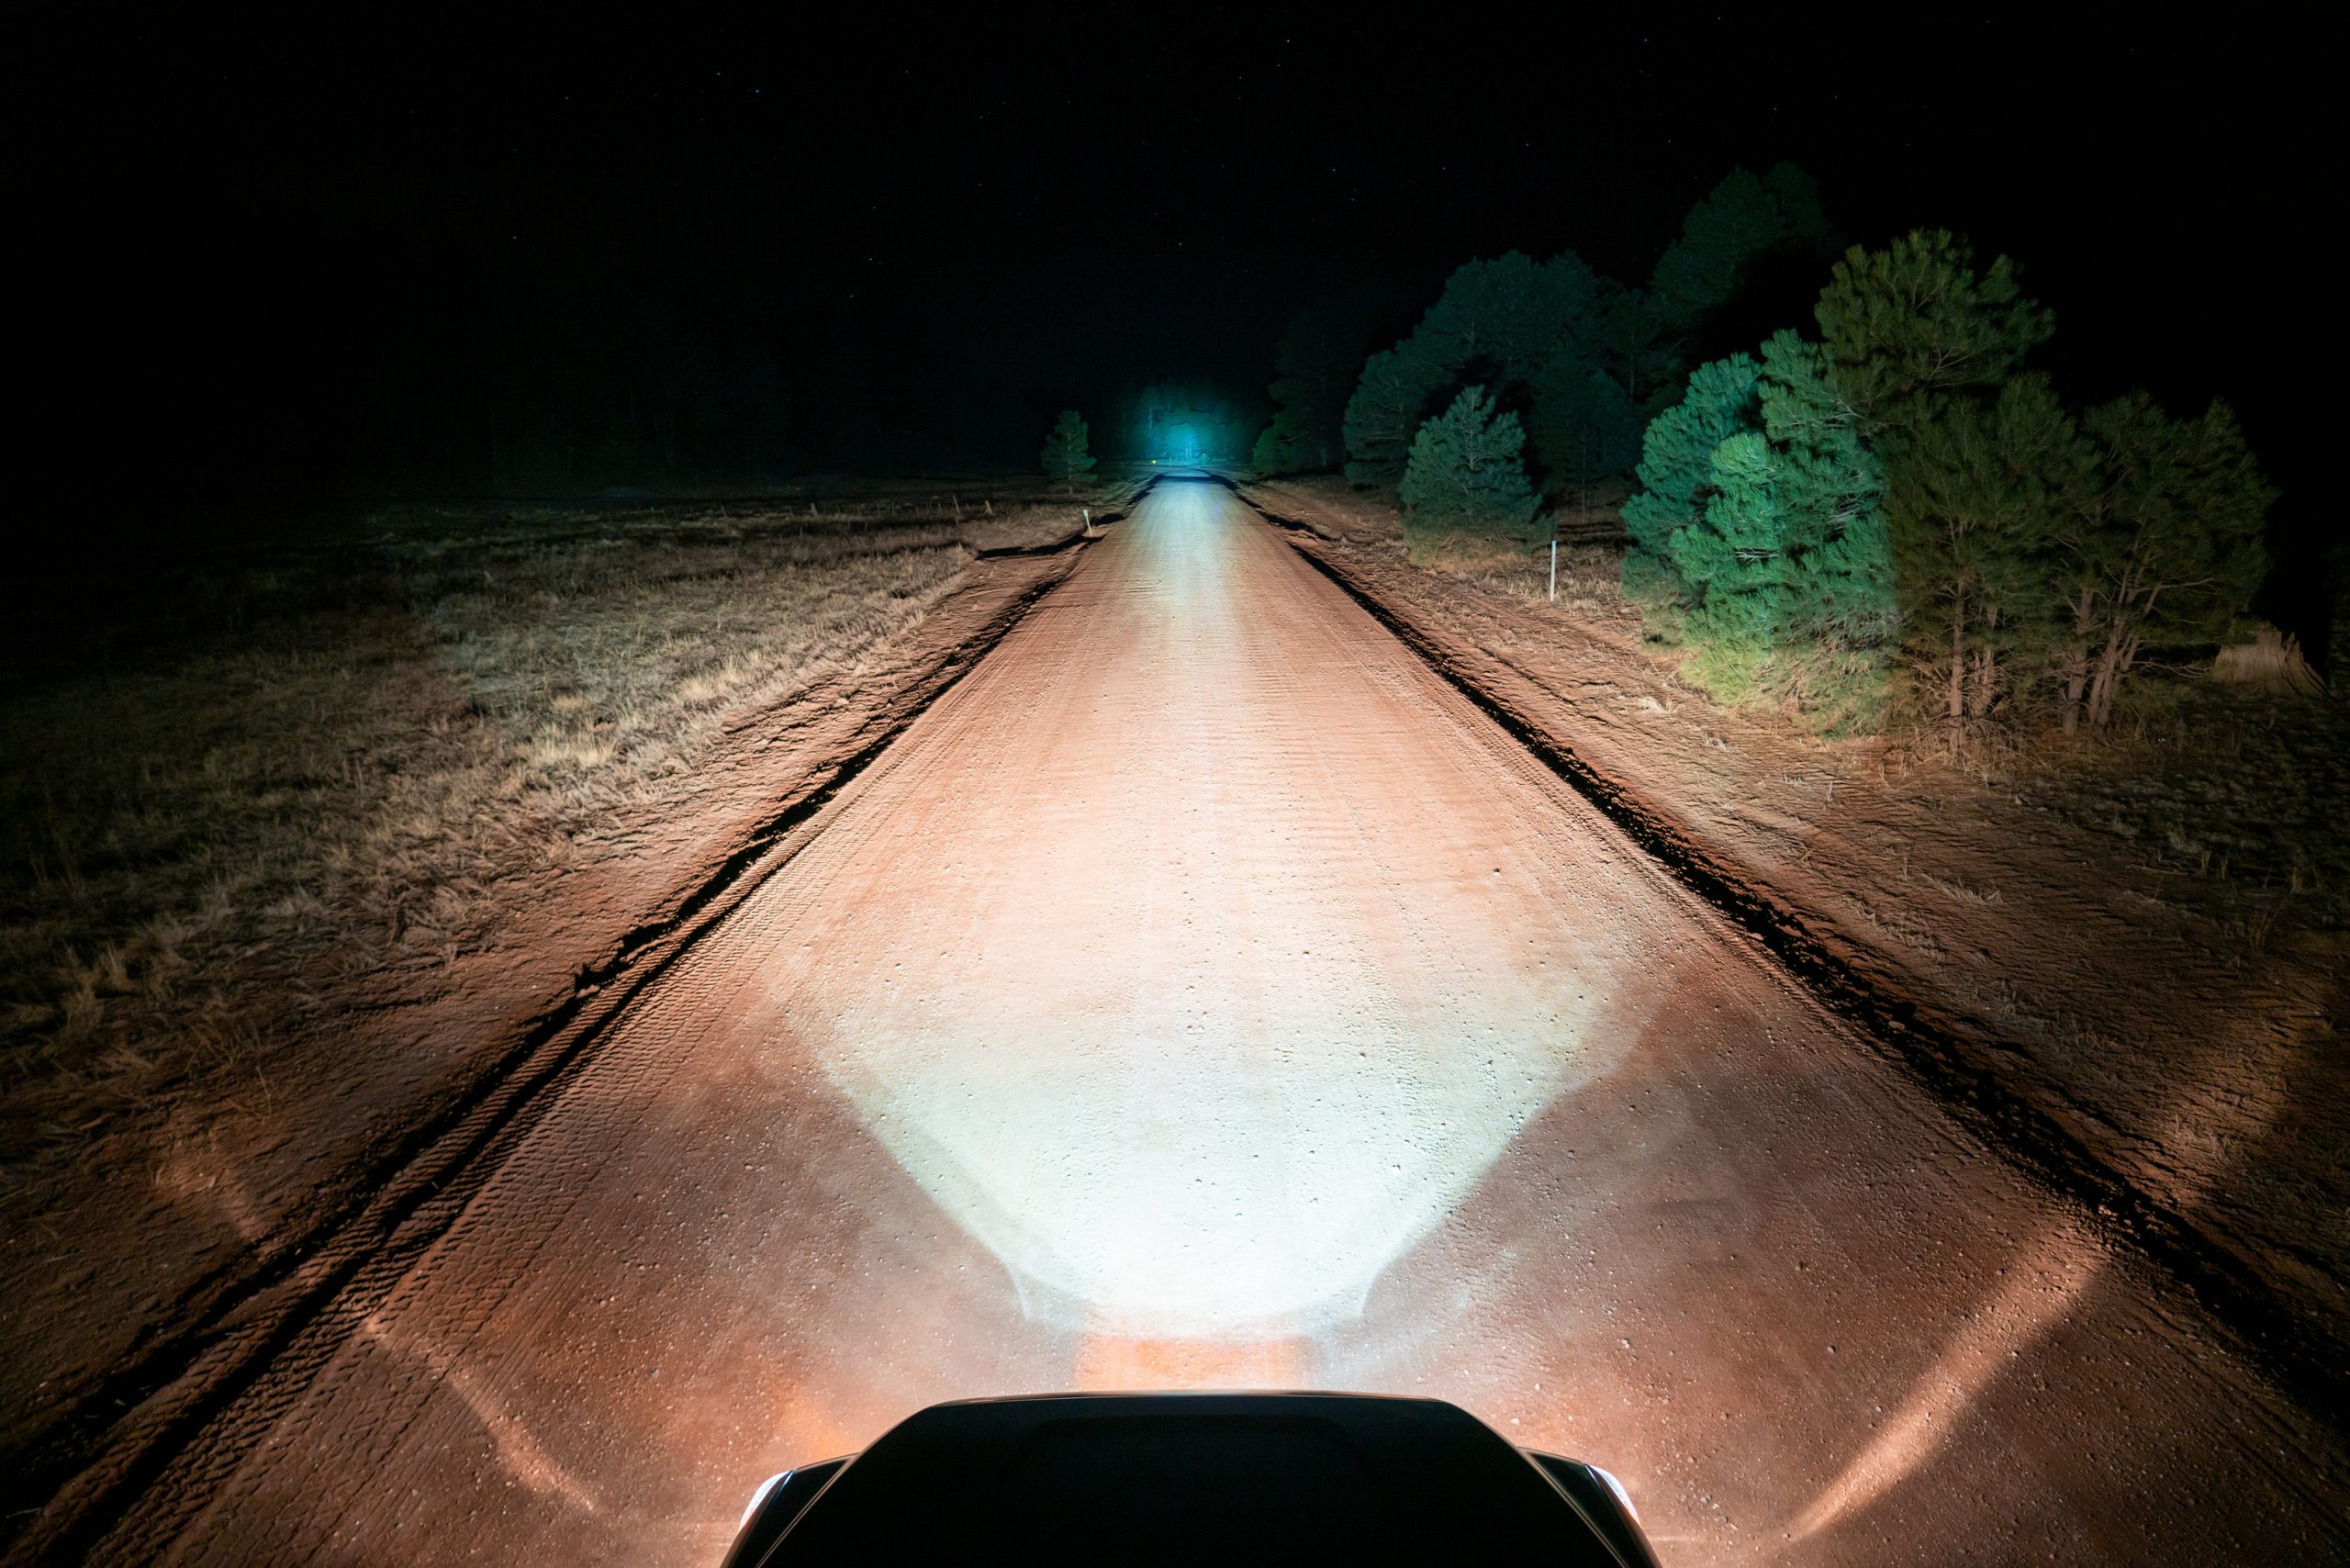
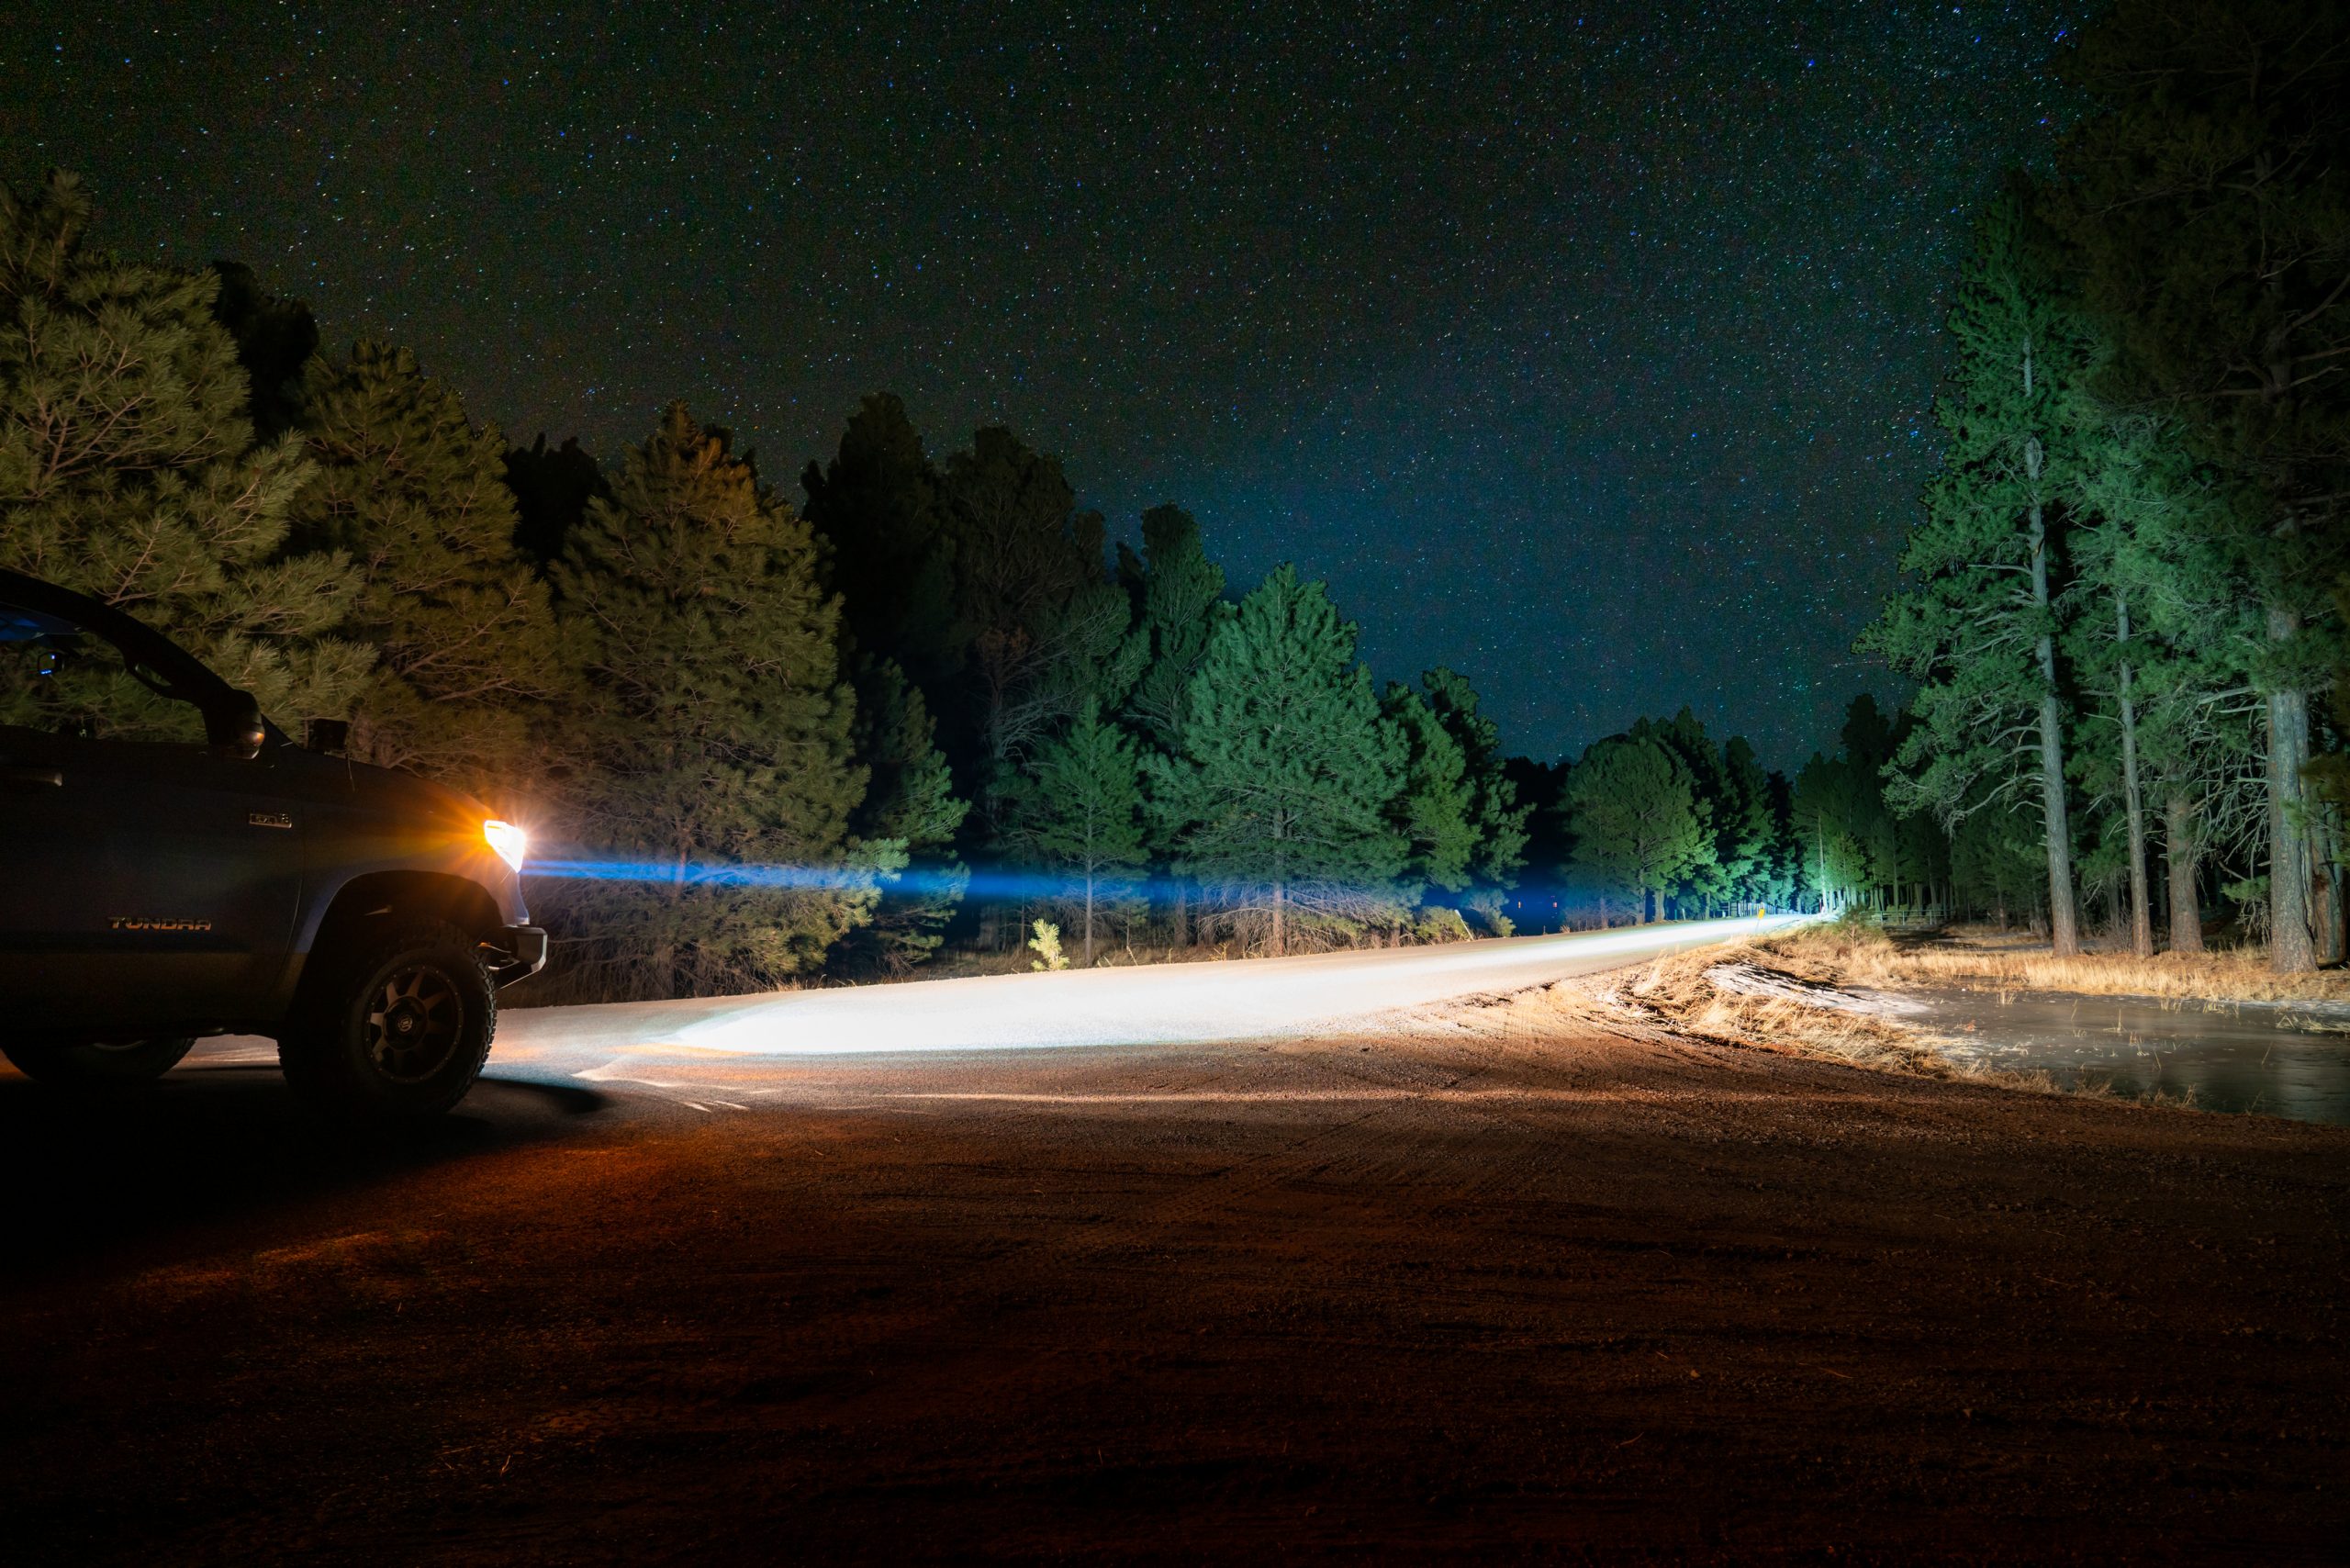
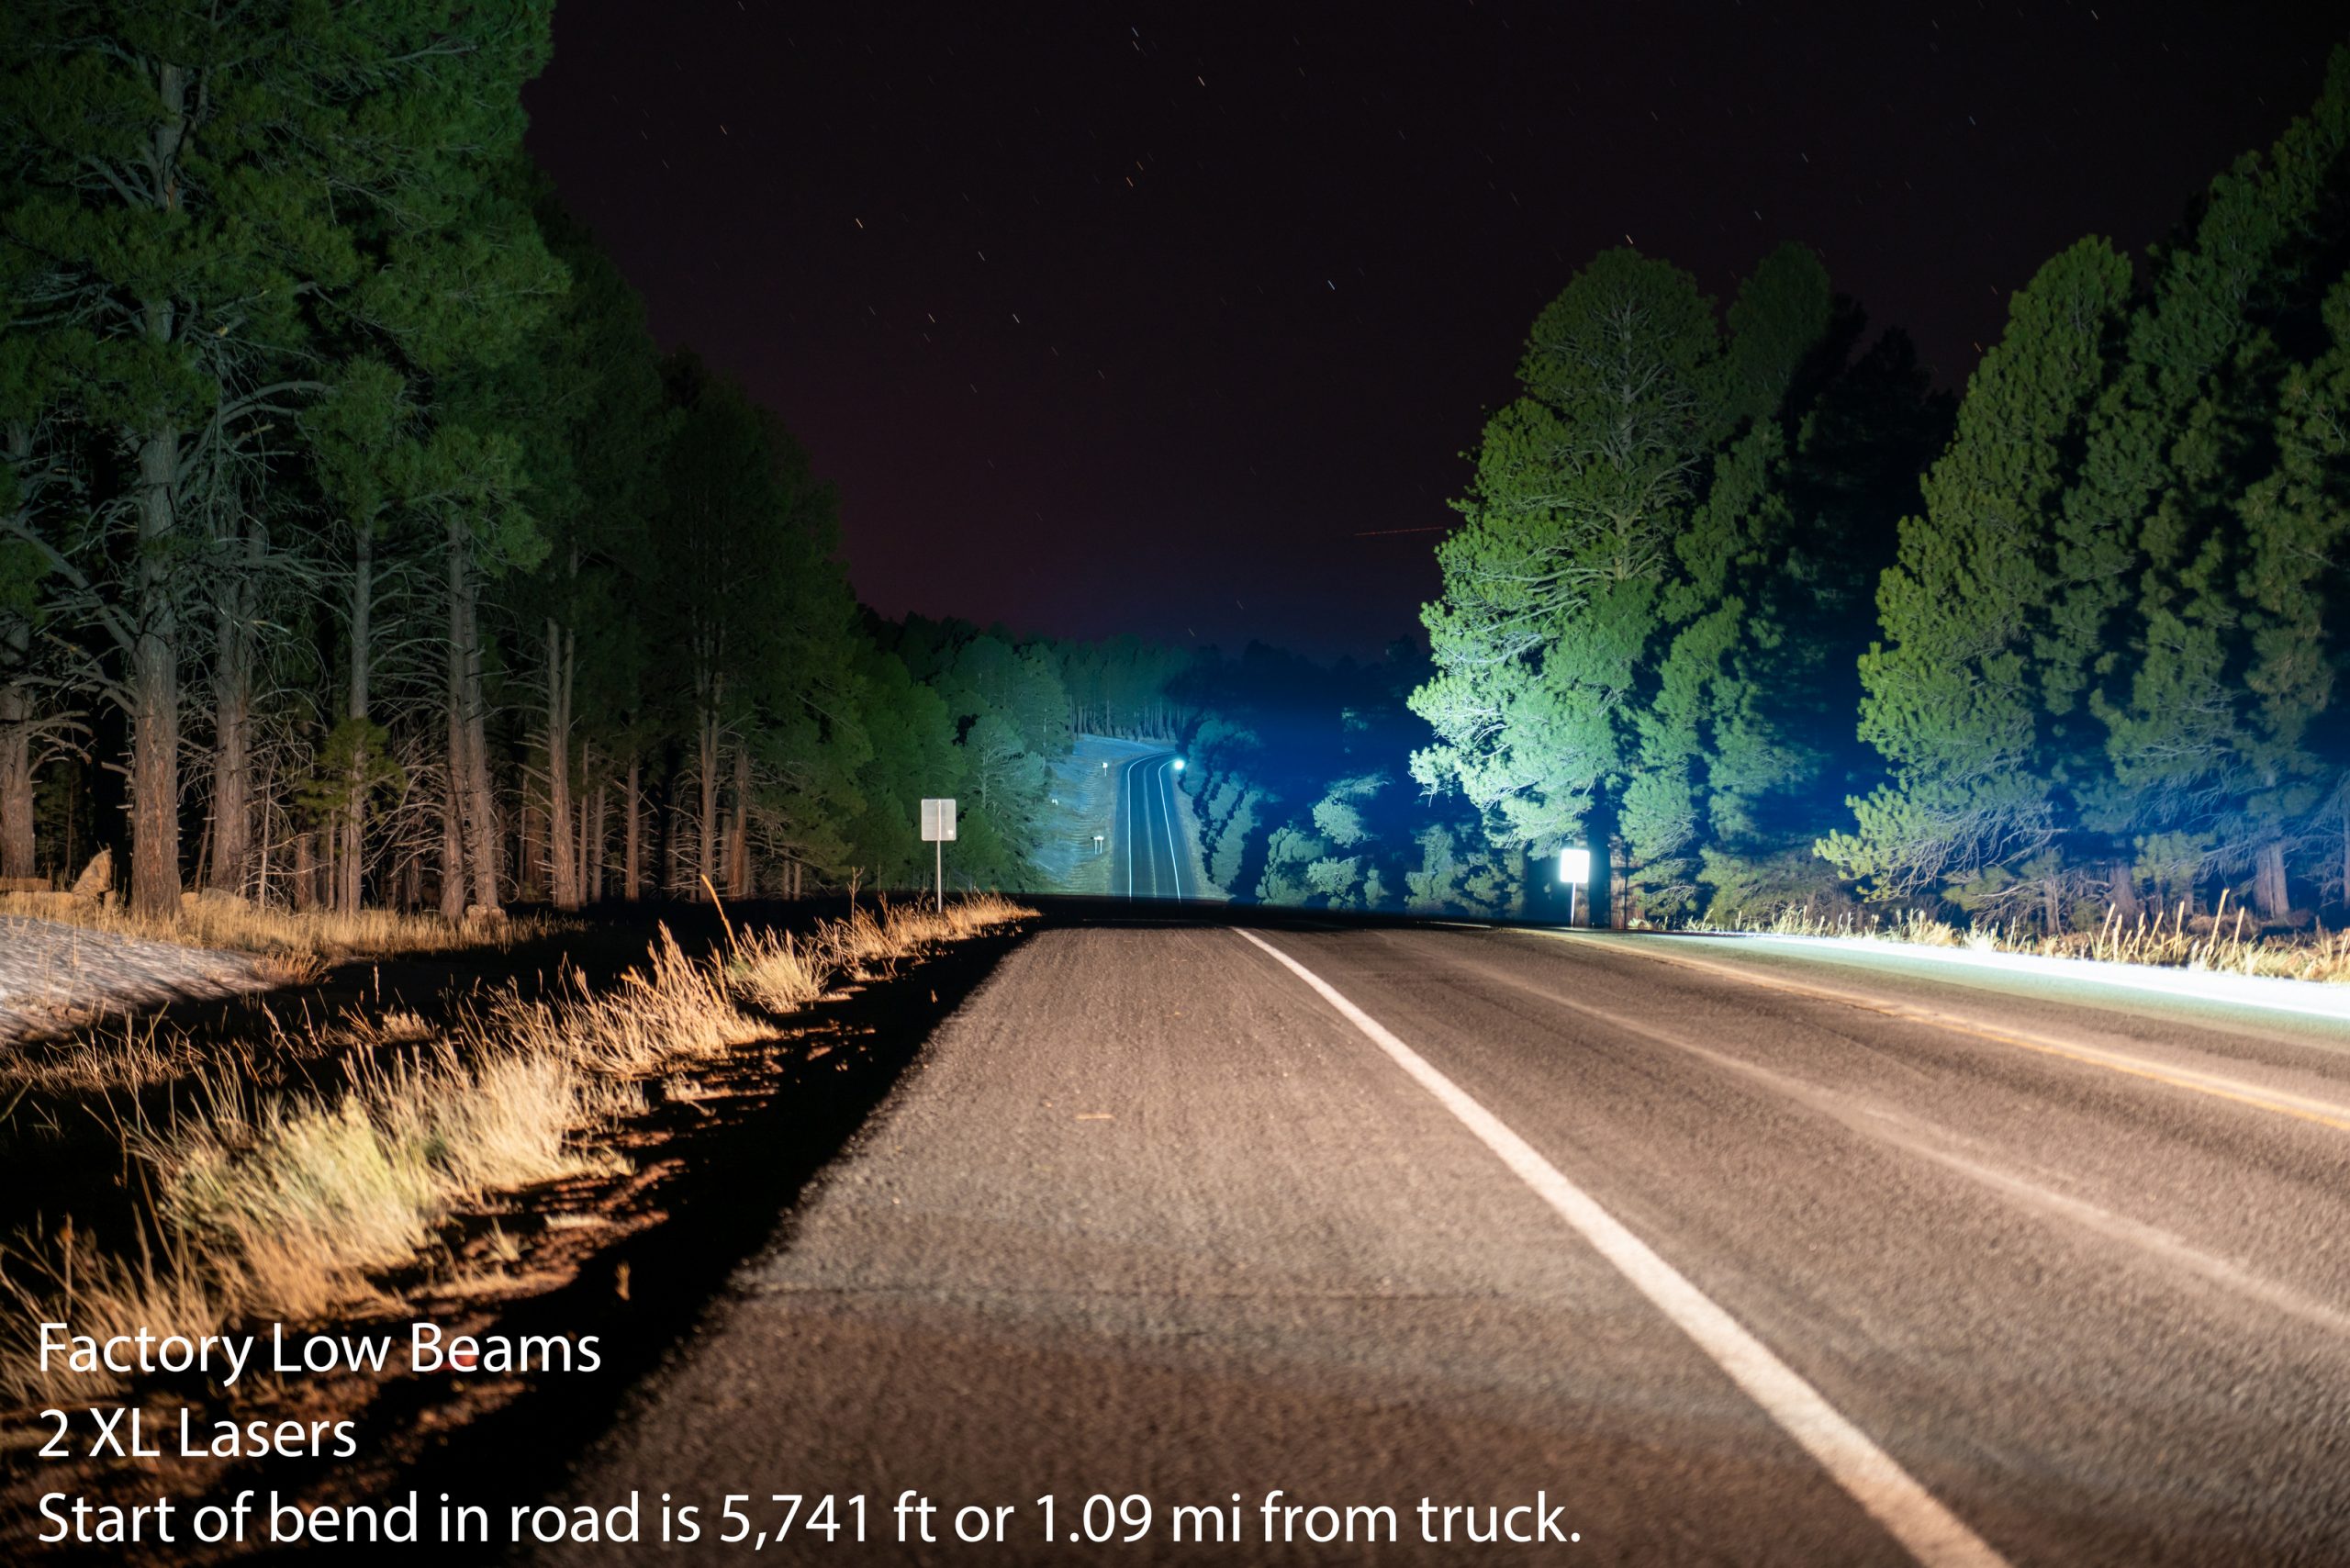 In real world use, BD Laser lights are the exact tool you’re looking for if you find yourself wanting to see as far as possible into the night. They create a very narrow beam of light that is hyper focused for going long distances, so whether you’re trying to see something in the trail, or just trying to find your way to camp when your buddy’s cryptic directions tell you to “follow the road with the snags (dead trees) on right a quarter mile after the fork.” There isn’t a better light out there for seeing as far as possible at night.
With laser lights, you can see the snags along the right side of the road sooner, so that means less time exploring a trail to make sure it’s the right one. Laser lights help you see road signs miles before you get to them, which gives you more time to consult your navigation for your next turn before you get to the turn. In short, laser lights are the cheat code you enter for maximum line of sight at night. Seeing further gives you more time to act and that translates into more relaxed travel at night with less wrong turns.
 The trade off to having a hyper-focused beam of light is that aim is a critical factor for getting the most out of these lights. An adjustment of as little as a couple tenths of a degree can make all of the difference in getting the light where you want it, and if you’re a few points low or high, you’ll find that you’re aimed down at the road or off into space. So be prepared to take some time setting your laser lights up. I used a framing level to make sure that both XL Lasers were aimed the same direction left to right, and a digital angle gauge became an invaluable tool for adjusting the tilt, or up-down axis of the lights. Once you have the aim dialed however, you can see into the night like never before, and the novelty of seeing so far at night has yet to wear off. Yet there’s more to this lighting thing than just being able to light up the next county.
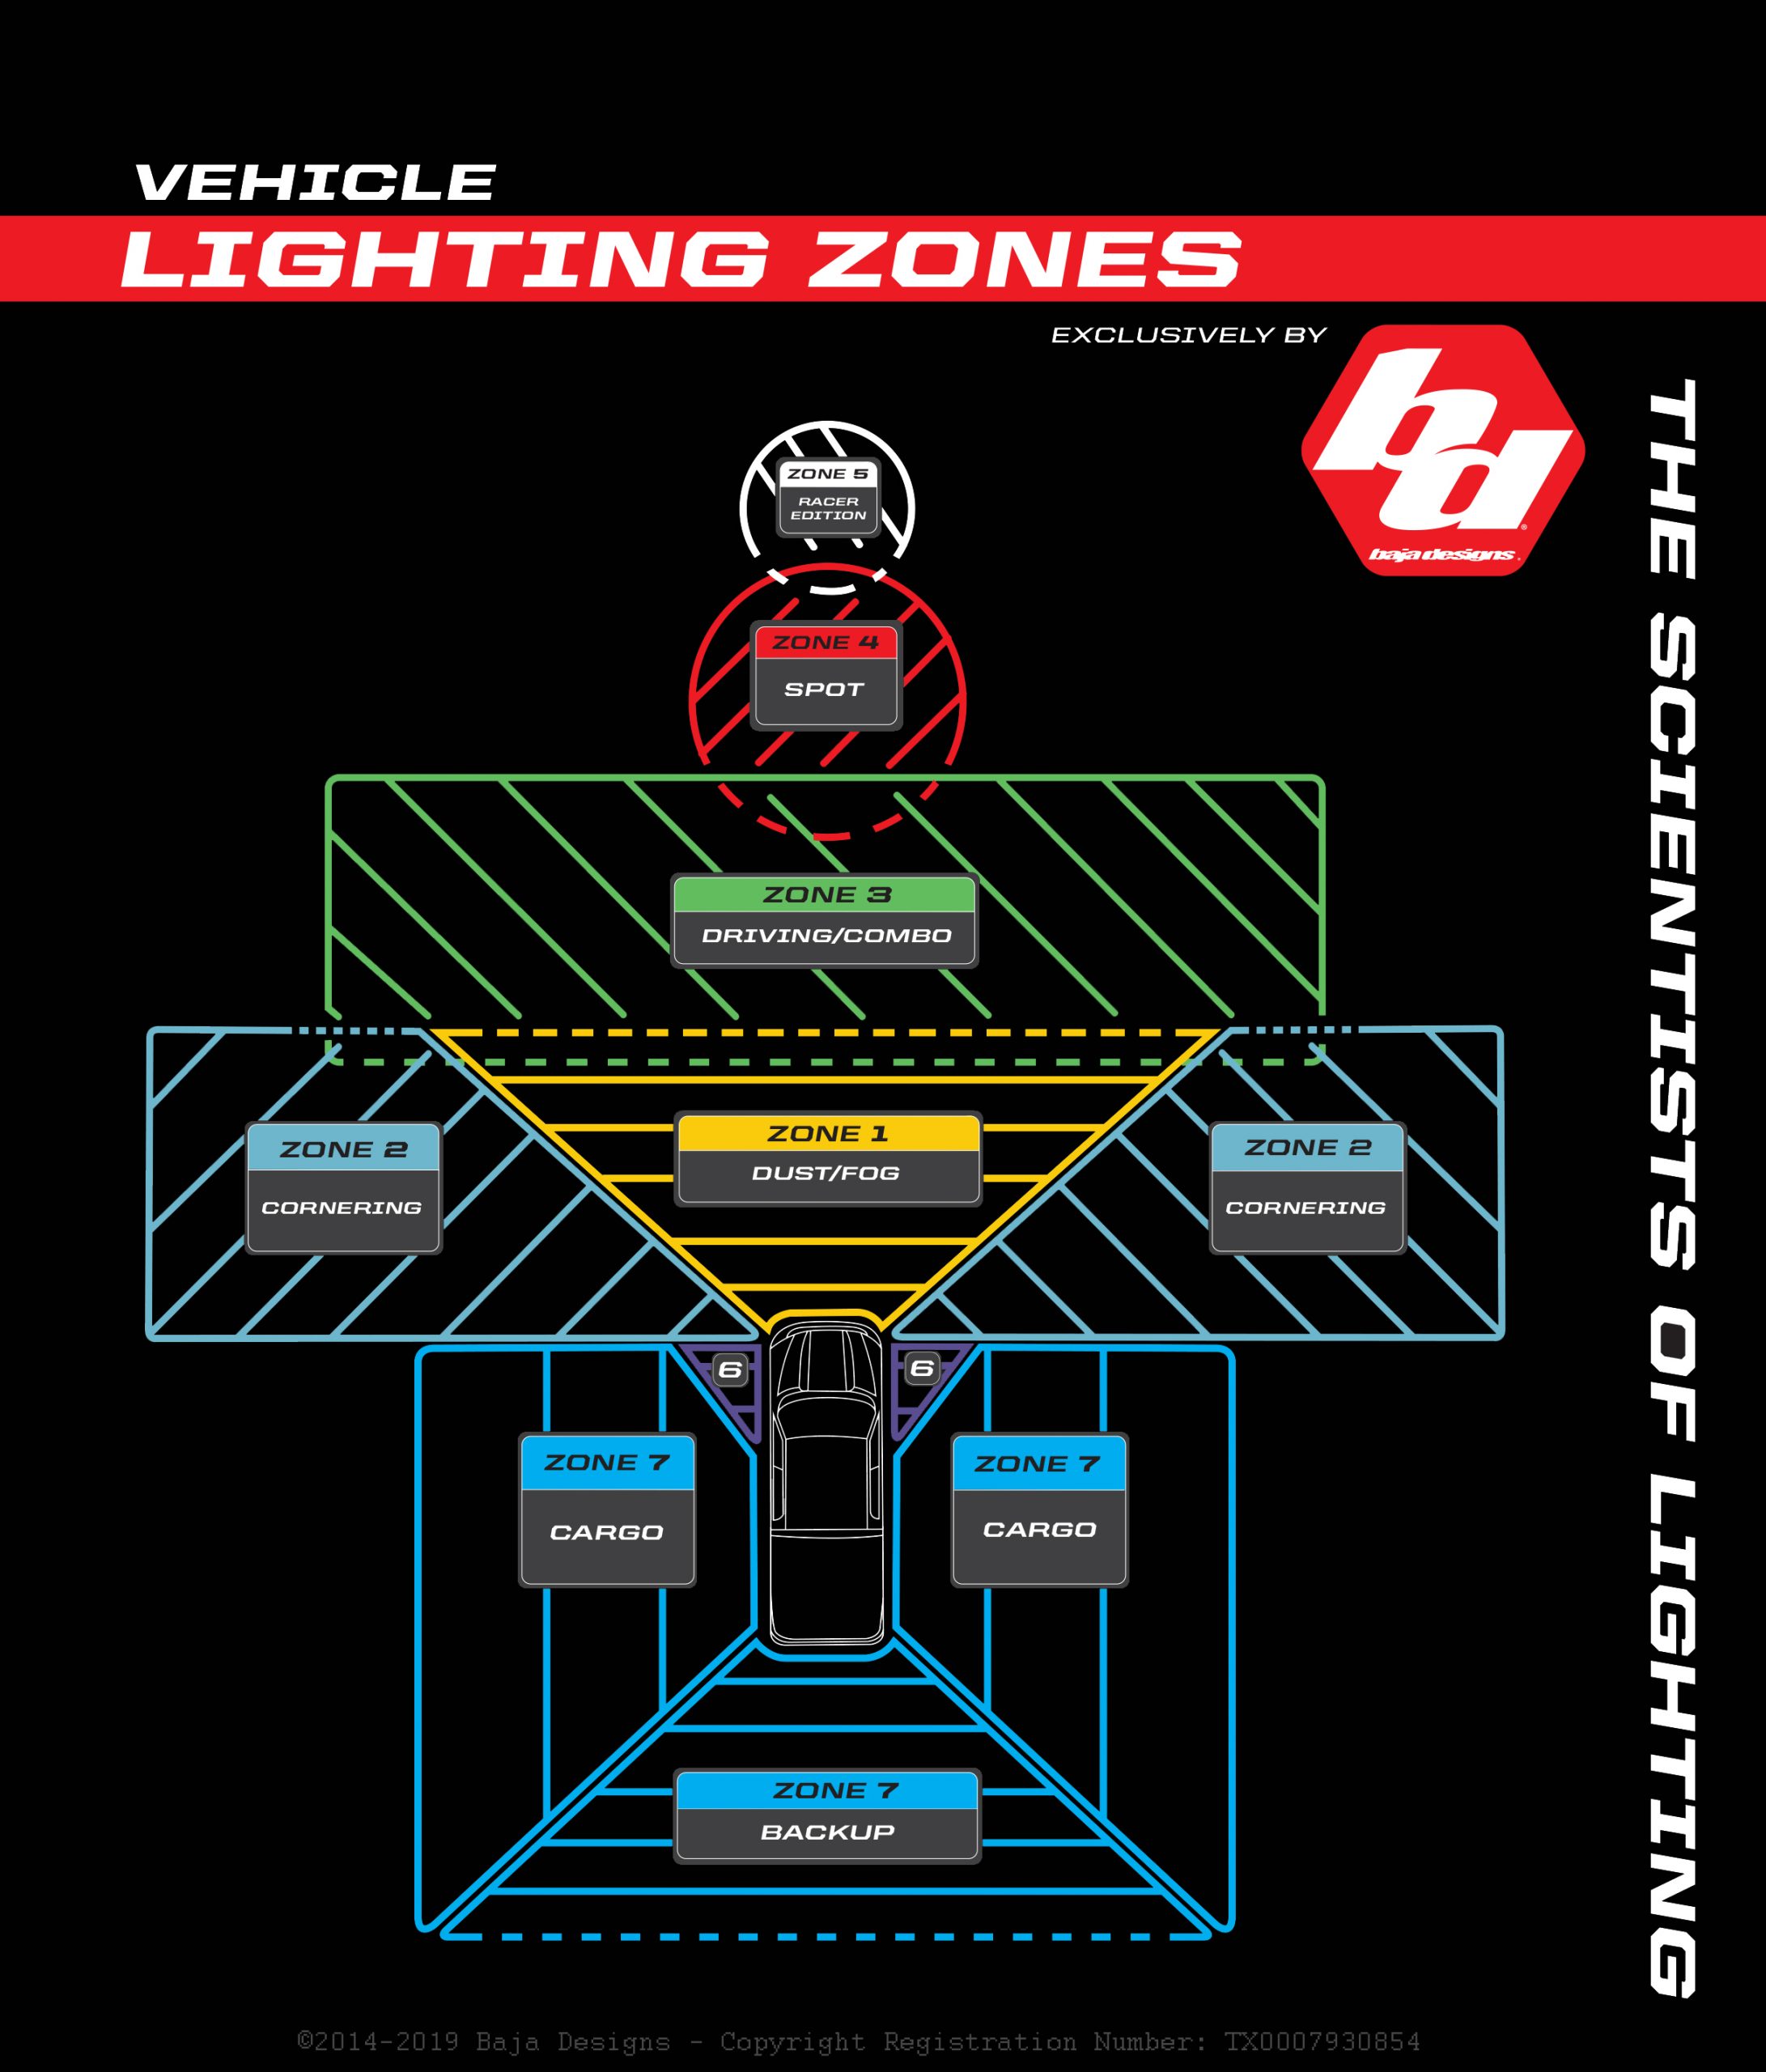


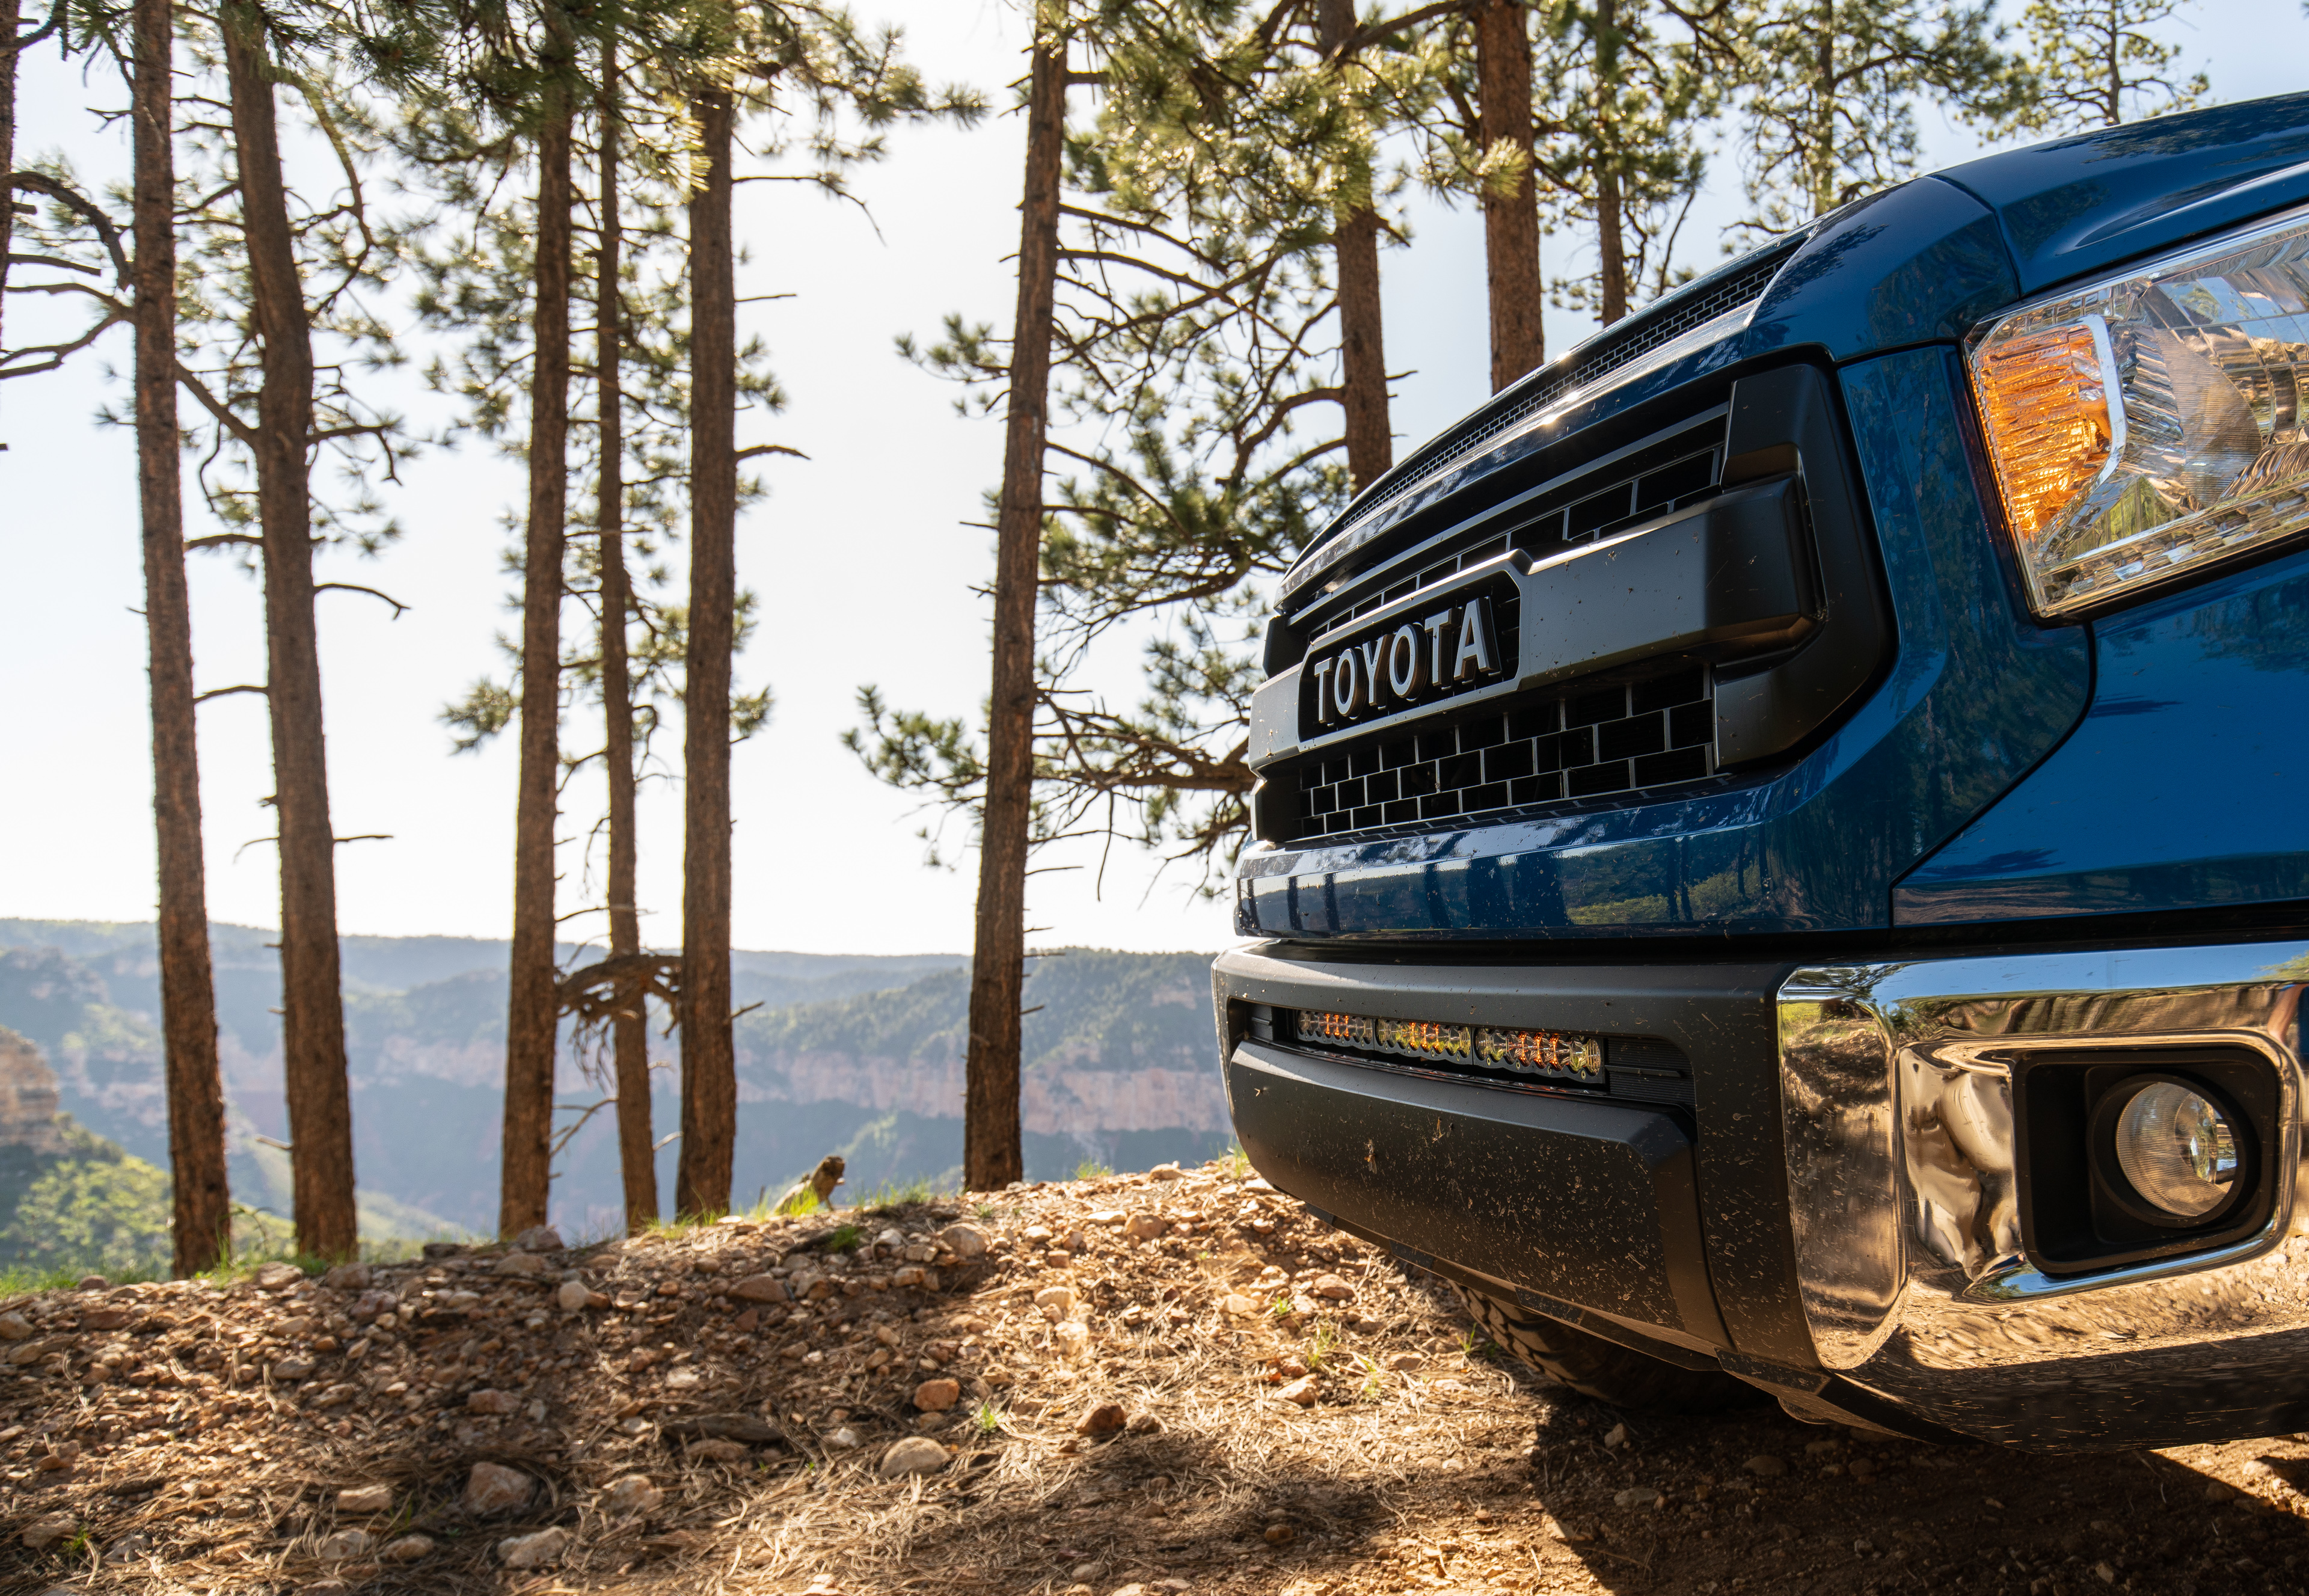
Baja Designs breaks down lighting coverage into zones and consulting their Vehicle Lighting Zones page on their website is very helpful in planning out a functional lighting system. Laser-only lights fit into Zone 5 or beyond (extreme distance), so make sure that you’ve got lights that address zones one, two, and three before you take on zone 5. Otherwise, you’ll find yourself with some very impressive tunnel vision when driving at night if you only have zone 5 lights in your system.
To help folks get the most out of each aftermarket light, BD makes a full size run of Laser and LED hybrid OnX6 light bars which combine the extreme distance of lasers with coverage closer in provided by spot and wide / cornering lensed LED lights. So if you want laser lighting technology but need to address more than just zone 5 lighting, the OnX6 hybrid bars are a great way to incorporate Lasers into your lighting solution without leaving other key zones uncovered.
 As for the XL Lasers that I’ve been playing with, they’re a great tool to add to my lighting toolbox, because they significantly bolster my long-range lighting. I’ve got each lighting zone mapped to it’s own switch on my sPOD, so I have a switch for two cornering lights, two fog lights, three spot lights, and the two XL Lasers. Having the ability to choose which lights I need on in any given situation is huge.
When I’m working my way through technical terrain, I can run my cornering and fog lights to bathe the trail in front of me with coverage to be able to evaluate every possible line option without getting blinded by glare. When it’s time to go fast and make miles, I can add in some driving and spot coverage to let me see what’s coming down the trail at me, while still having adequate fog and cornering coverage to make sure any animals don’t sneak up on me.
Once you drive at night with a vehicle that has a well thought out lighting system, getting in any vehicle that just has the stock lights feels scary – your mind will literally be back-burner-ing all of the bad things that could be hiding in the dark just beyond your lights.
 Baja Designs Laser Lights are very impressive lights. They absolutely work as advertised, and they do in fact shine light further than LED lights do. Yet, getting your hands on this level of technology and performance comes with a cost, and laser lights certainly aren’t cheap – so whether or not you buy them comes down to fitness for use in your individual case. The sooner you can see something means more time to run through your OODA loop, so whether that thing is a booby trap on the Baja 1000 racecourse, or a black angus cow that blends in perfectly with the night, more time to make and execute a plan is always in your favor. Given the kind of damage a large animal or unseen trail hazard can do to your rig, and in turn your wallet, adding laser lights to your system could be a much more affordable alternative.
 Even if you’re not going race pace at night, if being able to see further into the night is of value to you, these laser lights are where you need to look if you want to cast light further than LED lights can shine. They are currently available in laser-only XLs, S1s, and as the extreme long range component of hybrid OnX6 light bars. Between these three product lines, there’s a way to add laser lighting to any existing lighting system, or get everything in one light bar to do it all – so anyone can incorporate this impressive technology into their lighting system.
All the Baja Designs laser lights are built with the same quality materials and workmanship as any other BD product – which means you’re getting some the best lights on the market. At first take, laser lighting might just sound like cool marketing mumbo-jumbo, but in fact it’s the most impressive distance lighting solution I’ve ever seen. Oh, and did I mention that laser lights mean you can have actual lasers on the front of your truck? Science sure is neat.
Full Disclosure: Baja Designs provided a set of their laser lights on loan for this gear review.