

MAXTRAX has a great product in their MAXTRAX Mark II vehicle recovery board. They’ve been proven the world over, and everyone from special forces units to families out on afternoon adventures rely on MAXTRAX Mark II’s to solve vehicle recovery problems and so much more.
In the professional guiding world, MAXTRAX are the only vehicle recovery boards on the market to be endorsed by the International 4 Wheel Drive Trainer’s Association (I4WDTA) Product Recommendation Program – so it’s safe to say they’re a proven product. Yet just because a company makes an awesome product, doesn’t mean that they can shut down the lab and call it a day. There’s always room to innovate, and MAXTRAX sought out a variety of feedback, consulted with the I4WDTA, professional guides, military customers, and end users who are using theirs all the time, to figure out how to make them better.
The result is the Mark II taken to the extreme – meet the aptly named MAXTRAX XTREME. To get to know exactly what makes the XTREME the next big step in the evolution of the segment, I’ve been putting them to the test for the last several months.
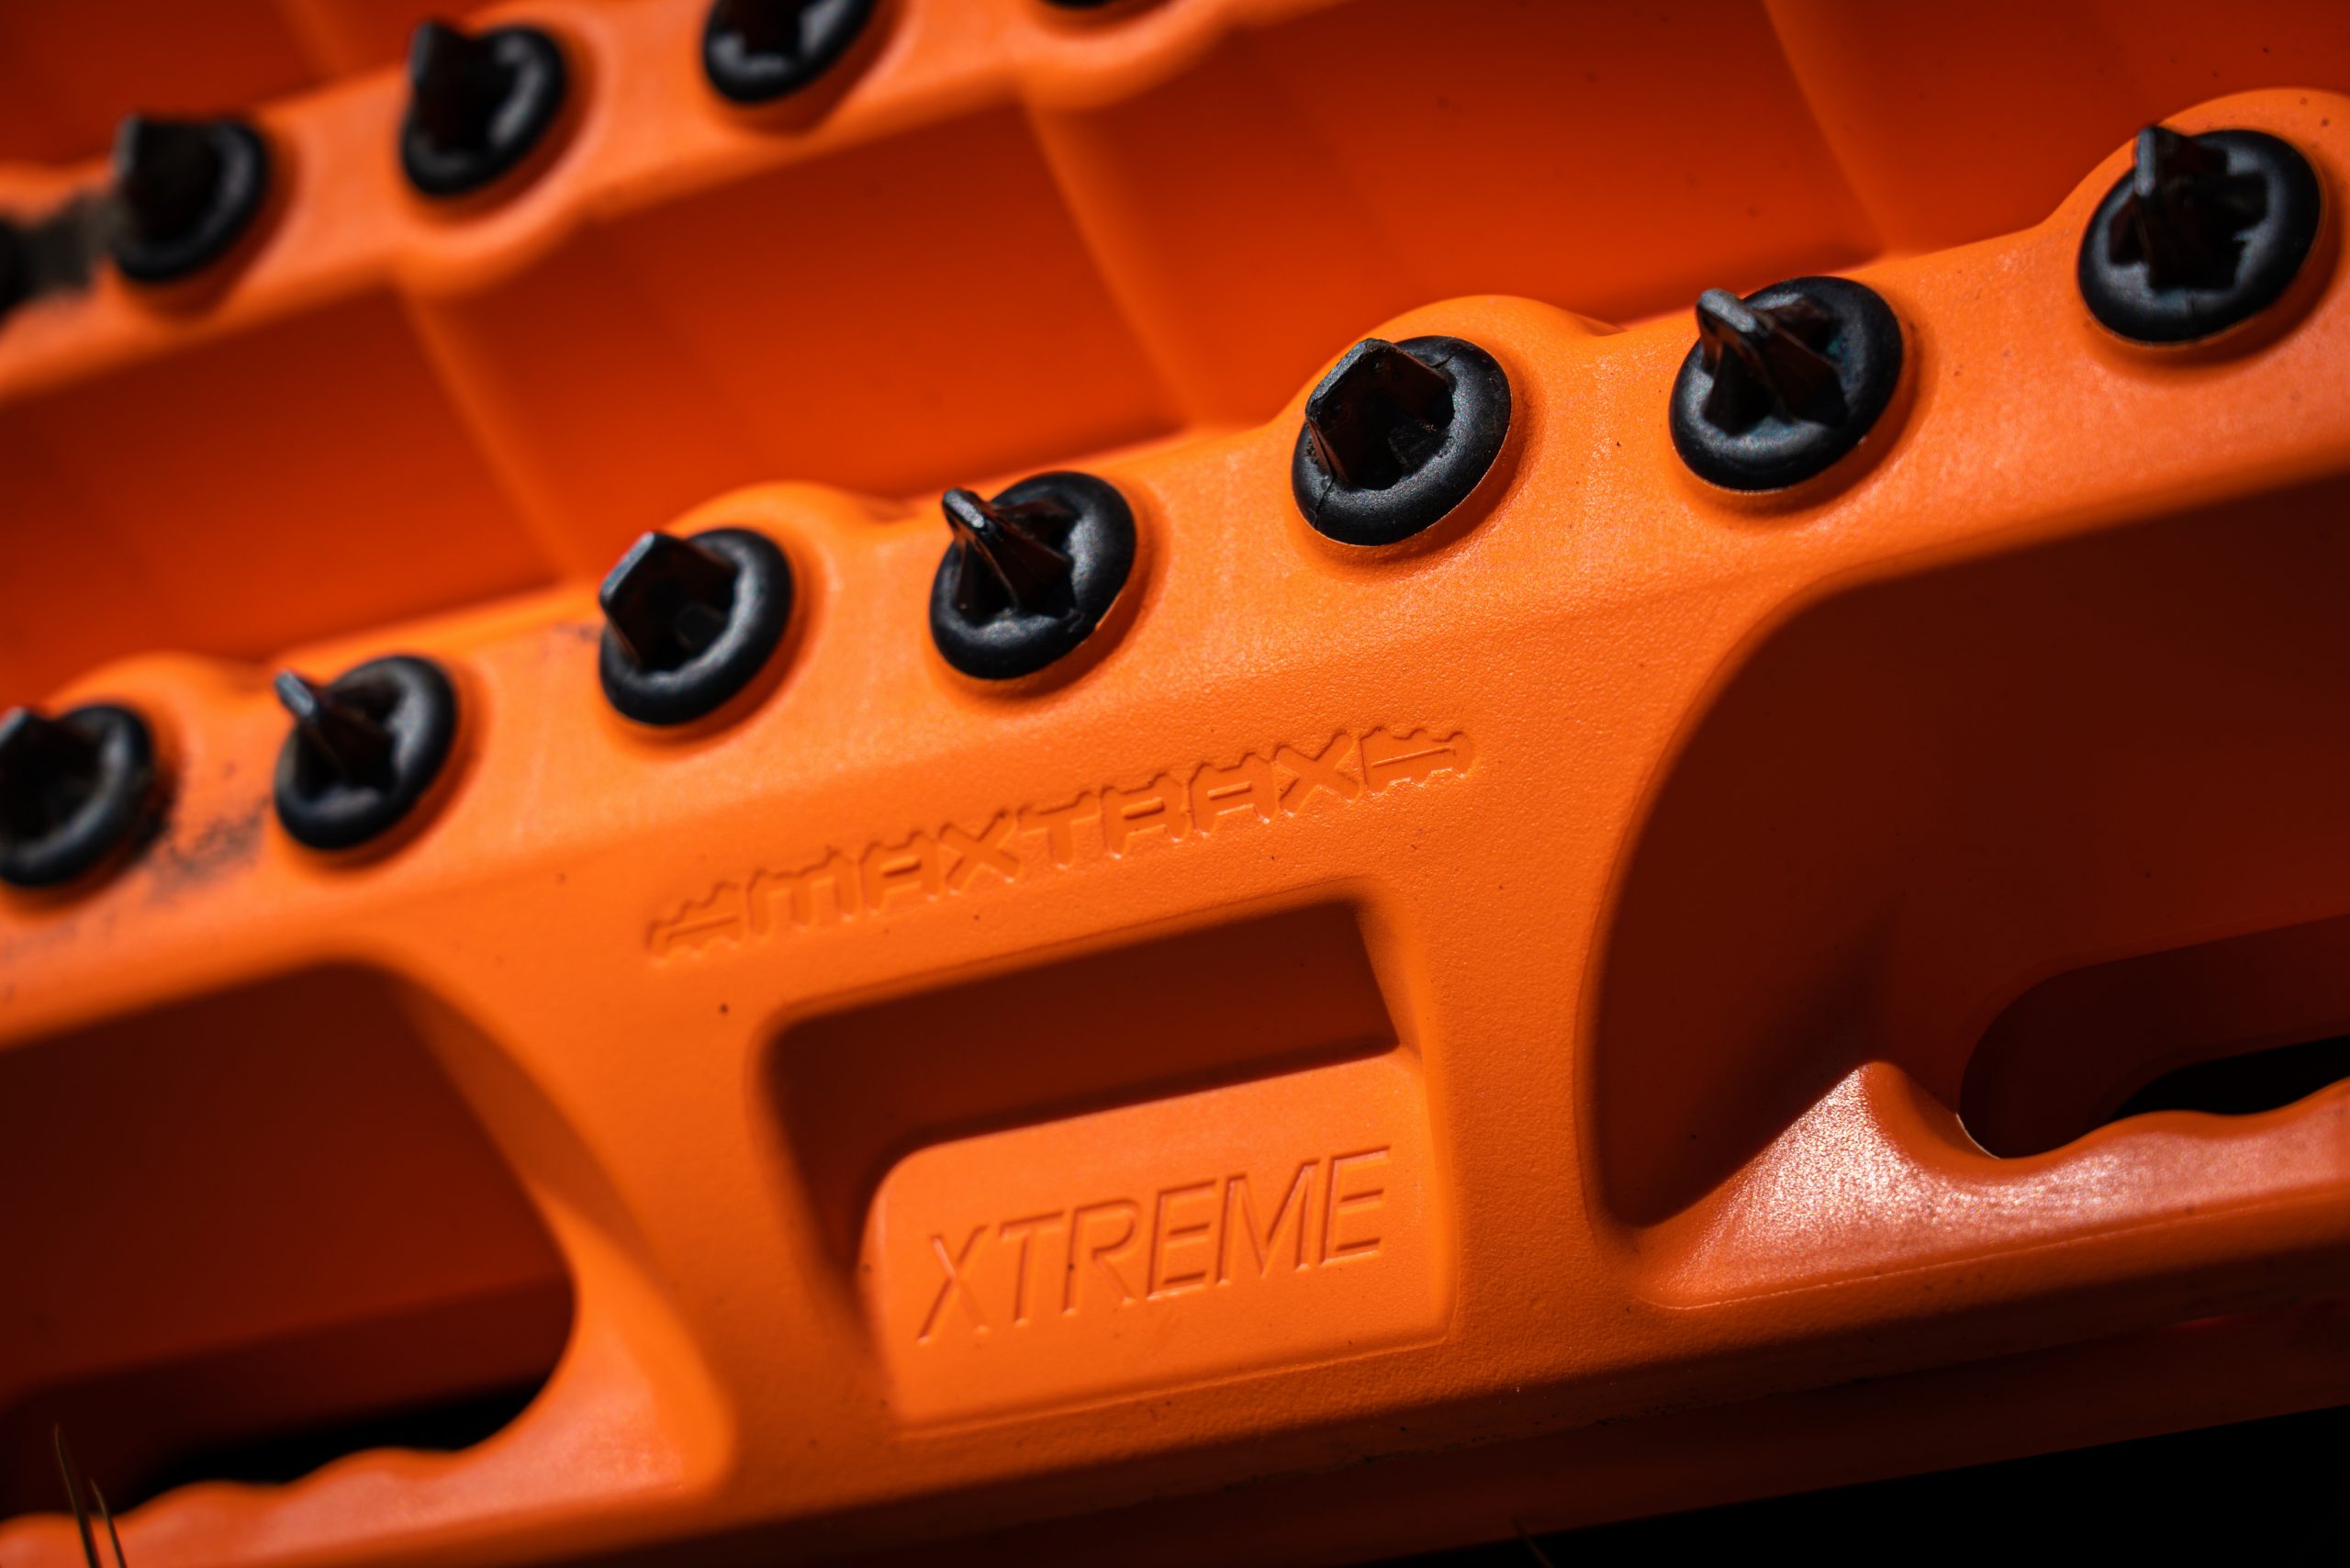
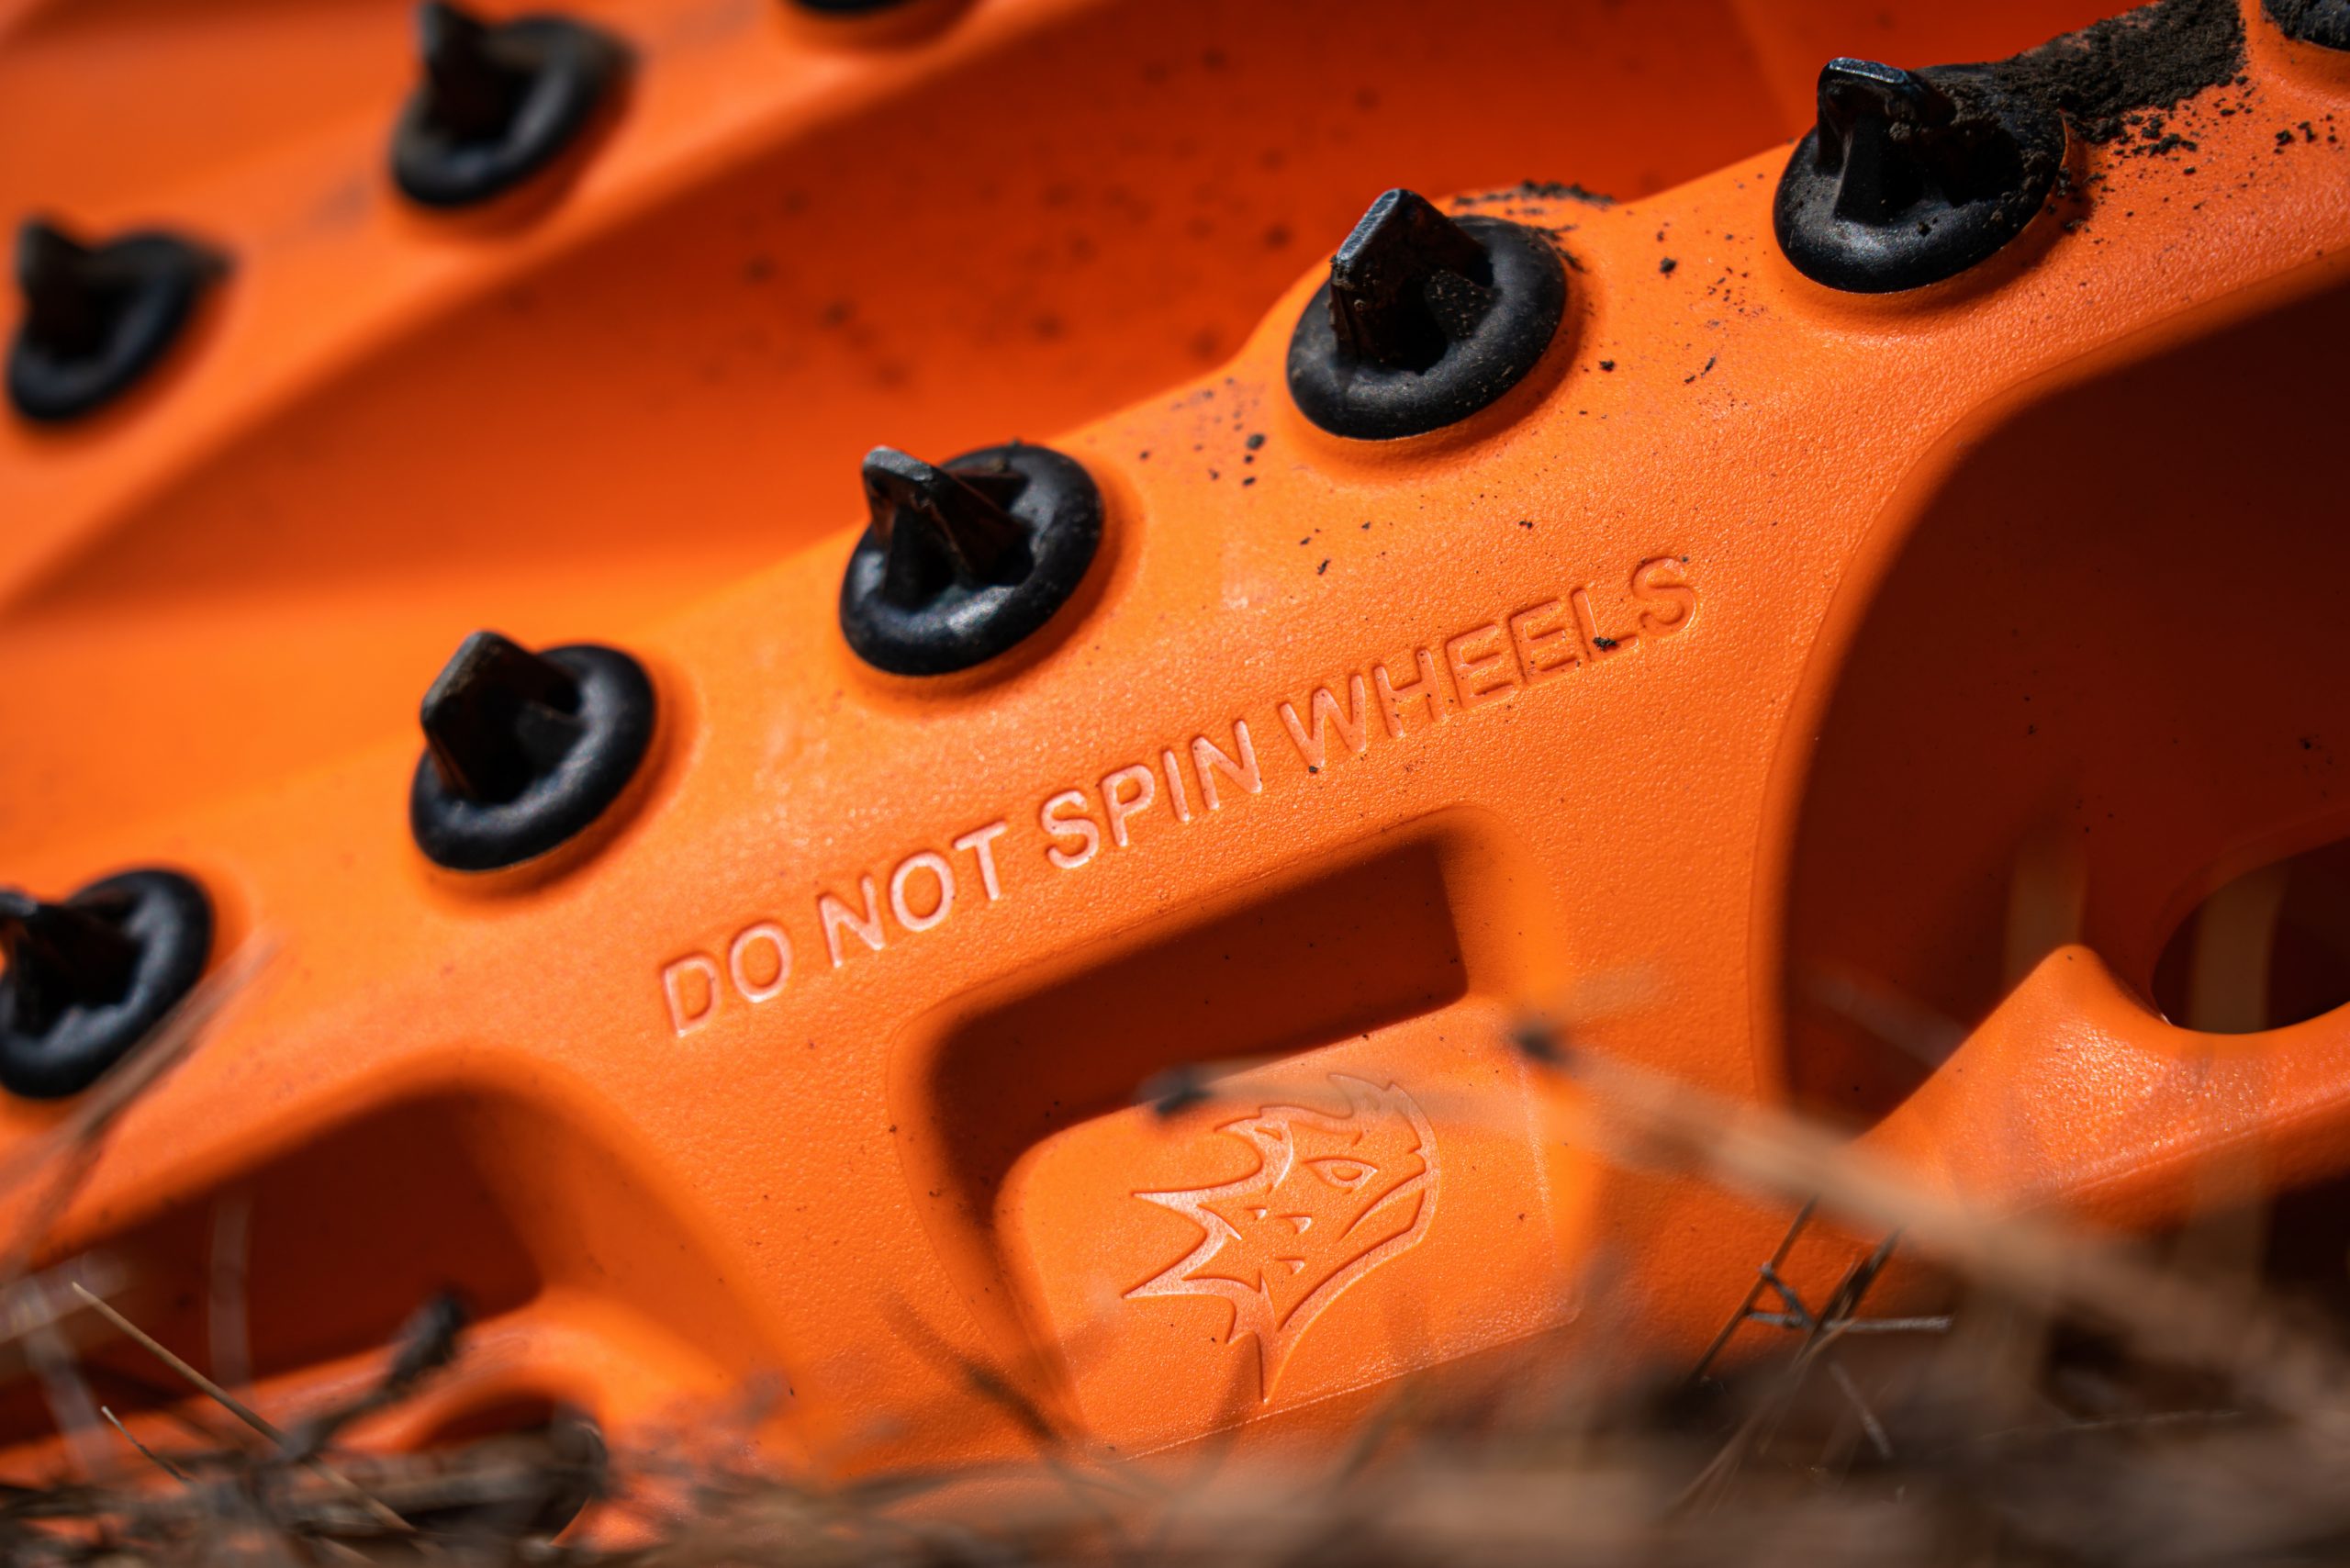
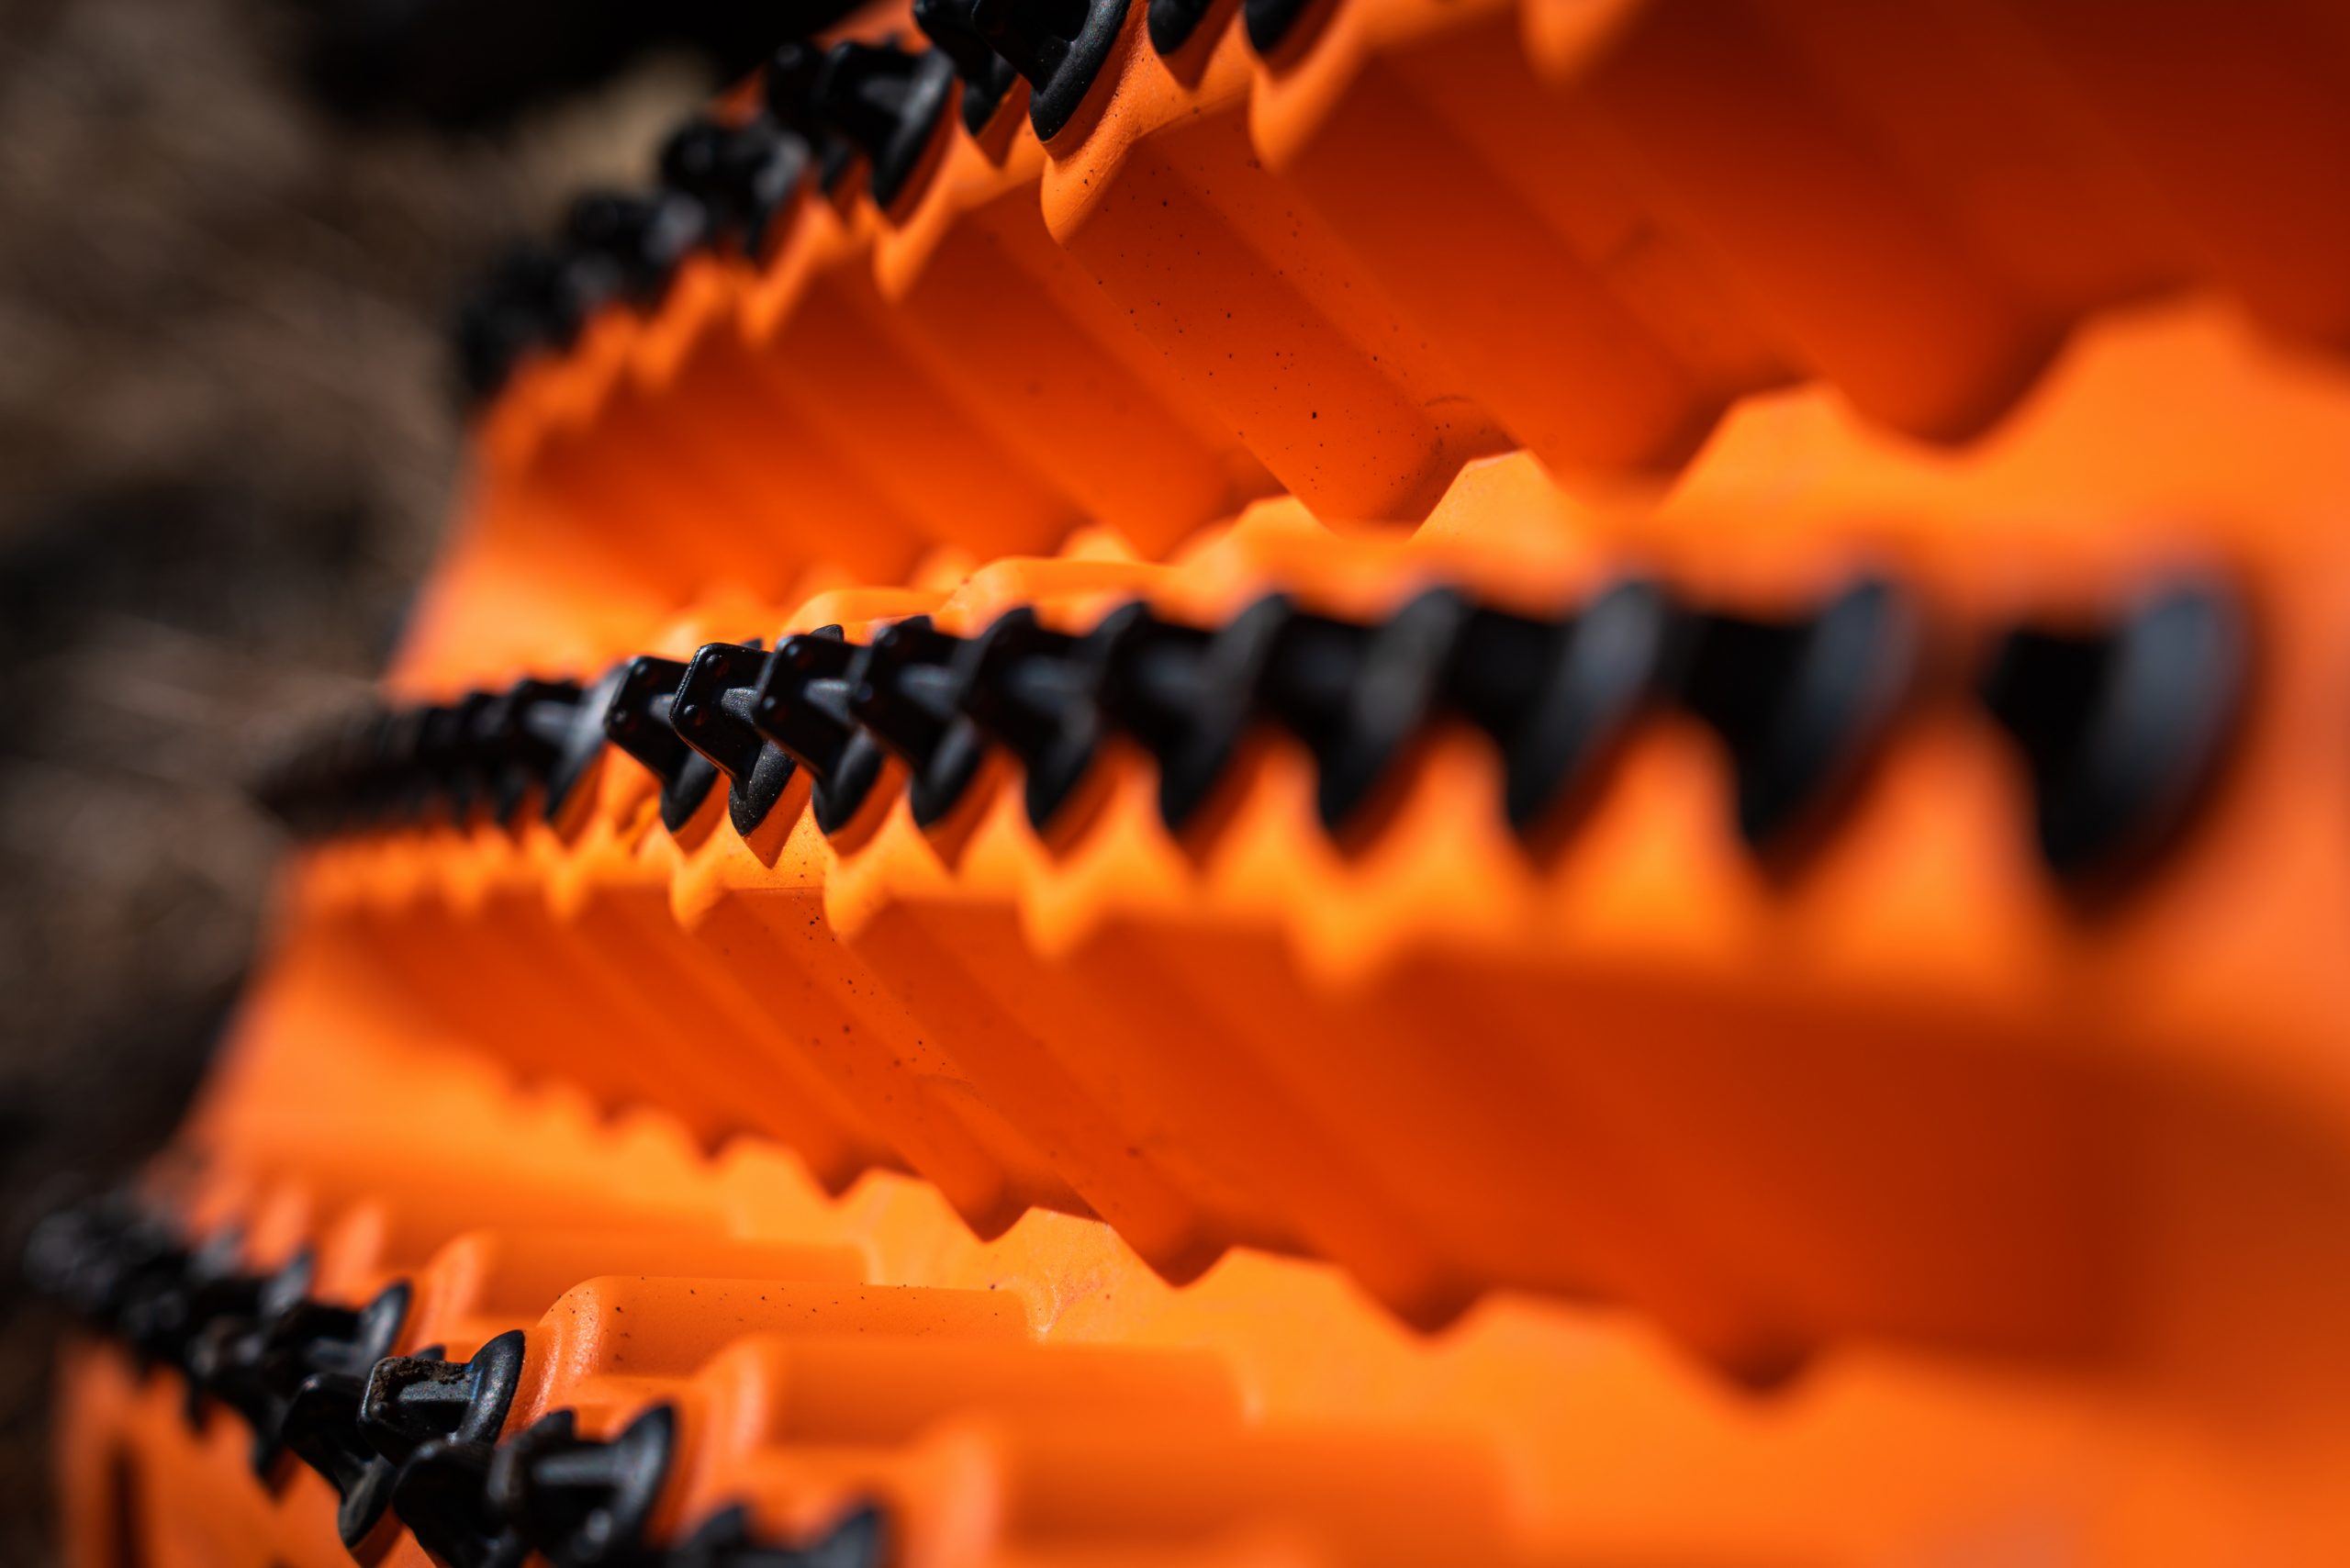
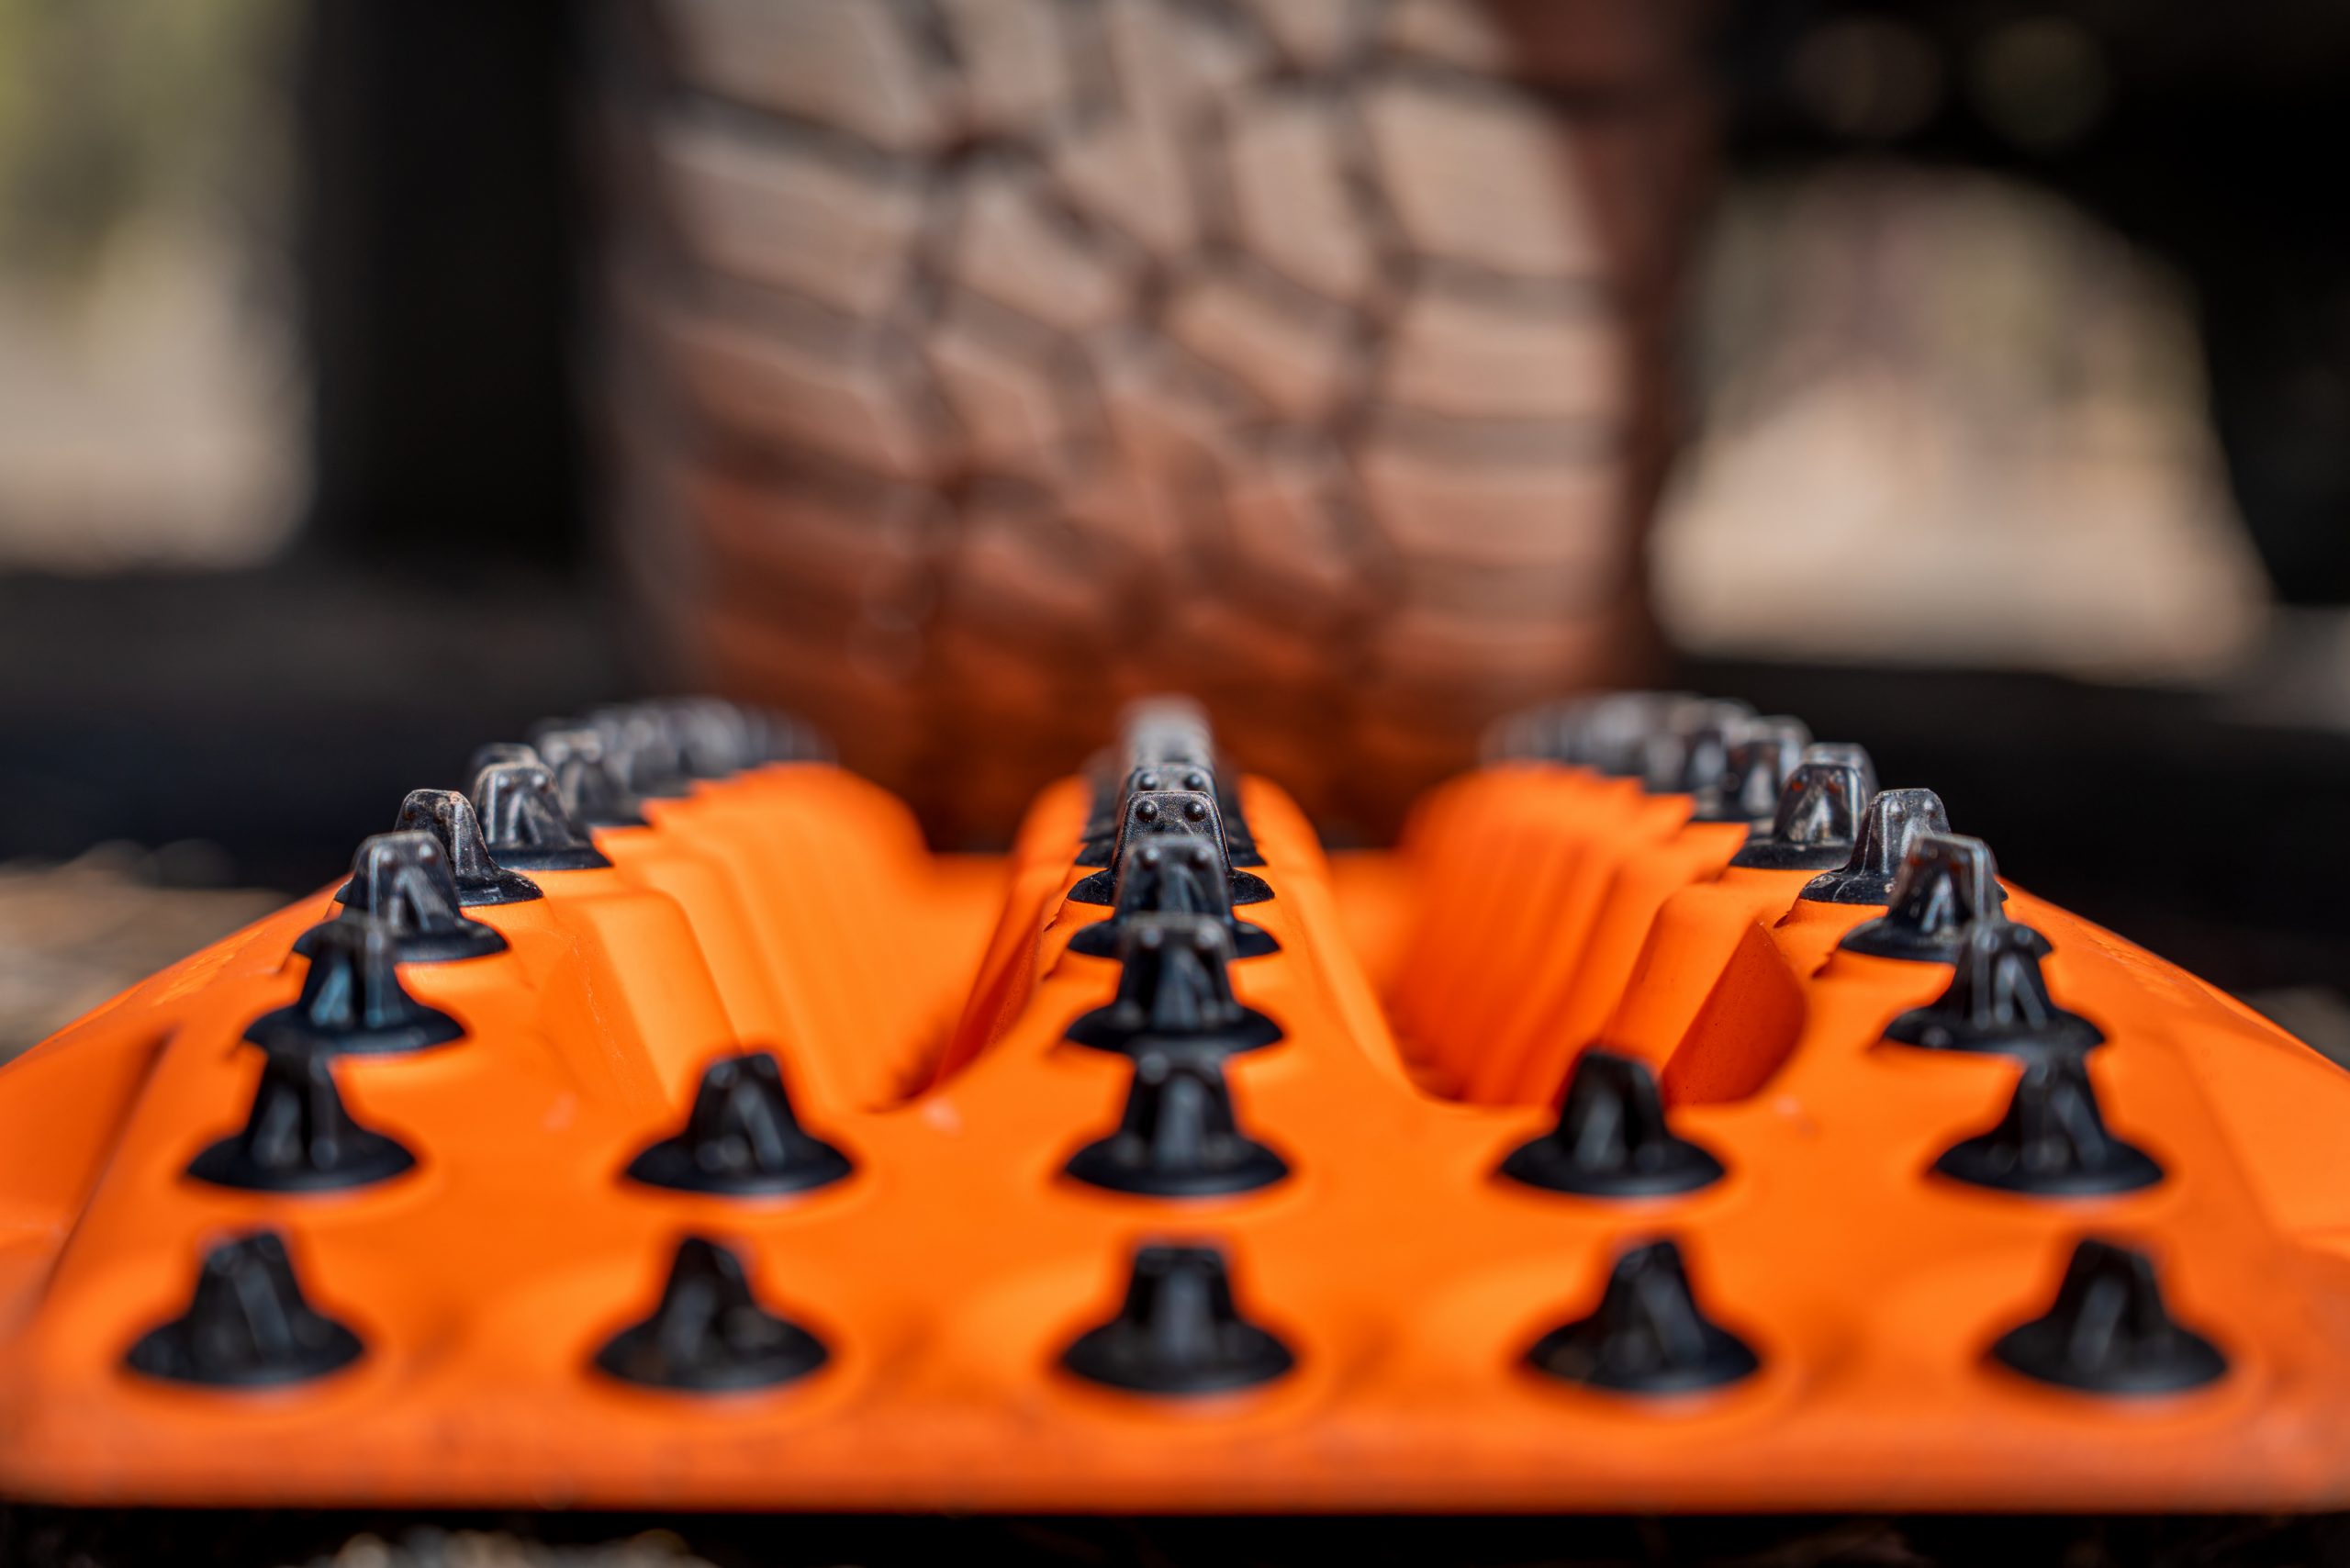
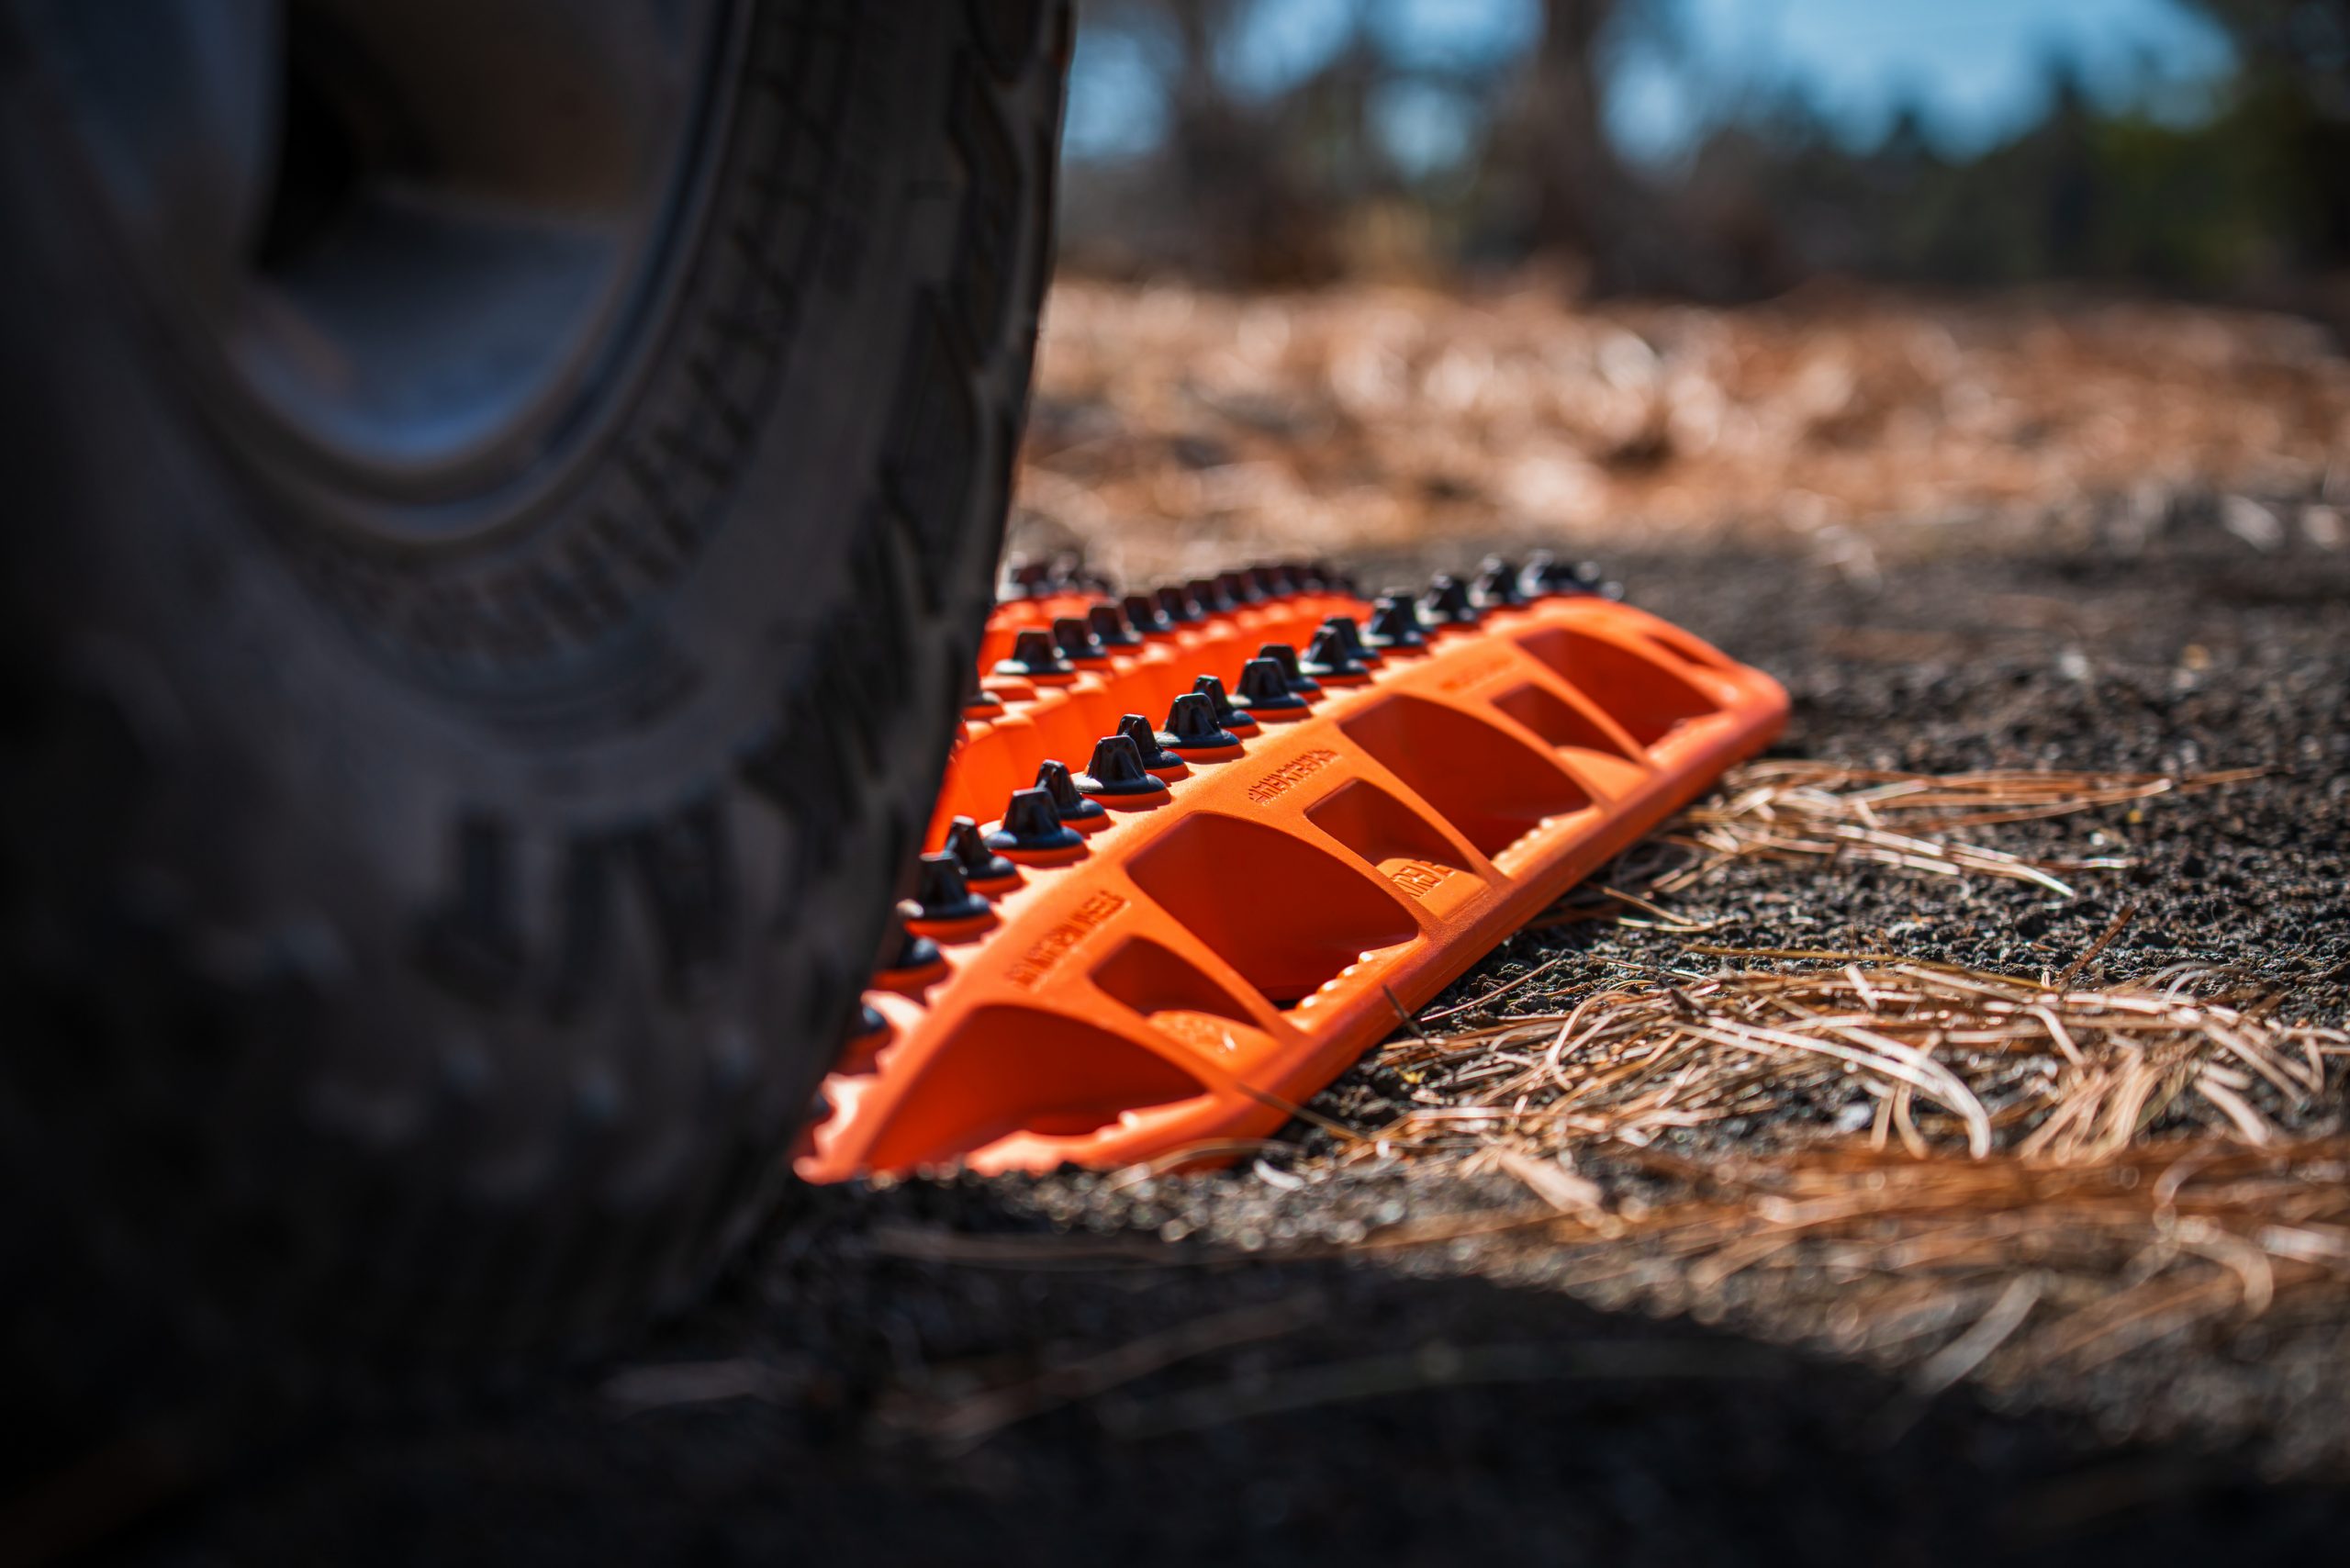
The new MAXTRAX XTREME’s take the proven recipe for the MAXTRAX Mark II’s and add plenty of hot sauce by making a few key design changes. Most notably, all of the nylon teeth found on the Mark II are replaced with hard-anodized aluminum teeth that are user-replaceable. On the back side of the board, additional structural bracing is added to help the board perform better under severe use conditions like bridging.
The result is a MAXTRAX that’s significantly more resistant to teeth-melting wheelspin, provides additional tire grabbing traction, and can take even more punishment and abuse than the ridiculous amount of use that the Mark II’s can withstand. To appreciate just how the XTREME’s perform compared to Mk 2s, and even some of “Amazon’s Choice” vehicle recovery boards, I created as many opportunities as I could to extensively test the new XTREME’s in several different environments.
 My buddy didn’t make it through the snowbank. With the sound of wet snow sliding and then returning to its resting state of semi-cured concrete, my buddy’s truck came to a stop high-centered on the snowbank. And people were watching. Moments ago, we had assured these onlookers that we knew what we were doing, and that we weren’t some YOLO-seeking idiots out to go further than anyone else had down a road blocked with snowbanks for the ‘Gram. (Full disclosure: My buddy owns land at the end of this road. No road closures or other regulations were violated).
Yet here my buddy’s truck was – drooped out on the top of a snowbank. No stranger to getting stuck in the snow , he was quick to act, hopping out of his truck for a quick “stuck assessment”, and then went for his shovel and his shiny new Maxsa traction boards (which as you may have guessed, are Amazon’s Choice). I helped as much as I could by staying clear and taking photos.
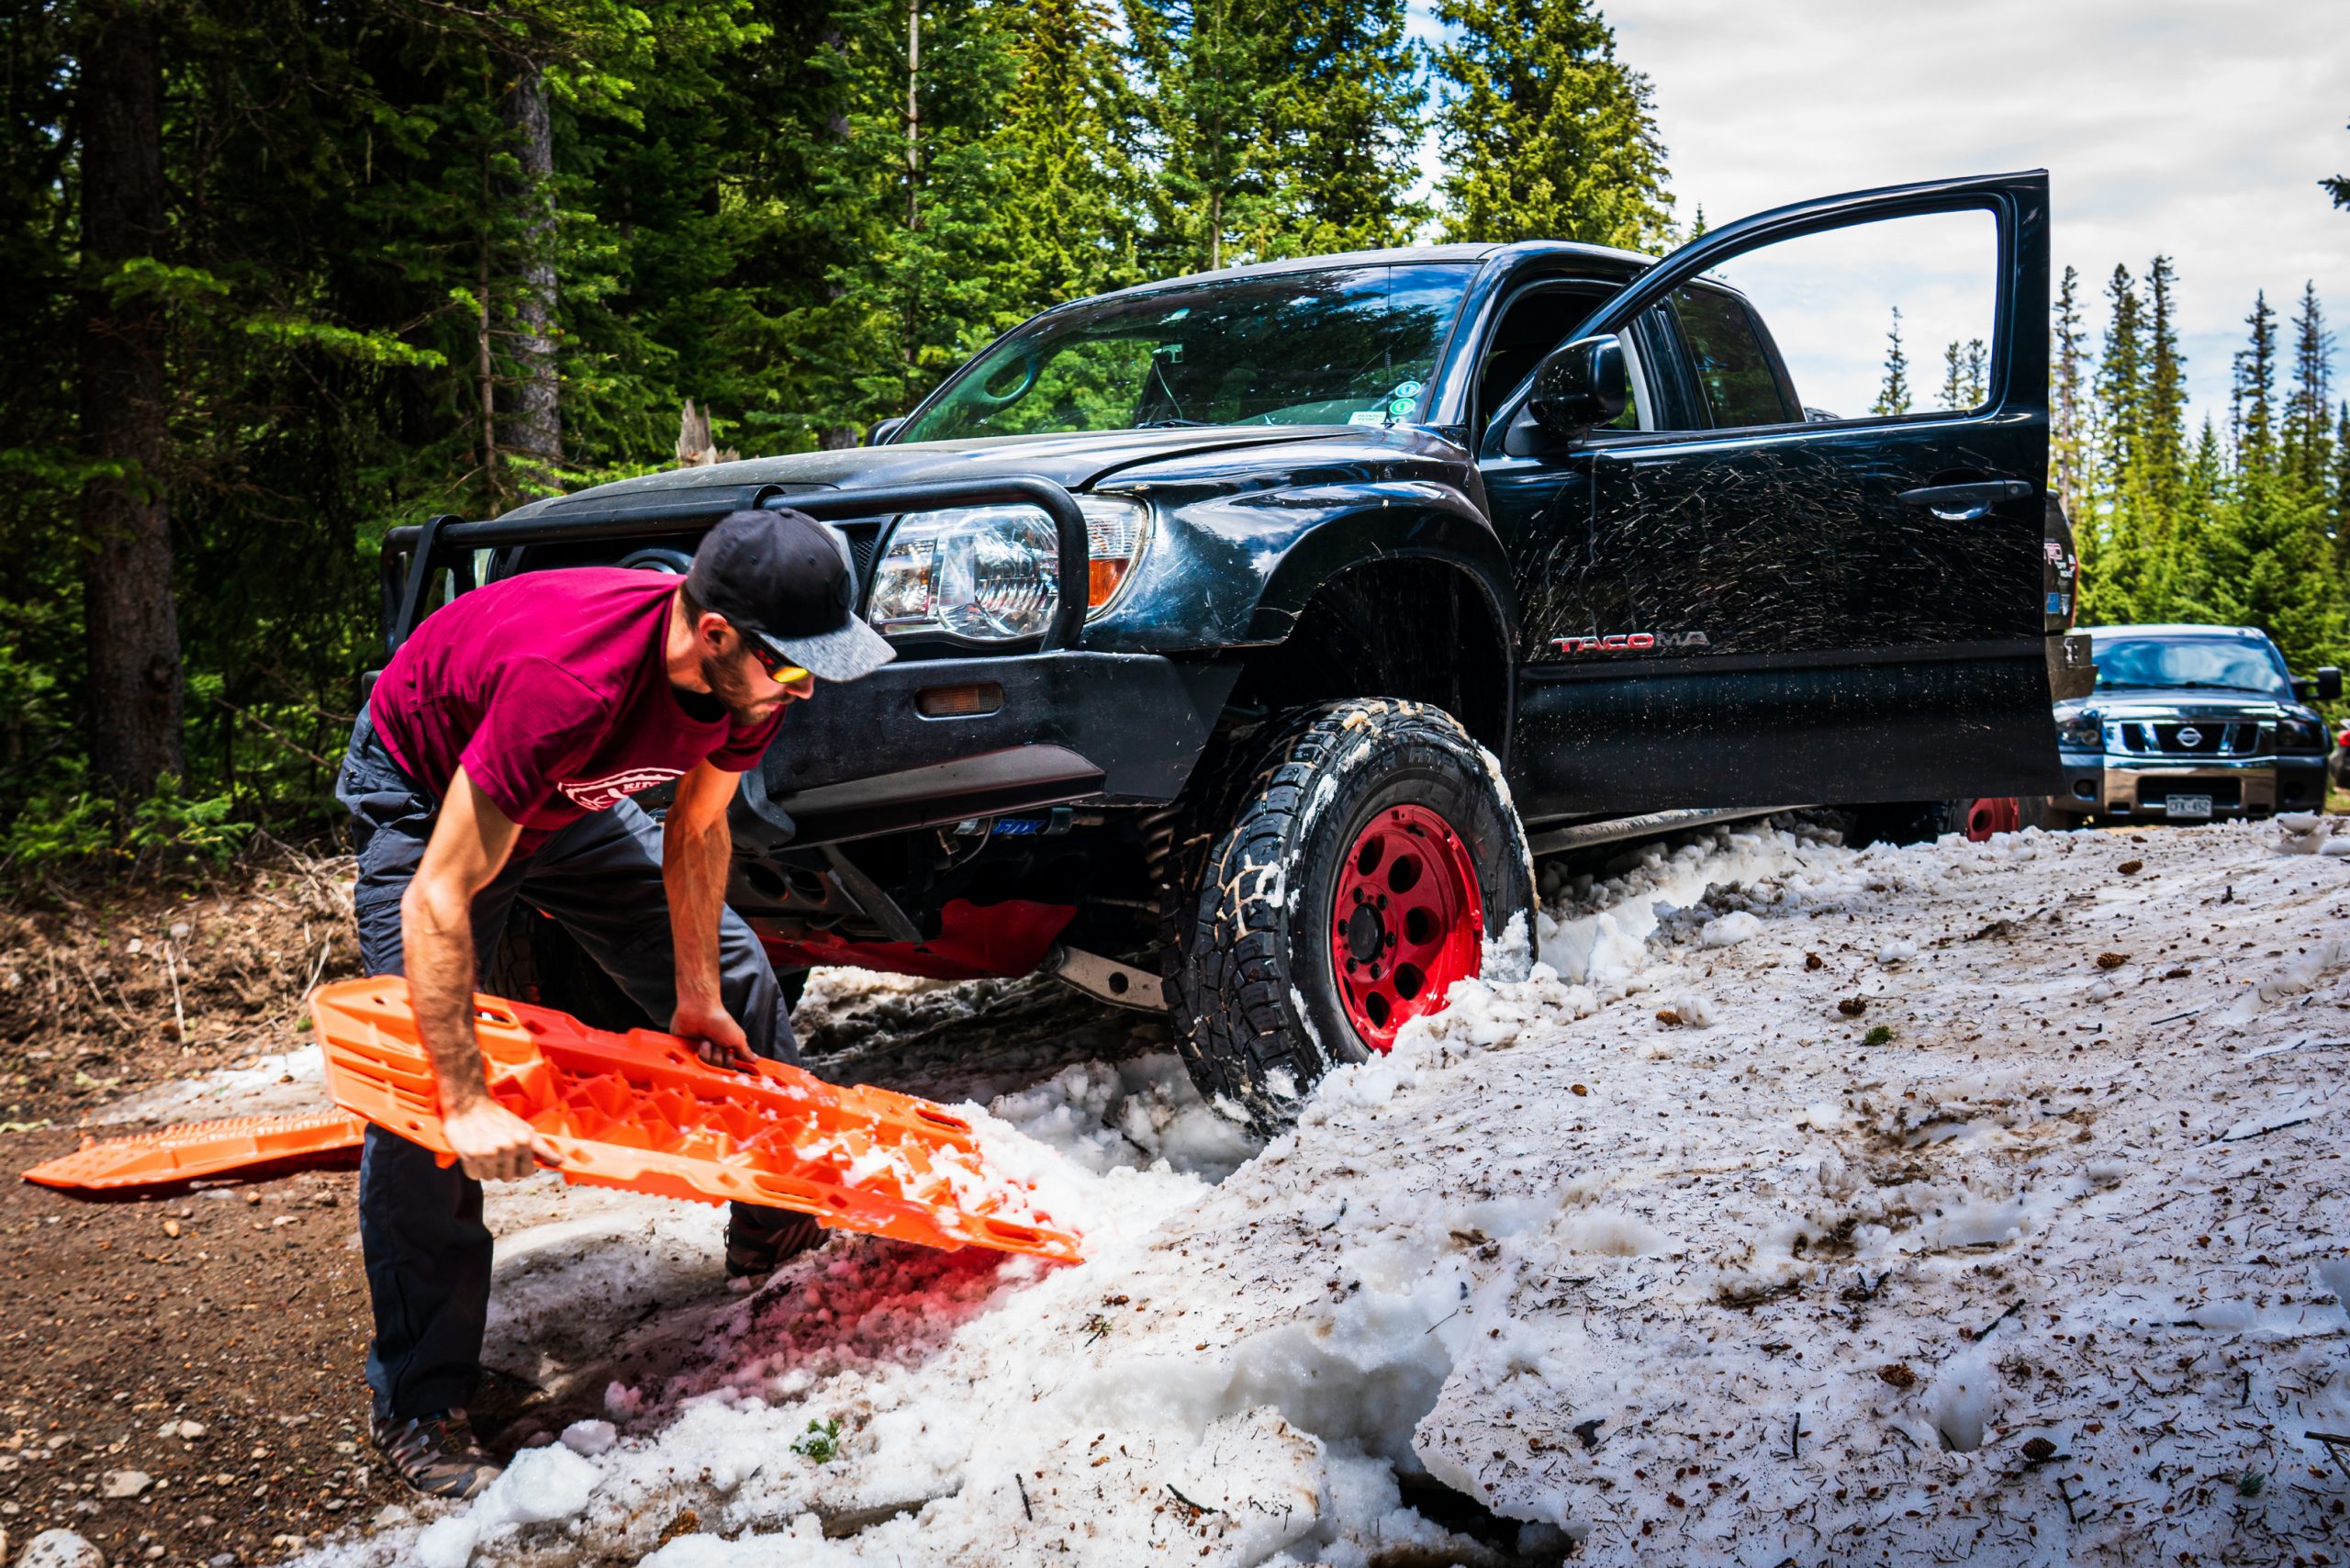 With a bit of shoveling and his Maxsas in place, my buddy tried to move his truck forward, but his tires couldn’t grip the non-existent teeth featured on Amazon’s Choice for recovery boards. More shoveling ensued to provide better placement for the Maxsas and less drag on the vehicle. Speedy recovery wasn’t happening, so I took more photos..
Yet even with the Maxsas driven well underneath the tires, wheel spin still occurred at the lightest application of throttle. It was blatantly obvious that they just didn’t provide the traction required, so it seemed like a good time to see what kind of difference the other end of the vehicle recovery board spectrum would make.
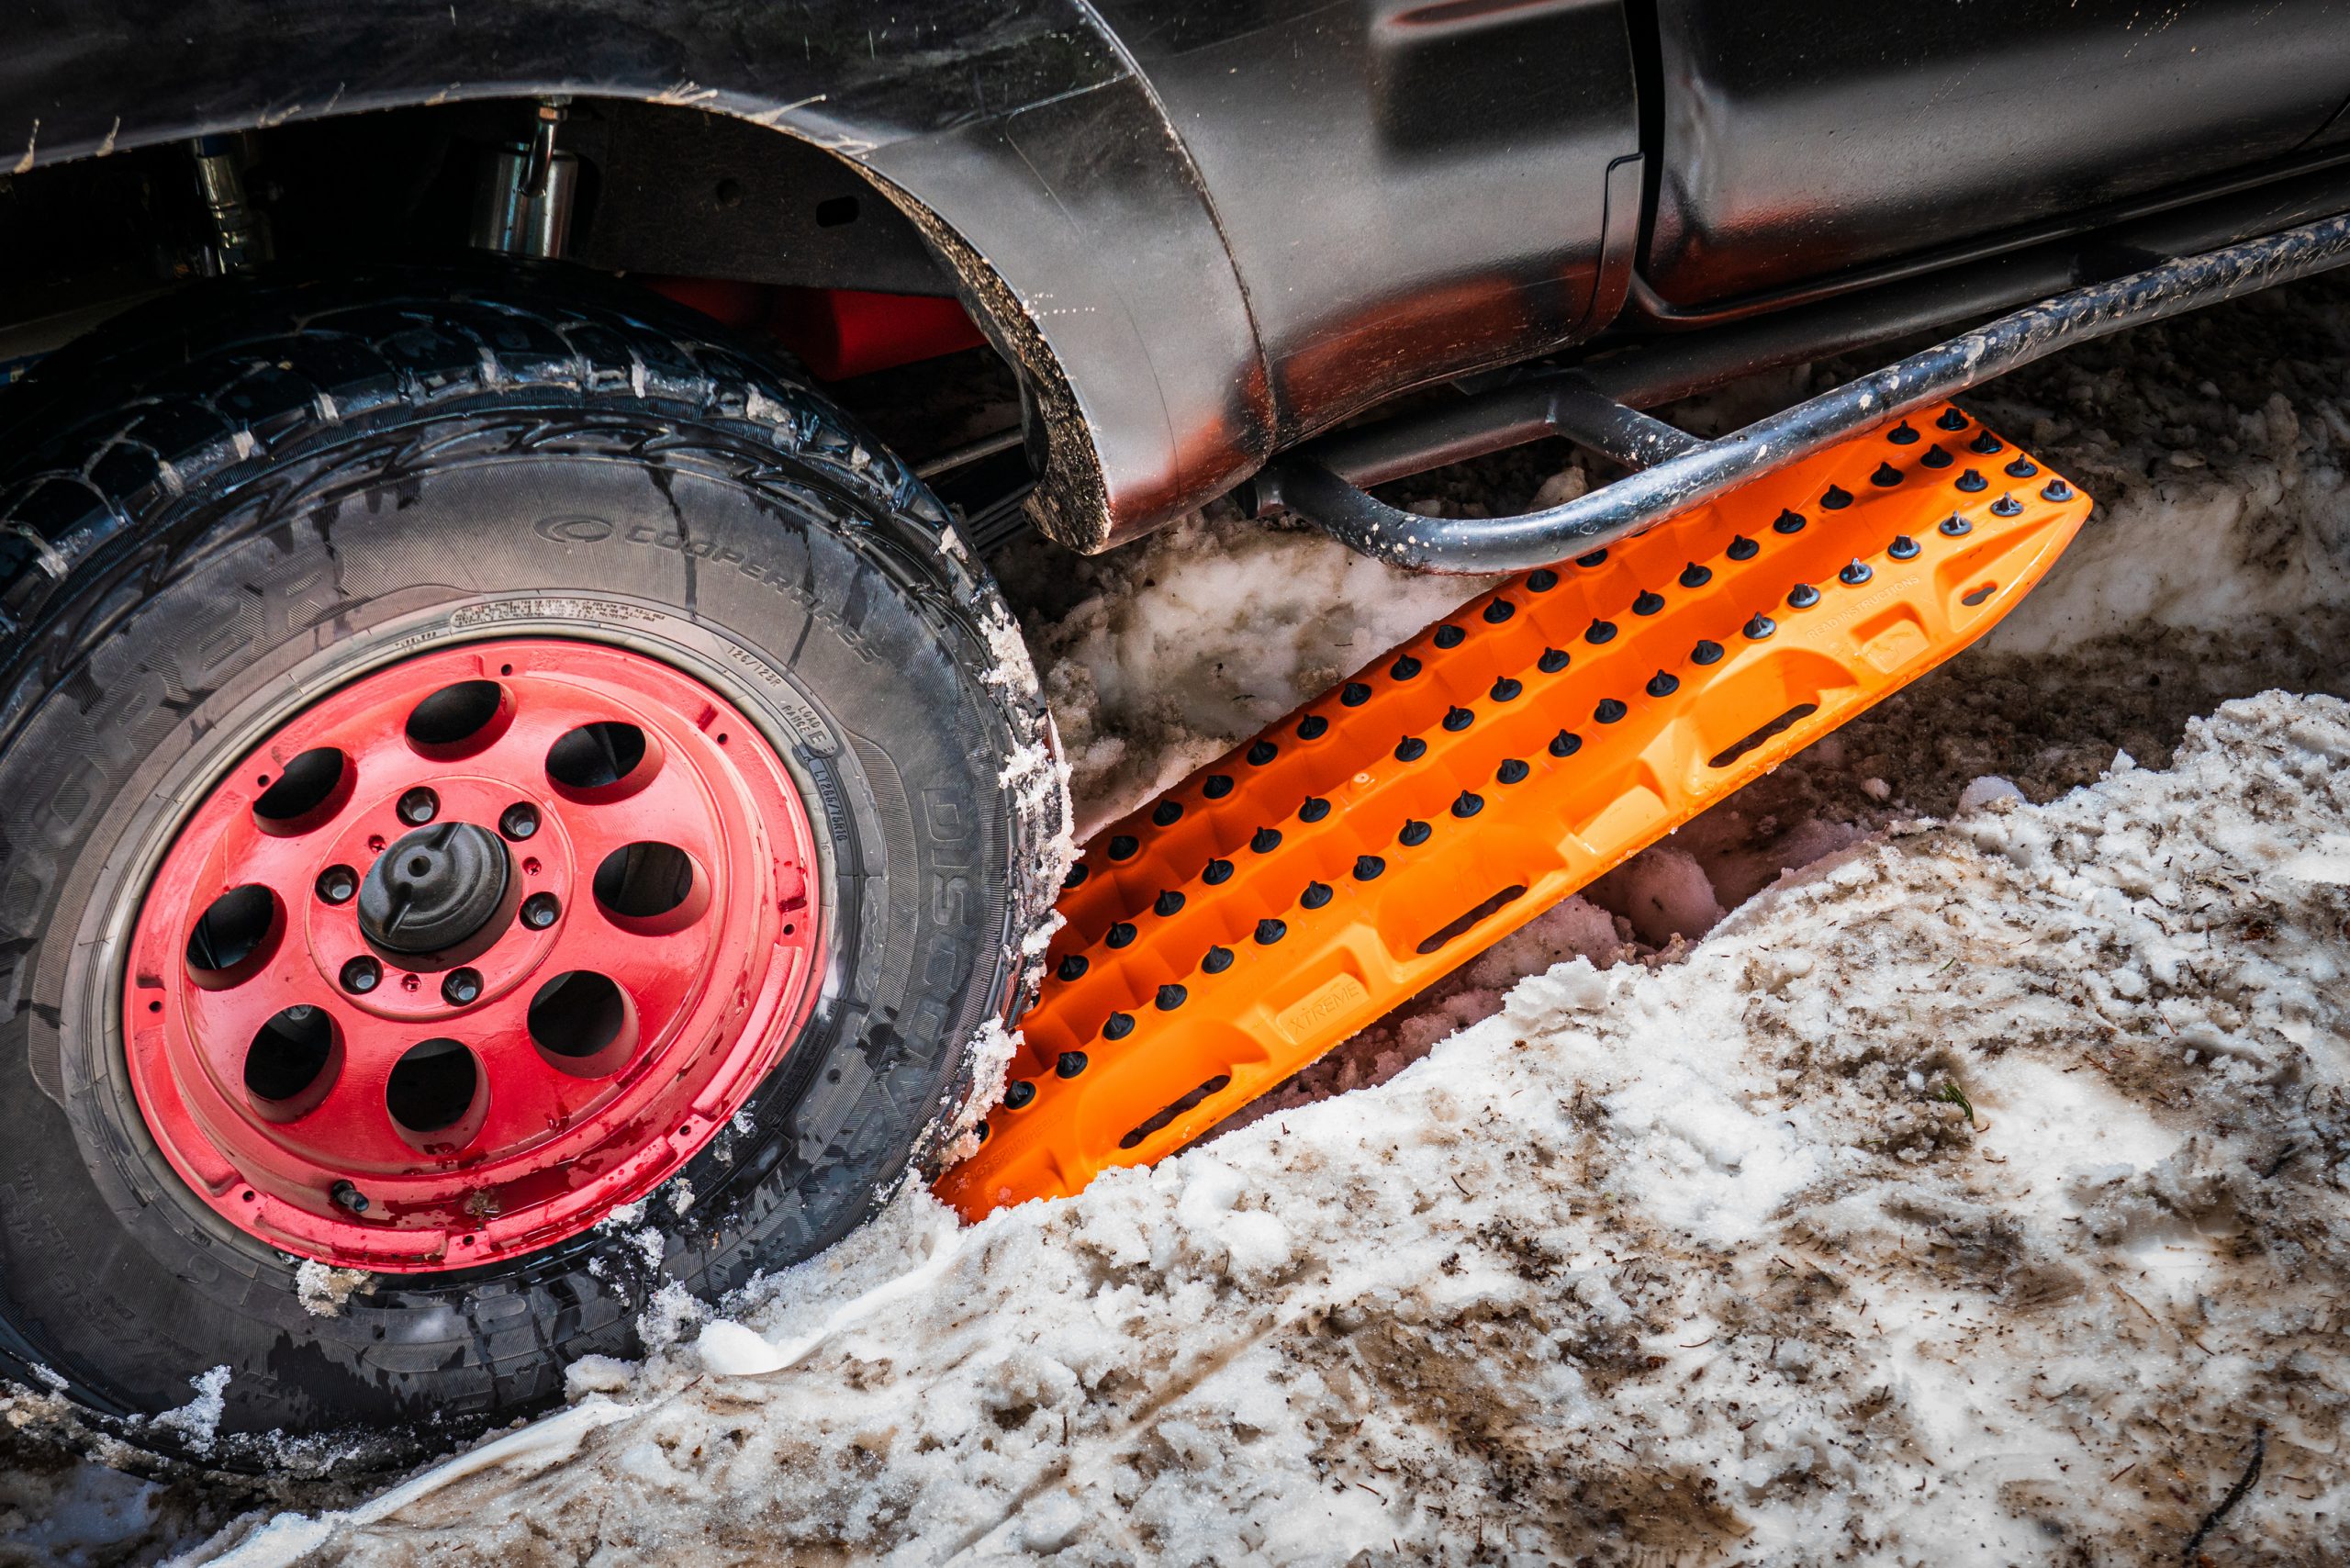
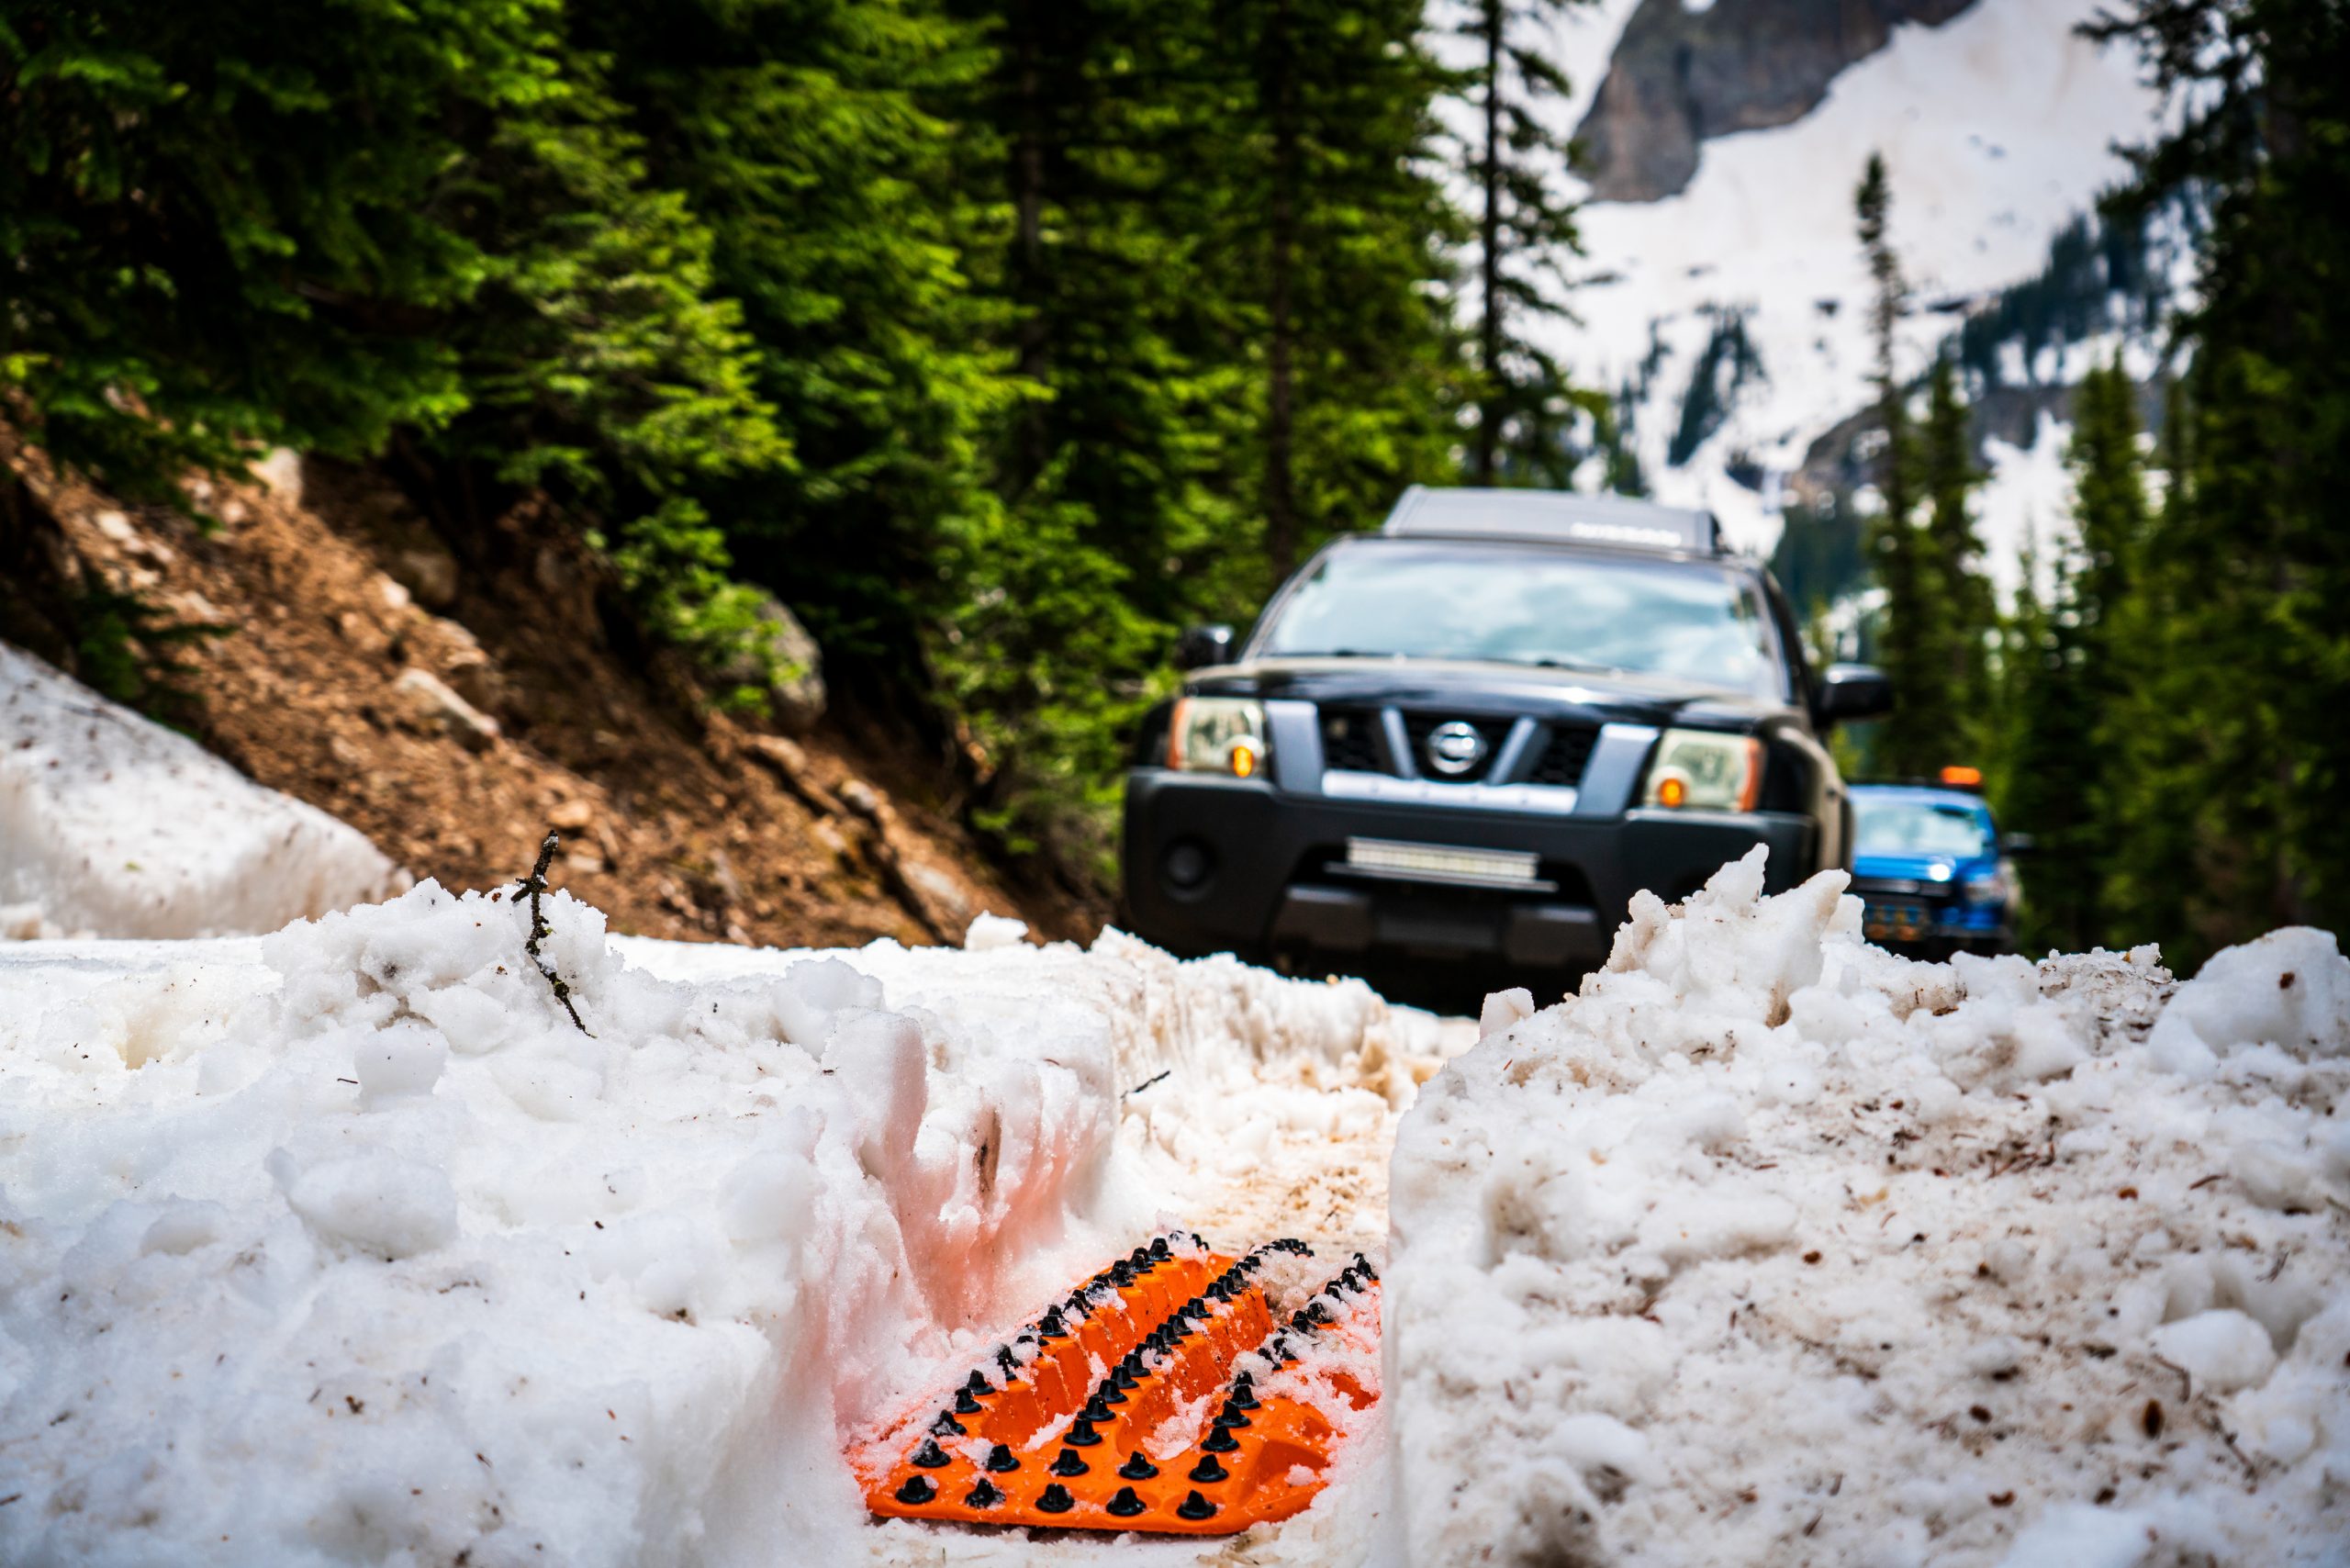
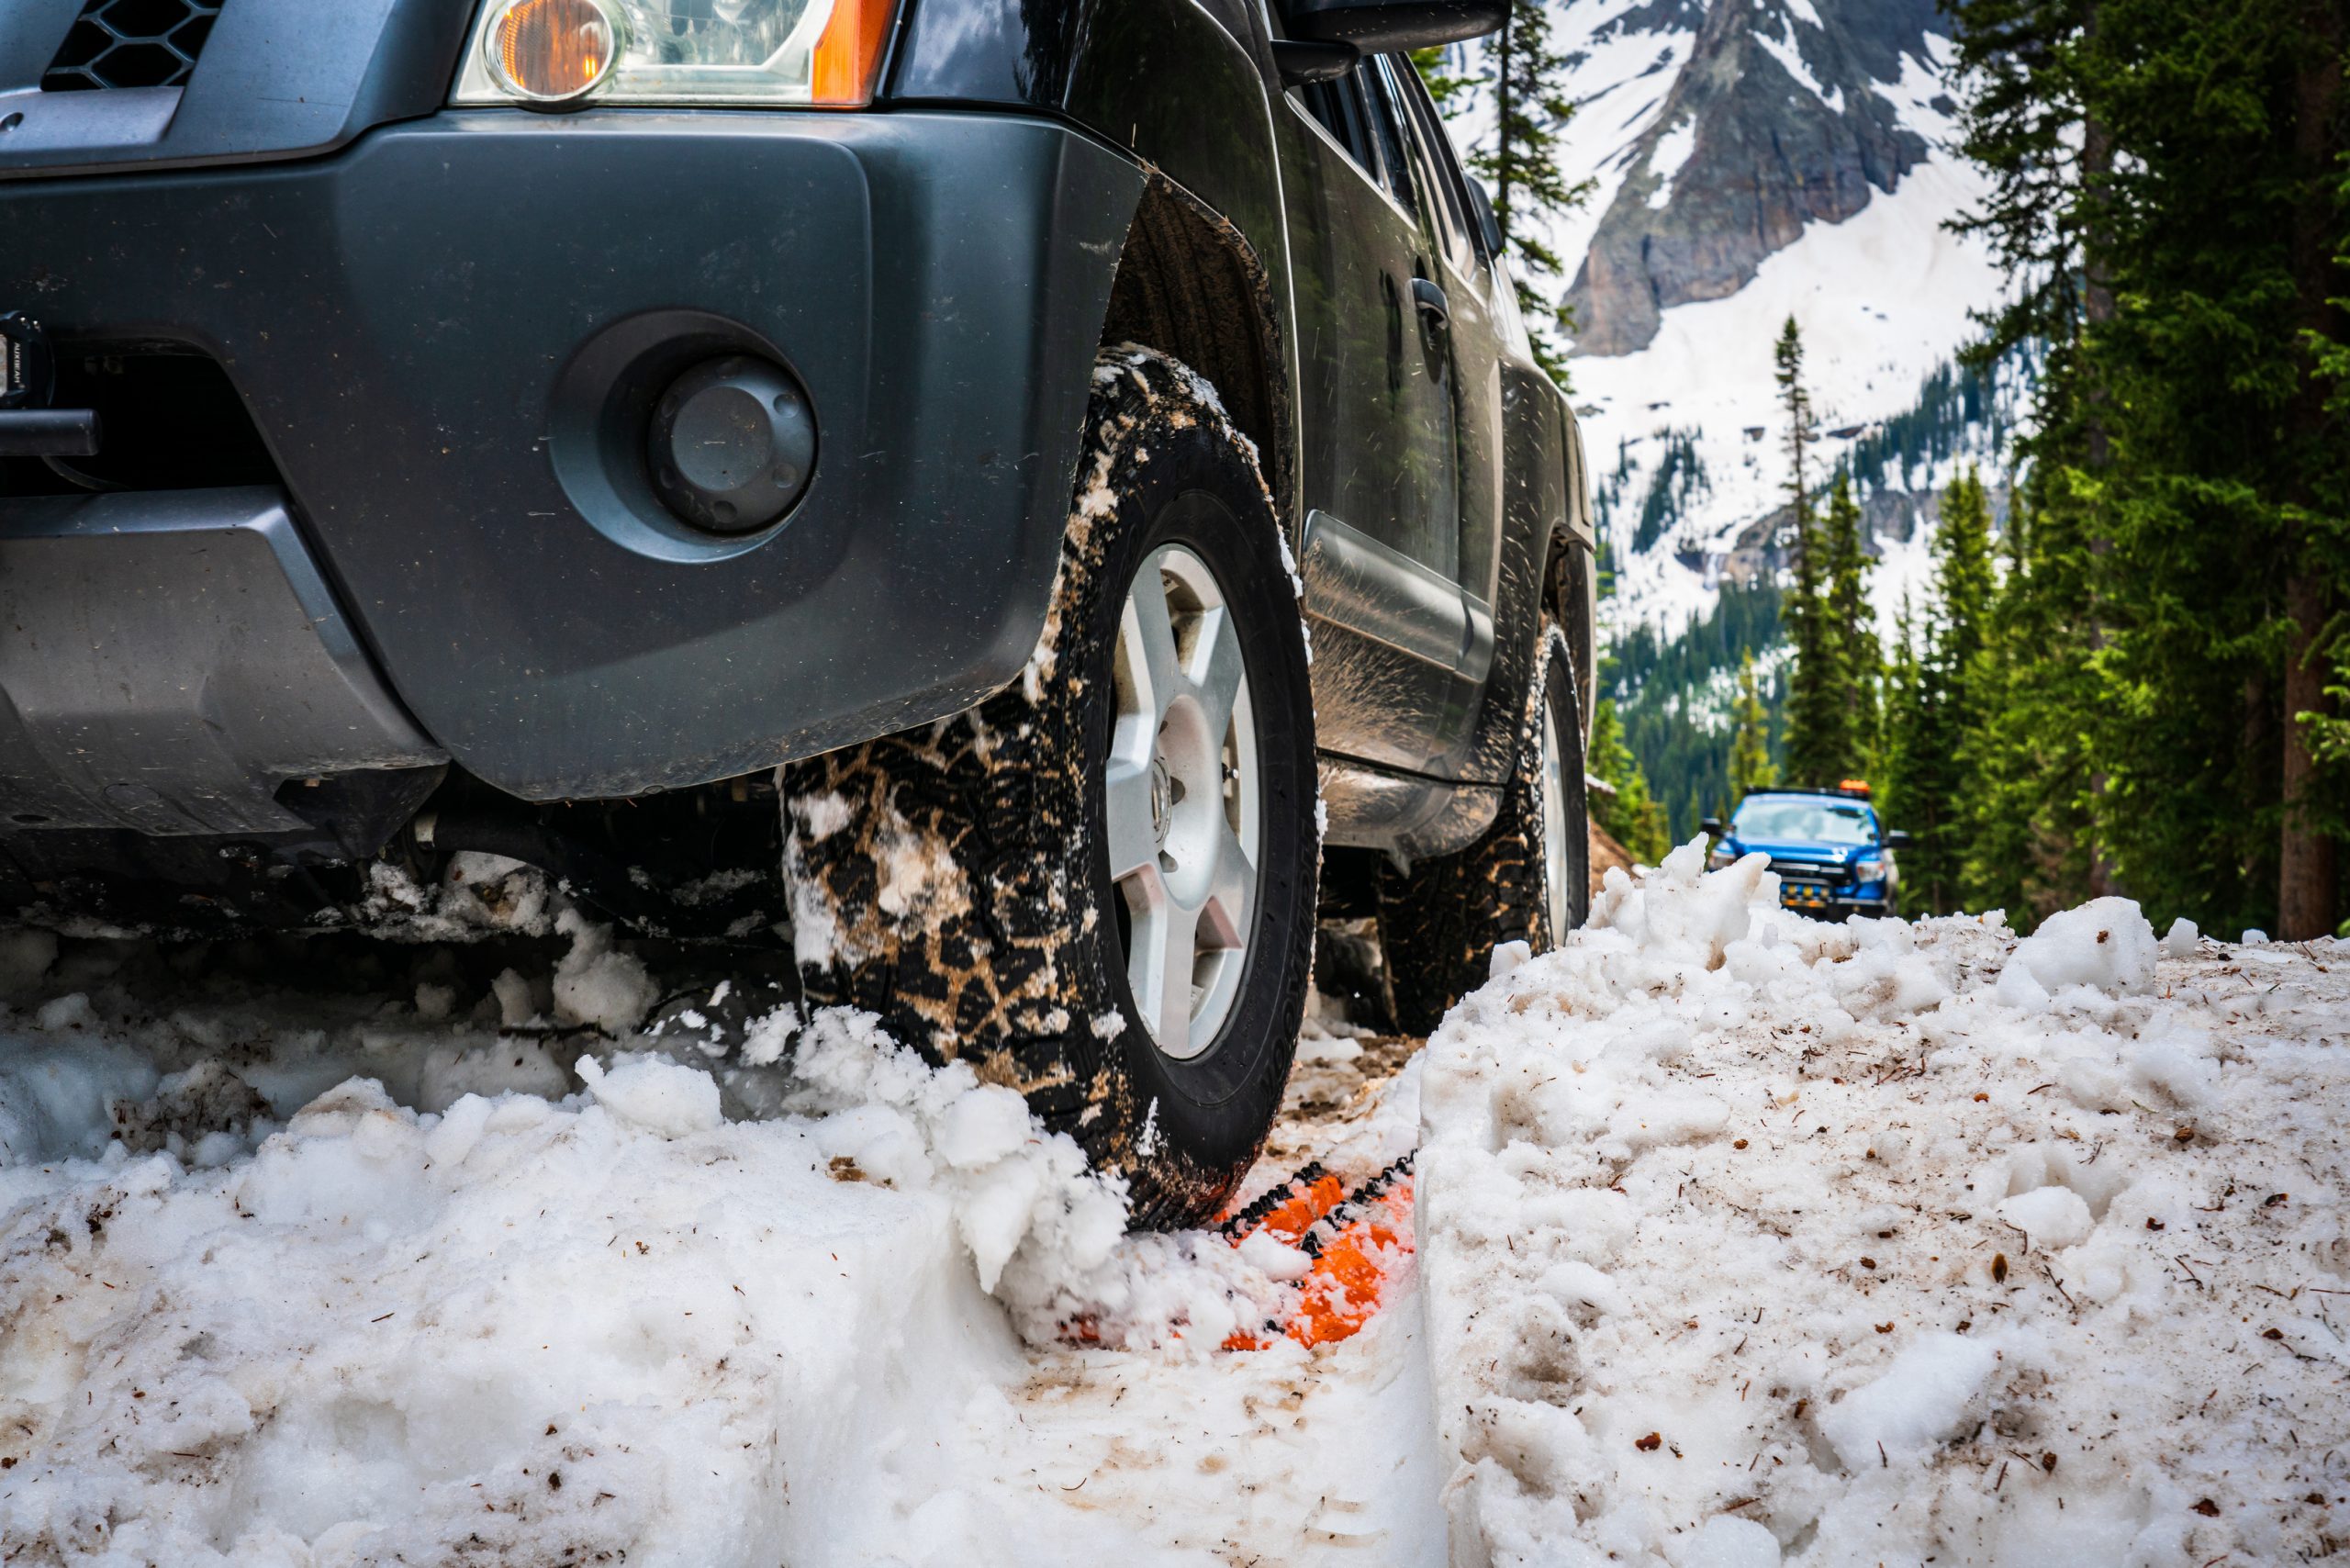
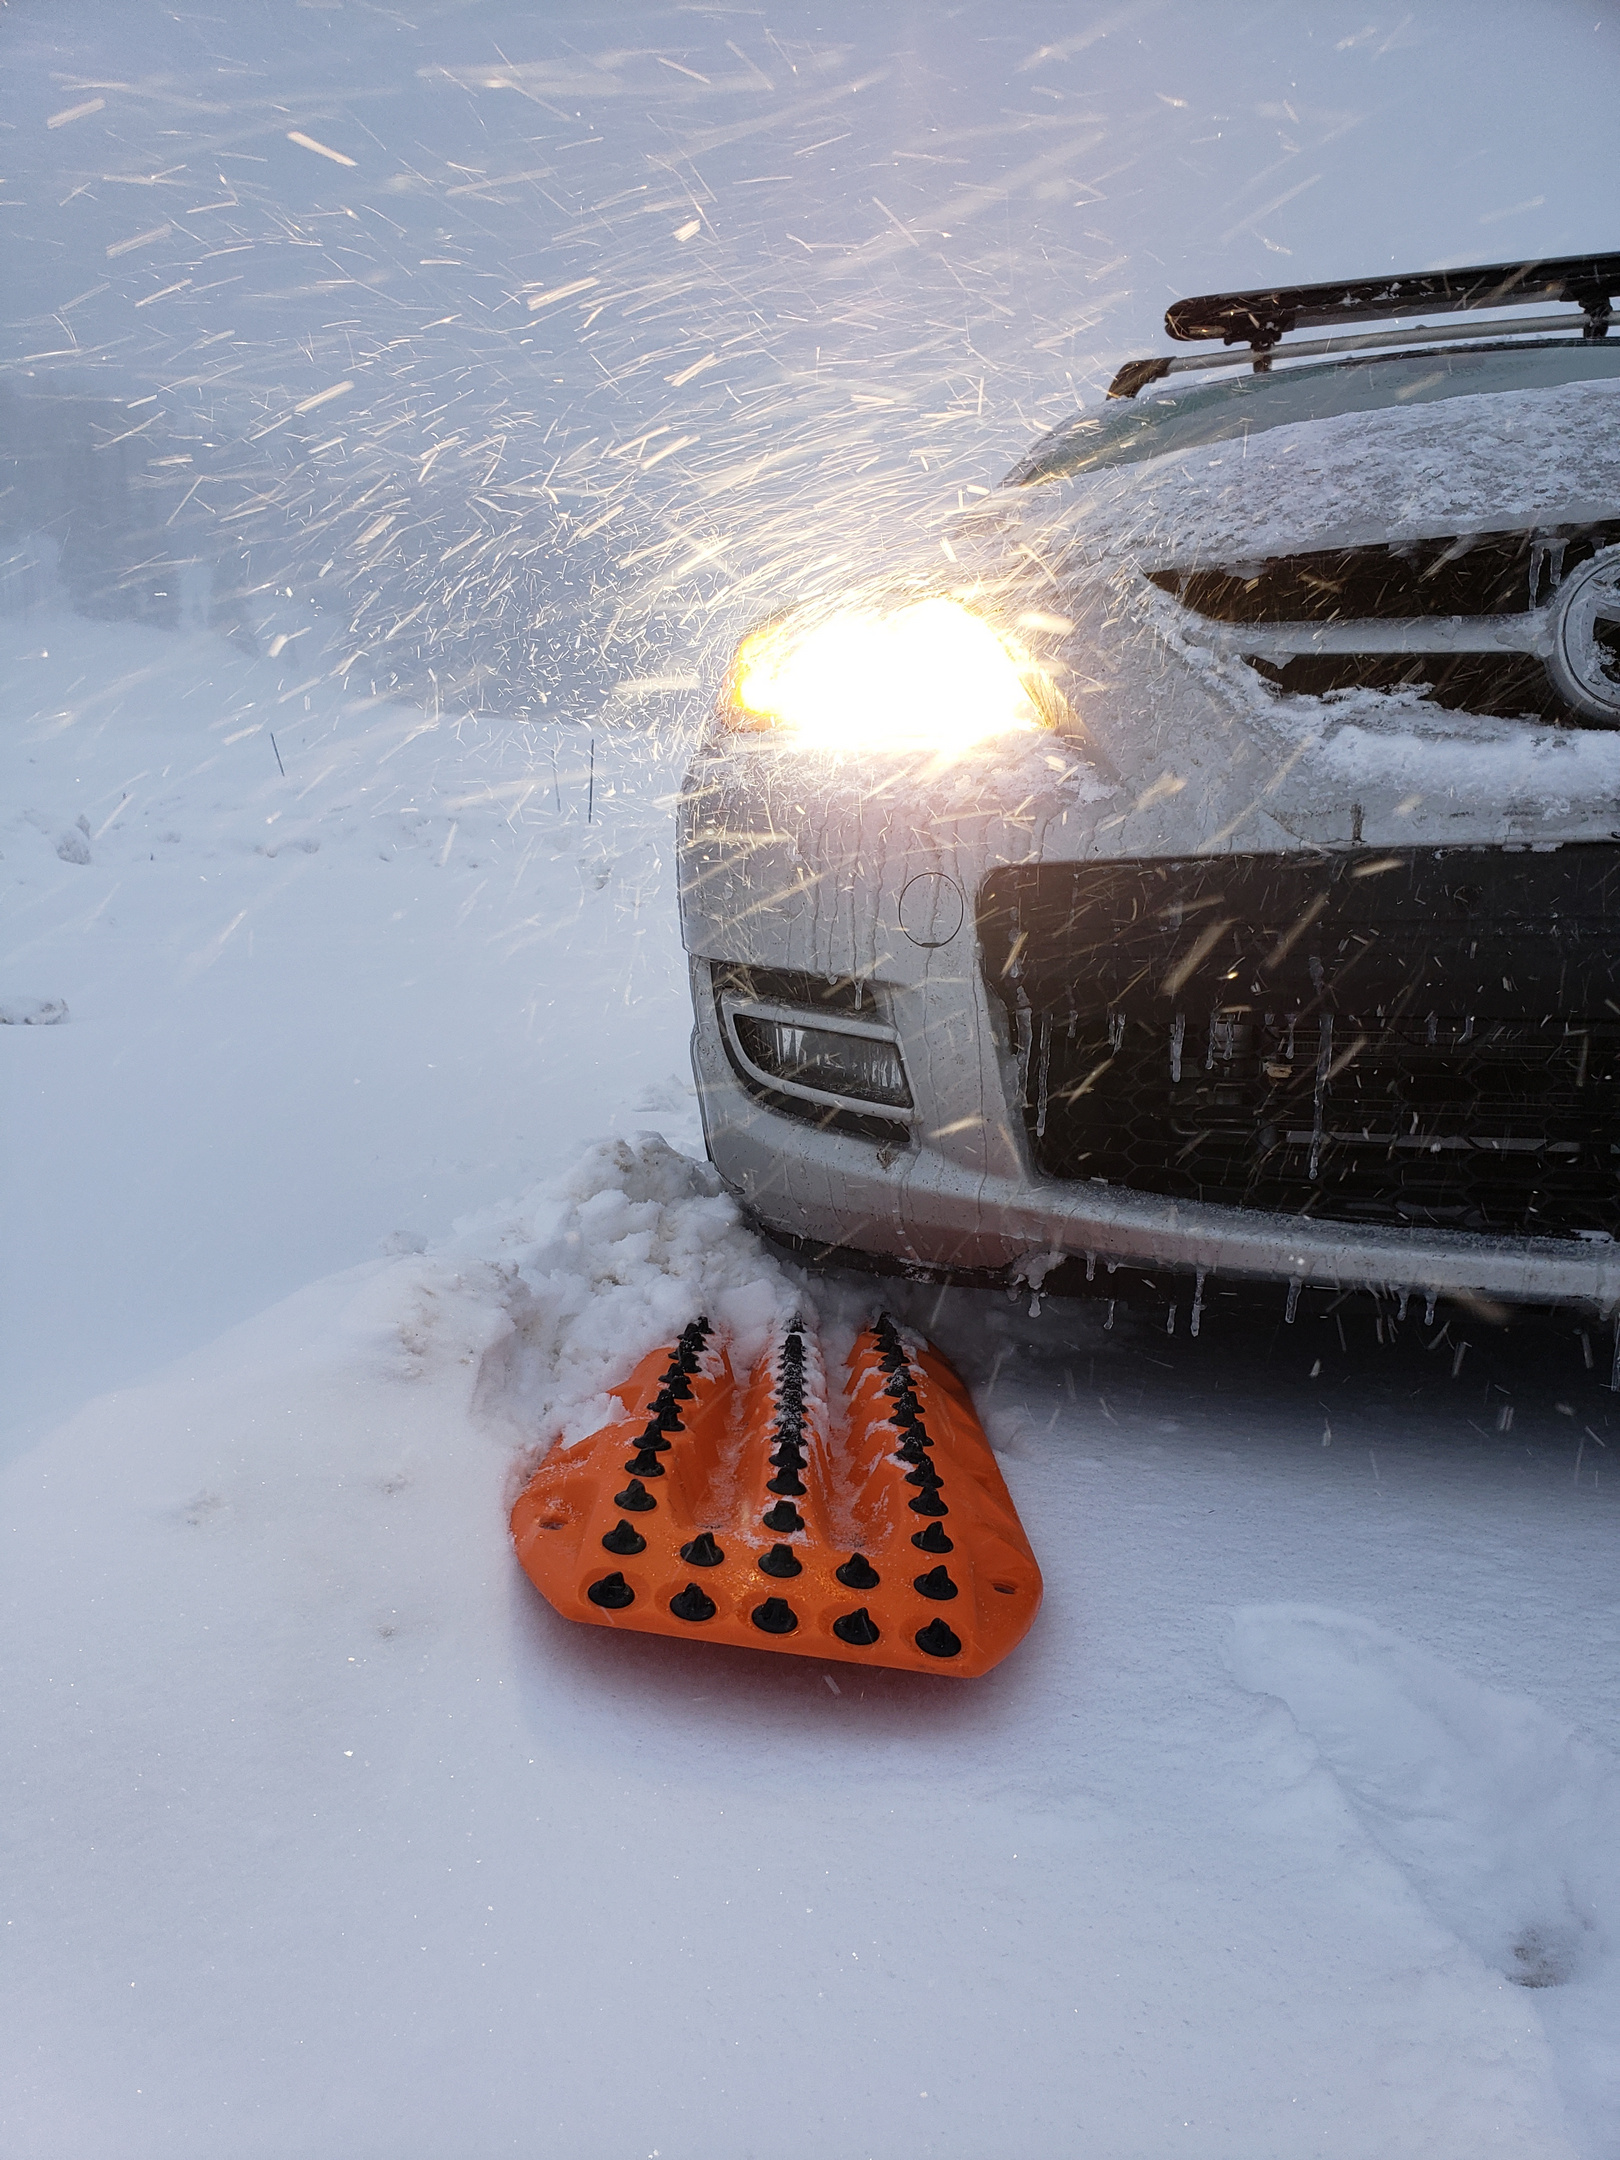
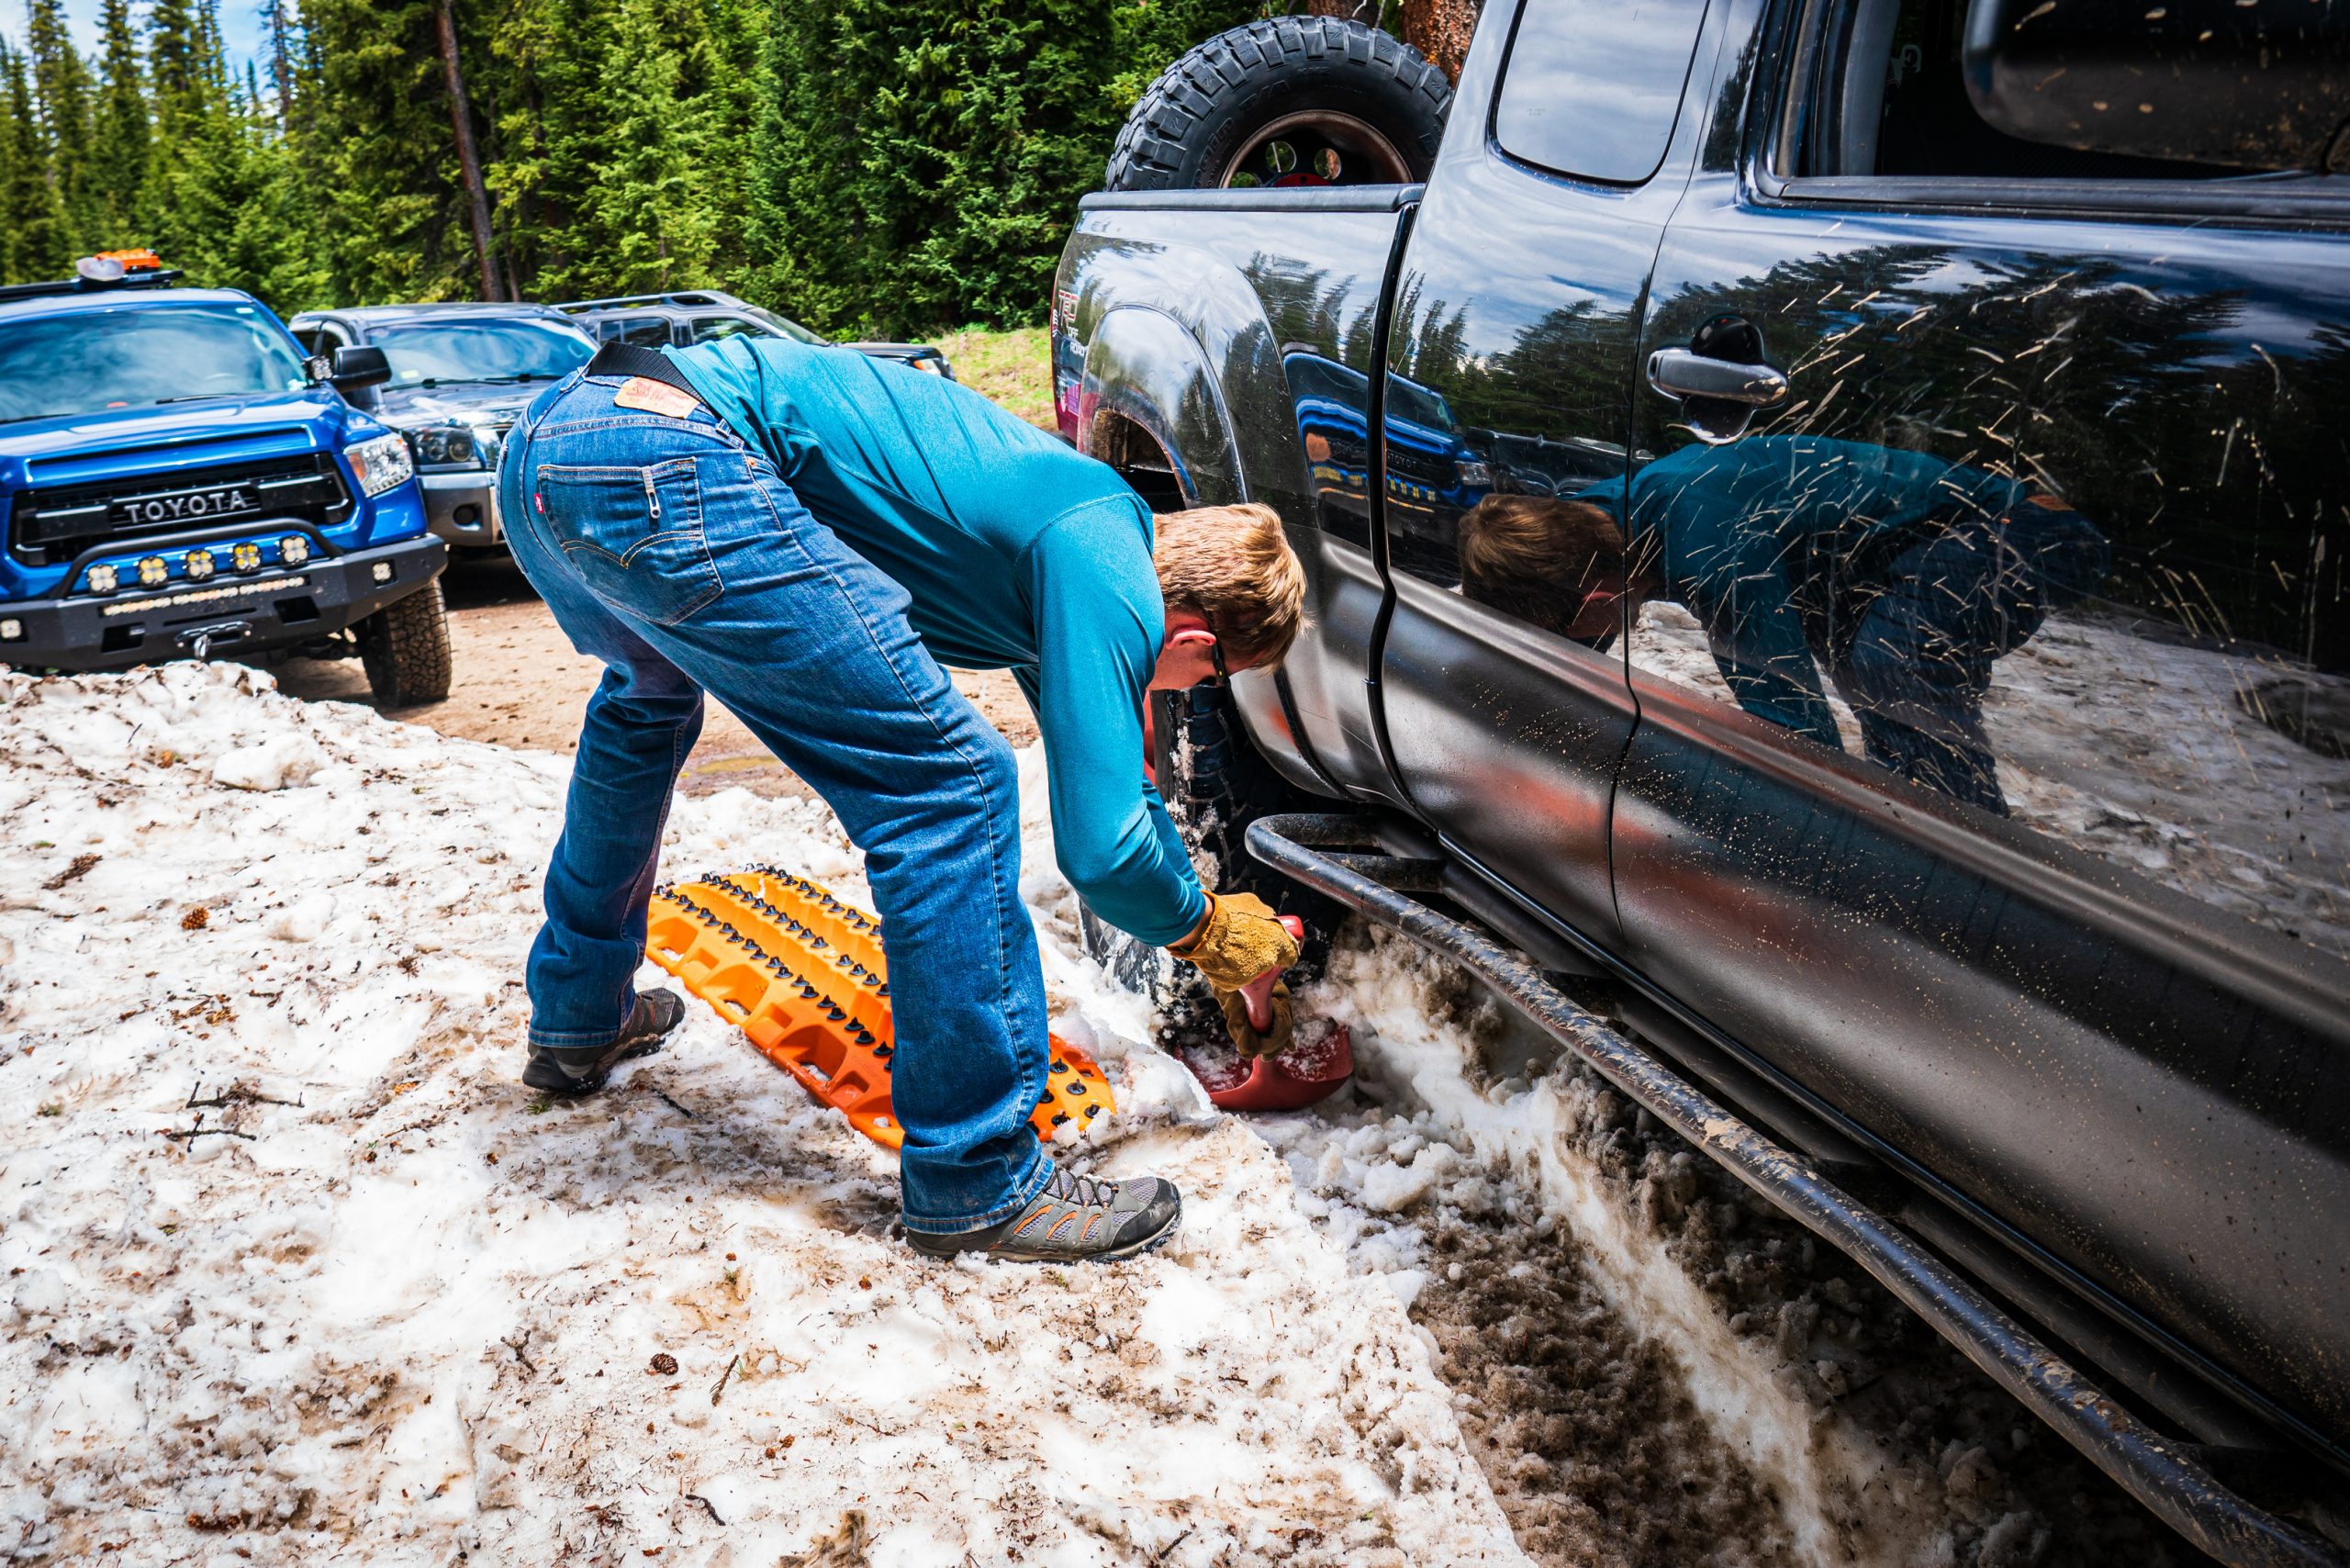 While my buddy’s tires are admittedly tired (see what I did there) and not aired down as far as they could be, they were still completely unable to grab any sort of meaningful traction from the Maxsa traction boards. When we placed a pair of MAXTRAX XTREME’s in the snow for both of the rear tires to grab, the difference in performance couldn’t have been more drastic. The truck’s tires grabbed the alloy teeth like they were magnetically attracted to each other and my buddy’s truck was instantly able to move forward onto dry ground and freedom.
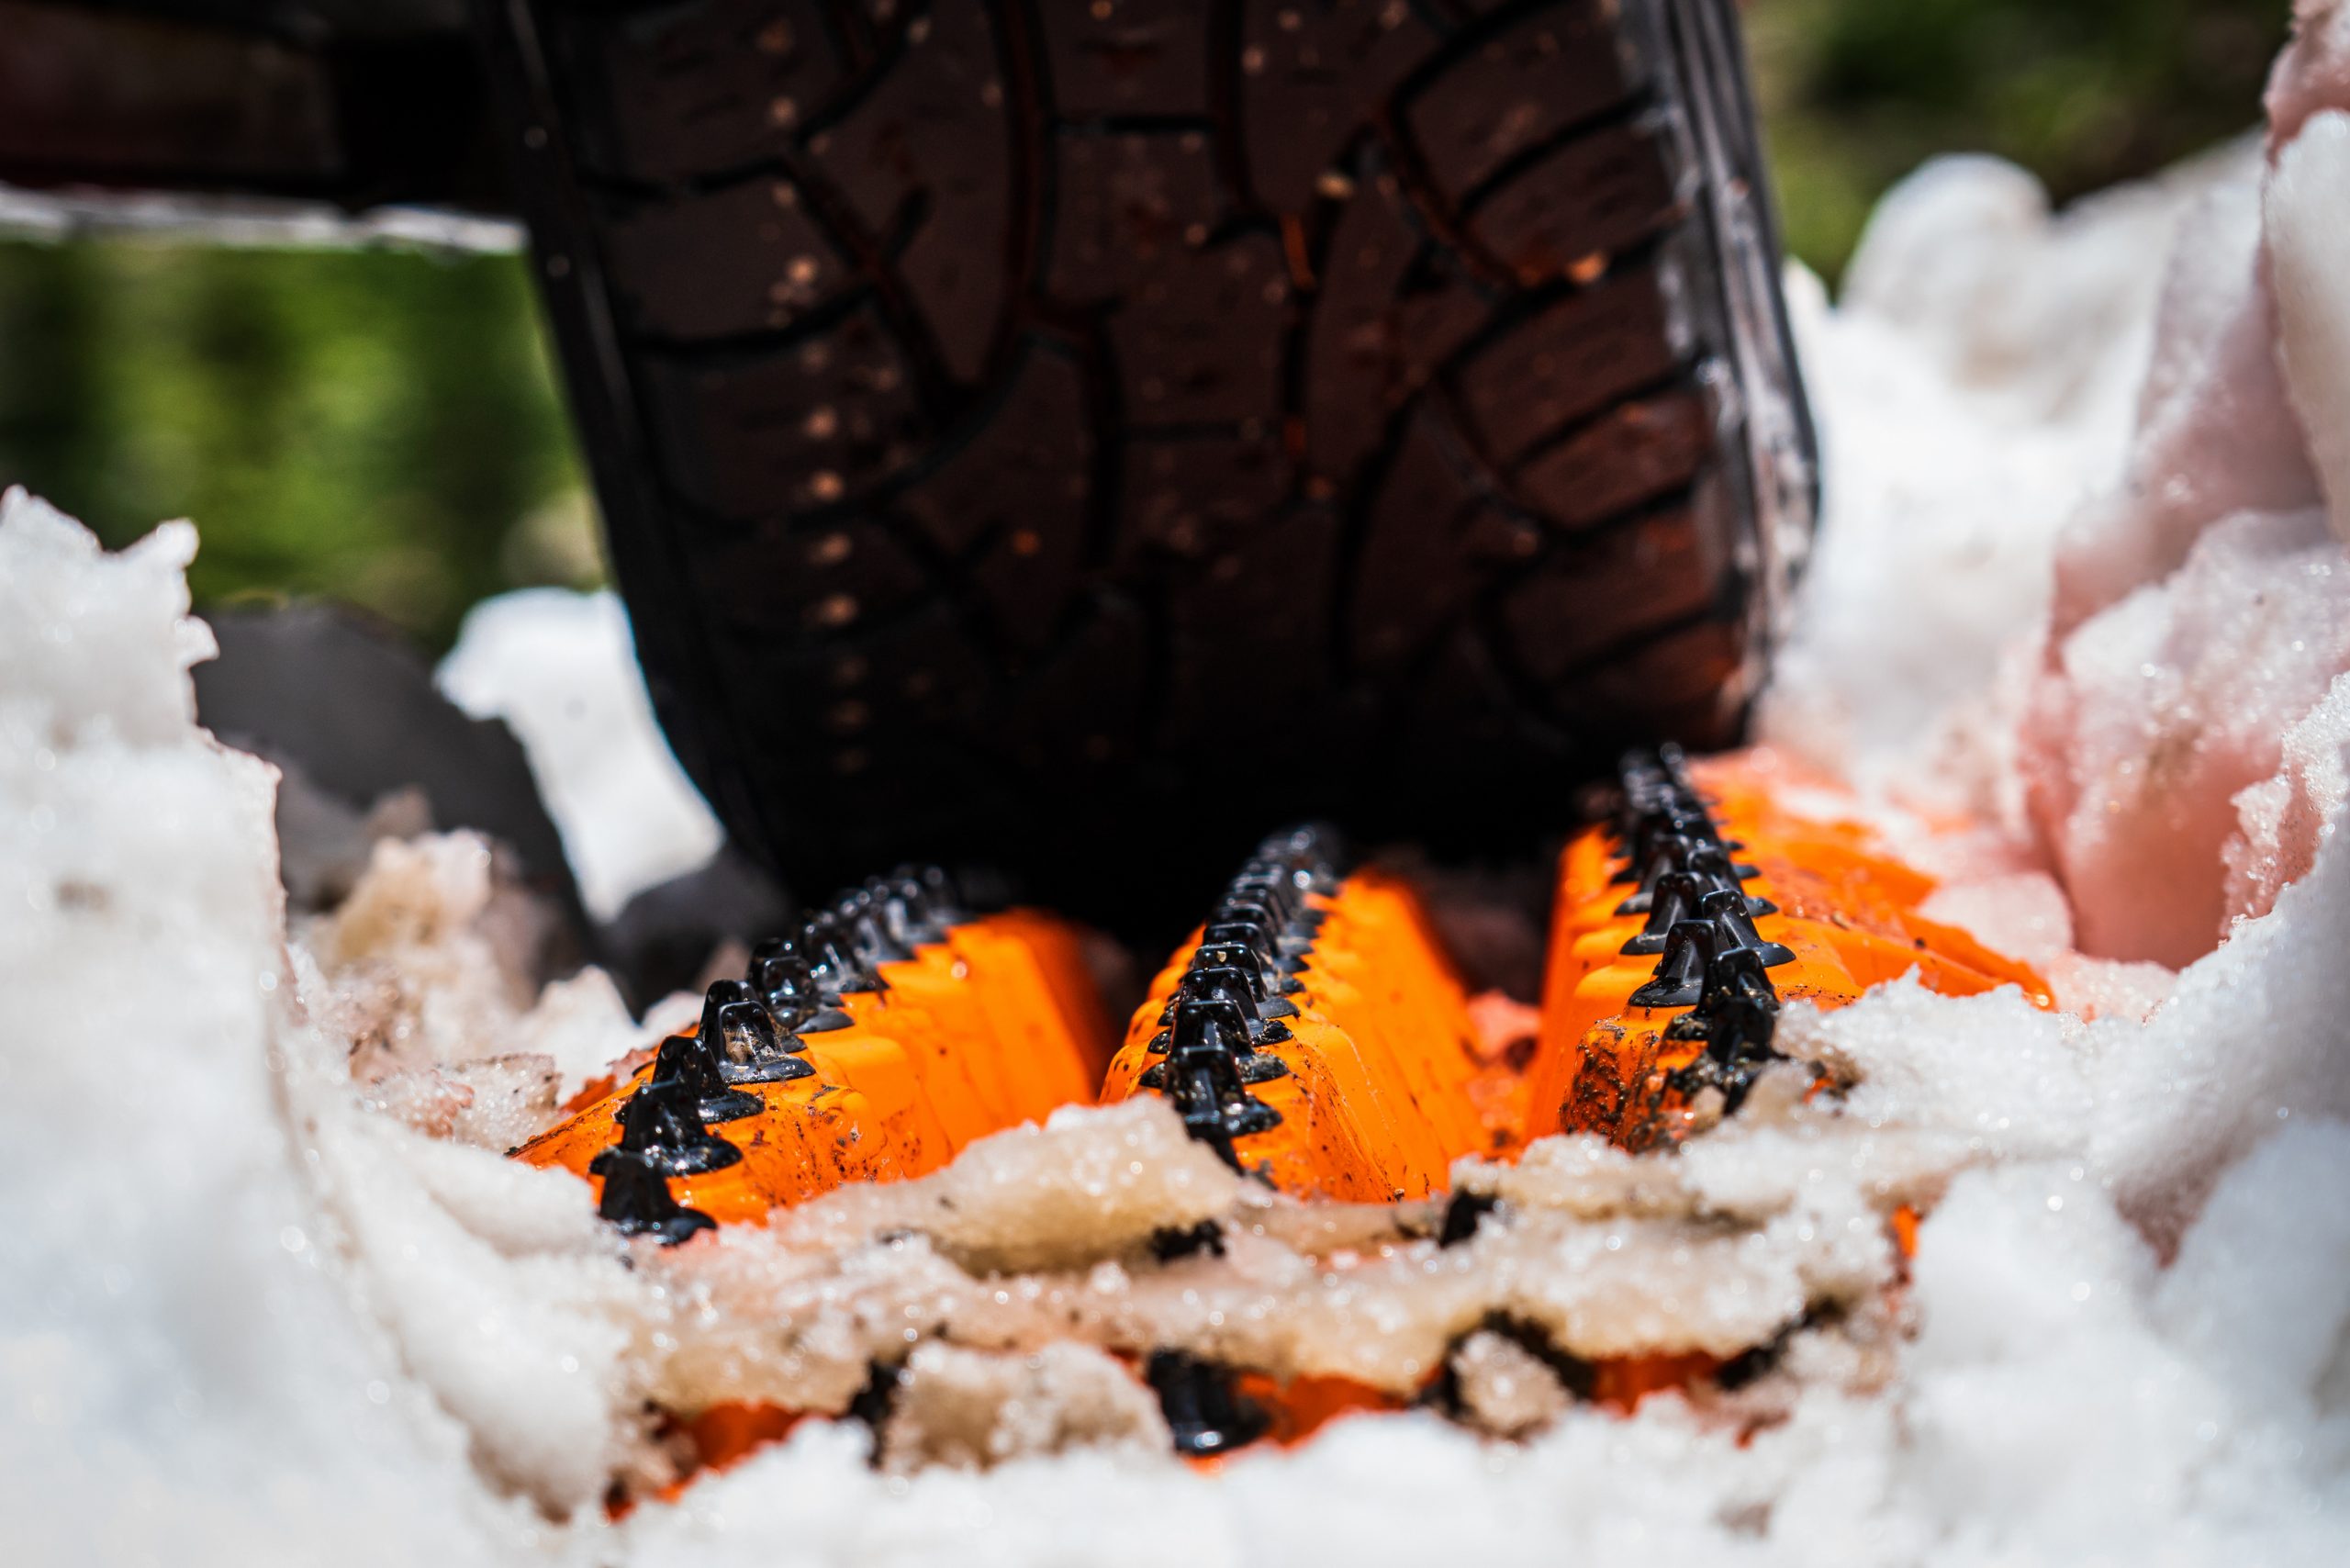
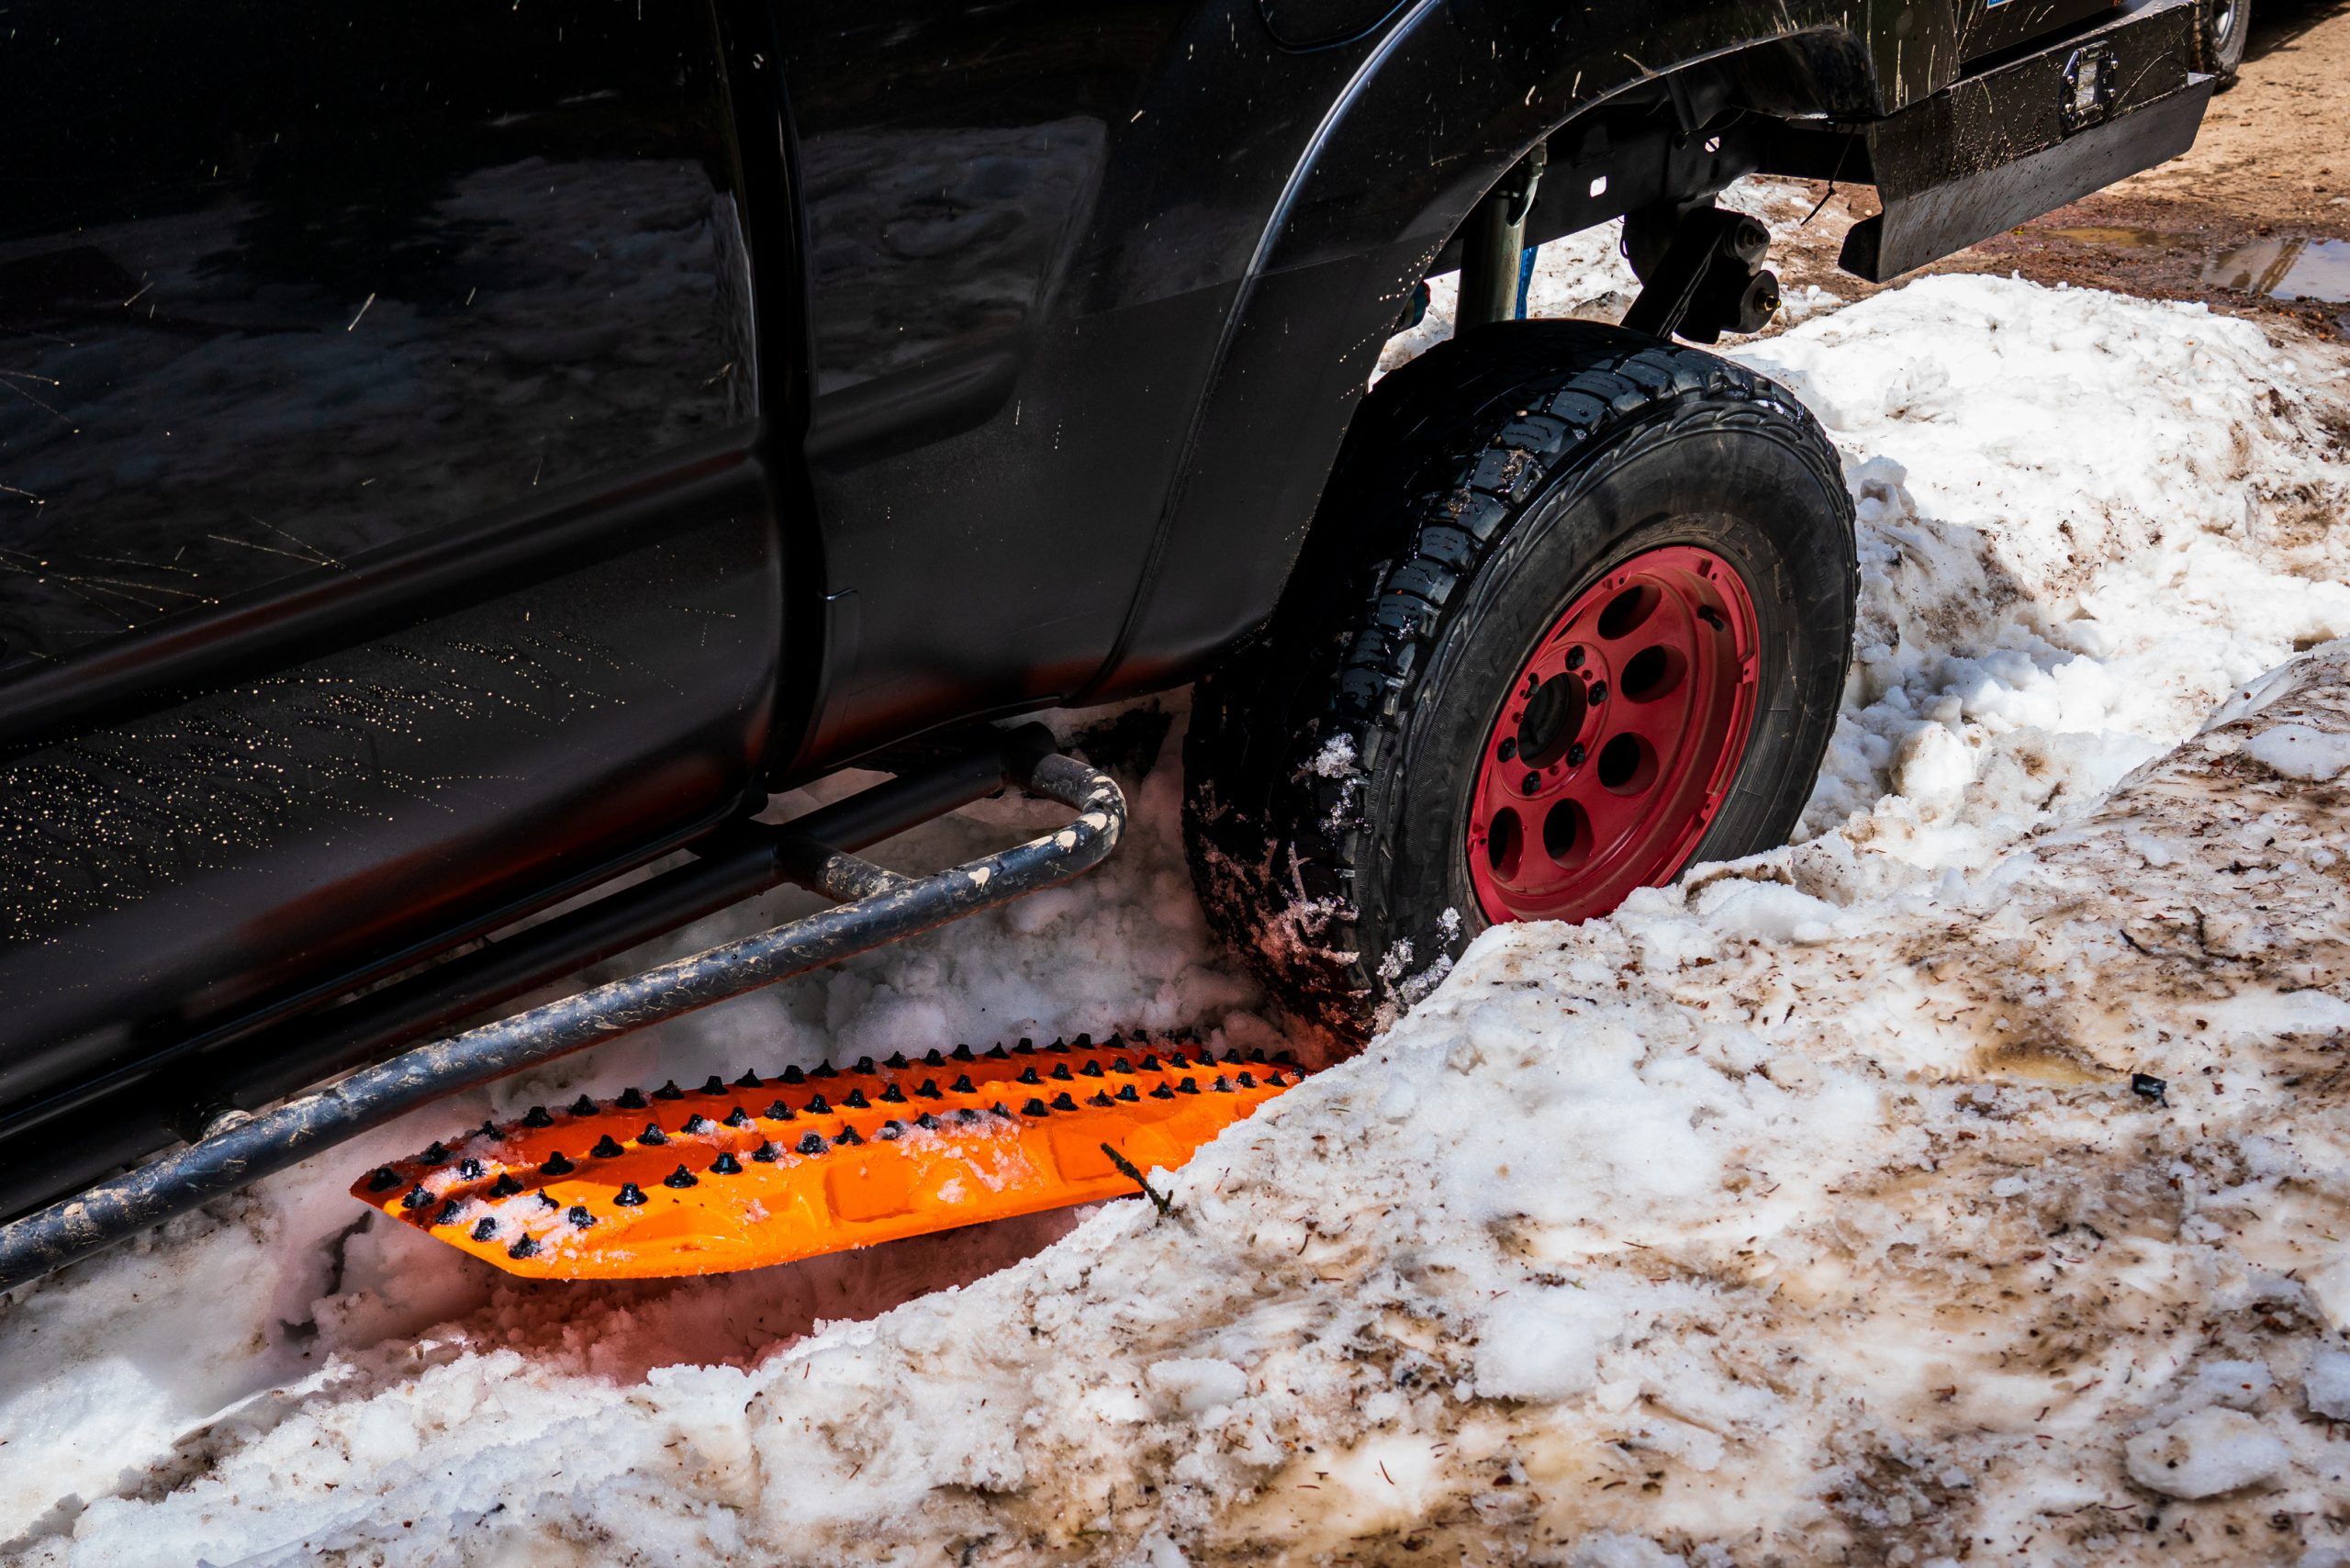
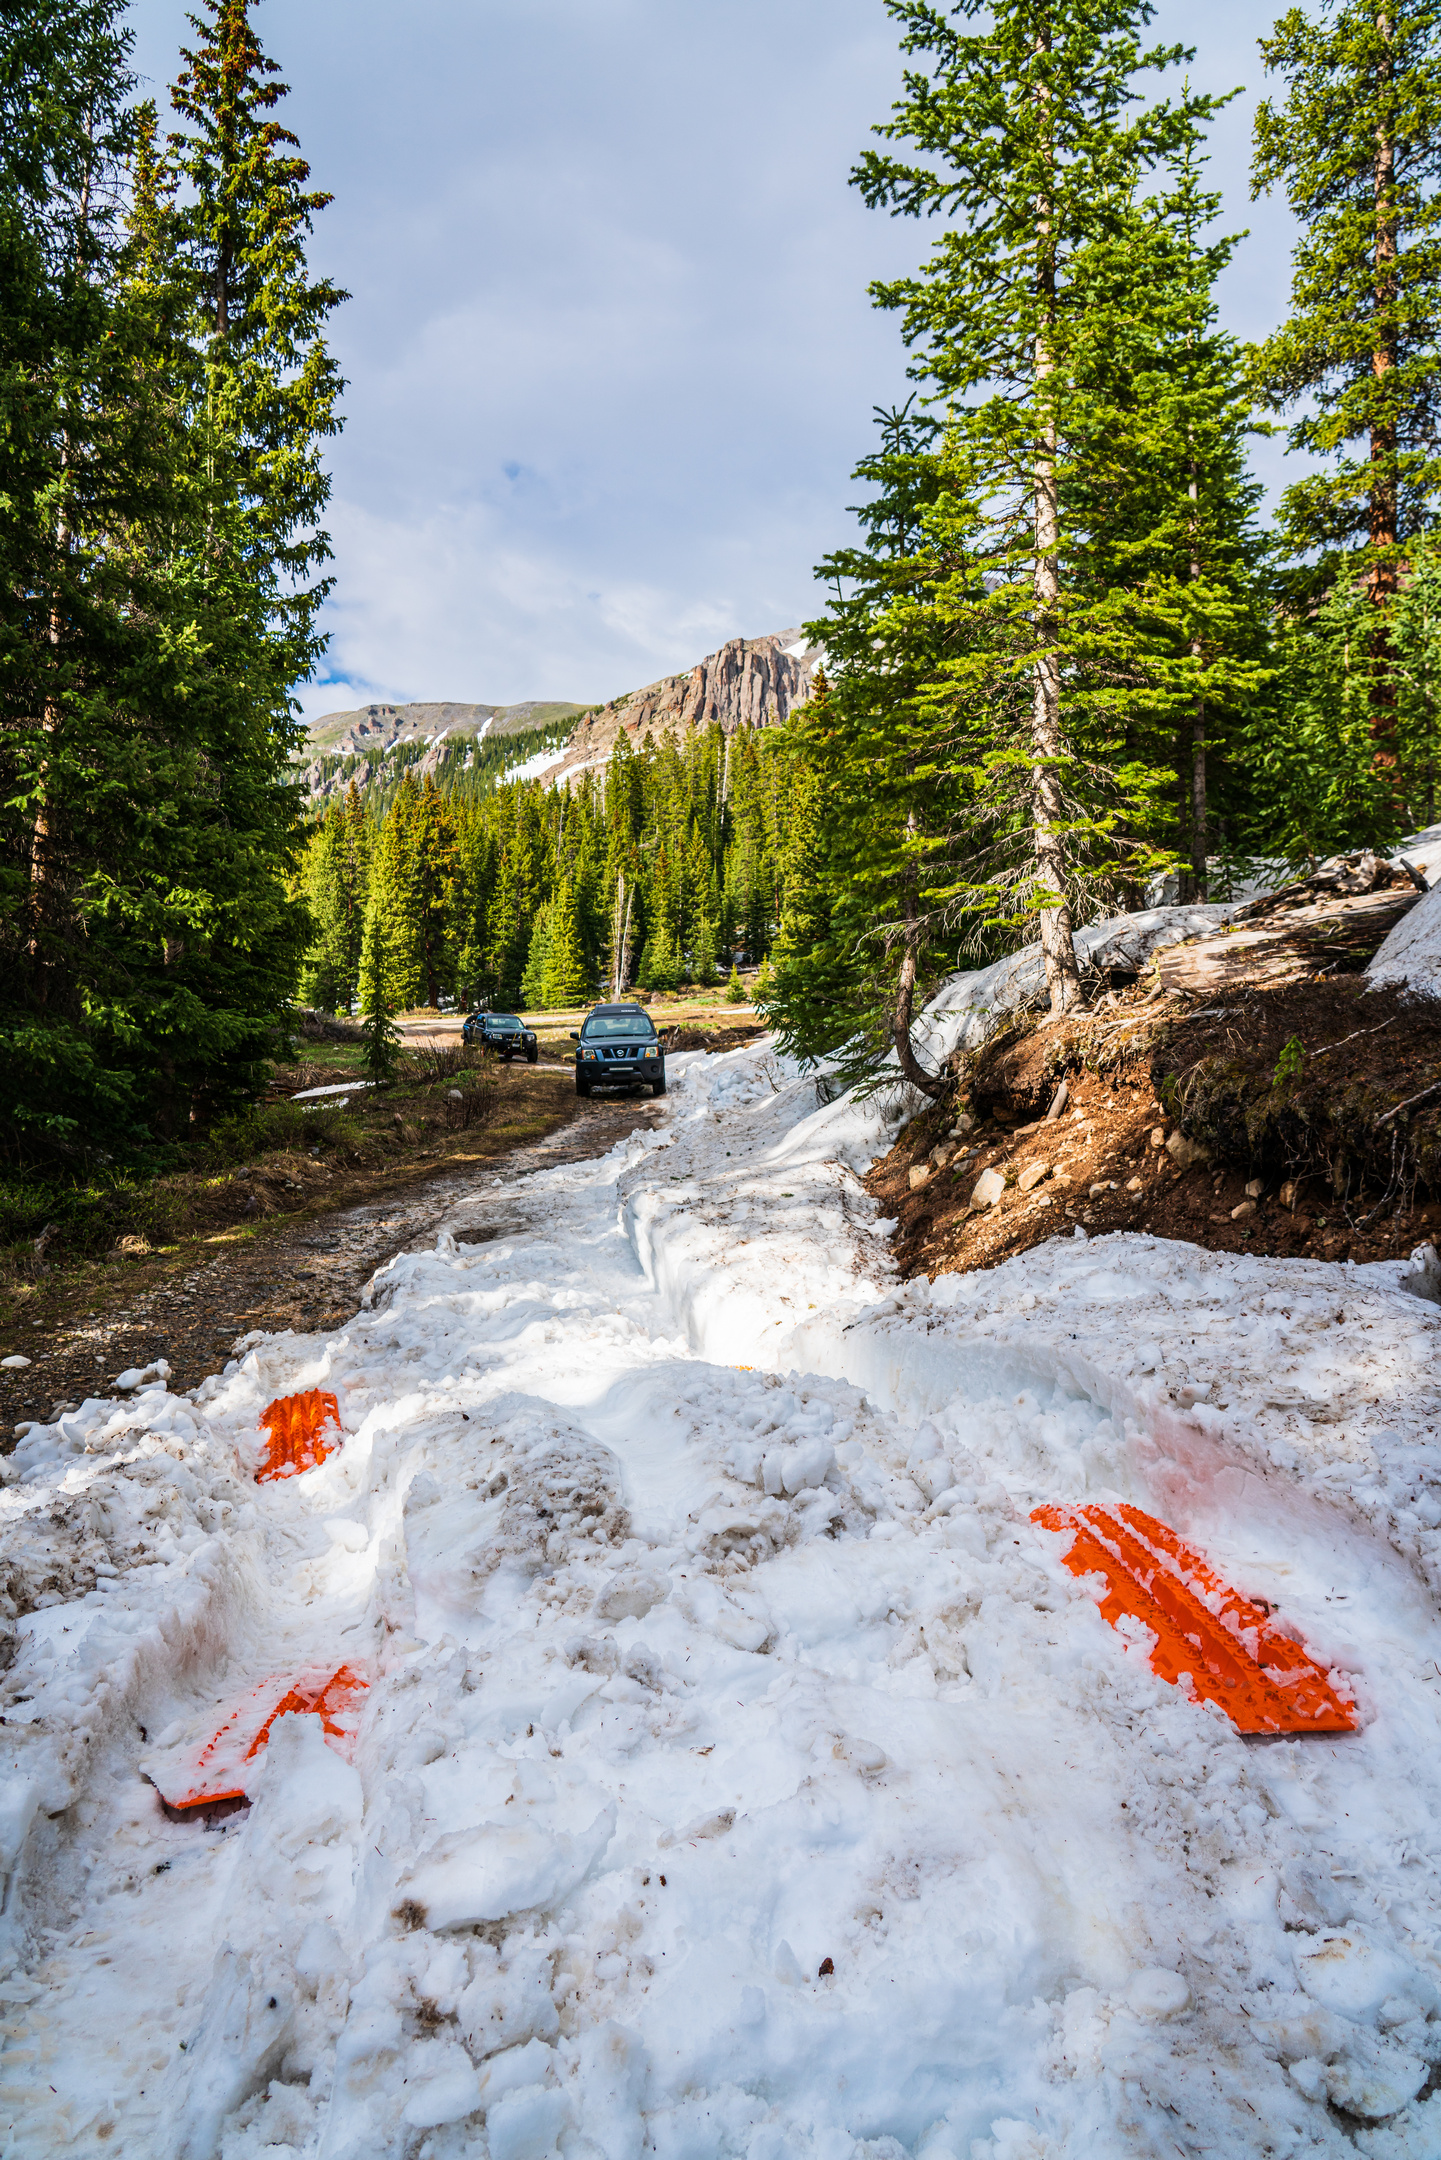
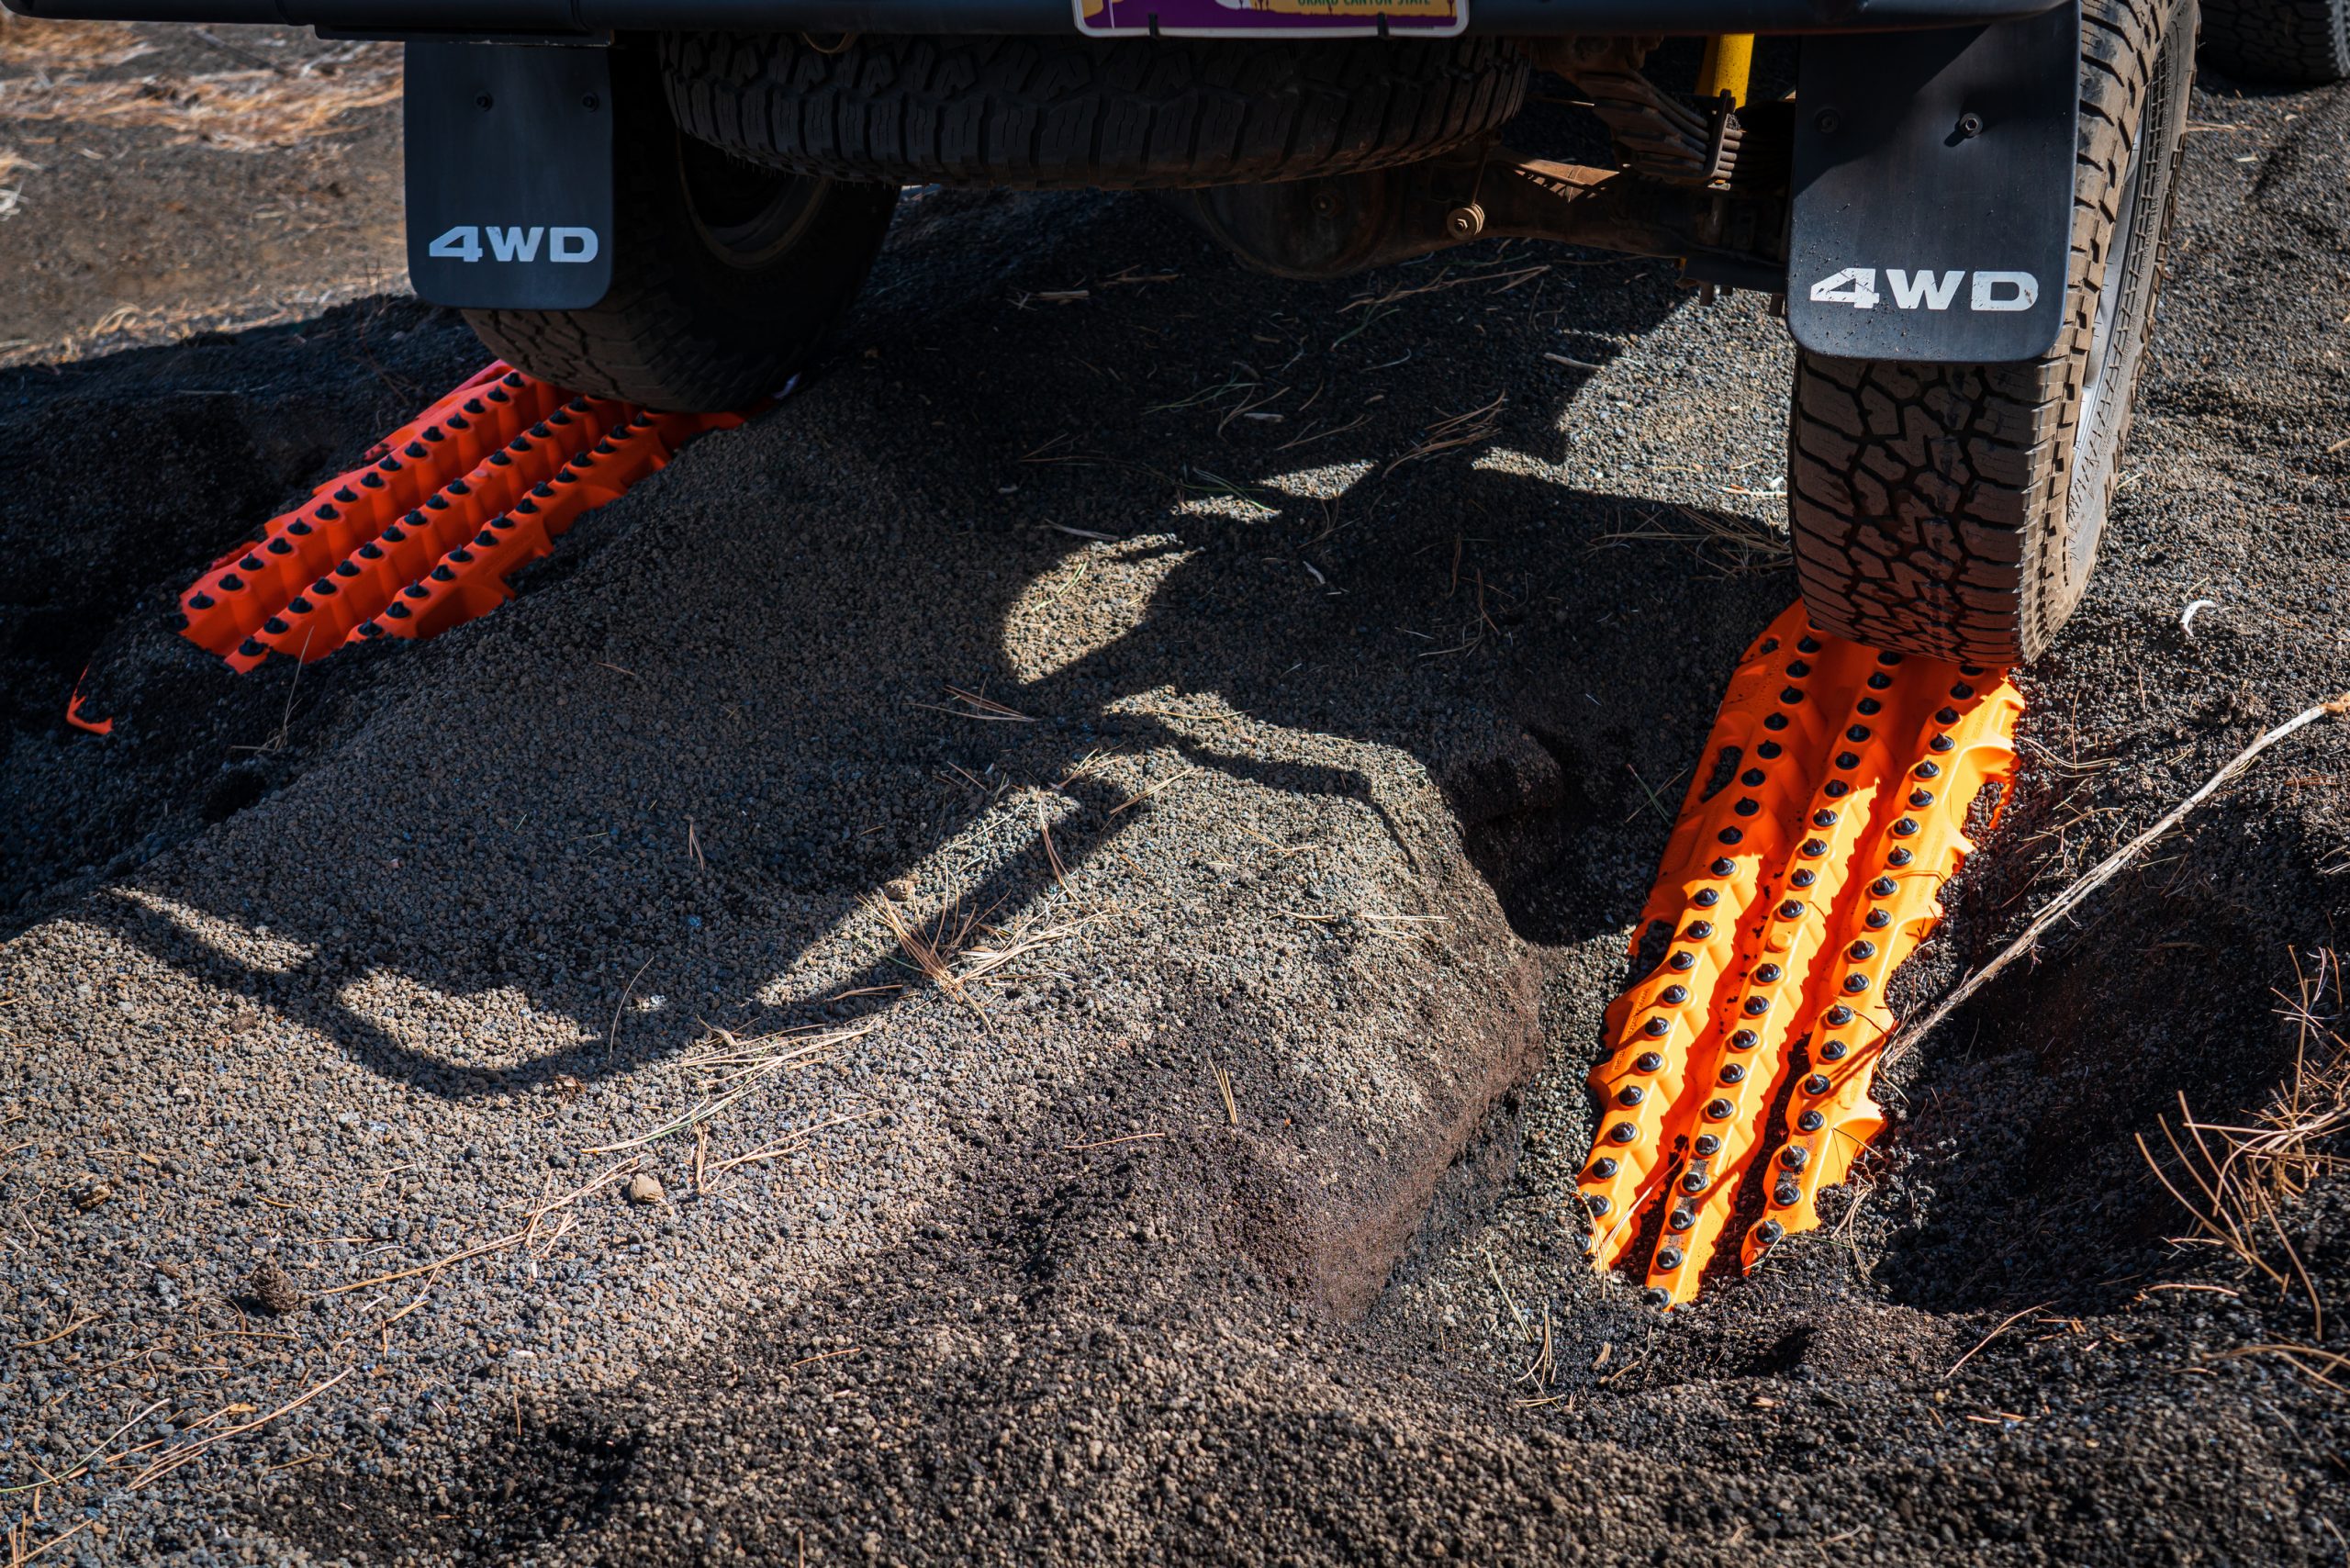
 We passed all three of our vehicles over this first snowbank and made it all of 60 yards down the road before we had to negotiate our next snowbank. Again, we employed the XTREME’s to help us quickly negotiate successive snowbanks as we continued to make progress down the road. On larger snowbanks and snowdrifts, progress was limited to the length of road we could make with all of our vehicle recovery boards, which provided a great opportunity to compare all of the different recovery boards back to back. To put it bluntly, the difference in performance is night and day.


The Maxsas required very careful and deliberate placement and more shoveling to be of any value when extracting a vehicle. With the MAXTRAX XTREME’s we could seemingly just get them near a tire and know that once contact was made there would be traction. (Don’t take this to mean that you can be lazy with XTREME’s. You still need to use your tools properly.)
We also came to appreciate just how much easier it was to drop a tire off a Maxsa when driving along a recovery board road. They were like driving on ice, and even without looking it was easy to tell what brand of recovery board your tires were on at any given time by the difference in grip.

 After a full day of MAXTRAX-ing our way through snowbanks, I felt the need to reset my baseline for traction board performance, and so I saved one of the larger snowbanks on our drive out to only use my Mark II’s. With one on each tire, I was able easily climb up and over a large, rutted snowbank. Mark IIs are still great vehicle recovery boards, and after a full day of use, my set looked no worse for wear. The same can’t be said for the Maxsas, which were all showing serious stress-lightening of the plastic. On a scale of 1-10 in super-wet spring snow, the XTREME’s provide traction performance at 10, with Mark II’s a solid 9. We’ll just say that Amazon’s choice may not be the best choice here.
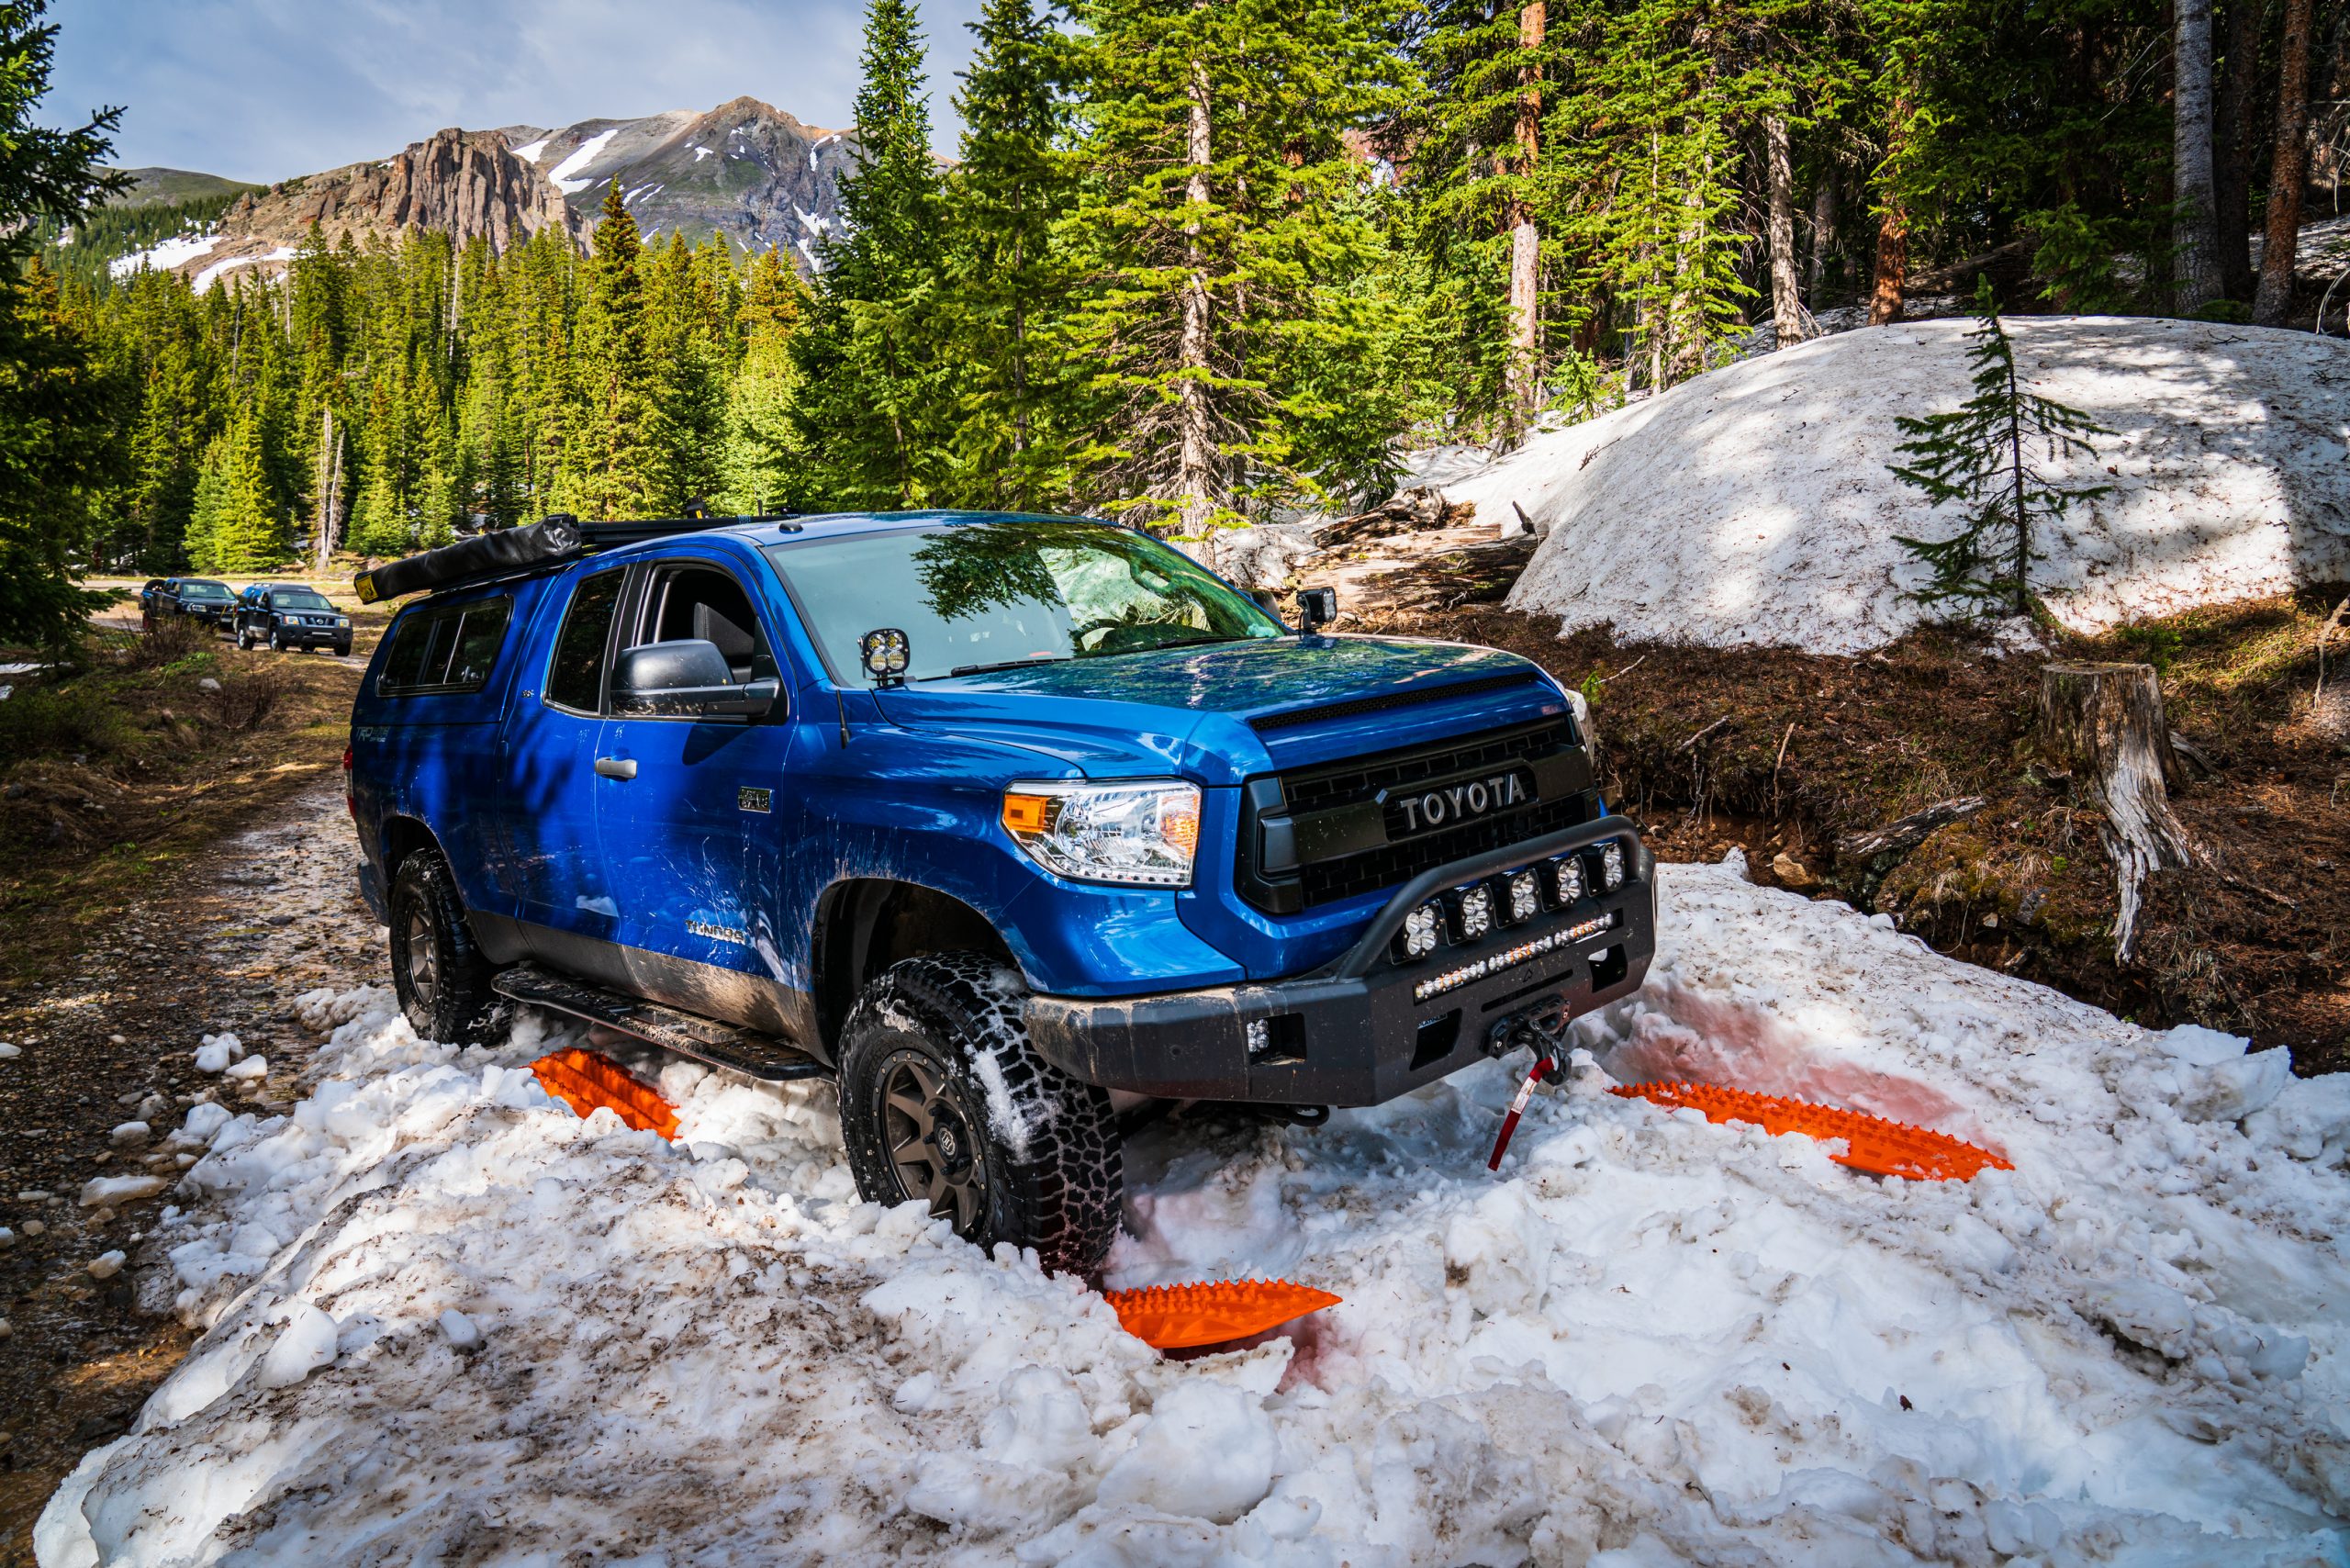
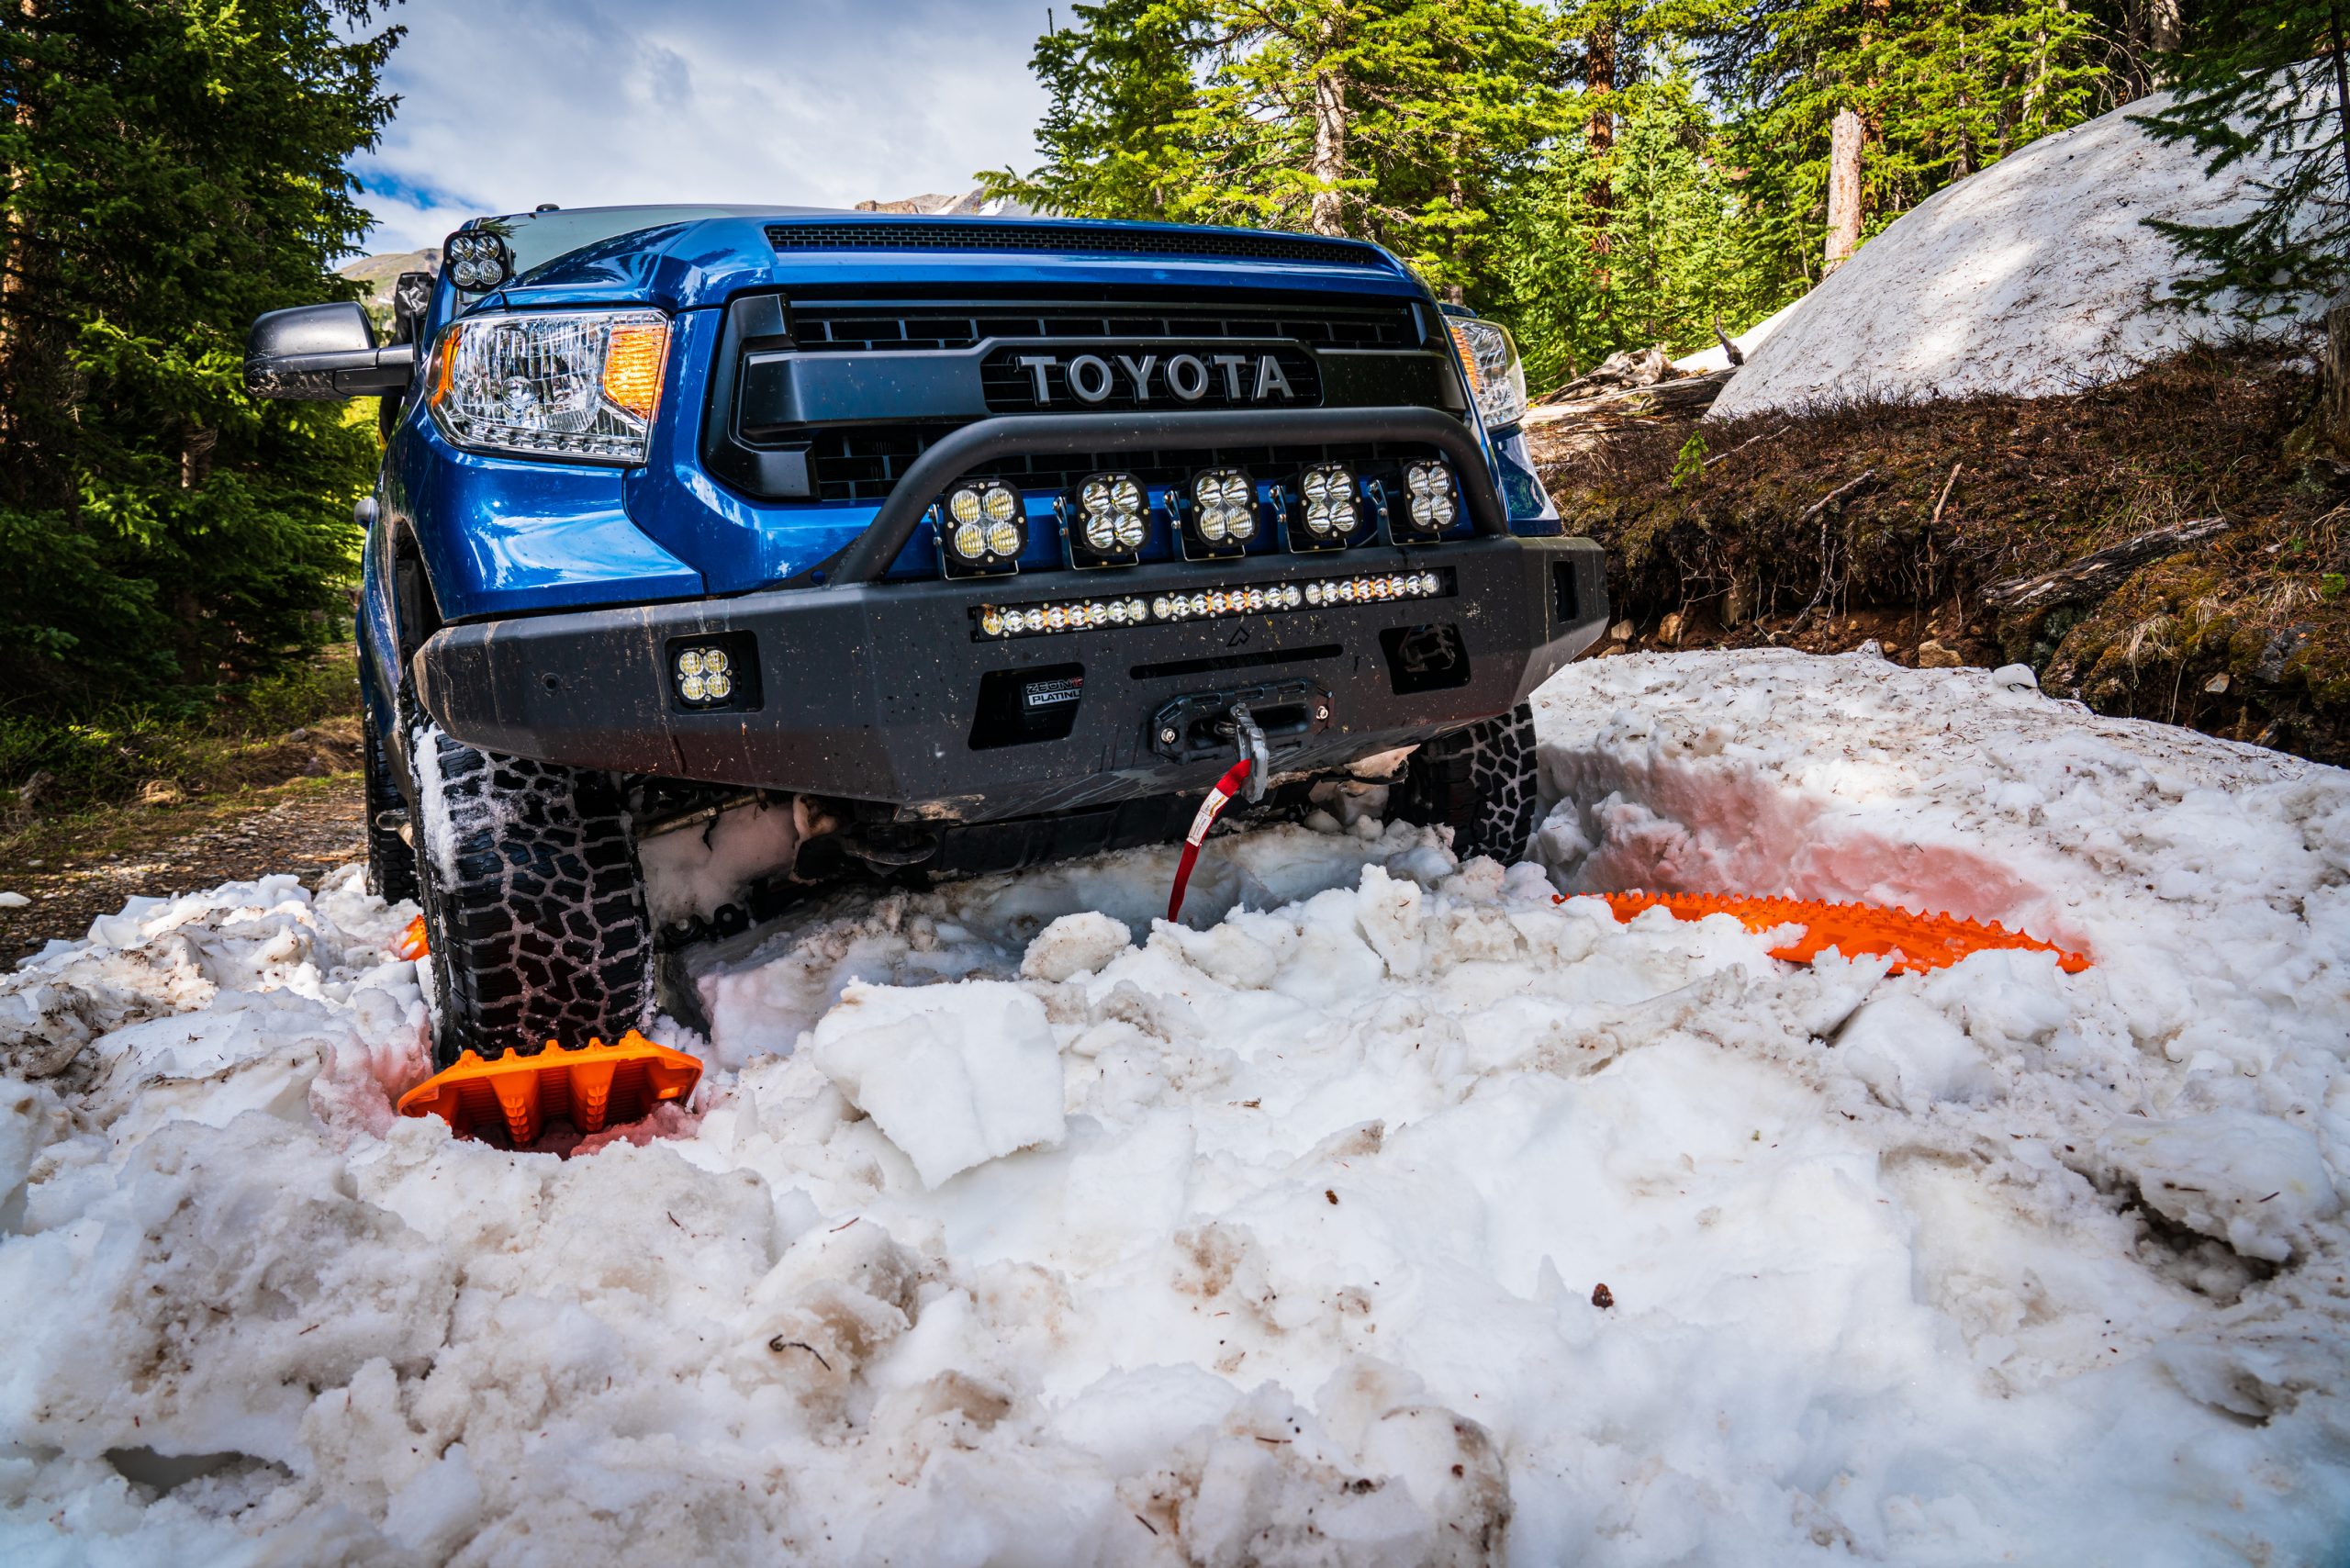
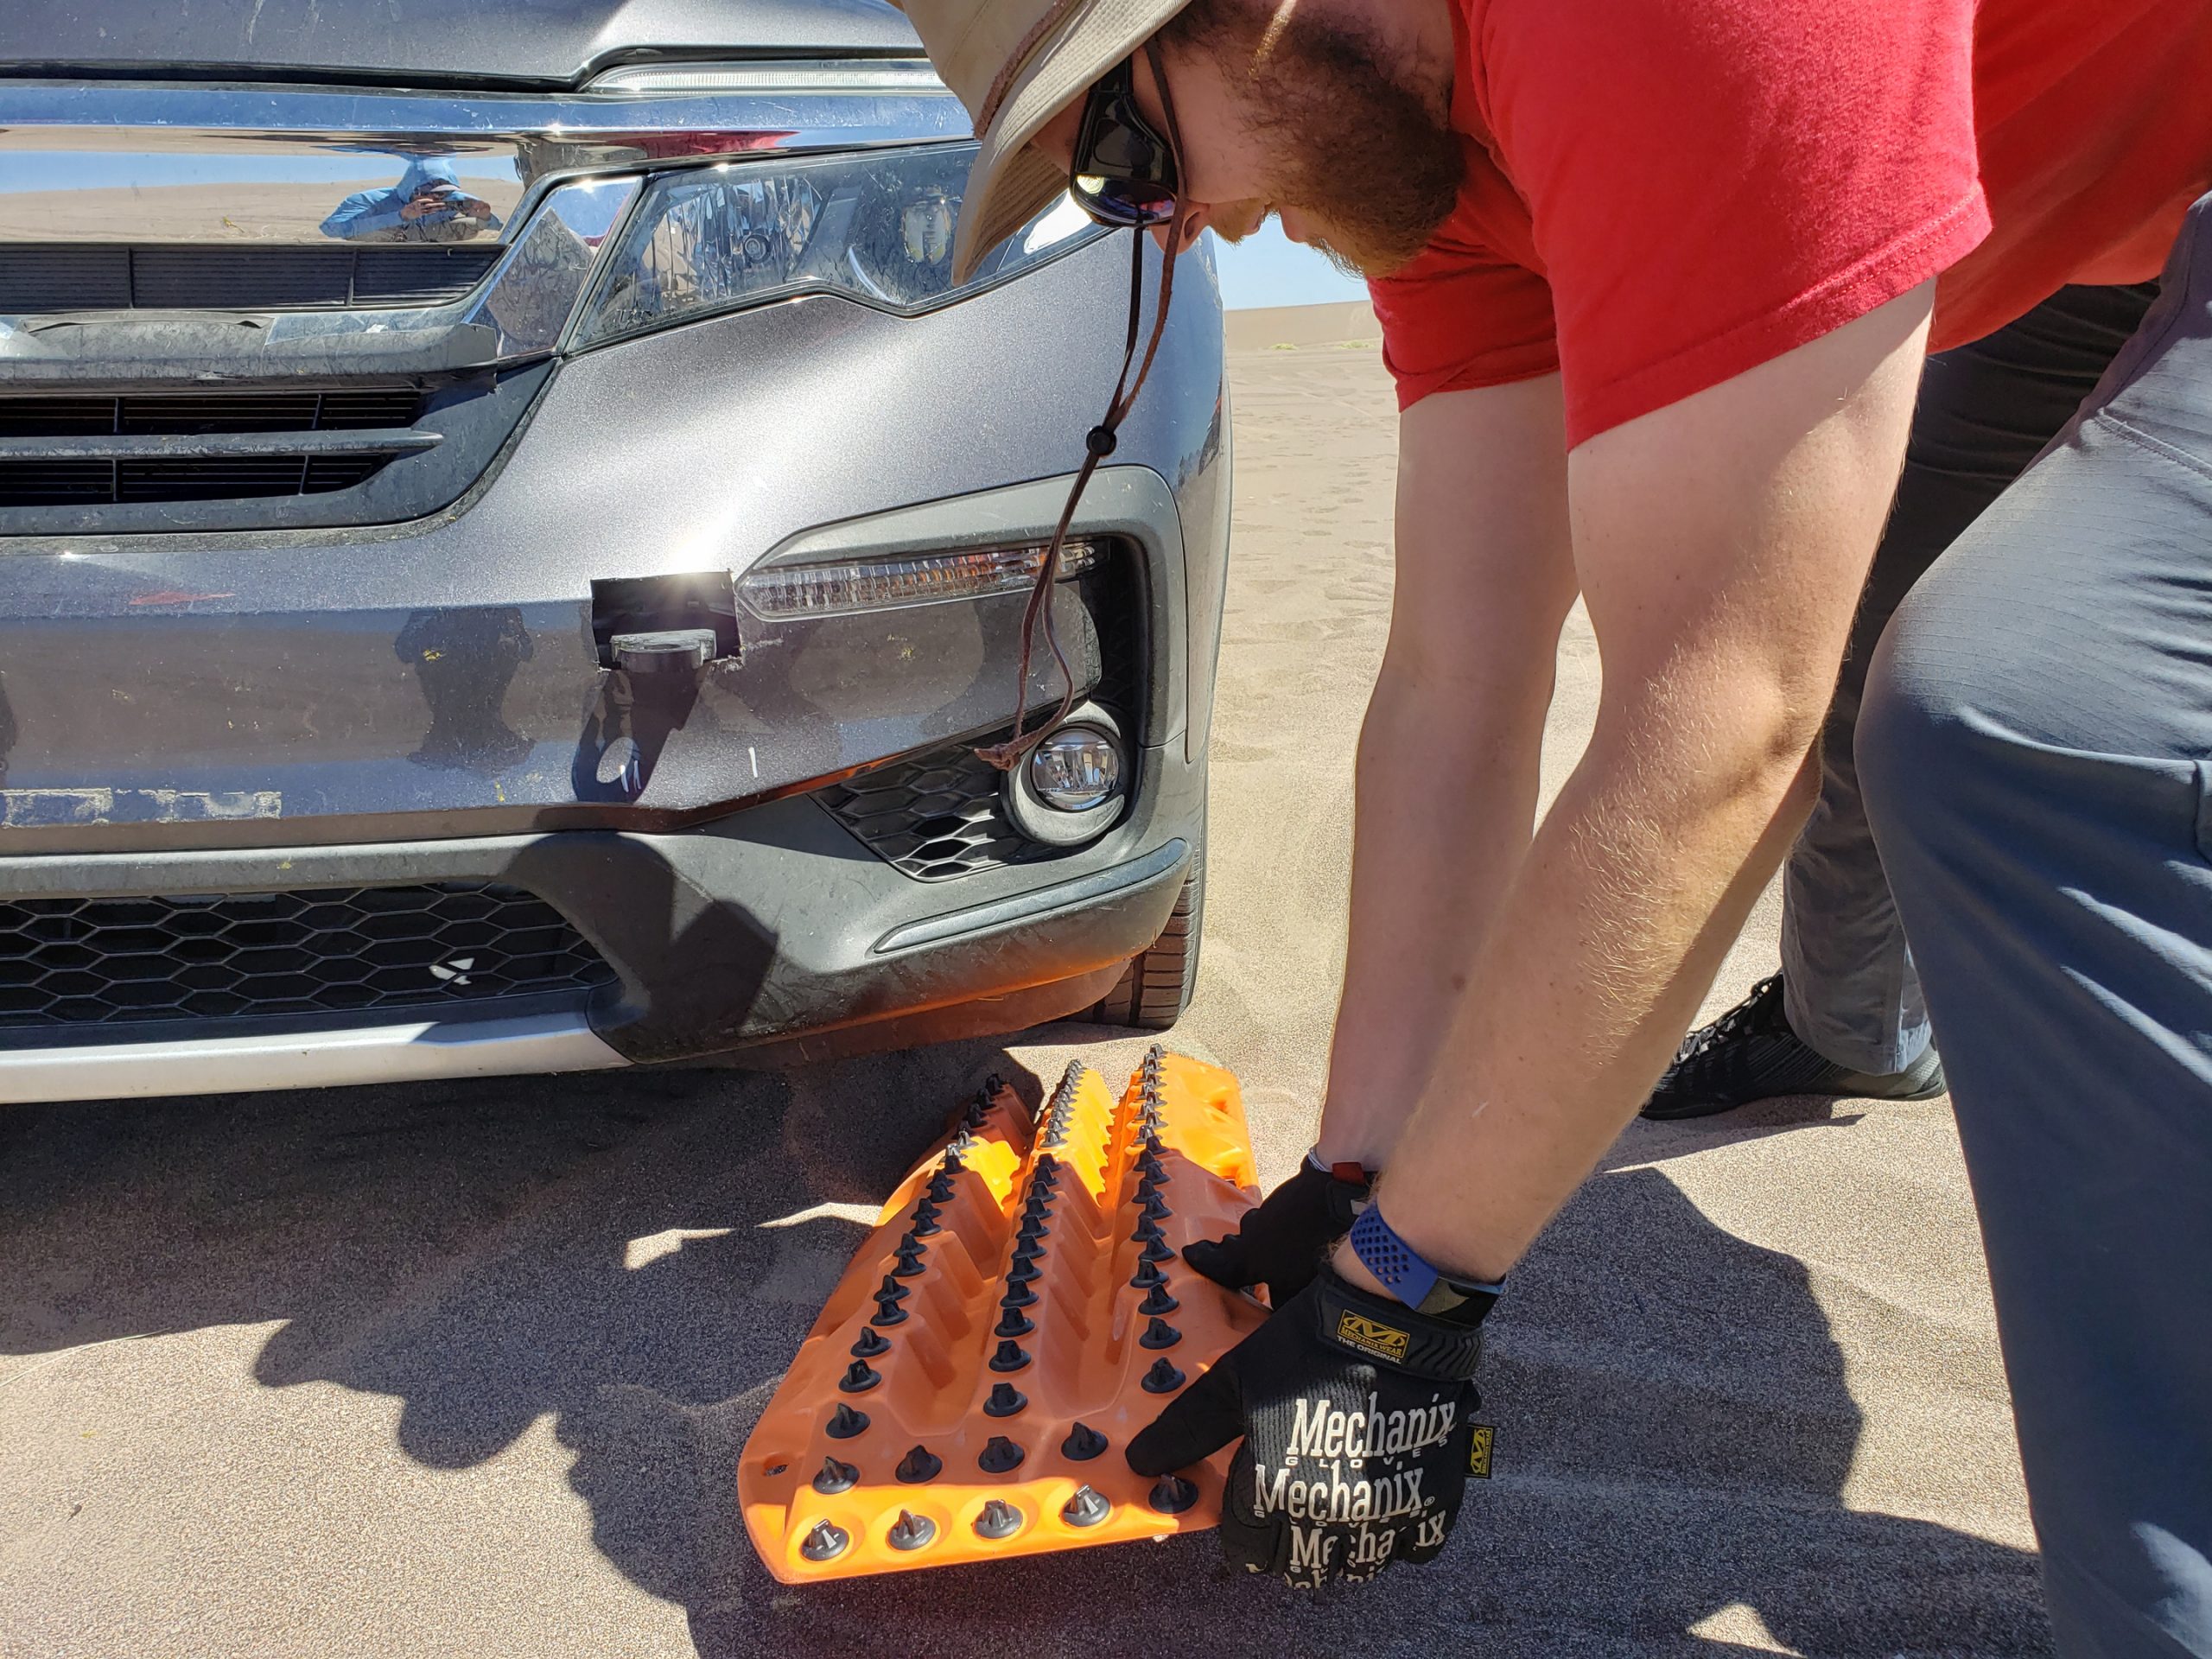 With the new XTREME’s proven in the extreme of constant use in the snow, it was time to take them to another extreme, and put them to work in the sand dunes of Southern Nevada in the middle of summer. With triple digit air temps and the sand considerably warmer, both human and machine were put to the test during a multi-day sand dune driving course. In these conditions, each time a vehicle would get stuck the recovery was an absolute exercise in making an accurate stuck assessment and efficient recovery.
Here the alloy teeth once again proved their worth, this time by being completely impervious to drivers who were feeling some nerves from being thrown into an environment that they’ve never driven in before. More than once, a little too much throttle was applied when it was time for a stuck vehicle to drive out, but this was still nothing for the XTREME’s. If you’ve ever felt trepidation at letting someone else drive on your recovery boards as you’re worried that they’re about to get melted with wheelspin, MAXTRAX XTREME’s will most likely damage tires long before they take any real damage.
 In the time that I’ve had the XTREME’s, they’ve proven to be exactly what I hoped they would be – a burlier version of the Mark II’s that retain everything that makes earlier versions great. At every chance I’ve had or created for a vehicle recovery, they have performed flawlessly and are no worse for the wear. Since I’m the guy in my group of local friends who has MAXTRAX, I’m constantly supplying them for recovery situations, and it’s great to have the peace of mind that when I’m helping someone out who isn’t dialed in on proper MAXTRAX usage, or is just a little to high-strung at the moment, accidental wheelspin isn’t going to roast my traction boards. Do I still use and carry my Mark IIs? Absolutely. They’re awesome and the ace up my sleeve for when stuck happens to me. Yet, when I’m heading out knowing that I’m going to be the guy providing the MAXTRAX for any recoveries that may occur, I’ll toss in the XTREME’s.

 If you’re trying to decide between the XTREME’s and Mark II’s, know that you can’t go wrong with either. But, let me offer a few hypothetical questions to help you identify which MAXTRAX are right for you. If you’re the type of person who isn’t getting stuck every time out, or when you do get stuck you’re not prone to using panic throttle, Mark II’s are a great option that will last you a very long time.
Make no mistake about it – they can take some serious abuse, and I know professional guides and other serial MAXTRAX users who have used the same set extensively for years. Yet if you’re a guide, or you routinely tackle the hardest routes and trails wherever you go, and your honest enough to admit that you’re hard on gear, the XTREME’s are where you want to look.

 The additional performance of the XTREME’s comes with additional costs in several areas. A single XTREME weighs a couple pounds more than a Mark II (10 pounds vs. 8), and a set of XTREME’s doesn’t stack as tightly as a set of Mark II’s (4x Mark II’s are ~ 4 inches tall, where 4x XTREME’s are ~ 5.5 inches tall). But the biggest pain point of all is the cost – a pair of them cost $500 whereas a pair of Mark II’s costs $300. Yet for the folks who truly need the performance of an XTREME, these factors are hardly a consideration when weighed against the benefits.
 I’m sure by now someone is getting ready to fire off a smart comment to the effect of “but I can buy X sets of <insert cheap brand vehicle recovery board here> for the price of one set of MAXTRAX” Well that may be true – but everyone who makes that argument always seems to assume that they’re going to have data coverage and instant Amazon Prime delivery wherever in the world they are when they break their first set of cheapo traction boards trying to get unstuck or get home. I know Amazon delivers in cool Sprinter vans, but I sure haven’t seen many off-road. My suggestion would be to do it right the first time and get a product that isn’t going to let you down when it counts.
A wise man once said, “buy once, cry once”.
 In summary, you can’t go wrong with MAXTRAX. Yeah, you’re going to pay for them up front, but the first time you use them in a recovery and get to fully appreciate what a powerful tool they are you’ll find yourself saying “worth it” when your mobility is restored. In my experience, the difference between cheap alternatives and the genuine article has been night and day, and there’s plenty of good videos on the internet that corroborate my experience. I certainly don’t want to roll the dice on my family’s well being just to save a couple bucks. You can’t put a price on the peace of mind that comes from knowing you have quality tools with you to see the world and then see your friends and family back home safely.
MAXTRAX has a great product line, and anyone who uses them properly will enjoy years of reliable service from them. For the folks out there who really push it, or the professionals out there who are guiding or working in harm’s way where every second counts, MAXTRAX XTREME delivers that extra serving of performance that will make all the difference.
FULL DISCLOSURE: The vehicle recovery boards used in this article were not provided by MAXTRAX. They were privately purchased by the author and his Amigos.
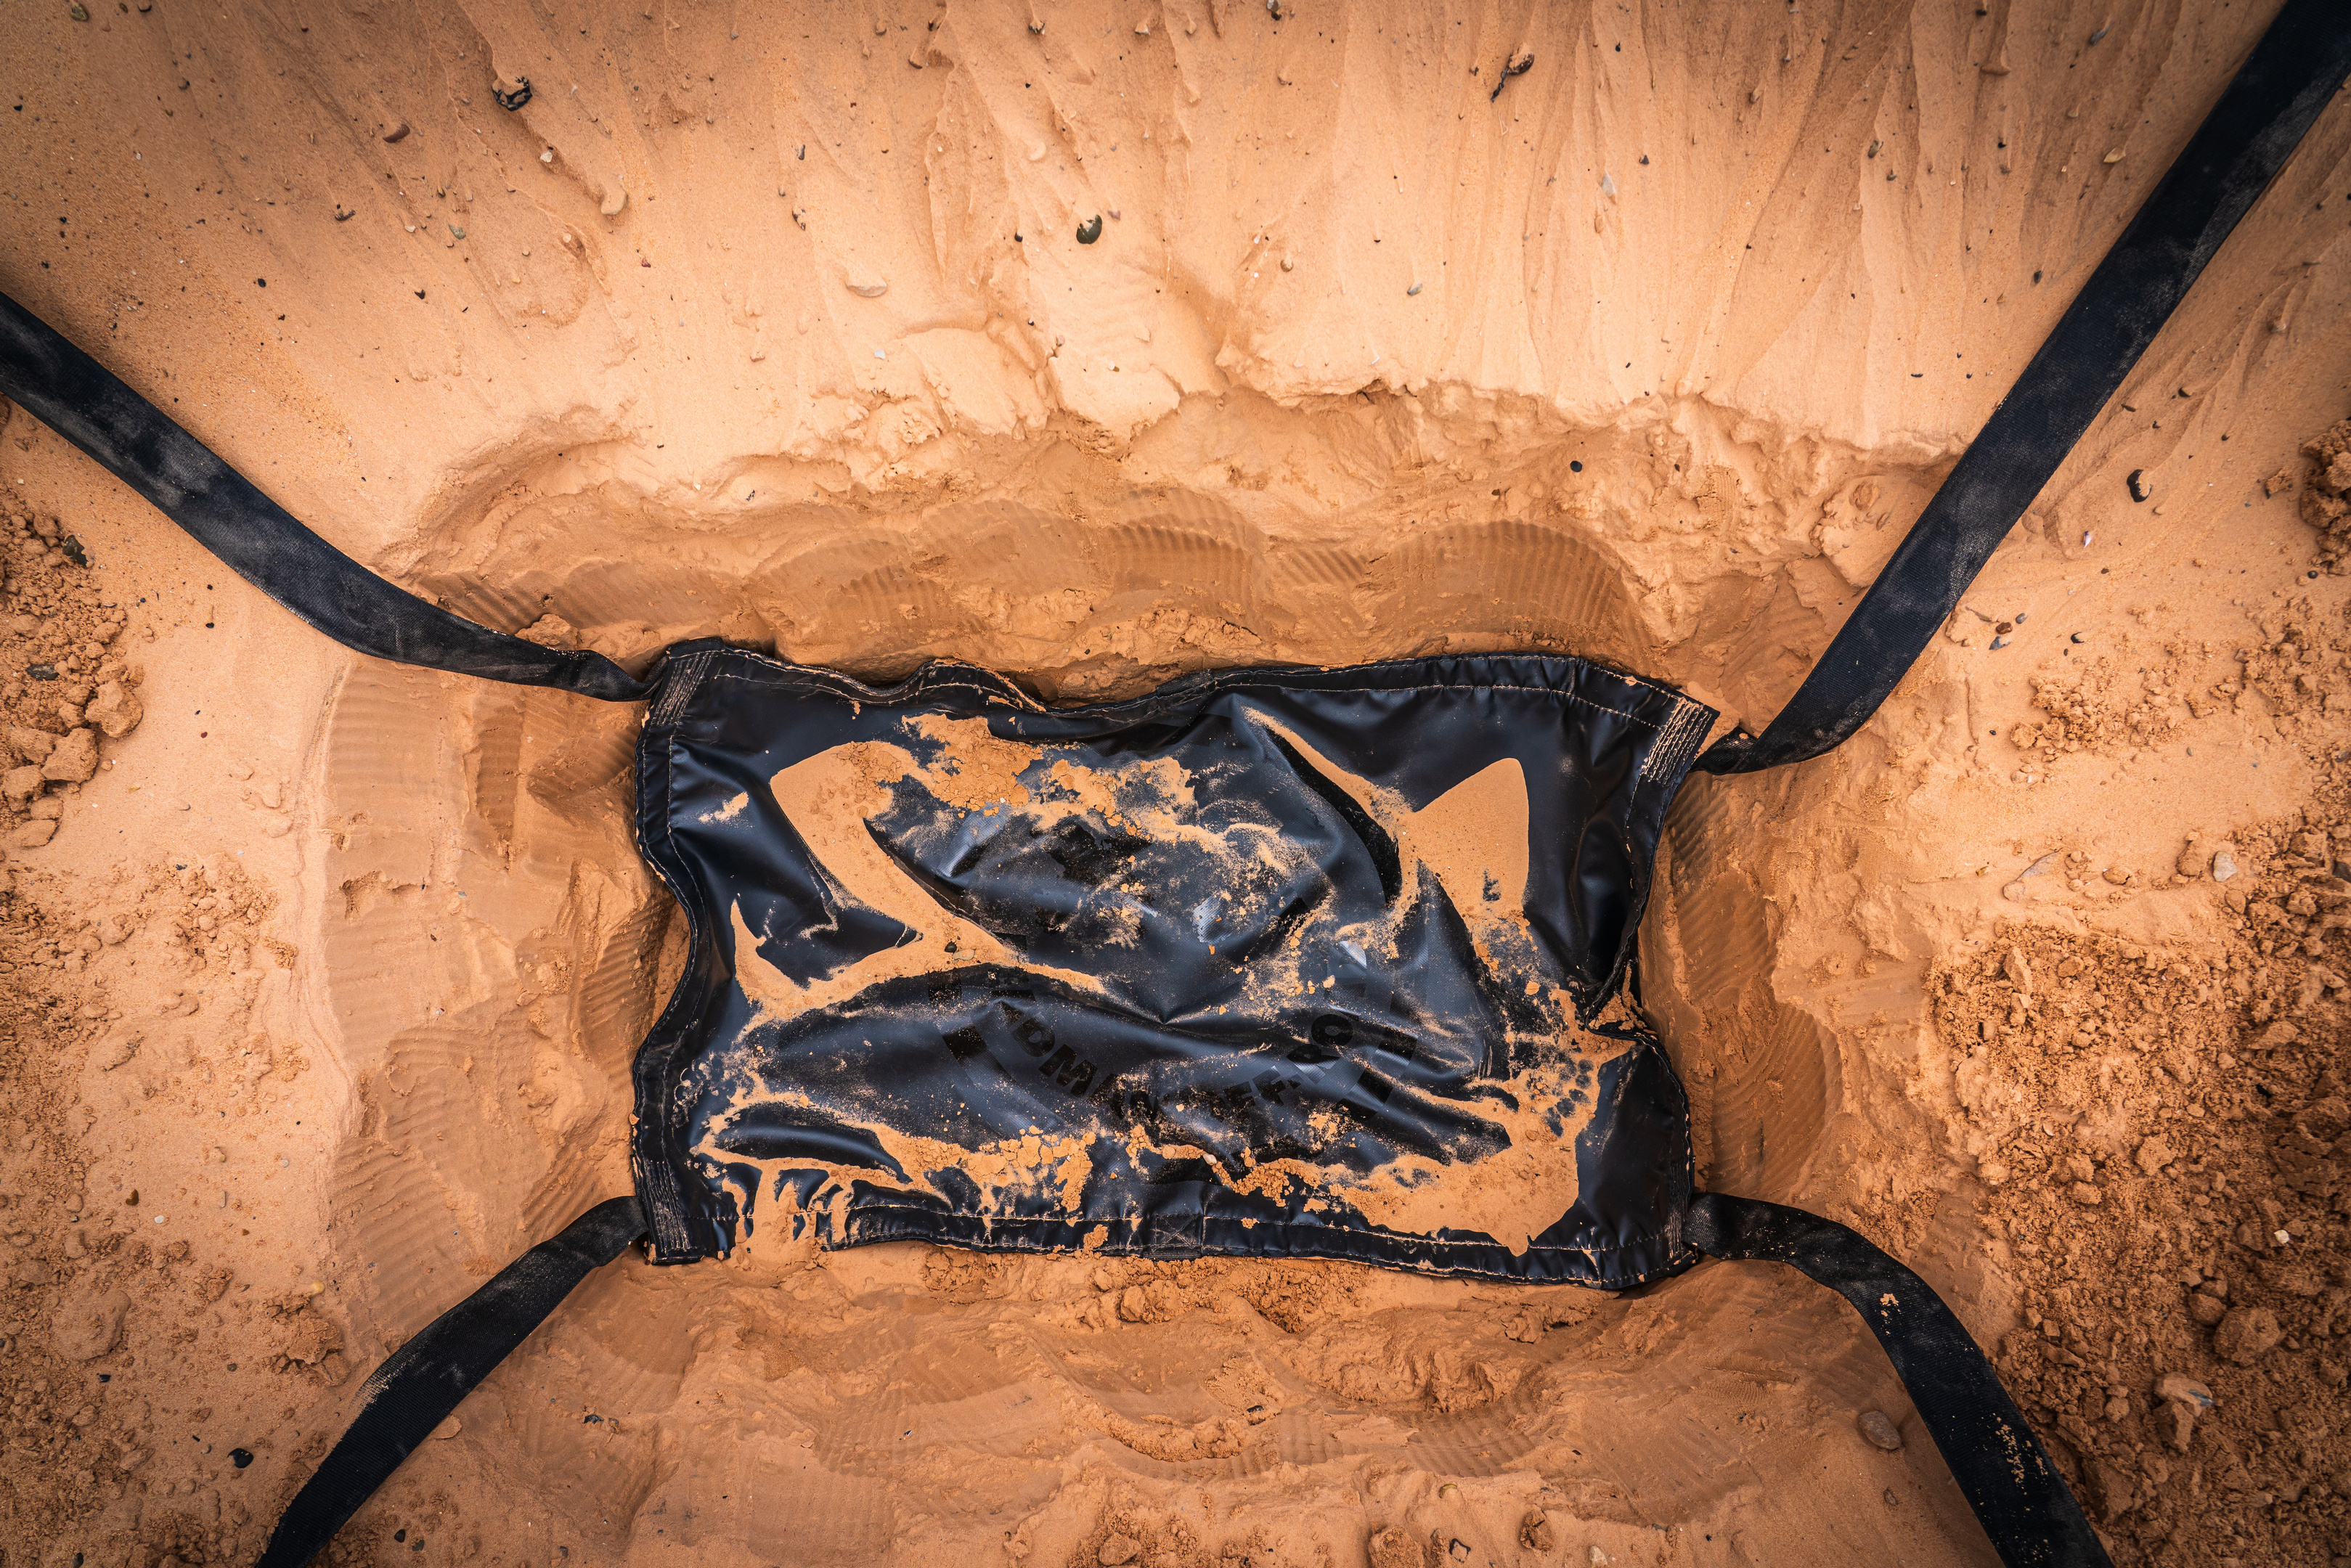

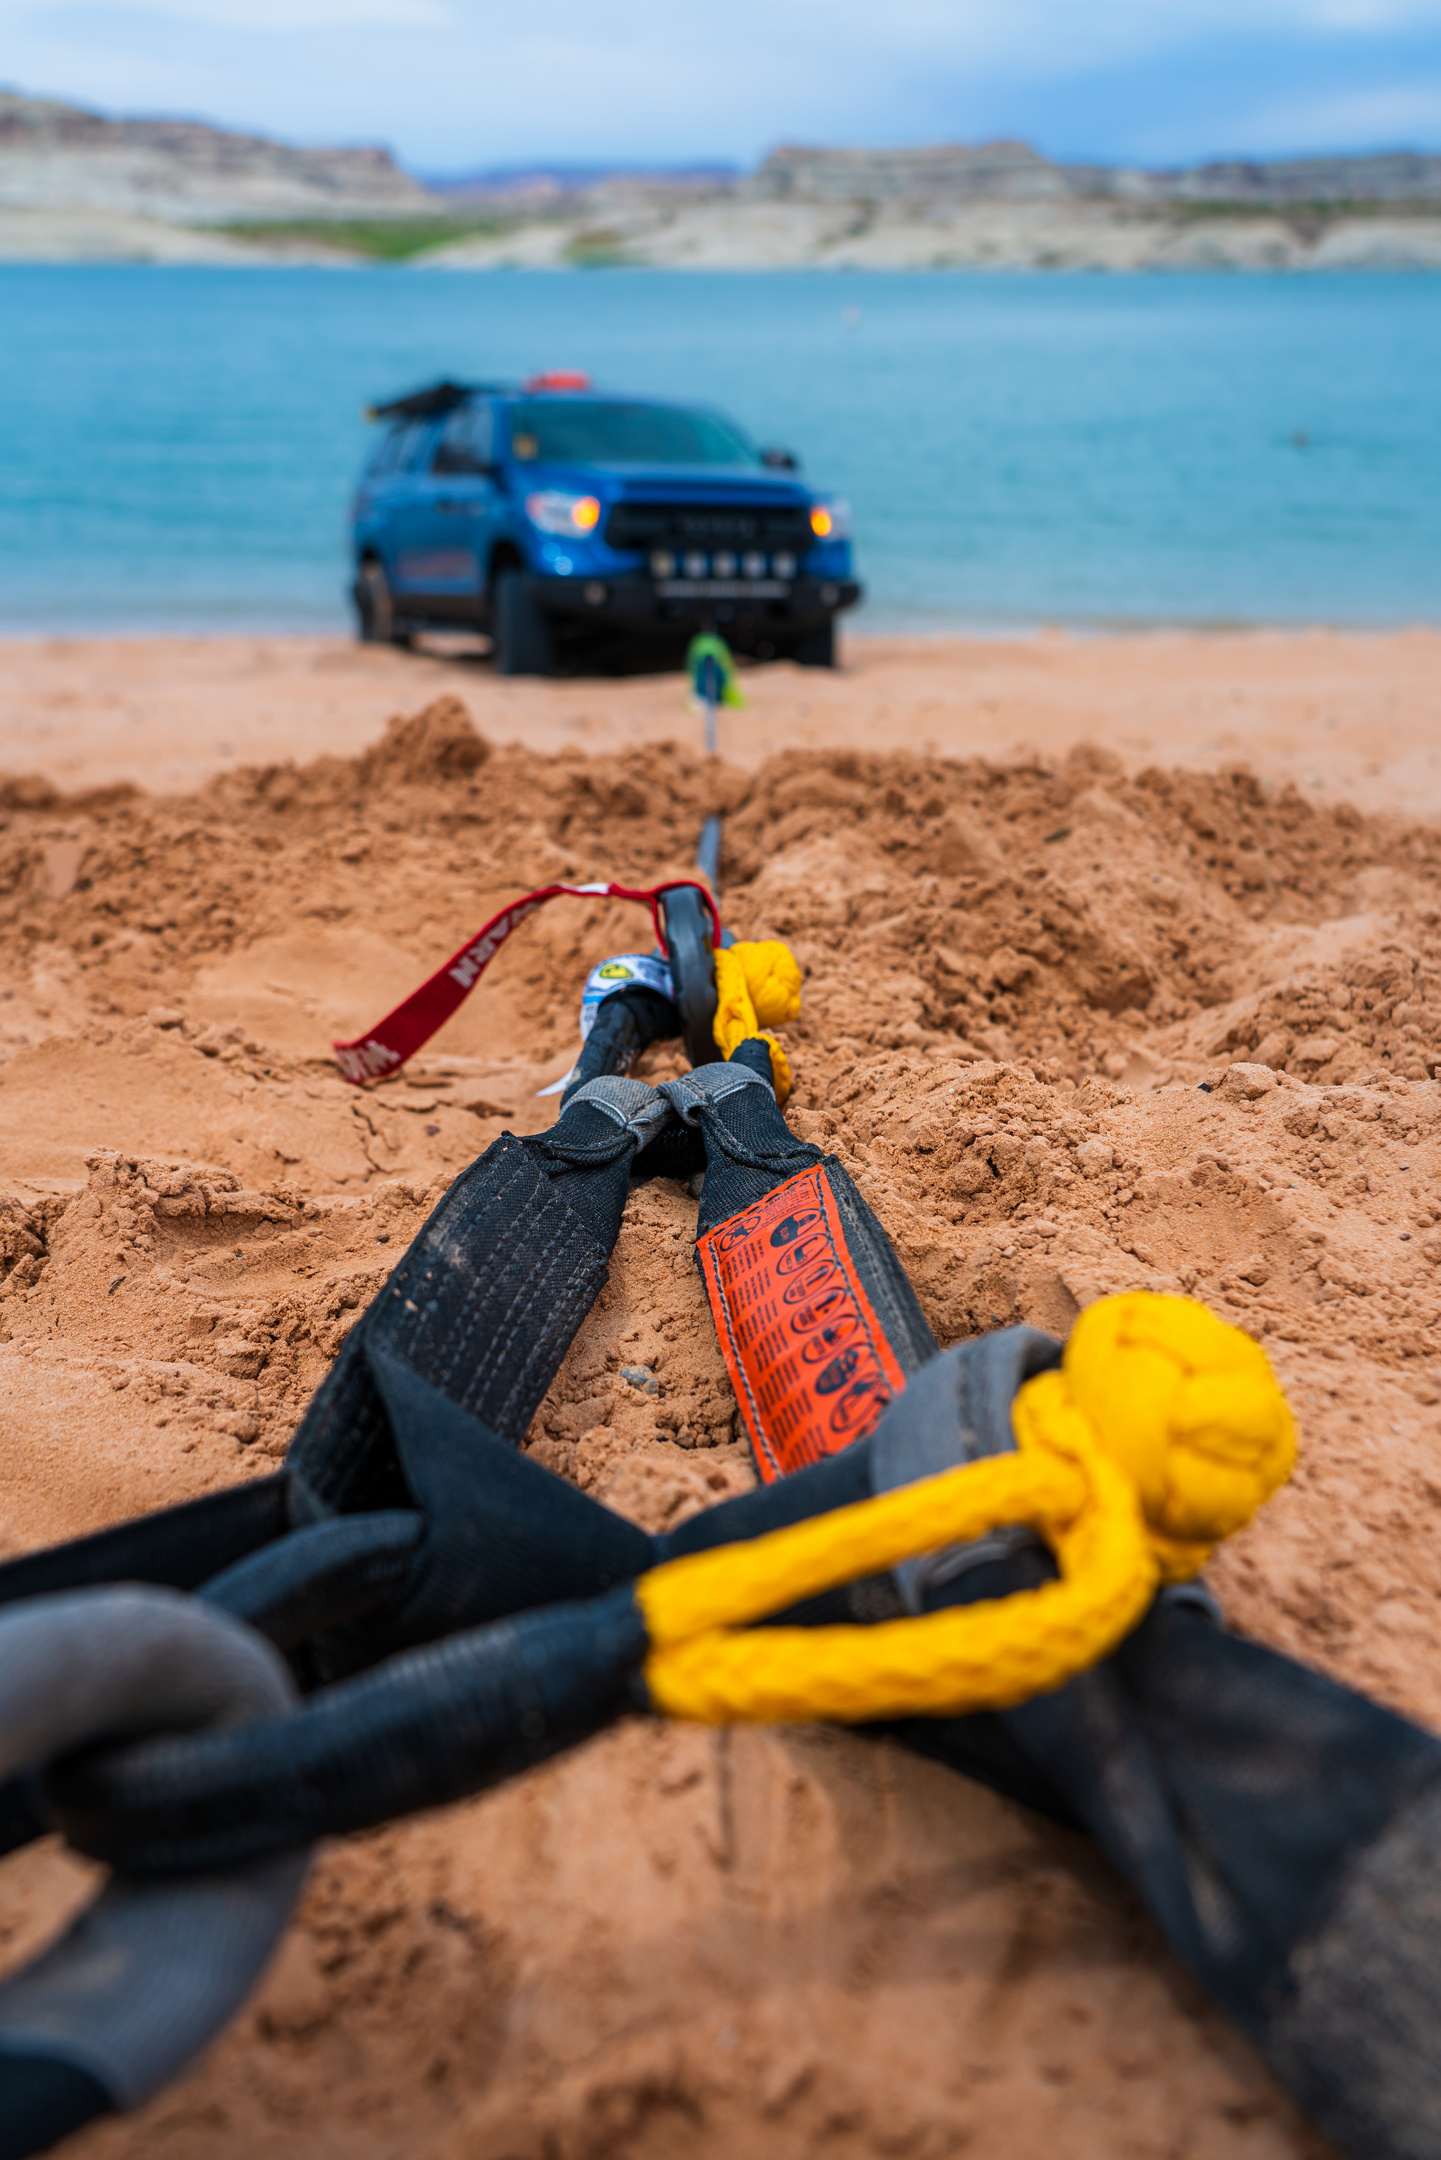
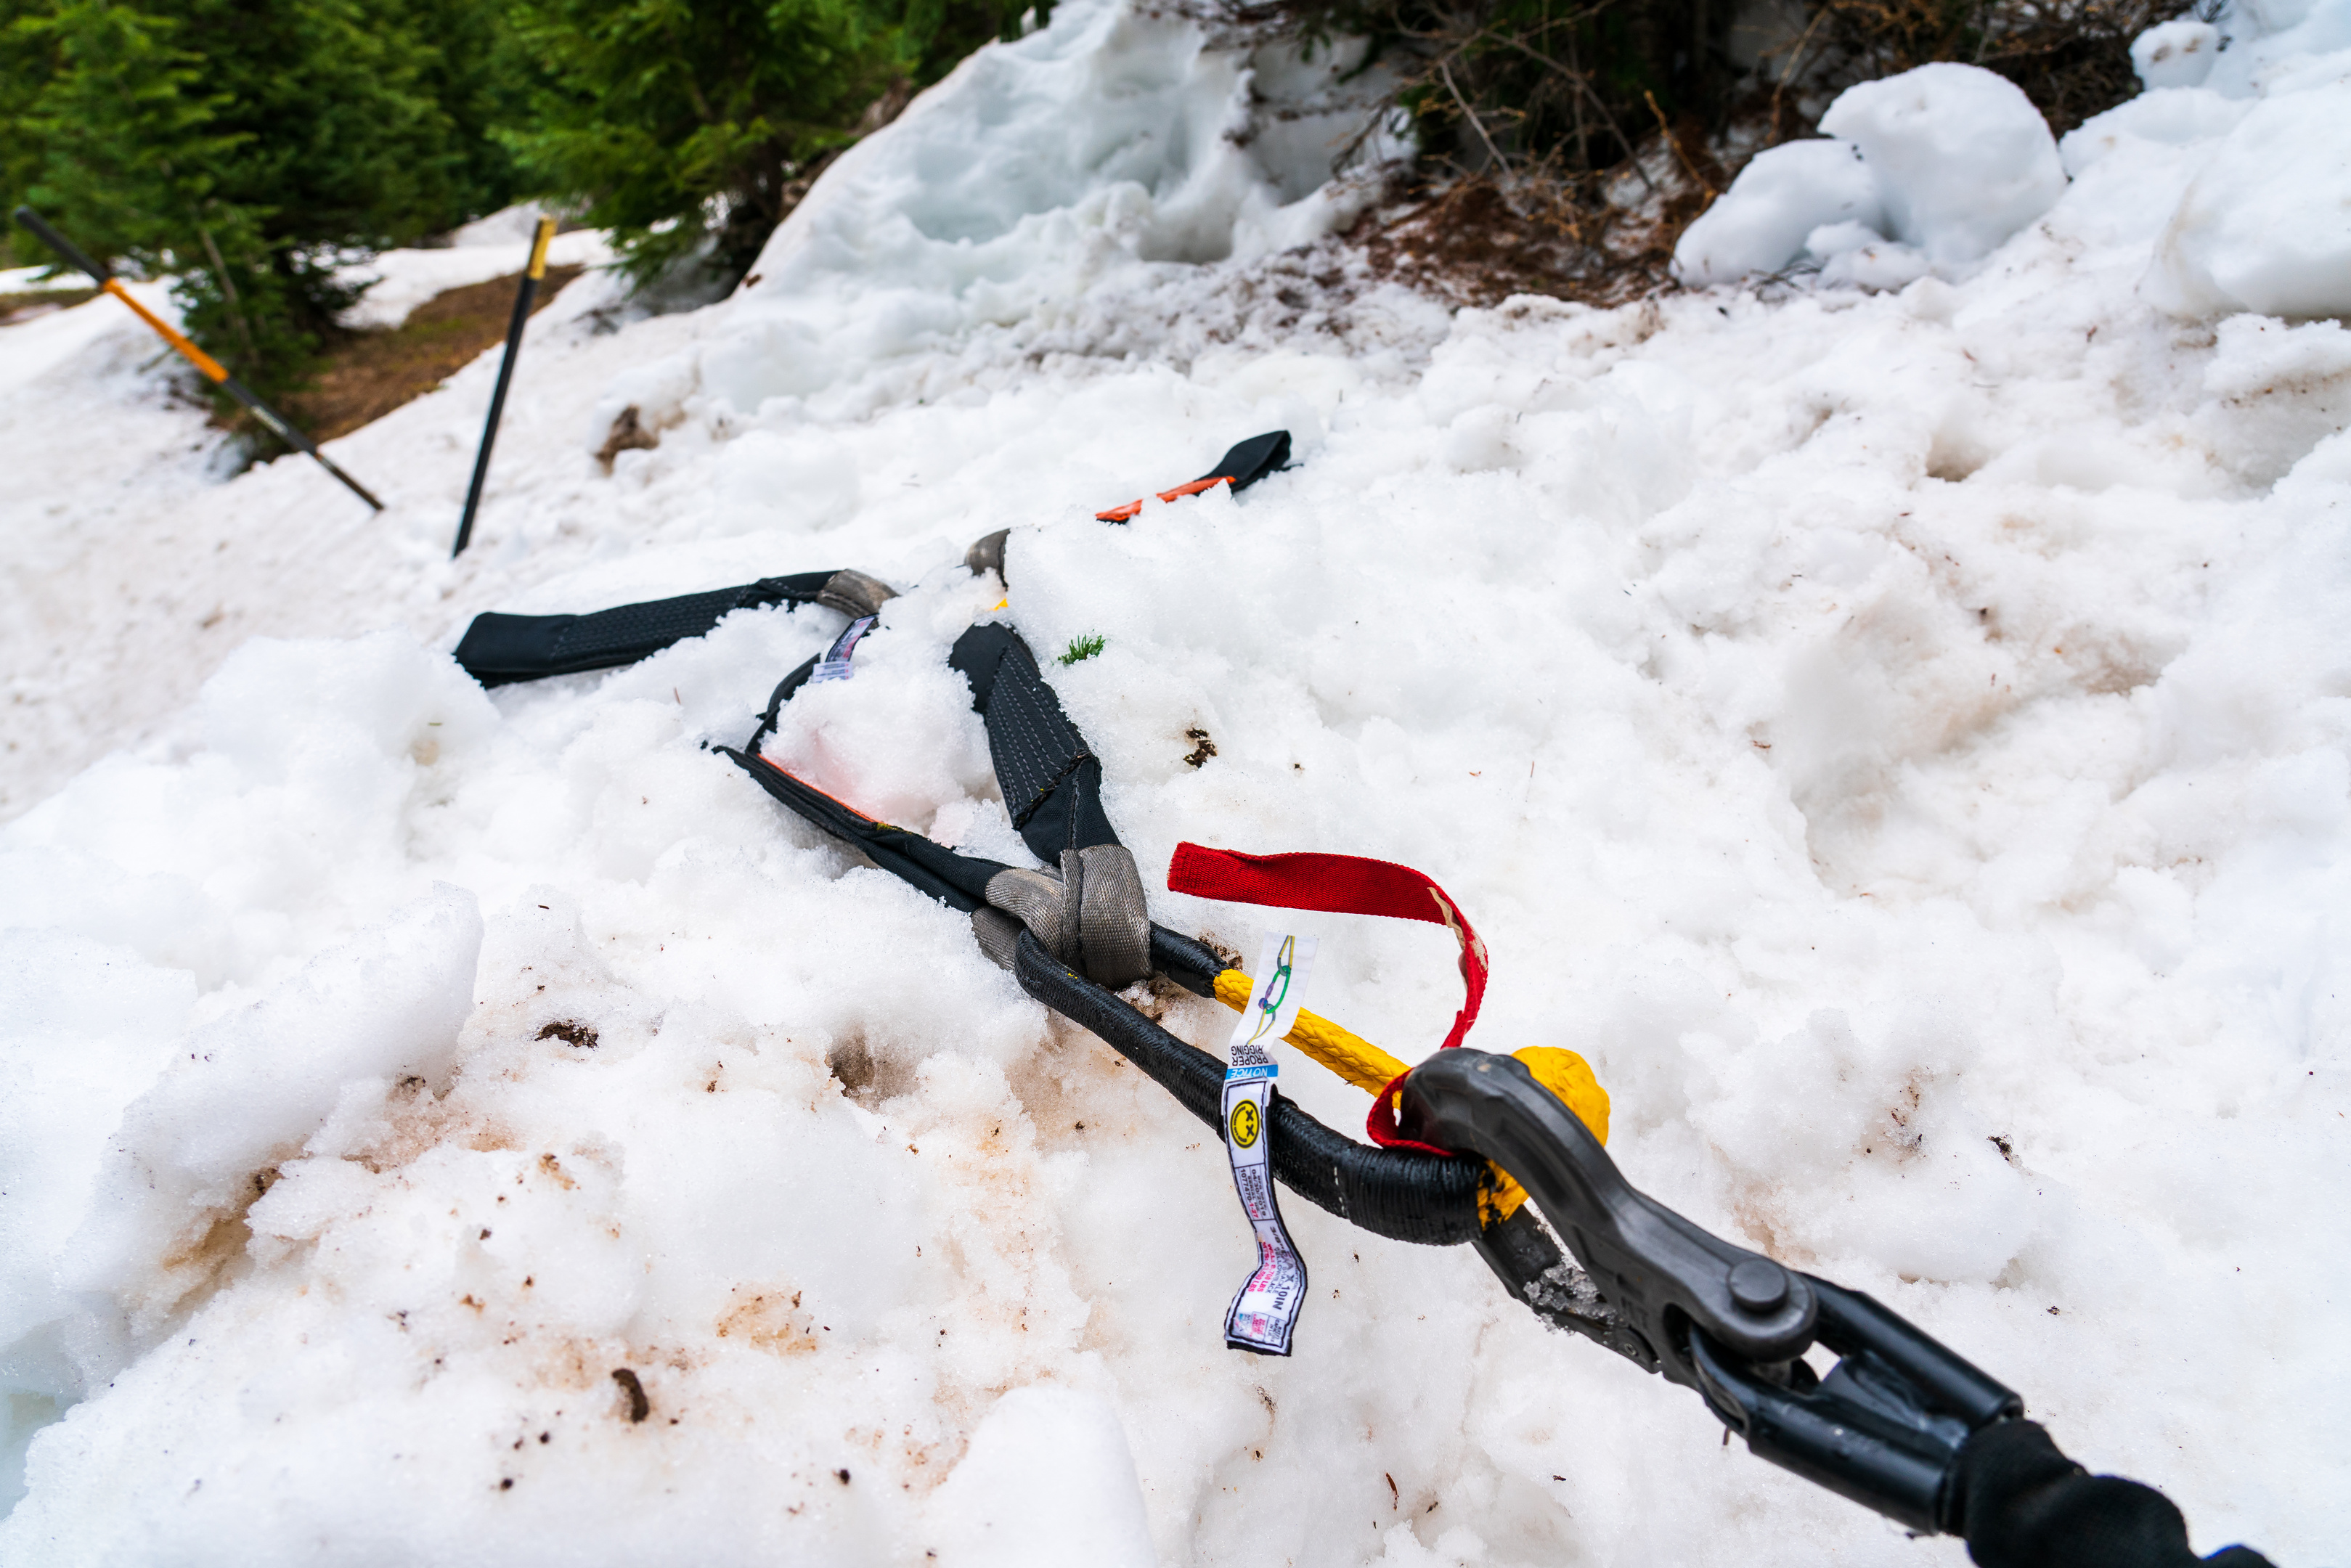
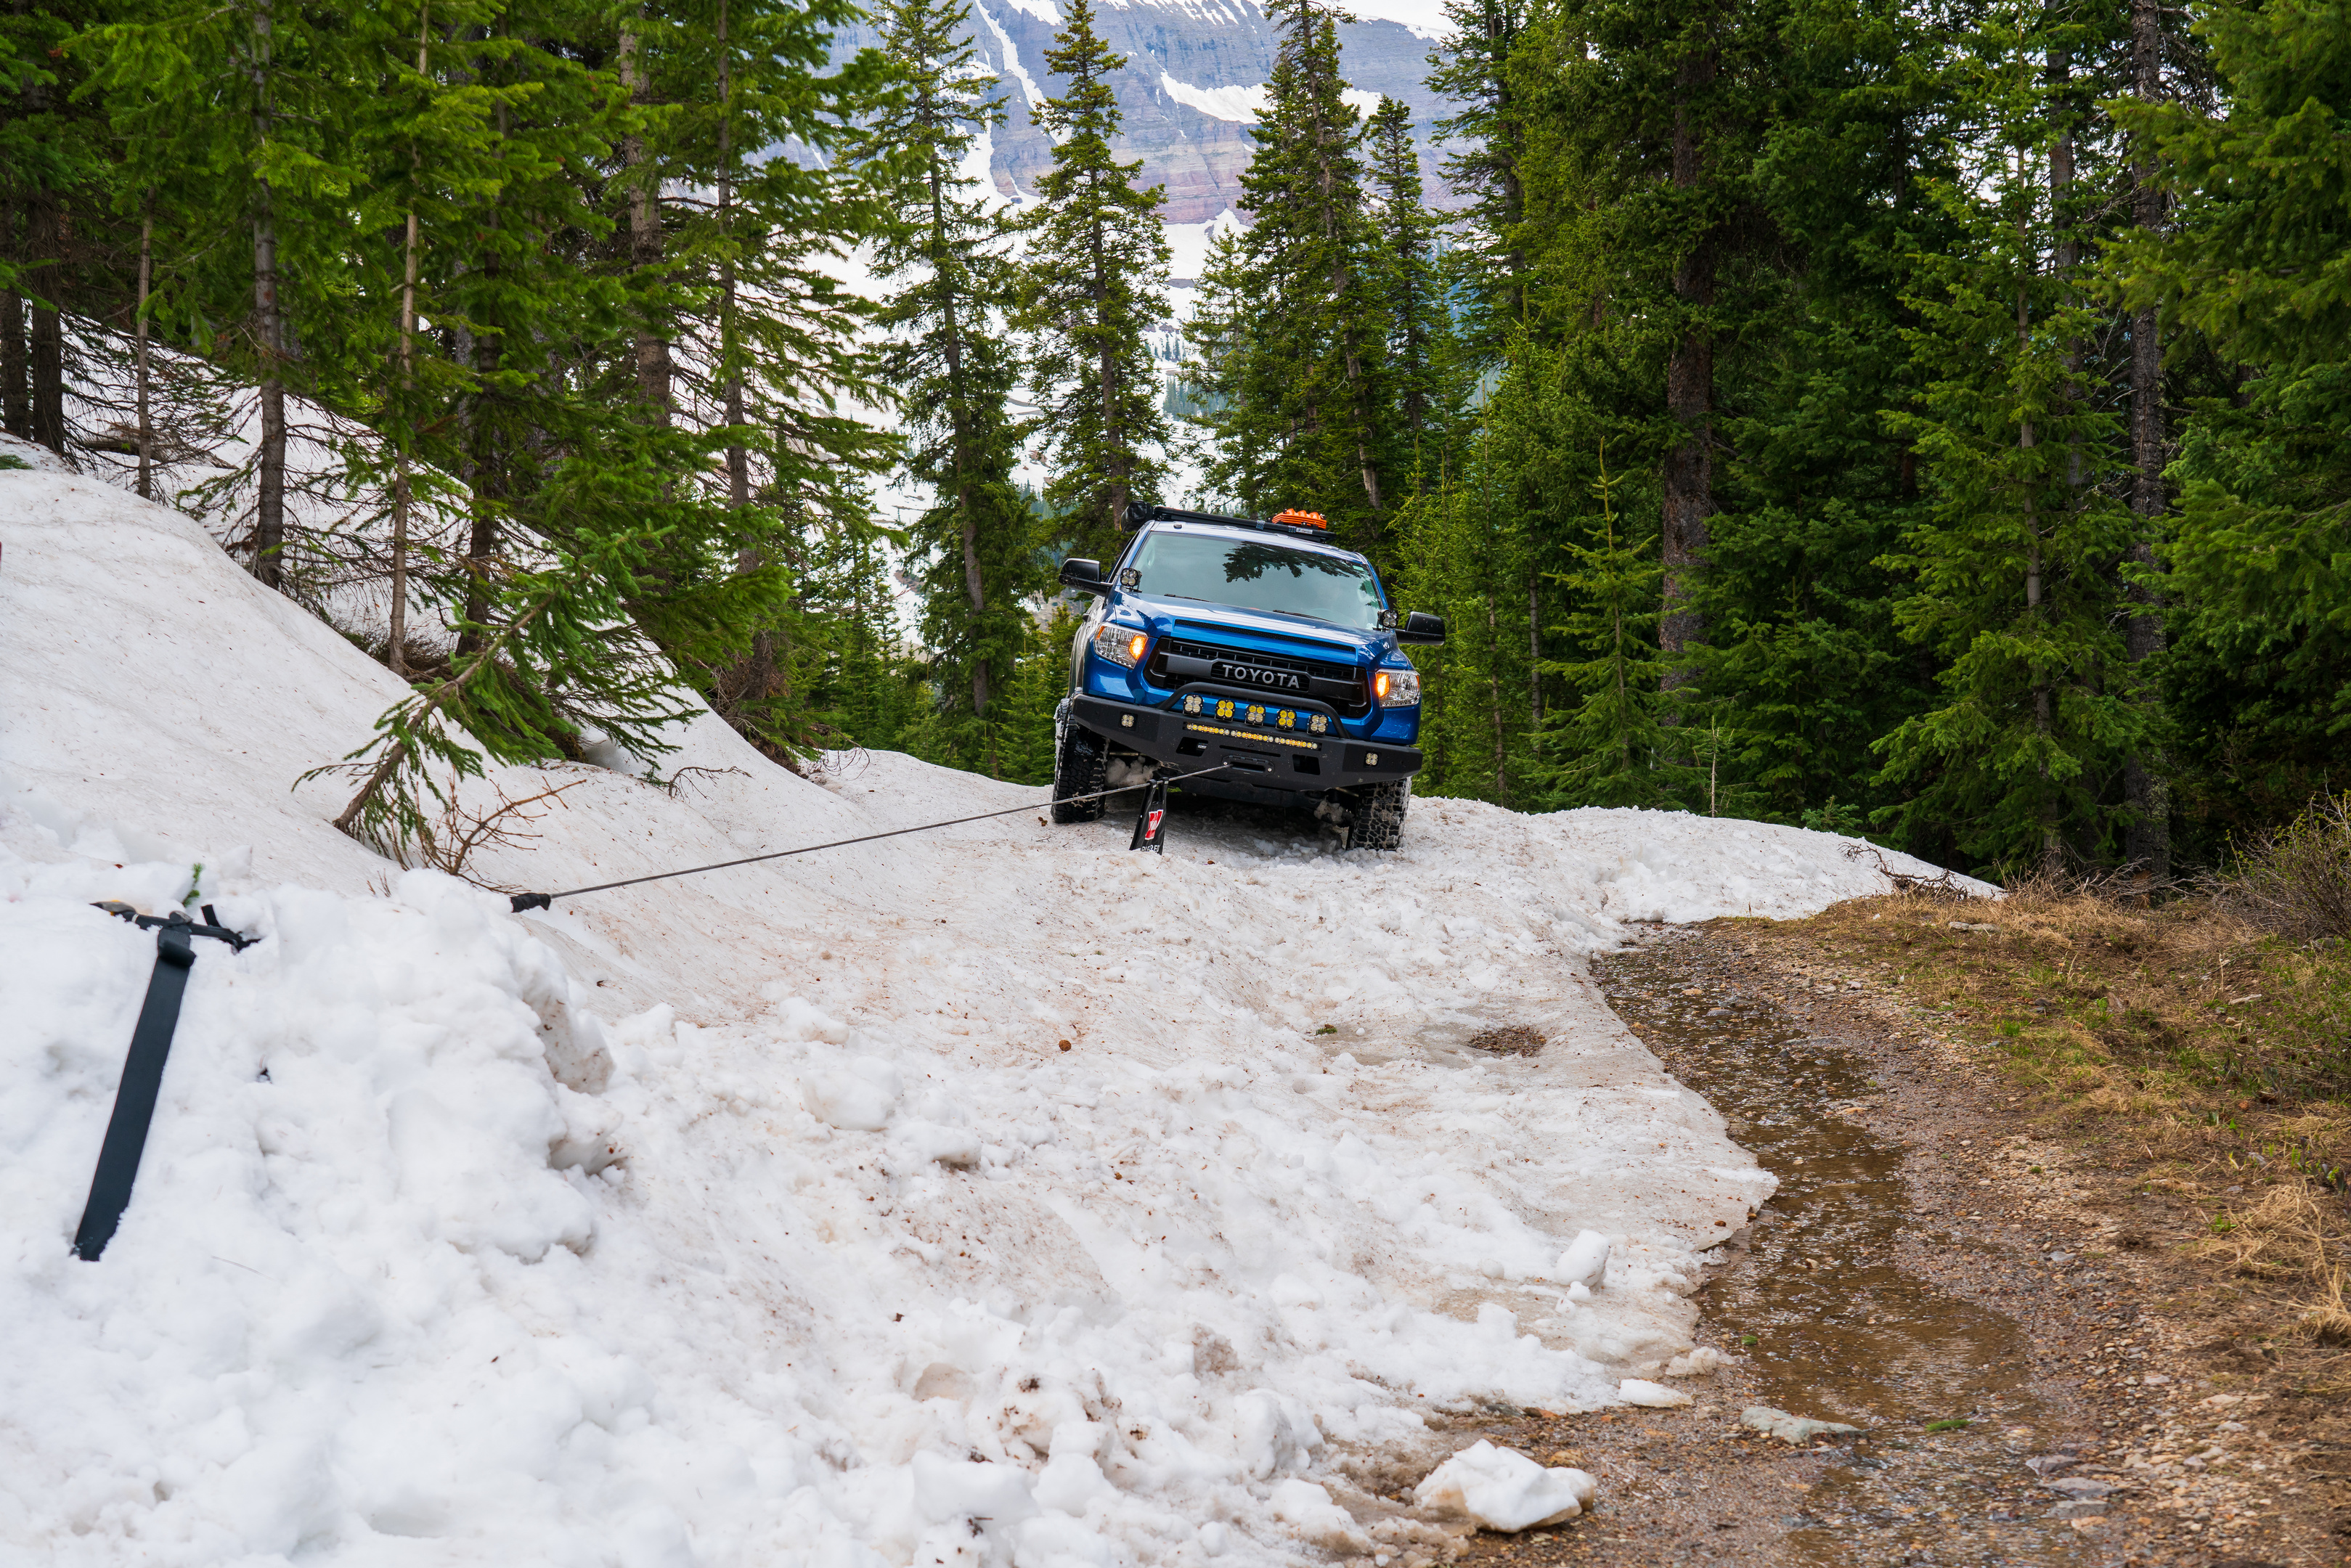
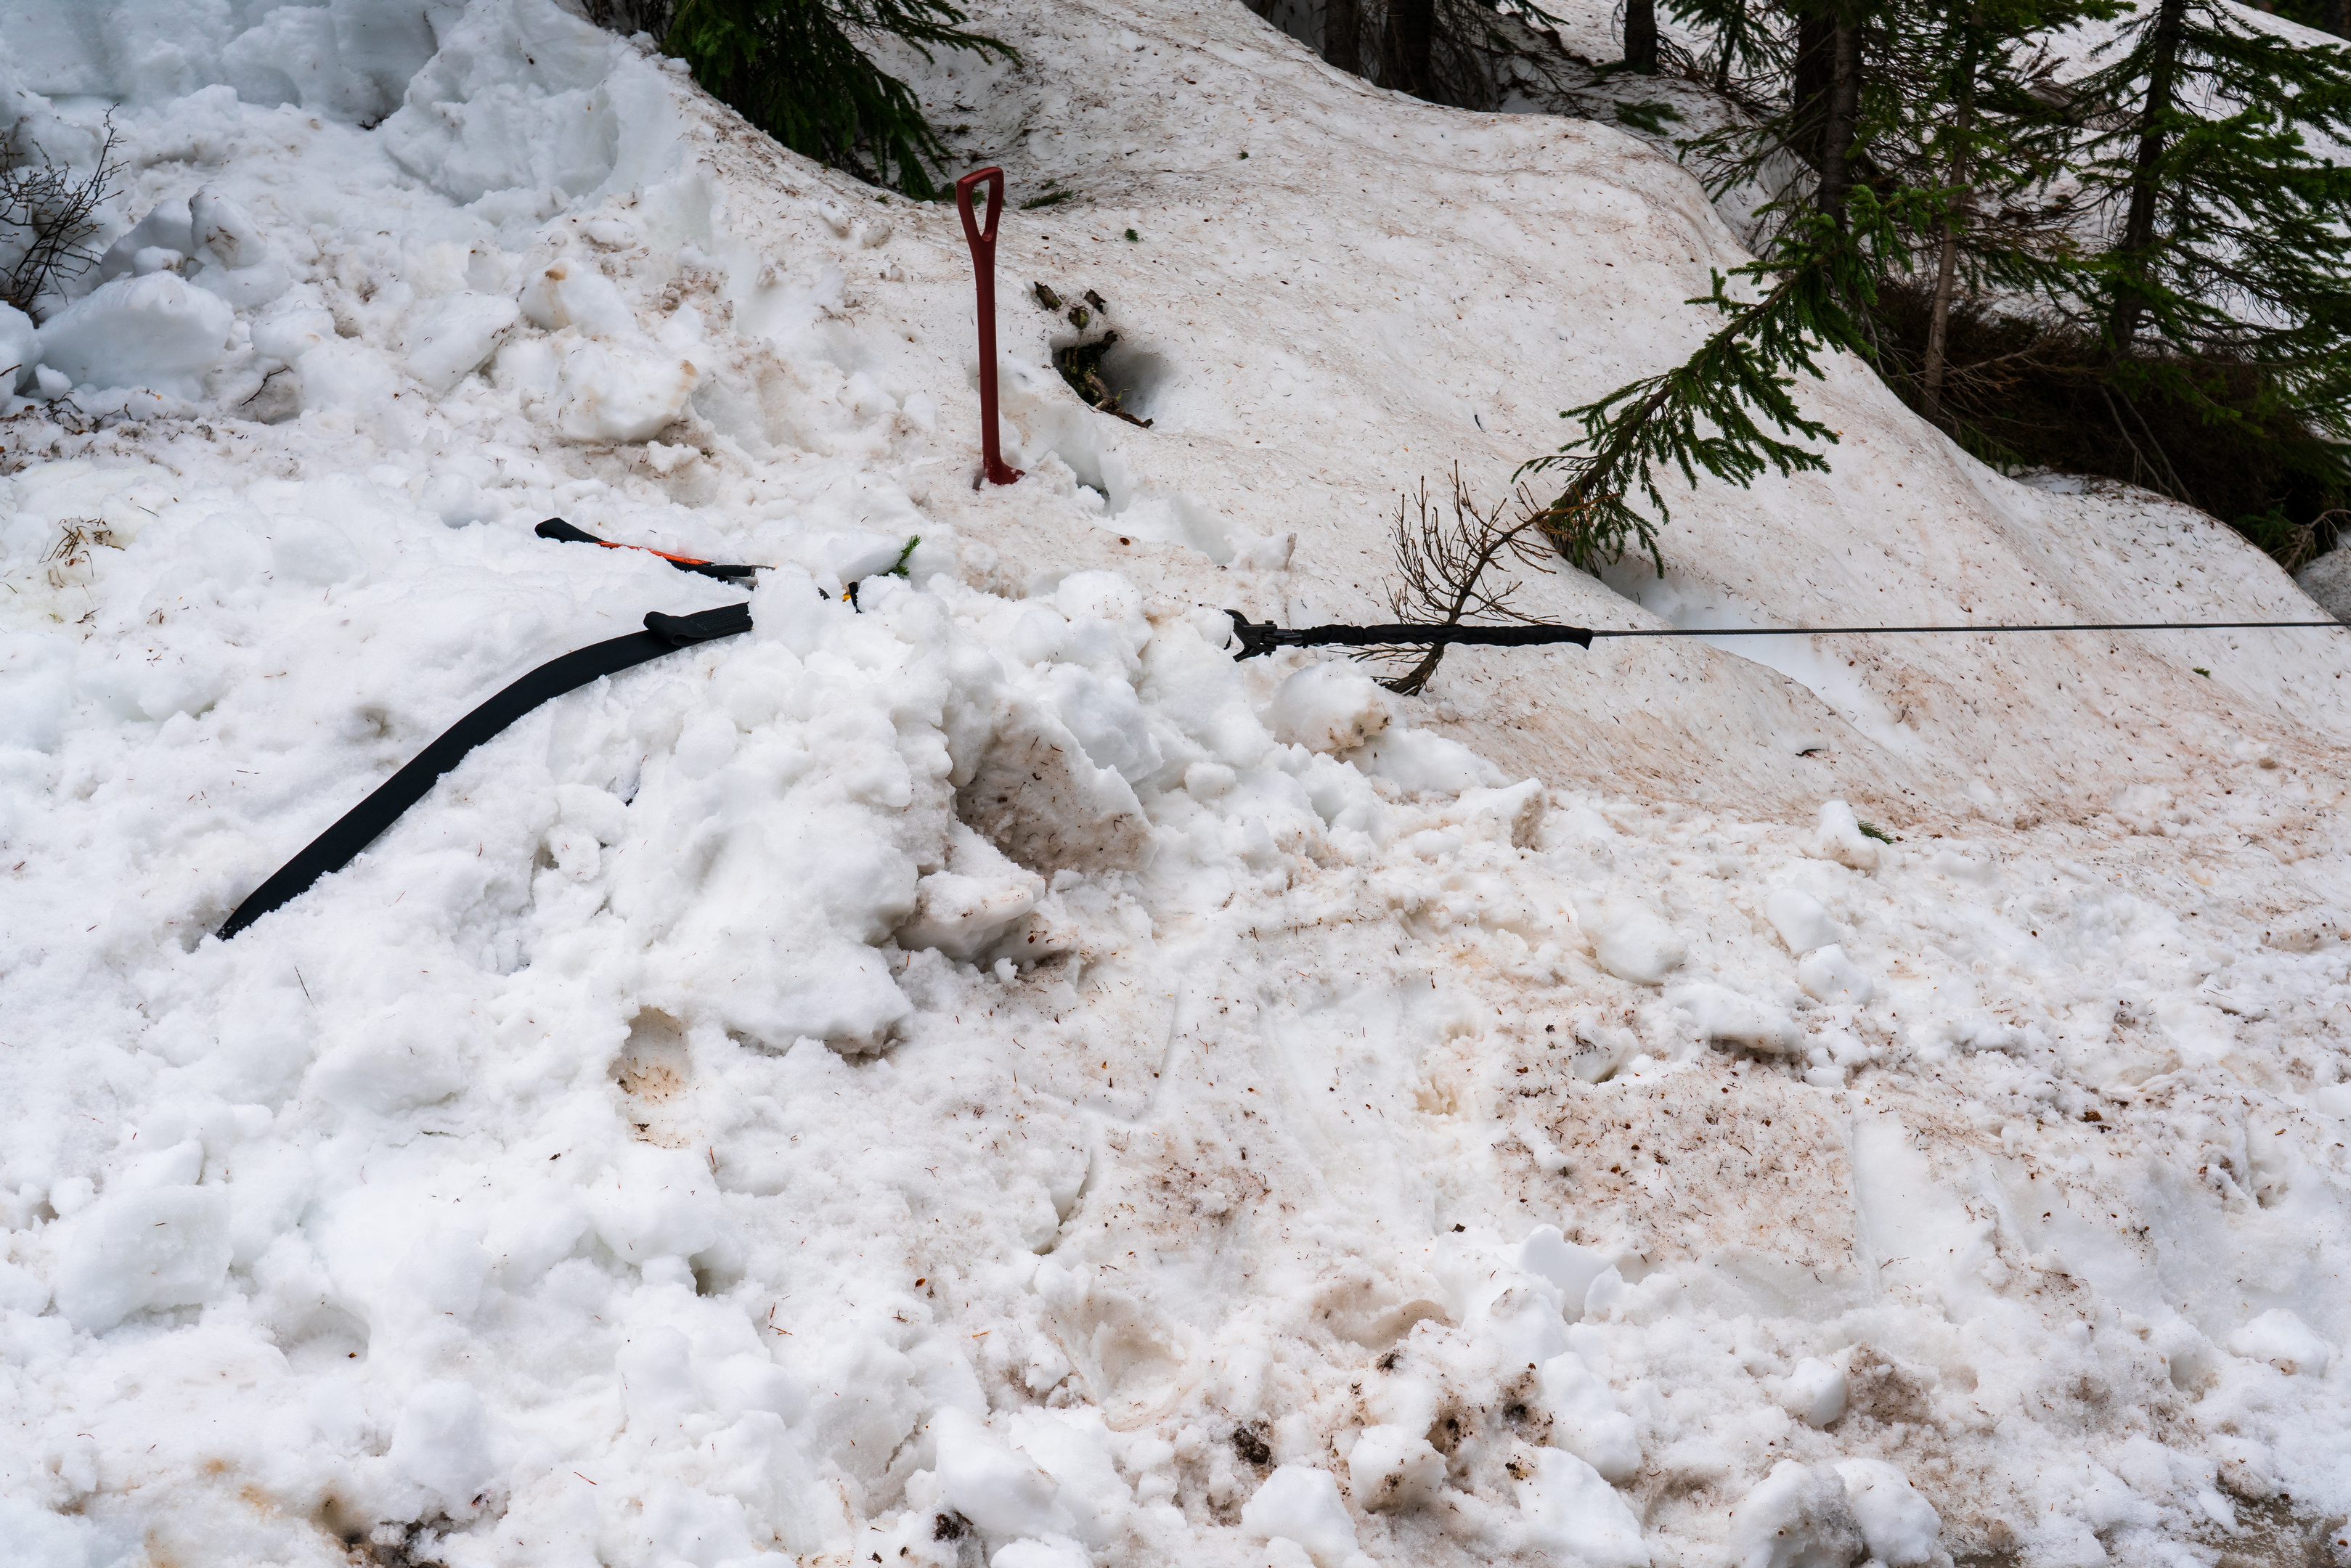
 Every recovery situation is unique, so there’s no way I can say if you’re stuck on X-surface dig down to Y-inches and you’ll magically get out. There are just too many factors in play for a hard and fast answer like that. The general guidance is that if you’re in soft surfaces you’re going to need to dig deeper than in harder pack surfaces. When I was using the Deadman in wet beach sand, I was able to get away with digging a ~16 inch deep hole on my second pull, after realizing that my first hole at over two feet was way more than I needed to do. Good thing my inner child likes to dig holes. Likewise, in spring snowpack (a very wet, packable snow that’s great for making snowballs) I started with a hole that was nearly three feet deep which was seriously overkill too. But, I’d rather err on the safe side – and besides, digging is good exercise. The good news is, that if you pull the Deadman out while winching, you can just bury him deeper, which is more than can be said for other earth anchors which can only hold on to so much soil.


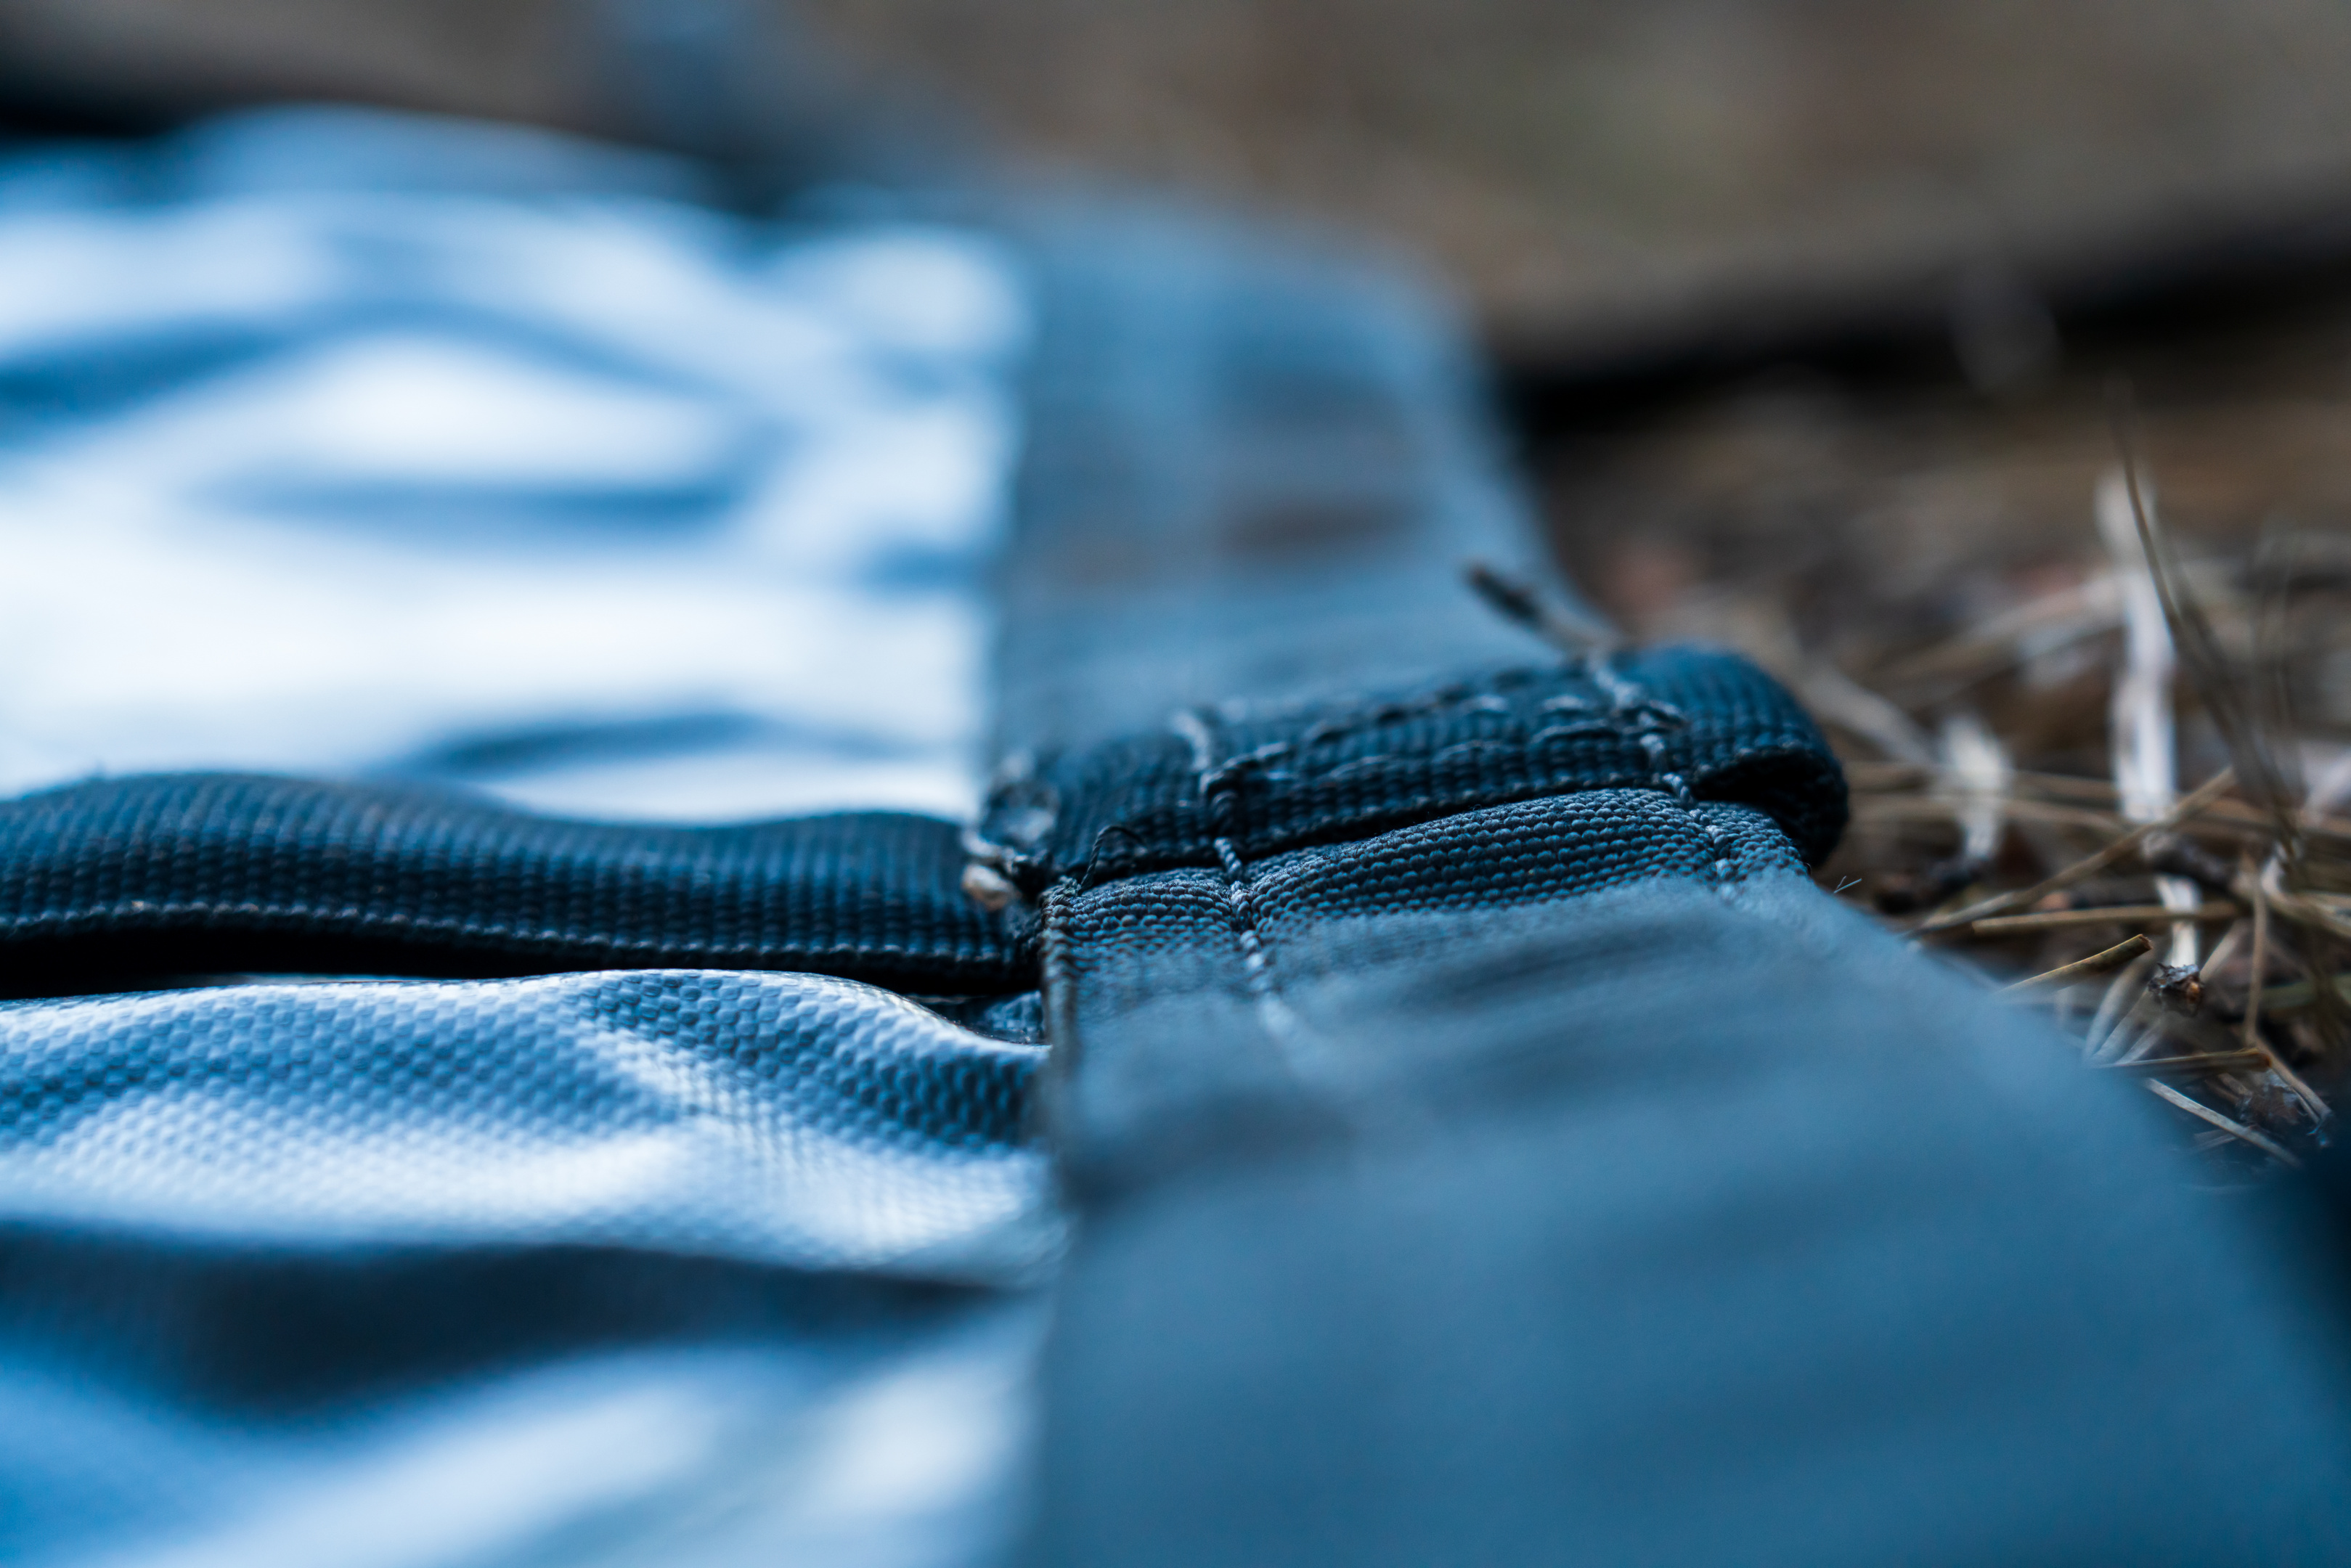

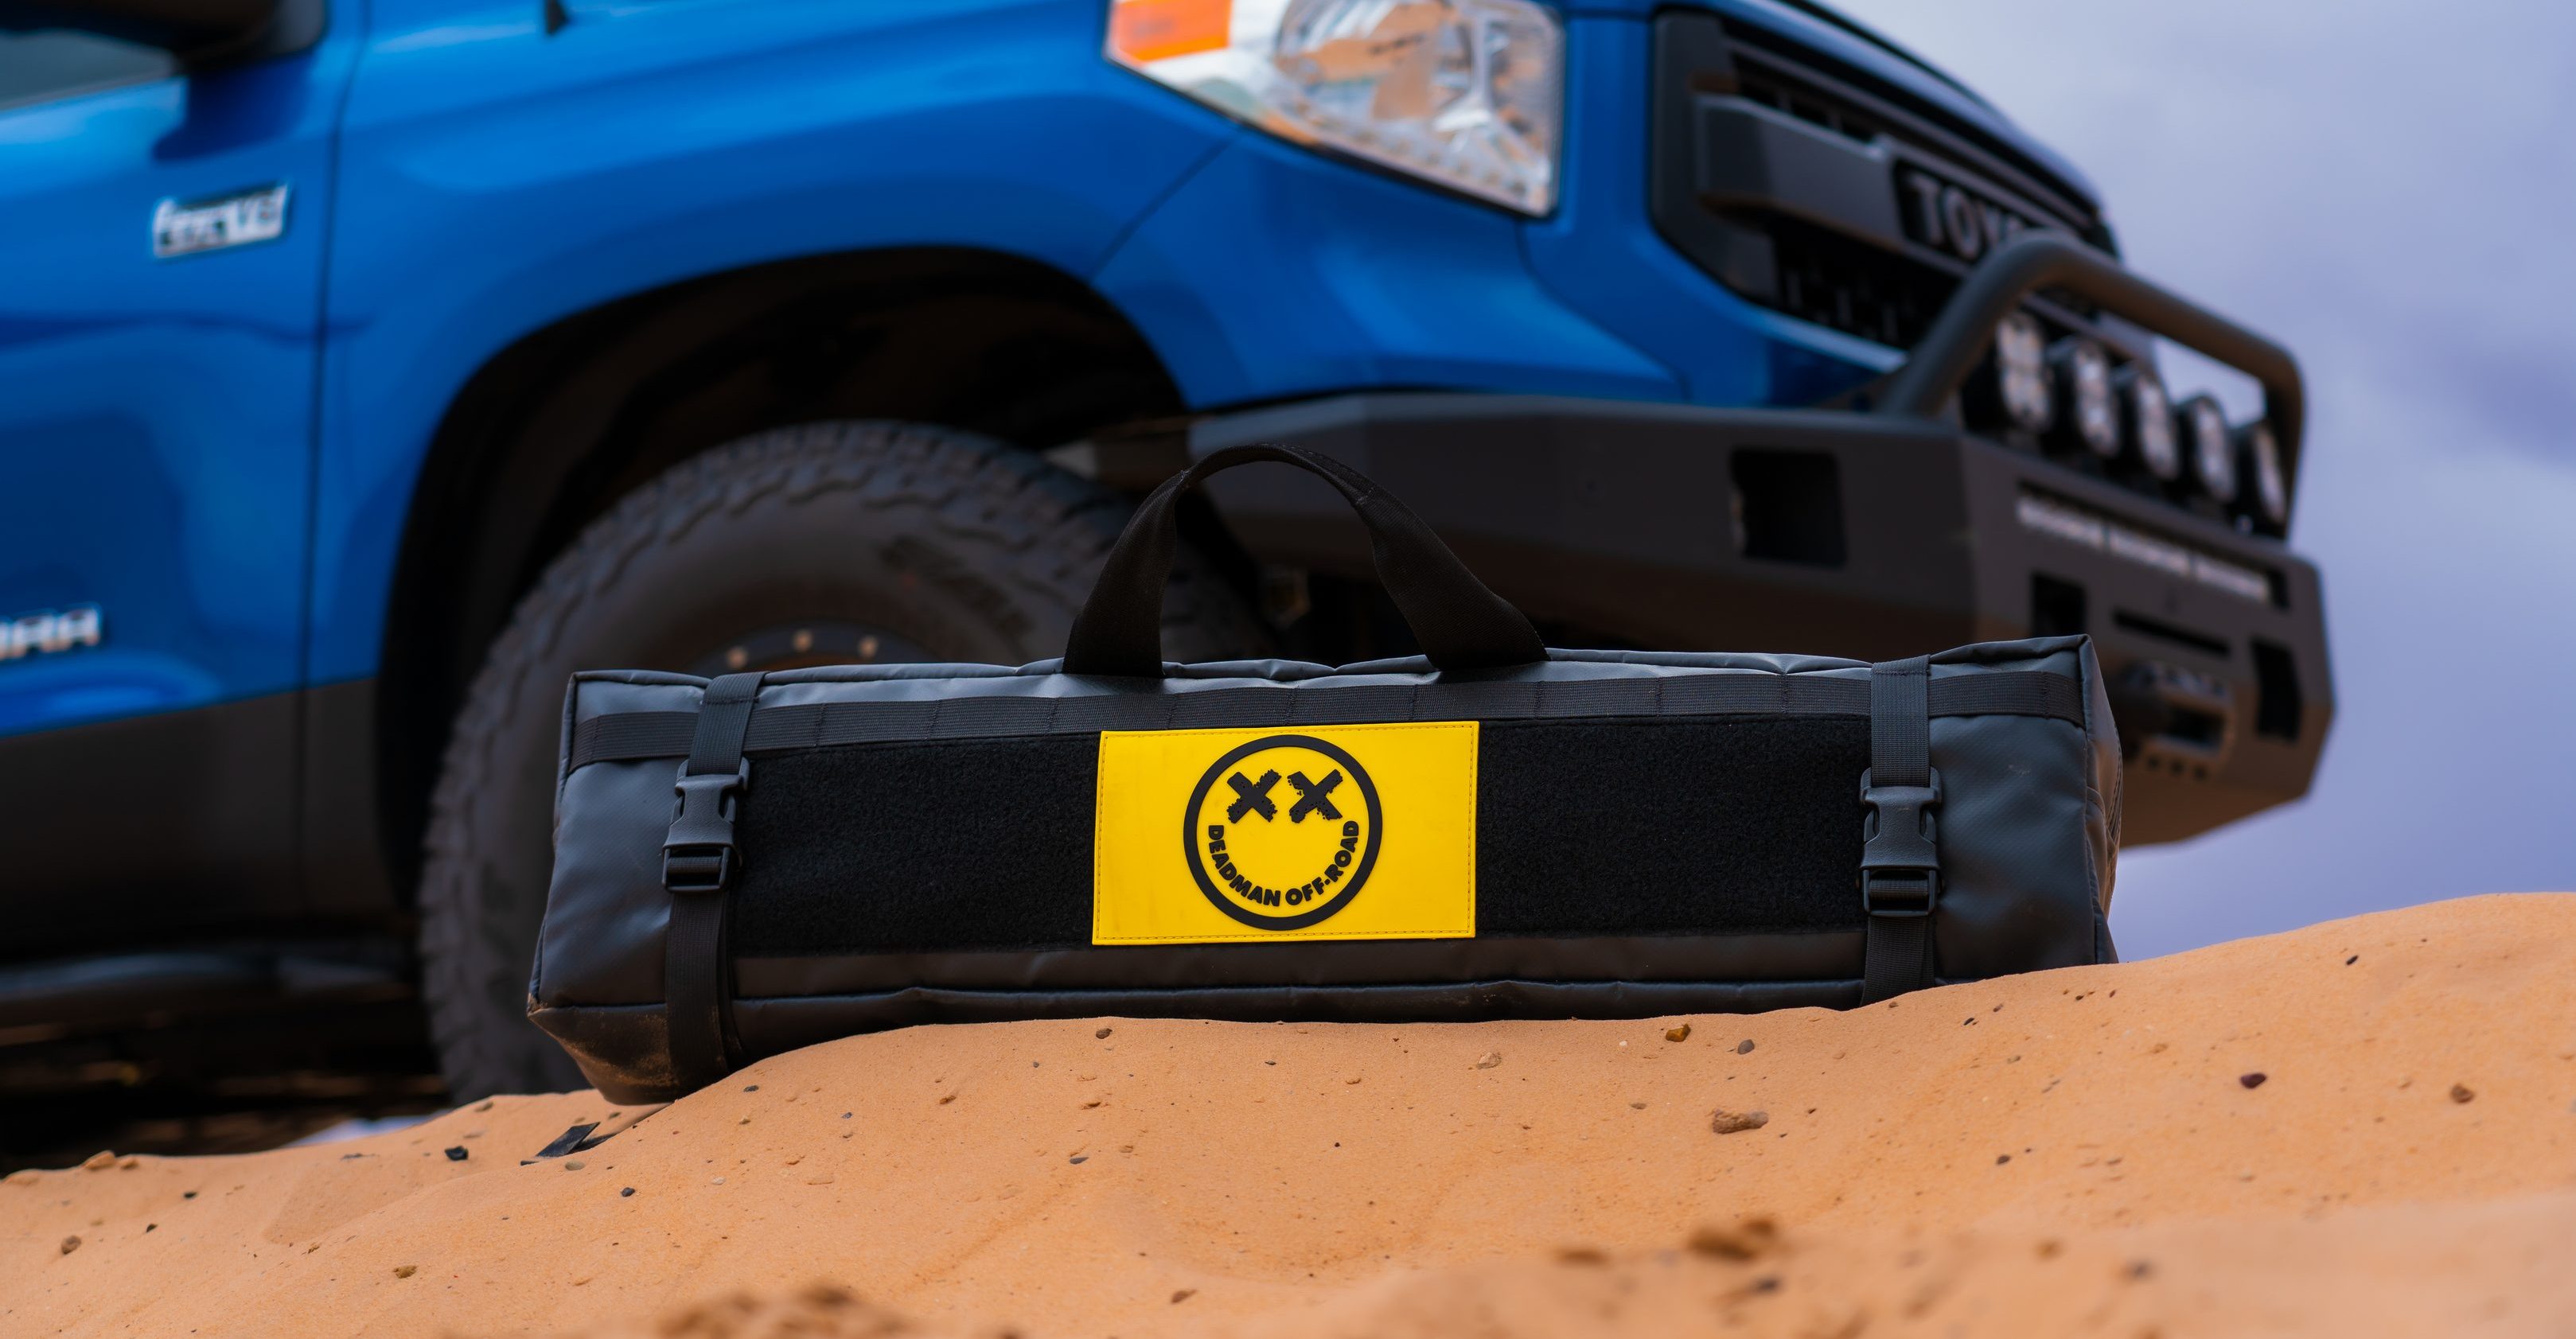
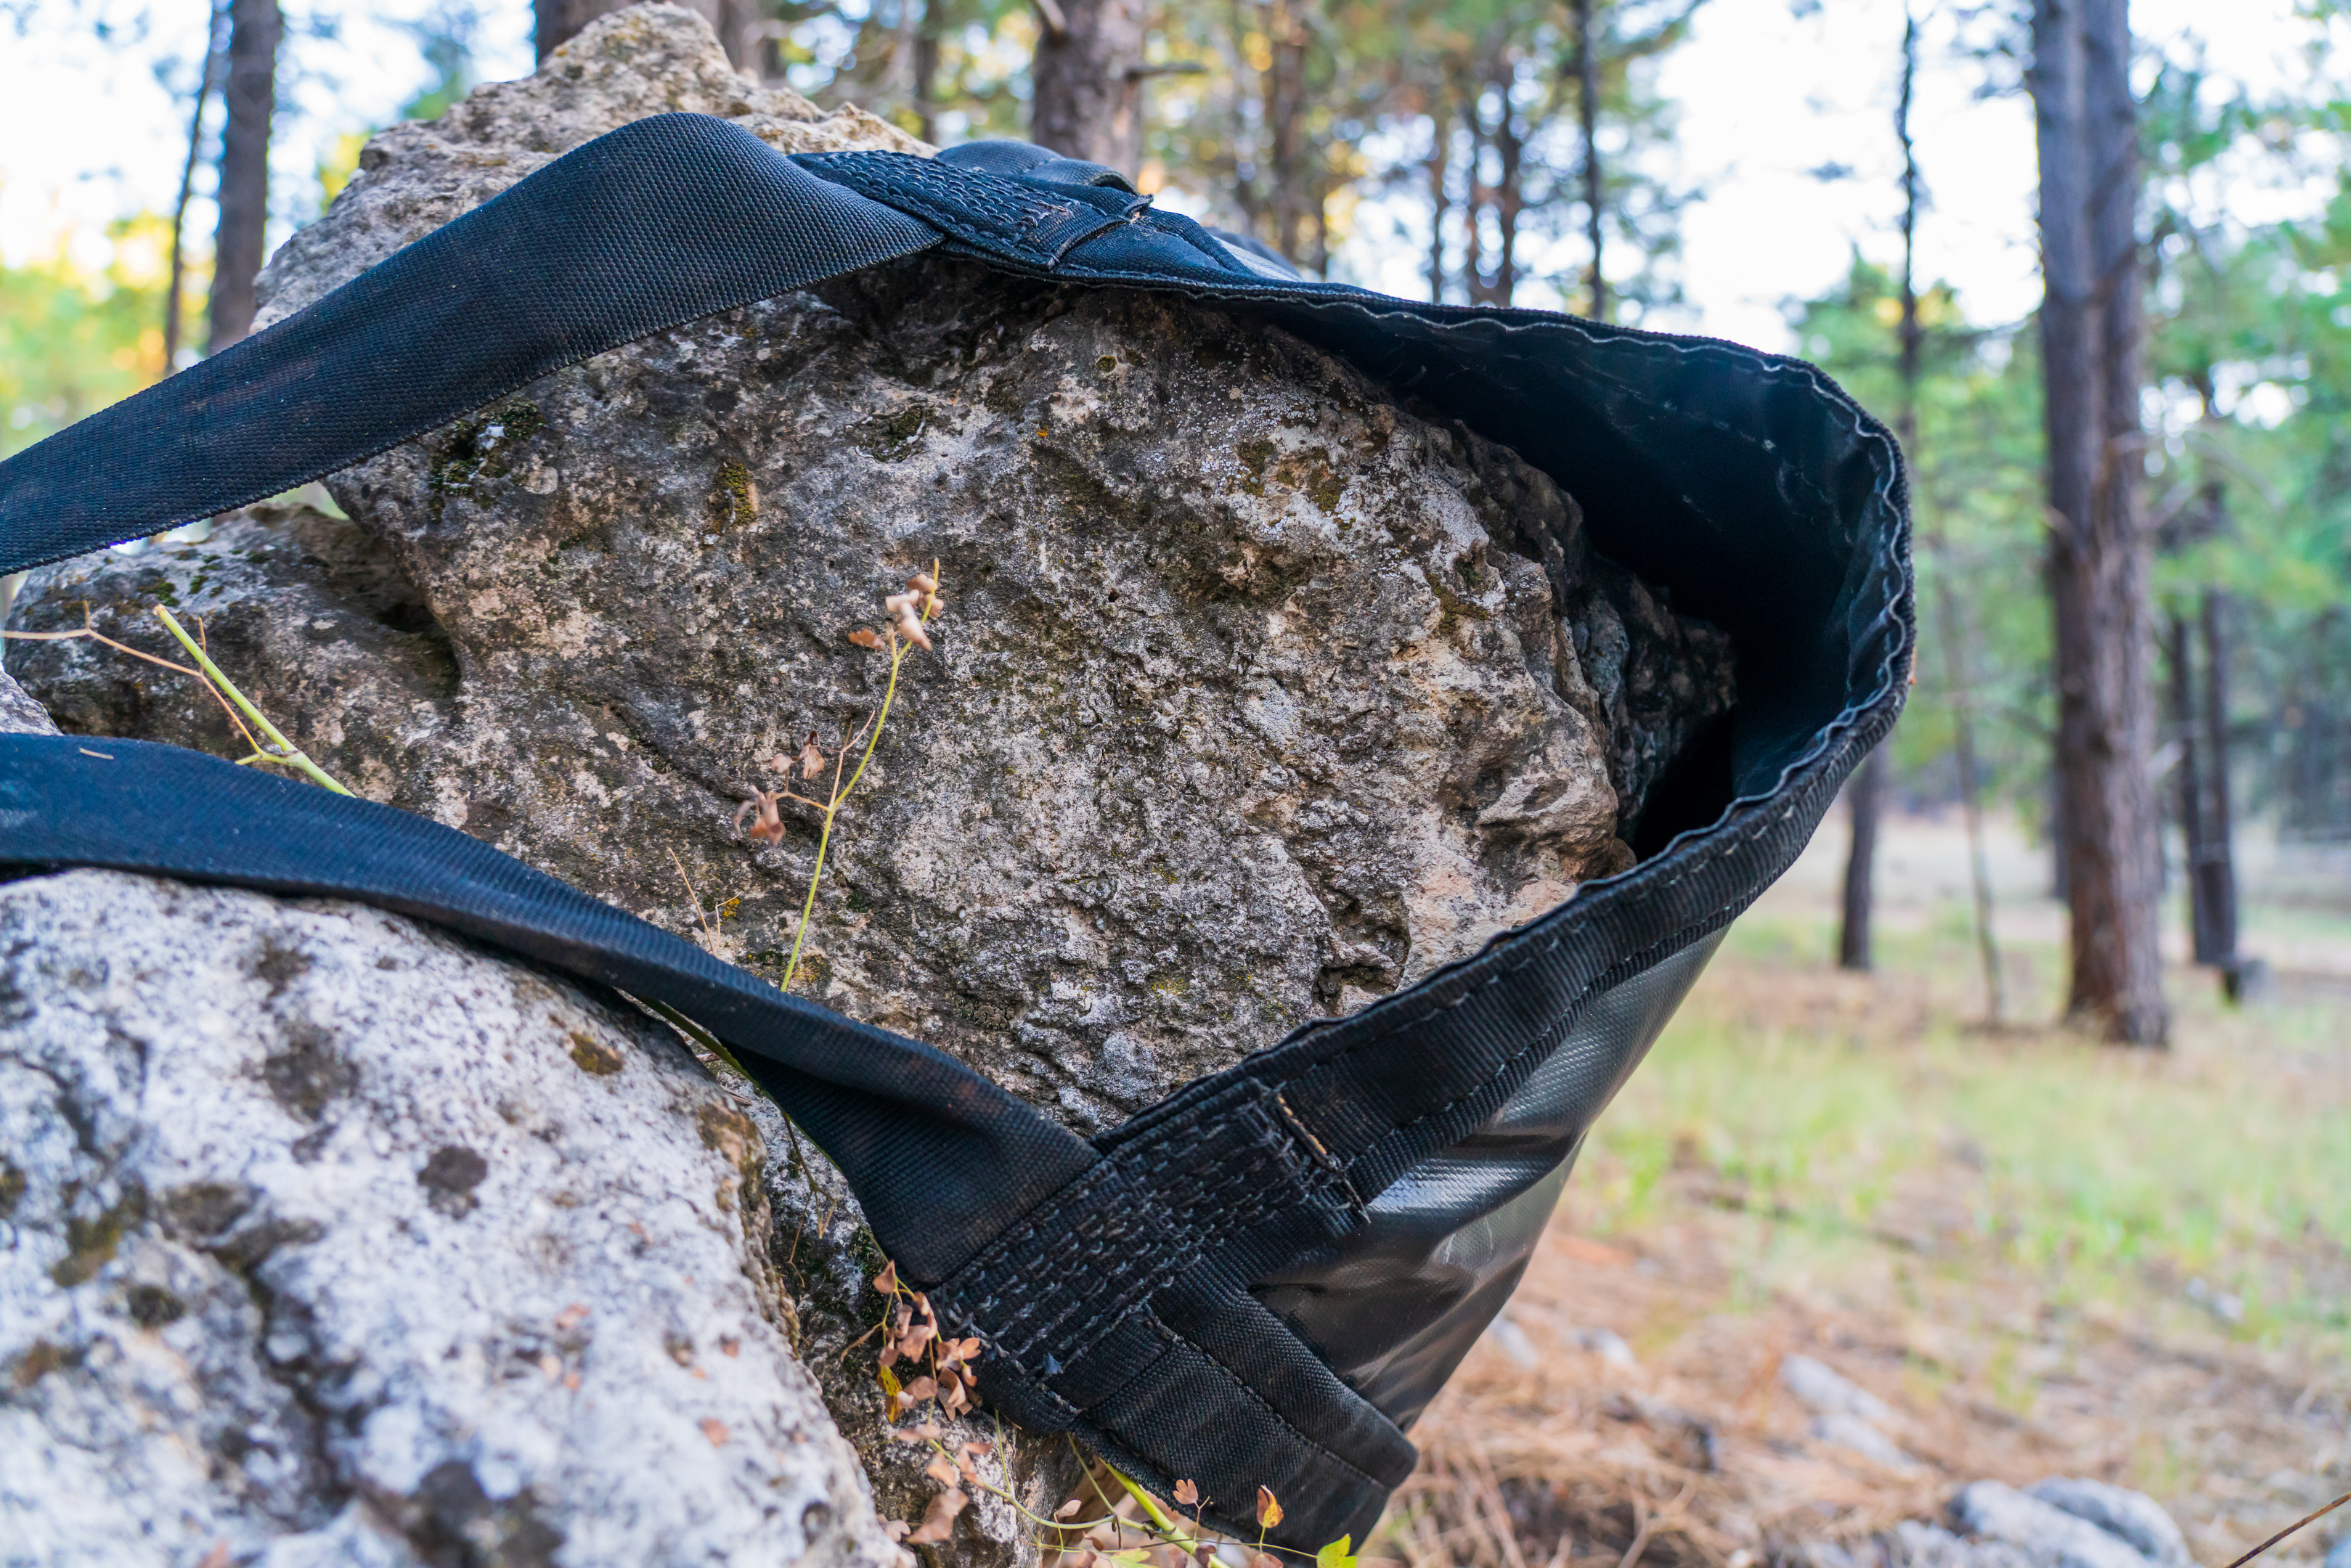
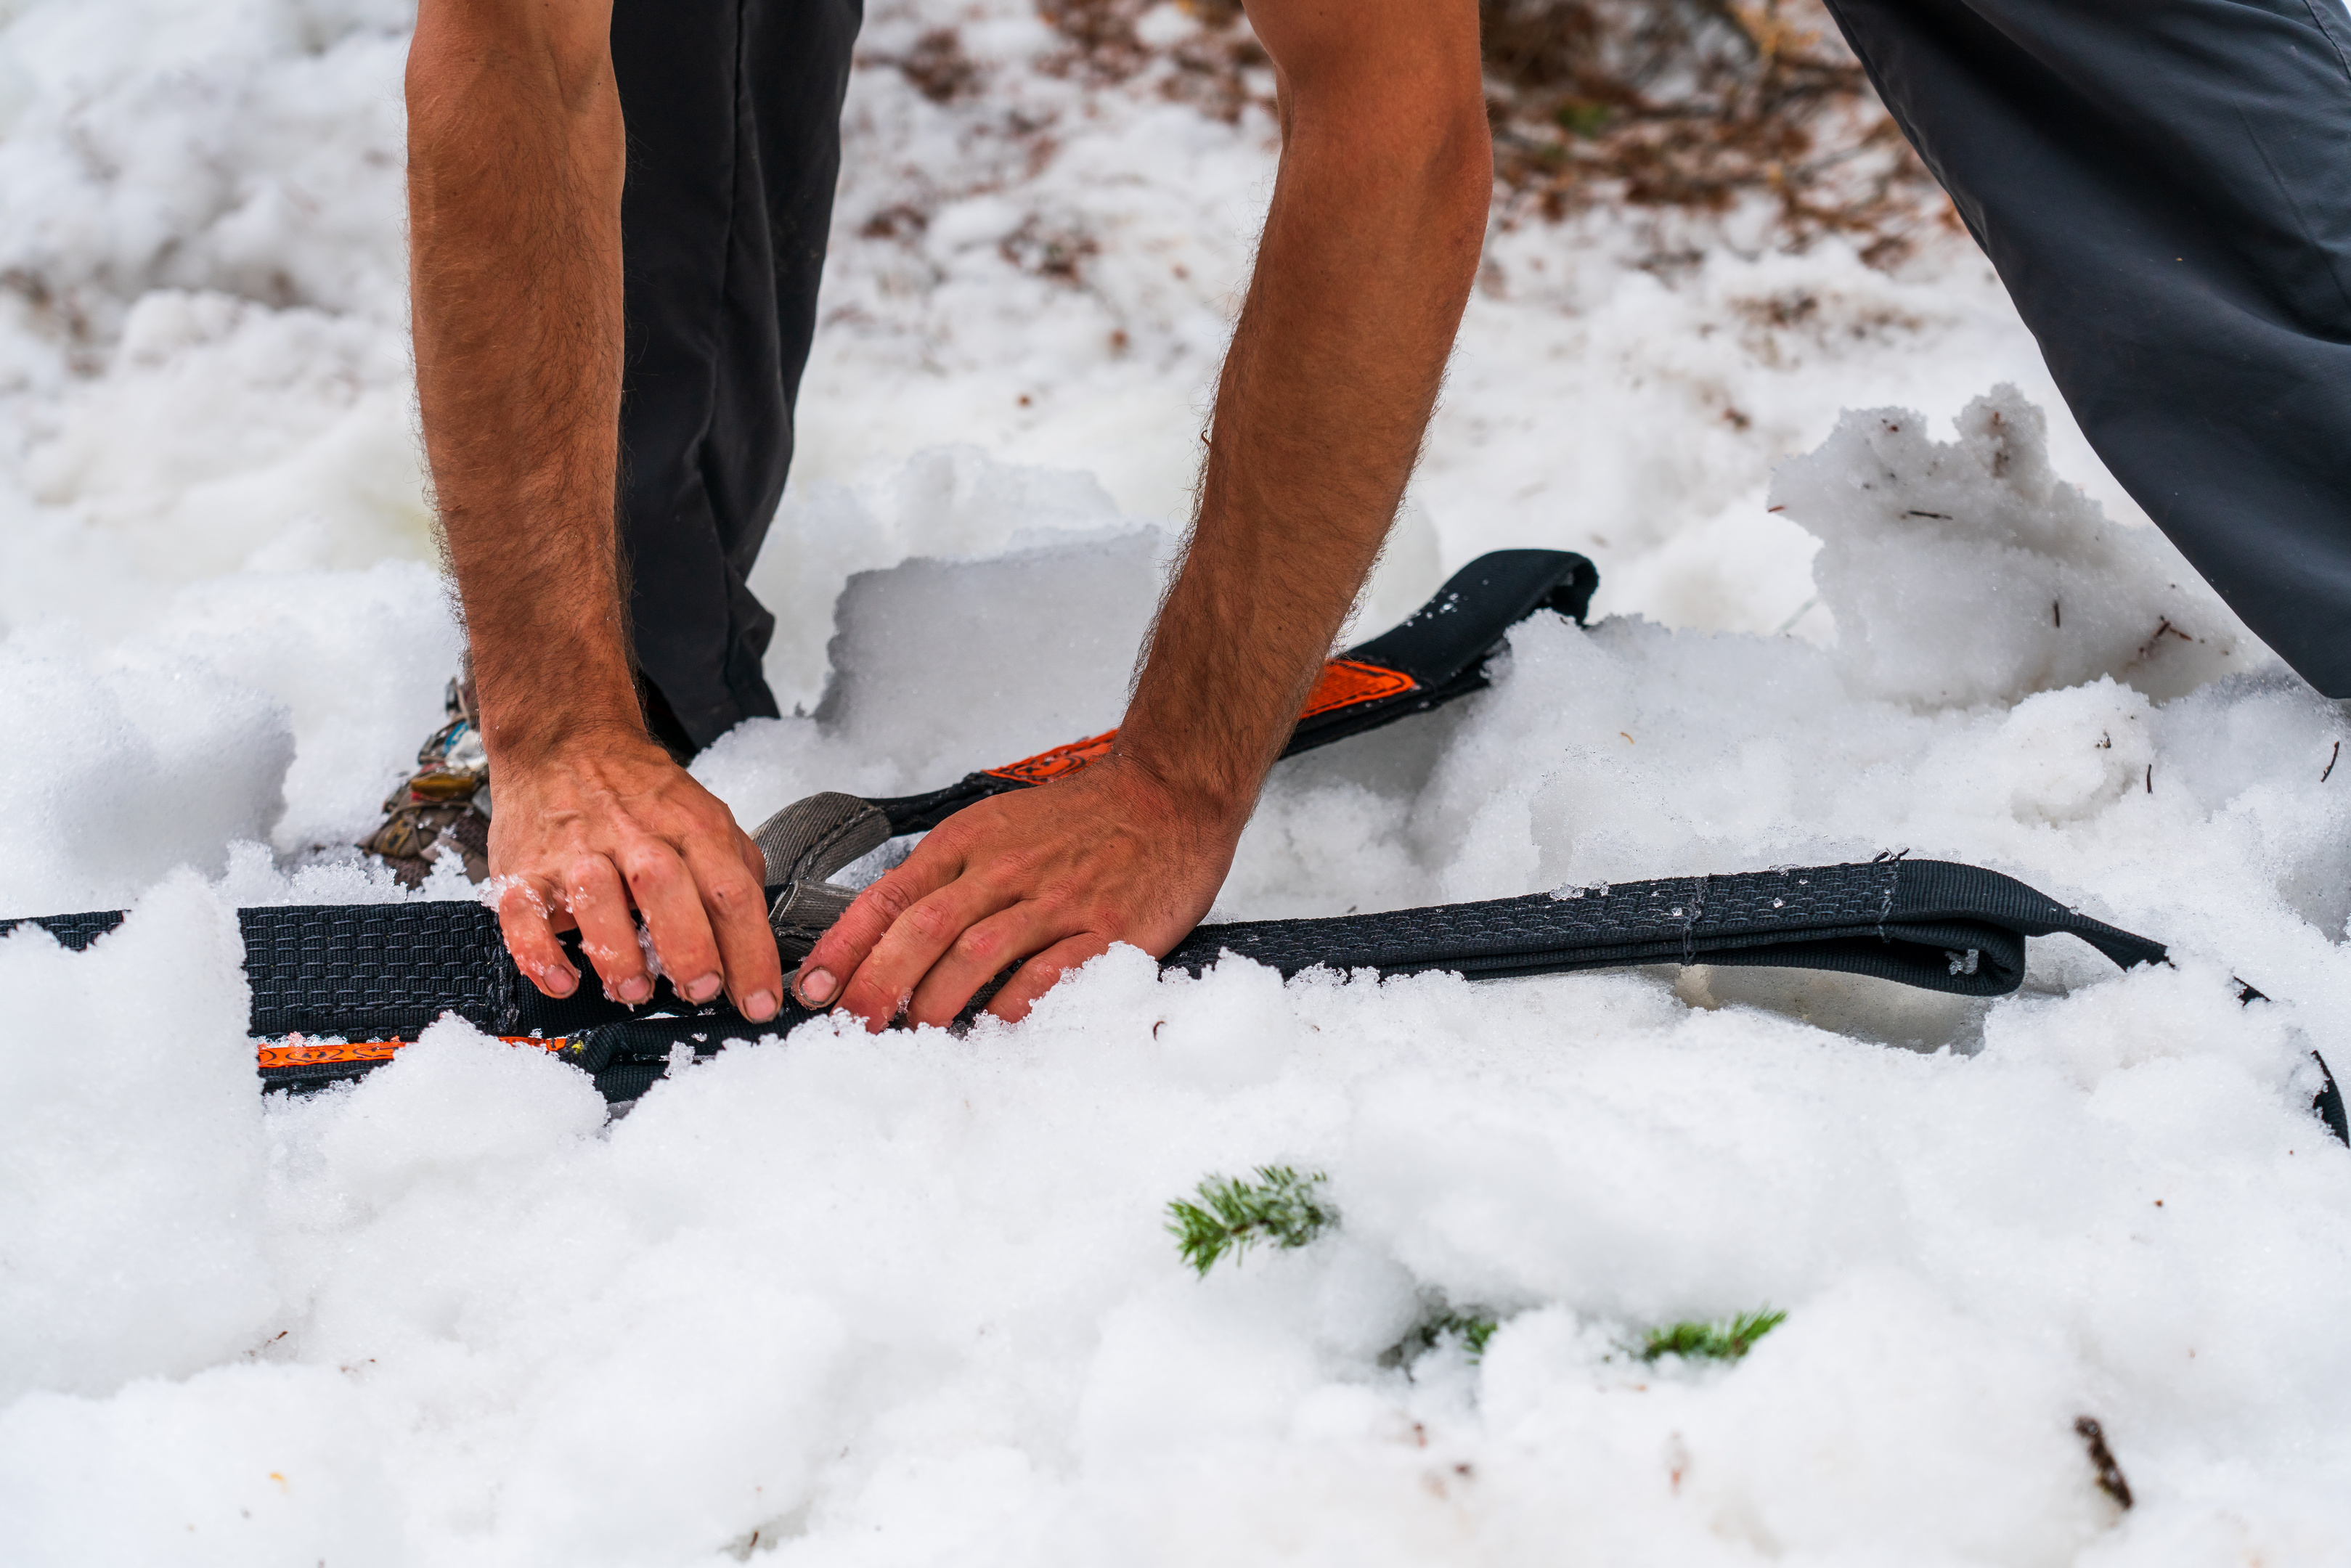
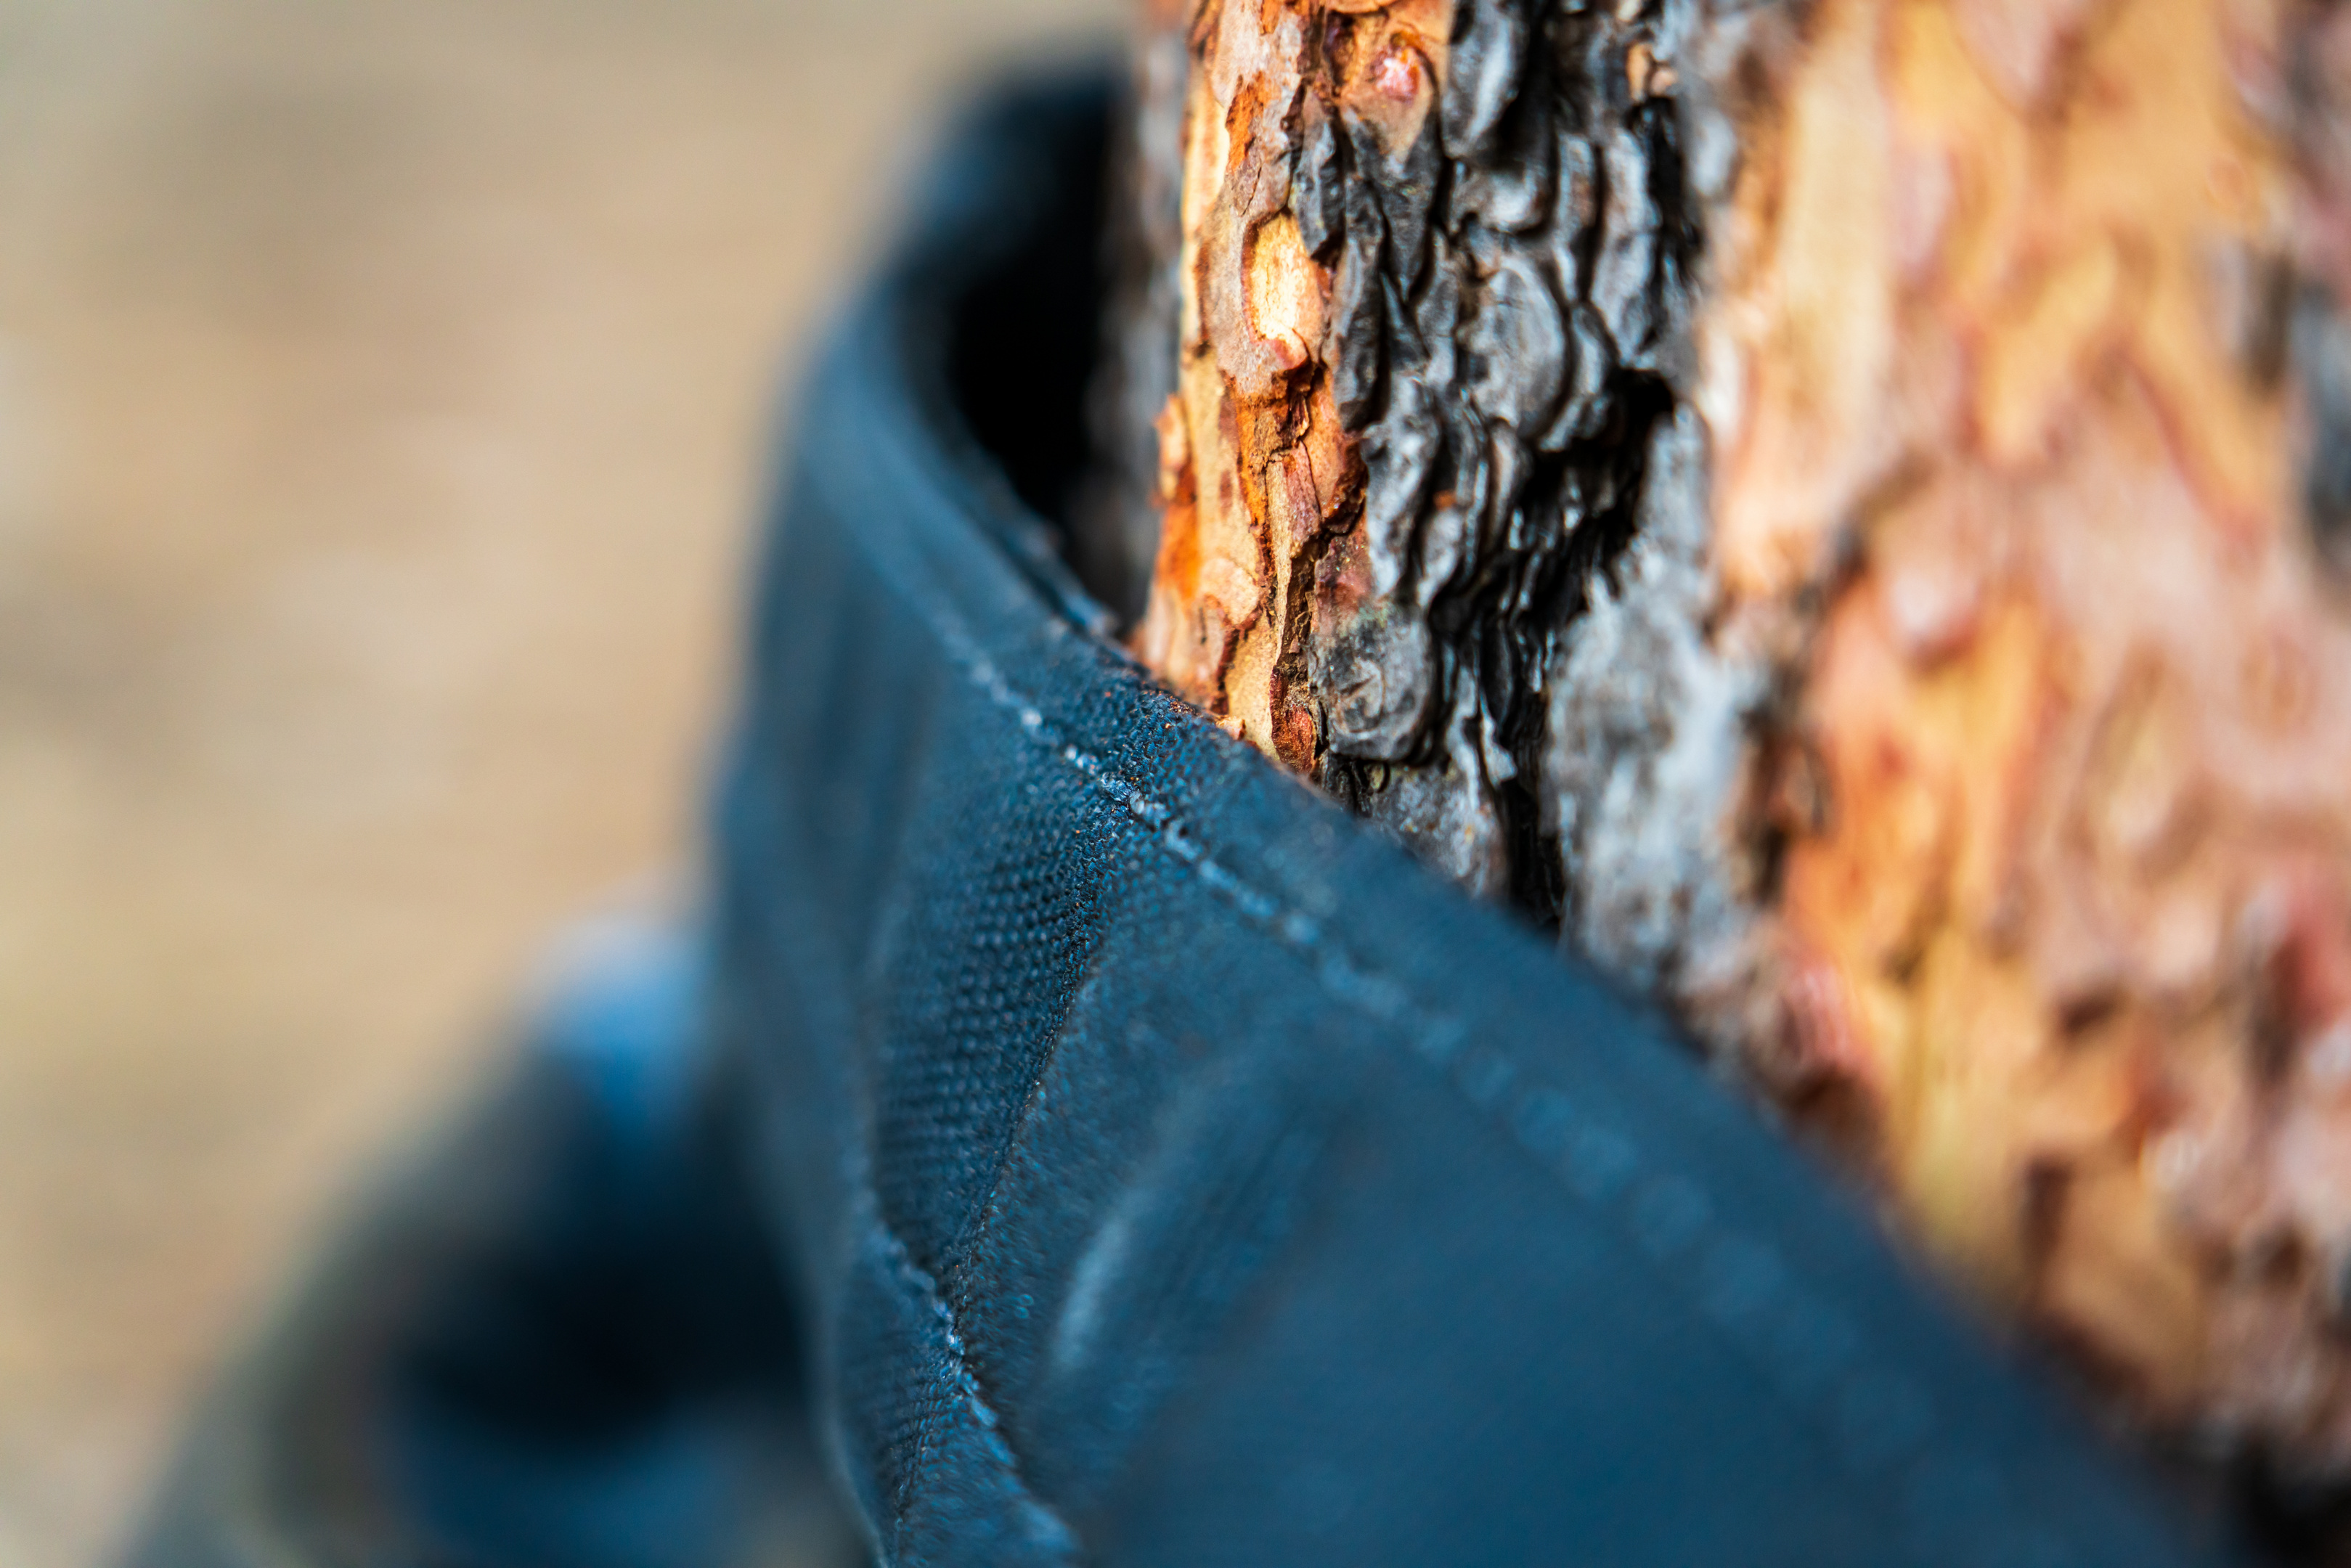 The original Deadman has arms and legs that are made of polyester, much like you would find on a quality recovery strap. While polyester straps can certainly take some serious use, they’re also prone to damage by abrasion and grit exposure, which is why the ruggedized Deadman has his arms and legs sleeved in beefy Cordura nylon. Think of a Cordura winch protector for your synthetic winch line, and you’ll get the idea. Soil loves to work it’s way into your straps and abraid them from within each time the strap is put under tension, and likewise running a strap over a sharp root, rock, or other sharp thing can cut the fibers and compromise the strap. The ruggedized Deadman has completely sleeved straps, so everything from the loop ends at the ends of his arms and legs to the middle of his body is protected. That’s right, there’s no exposed polyester to worry about damaging. Whether you’re burying the ruggedized Deadman in soil that has sharp embedded rocks, or using it to ‘hug’ something like a tree (think tree saver) or boulder, the addition of Cordura nylon “armor” allows the Deadman to better withstand use in abrasive conditions. If that perfect anchor point looks like it might hurt if you were to hug it, tag the Deadman in to do the hugging for you.
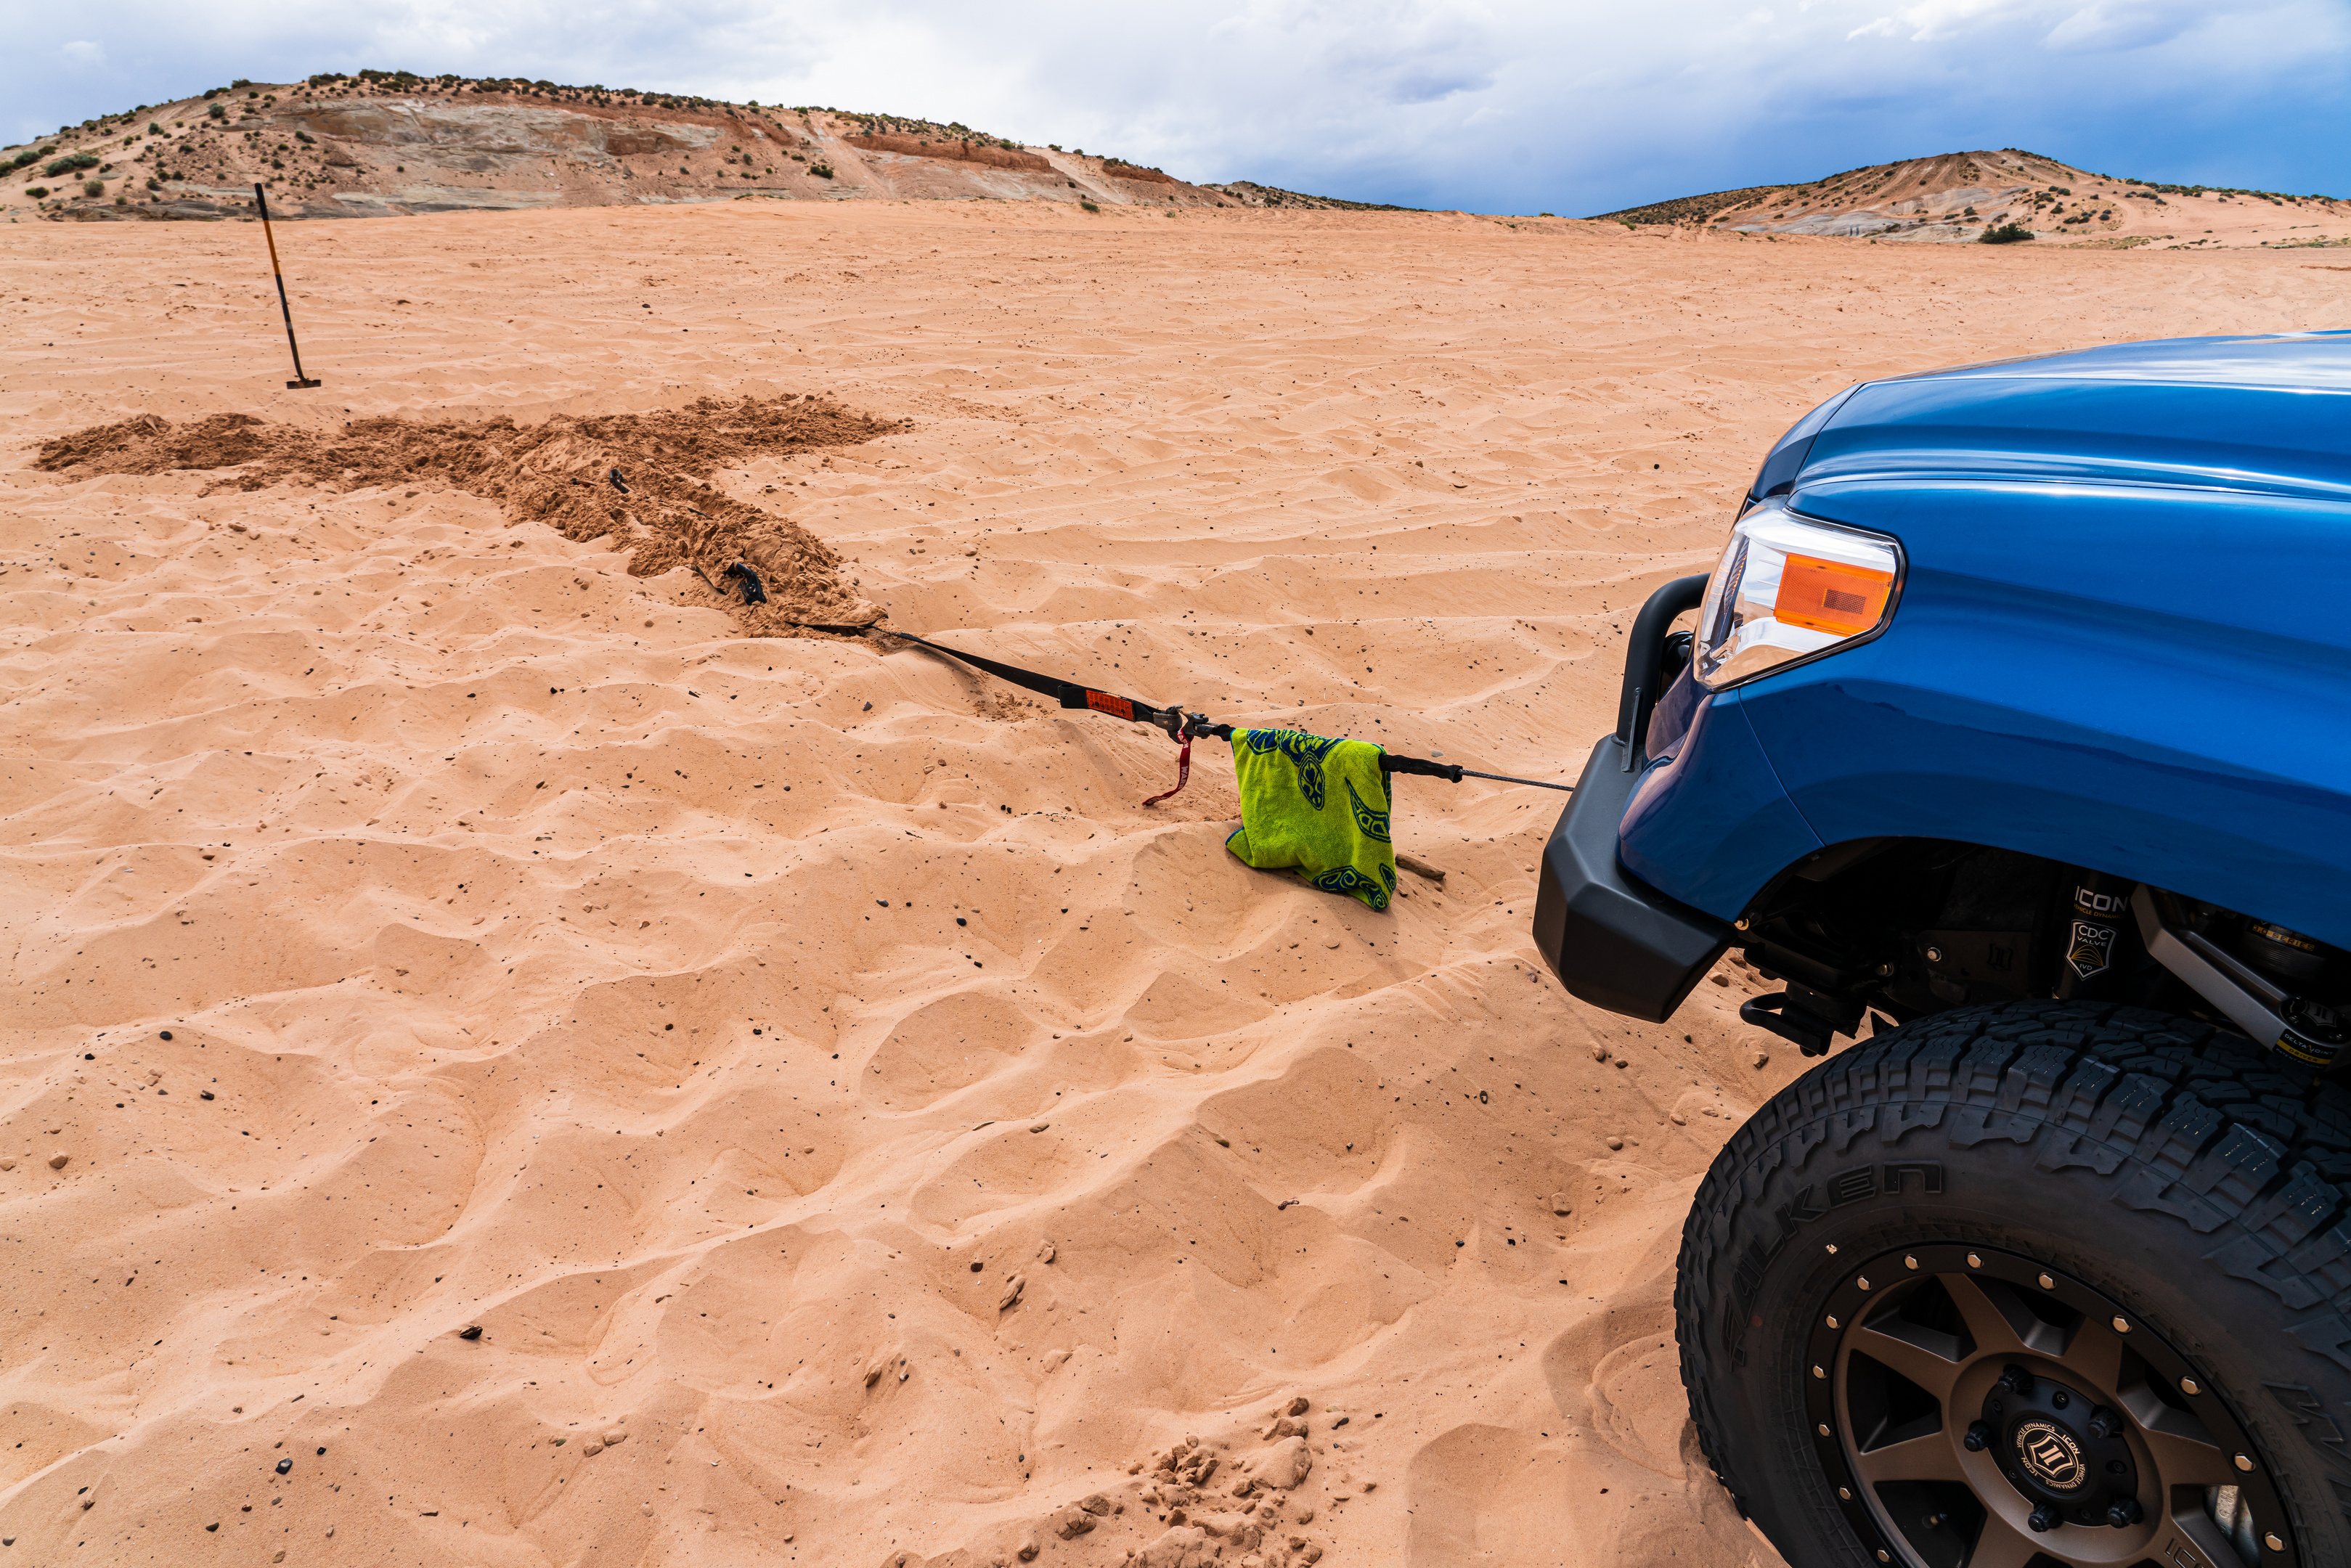
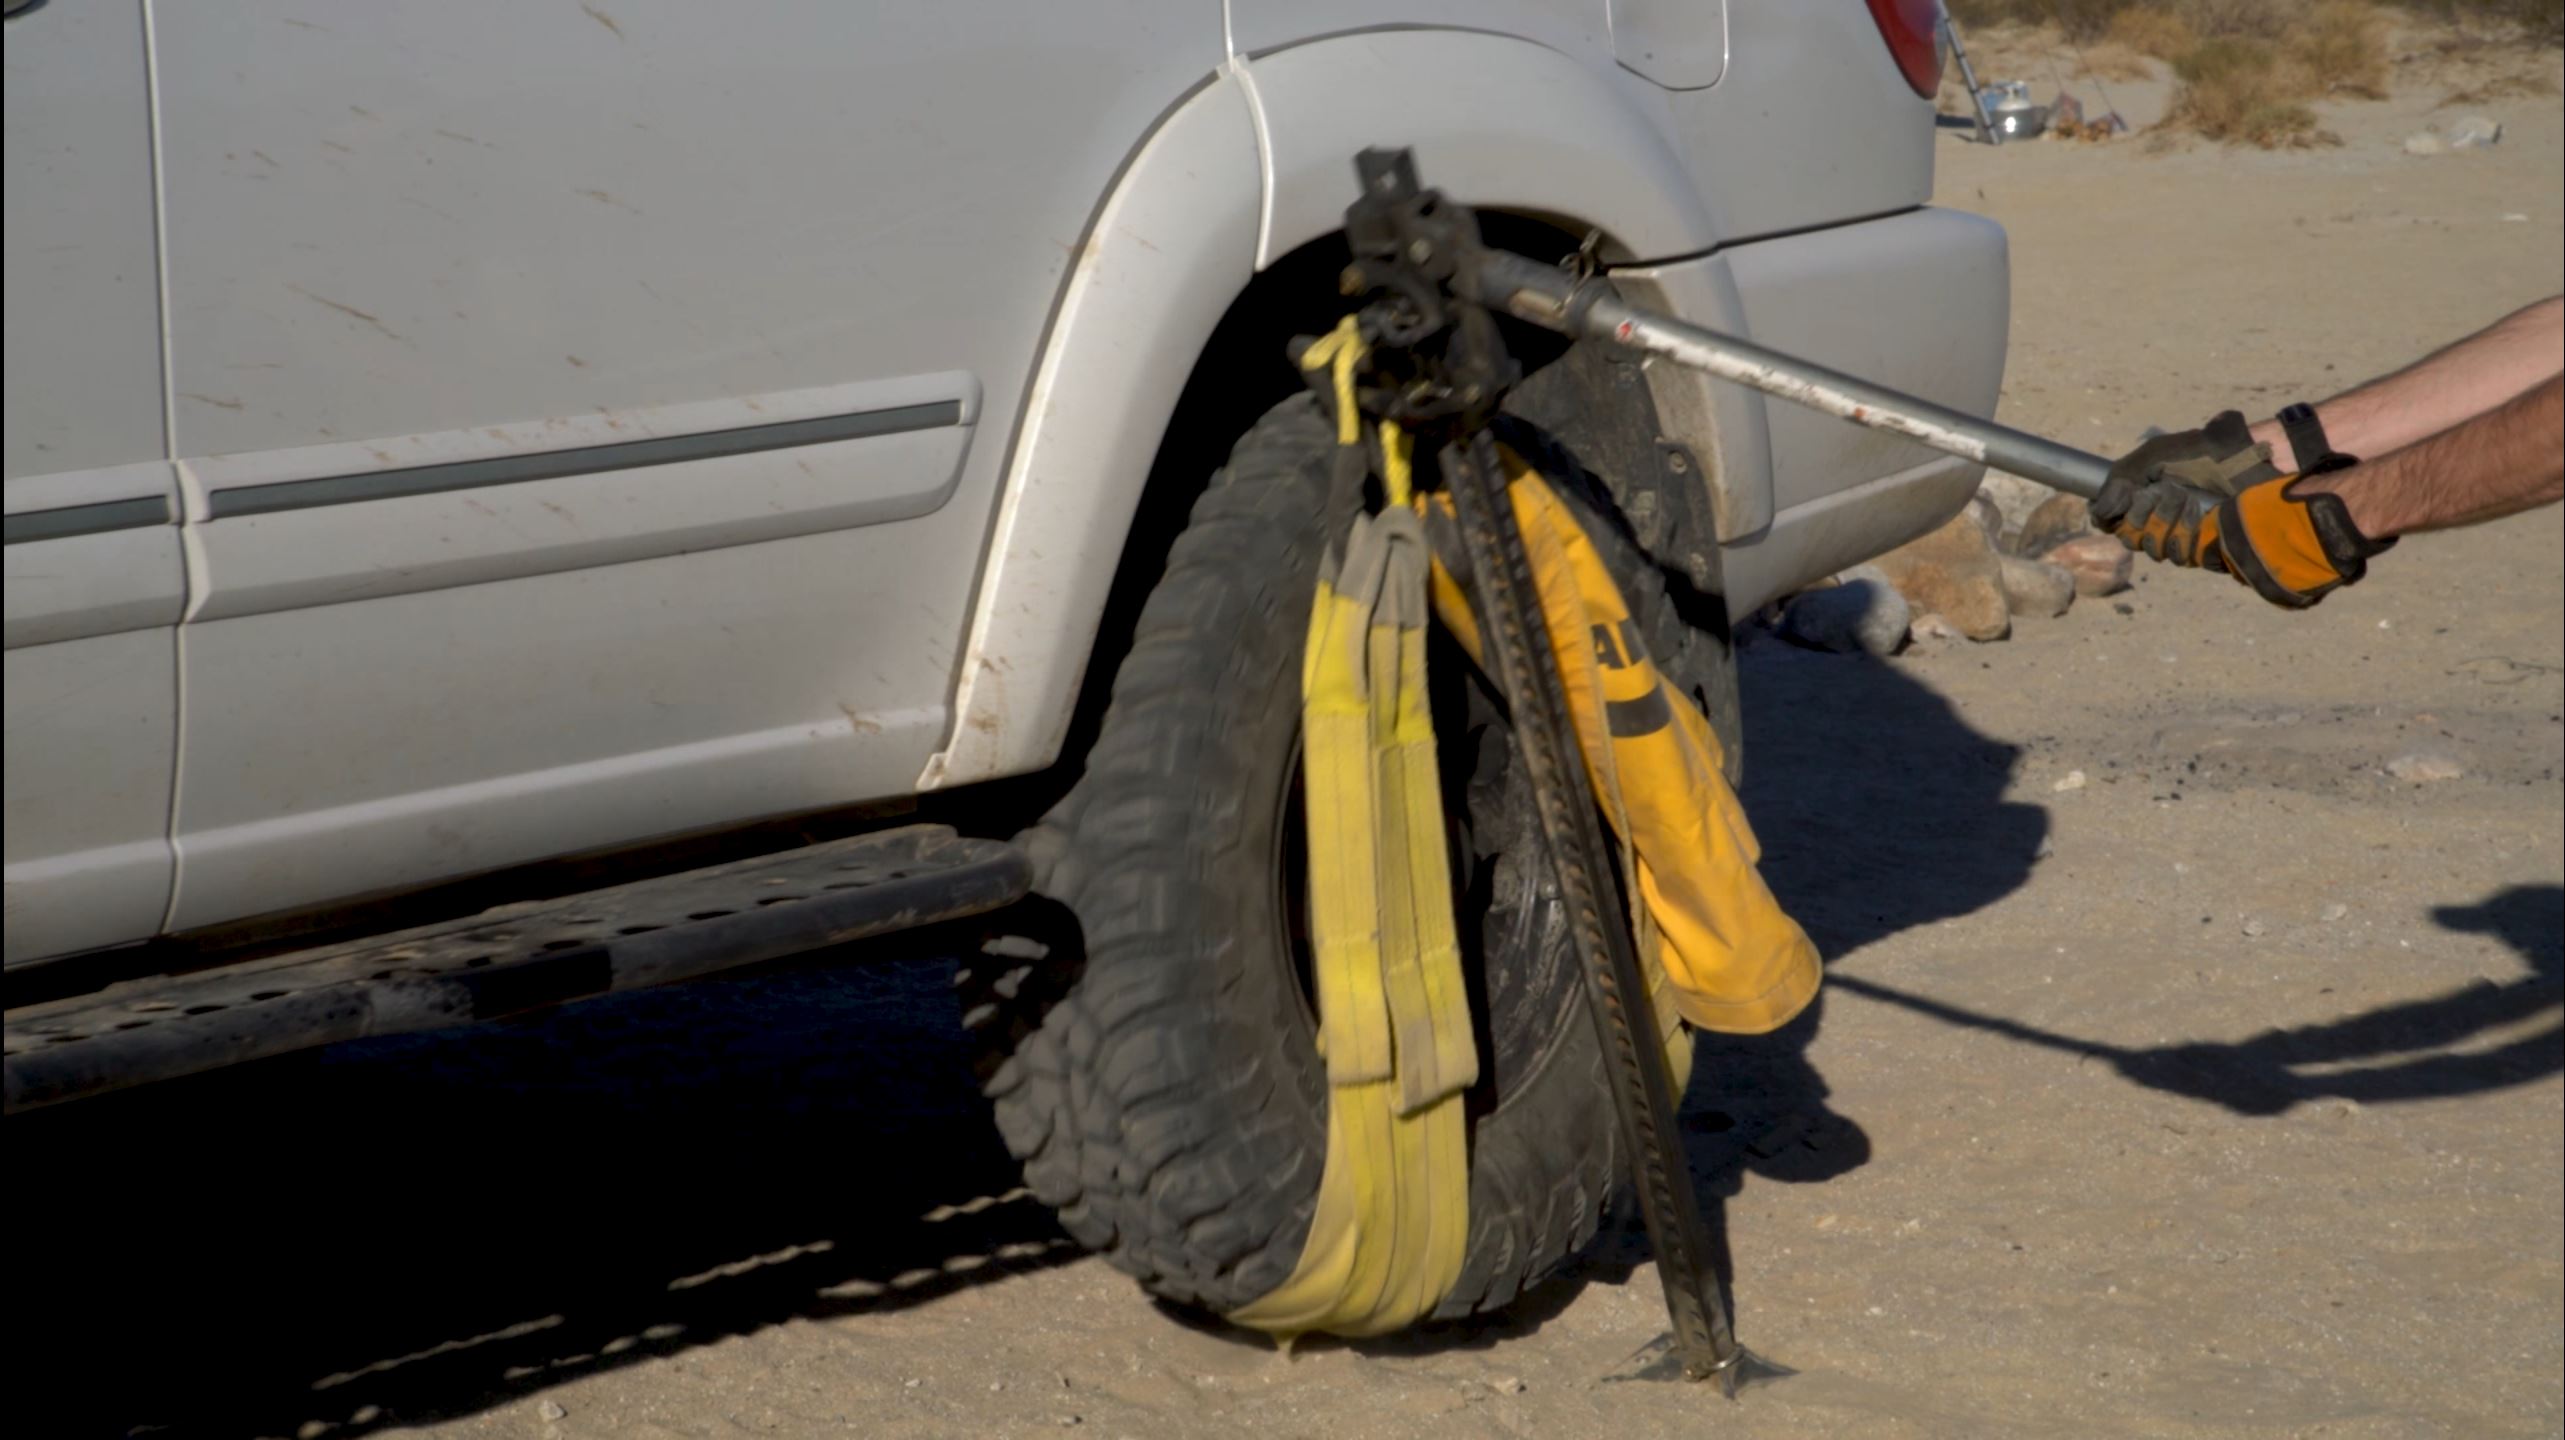
 Even when you’re not in need of a winch anchor, the Deadman can prove to be a useful piece of kit. If you’re just a few feet short of where you need to tie your winch into, the Deadman can also work as a winch extension. Tree down in the trail? Use the Deadman to drag it out of the way. Need to haul a boatload of firewood back to camp? Get a buddy and use the Deadman as a giant litter. Taking on some trail repairs on your rig? Unpack the Deadman and use it like a tarp so you don’t have to crawl in the mud under your rig. It’s extremely versatile – just remember to respect his Working Load Limit and you’ll be good to go. NOTE: Although both the original Deadman and the Ruggedized Deadman can be used as winch extensions, they are NOT rated for use in snatching a vehicle or in a kinetic recovery situation.
 About the only downside to the Deadman, ruggedized or not, is that you have to provide the hole to bury him in in when you’re burying dead things to create an anchor. Depending on the type of surface you’re digging in, this can be a quick process, or something that’s going to take some real work. If you have serious aversion to physical labor, make sure you’re aware that the Deadman doesn’t just automatically create an anchor for you – you have to do the burying. And likewise, make sure you’ve got enough water on hand to keep yourself in good order if you’re going to be working hard digging a hole on a hot day. As with any recovery situation, doing a proper stuck assessment before wasting any energy can make a significant difference in how much human powered work is required to get out. For example: If you’re stuck in sand up to your frame, taking the time to remove resistance (sand) from the underside of the vehicle and around the tires, will mean that you need less winching force to get out, which means that you won’t need to dig as big of a hole to bury the Deadman in, and your winch won’t emit the dreaded magic smoke. Each recovery situation is unique. Do a good assessment, and figure out how to best employ the tools and skills you have.
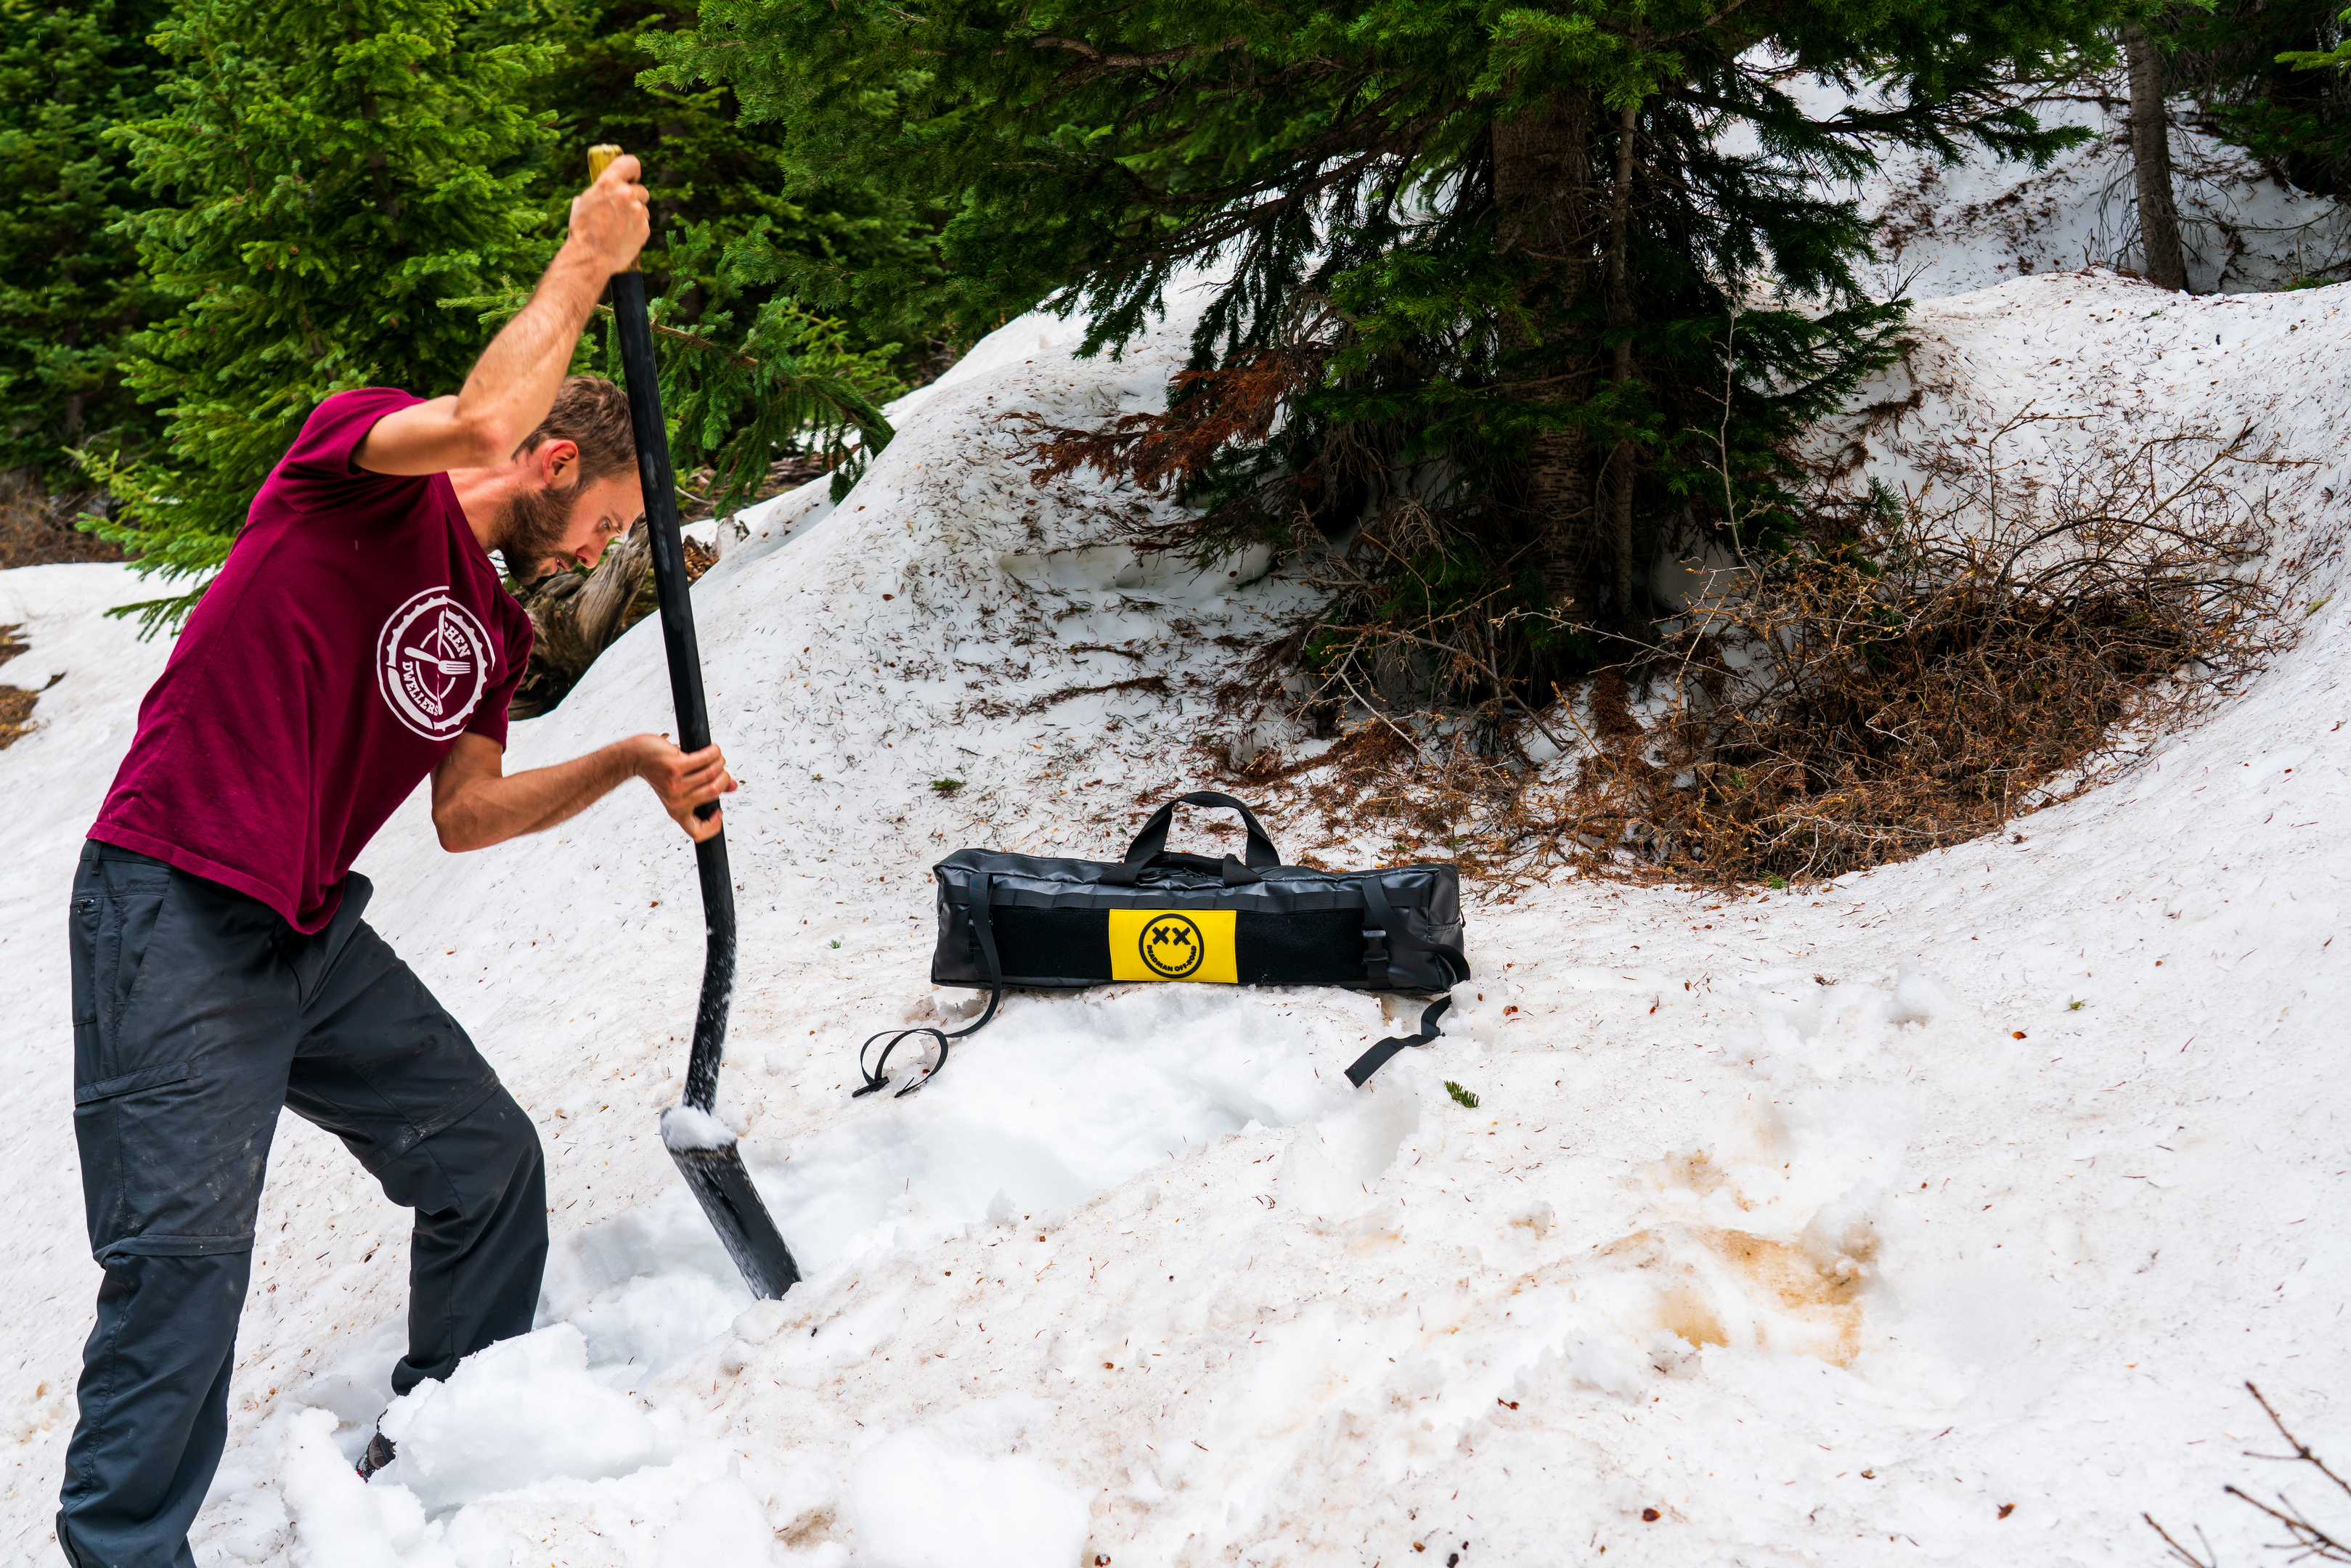


 FULL DISCLOSURE: