
This all started when I was unhappy with the $1300 shock I bought. Hard to swallow that I'd just shelled out that much for some bike jewelry that didn't perform. Enter 'the Google'. When in doubt, Google has all the answers. Usually. Lo and behold, darn near nothing is out there on this subject. So I decided I would just have to write something up in case others are in my shoes. Or you just like pictures of shocks. This is an 8987 ‘triple clicker’ series shock, by the way.
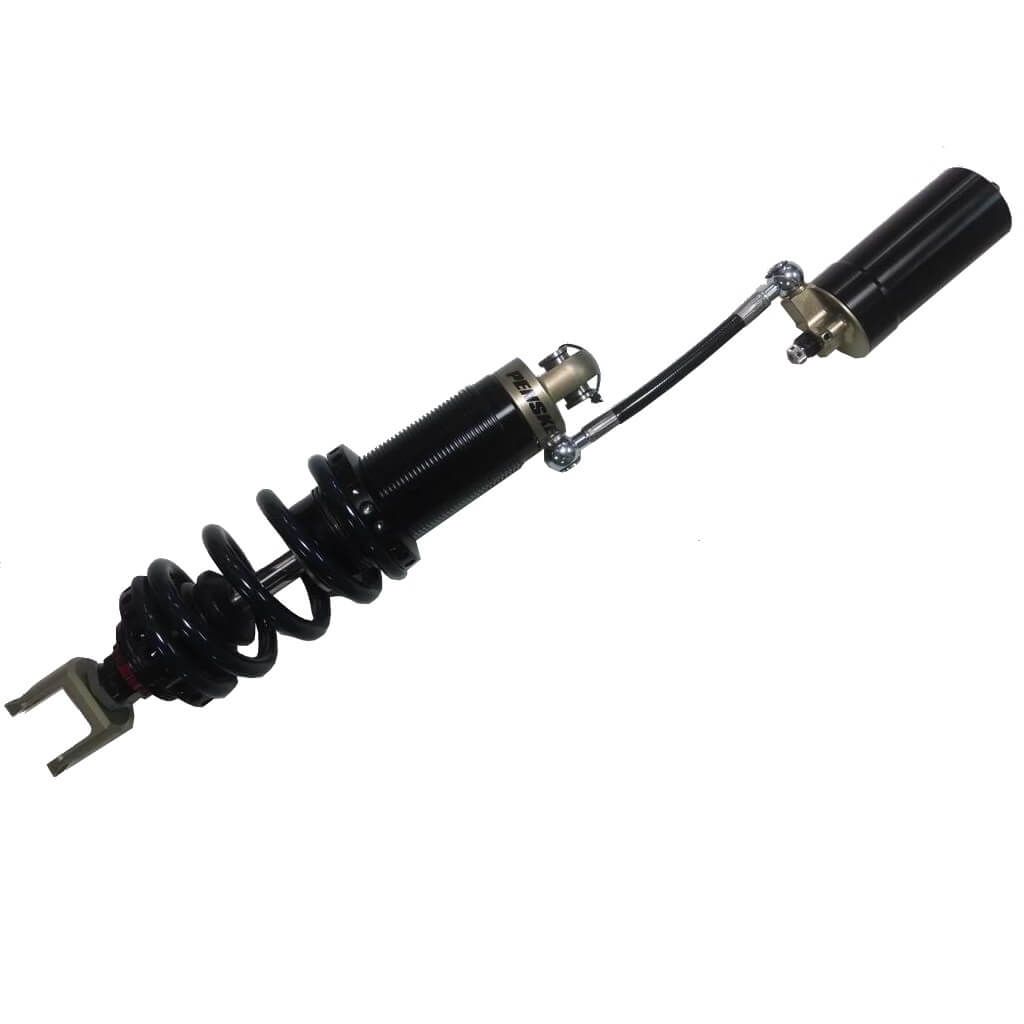
A little background: This is part of tailoring my 2012 Yamaha Super Tenere for two up touring both on and off road.

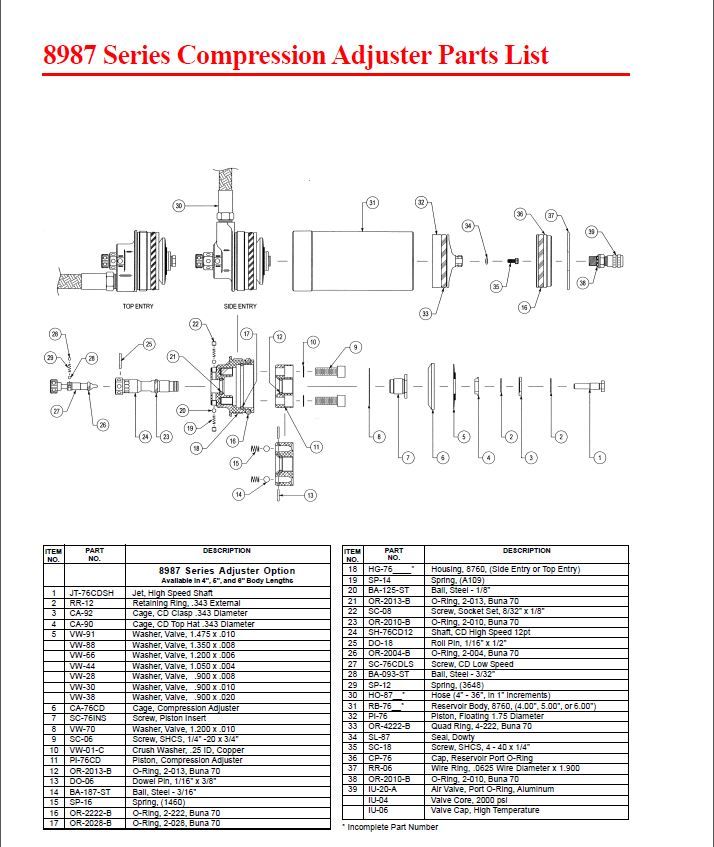
Luckily, the owner's manual that comes with the shock is surprisingly thorough. Not only does it lay out how to fully service the shock, but it provides you with tuning info, valving stacks, and damping curves for many different scenarios. Cool, but how does this relate to my specific bike? It's not that in depth, and once you get to tuning your machine, you're still in the dark, though you are presented with some good guidelines.
The following is more of a step by step, basically following the procedures in the manual, but with lots of pictures. Everyone loves pictures.
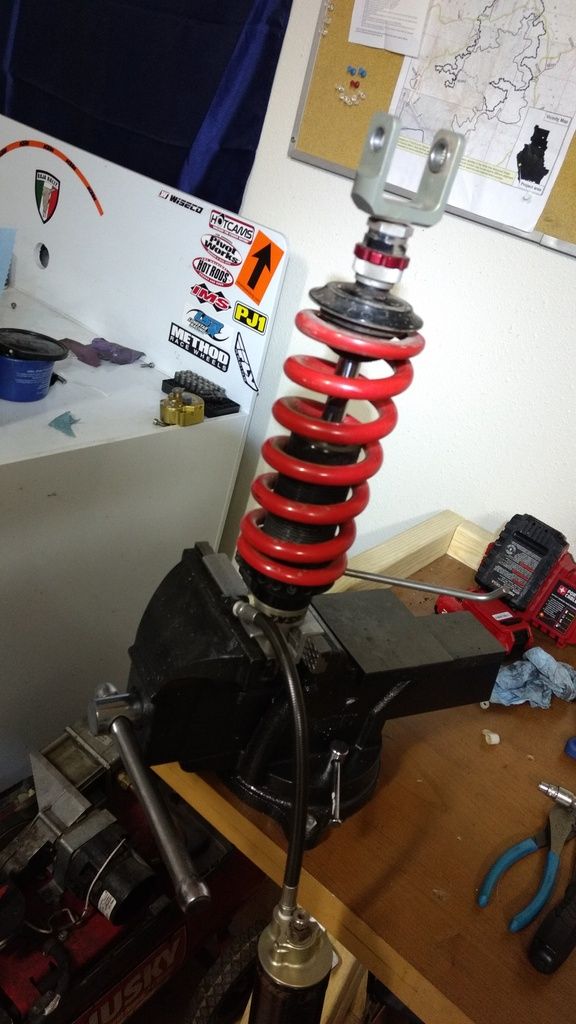
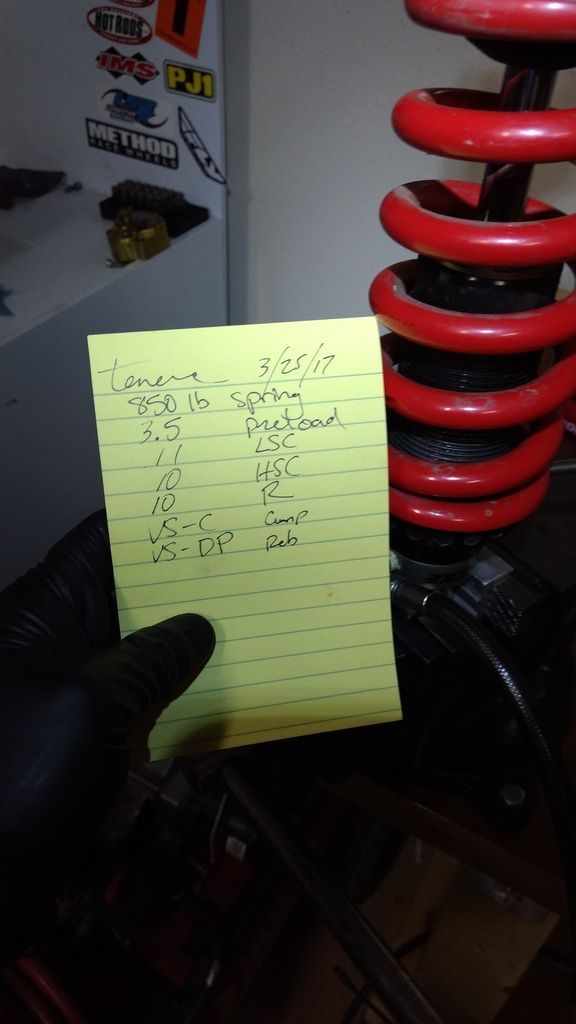
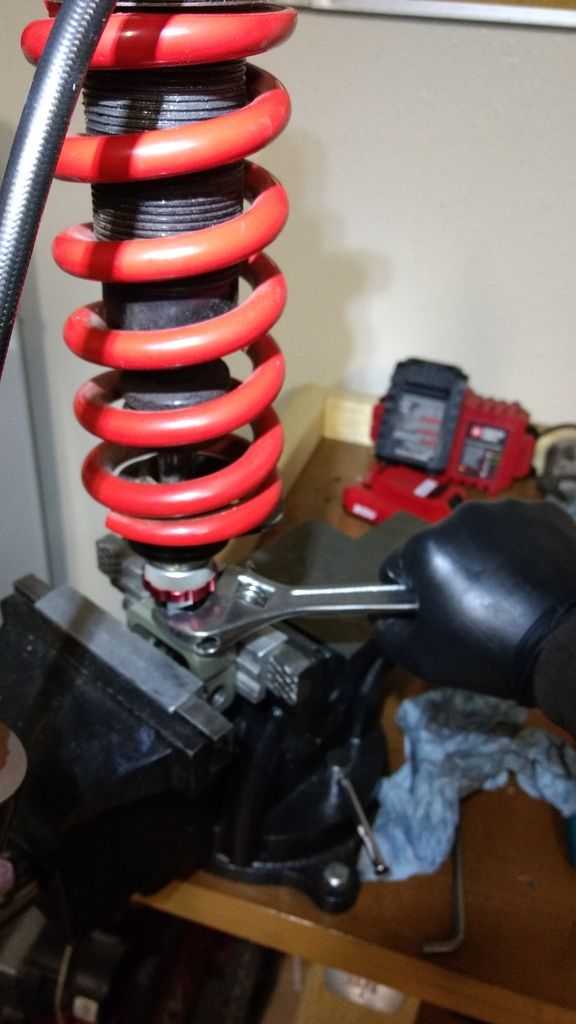
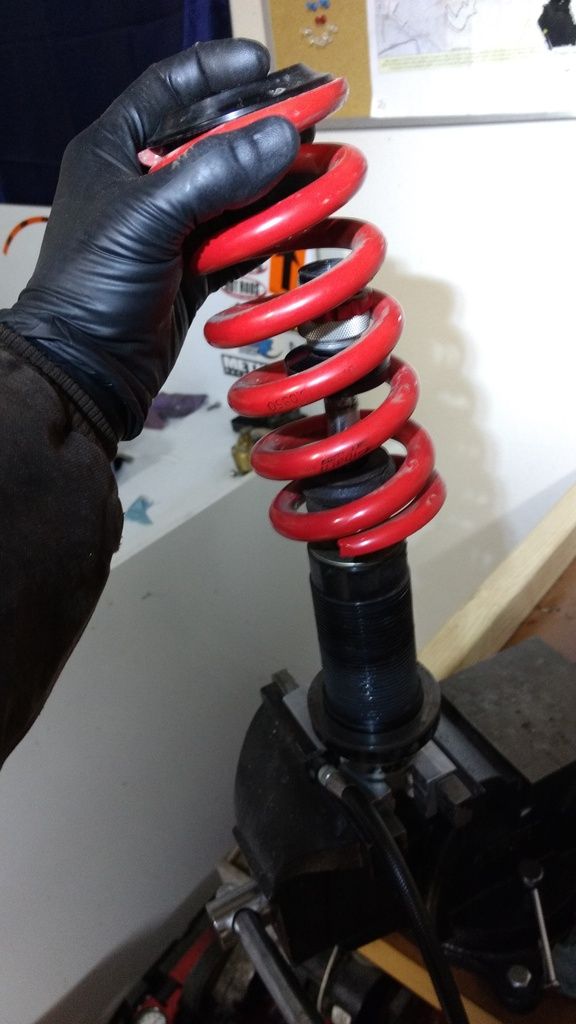
Step one, and this one is important, remove the shock from the bike! I like to work with the top clevis mounted in a vise (use soft jaws!). Take a minute to record all the relevant settings, whether you are revalving the shock or not. It's always better to have the info and not need it...
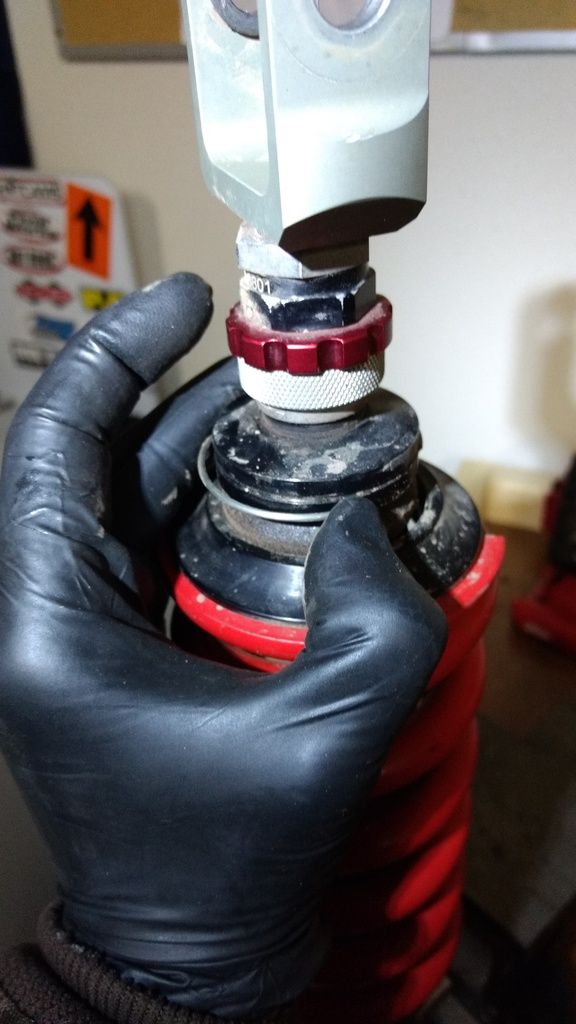
Unscrew the preload collar until the spring is just loose. The amount of turns it took is your preload setting. This, or more precisely the final sag numbers, can make or break the handling of your motorcycle. You're also going to back out all of the 'clickers' and record everything.
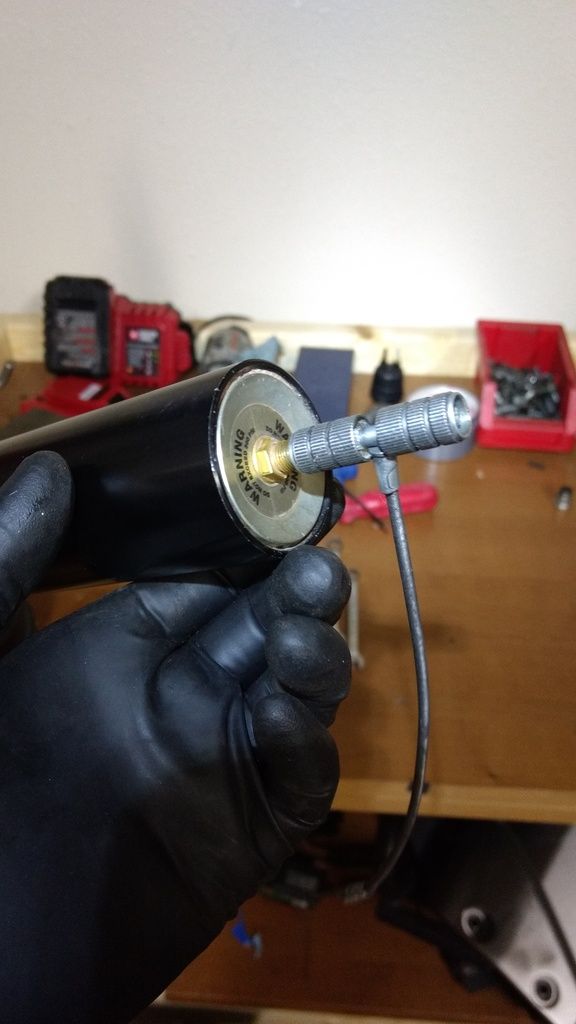
Your shock has a chamber of high pressure nitrogen that creates a 'preload' on the oil. The purpose is to eliminate cavitation, which is when bubbles form (then violently collapse) inside your shock fluid. Cavitation is bad, m'kay? Lots of pressure to keep in in check, so if you don't want a shower of oil, time to release it.
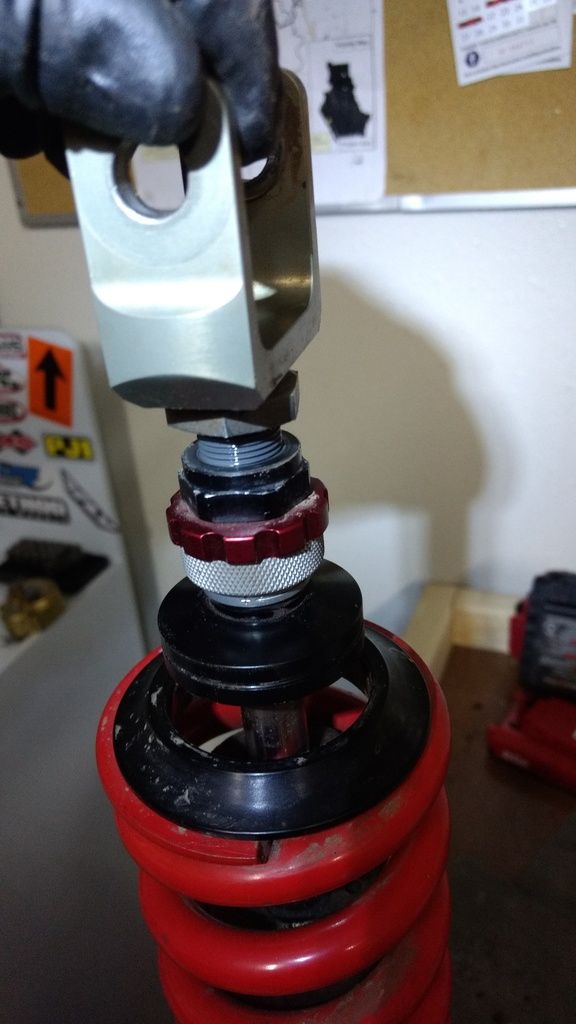
Now that there's no preload in the spring or the oil, you can remove the spring completely. Usually you have to unscrew the collar until there is a bunch of slack, then you can undo the spring clip and remove the spring seat that holds the spring in place.

Unfortunately, this shock has a dirty little trick - the spring seat does not fit over the lower clevis. Gotta remove that too. Don't forget to write down the distance the clevis protrudes from the shaft as this has a bearing on the ride height, but not the preload, of the bike.
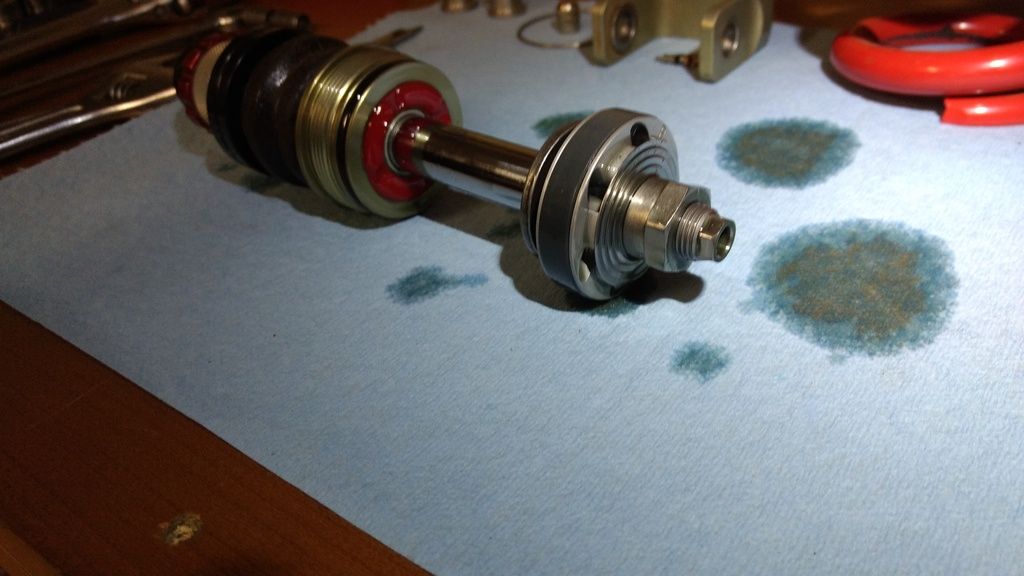
Now you can complete the divorce of the spring and the damper from the system.
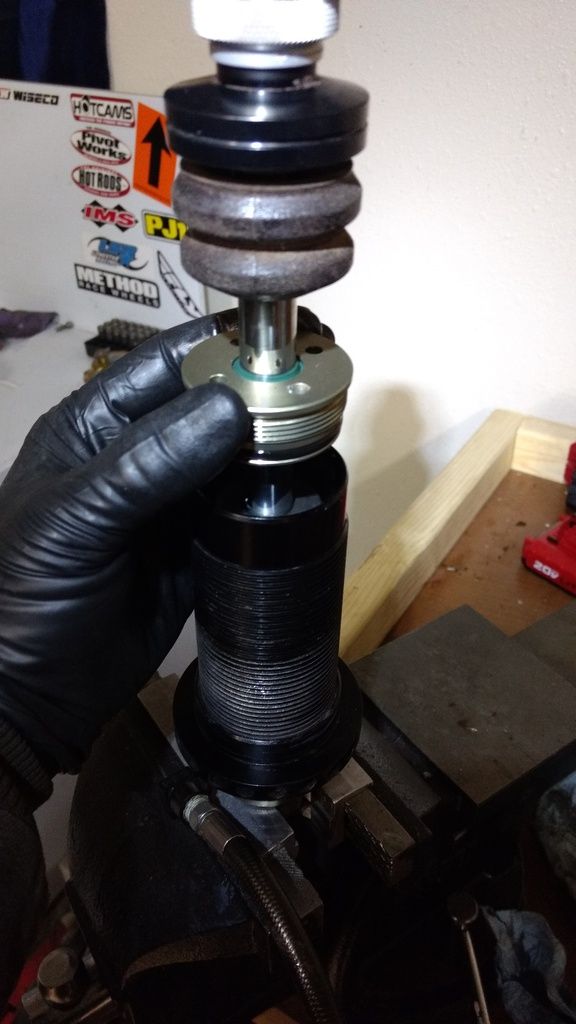
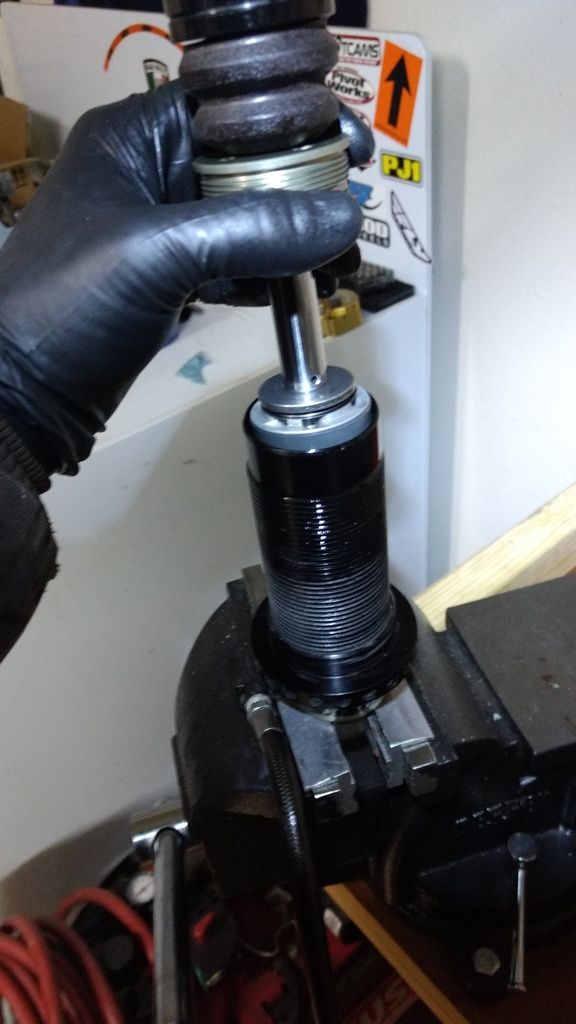
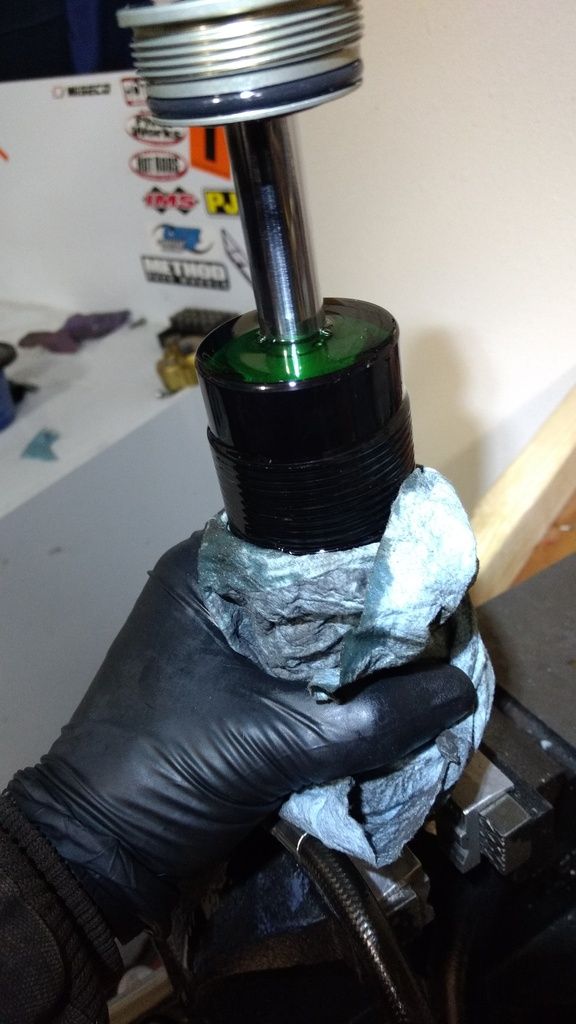
You've now got a great view of the seal head, which you will remove next. This component houses a bushing that controls the position of the shock shaft, a high pressure oil seal, which (duh) keeps the oil in the shock, and the dust seal, which helps keep the outside filth from contaminating that pretty green oil.
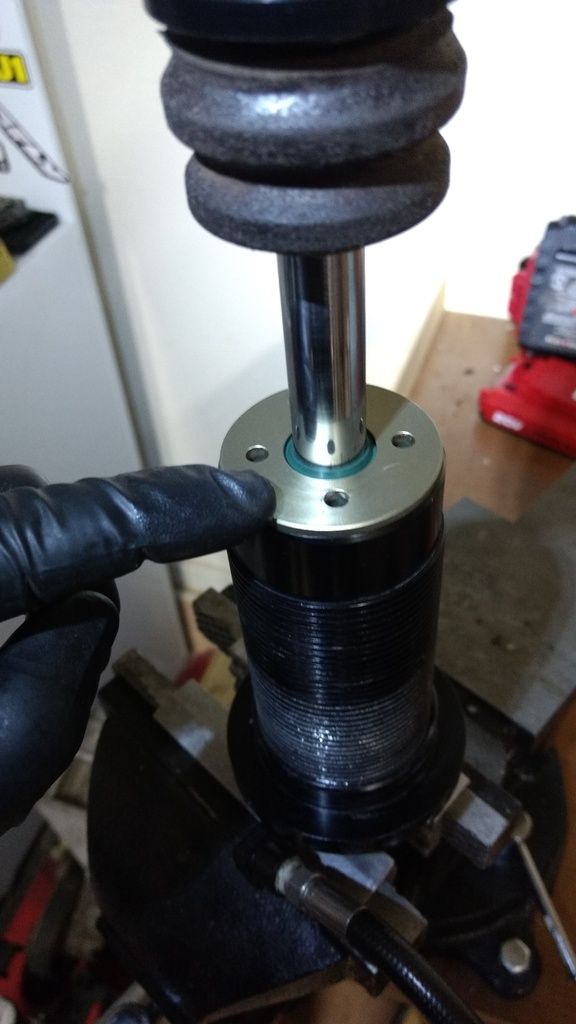
Using a pin wrench (or some ingenuity), unscrew the seal head and gently (remember that oil shower mentioned earlier?) pull up on the shaft to remove the piston from the shock body.
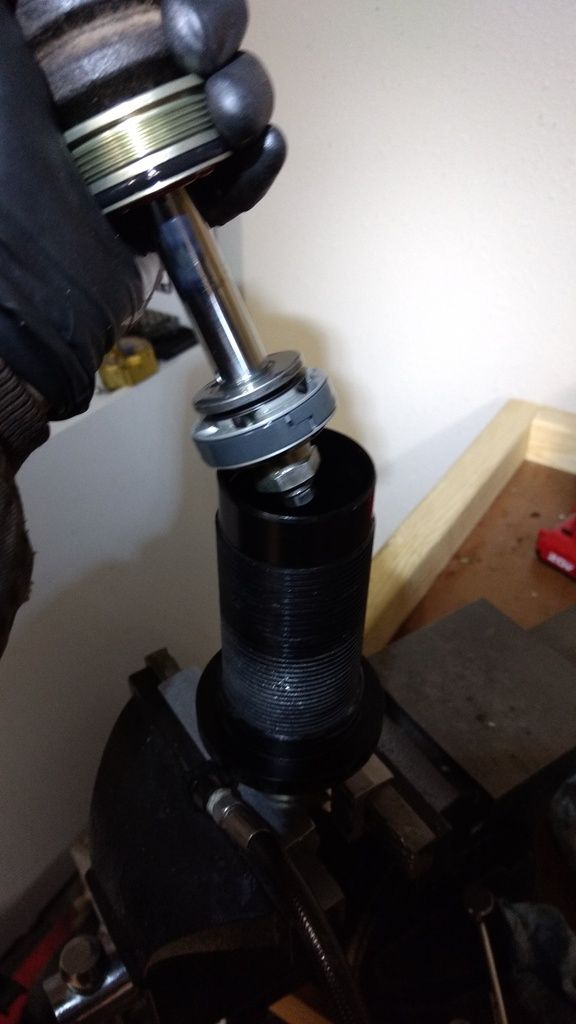
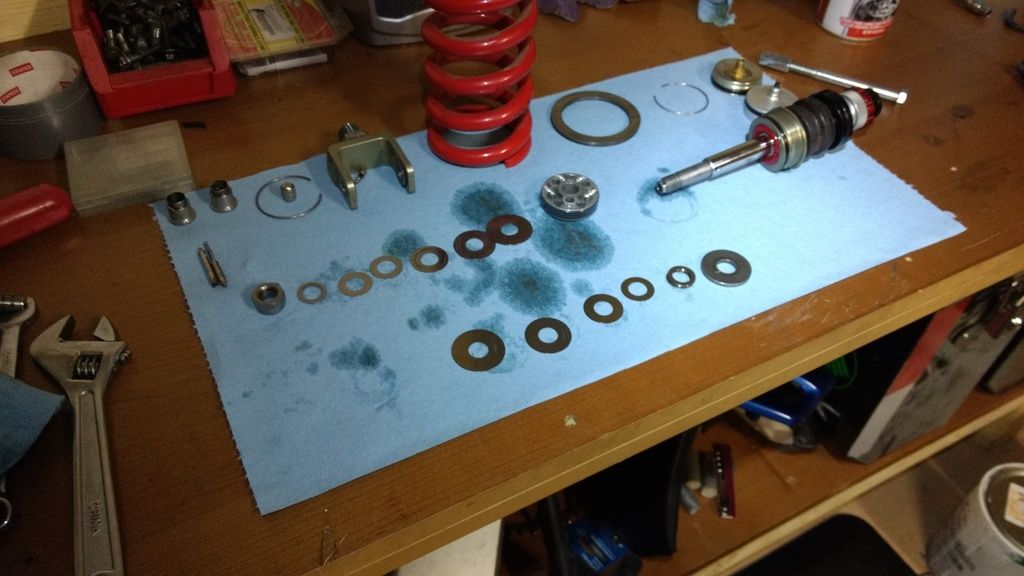
Set everything out on a clean workbench. Repeat after me, “cleanliness is next to Godliness”.

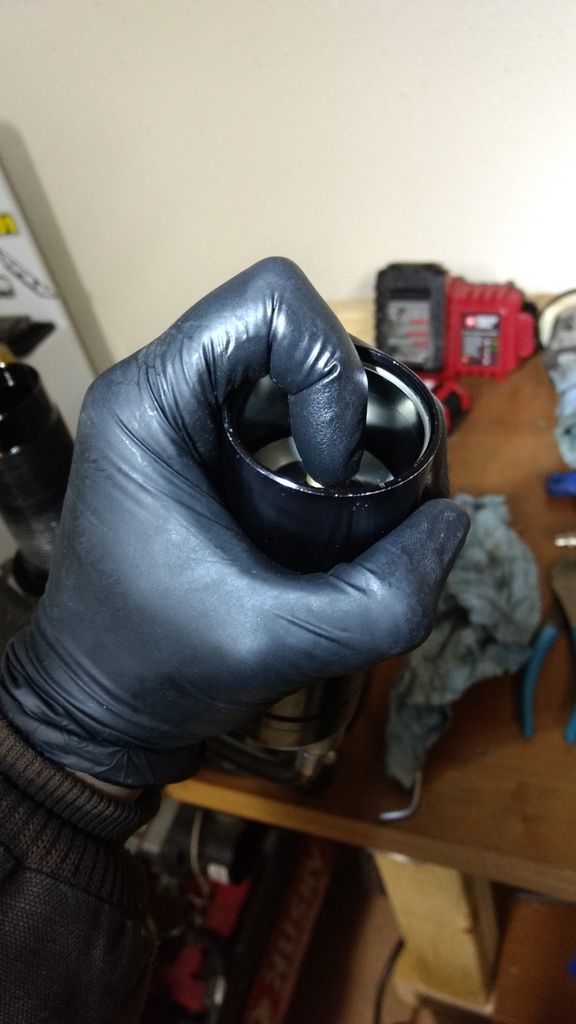
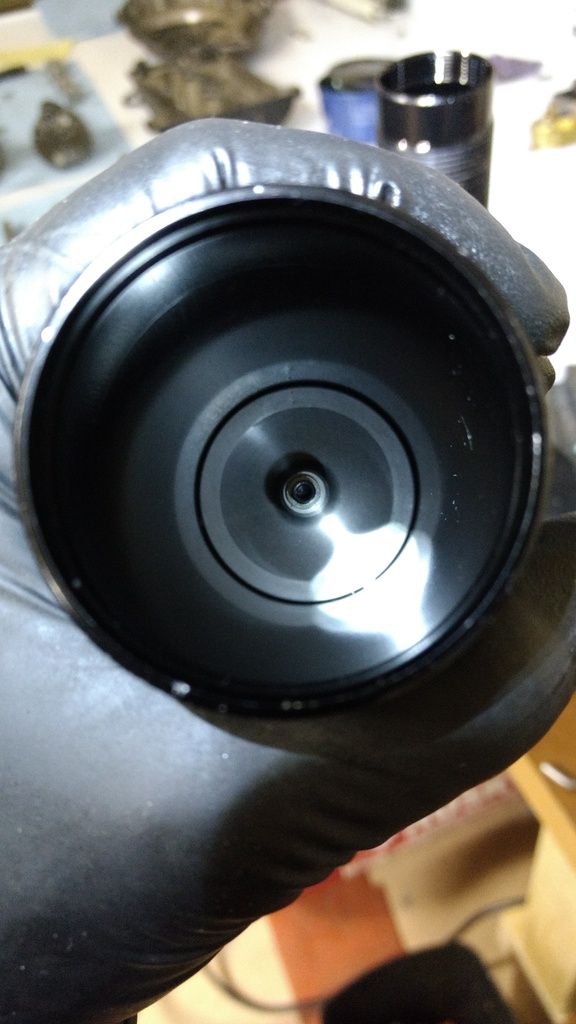
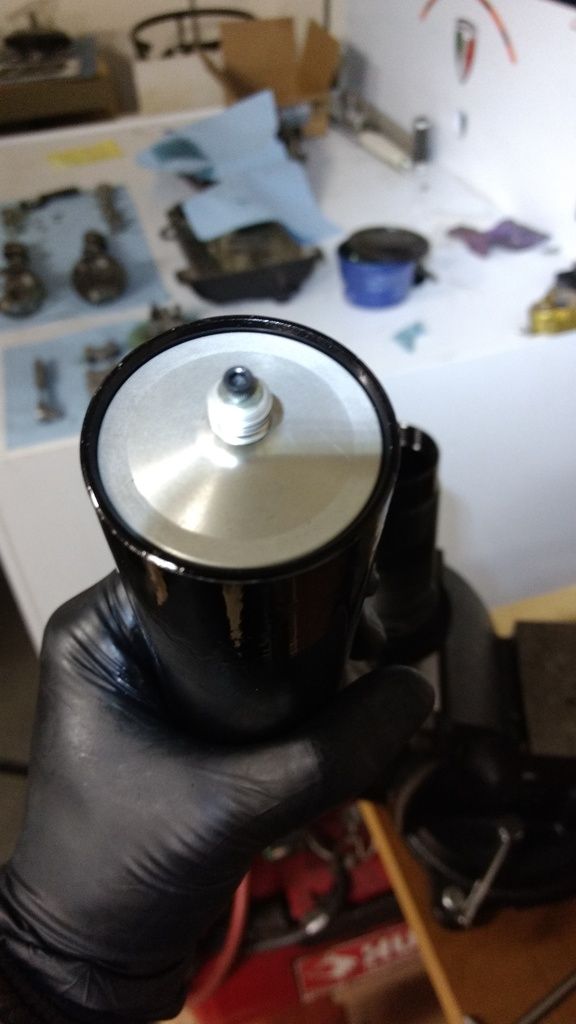
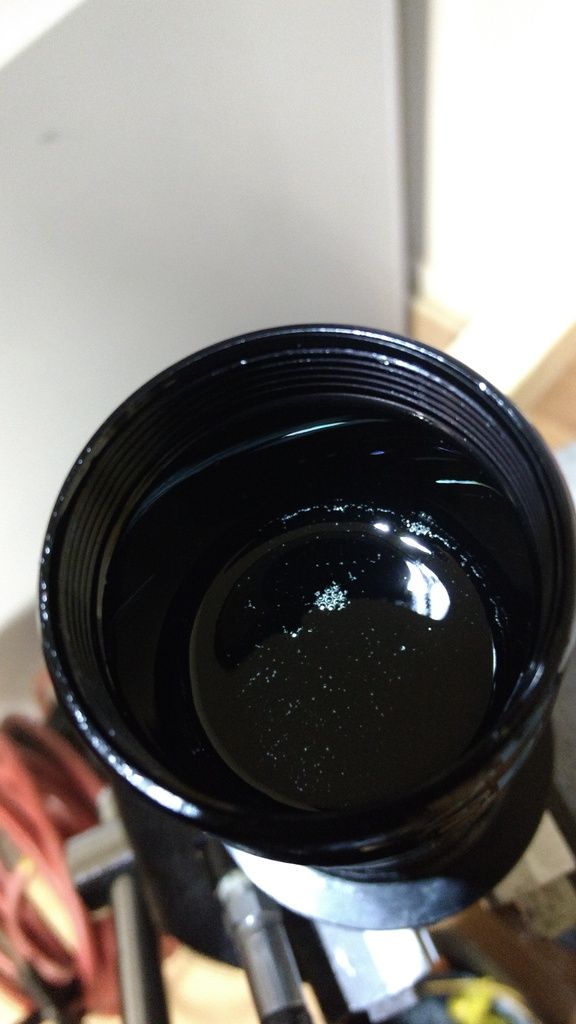
Now we can disassemble the reservoir, where we will find the internal floating piston, or IFP. This piston separates the high pressure nitrogen from the oil while allowing for a variable volume (since the shock shaft is going in and out of the body, and displacing incompressible fluid) inside the shock. Without this separation, you have an emulsion shock where the oil and gas mix and foam. Totally different beast.
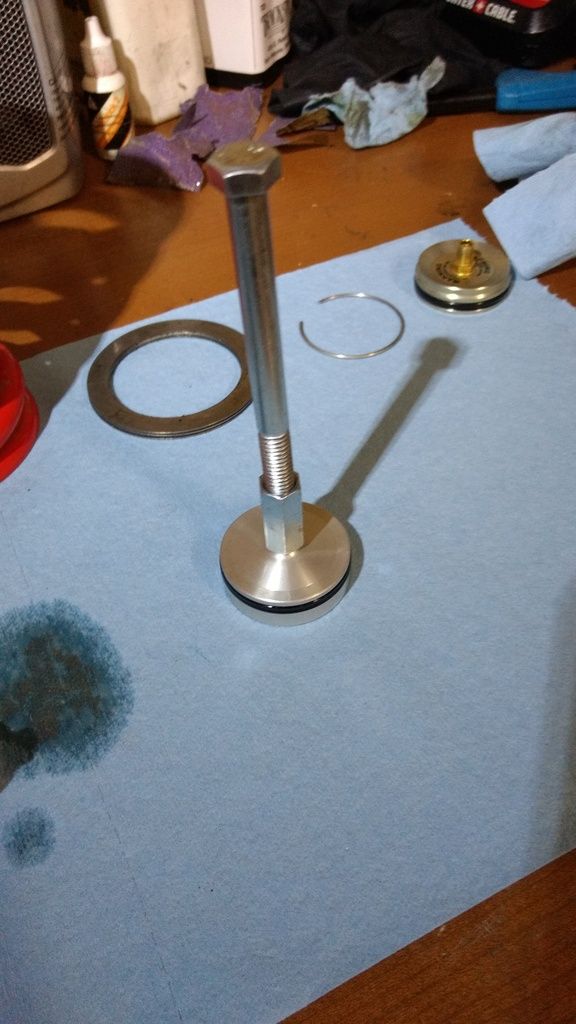
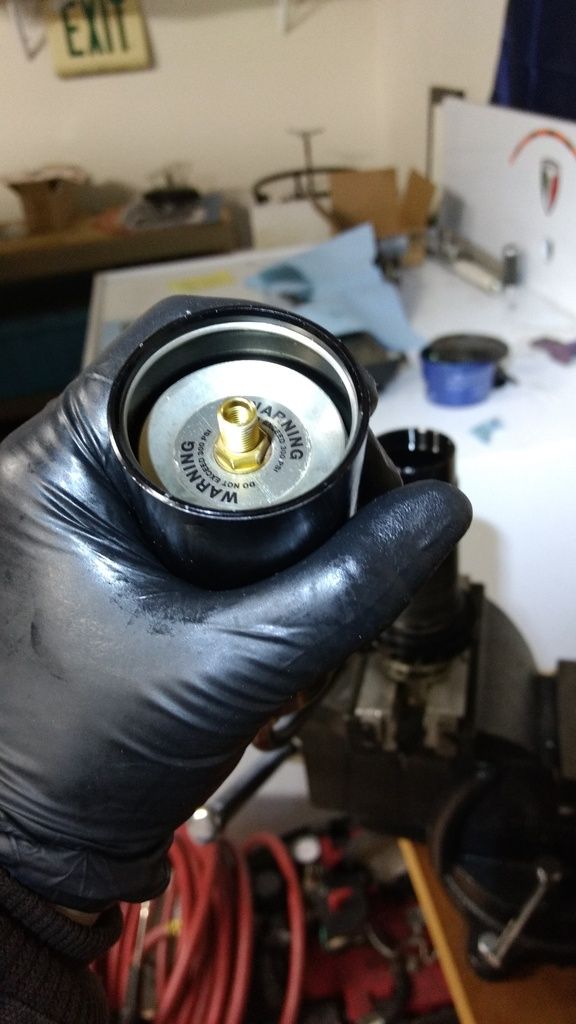
After pushing the resi cap down, remove another circlip, then the cap. It helps to completely remove the valve core, and use a valve stem fishing tool to get some traction.

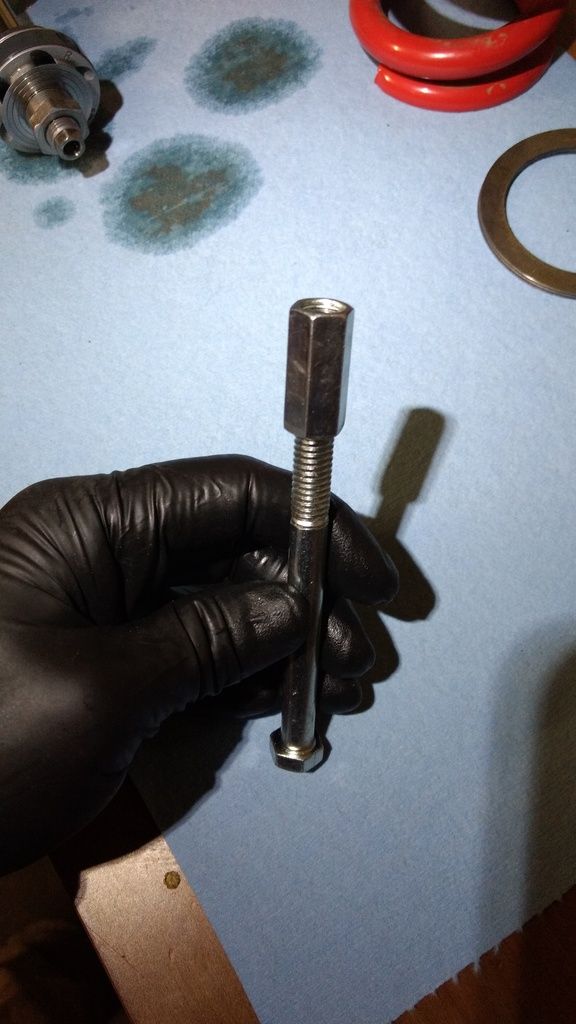
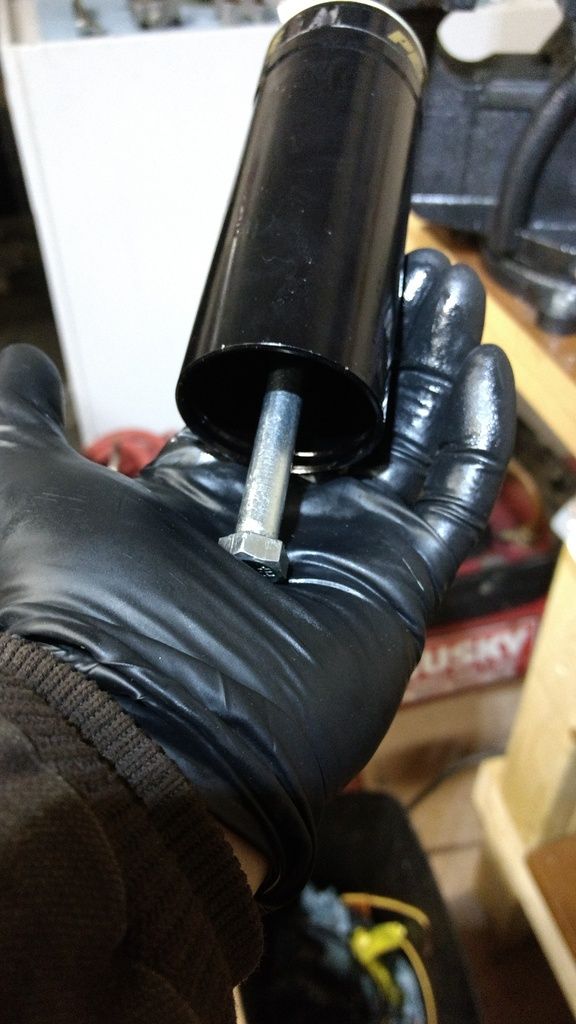
Now you'll see the IPF, which has a threaded boss in the center. I cobbled together a tool to screw onto these threads from a bolt and a coupling nut. Screw this on and pull.
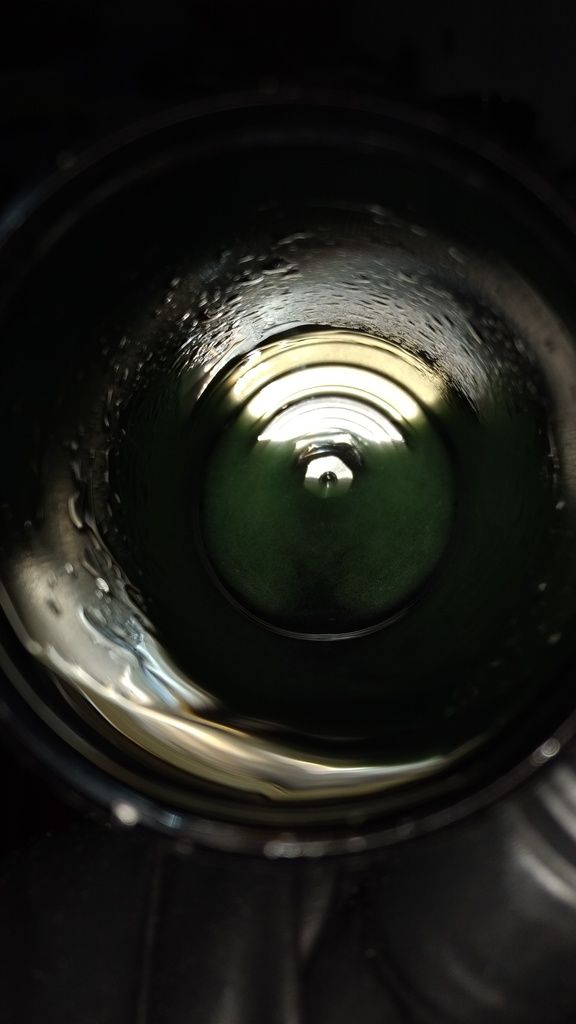
Dump the old oil, taking note of any debris, shimmer or cloudiness to the oil. It should come out clean and clear, usually with some color.
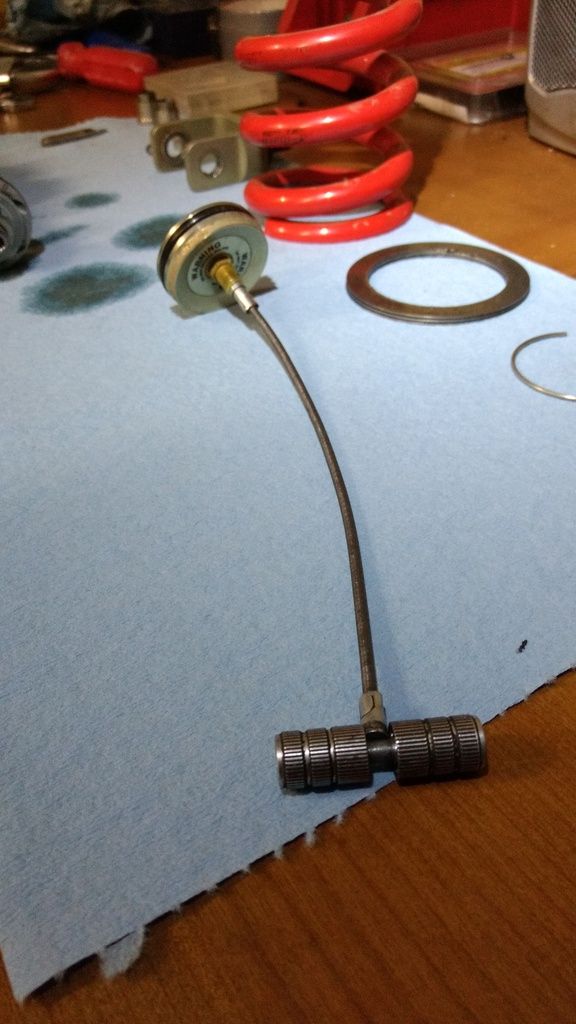
Next up we get to the real meat and potatoes of the issue - the main piston, and associated valve stacks. Penske has many different pistons to choose from – this one is a linear/linear piston, meaning the damping force curve is roughly linear with velocity.
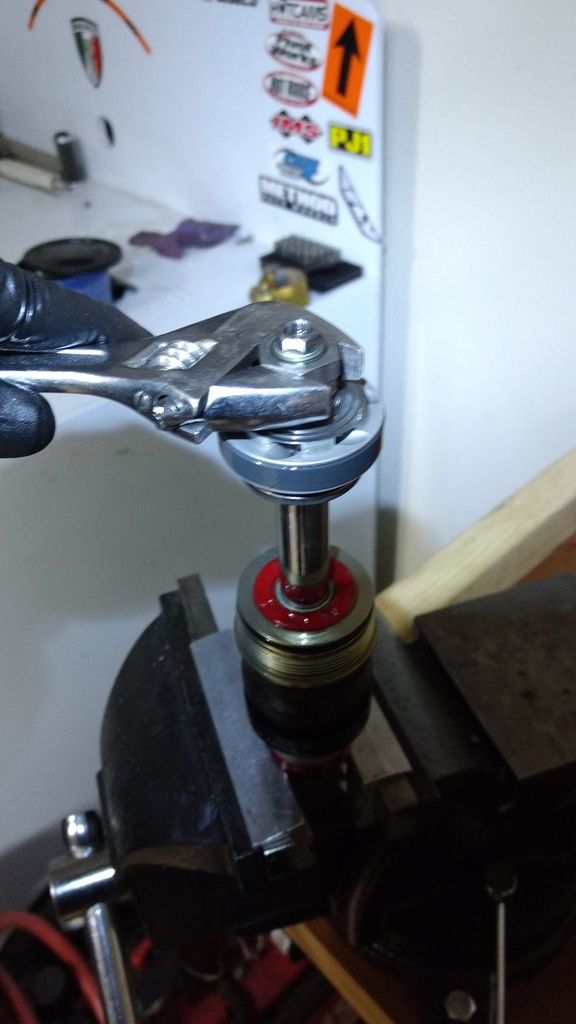
Get the main shaft back into the vice and unscrew the large nut. The small nut is the rebound needle seat - don't touch this unless you’re swapping it out. Rebound needle, or circuit, is kind of a misnomer, though, as the rebound needle (usually the adjuster or 'clicker' at the bottom of the shock) controls bleed in both the rebound and compression directions.
Take your shims off, carefully, and lay them out in order. You'll need a set of calipers or a micrometer to measure them. Do so, and record your findings.

Now is the time to decide on a new valving to try. Easier said than done. Sometimes too much compression feels like too little. Too little rebound feels like too much. Spring rate and sag effect everything. Some piston designs simply don't flow enough and 'hydrolock' once a certain suspension velocity is reached. In that case no matter what you do, the shock will feel harsh.
Unfortunately, that's somewhat out of the scope of this article, and, frankly, is somewhat of a black art with so many interdependent variables.
Hard considerations aside, you're now at the halfway point. You've decided on your stacks, and you're ready to start reassembly. Now is the time to replace anything in the seal head if you're going to.
Repeat after me, once more, "cleanliness is next to Godliness". You're going to reload the shock shaft with everything that came off, in the reverse order. One shim at a time, put the compression stack back on the shaft. No matter what, if you're working in a normal shop, there is going to be some grit trapped between the shims. Give the stack a shot with your favorite aerosol part cleaner (don't spray the stack off the shaft!), then slip the piston on. Same with the rebound stack, then give the threads and the nut another cleaning. You need these to be clean for the medium thread locker you will apply. Torque the nut to 40 ft-lbs. Oh, and make sure the piston is facing the right way, or you’ll really be chasing your tail.
Sorry, I screwed up and didn't take good pictures here. Assembly is the reverse of disassembly, and other standard verbiage.
Filling the shock with oil is easy. Doing so without including some air is not so much. With the shock mounted vertically in the vise again, fill the reservoir halfway and hold it up, once you've got oil coming through into the main body, top up the reservoir. Make sure the compression adjusters are full open for this step. Now pop the floating piston in (attached to the fancy tool we made earlier) and flip the reservoir around so it's the lowest point in the system. Now you're going to slowly stroke the floating piston all the way in, then out 2 - 3 inches, until no more bubbles come into the main shock body. Don't rush this and don't accidentally pull the floating piston out...messy.

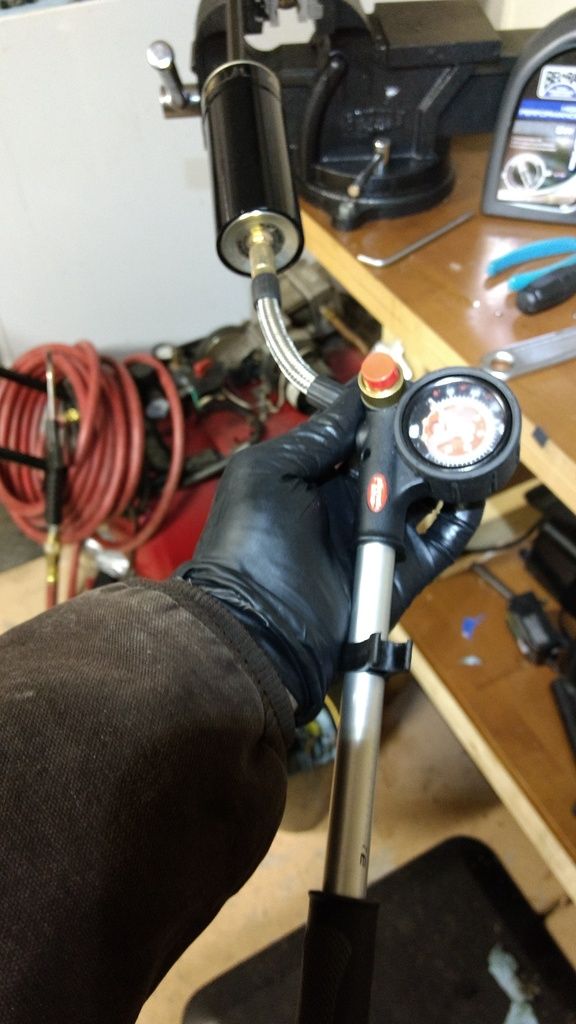
Now you'll get the reservoir cap back on and temporarily re-pressurize it. 50 psi will do. This will force the floating piston all the way to the front in preparation for the final assembly step.
Top up the main body with oil and slowly (notice a theme?) introduce the main piston into the oil. Some will overflow, so you should have a catch basin or rags positioned to catch the excess. Stroke the main shaft up and down as many times as it takes to bleed all the air out. Do NOT pull up hard. Remember that cavitation? With not much force, you will create a big void beneath the piston, which now has no more resistance to movement and will jump up and shoot the oil that's on top of the piston all over yourself and your workspace. Worse than that, you'll have to start the bleeding process over. Shock oil is a smell that tends to stay with you for a time, by the way...
Once you're confident you've gotten all the air out, give the shock shaft a few healthy taps with a dead blow hammer. This will force any air trapped in the piston out by cracking the valve stack open momentarily. Top up the oil and release the pressure from the reservoir. This allows some fluid to push the floating piston away from the reservoir body when you insert the seal head. With the shock piston near the top and the oil topped off, bring the seal head down and screw it in. Penske is real helpful here saying “tighten the shaft bearing. Do not overtighten the shaft bearing.” No duh, give us a torque spec!
Snug it up, pressurize the reservoir with nitrogen to 150 psi, and reinstall your spring. Then, it's back on the bike, and go testing!

A little background: This is part of tailoring my 2012 Yamaha Super Tenere for two up touring both on and off road.

Luckily, the owner's manual that comes with the shock is surprisingly thorough. Not only does it lay out how to fully service the shock, but it provides you with tuning info, valving stacks, and damping curves for many different scenarios. Cool, but how does this relate to my specific bike? It's not that in depth, and once you get to tuning your machine, you're still in the dark, though you are presented with some good guidelines.

The following is more of a step by step, basically following the procedures in the manual, but with lots of pictures. Everyone loves pictures.
Step one, and this one is important, remove the shock from the bike! I like to work with the top clevis mounted in a vise (use soft jaws!). Take a minute to record all the relevant settings, whether you are revalving the shock or not. It's always better to have the info and not need it...

Unscrew the preload collar until the spring is just loose. The amount of turns it took is your preload setting. This, or more precisely the final sag numbers, can make or break the handling of your motorcycle. You're also going to back out all of the 'clickers' and record everything.

Your shock has a chamber of high pressure nitrogen that creates a 'preload' on the oil. The purpose is to eliminate cavitation, which is when bubbles form (then violently collapse) inside your shock fluid. Cavitation is bad, m'kay? Lots of pressure to keep in in check, so if you don't want a shower of oil, time to release it.

Now that there's no preload in the spring or the oil, you can remove the spring completely. Usually you have to unscrew the collar until there is a bunch of slack, then you can undo the spring clip and remove the spring seat that holds the spring in place.


Unfortunately, this shock has a dirty little trick - the spring seat does not fit over the lower clevis. Gotta remove that too. Don't forget to write down the distance the clevis protrudes from the shaft as this has a bearing on the ride height, but not the preload, of the bike.


Now you can complete the divorce of the spring and the damper from the system.

You've now got a great view of the seal head, which you will remove next. This component houses a bushing that controls the position of the shock shaft, a high pressure oil seal, which (duh) keeps the oil in the shock, and the dust seal, which helps keep the outside filth from contaminating that pretty green oil.

Using a pin wrench (or some ingenuity), unscrew the seal head and gently (remember that oil shower mentioned earlier?) pull up on the shaft to remove the piston from the shock body.


Set everything out on a clean workbench. Repeat after me, “cleanliness is next to Godliness”.


Now we can disassemble the reservoir, where we will find the internal floating piston, or IFP. This piston separates the high pressure nitrogen from the oil while allowing for a variable volume (since the shock shaft is going in and out of the body, and displacing incompressible fluid) inside the shock. Without this separation, you have an emulsion shock where the oil and gas mix and foam. Totally different beast.
After pushing the resi cap down, remove another circlip, then the cap. It helps to completely remove the valve core, and use a valve stem fishing tool to get some traction.


Now you'll see the IPF, which has a threaded boss in the center. I cobbled together a tool to screw onto these threads from a bolt and a coupling nut. Screw this on and pull.


Dump the old oil, taking note of any debris, shimmer or cloudiness to the oil. It should come out clean and clear, usually with some color.

Next up we get to the real meat and potatoes of the issue - the main piston, and associated valve stacks. Penske has many different pistons to choose from – this one is a linear/linear piston, meaning the damping force curve is roughly linear with velocity.
Get the main shaft back into the vice and unscrew the large nut. The small nut is the rebound needle seat - don't touch this unless you’re swapping it out. Rebound needle, or circuit, is kind of a misnomer, though, as the rebound needle (usually the adjuster or 'clicker' at the bottom of the shock) controls bleed in both the rebound and compression directions.

Take your shims off, carefully, and lay them out in order. You'll need a set of calipers or a micrometer to measure them. Do so, and record your findings.

Now is the time to decide on a new valving to try. Easier said than done. Sometimes too much compression feels like too little. Too little rebound feels like too much. Spring rate and sag effect everything. Some piston designs simply don't flow enough and 'hydrolock' once a certain suspension velocity is reached. In that case no matter what you do, the shock will feel harsh.
Unfortunately, that's somewhat out of the scope of this article, and, frankly, is somewhat of a black art with so many interdependent variables.
Hard considerations aside, you're now at the halfway point. You've decided on your stacks, and you're ready to start reassembly. Now is the time to replace anything in the seal head if you're going to.
Repeat after me, once more, "cleanliness is next to Godliness". You're going to reload the shock shaft with everything that came off, in the reverse order. One shim at a time, put the compression stack back on the shaft. No matter what, if you're working in a normal shop, there is going to be some grit trapped between the shims. Give the stack a shot with your favorite aerosol part cleaner (don't spray the stack off the shaft!), then slip the piston on. Same with the rebound stack, then give the threads and the nut another cleaning. You need these to be clean for the medium thread locker you will apply. Torque the nut to 40 ft-lbs. Oh, and make sure the piston is facing the right way, or you’ll really be chasing your tail.
Sorry, I screwed up and didn't take good pictures here. Assembly is the reverse of disassembly, and other standard verbiage.

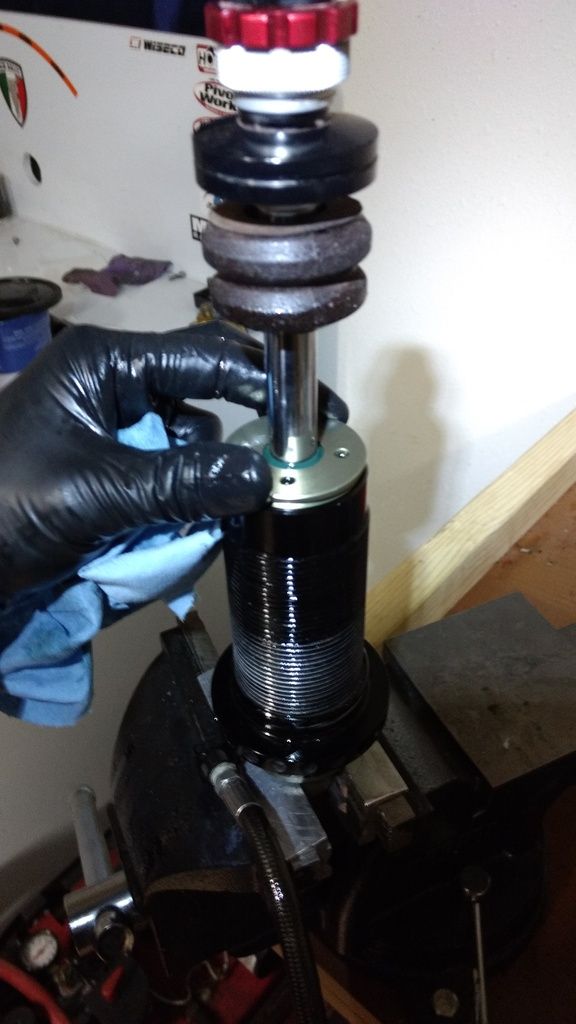
Filling the shock with oil is easy. Doing so without including some air is not so much. With the shock mounted vertically in the vise again, fill the reservoir halfway and hold it up, once you've got oil coming through into the main body, top up the reservoir. Make sure the compression adjusters are full open for this step. Now pop the floating piston in (attached to the fancy tool we made earlier) and flip the reservoir around so it's the lowest point in the system. Now you're going to slowly stroke the floating piston all the way in, then out 2 - 3 inches, until no more bubbles come into the main shock body. Don't rush this and don't accidentally pull the floating piston out...messy.


Now you'll get the reservoir cap back on and temporarily re-pressurize it. 50 psi will do. This will force the floating piston all the way to the front in preparation for the final assembly step.


Top up the main body with oil and slowly (notice a theme?) introduce the main piston into the oil. Some will overflow, so you should have a catch basin or rags positioned to catch the excess. Stroke the main shaft up and down as many times as it takes to bleed all the air out. Do NOT pull up hard. Remember that cavitation? With not much force, you will create a big void beneath the piston, which now has no more resistance to movement and will jump up and shoot the oil that's on top of the piston all over yourself and your workspace. Worse than that, you'll have to start the bleeding process over. Shock oil is a smell that tends to stay with you for a time, by the way...


Once you're confident you've gotten all the air out, give the shock shaft a few healthy taps with a dead blow hammer. This will force any air trapped in the piston out by cracking the valve stack open momentarily. Top up the oil and release the pressure from the reservoir. This allows some fluid to push the floating piston away from the reservoir body when you insert the seal head. With the shock piston near the top and the oil topped off, bring the seal head down and screw it in. Penske is real helpful here saying “tighten the shaft bearing. Do not overtighten the shaft bearing.” No duh, give us a torque spec!

Snug it up, pressurize the reservoir with nitrogen to 150 psi, and reinstall your spring. Then, it's back on the bike, and go testing!
Last edited: