I am a big fan of Toyota trucks - Hilux, Tacoma, 4Runner and Land Cruiser.

My first experience with Mr. Toyoda's legacy came in the form of a used '79 Toyota Hilux 3/4 ton long bed with a 20R/4 speed tranny, an old school Timberline shell, and some rust. That thing ran like a swiss watch and never complained through almost 200,000 miles of abuse from me with nothing but routine maintenance and tires. So began my love affair with all things Toyota.
My second Toyota was a 1988 4Runner 4WD SR5 with the 22RE, R151 5-spd, and all factory options. That thing could go anywhere I pointed it with ease so long as I didn't try to go fast uphill on a long highway grade! 1st Gen 4Runners are solid machines and excellent off road in all conditions.
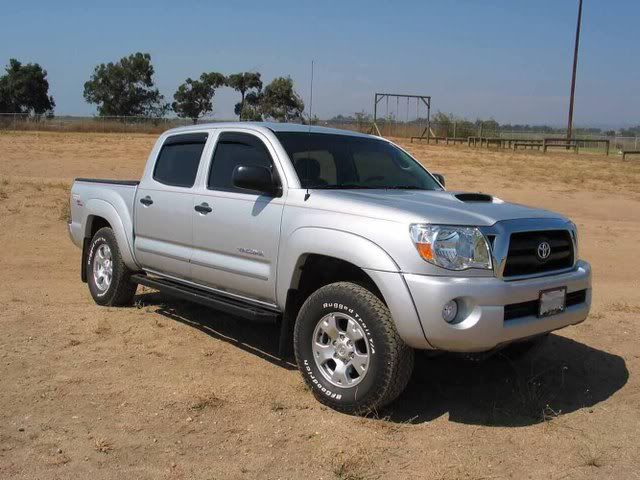
My third Toyota was a 2002 Toyota Tacoma TRD PreRunner Xtra-Cab with the V6 in Lunar Mist which my wife sold when I was in Iraq in 2003. I came home to my fourth Toyota, a brand new 2003 Toyota Tacoma TRD 4WD SR5 Xtra-Cab in Lunar Mist. We quickly outgrew the cab size which brings us to my fifth and "final" Toyota, a 2005 Toyota Tacoma TRD 4WD Double Cab in Silver Streak Mica with all available factory options.
The 2005+ Tacoma was based on the international Land Cruiser Prado 120 chassis and came the 1GR-FE 4.0 Liter V6 gasoline engine that produces 236 horsepower (176 kW) and 266 ft·lbf (361 N·m) torque. This Tacoma is the North American version of the Toyota Hilux pickup sold in international markets.
The project vehicle was purchased new in February 2005 at Toyota of San Juan Capistrano, CA, with a build date of January 2005. It is one of the very first trucks of this generation built at NUMMI in Fremont, CA, USA http://en.wikipedia.org/wiki/NUMMI and was a dealer trade from Reno, Nevada.
My buildup is an ongoing strategic process of parts selection and vehicle modification focusing on reliability, durability, and comfort in the field. The end result of all the time, money, sweat, and busted knuckles has been all the great memories made while enjoying the wonders of adventuring in North America with family and friends!

**************************************************************************************
Make: Toyota
Model: Tacoma Double Cab 4WD SR5 TRD Off Road
Year: 2005
Engine: 4.0 1GR-FE
Trans: 5 spd Auto A750F, 3.35 low ratio: A750F
T-Case: VF2A, low ratio 2:57:1
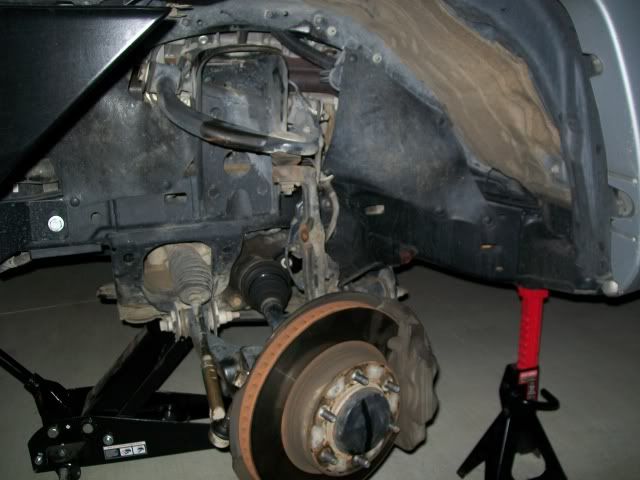
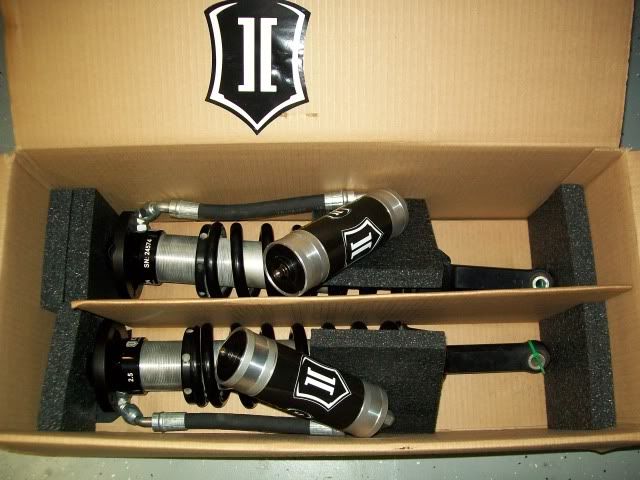
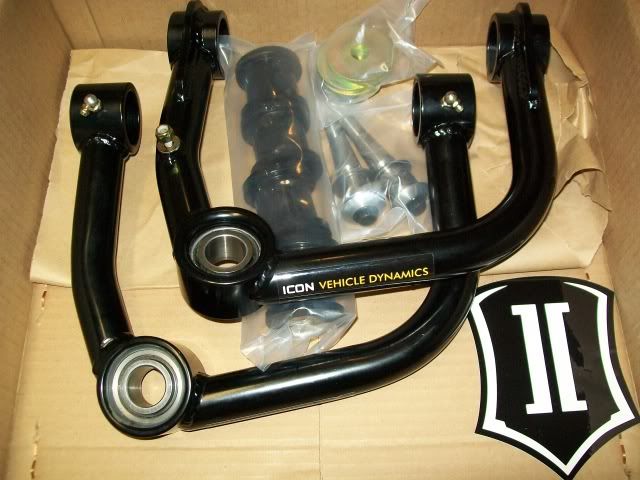
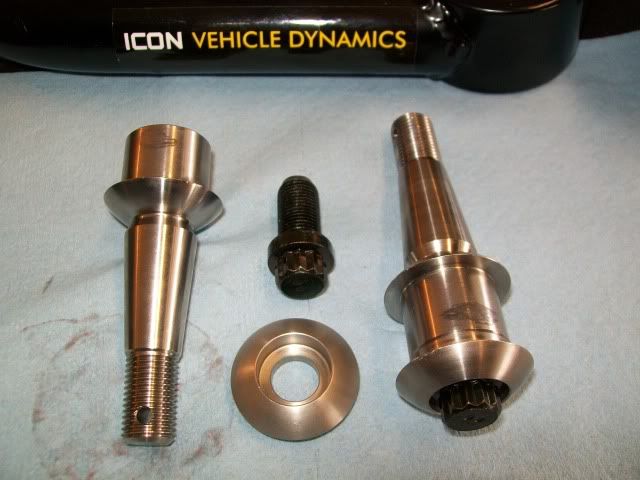
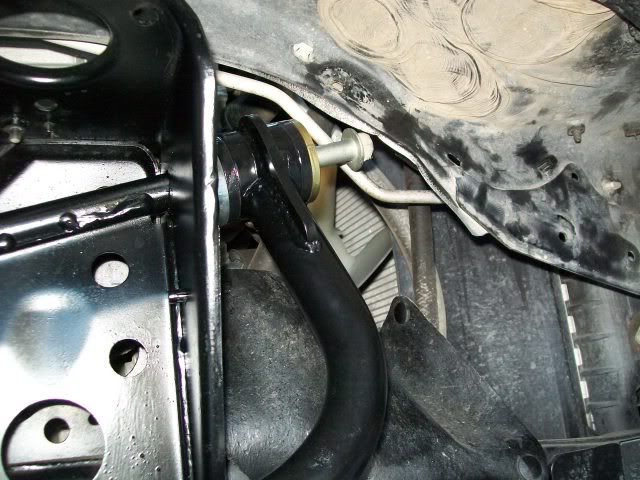
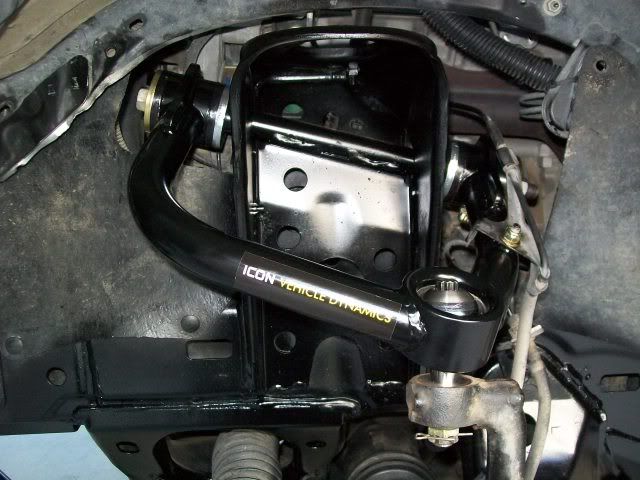
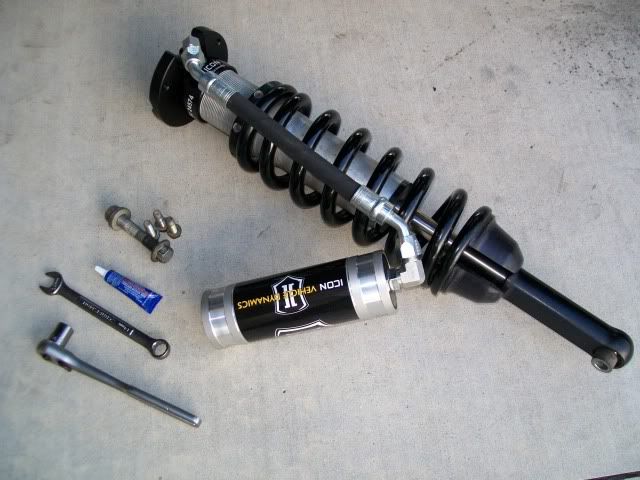
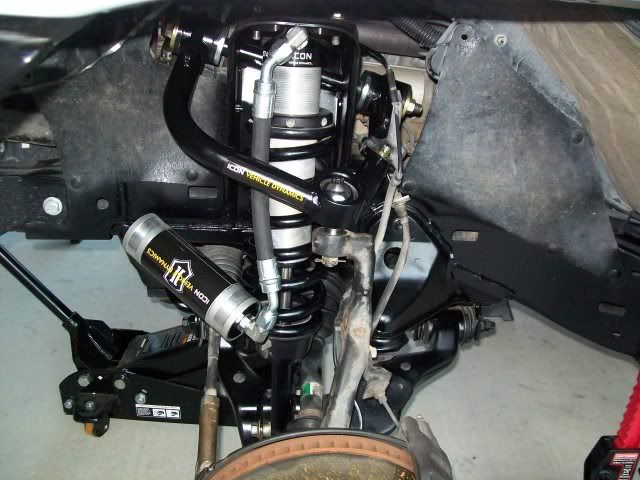
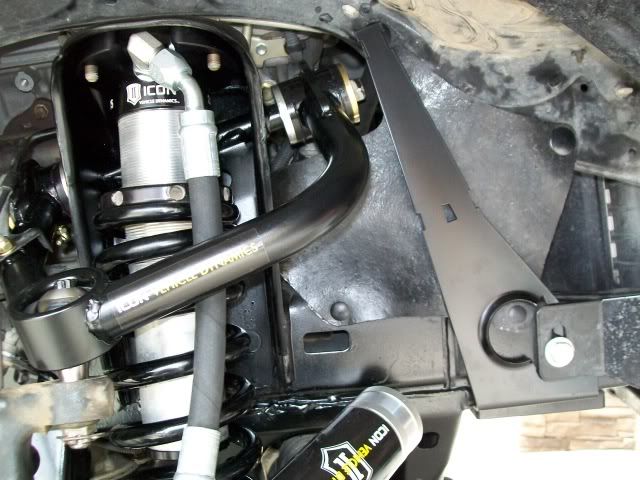
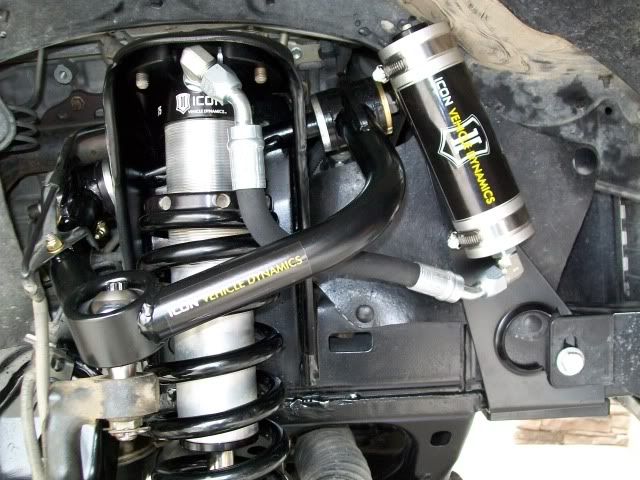
Front Axle: Stock Toyota IFS, 4.88 Nitro Gears, Icon Tubular Upper Control Arms, Icon 2.5 Remote Reservoir Coil-Overs
Rear Axle: Stock Toyota E-Locker, 4.88 Nitro Gears, All-Pro "APEX" Expedition HD leaf springs with Timbren bump stops.
Tires: BF Goodrich AT KO2, 285/75R16
Wheels: Stock Toyota TRD Alloys
**************************************************************************************
CURRENT MODS:
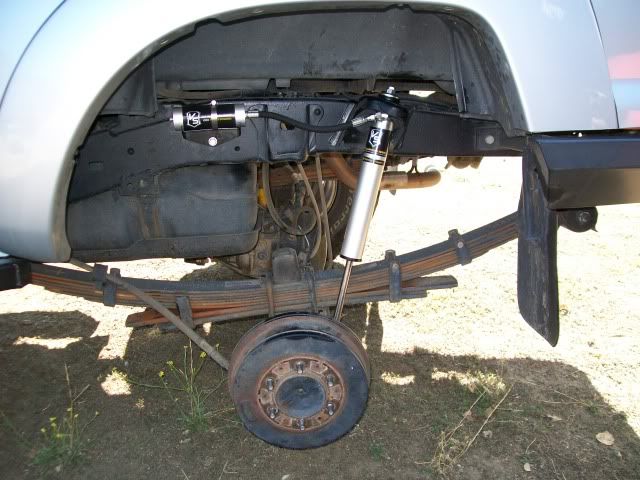
3.0 inch lift via Icon Vehicle Dynamics Tubular Upper Control Arms, Icon 2.5 Remote Resi Coilovers, & rear Icon 2.0 Remote Resi's and All-Pro Offroad "APEX" Expedition HD leaf springs with Timbren bump stops.
BFG AT KO2, 285/75R16 's, Stock Toyota TRD Alloys
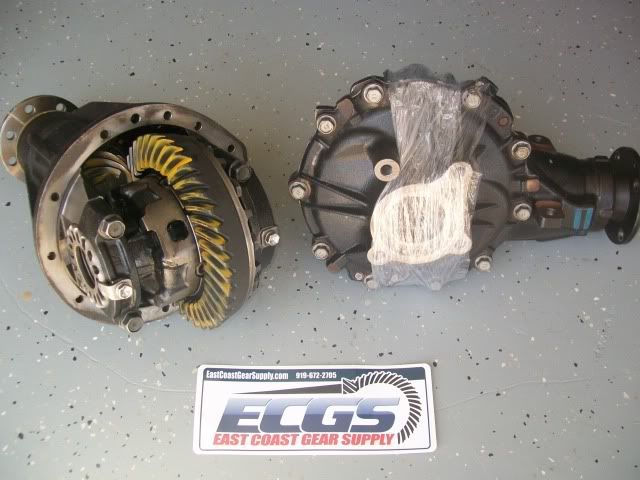
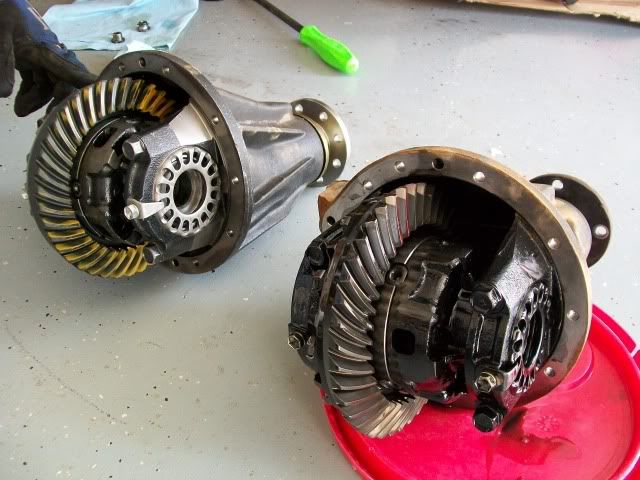
4.88 Nitro Gears from East Coast Gear Supply
All-Pro Offroad APEX aluminum front bumper with Rigid Industries D-2 LED's
All-Pro APEX aluminum IFS skid
All-Pro Trans and T-case skids
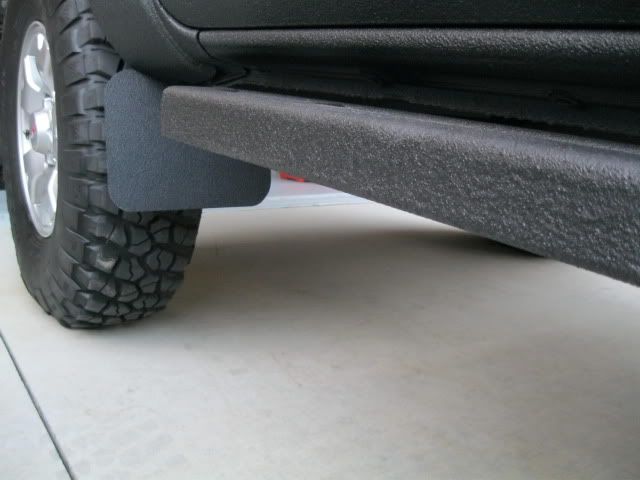
All-Pro APEX HD rock sliders
Warn M8000 winch w/Viking hawse fairlead
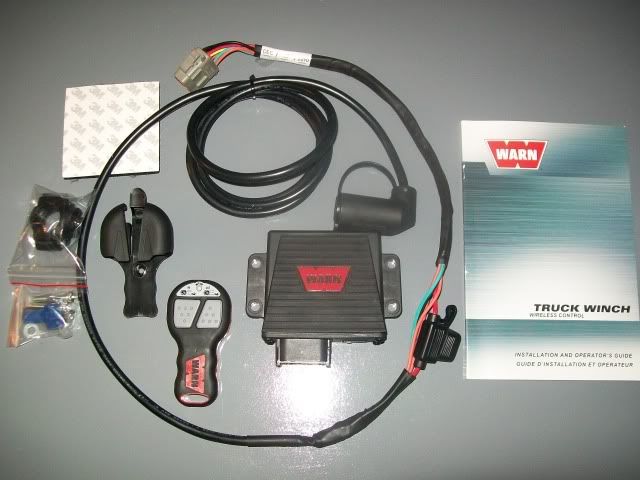
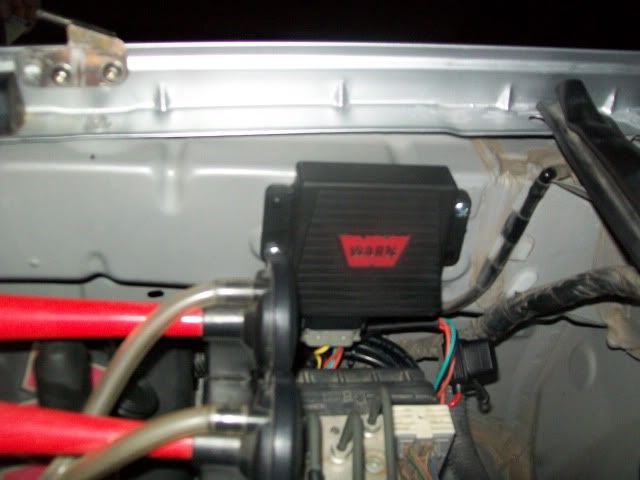
Warn wireless winch remote
Viking 3/8 synthetic winchline (80ft) w/Safety Thimble and Winch Saver
Rigid Industries grill and SR-20 LED light bar
sPod lighting control system
Rigid Industries SR-50 LED light bar mounted via SoCal Super Trucks brackets
Rigid Industries rock lights
Rigid Industries back up light
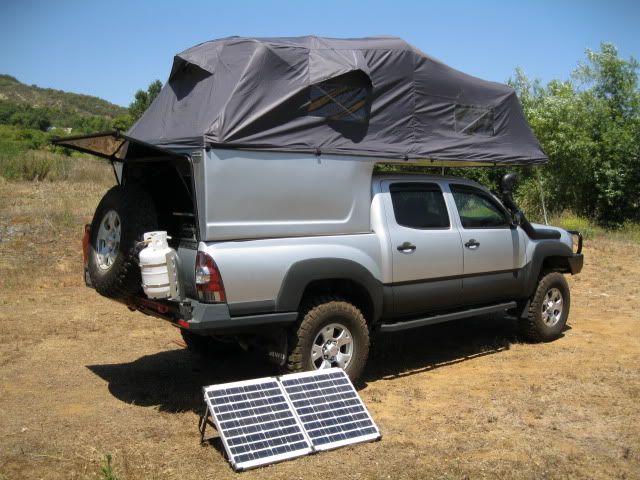
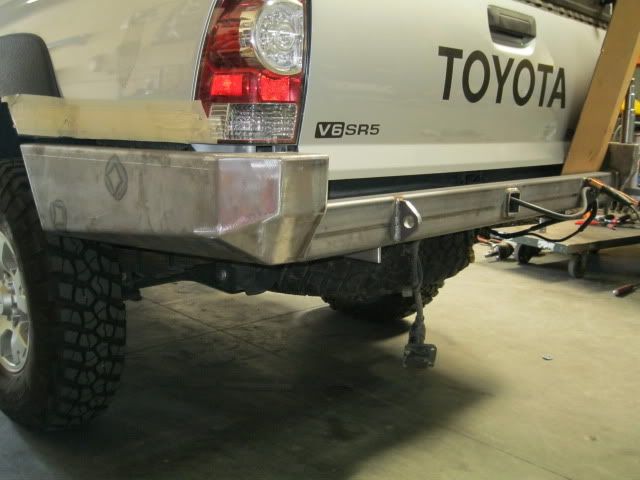
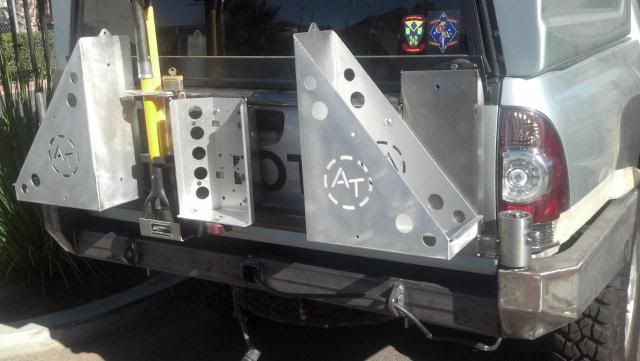
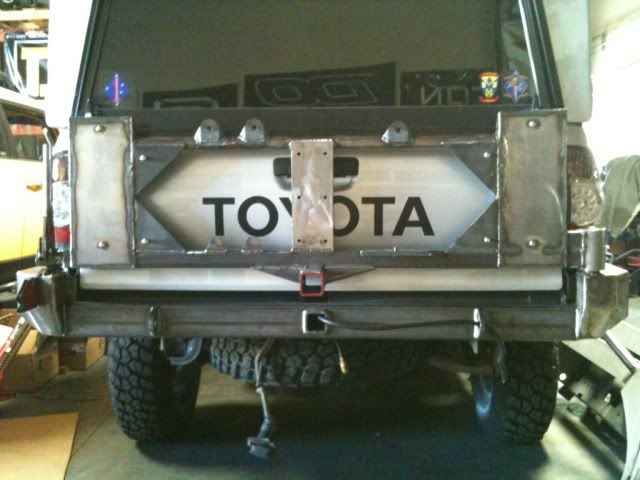
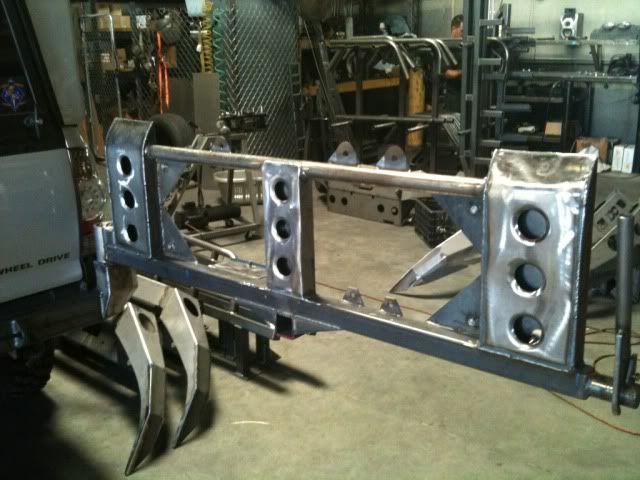
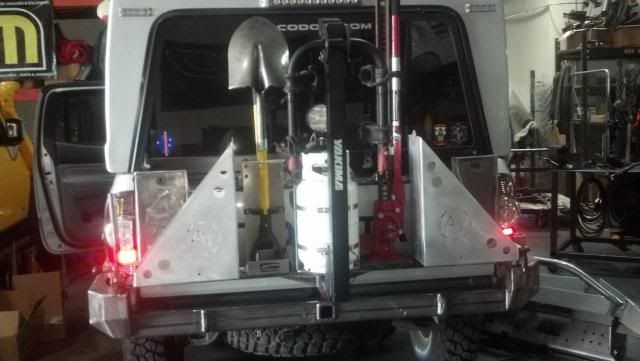
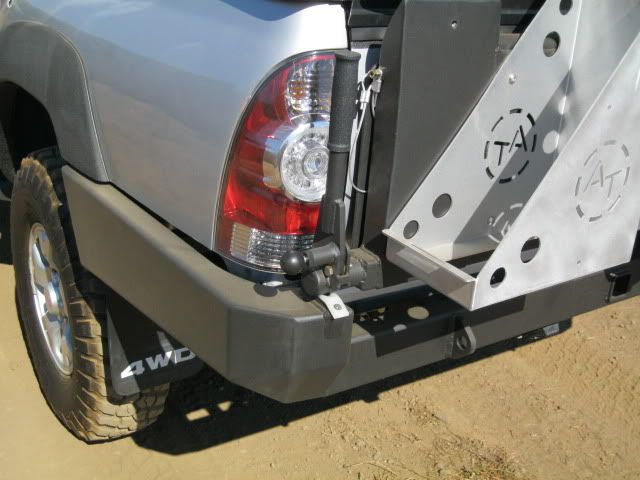
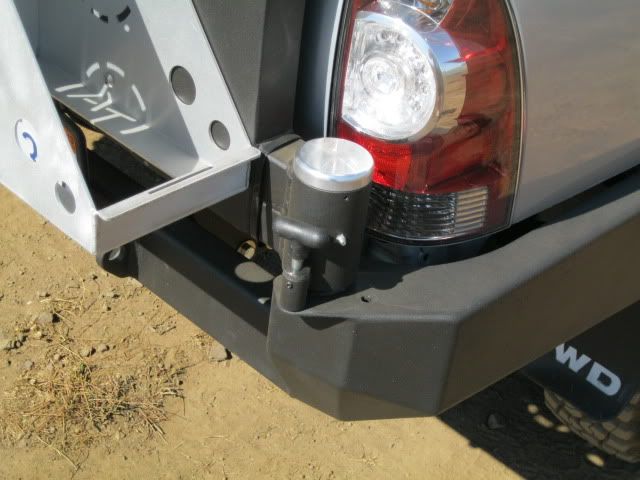
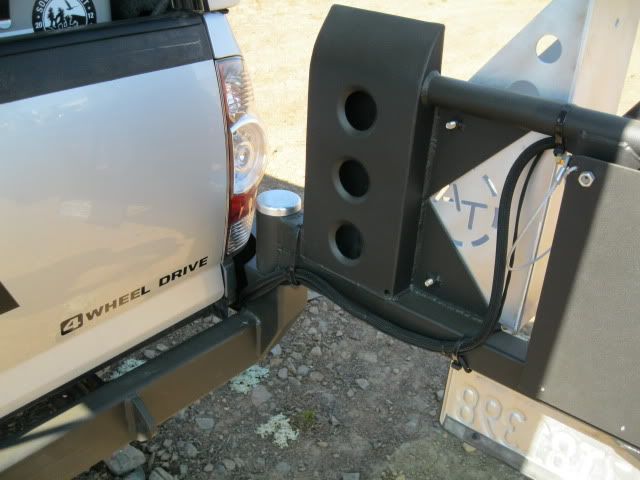
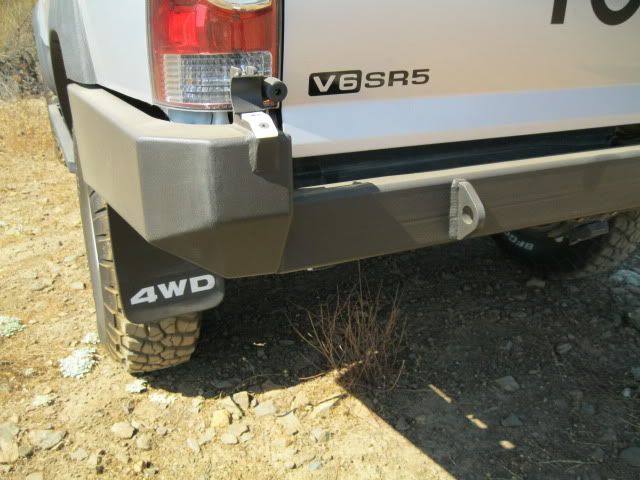
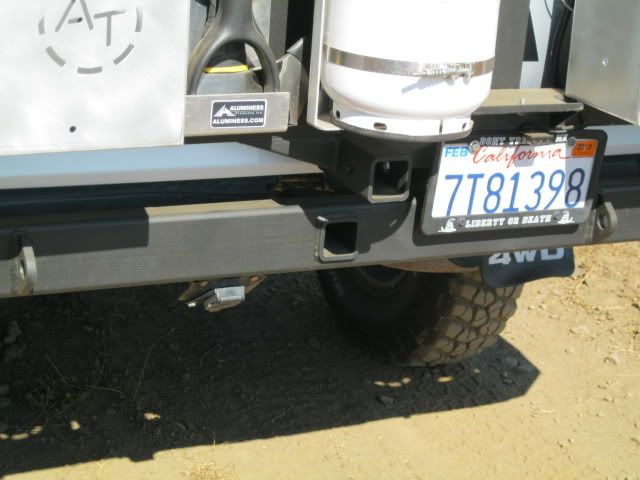
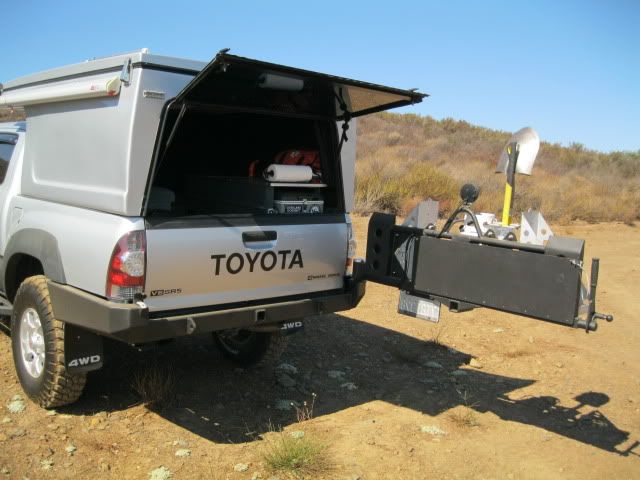
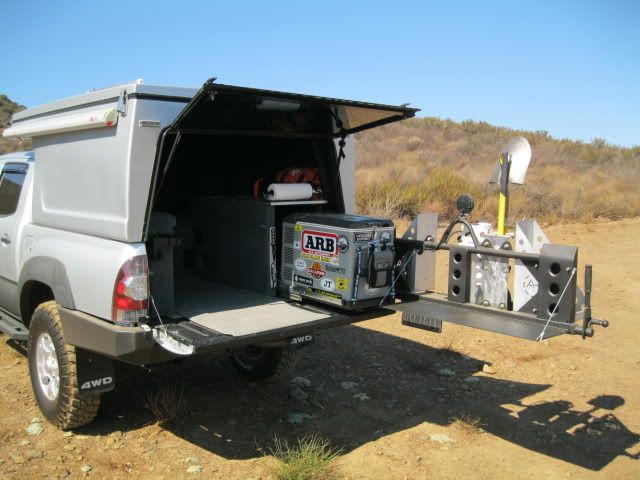
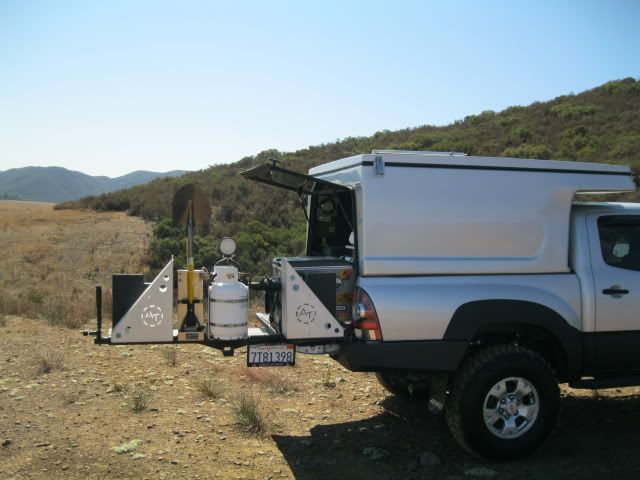
Demello Offroad custom rear swingout bumper
Trimmed Rear Bed Quarters
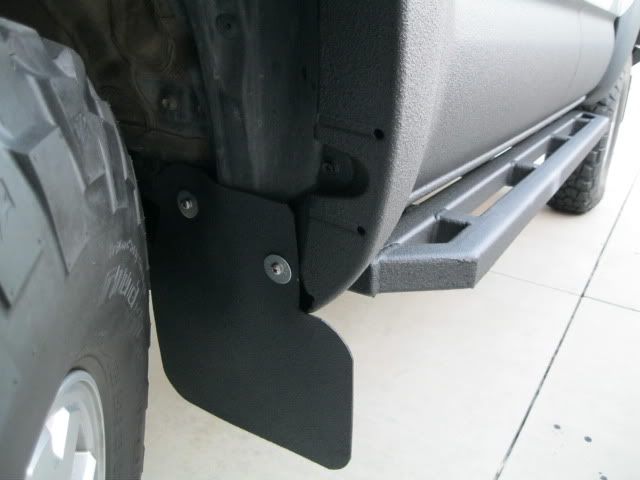
Rhino Lined fenders, rockers etc
iPad Mini navigation mounted via Bird Dawg Industries Tech Deck
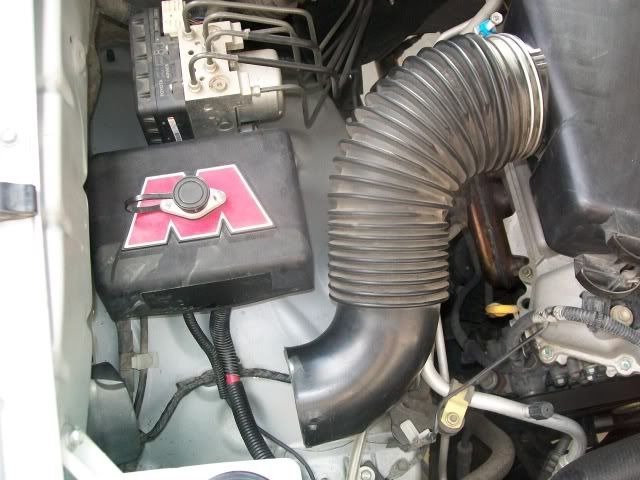
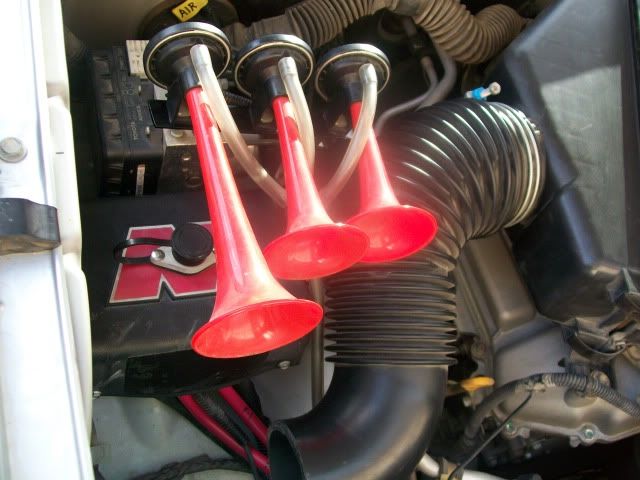
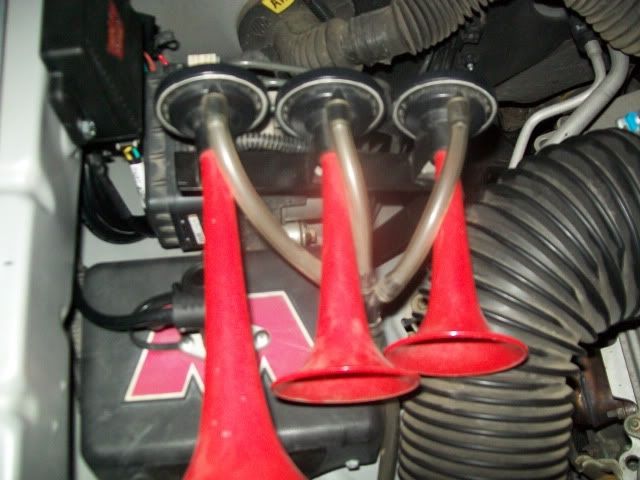
Hella air horns x3
TRD Sport hood/grill
Rear Diff breather extension
TRD neoprene seat covers
Weathertech floor mats
Kenwood Excelon KDC-994 Head Unit, Bluetooth and iPod
Kenwood KAC-7202 Amp
PAC SWI-X steering wheel audio control adapter for Kenwood
Image Dynamics IDQ10 v.2 D2 Subwoofer
Alpine Type-S Door Speakers
Total Sound Deadening - eDead v1 SE2 - Fatmat
Ventshades
Quick Fist 4-D Mag Light mount
Sears Die Hard Platinum P5 Group 35 Battery (main)
Blue Sea Systems negative bus 12 circuit fuse block (cab power)
National Luna Power Pack w/remote dual battery monitor
Blue Sea Systems negative bus 6 circuit fuse block (house)
Overland Solar 90 watt solar panel
Power Tank CO2 system
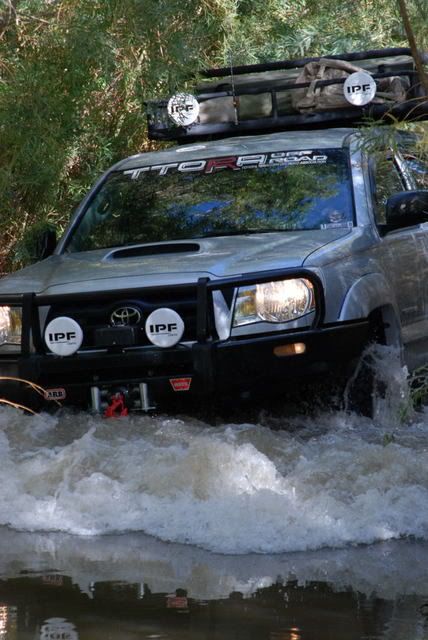
Safari Snorkel SS135HF
Console Vault
On board hard mounted First Aid kit and 2.5 lb ABC fire extinguisher
Full trauma kit
Full recovery kit
Frame and sliders corrosion proofed with full POR-15 treatment
Hi-Lift
Engel MT-45 Fridge W/New Gen Engel fridge slide & Engel remote thermometer
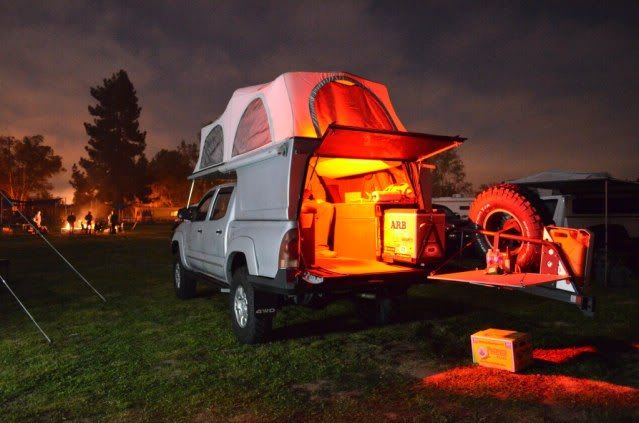
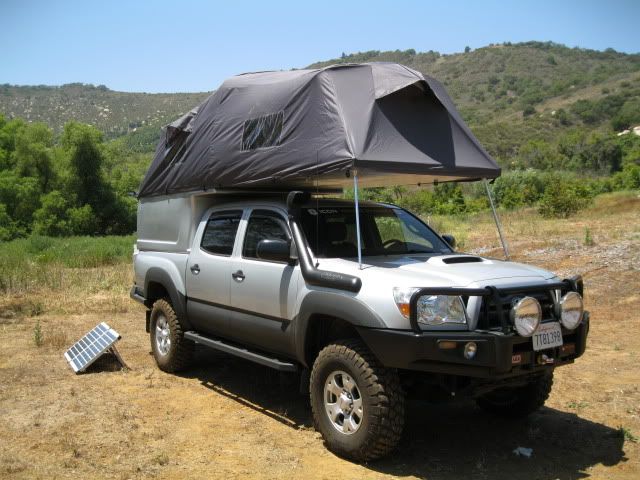
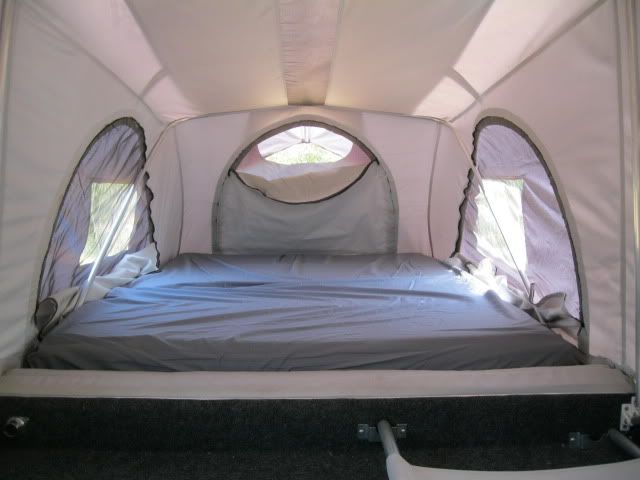
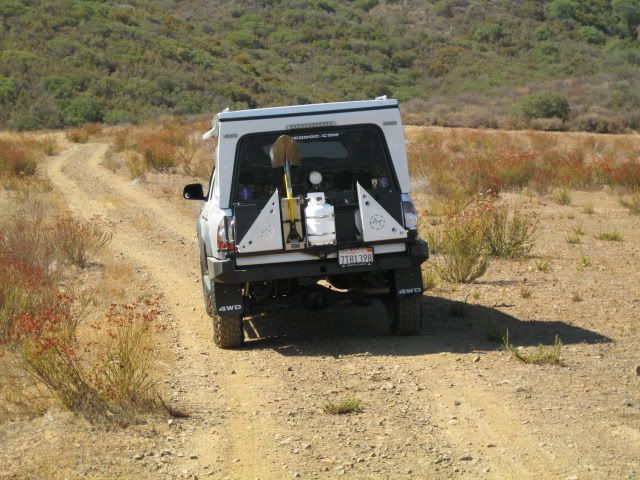
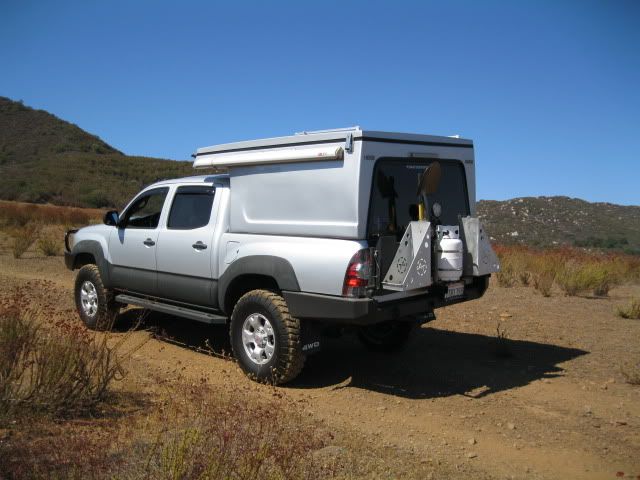
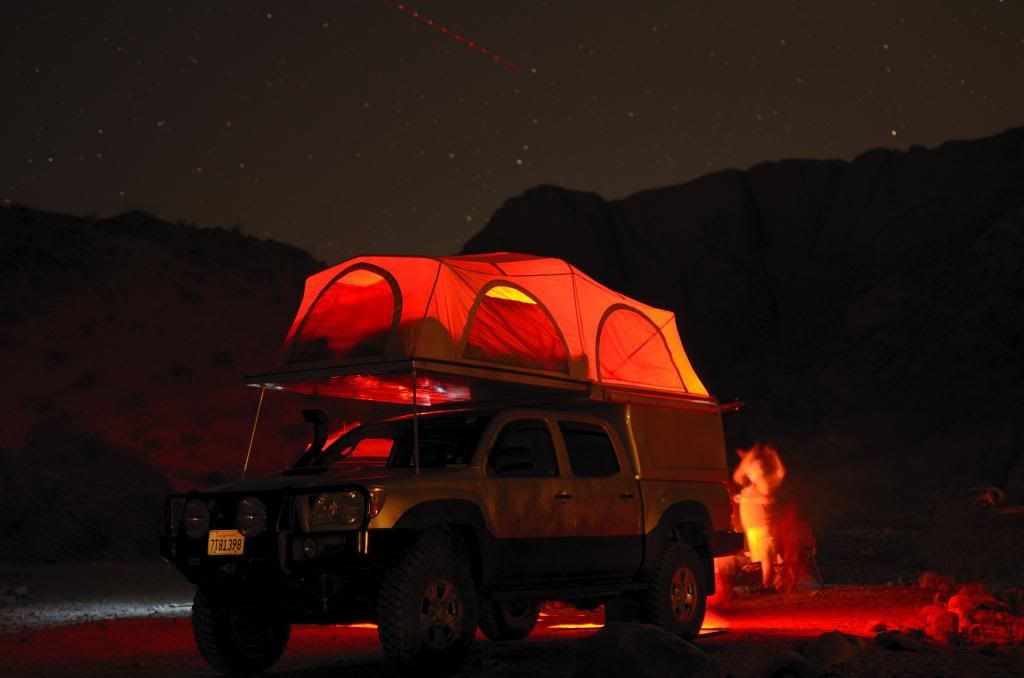
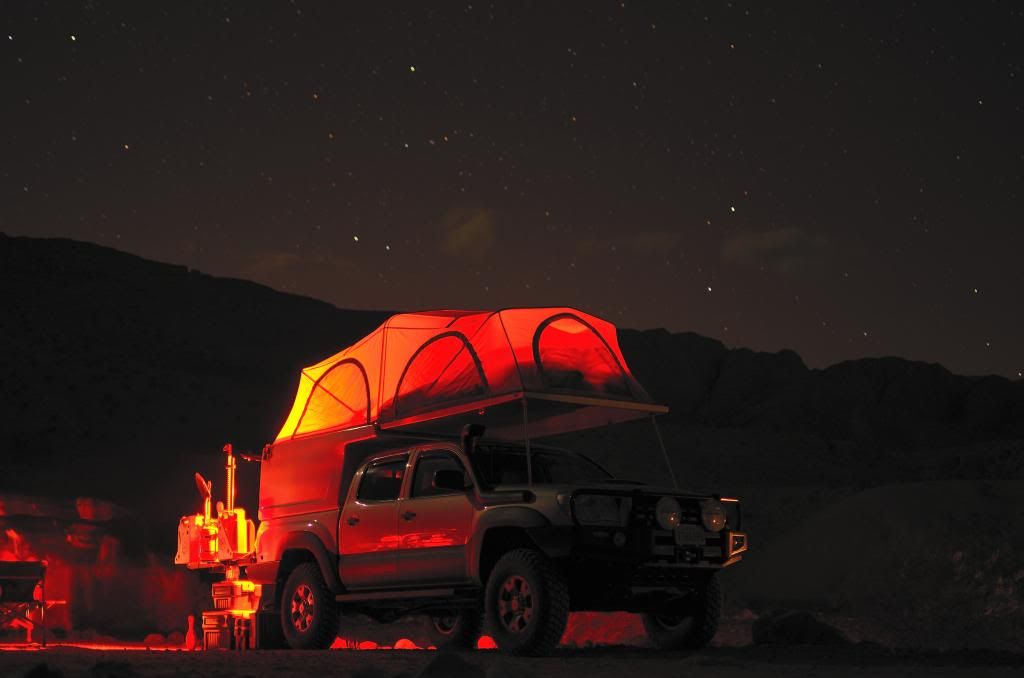
Adventure Trailers FlipPac, color matched w/AT LED lighting upgrade
Goose Gear custom FlipPac camper interior module
Fiamma F35 Pro awning w/custom enclosure made by SLO Sail
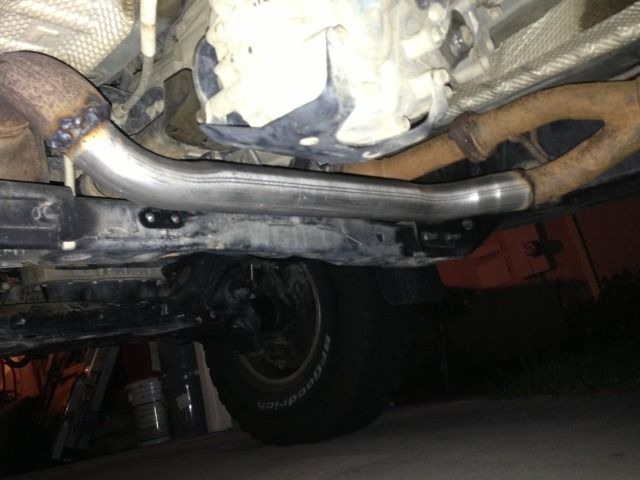
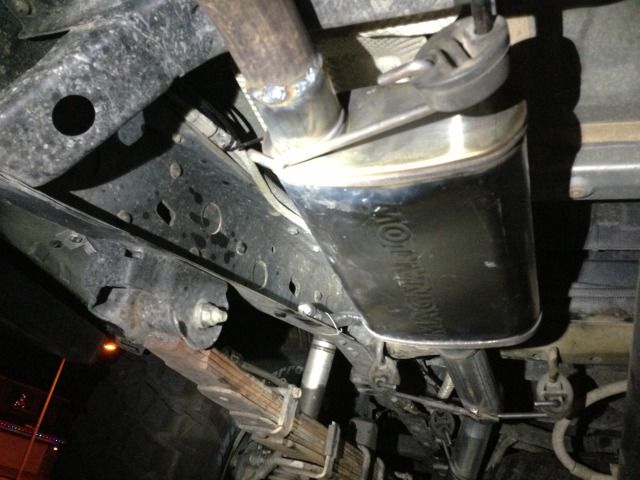
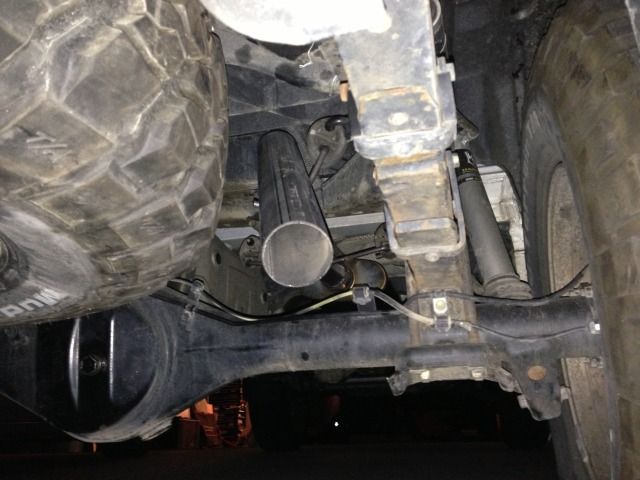
Magnaflow CAT back exhaust system with high clearance crossover pipe. Wrapped and heat shielded.
LED lighting upgrades: Tails, markers, rock lights. Custom interior lighting by Anti-Dark
Stop Tech slotted rotors and Power Stop HD disc brake pads
Yaesu FT-2900R 2M radio, Diamond antenna
********************************************************************
Then:
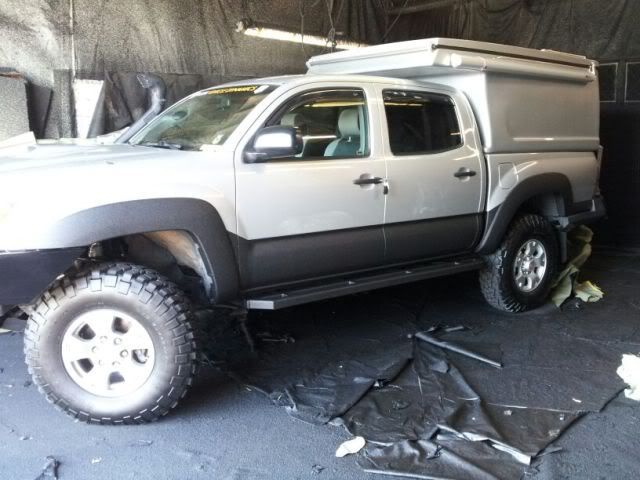
Now:


The evolution of the truck since new:
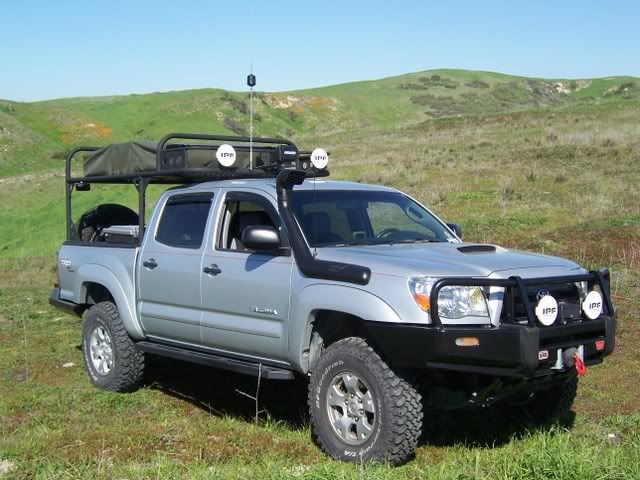
Rack and Eezi-Awn version
Coyote Creek, Anza Borrego, CA
Trip with HMR's rig and ours, Anza Borrego, CA, 2006/7-ish

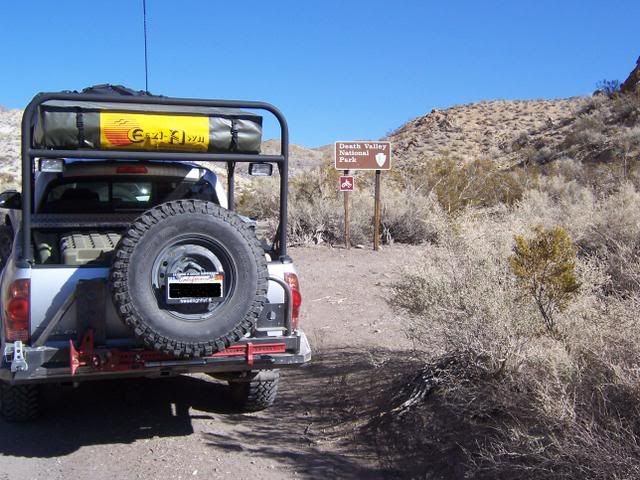
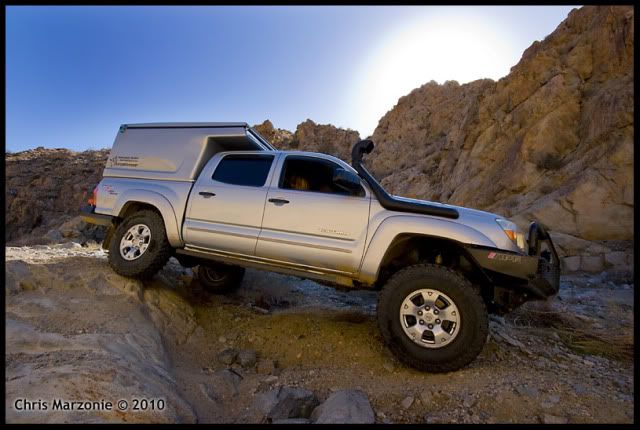
Death Valley trip
Calico Cleanup 2008

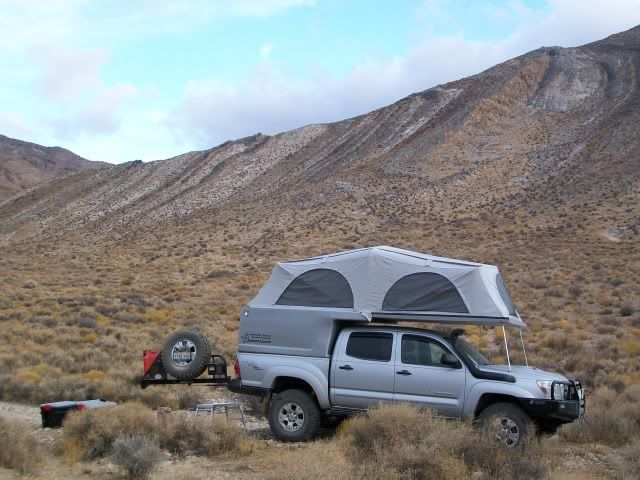
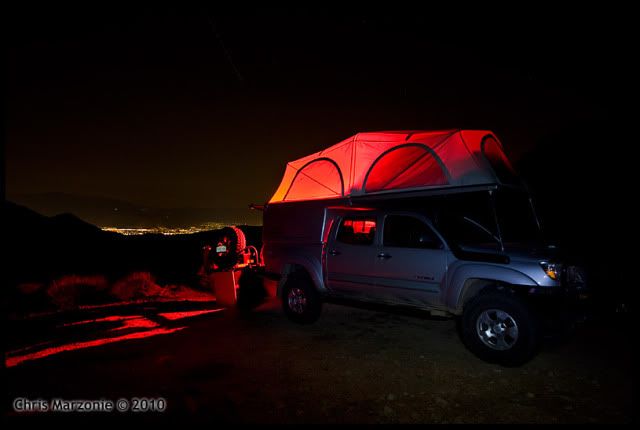
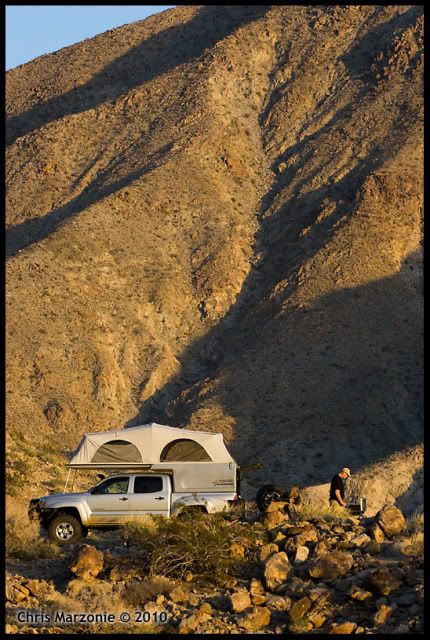
Camped near Striped Butte with the new FlipPac, Nov 2009
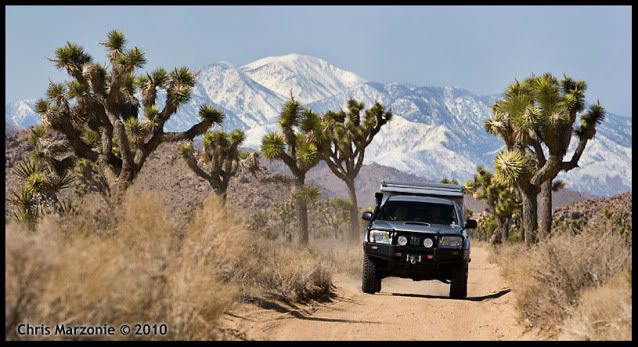
Joshua Tree NP, rarely seen snow-capped Idyllwild in the background, photo by Chris Marzonie
**************************************************************************************
MAINTENANCE CORNER:
New BFG MT KM's at 56,500 miles (21JUL09)
POR-15 corrosion proofing project on sliders and frame completed (23JUL09)
OME Dakar HD rear springs and OME Nitrocharger shocks at 57,500 miles (28JUL09)
Nitro Gear 4.88's from ECGS at 58,200 miles(30AUG09)
New cataytic converters x2 and new MAF under warranty at 80K (20OCT10)
Icon Vehicle Dynamics 2.0 rear remote reservoir shocks at 102K (20OCT11)
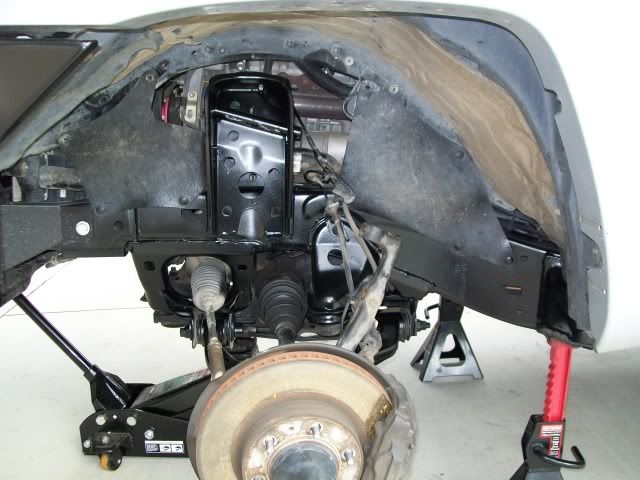
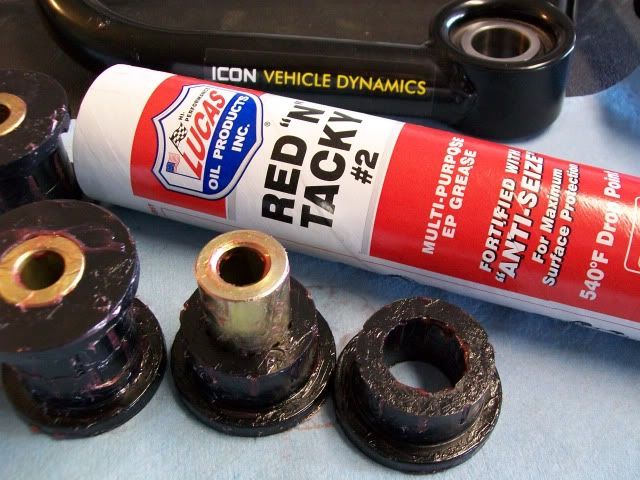
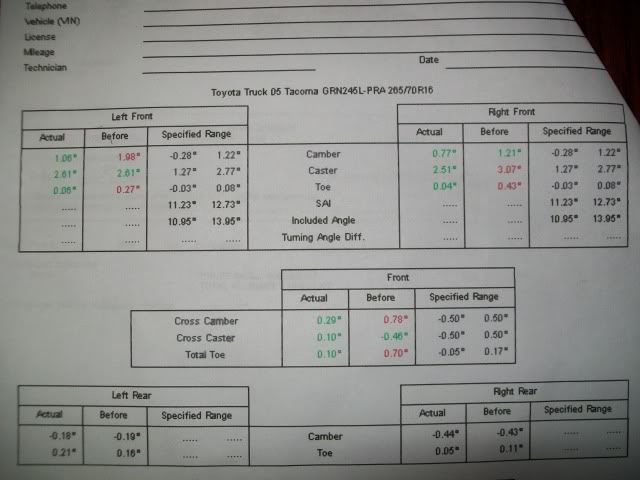
Icon Vehicle Dynamics 2.5 front remote reservoir coilovers and Icon billet upper control arms, front end alignment at 102,000 (25NOV11)
New BFG MT KM2's at 102,11 miles (29NOV11)
New OEM rear 2 piece drive shaft (SEP12)
Magnaflow CAT back exhaust with high clearance crossover (DEC12)
Disc brakes upgraded to Power Stop slotted rotors and extreme HD pads at 112k (DEC12)
New All-Pro Expedition rear leaf springs & polyurethane bushings w/Timbren bump stops. Front end alignment at 113.6k (JAN14)
ROUTINE SERVICE:
- 60,000 Mile Service (12OCT09): Front and rear diff fluids changed. Transfer Case fluid changed.
Engine Oil and filter. Transmission fluid flushed @ dealer. New OEM front brake pads, rotors machined @ dealer. OEM air filter, new wiper blades.
- 72,500 Mile Maintenance (5JUL10): Denso spark plugs, OEM engine air filter, OEM cabin air filter. Engine oil change, OEM filter. U-joints greased.
- 77,000 Mile Maintenance (10OCT10): Engine oil change, Bosch filter.
- 80,700 Mile Maintenance (6NOV10): Engine oil change, OEM filter. Tires rotated. U-joints greased.
- 85,420 Mile Maintenance (22FEB11): Engine oil change, OEM filter. OEM engine air filter. New wiper blades.
- 86,500 Miles (26MAR11): New OEM rear drum brake shoes (replaced early, 30%+ remaining on old shoes). Tires rotated.
- 90,700 Mile Service (21MAY11): Denso spark plugs. Engine oil change, OEM filter. MAF cleaned. Front and rear diff fluids changed. Transfer Case fluid changed. U-joints greased.
- 91,500 Mile Maintenance (3JUN11): New OEM front brake pads. (only had 31k on this set...) Topped off coolant with OEM Toyota pink engine coolant.
- 93,768 Mile Maintenance (17JUL11): Engine oil change, OEM filter. U-joints greased. Brake fluid flushed and replaced at dealer.
- 98,500 Mile Maintenance (18SEP11): Engine oil change, OEM filter. U-joints greased. OEM engine air filter.
- 103,000 Mile Maintenance (15DEC11): Engine oil change, OEM filter. U-joints greased. Brake fluid flushed.
- 106,817 Mile Maintenance (10MAY12): Transmission fluid flushed, Cooling system flushed, Power steering fluid flushed, new serpentine belt.
- 110k Mile Maintenance (DEC 12): Engine oil change, OEM filter. U-joints greased. OEM engine air filter.
- 112k Mile Maintenance (OCT 13): Engine oil change, OEM filter. U-joints greased.
- 113.6k Mile Maintenance (JAN14): Denso spark plugs, MAF cleaned. U-joints greased. Tires rotated.
- 120K Mile Maintenance (OCT15): Transmission fluid flushed, OEM engine air filter.
- 122.2K Mile Maintenance (DEC15): Engine oil change, OEM filter. Transfer Case fluid changed. U-joints greased, A-arms greased. New BFG AT KO2 285/75R16 tires.
**************************************************************************************
Spark Plugs: If it's your first time changing the plugs, you will notice that the Driver Side has NGK, and the passenger has Denso Plugs. Toyota has been doing this for eons, and I really cant confirm why they do this.
Using 6 identical Denso plugs is what I recommend, gapped @ .040 to .041. OEM does not use iridium so I recommend non-iridium plugs per OEM engine build specs.
1GR-FE Spark Plugs:
HOW TO CHANGE SPARK PLUGS ON 1GR-FE
1GR-FE Throttle Body Cleaning:
HOW TO CLEAN 1GR-FE THROTTLE BODY
Great Electrical Reference:
http://www.tacomaworld.com/forum/technical-chat/103969-electronics-basics-reference.html
http://www.the12volt.com/
FLUIDS:
Diffs:
Hypoid gear oil APL GL-5
Above -18 °C (0 °F): SAE 90
Below -18 °C (0 °F): SAE 80W or 80W - 90
HOW TO CHANGE DIFF FLUID
Transfer Case:
API GL-4 or GL-5
SAE 75W-90
Rear Diff - 3 QTS, APL GL-5 SAE 90 (torque fill and drain plugs (24mm socket) to ONLY 36 ft lbs per OEM specs!)
Front Diff – 2 QTS, APL GL-5 SAE 90 (same as above, 10mm allen socket)
Transfer Case - 1.1 US QT, APL GL-5 SAE 75-90 (same as above, 24mm socket)
Engine Oil – SAE 5W-30, OEM recommended. 5.5 US QTS, 4.6 Imp QTS
ONLINE TOYOTA SCHEDULED MAINTENANCE GUIDE!
http://smg.toyotapartsandservice.com/guides.php?xv=1&xy=2004&xint_id=6&v=22&y=2005&int_id=6
ONLINE TOYOTA TACOMA FSM!
http://www.ncttora.com/fsm/05+/local files/repair.html
TACOMA TSB INFO!
http://www.tundrasolutions.com/forums/tacoma/127749-2005-technical-service-bulletins/
Resetting the "Maintenance Required" light on 2005+ Tacoma:
1. Turn ignition key to 'ON' and press the odometer button until the display reads actual mileage... not Trip A or B.
2. Turn ignition key to OFF.
3. Hold in the same button you used in step 1.
4. While holding the button in, turn ignition key to 'ON'.
5. The 'Maint Reqd' light should blink and go out!
My complete Hilux Safari Snorkel install write up for 05+ Tacomas featured at Cruiser Outfitters:
http://www.cruiseroutfitters.com/tech_2ndgenTaco_snorkel.html
“In the Summer 2010 Overland Journal, there’s an article about a well-equipped camper owned by forum member Tacodoc. The truck has many upgrades that make it more capable off-road. The camper is an Adventure Trailers Flip-Pac, tailored to meet Tacodoc’s needs. The result is a go-anywhere adventure travel vehicle with enough creature comforts and conveniences to make a trip of several weeks a pleasure. And the truck just looks cool!” – Chip Haven
Feature Vehicle, Overland Journal Summer 2010 issue:
http://store.overlandjournal.com/products/Summer-2010.html
My first experience with Mr. Toyoda's legacy came in the form of a used '79 Toyota Hilux 3/4 ton long bed with a 20R/4 speed tranny, an old school Timberline shell, and some rust. That thing ran like a swiss watch and never complained through almost 200,000 miles of abuse from me with nothing but routine maintenance and tires. So began my love affair with all things Toyota.
My second Toyota was a 1988 4Runner 4WD SR5 with the 22RE, R151 5-spd, and all factory options. That thing could go anywhere I pointed it with ease so long as I didn't try to go fast uphill on a long highway grade! 1st Gen 4Runners are solid machines and excellent off road in all conditions.
My third Toyota was a 2002 Toyota Tacoma TRD PreRunner Xtra-Cab with the V6 in Lunar Mist which my wife sold when I was in Iraq in 2003. I came home to my fourth Toyota, a brand new 2003 Toyota Tacoma TRD 4WD SR5 Xtra-Cab in Lunar Mist. We quickly outgrew the cab size which brings us to my fifth and "final" Toyota, a 2005 Toyota Tacoma TRD 4WD Double Cab in Silver Streak Mica with all available factory options.
The 2005+ Tacoma was based on the international Land Cruiser Prado 120 chassis and came the 1GR-FE 4.0 Liter V6 gasoline engine that produces 236 horsepower (176 kW) and 266 ft·lbf (361 N·m) torque. This Tacoma is the North American version of the Toyota Hilux pickup sold in international markets.
The project vehicle was purchased new in February 2005 at Toyota of San Juan Capistrano, CA, with a build date of January 2005. It is one of the very first trucks of this generation built at NUMMI in Fremont, CA, USA http://en.wikipedia.org/wiki/NUMMI and was a dealer trade from Reno, Nevada.
My buildup is an ongoing strategic process of parts selection and vehicle modification focusing on reliability, durability, and comfort in the field. The end result of all the time, money, sweat, and busted knuckles has been all the great memories made while enjoying the wonders of adventuring in North America with family and friends!
**************************************************************************************
Make: Toyota
Model: Tacoma Double Cab 4WD SR5 TRD Off Road
Year: 2005
Engine: 4.0 1GR-FE
Trans: 5 spd Auto A750F, 3.35 low ratio: A750F
T-Case: VF2A, low ratio 2:57:1
Front Axle: Stock Toyota IFS, 4.88 Nitro Gears, Icon Tubular Upper Control Arms, Icon 2.5 Remote Reservoir Coil-Overs
Rear Axle: Stock Toyota E-Locker, 4.88 Nitro Gears, All-Pro "APEX" Expedition HD leaf springs with Timbren bump stops.
Tires: BF Goodrich AT KO2, 285/75R16
Wheels: Stock Toyota TRD Alloys
**************************************************************************************
CURRENT MODS:
3.0 inch lift via Icon Vehicle Dynamics Tubular Upper Control Arms, Icon 2.5 Remote Resi Coilovers, & rear Icon 2.0 Remote Resi's and All-Pro Offroad "APEX" Expedition HD leaf springs with Timbren bump stops.
BFG AT KO2, 285/75R16 's, Stock Toyota TRD Alloys
4.88 Nitro Gears from East Coast Gear Supply
All-Pro Offroad APEX aluminum front bumper with Rigid Industries D-2 LED's
All-Pro APEX aluminum IFS skid
All-Pro Trans and T-case skids
All-Pro APEX HD rock sliders
Warn M8000 winch w/Viking hawse fairlead
Warn wireless winch remote
Viking 3/8 synthetic winchline (80ft) w/Safety Thimble and Winch Saver
Rigid Industries grill and SR-20 LED light bar
sPod lighting control system
Rigid Industries SR-50 LED light bar mounted via SoCal Super Trucks brackets
Rigid Industries rock lights
Rigid Industries back up light
Demello Offroad custom rear swingout bumper
Trimmed Rear Bed Quarters
Rhino Lined fenders, rockers etc
iPad Mini navigation mounted via Bird Dawg Industries Tech Deck
Hella air horns x3
TRD Sport hood/grill
Rear Diff breather extension
TRD neoprene seat covers
Weathertech floor mats
Kenwood Excelon KDC-994 Head Unit, Bluetooth and iPod
Kenwood KAC-7202 Amp
PAC SWI-X steering wheel audio control adapter for Kenwood
Image Dynamics IDQ10 v.2 D2 Subwoofer
Alpine Type-S Door Speakers
Total Sound Deadening - eDead v1 SE2 - Fatmat
Ventshades
Quick Fist 4-D Mag Light mount
Sears Die Hard Platinum P5 Group 35 Battery (main)
Blue Sea Systems negative bus 12 circuit fuse block (cab power)
National Luna Power Pack w/remote dual battery monitor
Blue Sea Systems negative bus 6 circuit fuse block (house)
Overland Solar 90 watt solar panel
Power Tank CO2 system
Safari Snorkel SS135HF
Console Vault
On board hard mounted First Aid kit and 2.5 lb ABC fire extinguisher
Full trauma kit
Full recovery kit
Frame and sliders corrosion proofed with full POR-15 treatment
Hi-Lift
Engel MT-45 Fridge W/New Gen Engel fridge slide & Engel remote thermometer
Adventure Trailers FlipPac, color matched w/AT LED lighting upgrade
Goose Gear custom FlipPac camper interior module
Fiamma F35 Pro awning w/custom enclosure made by SLO Sail
Magnaflow CAT back exhaust system with high clearance crossover pipe. Wrapped and heat shielded.
LED lighting upgrades: Tails, markers, rock lights. Custom interior lighting by Anti-Dark
Stop Tech slotted rotors and Power Stop HD disc brake pads
Yaesu FT-2900R 2M radio, Diamond antenna
********************************************************************
Then:
Now:
The evolution of the truck since new:
Rack and Eezi-Awn version
Coyote Creek, Anza Borrego, CA
Trip with HMR's rig and ours, Anza Borrego, CA, 2006/7-ish
Death Valley trip
Calico Cleanup 2008
Camped near Striped Butte with the new FlipPac, Nov 2009
Joshua Tree NP, rarely seen snow-capped Idyllwild in the background, photo by Chris Marzonie
**************************************************************************************
MAINTENANCE CORNER:
New BFG MT KM's at 56,500 miles (21JUL09)
POR-15 corrosion proofing project on sliders and frame completed (23JUL09)
OME Dakar HD rear springs and OME Nitrocharger shocks at 57,500 miles (28JUL09)
Nitro Gear 4.88's from ECGS at 58,200 miles(30AUG09)
New cataytic converters x2 and new MAF under warranty at 80K (20OCT10)
Icon Vehicle Dynamics 2.0 rear remote reservoir shocks at 102K (20OCT11)
Icon Vehicle Dynamics 2.5 front remote reservoir coilovers and Icon billet upper control arms, front end alignment at 102,000 (25NOV11)
New BFG MT KM2's at 102,11 miles (29NOV11)
New OEM rear 2 piece drive shaft (SEP12)
Magnaflow CAT back exhaust with high clearance crossover (DEC12)
Disc brakes upgraded to Power Stop slotted rotors and extreme HD pads at 112k (DEC12)
New All-Pro Expedition rear leaf springs & polyurethane bushings w/Timbren bump stops. Front end alignment at 113.6k (JAN14)
ROUTINE SERVICE:
- 60,000 Mile Service (12OCT09): Front and rear diff fluids changed. Transfer Case fluid changed.
Engine Oil and filter. Transmission fluid flushed @ dealer. New OEM front brake pads, rotors machined @ dealer. OEM air filter, new wiper blades.
- 72,500 Mile Maintenance (5JUL10): Denso spark plugs, OEM engine air filter, OEM cabin air filter. Engine oil change, OEM filter. U-joints greased.
- 77,000 Mile Maintenance (10OCT10): Engine oil change, Bosch filter.
- 80,700 Mile Maintenance (6NOV10): Engine oil change, OEM filter. Tires rotated. U-joints greased.
- 85,420 Mile Maintenance (22FEB11): Engine oil change, OEM filter. OEM engine air filter. New wiper blades.
- 86,500 Miles (26MAR11): New OEM rear drum brake shoes (replaced early, 30%+ remaining on old shoes). Tires rotated.
- 90,700 Mile Service (21MAY11): Denso spark plugs. Engine oil change, OEM filter. MAF cleaned. Front and rear diff fluids changed. Transfer Case fluid changed. U-joints greased.
- 91,500 Mile Maintenance (3JUN11): New OEM front brake pads. (only had 31k on this set...) Topped off coolant with OEM Toyota pink engine coolant.
- 93,768 Mile Maintenance (17JUL11): Engine oil change, OEM filter. U-joints greased. Brake fluid flushed and replaced at dealer.
- 98,500 Mile Maintenance (18SEP11): Engine oil change, OEM filter. U-joints greased. OEM engine air filter.
- 103,000 Mile Maintenance (15DEC11): Engine oil change, OEM filter. U-joints greased. Brake fluid flushed.
- 106,817 Mile Maintenance (10MAY12): Transmission fluid flushed, Cooling system flushed, Power steering fluid flushed, new serpentine belt.
- 110k Mile Maintenance (DEC 12): Engine oil change, OEM filter. U-joints greased. OEM engine air filter.
- 112k Mile Maintenance (OCT 13): Engine oil change, OEM filter. U-joints greased.
- 113.6k Mile Maintenance (JAN14): Denso spark plugs, MAF cleaned. U-joints greased. Tires rotated.
- 120K Mile Maintenance (OCT15): Transmission fluid flushed, OEM engine air filter.
- 122.2K Mile Maintenance (DEC15): Engine oil change, OEM filter. Transfer Case fluid changed. U-joints greased, A-arms greased. New BFG AT KO2 285/75R16 tires.
**************************************************************************************
Spark Plugs: If it's your first time changing the plugs, you will notice that the Driver Side has NGK, and the passenger has Denso Plugs. Toyota has been doing this for eons, and I really cant confirm why they do this.
Using 6 identical Denso plugs is what I recommend, gapped @ .040 to .041. OEM does not use iridium so I recommend non-iridium plugs per OEM engine build specs.
1GR-FE Spark Plugs:
HOW TO CHANGE SPARK PLUGS ON 1GR-FE
1GR-FE Throttle Body Cleaning:
HOW TO CLEAN 1GR-FE THROTTLE BODY
Great Electrical Reference:
http://www.tacomaworld.com/forum/technical-chat/103969-electronics-basics-reference.html
http://www.the12volt.com/
FLUIDS:
Diffs:
Hypoid gear oil APL GL-5
Above -18 °C (0 °F): SAE 90
Below -18 °C (0 °F): SAE 80W or 80W - 90
HOW TO CHANGE DIFF FLUID
Transfer Case:
API GL-4 or GL-5
SAE 75W-90
Rear Diff - 3 QTS, APL GL-5 SAE 90 (torque fill and drain plugs (24mm socket) to ONLY 36 ft lbs per OEM specs!)
Front Diff – 2 QTS, APL GL-5 SAE 90 (same as above, 10mm allen socket)
Transfer Case - 1.1 US QT, APL GL-5 SAE 75-90 (same as above, 24mm socket)
Engine Oil – SAE 5W-30, OEM recommended. 5.5 US QTS, 4.6 Imp QTS
ONLINE TOYOTA SCHEDULED MAINTENANCE GUIDE!
http://smg.toyotapartsandservice.com/guides.php?xv=1&xy=2004&xint_id=6&v=22&y=2005&int_id=6
ONLINE TOYOTA TACOMA FSM!
http://www.ncttora.com/fsm/05+/local files/repair.html
TACOMA TSB INFO!
http://www.tundrasolutions.com/forums/tacoma/127749-2005-technical-service-bulletins/
Resetting the "Maintenance Required" light on 2005+ Tacoma:
1. Turn ignition key to 'ON' and press the odometer button until the display reads actual mileage... not Trip A or B.
2. Turn ignition key to OFF.
3. Hold in the same button you used in step 1.
4. While holding the button in, turn ignition key to 'ON'.
5. The 'Maint Reqd' light should blink and go out!
My complete Hilux Safari Snorkel install write up for 05+ Tacomas featured at Cruiser Outfitters:
http://www.cruiseroutfitters.com/tech_2ndgenTaco_snorkel.html
“In the Summer 2010 Overland Journal, there’s an article about a well-equipped camper owned by forum member Tacodoc. The truck has many upgrades that make it more capable off-road. The camper is an Adventure Trailers Flip-Pac, tailored to meet Tacodoc’s needs. The result is a go-anywhere adventure travel vehicle with enough creature comforts and conveniences to make a trip of several weeks a pleasure. And the truck just looks cool!” – Chip Haven
Feature Vehicle, Overland Journal Summer 2010 issue:
http://store.overlandjournal.com/products/Summer-2010.html
Last edited:


")