All-Purpose Scout 80 Build

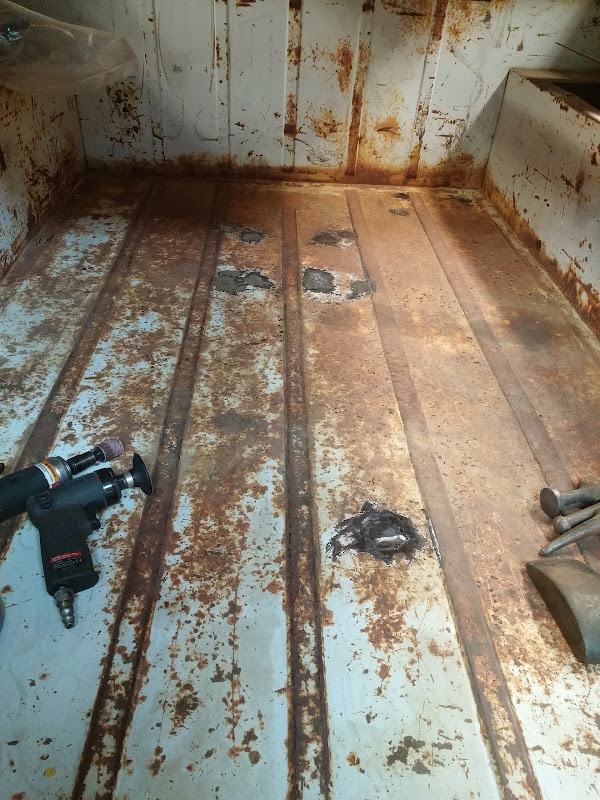
Minor update, nothing terribly exciting.

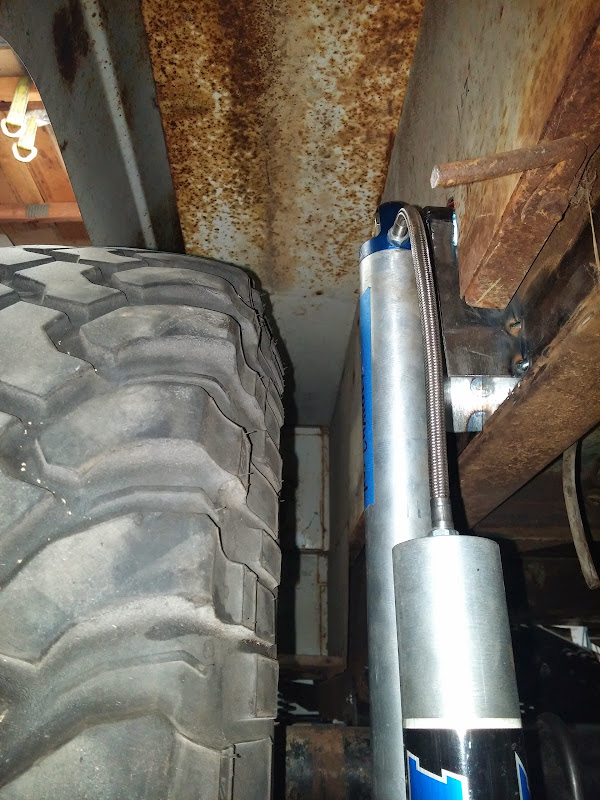
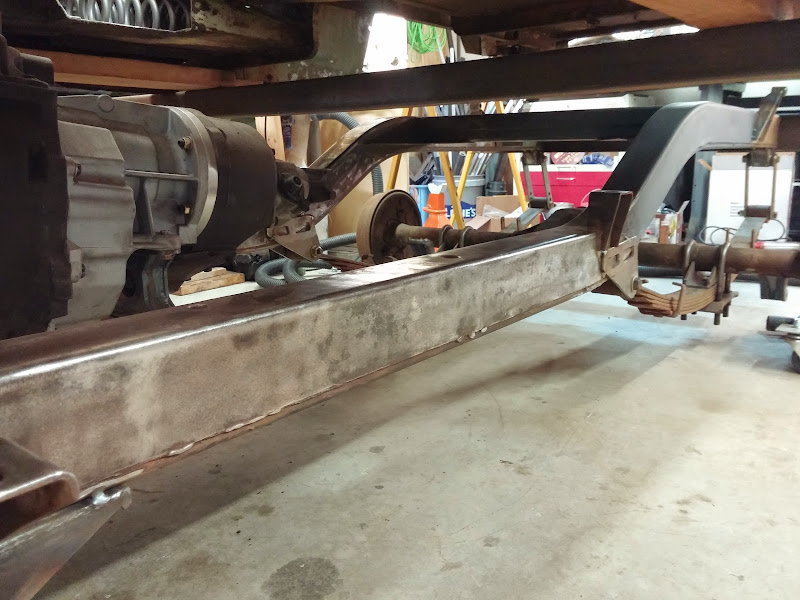
The rear axle is slightly narrower than the front, so I am running into similar shock mounting issues as I had with the front coilovers. I'd like to package the rear shocks outside of the frame in the wheel well, otherwise I'm severely length limited since I am not going to poke the shocks through the floor.

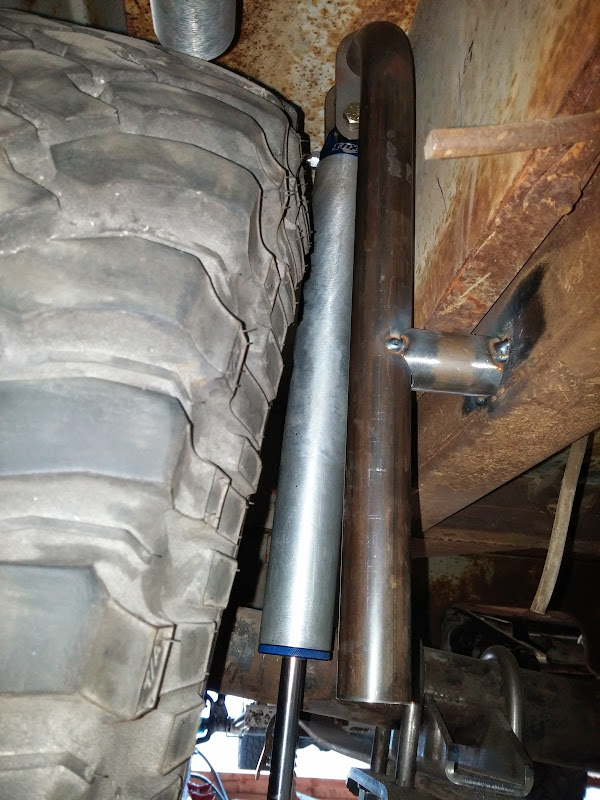
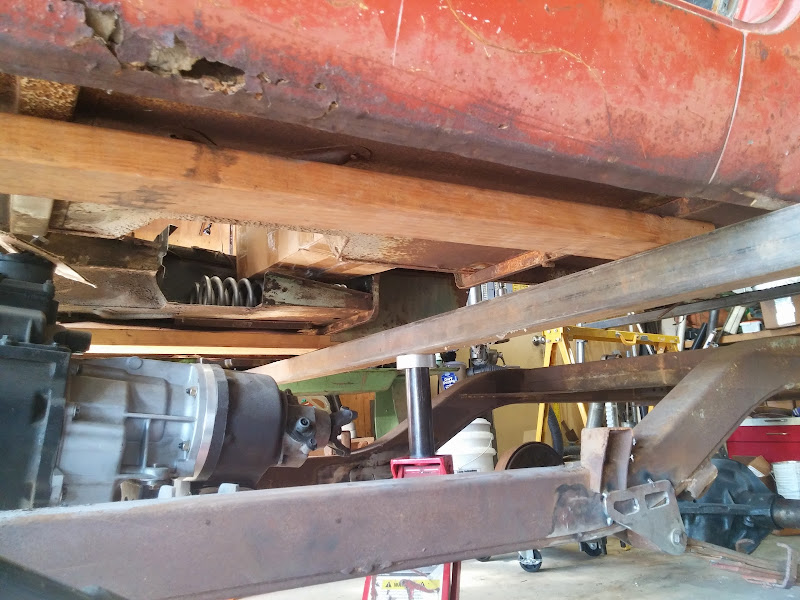
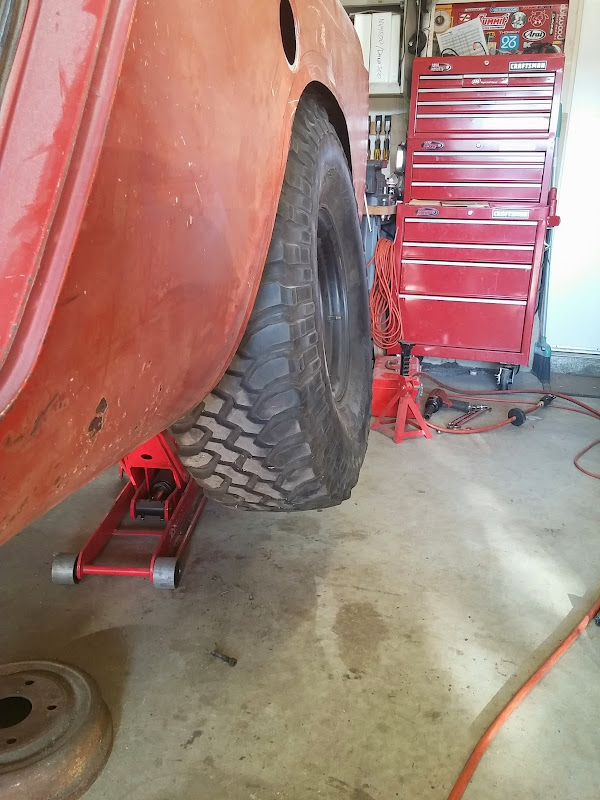
I spent some time pulling the leaf pack apart so that I can flex things out with just the main leaf in place, to see where the top of the tire really ends up at full stuff.

Wheel well clearance looks OK, I may need to cut a bit more to fit at full bump.
2014-11-02%252015.31.37.jpg

2014-11-02%252015.30.19.jpg


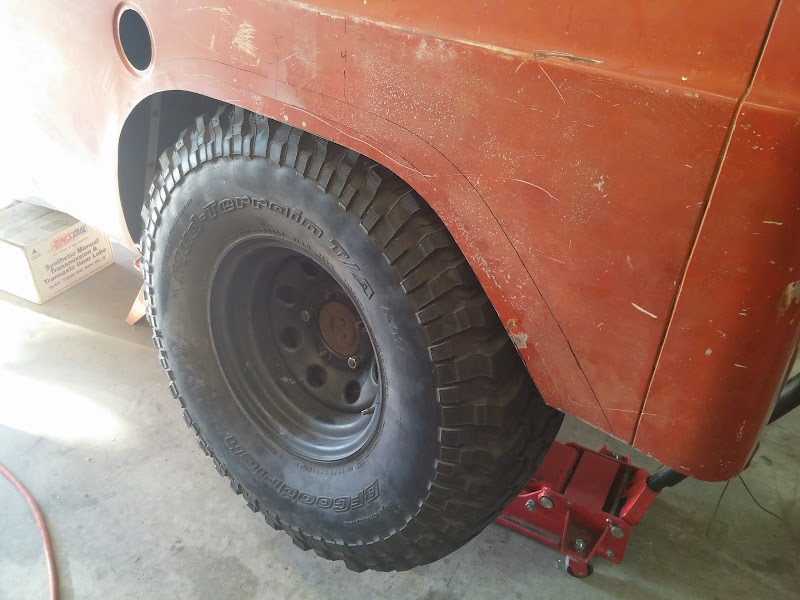
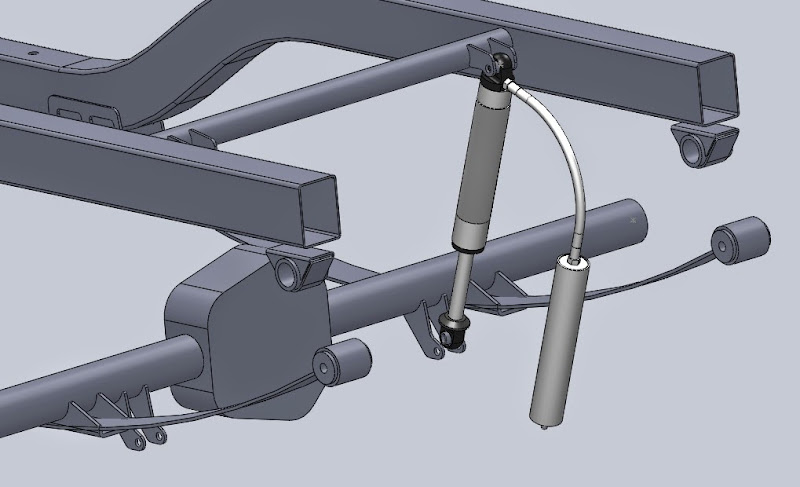
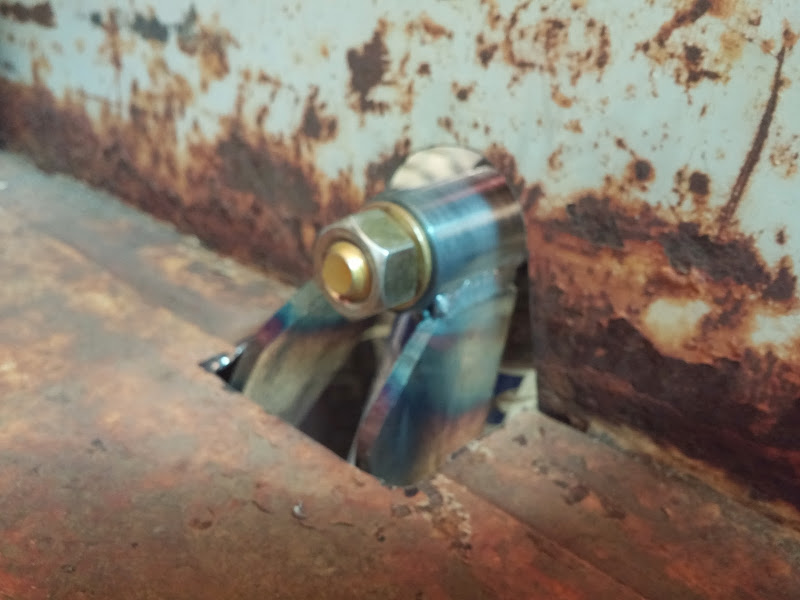
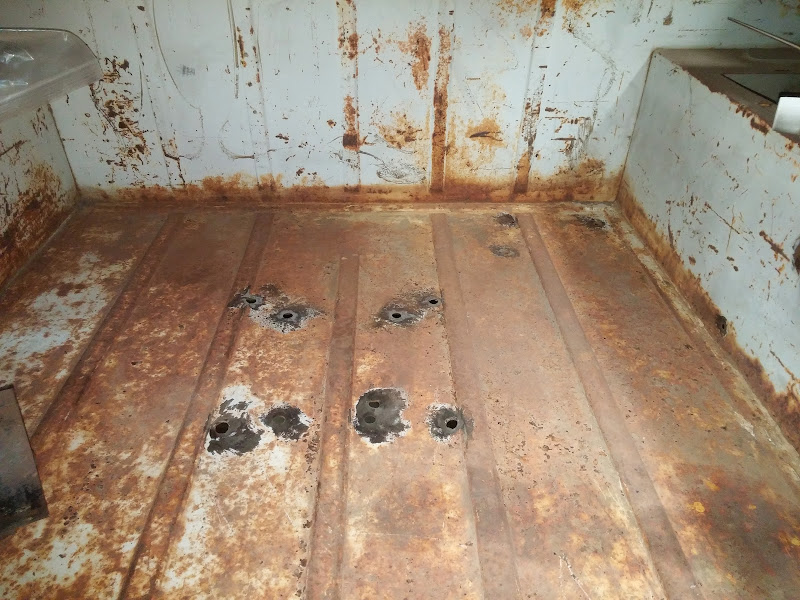
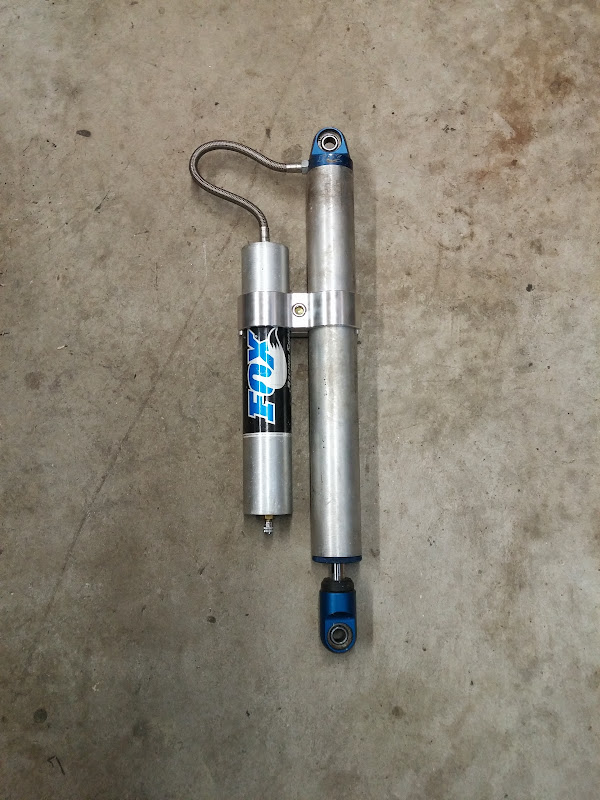
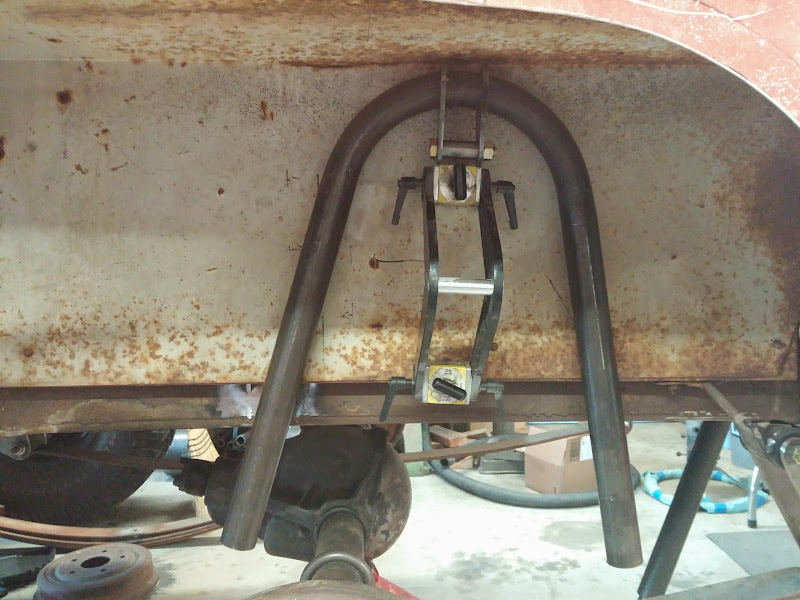
The idea is to try to run the shock behind the axle to see if I can avoid the top of the tire as it moves in under articulation. I should also get rid of what's left of the stock body mount - it looks like it would do some work to the sidewall of a tire :)
2014-11-02%252015.35.43.jpg


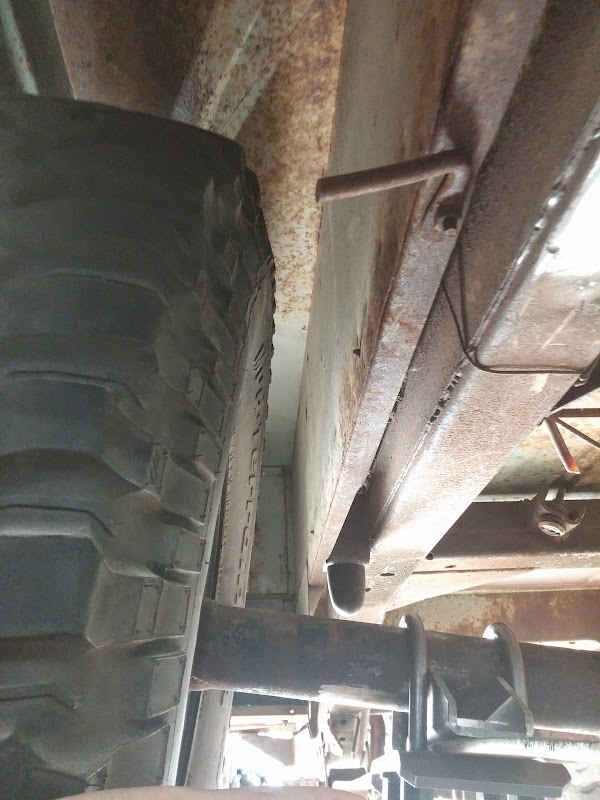
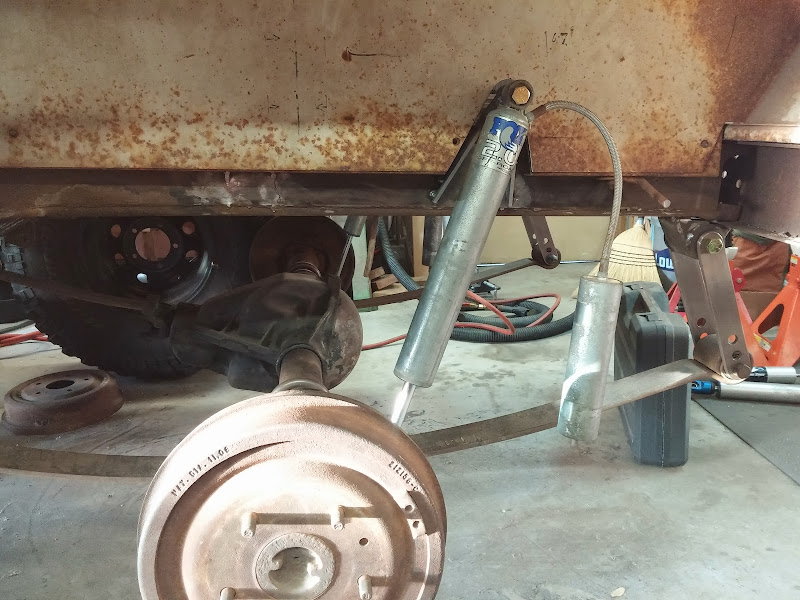
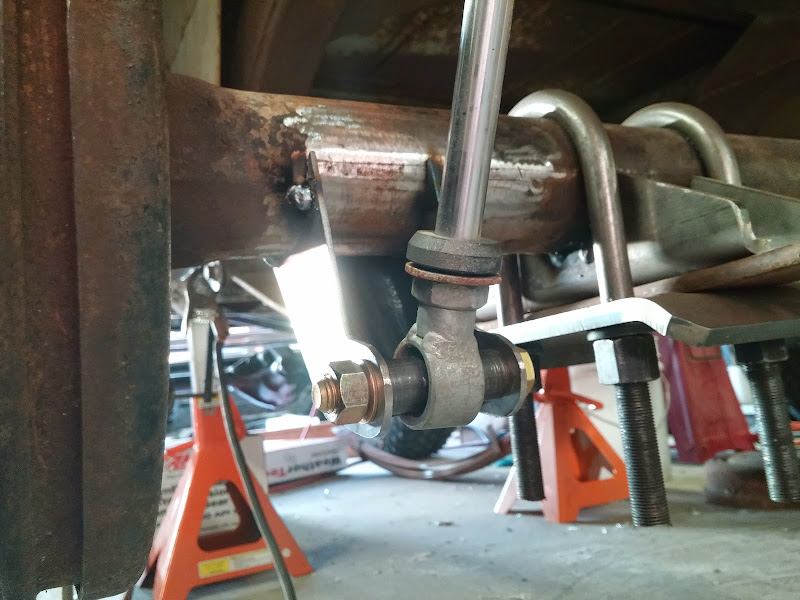
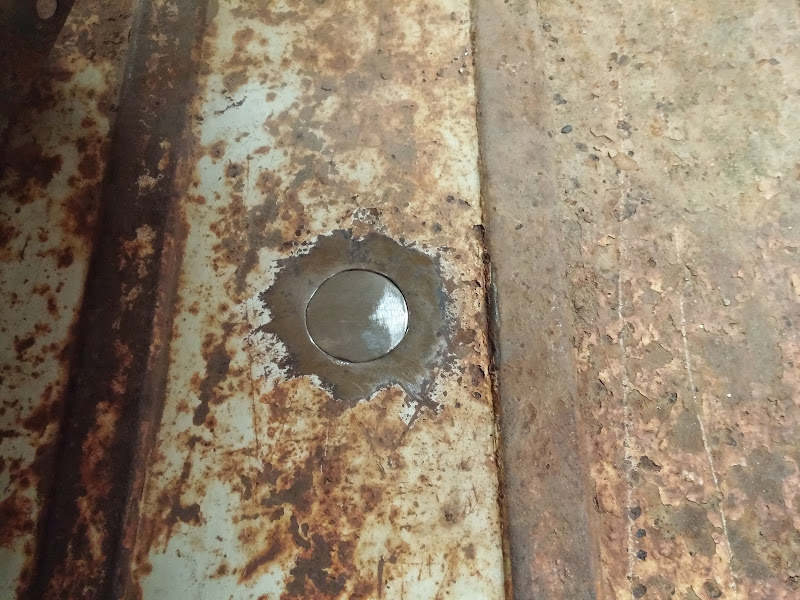
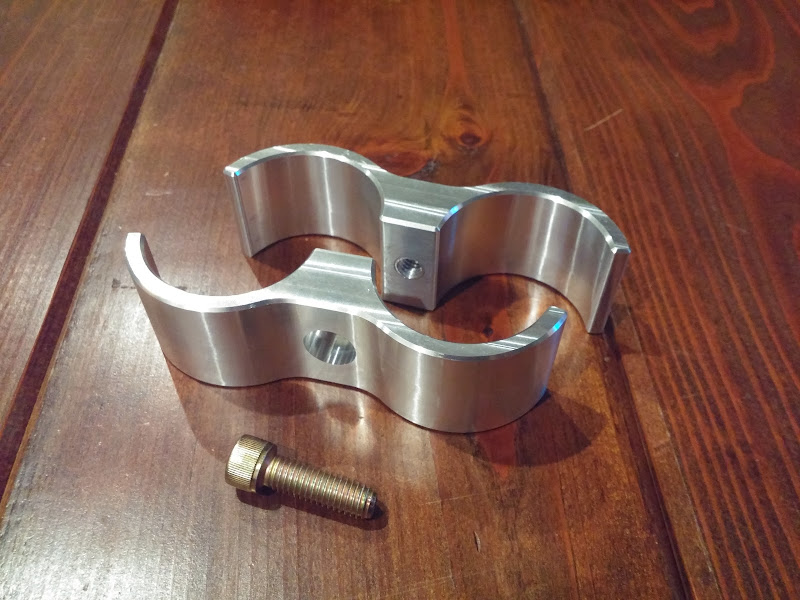
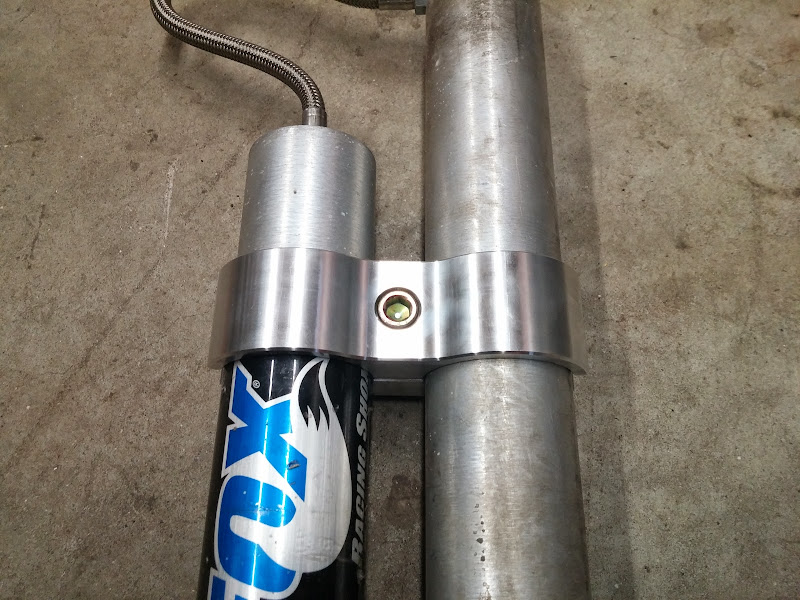
Mocked up shock mount, I'll tack all this in place and cycle again to see how it looks.
2014-11-02%252016.36.48.jpg


Backup plan is to run a 10" travel short body Bilstein 7100 shock under the floor. It'll have to be laid back at roughly a 30° angle, which is more than I would like, but is something I can work around if it comes to it.

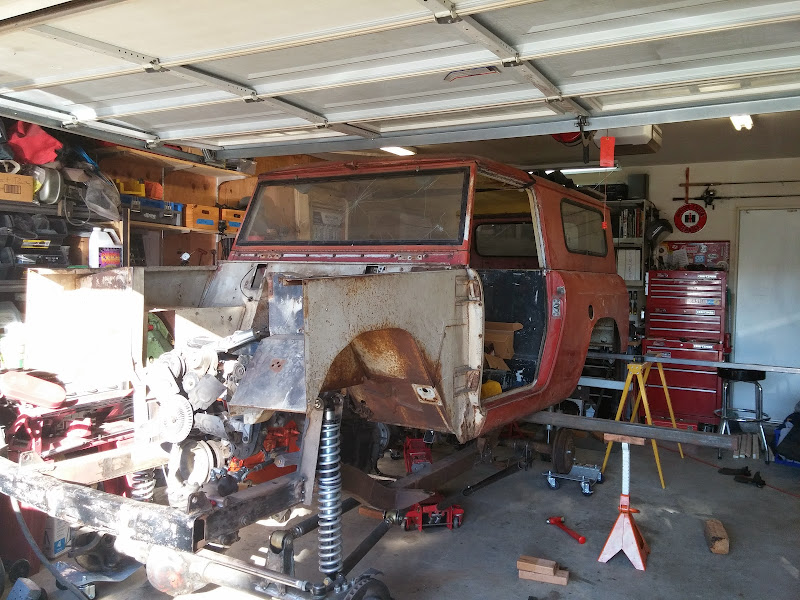
I've also got all of the TBI sensors mounted, as well as the front accessory drive stuff. I think I have a radiator that will work (Camaro) and have been thinking over how to mount it. Looks like I can work with the stock mechanical fan so I'll stick with that, but I have room to go electric if I want to later on. Starting to think through plumbing and wiring.

Any suggestions for a fuel tank that will fit behind the rear axle? I'd like to find something around 20 gallons that doesn't hang down too far, ideally with an internal fuel pump that will work with the TBI system. My plan is to run the fuel system off of this primary tank, and use the 2 10 gallon saddle tanks as extra capacity for longer trips. They will have a transfer pump system to pump into the main tank.
 
I'm just now reading through this thread and I've got to say, you have some amazing fab skills! I still need to read through the whole thing but I hope you're doing something to stop the onset of any rust because it seems like every Scout 80 I've ever seen was liable to lose parts driving down the road because rust has chewed them up so badly. Again, great work!
 
I'm just now reading through this thread and I've got to say, you have some amazing fab skills! I still need to read through the whole thing but I hope you're doing something to stop the onset of any rust because it seems like every Scout 80 I've ever seen was liable to lose parts driving down the road because rust has chewed them up so badly. Again, great work!

Thanks!

This scout is fairly rust free, I believe it lived most of its life on a farm in Southern California. The worst sports on the body are in the rockers, and I have plans to plate those in which will cut out pretty much all of the rusty areas. The truck will get torn down and painted once all the major fab work is done, which should keep the rust at bay since I live 5 miles from the beach.
 
Squeezed in a little bit of garage time in between all the family stuff this weekend. I tacked on the rear shock hoops, here it is at ride height (shock isn't conncted to the axle, just mounted to check clearances)

2014-11-30%252015.55.36.jpg


Hrm, this isn't gonna work ...
2014-11-30%252015.54.00.jpg


That's with the drivers side jacked up ~4", and the passenger side hanging free.

So on to the backup plan it is, mounting some 10" short body Bilstein 7100's under the foor. Did a quick mockup to get an idea of what I want the mounts to look like:

rear_shock_mounts.jpg


The lower mount is dropped below the axle about as much as the spring pack will stick down, so I'm not really losing anything in clearance. Its not perfect, but it'll work. I can always re-work it later if I decide it sucks :)

Anyone want to buy some used 12" travel Fox shocks? :)
 
Last edited:
Gotta love those projects you spend a ton of time on for what seems like something stupid simple.

I got some good suggestions on another forum to try the mount at the same height as the under the floor version but outside the frame, so after about 4 iterations, some on the computer and some in metal, here's where I ended up. I finally conceded that cutting the body flange that hangs down over the frame was the way to go, it gains me over an inch of clearance between the shock body and tire where I really need it most. I'll make a bolt on piece to cover the opening on the inside of the tub, and allow me access to the nut on the backside of the shock mount. The lower mount hangs down from the axle which isn't perfect, but its less than the thickness of the spring pack, and it is tucked next to the tire. I hope its not too much of a rock anchor.

To head off the comments, the shock in the pictures is a 12" travel shock, set at the length of the 10" version at ride height (50% of travel). I'm ordering a new body and shaft to rebuild them into 10" versions, rather than buying new Bilstein shocks as i said earlier.
2015-01-18%252018.14.58.jpg


2015-01-17%252019.16.17.jpg


2015-01-18%252018.15.27.jpg


With the axle articulated as much as I think it will, there's 1/2" between the shock eyelet and the tire sidewall. I think a rear disc conversion will push the wheel mounting face outboard a bit more which will help.
2015-01-17%252019.15.19.jpg


The bolt will be replaced with a flange head version that will allow the shock spherical to articulate without binding on the hex head. There's a spacer between the mount and eye that I can tweak to fine tune the spacing a bit more.

Glad to be done with this part and I can move onto other things. Next up will be lifting the body off the frame somehow, finish welding all the suspension bracketry, and generally cleaning up the frame and underside of the tub. Then assembly can finally start for good.
 
I could, but I'm trying to avoid too much intrusion into the rear tub. May not be that clear from the pics but the surface of the inner fender that you can see is also the inside of the rear cargo area. The mounts as they are stick into the rear tub/cargo area about 1.5" per side, the mounts like you show would be more like 4" per side with how the body sits over the frame.
 
I'm calling the rear shock mounts done for now. Everything clears when I cycle it as much as I can with a floor jack in the garage, we'll just have to see how they do in the real world.

The pictures don't look much different, but I remade the upper mounts using 3/16" plate, and configured them so I have more room for a washer and lock nut on the backside of the bung.

2015-01-25%252016.42.49.jpg


2015-01-25%252016.43.52.jpg


2015-01-25%252016.43.15.jpg


Yes there's rust :(
2015-01-25%252016.44.41.jpg


The mounts ended up ~1.5" inside of the body, I'll make some cover plates that can be removed for access to the nut. Hex head bolt will be replaced with a flange bolt, and the length will be such that no thread is inside the bung, i.e. proper grip length to avoid a shear load on a threaded section of bolt. It as good as I can make a single shear mount in this case.

The tire cycles about 6" of bump for 5" of shaft travel due to the angle of the shock, which I'm happy with. Droop doesn't seem great with these springs (56" Chevy) but we'll see how it does in the rear world. A custom spring pack is likely once I figure out what exactly I need.

I think I'm close to pulling the body off the frame, or at least lifting it up enough to get to all the welds that need finishing on the top side. I'm going to deal with the surface rust on the tub, as well as the frame at the same time. Not really looking forward to grinding/sanding/painting, but at least it'll be a change of pace.
 
Shifting gears from all that suspension work, I've been working on cleaning up the frame and underside of the body to paint. Goal is to get that done, drop the body back on the frame for good, and then start final mechanical assembly. I will paint the outside sometime later.

In process of lifting the body
2015-02-15%252015.35.31.jpg


I was planning to lift it high enough to roll the frame out from under it, but once I got it up about 12" I realized I've got enough room to do what I need to, so I'm just running with it as-is. Before anyone yells at me, this was just during the lift, there are now additional supports between the body and frame to keep it from falling on my head.

Jack riser I built, its bolted solid to my floor jack. this also gives an idea of what the frame is like now, lots of surface rust but nothing serious. the body rot you see in the rocker is the worst spot on the body, and I have plans for a solid rock slider piece that will replace this whole area.
2015-02-15%252015.35.49.jpg


I'm lifting on a piece of heavy wall tube, with 2x10 wood blocks distributing the load between 2 braces that are under the cab. The back of the body is supported by a tube bolted to the body mounts, across some sawhorses.

I'm starting with a twisted wire cup on a grinder to knock the loose stuff off, followed by another grinder with a paint stripper disc on it (LINK). These things work awesome but I learned quickly to stay away from edges, or you get to watch a $5 disc disappear in about 0.1 seconds.

Anyways a couple of afternoons of work has the frame from what you see above to this:
2015-02-28%252017.15.03.jpg


The plan is to shoot the frame with good old rustoleum primer and top coat, this will make changes later easier than if I used something like POR-15. The underside of the body will get a coat of this stuff (LINK) since I don't see any way I will get 100% of the rust off the body. Primer will be followed by LizardSkin sound insulation, and finally a top coat of rustoleum with ceramic beads mixed in to (hopefully) help with heat insulation. Yes I know its a lot of work to throw at a crappy old truck with a not great body, but I am hoping the sound/heat insulation helps make it a halfway reasonable truck to put some miles down.

Before I spray the coating on the body I need to make sure all the holes in the body are welded up, so I've been making plugs to weld in using my new favorite toy - Blair Rotabroach kit
0301151743.jpg


Some of these holes look like they were drilled with a dull masonry bit, or maybe a .45 ACP. You can see that the metal under all that surface rust really isn't that bad. Its not a show truck, so it'll work out fine. I'm more interested in keeping water out than how it looks, plus eventually the inside of the tub will get a coat of bedliner to hide all my crappy body work..
0301151757a.jpg


Random holes in the fenders, I'm just going to try to take these closed using a copper backer.
0301151757c.jpg


The worst hole at the back of the floor was bad enough I just cut out out with a 1.5" hole saw and made a larger patch.
0301151745.jpg


I've also been collecting parts for the steering/hydroboost system as well as the rest of the plumbing, so once I get though this body work phase I'm hoping to be making some more interesting progress.
 
My garage is currently stuffed full of the contents of my house, we're replacing the crap floors that were in there when we bought. I figured my wife might be happier if I didn't bring the couches back into the house full of grinding dust, so I came up with another project to work on this weekend - shock reservoir clamps.

I helped a friend start up a business machining billet AR15 and AR10 sets, and I've still got access to the machine (Haas VF-1) when I want to. Also have access to a lot of free 7075 material, but its not always the shape I really need, so I got creative and nested 2 parts in one block.
2015-03-06%252014.59.27.jpg


A few more steps, we've got a clamp!
2015-03-07%252020.27.04.jpg


Seems to work
2015-03-08%252021.48.38.jpg

2015-03-08%252021.48.45.jpg
 
:drool
OOOooooOOoo!! Look at those uppers!!!

They're designed as a matched upper and lower set, I don't actually have a picture of the finished assembly here but this is what the CAD model looks like (AR-15 shown)
AA15_assembly.jpg


Must have taken this picture with a toaster oven. This is another version I designed (and machined) to mate with a normal forged upper.
2012-05-12%252015.58.18.jpg
 
Last edited:
Wow! Read the whole thread, BEST HOUR I'VE SPENT IN A LONG TIME!
Awesome build, some day I hope I can see it in the flesh.
 
I guess golf is out of the question

I guess, though one of the holes I patched was about the right size!

Several others look suspiciously like bullet holes. I debated leaving them for 'character' but then I decided I'd rather stay dry :)
 
Well, bit of a break in the action while we replaced all of the flooring in our house, but I'm back to work now.

I finally got a solid day in the garage yesterday, it was one of those where nothing really looks different at the end of the day but my arms and back are telling me work got done :)

After lots of practicing I finally burned in all of the suspension brackets that will be inaccessible once the body is back down on the frame. Won't be winning accolades in the 'pretty welds' thread but I did some bend testing on practice pieces and they're plenty strong. And if anyone wants to poke at my welds you're welcome to come do it yourself :)

Front shock tower & back side of motor mount
2015-04-19%252012.06.42.jpg


Another view
2015-04-19%252012.07.15.jpg


Rear shock mounts
2015-04-19%252012.08.18.jpg


Rear spring hanger - i wish this had come out a bit nicer, but this is really pushing my vertical & overhead welding skill level :)
2015-04-19%252012.08.39.jpg


Also got the rest of the holes filled in in the back of the tub and got about 1/2 of the underside cleaned up for paint. Too tired to care about taking a picture at that point, but its not exciting anyways. I'll keep plugging away at paint prep and hope to shoot the underside soon, then I'll drop the body back on the frame and have a roller again.
 
Back
Top Bottom