1997 Dodge Ram 2500 4x4 and FWC Grandby

OverlandMike

Adventurist
Founding Member
Thought I would start up a thread on our current rig. It's a 1997 Dodge Ram 2500, Club Cab 4x4 with a Cummins diesel. I bought it over in AZ and brought it back to CA to be our new adventure rig. Within a couple weeks I found the perfect Four Wheel Camper Grandby model, that was exactly what we wanted for this truck. I'll add more to this but just a couple teaser pics...

As I bought it and driving back from AZ

IMAG0057.jpg


As it is currently

IMG_2321.jpg
 
Well, I am going to bring this build thread up to date but much of it will be copied and pasted from another forum. Please excuse the date references when I talk about stuff, as this stuff has happened in the distant past. It's just easier than trying to rewrite all of this info. Enjoy!

Well... we really did it today. We were scheduled to drive up to Redding to check out a Four Wheel Camper, Grandby model, later this week. Then I found one in Modesto that we would check out on the way up. As it happened to be, one popped up in Mission Hills which was about 100 miles away versus 600+. It had the extended cab over that I really wanted and the hot water heater with outside shower that the wife really wanted. It basically had ever option, other than the back flood lights, that I would have configured had I had one built for us. It's a 2004 model in really good shape. We are very happy with the find and it fits the truck perfect.

Well as everyone wants to see... here are the pictures having just got home with it. Enjoy!

Sweet... and yes, jacks will come off once I get everything setup in the bed and not need to remove it.
PICT6084.jpg


PICT6085.jpg


PICT6086.jpg


PICT6087.jpg


In the brotherhood. :D
PICT6088.jpg


Awning
PICT6089.jpg


I'll get some pics popped up and the inside this weekend. <doing the happy dance>
 
So I got my new tires installed today. :D Definitely give a more offroad look to the rig and the bonus of something that will work in the dirt better than the mismatched set that was on it. Also the extra height will be nice (~33" tall vs. ~31"). They are 285/75-16.

PICT6090.jpg


PICT6091.jpg


Changed the center caps to something that didn't stick out quite as far and had a better look. I think the name is appropriate. (if you can read it upside down... if not, turn your monitor over) :D
 
So I just picked these up today. Got some work to do this weekend. :D

PICT6133.jpg


New Bilstein 5160's! Oh Yeah!!!
 
So I got a little time to get the rear shocks installed. Fronts will take more time so I am waiting until I have a free weekend. Overall the install when well and quick. Getting the reservoir in the correct orientation on the pass. side took a little more time, due to the exhaust that routes by it. A couple pics.

Yeah, I would say these original 145,000 miles shocks were done...

PICT6140.jpg


Ah... much better!!!

PICT6141.jpg


PICT6142.jpg
 
Well, finished up the front shock install. Drivers side was harder as the frame is not flat in the area to mount the reservoir. Made a spacer for one end of the bracket. Also removing the old shocks was a PITA as the area for the lower mount, the metal compressed some and basically wedged the lower mount on. You should have seen the bend I was putting into my prybar. :Wow1: Pass. side was much easier as I learned a lot from the driver side. I only took pics of the driver side install since the other side is basically the same. Here are the pics. :D

Old shock and inner liner
PICT6149.jpg


Chrysler's great "idea" to use plastic rivets to hold the fender liner. Have to drill them out and then use new plastic rivet. Harbor Frieght sell this tool and rivets so that was good. They are a couple miles away.
PICT6150.jpg


Liner removed
PICT6151.jpg


Bracket mounted on frame for reservoir
PICT6152.jpg


Shock and reservoir installed
PICT6153.jpg


PICT6154.jpg


That's it for now. New National Springs for the rear is the next major mod and also dealing with the steering to strengthen it up.
 
Well, here are the pics of the new springs. I still need to go back to National so they can add an extra leaf on the driver side. Since these springs are more flexy than the stock ones, the extra weight of all the camper appliances is causing that side to sit lower than the pass. side. Also, the truck basically sits at the stock height WITH the camper versus sitting an 1" lower in the front and 2" lower in the rear. This keep the CG low, still allows me to get to all the camper latches without a step stool and keeps steering and suspension parts in factory specs, which should help with wear issues. I also got rid of those STUPID blocks that the factory uses in the rear.

Front
PICT6176.jpg


Original rears with factory blocks
PICT6141.jpg


Look Ma... no blocks!!!
PICT6177.jpg


PICT6178.jpg


The ride is sooooo much better, especially in the rear. There is almost zero freeway hop and bumps disappear. Should be nice on the trail.

Still need to redo my rear bump stops.
 
Well, check other thing off my list for the moment. I needed to get a spare tire mounted and the larger size would not fit in the stock location between the frame rails, under the bed. Well, with some upcoming trips planned and not a lot of time to custom build something myself, I had been looking at a couple options out there. TireGate makes a couple units that would likely work but the cost was in the $800 range. Not knowing if I am going to keep the stock bed or move over to a flat bed, I didn't want to get tied into something with a lot of money, that I might not end up using. The simplest thing was the TireGate HitchGate. It's basically a swing out that mounts into the receiver hitch. Again, cost was a big factor. I was doing some Criagslist searching and happened to find one in Whittier for sale. Wooo Hooo!!!! It was priced so if/when I am done with it, I should be able to sell it for what I paid for it. This will work for the time being. Next project will be installing factory tow hooks up front. I haven't been able to decide on a bumper so this will give me tow points for the time being. On to the new pics... :)

Mounted up with my new spare wheel/tire
PICT6180.jpg


Swung open
PICT6181.jpg


Camper door clears no problem
PICT6182.jpg


It will rotate all the way around and clear the door and camper
PICT6183.jpg


Another nice thing is I will FINALLY have a place to hang my Trasharoo!!! :D
 
Okay, got the front tow hooks installed today. Surprisingly it went very smoothly and only took a couple hours. Definitely happy to have some pull points now! I still think that it should be a requirement for ALL 4x4's to have some tow points...

Brackets that tie into the frame and front crossmember
PICT6184.jpg


Hook and trimmed airdam
PICT6185.jpg


Much better!
PICT6186.jpg
 
Okay, took another item off my check list. One problem with adding the HitchGate on the back is that it created a well where the center of the bumper dropped and the crossbar of the HitchGate pass by it. This creates a perfect spot to catch your foot and trip or even worst, twist your ankle. Well I can't have any of that so I basically made a "cover" that creates a nice step out of the camper. I might have built it just a bit overkill but with my tooling, it was a quick and easy method.

Here's the "well" that got created
PICT6187.jpg


PICT6188.jpg


Machining 4 matching stand offs. I had to use the drill press for making the holes so they are a little off center but it doesn't matter a single bit
PICT6189.jpg


Piece of aluminum sheet
PICT6190.jpg


Some cutting, drilling and sanding, volia a step. The mounting holes were using existing holes in the bumper
PICT6191.jpg


PICT6192.jpg


All I need to do now is pick up some non slip tape to put on the two steps. I had created the hitch mounted step a few weeks ago and it works great. Being everything outside of the hardware is aluminum, I don't have to worry about rust or painting.
 
Project 1 was getting the CB installed. Because of the camper, it creates large "blind" spots so I decided to use a co-phase (dual) antenna setup. I used a pair of Firestick Dodge Ram mounts and a set of Hustler co-phase antennas. The CB is a Cobra 75WX which holds the whole CB part in the mic. Used this style on a number of other vehicles and have been happy with them. Hard part was figuring out the mounting of the mic clip, since Dodge didn't leave a lot of flat, open areas. I ended up mounting it to the front of the useless cup holder.

PICT6210.jpg


PICT6211.jpg


PICT6212.jpg


Project 2, better back up lights. I needed some better lighting then the ones Dodge put on. Another ExPo member used these LED ones and the company happened to be local so I figured I would give them a try. They are 1320 lumen each and I currently have them wired to turn on with the reverse lights. Basic and simple.

PICT6213.jpg


PICT6214.jpg


Project 3, mount for AT can holder. I wanted to have a place to carry a Scepter gas or water can and use an Adventure Trailers can holder. Since the HitchGate offered a gas can mount but wanted way too much for what it was, I decided to build my own mount for a single holder. I welded up a bracket and mounted the holder. It worked out great and clears the camper with room to spare. Nice thing too, from the back you can't even see it behind the spare tire.

PICT6216.jpg


PICT6217.jpg


PICT6218.jpg


PICT6219.jpg


Got a couple other little things like a bed mat, a divider in the fridge and such. More stuff to come.
 
Well, did another project to the truck. From the start I knew I was going to add a steering box brace, to help some of the wondering issues that Ram trucks seem to have. I had been on my list but most of the kits were close to $200 so I just hadn't gotten to buying one. On a Cummins forum I also frequent, someone posted up about Custom Diesel having this setup for $99 and had been getting good reviews. I jumped at that price and ordered one up. It came in very quickly and looks to be a very nice setup. Including the test drive time, I had about an hour total in the installation.

Did it make a difference? Yes it did. Not all the wondering is gone but a large amount is. Biggest thing I noticed was on turns, I no longer have to make minor adjustments to stay tracking on the route selected. Also mid corner bumps don't require any correction either. For $200 I would say it was an okay mod but for $99, it was a great mod. Here are some pics.

You remove the stock pitman arm nut and replace it with this "stud" nut. One thing, with as long as it is and the torque of 185 ft. lbs. a standard deep 1/2" drive 1 1/4" socket would not fit. The stud part would not drop far enough in. I bought a set of 3/4" drive, deep impact sockets and that worked great... plus my new 250 ft. lbs. torque wrench. :)

PICT6319.jpg


Brace

PICT6320.jpg


Loosely bolted in place. It mounts to the same point of the sway bar, reusing those bolts and the sway bar mounts on top of the bracket

PICT6321.jpg


Greaseable bearing with two set screws (which I Lock-Tited in)

PICT6322.jpg


Not sure what the next mod will be. Likely get around to installing the larger rear wheel cylinders to improve the rear brakes.
 
Finally, I got a project I had been putting off for over a year now, done. Since having the springs installed in the rear, I lost the use of the factory rear bump stops as they were designed to hit an "arm" that stuck out from the factory lift blocks. Crappy design if you ask me. I had started last weekend with one design idea but found the frame was not flat (it's stepped) where I had planned to tie into. It was going to be too much work so I went with plan 2, similar to how I did our Cherokee when I had it. I made a spacer and used aftermarket bump stops. With all the measurements, I was able to get them at the same travel range that the factory setup was so this should work well. Got everything built and installed, did a little test drive with some dips and some posing flex at a local loading dock. In all I think this will work out perfect.

Here's the pics of what I built.

Factory block and bump stop

PICT6330.jpg


Spacer I made, 1/4" thick steel

PICT6327.jpg


PICT6328.jpg


Prothane 4.5" bump stop

PICT6329.jpg


Spacer and stop mounted together

PICT6331.jpg


Mounted to the factory location

PICT6332.jpg


PICT6333.jpg


Checking the flex. This was far as I could get without a someone spotting. Looks like it will work perfect (passenger side)

PICT6334.jpg


Driver side

PICT6335.jpg


Poser pics testing flex

PICT6336.jpg


PICT6337.jpg


Glad to have that done!
 
Okay, after a year long search on how I wanted to mount the gauges I ordered from Speed Hut, I finally found what I wanted. I ordered a 3 gauge pod off EBay. When I got it I was very happy to find it fit very well on the underside of the dash, almost like it wad made for it. Now I wanted to have a secure method of mounting this, since it was mounting to the plastic dash. I didn't just want to use sheet metal screws as most likely would. I found "jack nuts" that are similar to nutserts but are designed for "soft" materials. This allows me to put in a machine screw and the load is spread out more. This worked perfect. Now I just need to finish up all the wiring and senders. Have a good buddy that does auto electrical coming over Sunday to help me out. Here's some pics of mounting the pod and gauges.

Custom made Speed Hut gauges, EGT, Boost and Trans Temp. These have programmable warning lights.
PICT6340.jpg


Gauge pod from EBay
PICT6341.jpg


Jack nuts, before and after expanding
PICT6342.jpg


This is what's the front looks like
PICT6343.jpg


Installed in the dash
PICT6345.jpg


Test fit the pod
PICT6344.jpg


With the gauges mounted up. Definitely like how this turned out
PICT6346.jpg


More once I get them wired up.
 
Okay, got them wired up (outside of installing the trans temp gauge, I need to install the new pan). I drilled a 1" hole in the dash that is covered by the pod. Ran all the wires. Had to drill and tap the exhaust manifold and install a 45* fitting to allow the boost sender to clear the pump. In all, everything went very well. Took it for a test drive and the EGT and boost worked perfect. Very responsive and real time info, unlike some others EGT and boost gauges I have had in other vehicles.

Got some pics of them lighted up. Love the look. They are a little more blue than the teal Dodge uses for their lighting. Still very happy with them and how they turned out.

Another great feature is the programable warning light. There is a led that will light up when it hits a point you set for the light. I have the EGT set to 1200*, boost at 25 psi and trans at 240*. They will also recall the last time they were on. Very cool gauges that I will definitely have to use in other projects.

Speed Hut gauges
IMG_1874.jpg


Factory gauges
IMG_1875.jpg
 
Now on to what I did this past Saturday. I have been looking to build or buy a light bar for the front, to hold the pair of IPF and pair of Lightforce lights I had. The IPF's are going to be driving lights as the stock headlights suck! The Lightforce ones are for offroad use. With some upcoming trips, I needed to get this done. I have spent countless hours trying to figure out what to build. Nothing on the market I cared for or was $$$. I said screw it and just started fabbing up a bar. Got it build and back from powder coating. I'll get the lights mounted and wired up this weekend. Here's what I did.

1.5" piece of tube with a large washer (grade 8) welded to it
PICT6361.jpg


Then I used a hole saw to drill the bumper and notch the plastic cover
PICT6362.jpg


Tubes mounted to bumper
PICT6363.jpg


Trying to figure how how I wanted to bend the tube
PICT6364.jpg


A couple bends at the end and notched the tube on the ends
PICT6365.jpg


Checking to see if the bar is level with the bumper. Not too bad :)
PICT6366.jpg


Tacked some light tabs and bar together. Pulled it off and did all the finish welding
PICT6367.jpg


I cut the ends off at and angle and this is what it looks like back from the powdercoater. Not too bad
PICT6370.jpg


Will post more after the lights are mounted and wired up.
 
Okay, got the light bar mounted and the light installed and wired up. Still have to go out at night and aim them. Here's what I ended up with.

PICT6372.jpg


PICT6373.jpg


PICT6374.jpg


Used K4 LED tip lighted switches with run to a pair of relays under the hood. Green for the driving lights (55 watt each) and red for offroad lights (100 watt each)
PICT6375.jpg


PICT6376.jpg
 
Well, that should bring me up to date on the build.

After our Death Valley trip in March, I noticed the steering wheel being off about 15-20*. I think I bent part of the steering linkage on the trail. Since this was all original 152,000 mile linkage, it was time to upgrade. After a lot of research, I went with the '99 Dodge 2500 HD linkage. This converts to a "T" style linkage, which is a better overall setup. The stock "Y" linkage doesn't tie the two wheels together and you will get bump steer from it. It is also not as strong. Swap took about 2 hours. Still need to figure out a steering stabilizer setup as the HD setup does not have built in mounts for it.

Stock, old Y linkage

PICT6458.jpg


PICT6459.jpg


PICT6460.jpg


New linkage

PICT6462.jpg


PICT6463.jpg


Really easy swap. While having the alignment done, we found the brakes are toast and one rotor is loose on the hub. Getting all new parts for brakes and hubs. $$$ but should be well spent money.
 
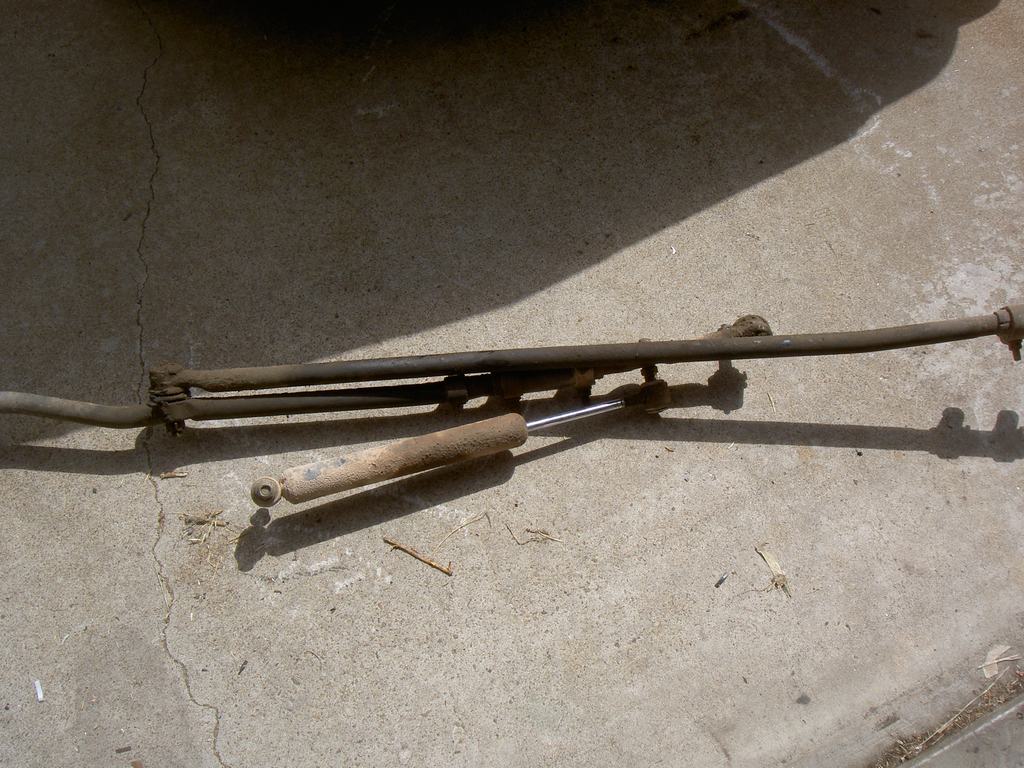
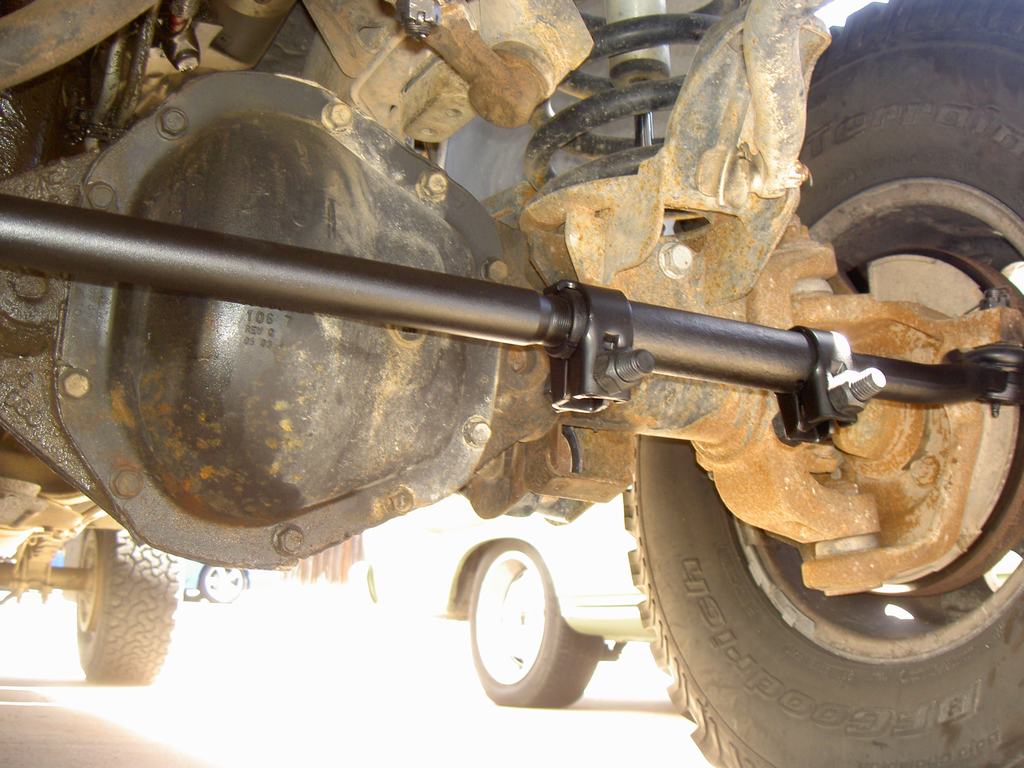
I never got around to posting this as I didn't realize I took pics. Found them last night so figured I would post up some work I did back in Oct. last year. After getting the steering linkage swapped in, during the alignment we found some issues with the brakes. I ended up replacing the hubs, rotors, calipers, pads but did not get the braided brake lines in as I was running on a deadline and there are a couple hard lines I was afraid might have issues coming apart. I also am trying out the new Hawk SD pads which are supposed to be for severe duty. Outside of the first couple of stops being long due to the pads being cold, once a little heat is in them, the work very well.

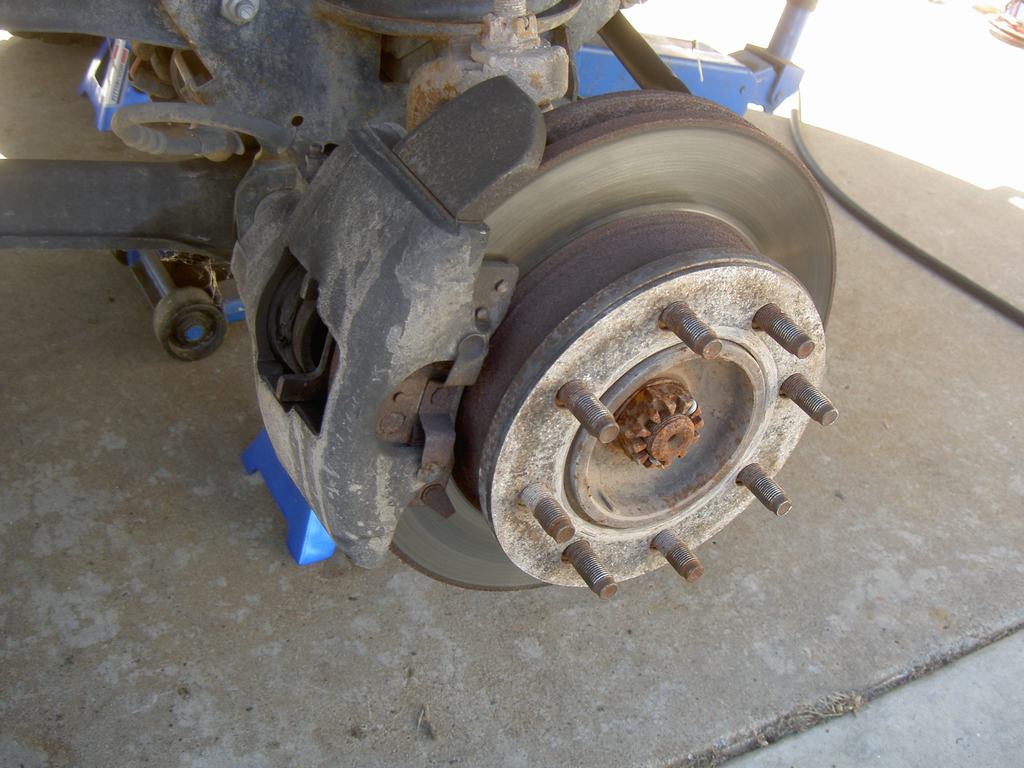
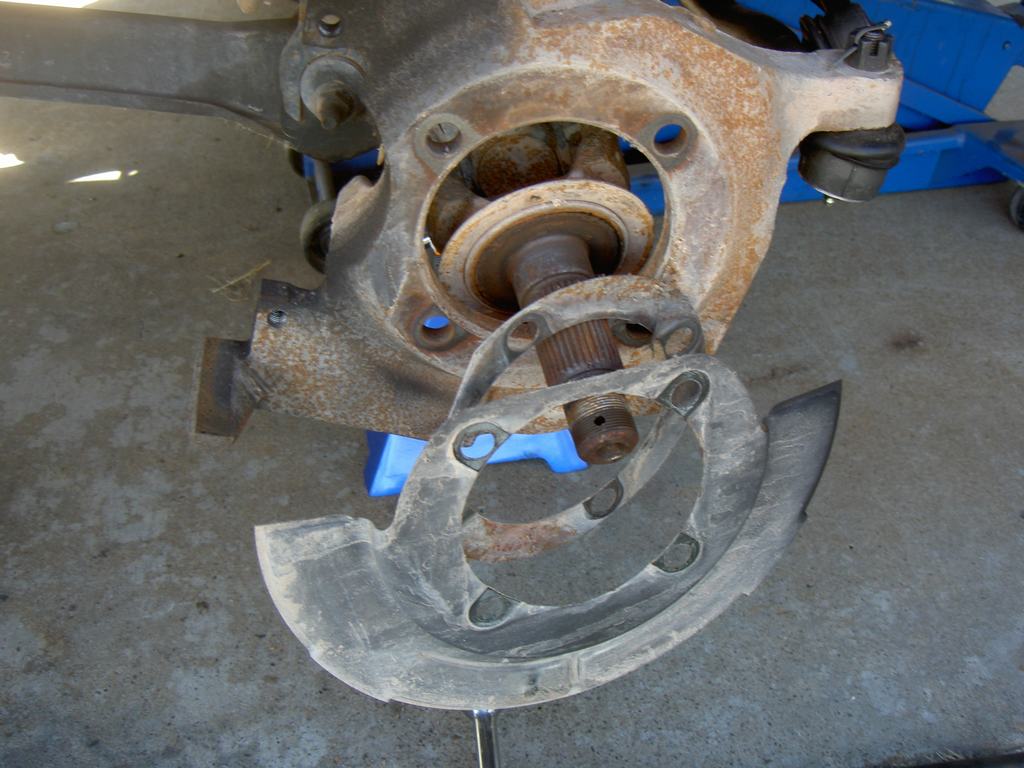
Old parts - actually found the pass. side one, the rotor was rotating on the hub due to someone incorrectly pressing the studs in
PICT6477.jpg


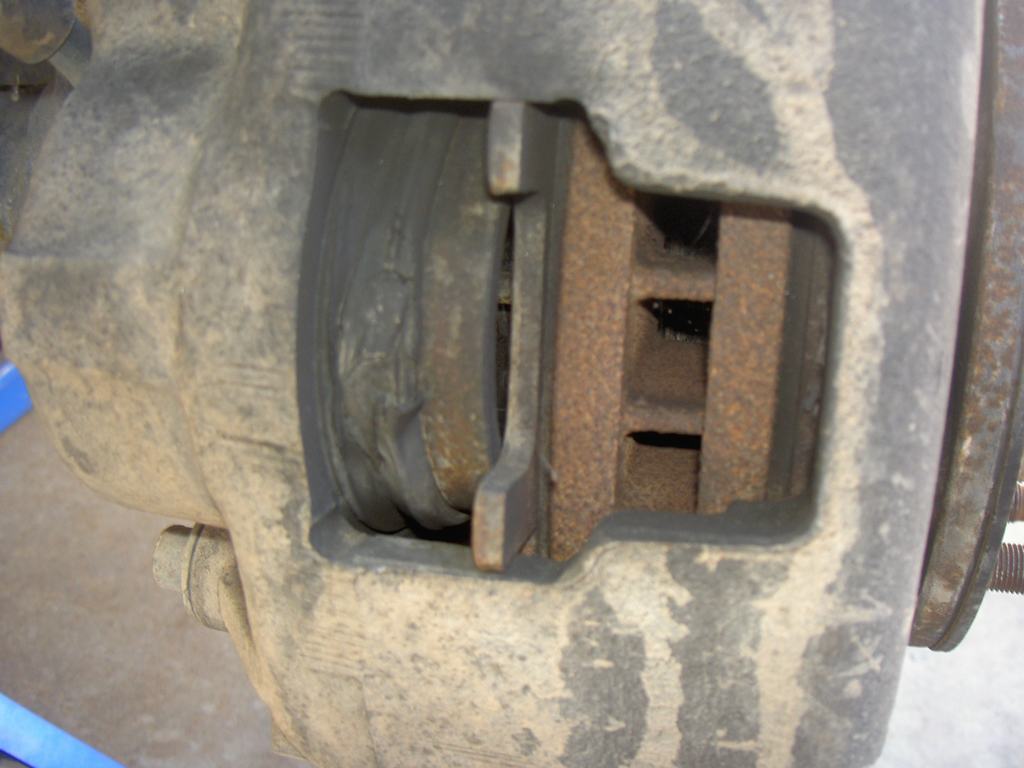
Pads almost gone and torn caliper boots
PICT6478.jpg


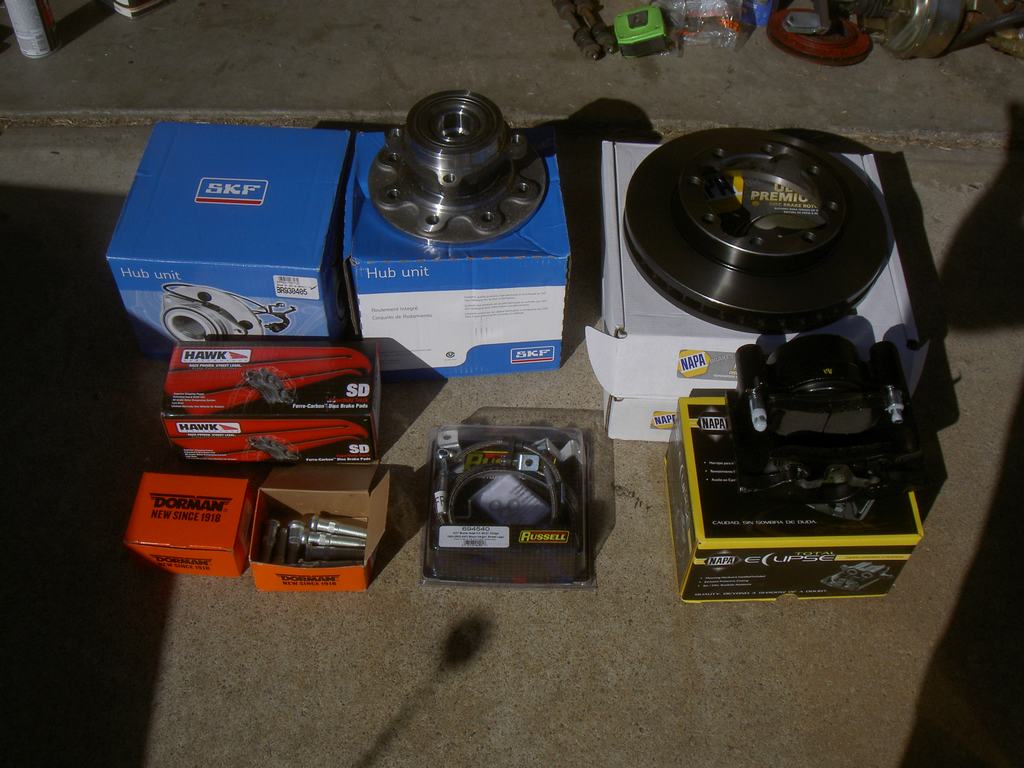
Many hundreds of dollars worth of parts. By replacing everything, I could assemble the hubs/rotors prior to disassembling the old ones.
PICT6469.jpg


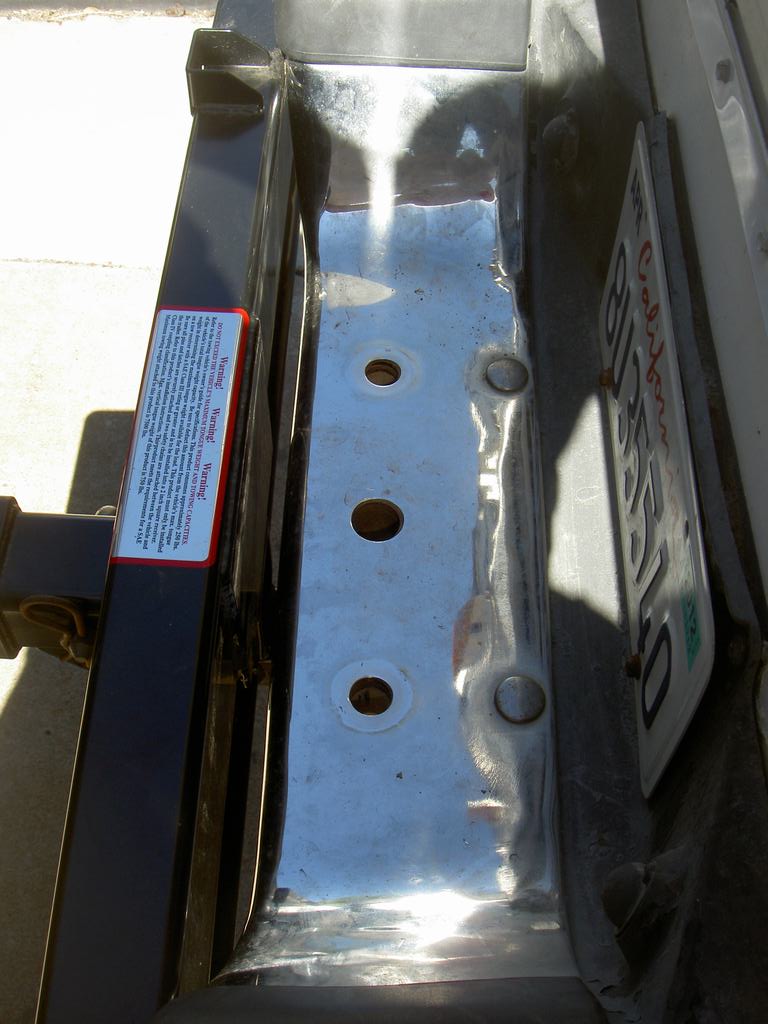
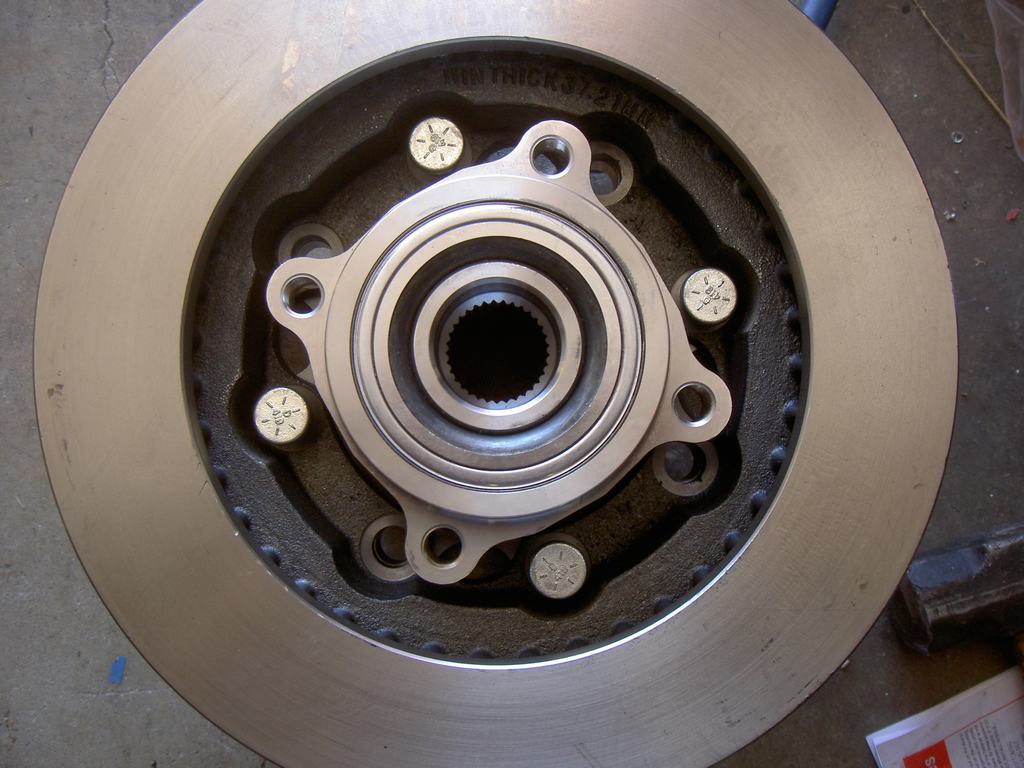
Unlike slip on rotors, the hubs slide in from the front and the studs push through from the back, to lock the rotor between them. Not very user friendly needless to say!
PICT6470.jpg


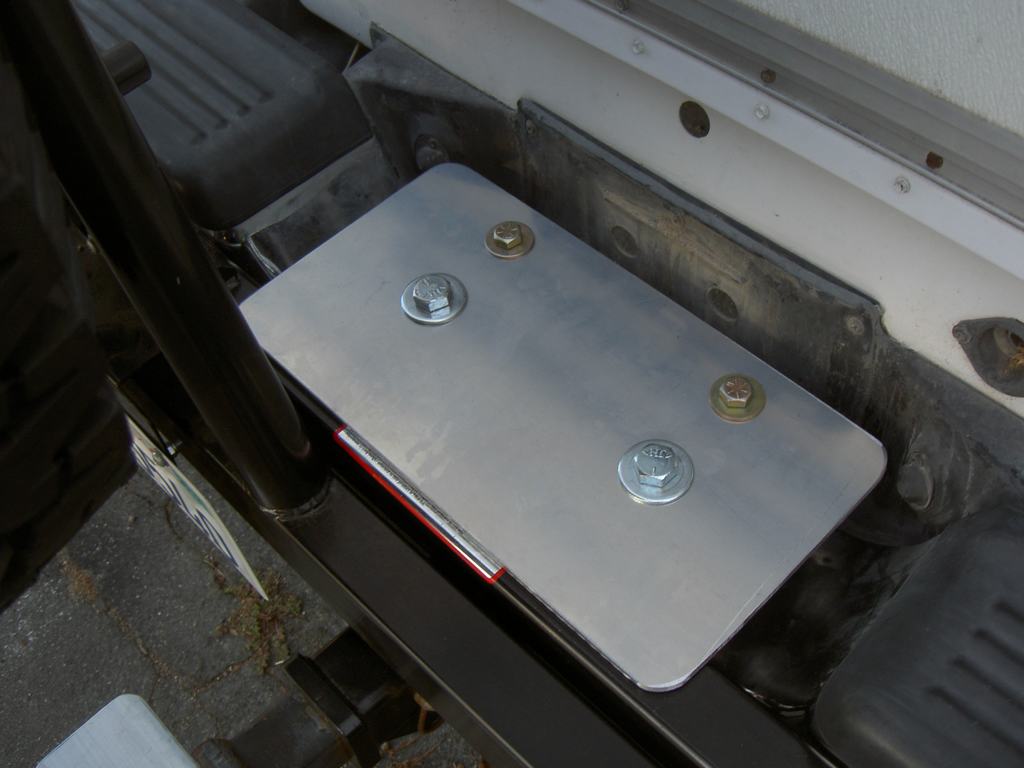
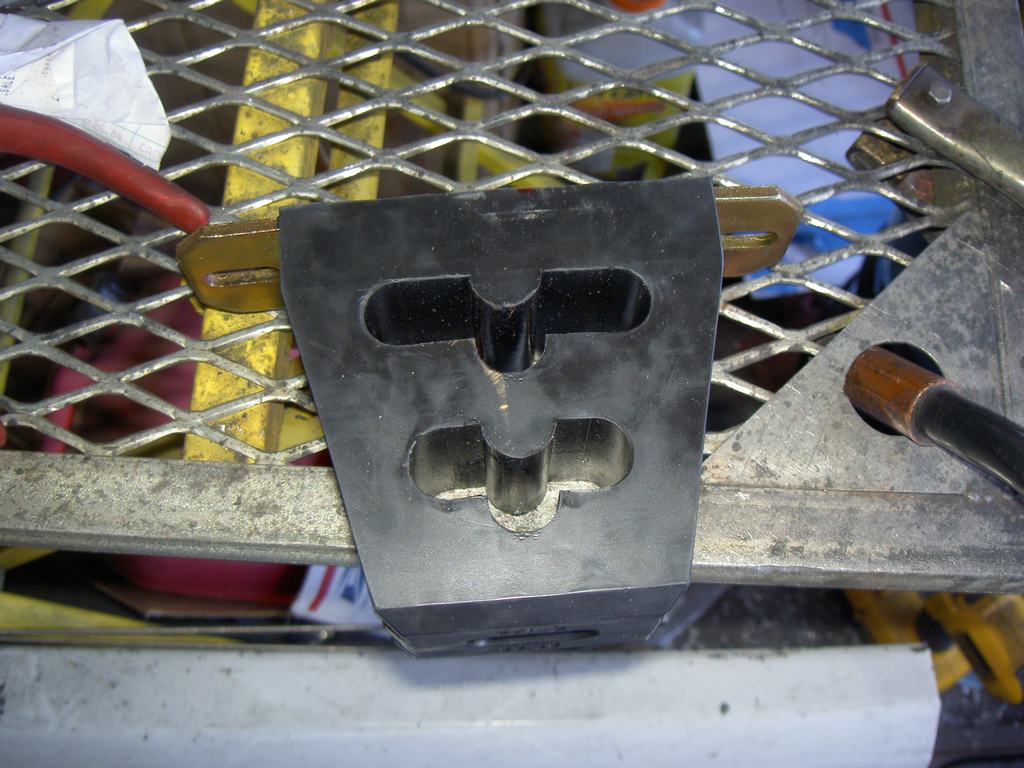
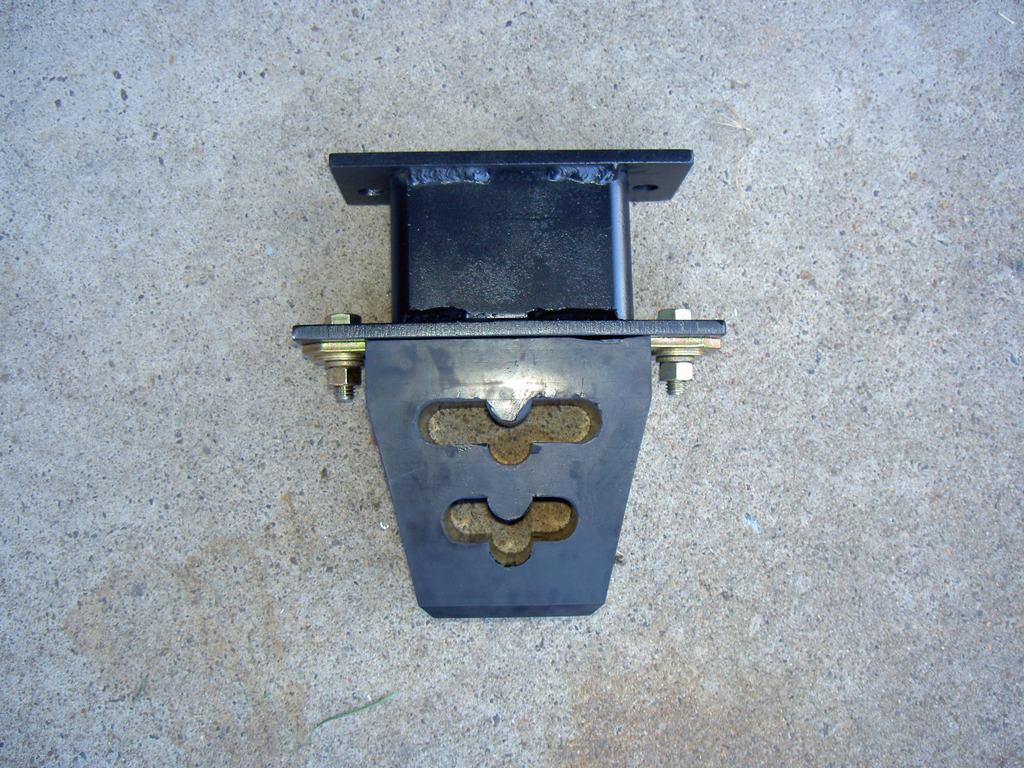
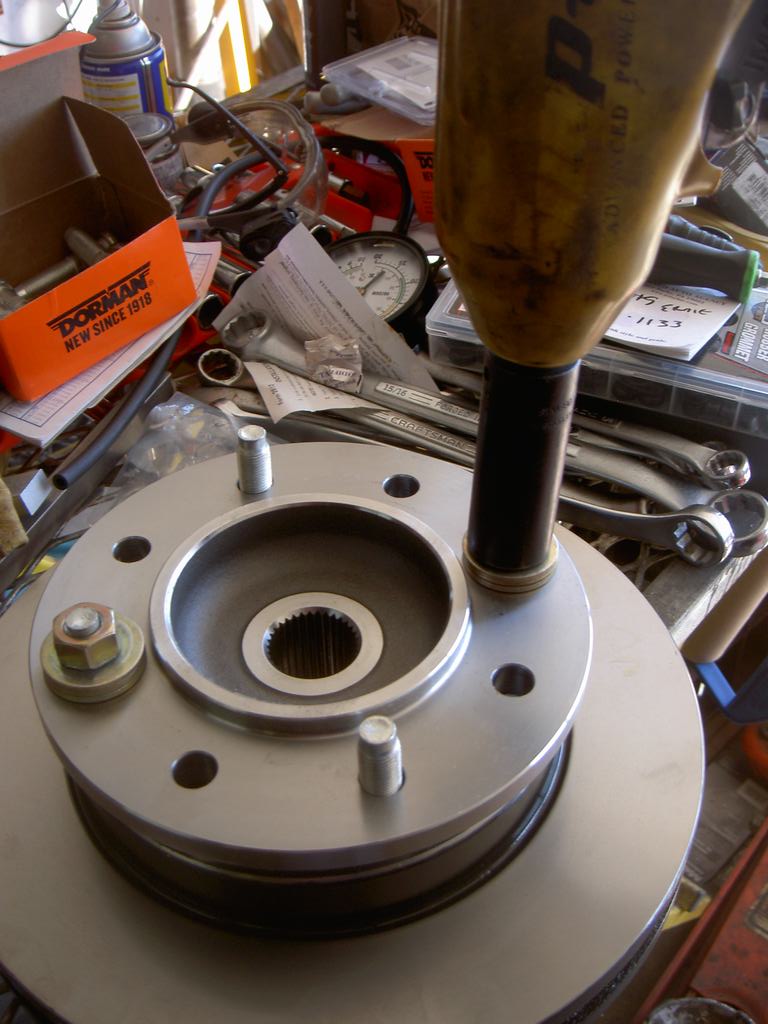
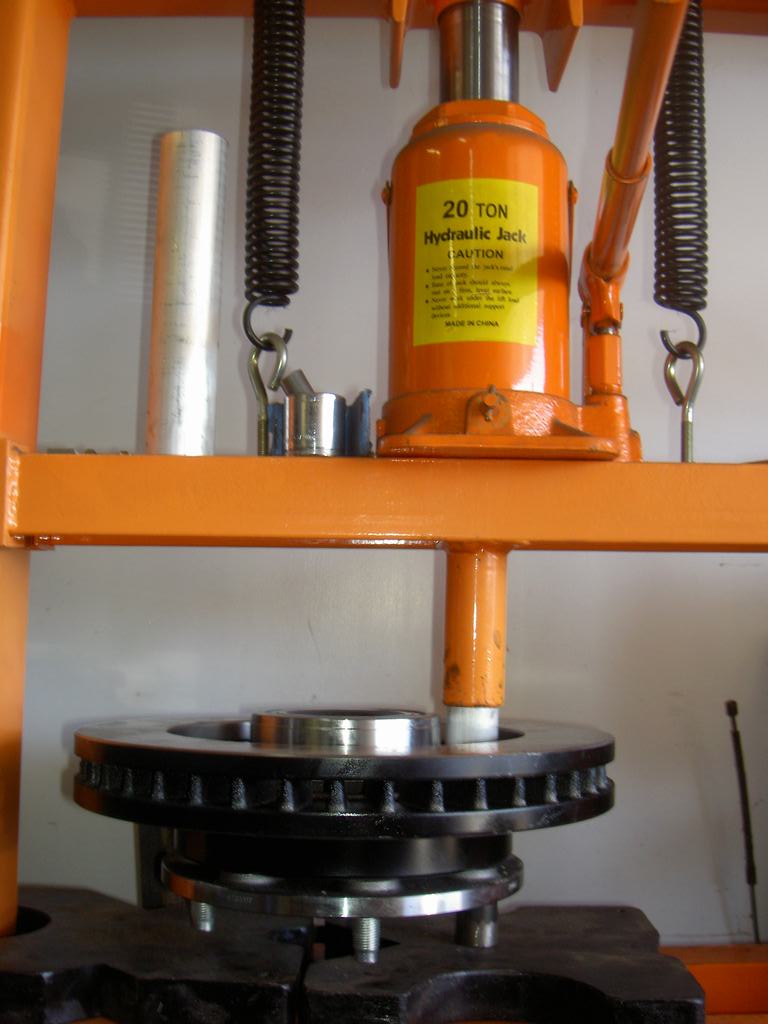
Used Grade 8 nuts and washers to start pulling the studs through.
PICT6471.jpg


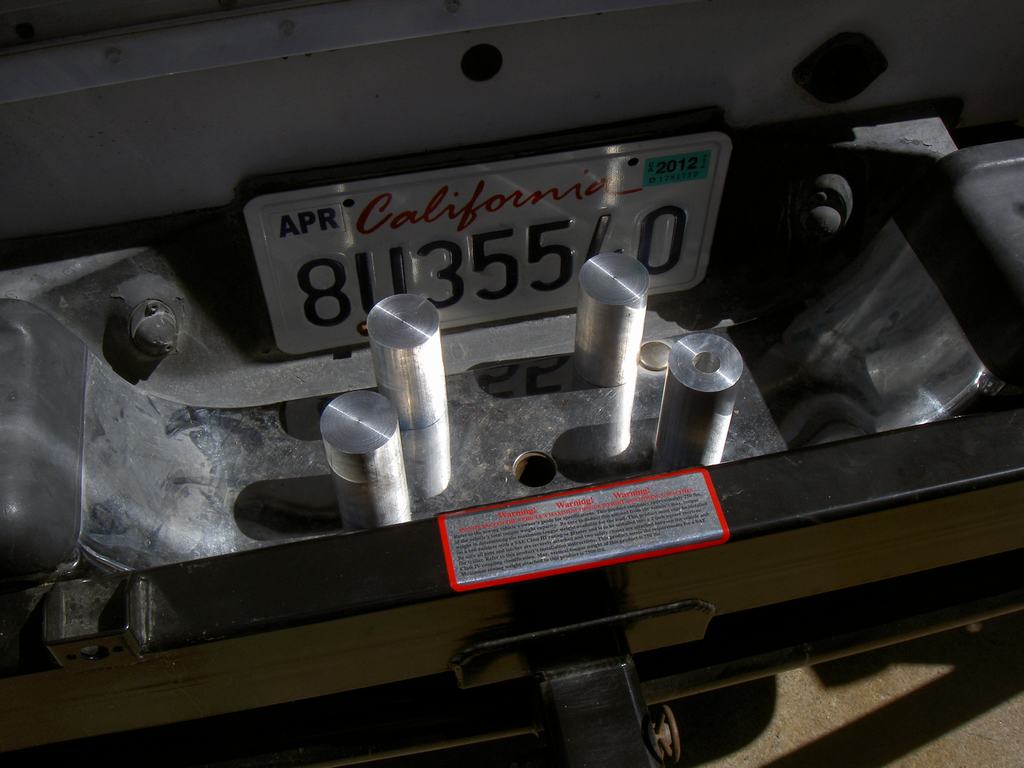
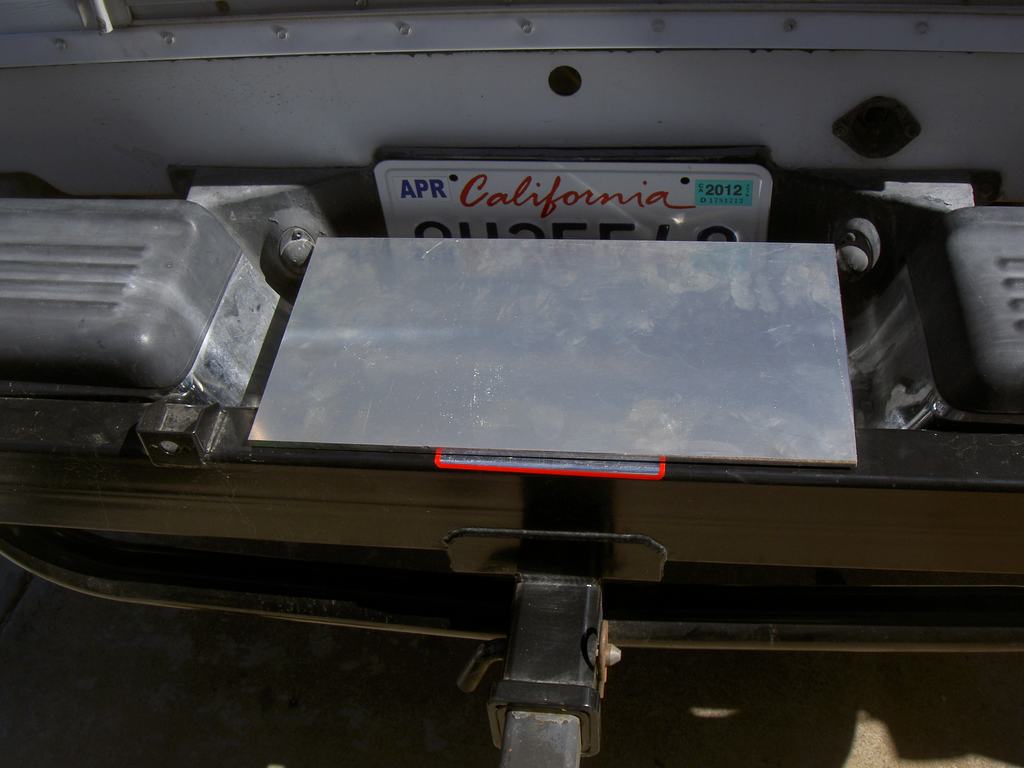
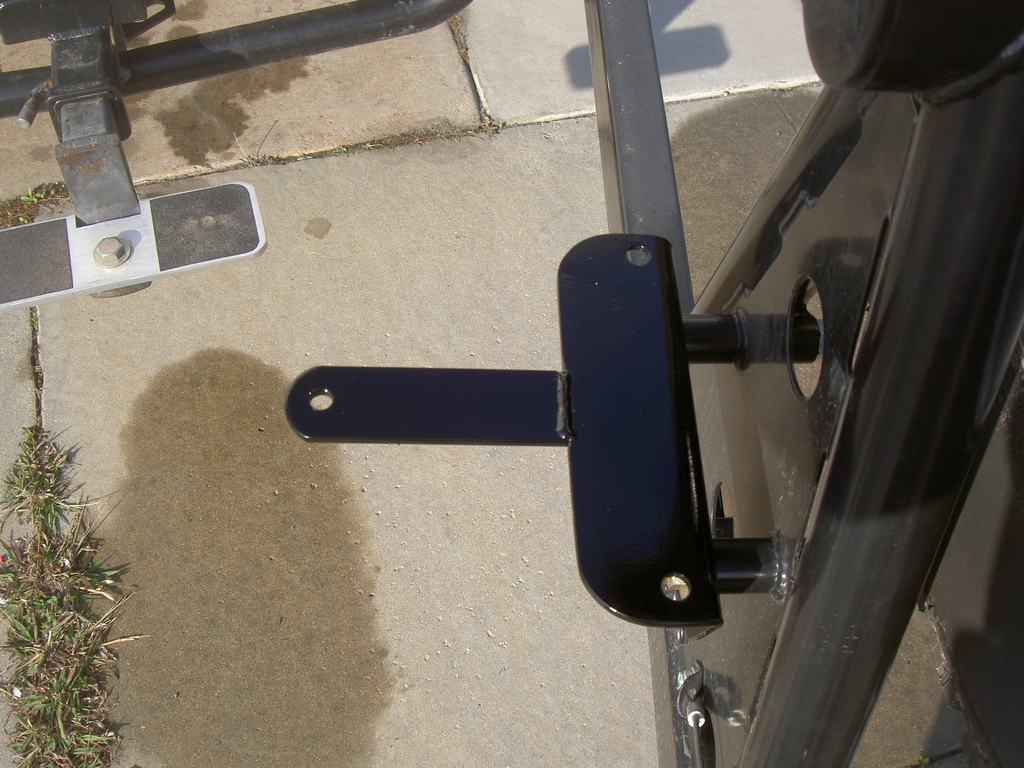
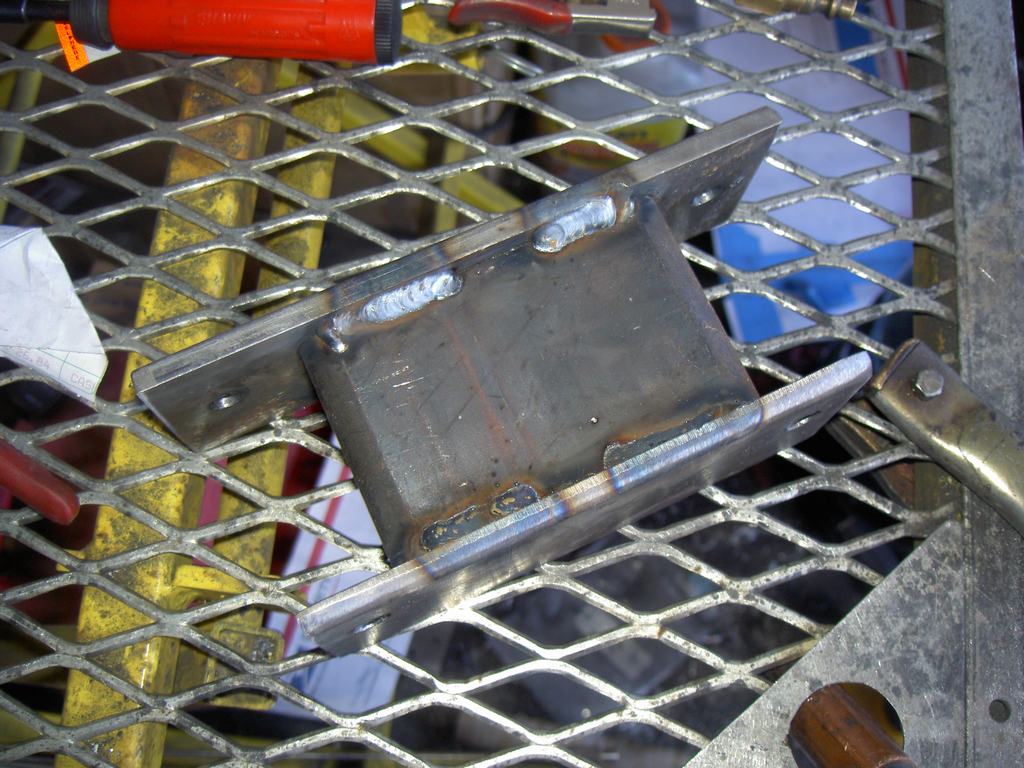
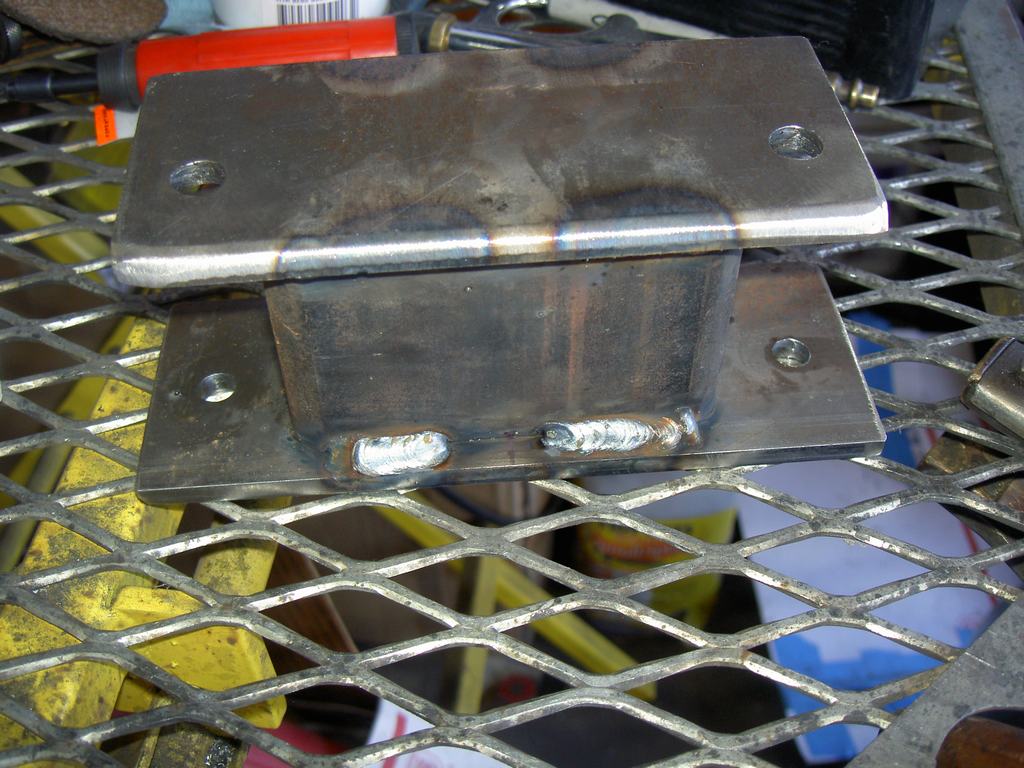
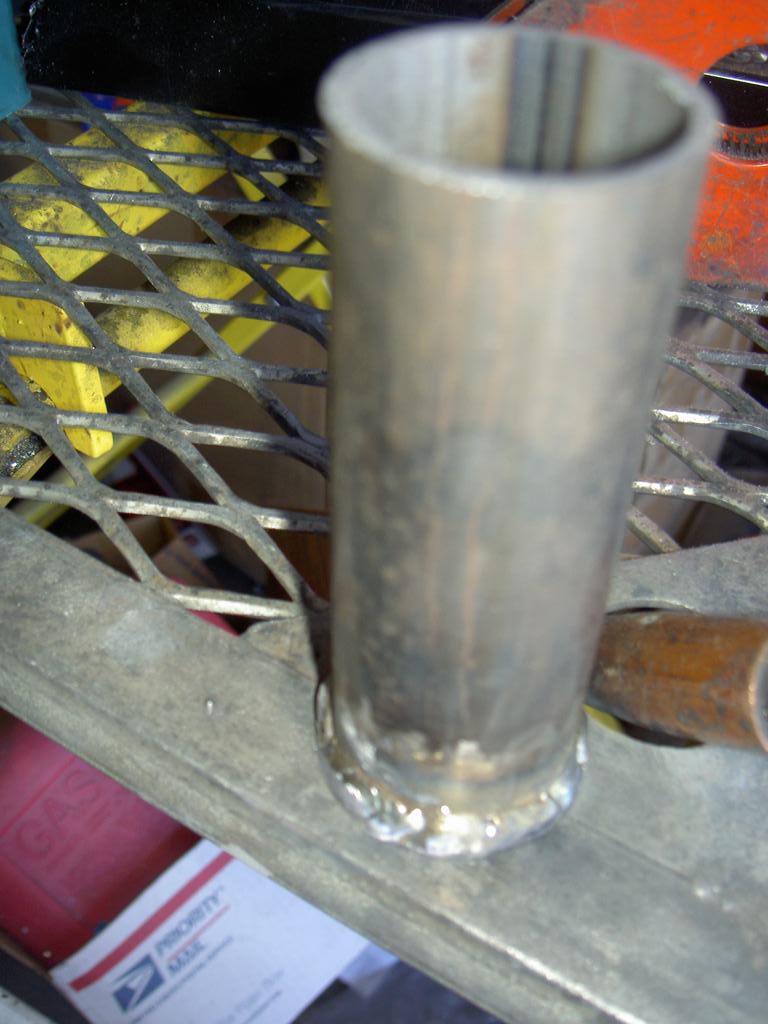
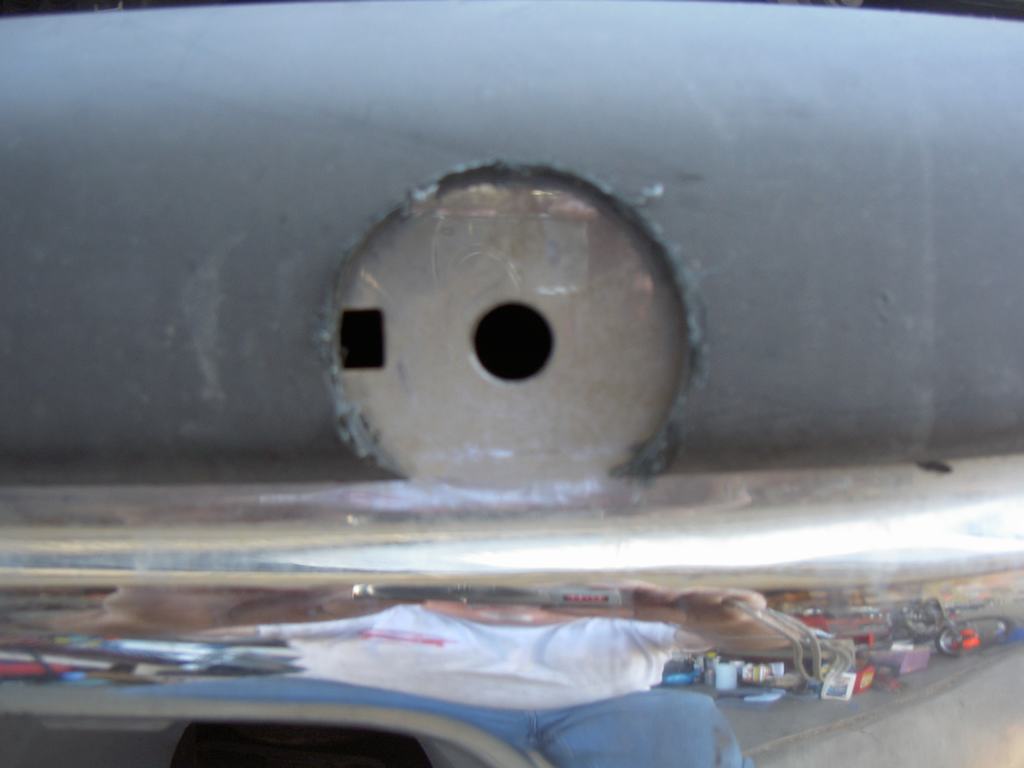
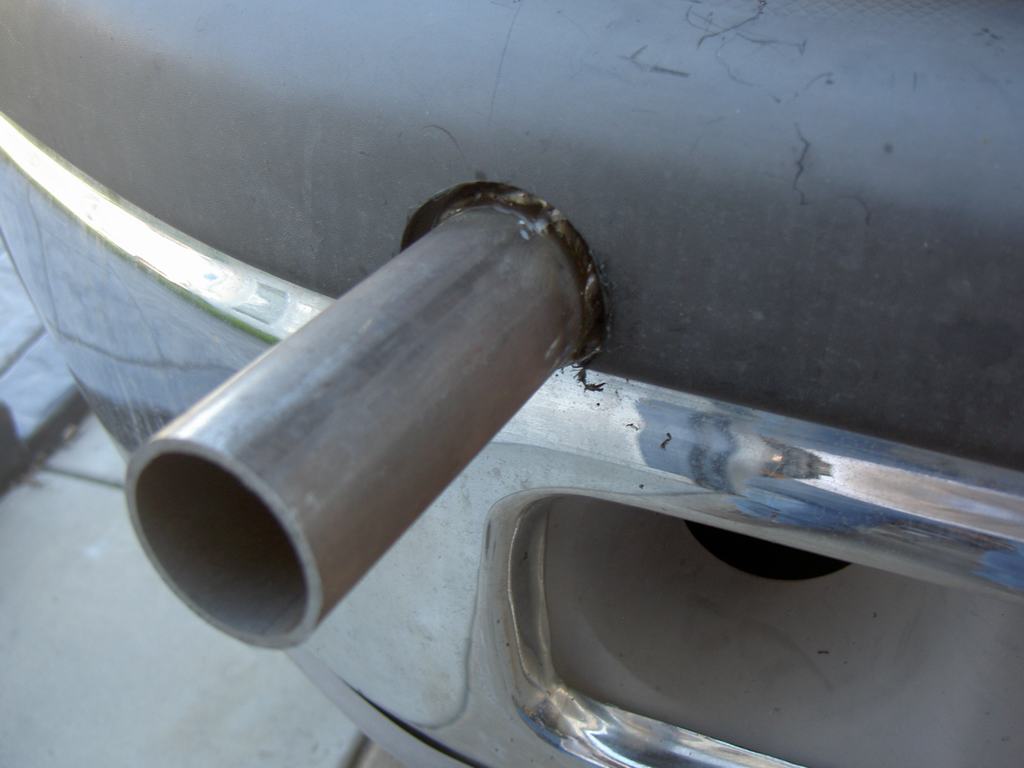
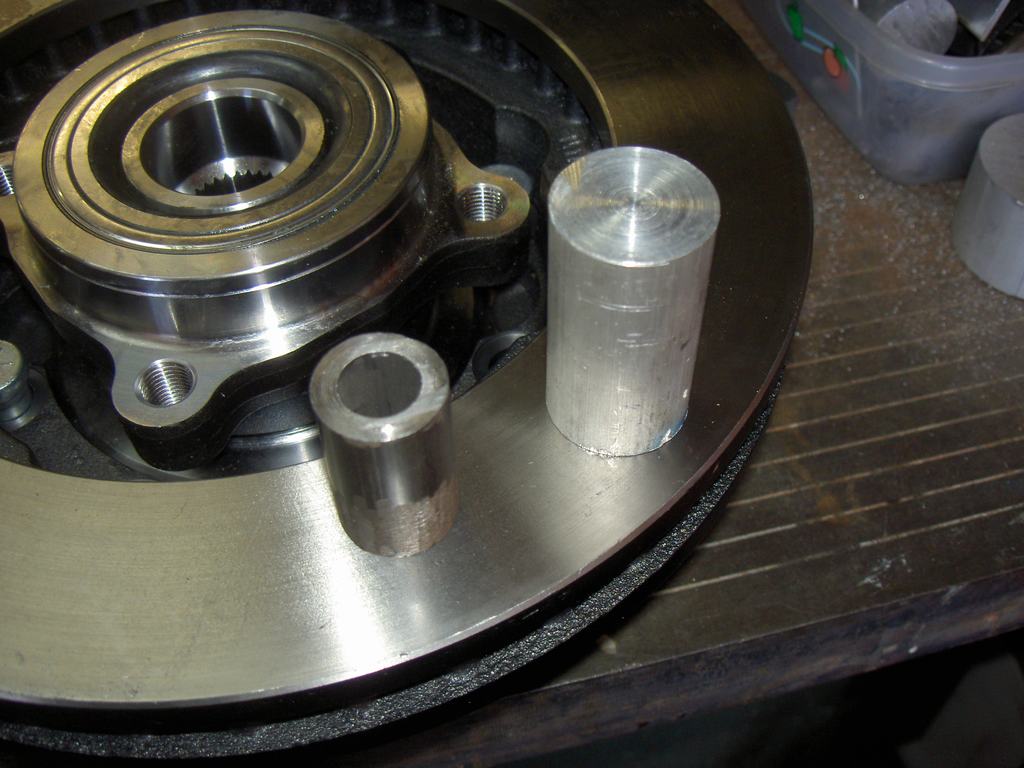
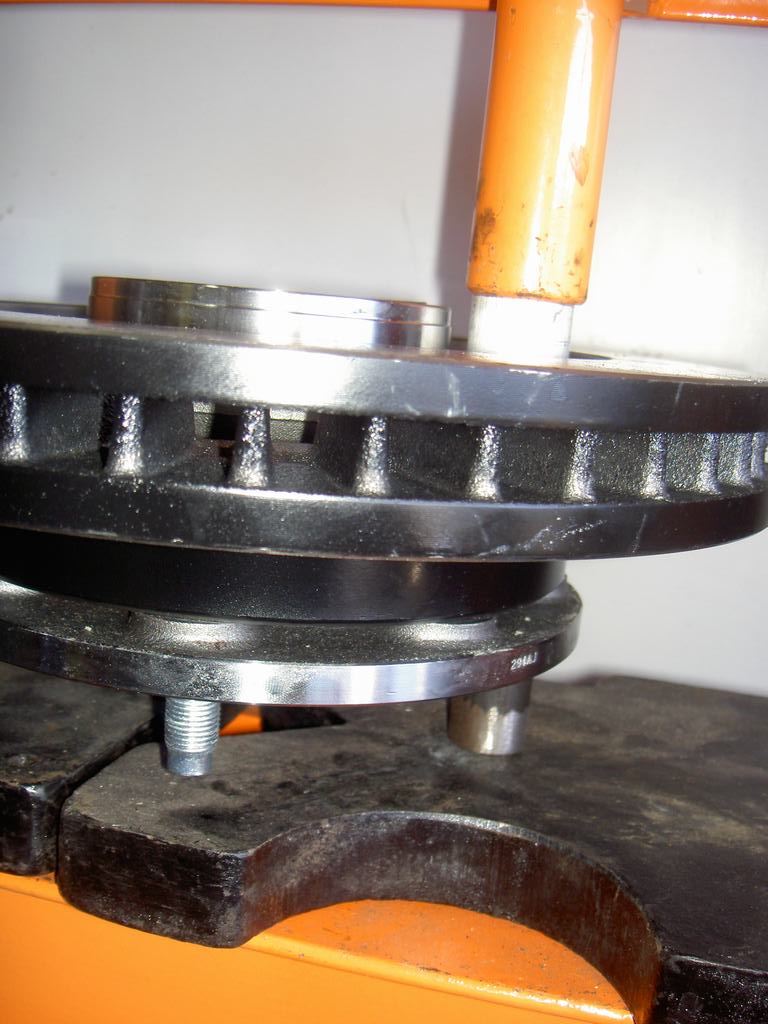
Pieces I machined up to allow me to push in the studs on my press
PICT6472.jpg


Stud through the tubing, solid piece pushing on the back of the stud. One down... 15 to go
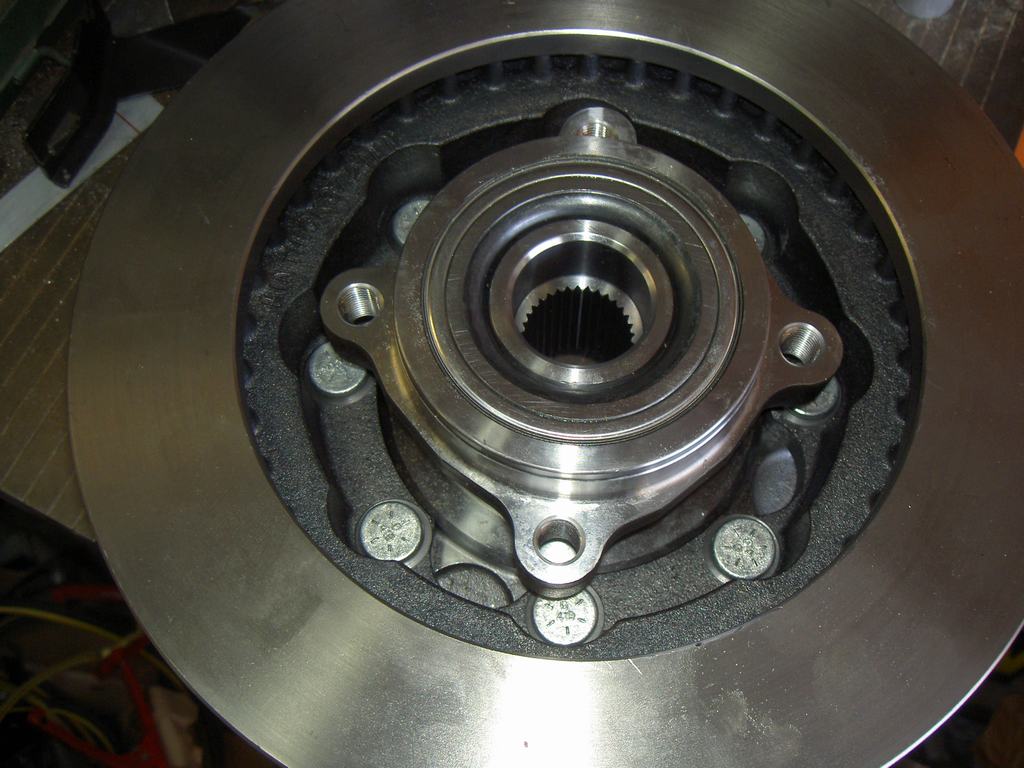
PICT6473.jpg


PICT6474.jpg


One rotor completed
PICT6475.jpg


PICT6476.jpg


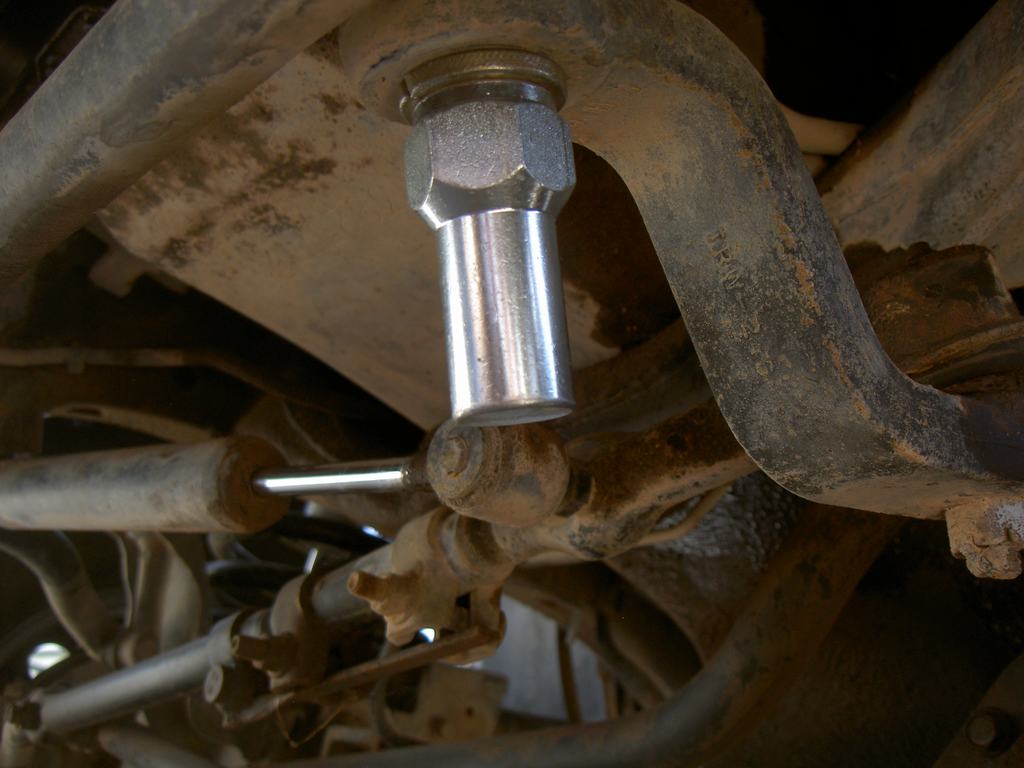
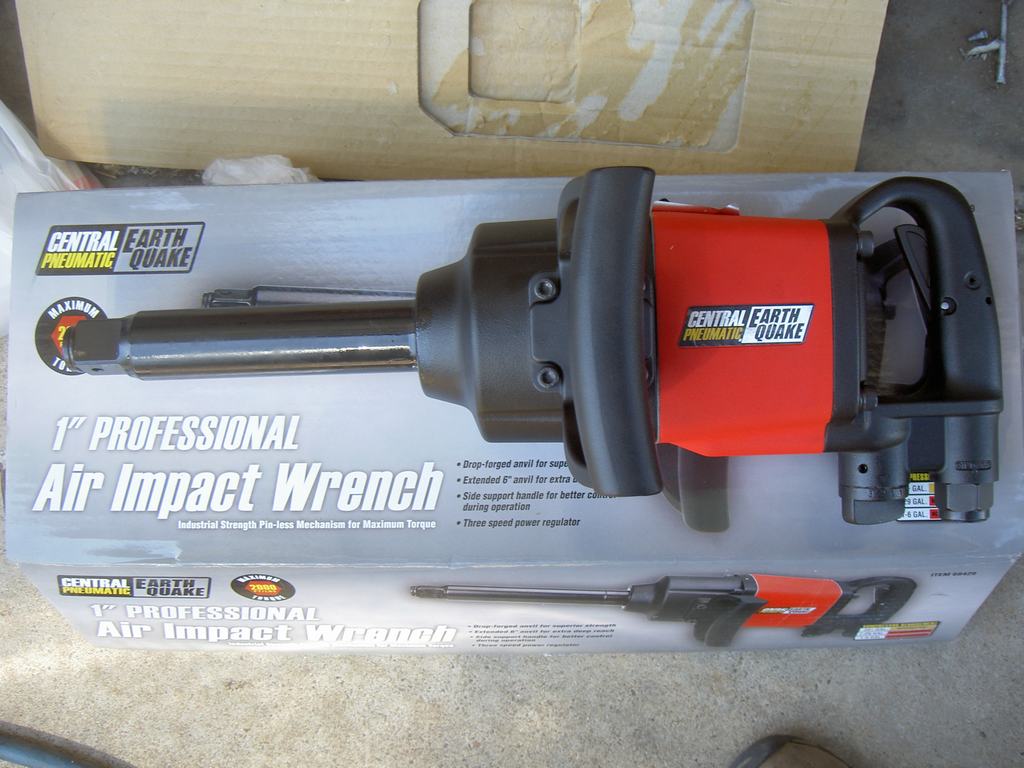
I had big problems getting the axle nuts off. Breaker bar with 4' long pipe didn't budge them. My Snap-On 600 ft. lbs. impact did not budge them. I had to go out and buy a BIG impact wrench!!! It got them off
PICT6479.jpg


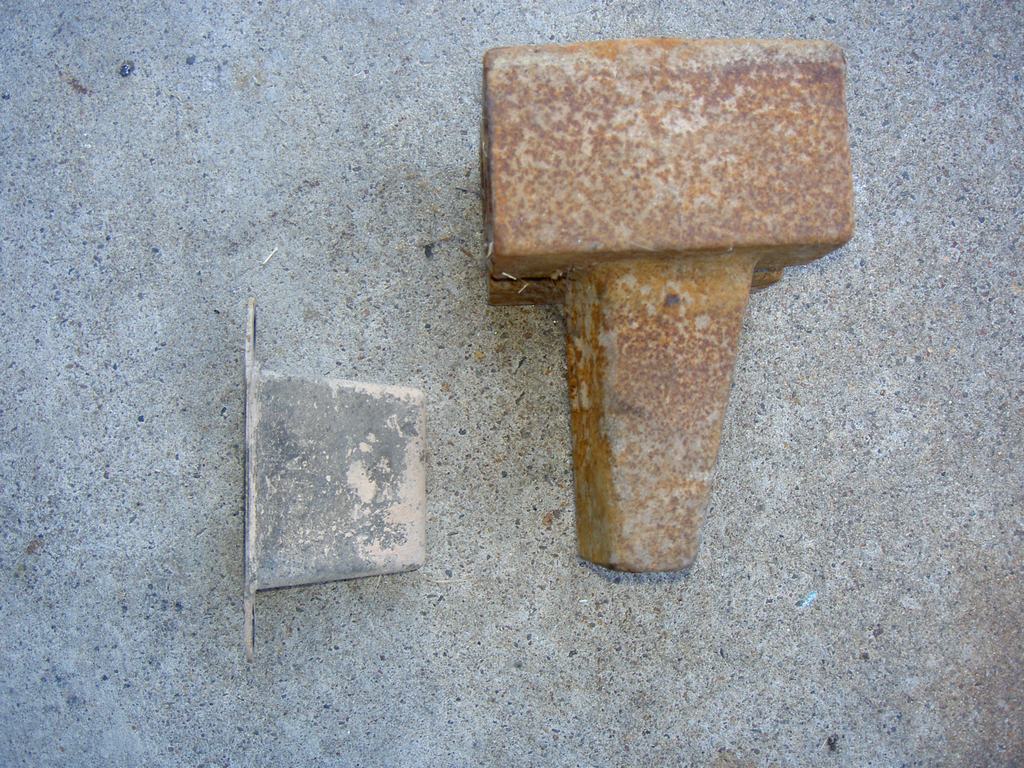
Old hub and rotor off
PICT6480.jpg


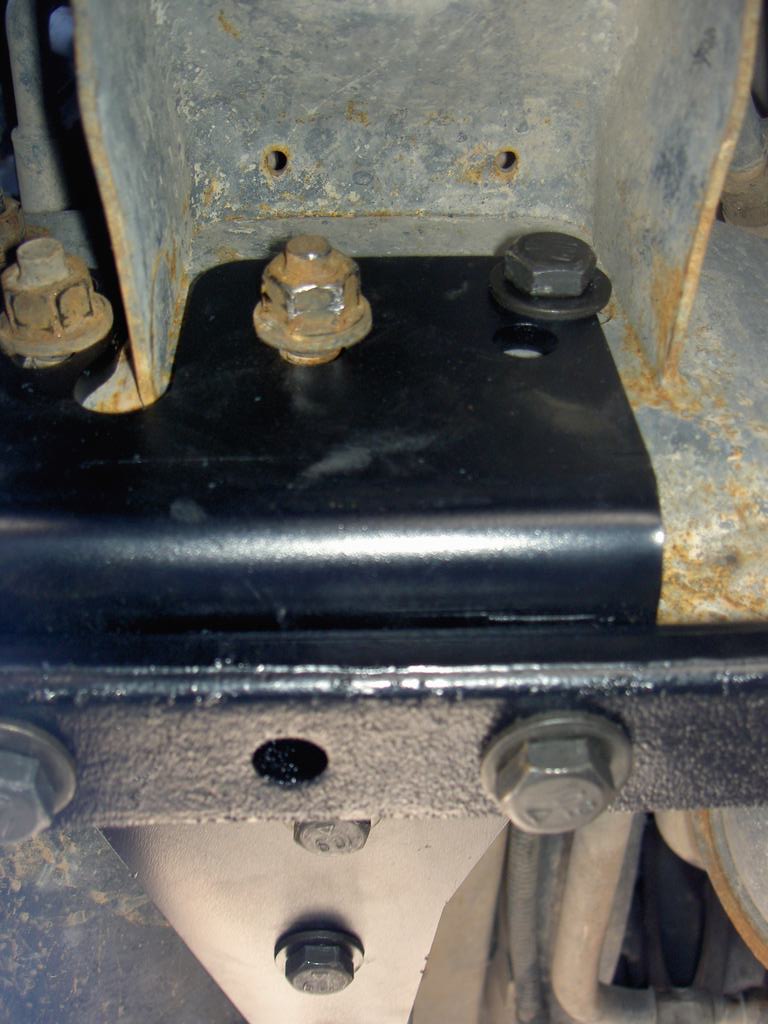
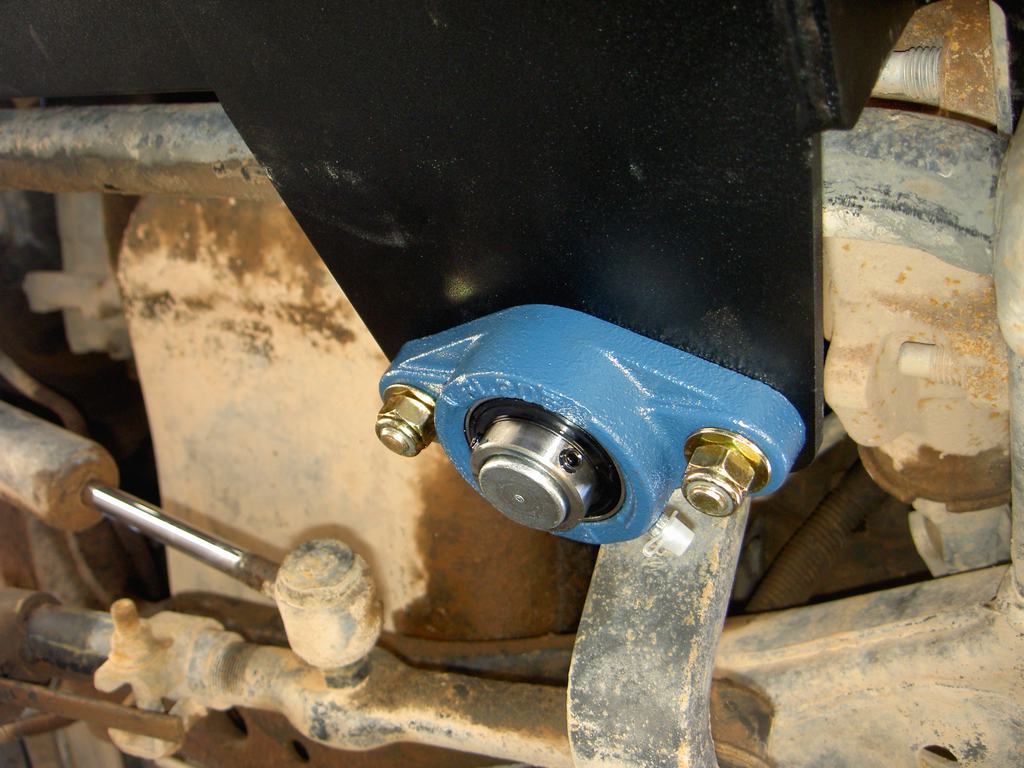
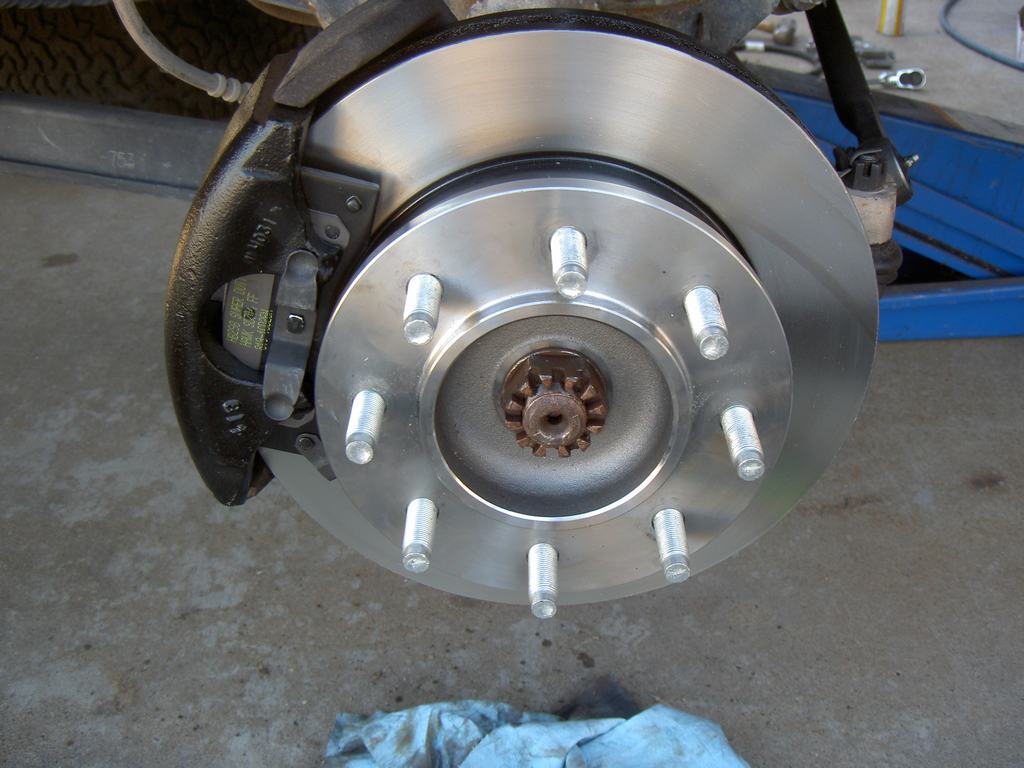
New hub, rotor, caliper and pads installed. Still needed to put the cotter pin back in
PICT6481.jpg
 
Back
Top Bottom