
You are using an out of date browser. It may not display this or other websites correctly.
You should upgrade or use an alternative browser.
You should upgrade or use an alternative browser.
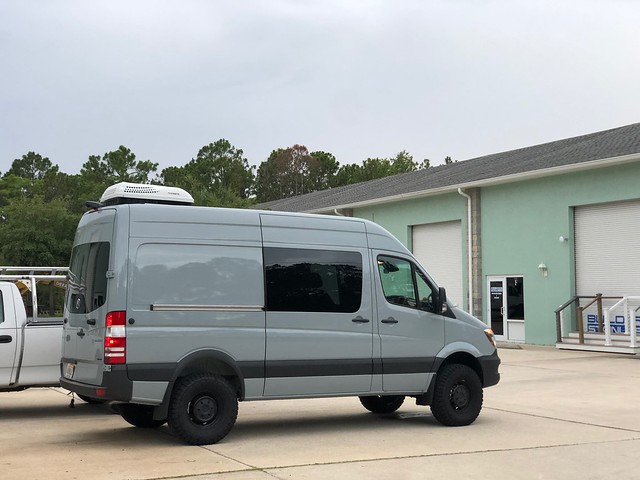
2018 Sprinter 4x4 144"...Take 2
- Thread starter grantwilson
- Start date
grantwilson
Adventurist
dont make money on posts lolThanks for the pics! I much prefer them to Videos.....
But i try and do both. This covers about three videos. Alot of people like to see the process, that lets them. Some just like to see pieces, this does that.
java230
Adventurist
dont make money on posts lol
But i try and do both. This covers about three videos. Alot of people like to see the process, that lets them. Some just like to see pieces, this does that.
Yeah I get it, I guess I'm just an old school build thread guy. Pictures and text... Watching a video is much more time consuming.
grantwilson
Adventurist
Thats why i try and do both. Sometimes its just easier to deal with video for some stuff than photos and a bunch of textYeah I get it, I guess I'm just an old school build thread guy. Pictures and text... Watching a video is much more time consuming.
grantwilson
Adventurist
Not a ton of pictures, just doing a bunch of small work that takes time.
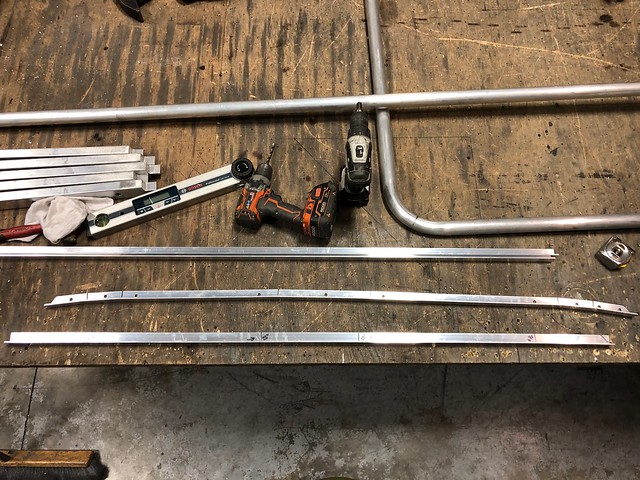
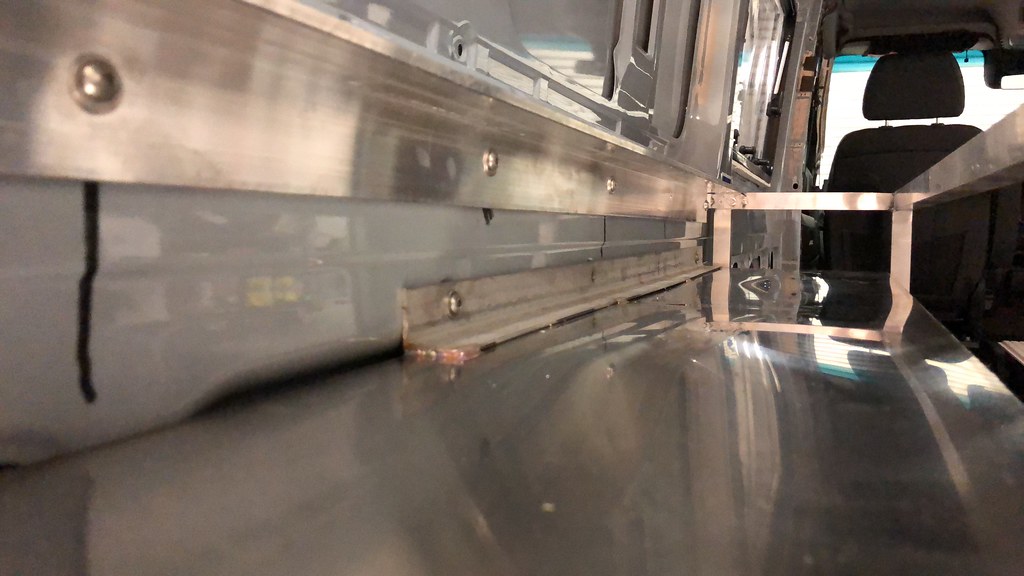
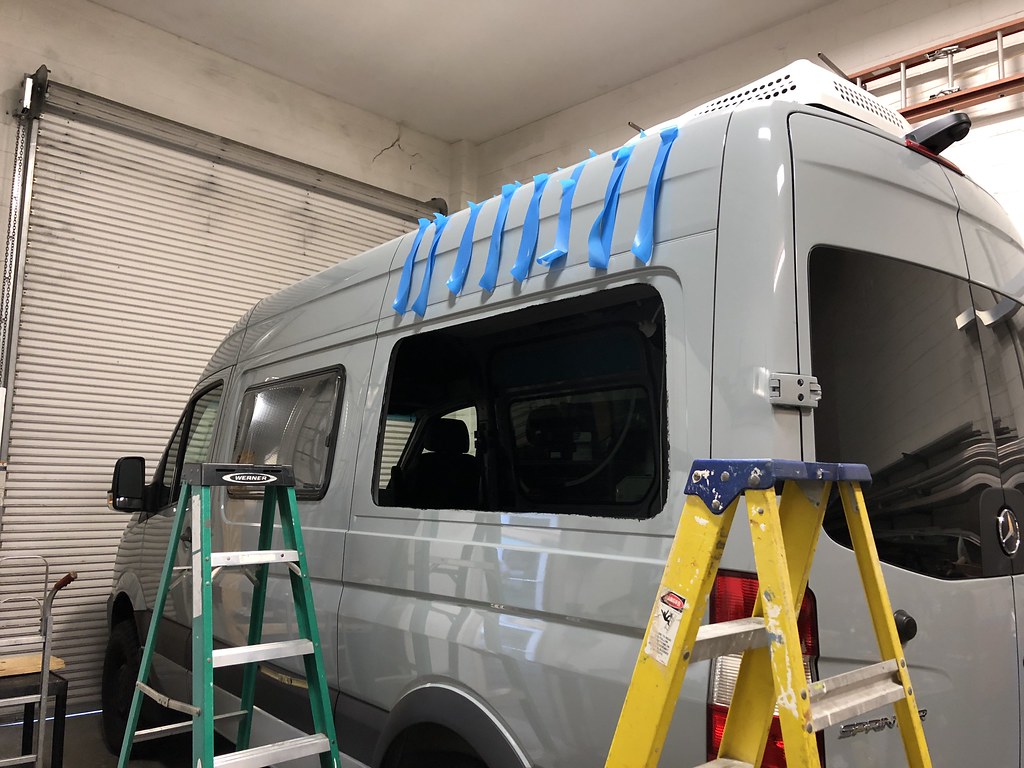
"Fabricated" some roof rails so I didn't have to negotiate the large number of holes in the roof beams.
used some 2" x 2" aluminum angle with some slits and bends and then rivnuts to the side of the roof cross beams.
 Untitled by Grant Wilson, on Flickr
 Untitled by Grant Wilson, on Flickr
 Untitled by Grant Wilson, on Flickr
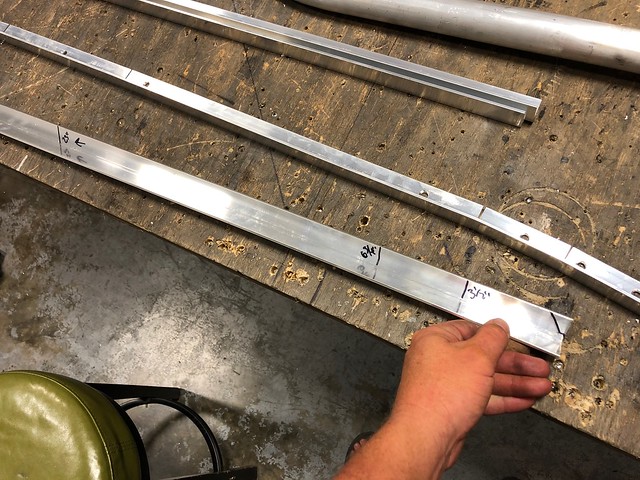
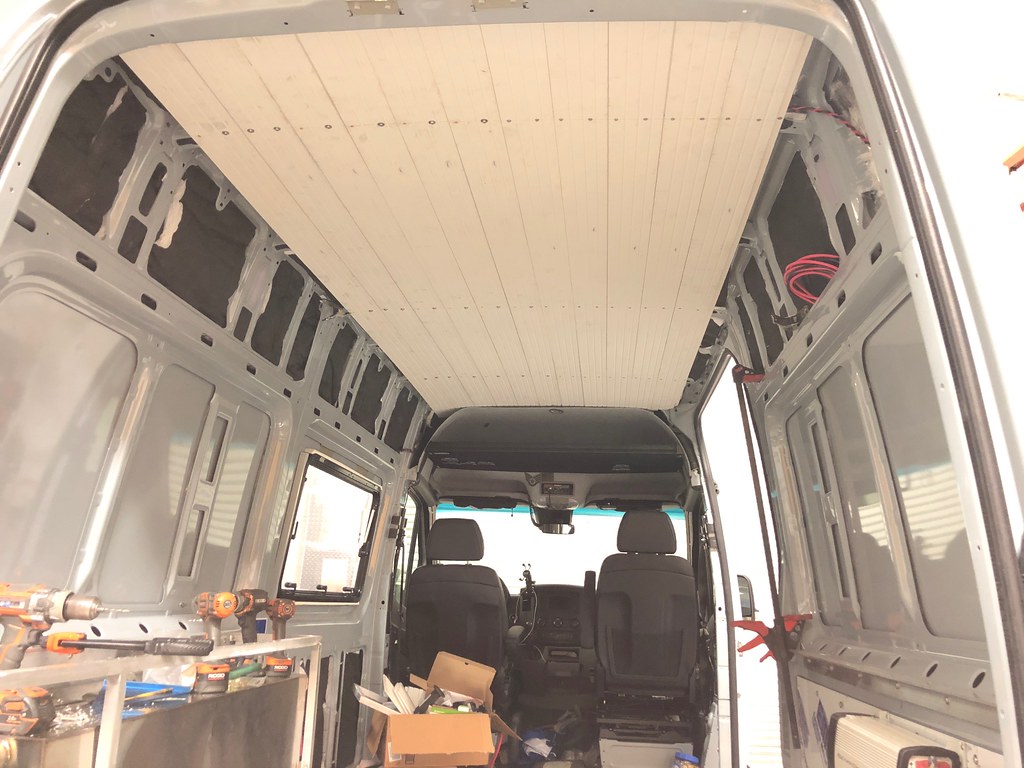
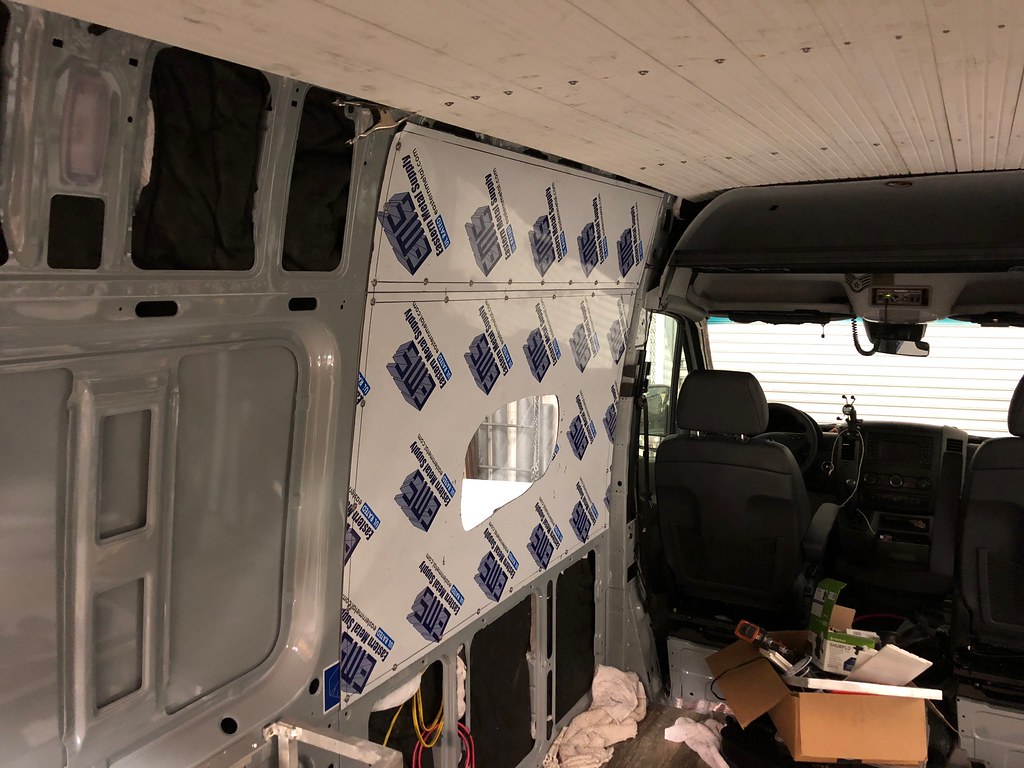
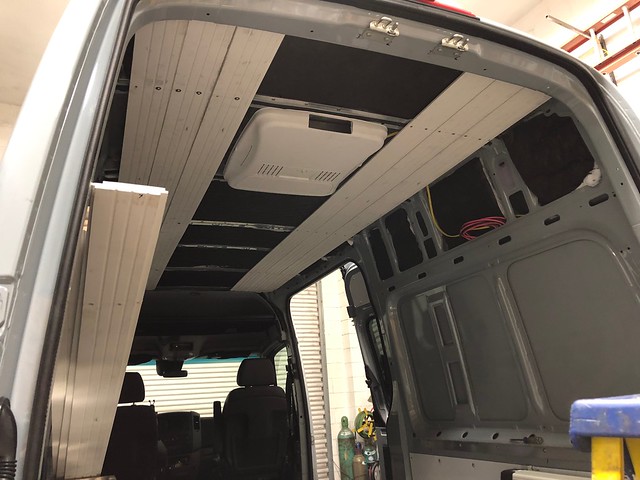
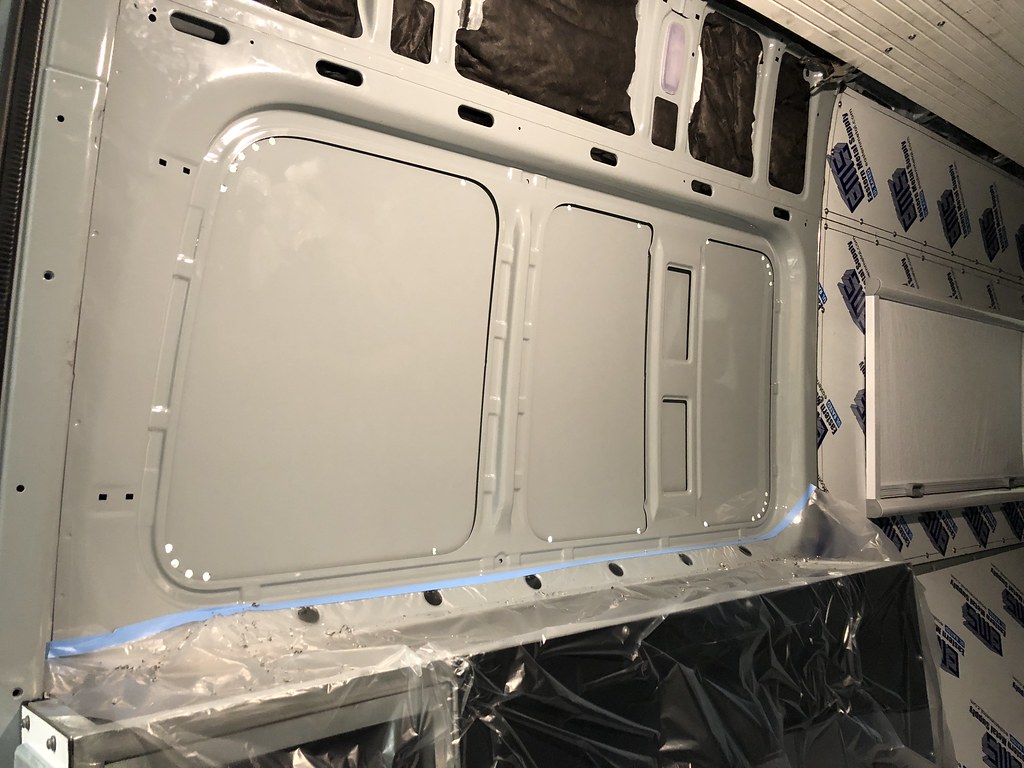
Then i mounted some of the boards for the ceiling at the end of the evening.
These take about 20-30 minutes a piece to do at a leisure pace.
Have to put them up, clamp them together so the lines are all lined up, then measure the hole position, predrill with 1/8", take it back off, open the wood to 5/32 and the angle for the rivnut, install the rivnuts, put the board back up and throw in the 1 1/2" Stainless Hex Button Screws
 Untitled by Grant Wilson, on Flickr
Did 10ft pieces this time so there are no splices. One continuous piece. Should finish the ceiling this afternoon, then label it, pull it all out, and paint it on saturday hopefully to put back in.
Also got some stuff back from paint
Flarespace Flares are all painted and pretty, may install on sunday hopefully.
 Untitled by Grant Wilson, on Flickr
The Tern Overland water and electrical covers are all painted as well to match. Super impressed with the job the shop did on all the stuff.
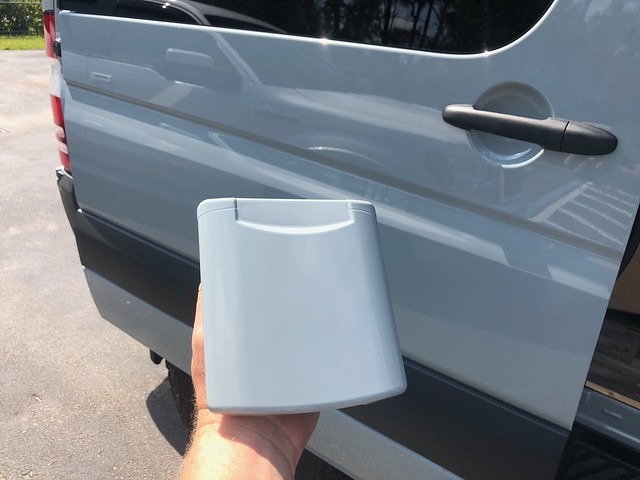 Untitled by Grant Wilson, on Flickr
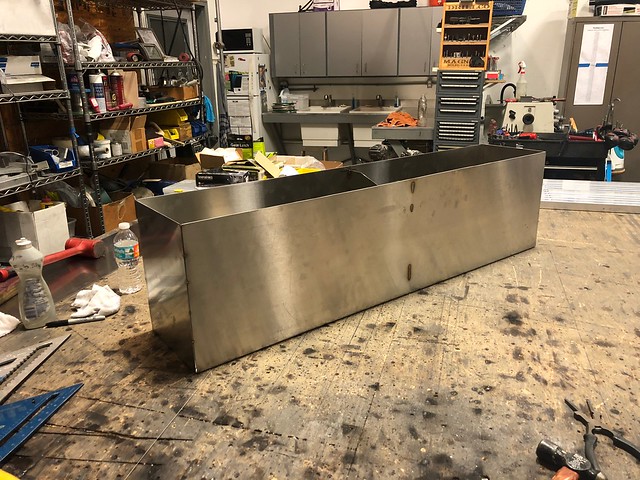
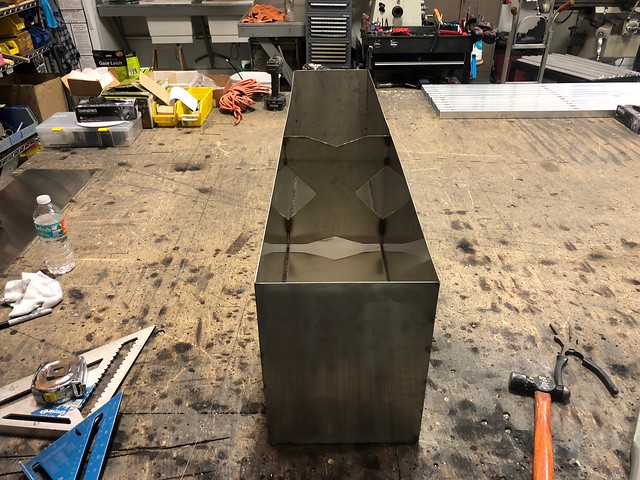
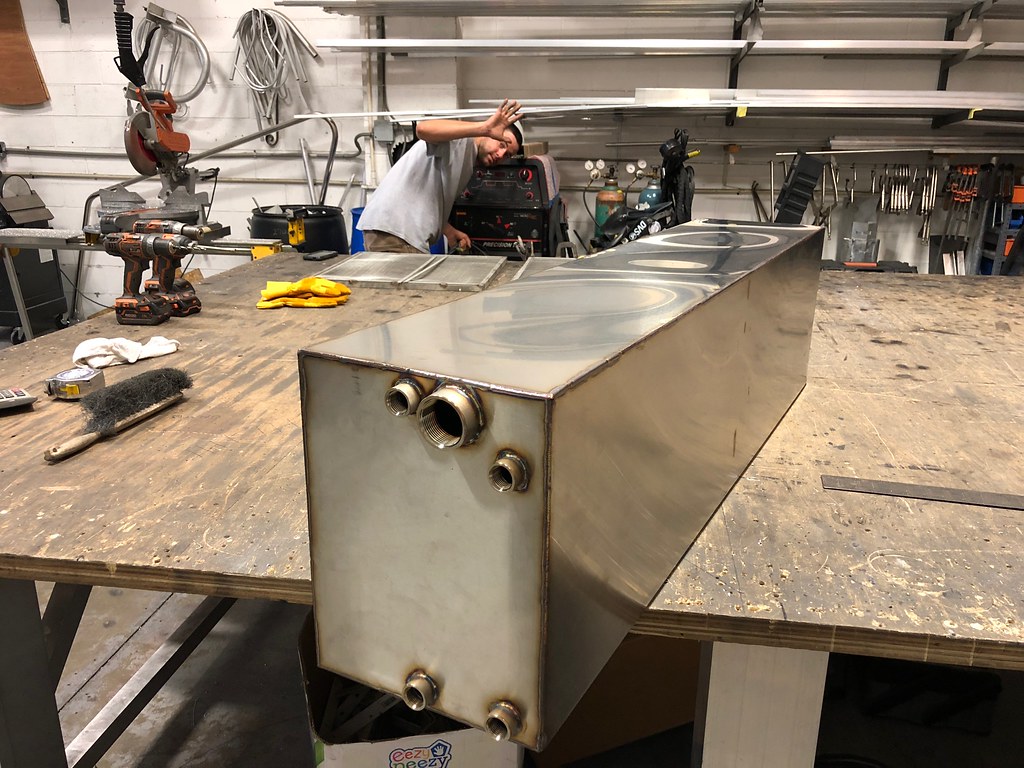
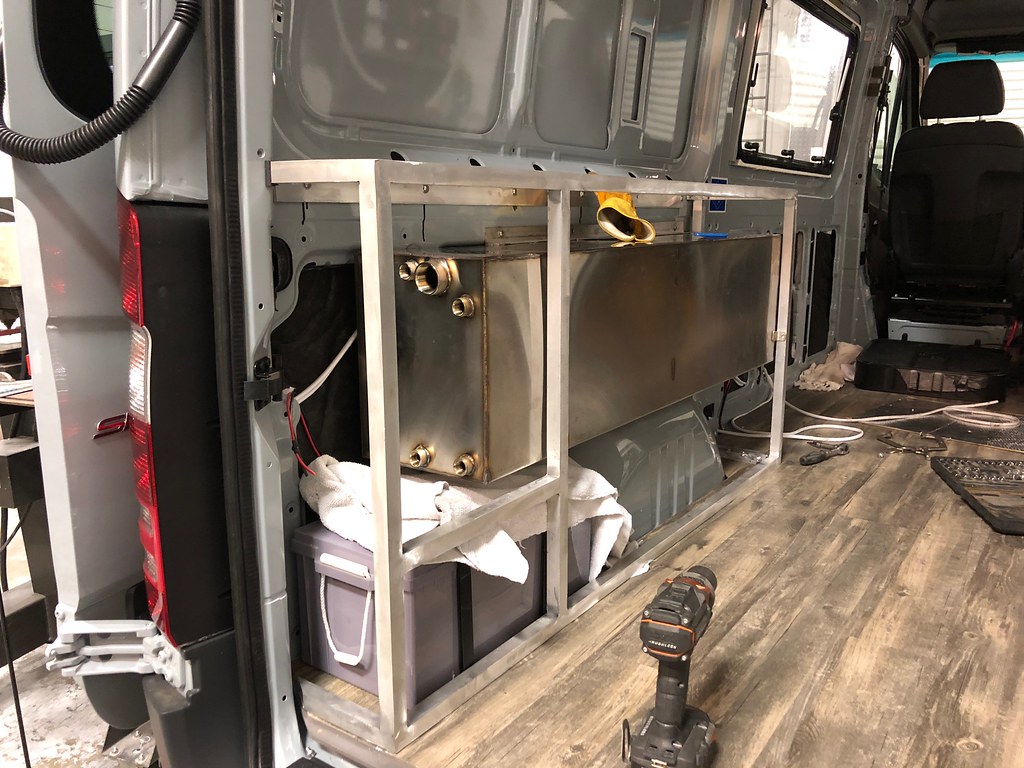
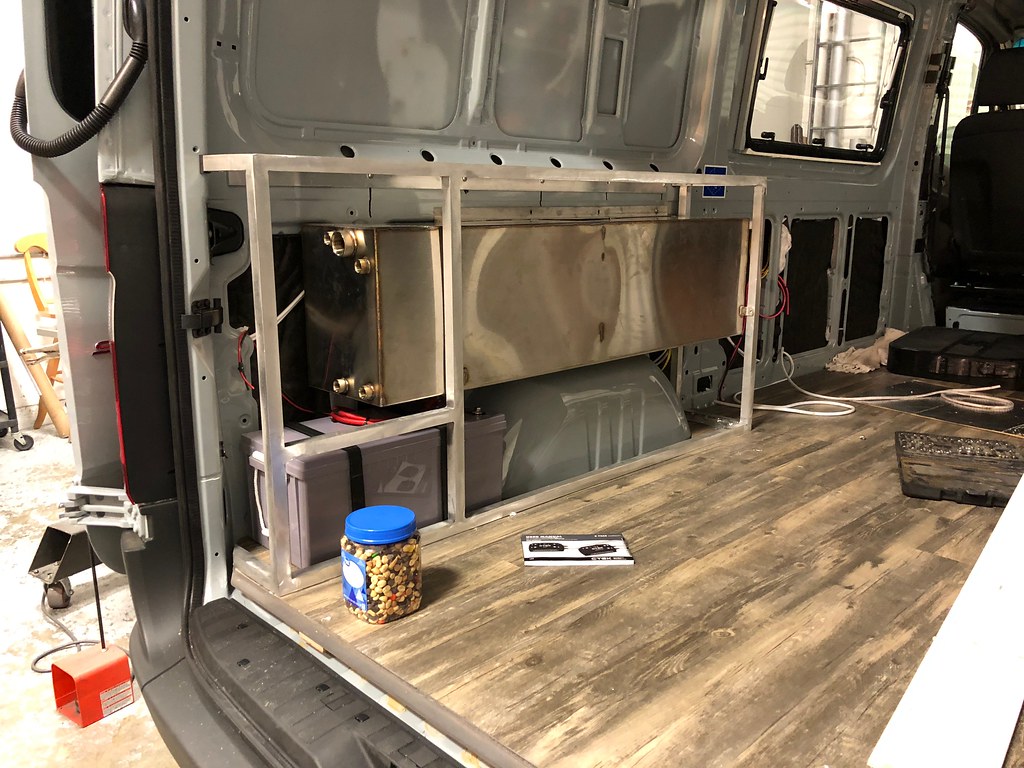
And Lastly, the driver side wheel well water tank
26 gallons
Will mount to the wall, and the structure I made
Leaves enough room to have the bedslide in this one, where the last setup was about 4" difference into the cargo area. Inches literally matter here. Crazy.
 Untitled by Grant Wilson, on Flickr
 Untitled by Grant Wilson, on Flickr
"Fabricated" some roof rails so I didn't have to negotiate the large number of holes in the roof beams.
used some 2" x 2" aluminum angle with some slits and bends and then rivnuts to the side of the roof cross beams.
Untitled by Grant Wilson, on FlickrUntitled by Grant Wilson, on FlickrUntitled by Grant Wilson, on FlickrThen i mounted some of the boards for the ceiling at the end of the evening.
These take about 20-30 minutes a piece to do at a leisure pace.
Have to put them up, clamp them together so the lines are all lined up, then measure the hole position, predrill with 1/8", take it back off, open the wood to 5/32 and the angle for the rivnut, install the rivnuts, put the board back up and throw in the 1 1/2" Stainless Hex Button Screws
Untitled by Grant Wilson, on FlickrDid 10ft pieces this time so there are no splices. One continuous piece. Should finish the ceiling this afternoon, then label it, pull it all out, and paint it on saturday hopefully to put back in.
Also got some stuff back from paint
Flarespace Flares are all painted and pretty, may install on sunday hopefully.
Untitled by Grant Wilson, on FlickrThe Tern Overland water and electrical covers are all painted as well to match. Super impressed with the job the shop did on all the stuff.
Untitled by Grant Wilson, on FlickrAnd Lastly, the driver side wheel well water tank
26 gallons
Will mount to the wall, and the structure I made
Leaves enough room to have the bedslide in this one, where the last setup was about 4" difference into the cargo area. Inches literally matter here. Crazy.
Untitled by Grant Wilson, on FlickrUntitled by Grant Wilson, on Flickrgrantwilson
Adventurist
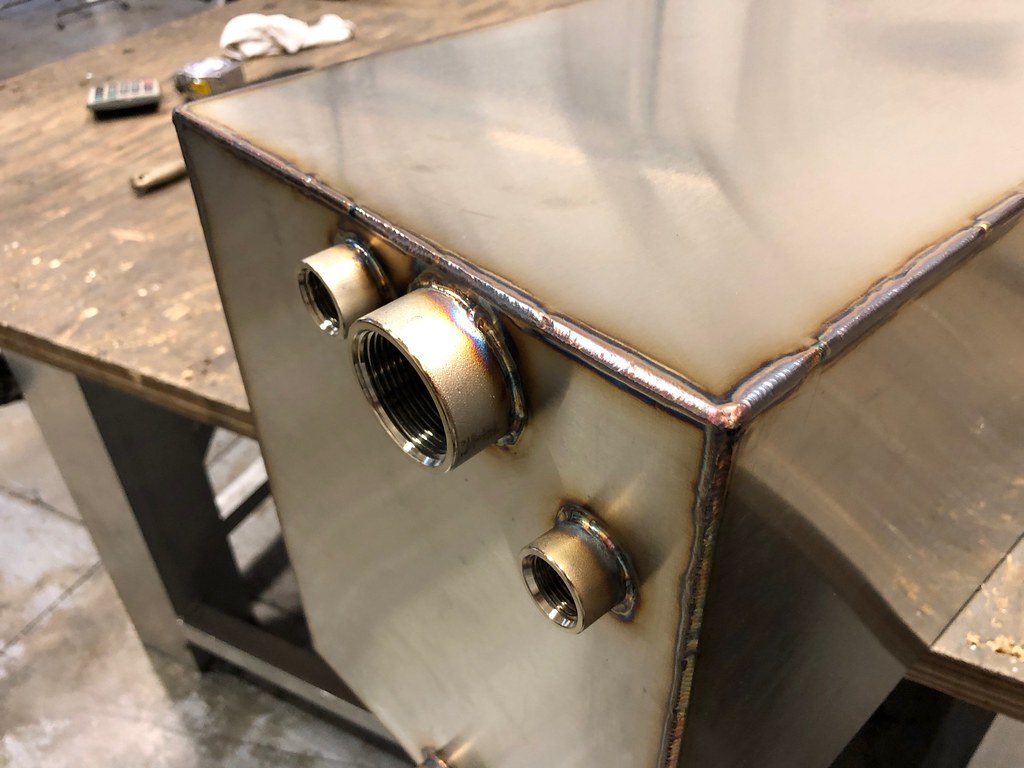
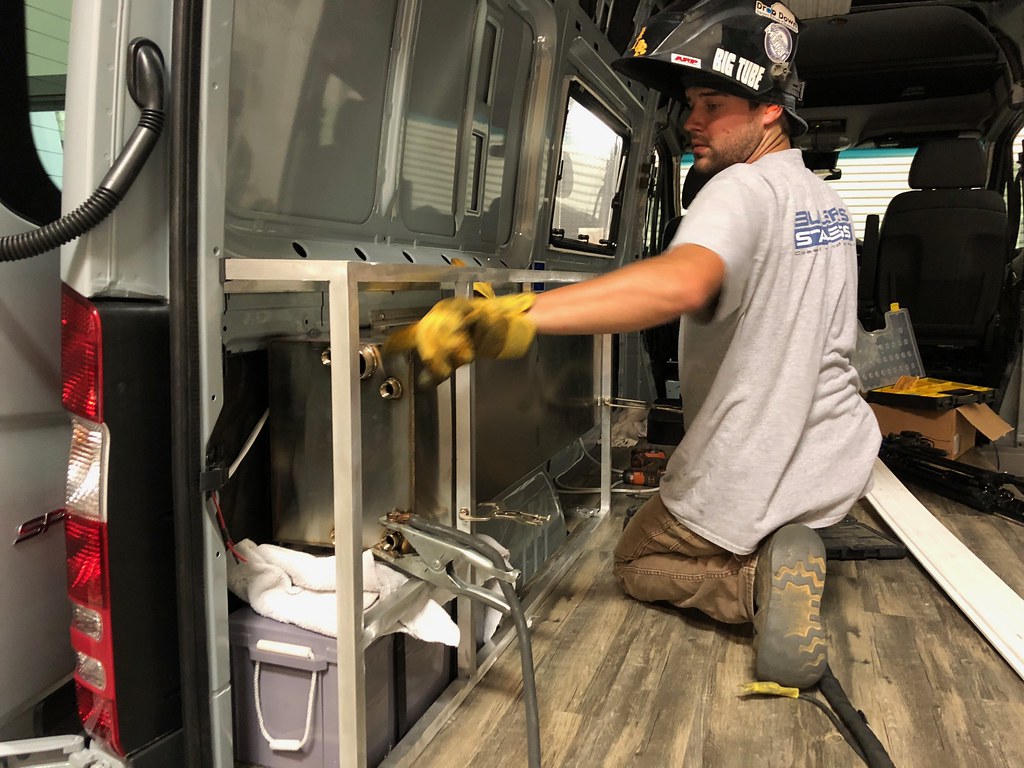
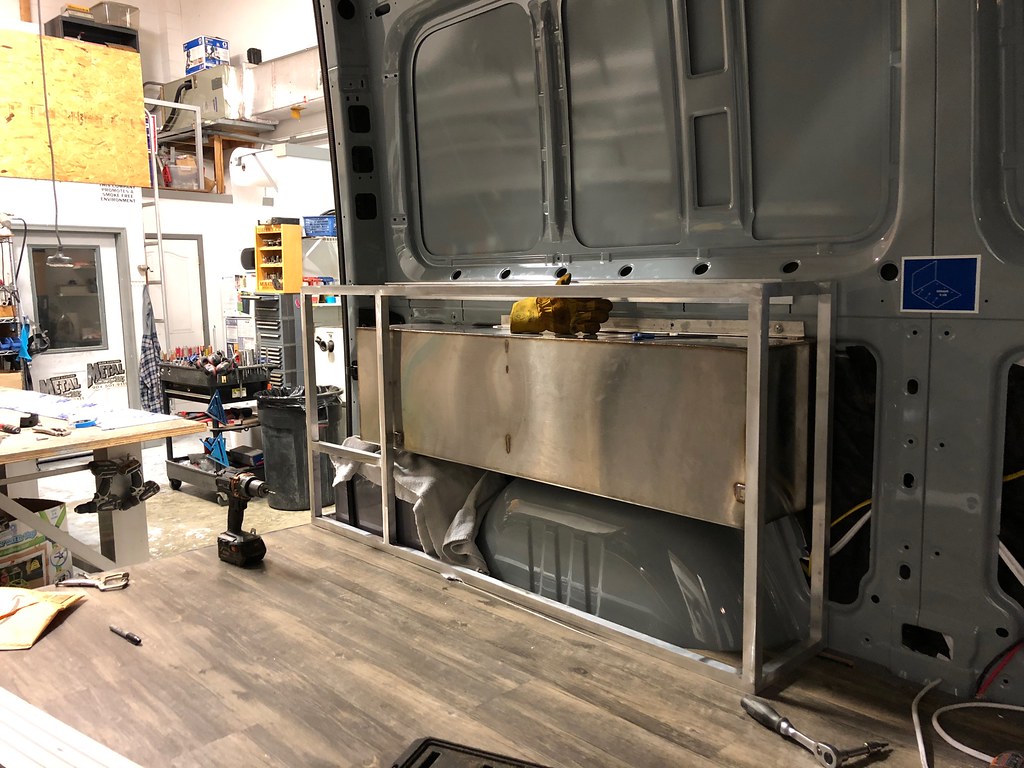
Water tank is all done, just gotta weld on the brackets for support, and install!
 Untitled by Grant Wilson, on Flickr
 Untitled by Grant Wilson, on Flickr
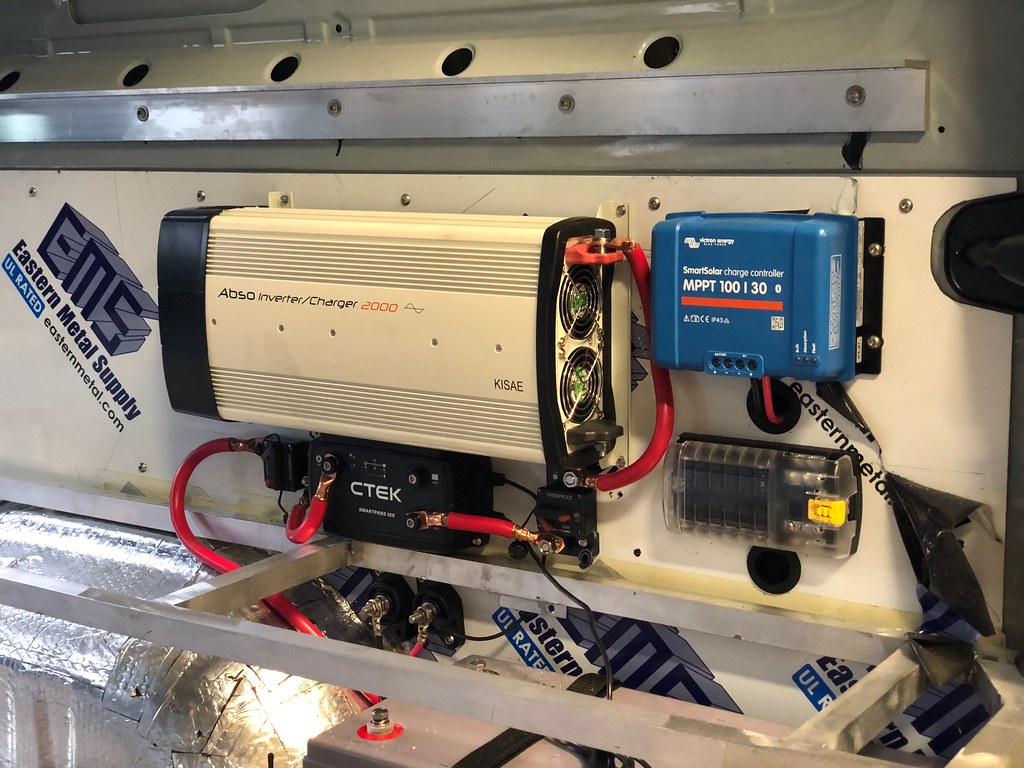
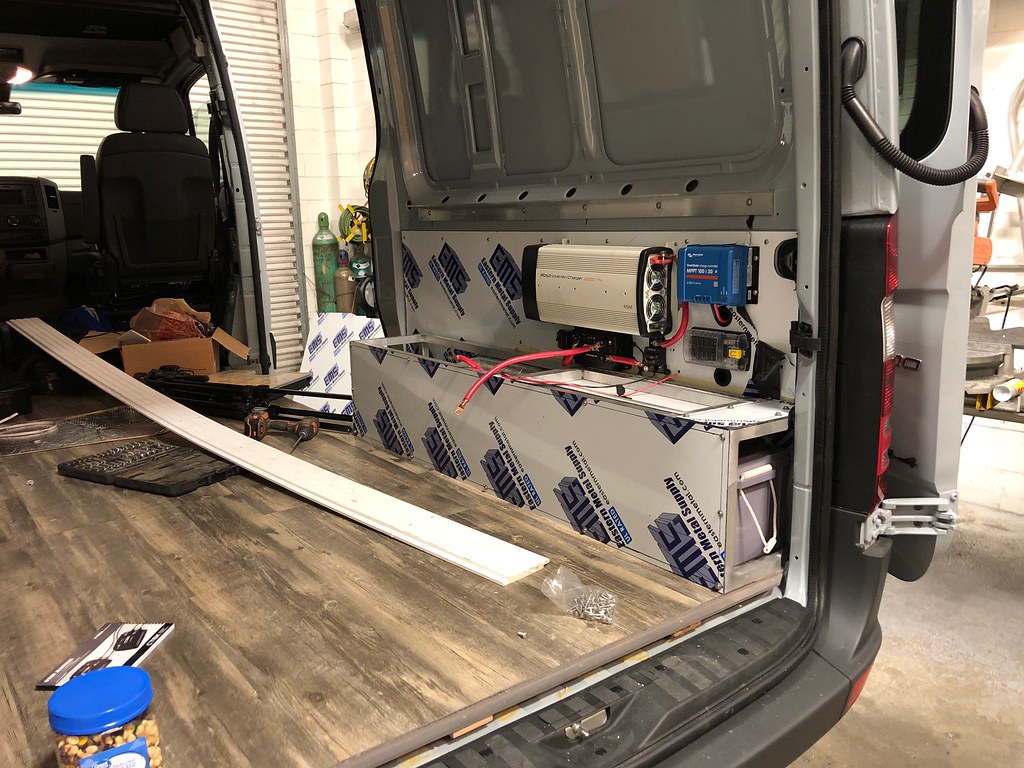
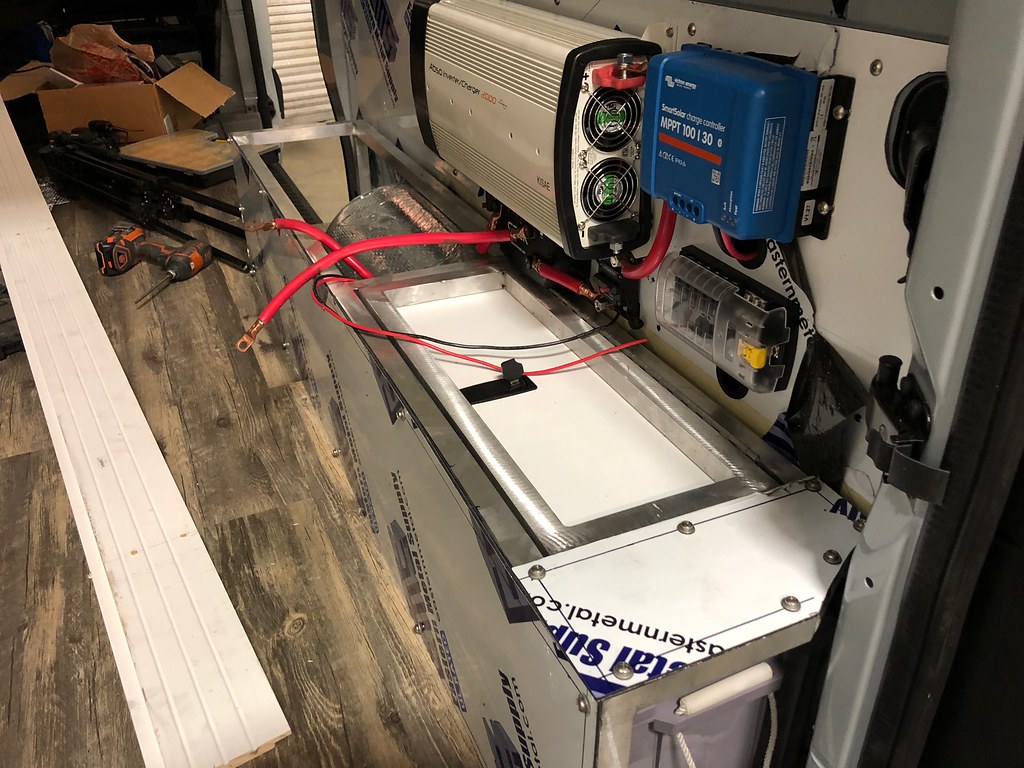
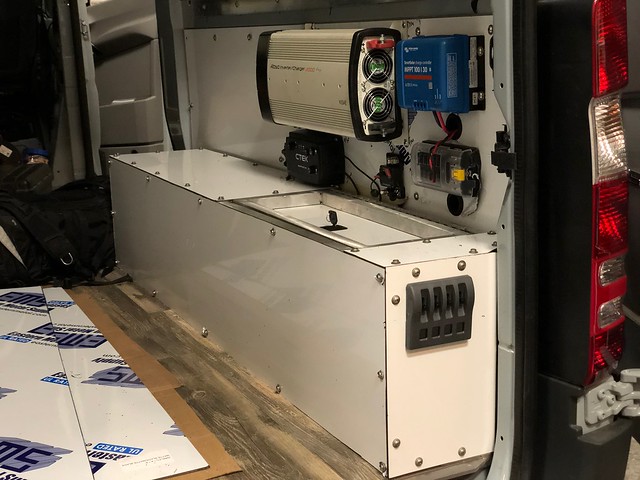
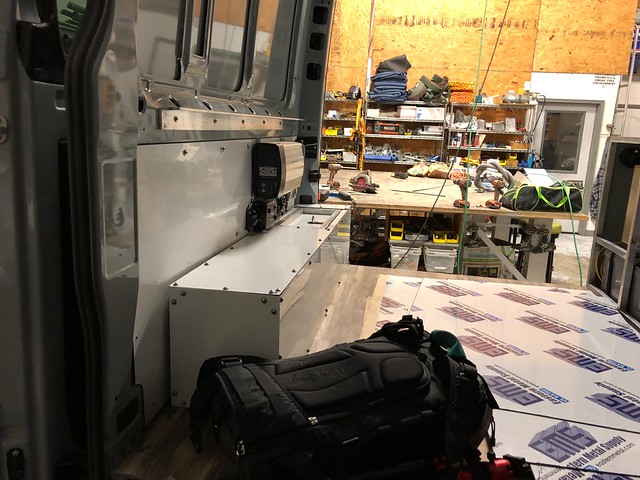
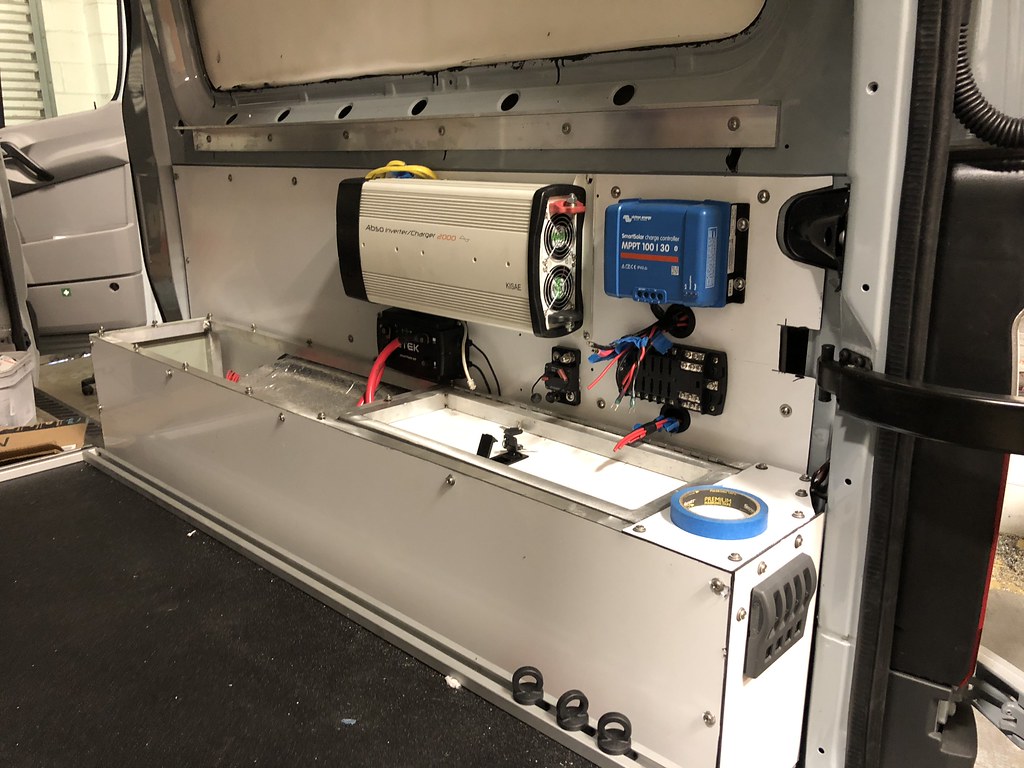
Starting to mock up electrical components to put on rivnuts and and heat shrink and stuff. Gotta build some 90* terminal blocks for the inverter to clean up the wiring a bit.
 Untitled by Grant Wilson, on Flickr
Untitled by Grant Wilson, on FlickrUntitled by Grant Wilson, on FlickrStarting to mock up electrical components to put on rivnuts and and heat shrink and stuff. Gotta build some 90* terminal blocks for the inverter to clean up the wiring a bit.
Untitled by Grant Wilson, on Flickrgrantwilson
Adventurist
A big thing is done, and marked off the list.
Water tank is finished and installed. Bolts to the wall and the structure for the side to support it.
 Untitled by Grant Wilson, on Flickr
 Untitled by Grant Wilson, on Flickr
 Untitled by Grant Wilson, on Flickr
 Untitled by Grant Wilson, on Flickr
 Untitled by Grant Wilson, on Flickr
 Untitled by Grant Wilson, on Flickr
 Untitled by Grant Wilson, on Flickr
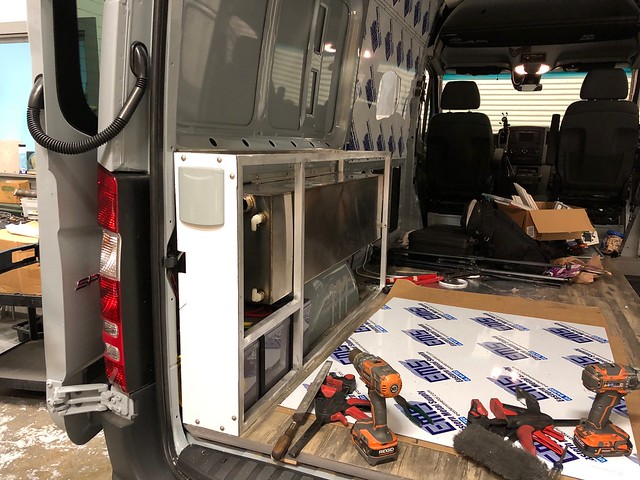
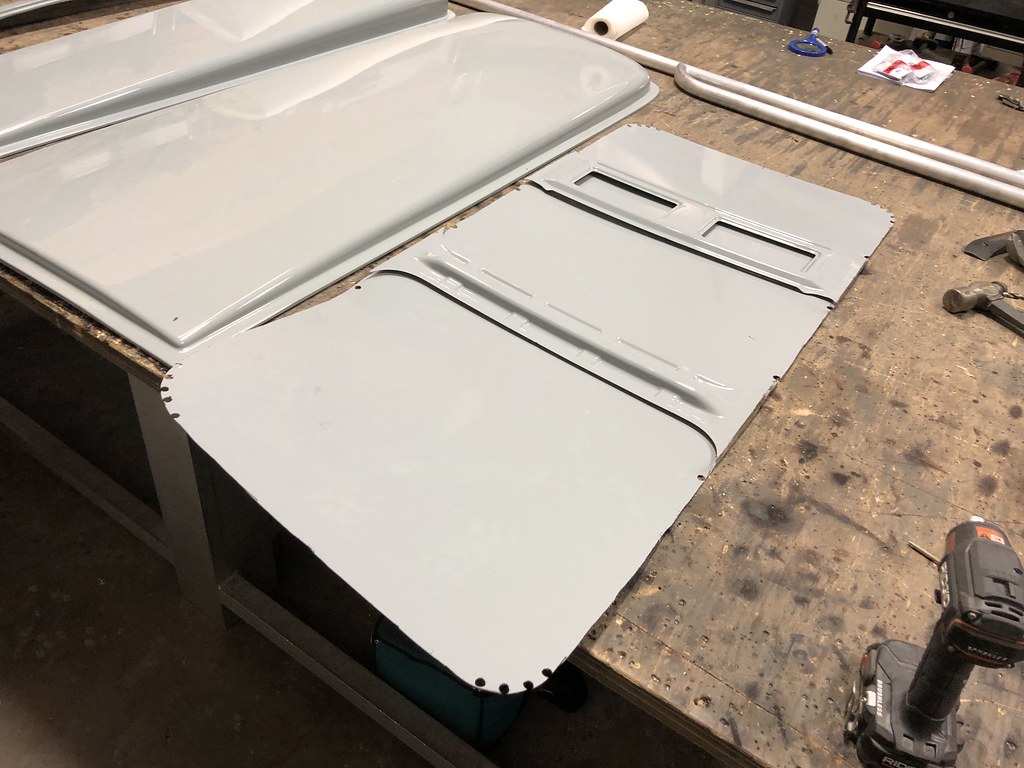
Also started to skin the passenger side battery/wheel well cover
Will also be covering everything panneled with foam and fabric for a nice touch surface on everything. got some nice outdoor fabric that should hold up quite well.
 Untitled by Grant Wilson, on Flickr
 Untitled by Grant Wilson, on Flickr
I do have to move the Ctek forward a bit, but this is why we mock stuff up right?
Water tank is finished and installed. Bolts to the wall and the structure for the side to support it.
Untitled by Grant Wilson, on FlickrUntitled by Grant Wilson, on FlickrUntitled by Grant Wilson, on FlickrUntitled by Grant Wilson, on FlickrUntitled by Grant Wilson, on FlickrUntitled by Grant Wilson, on FlickrUntitled by Grant Wilson, on FlickrAlso started to skin the passenger side battery/wheel well cover
Will also be covering everything panneled with foam and fabric for a nice touch surface on everything. got some nice outdoor fabric that should hold up quite well.
Untitled by Grant Wilson, on FlickrUntitled by Grant Wilson, on FlickrI do have to move the Ctek forward a bit, but this is why we mock stuff up right?
grantwilson
Adventurist
I got alot done today, but it doesn't look like it lol.
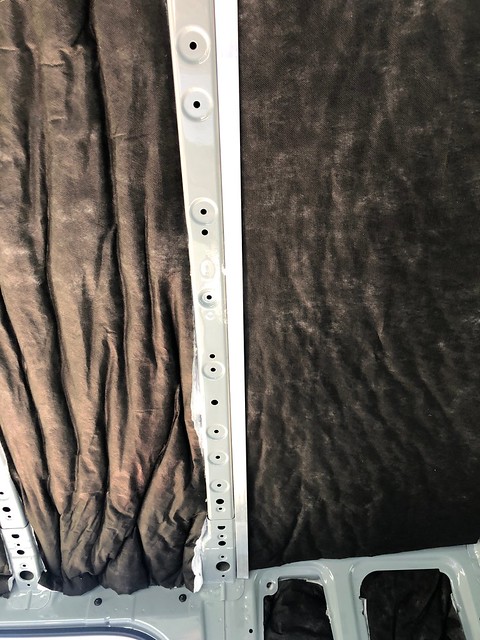
The ceiling is about 90% up. gotta make some side pieces to fill that gap on the edges, then pull it down, finish doing some nuterts and paint it all.
 Untitled by Grant Wilson, on Flickr
Took far too long to do. Put every single piece up, measured where to drill the holes so every single bolt is in the same spot on each board. a bit over the top lol
 Untitled by Grant Wilson, on Flickr
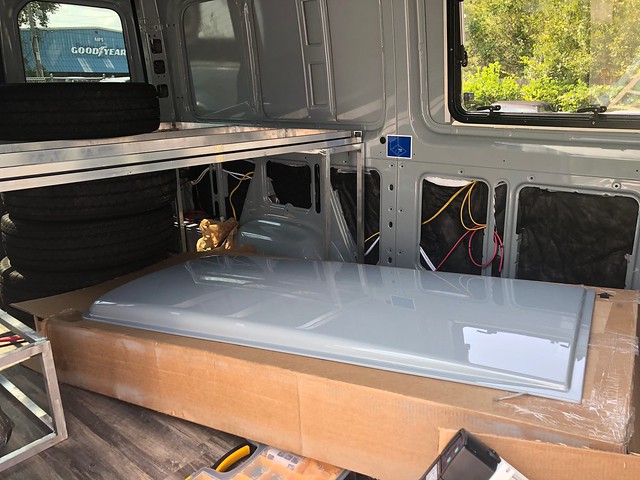
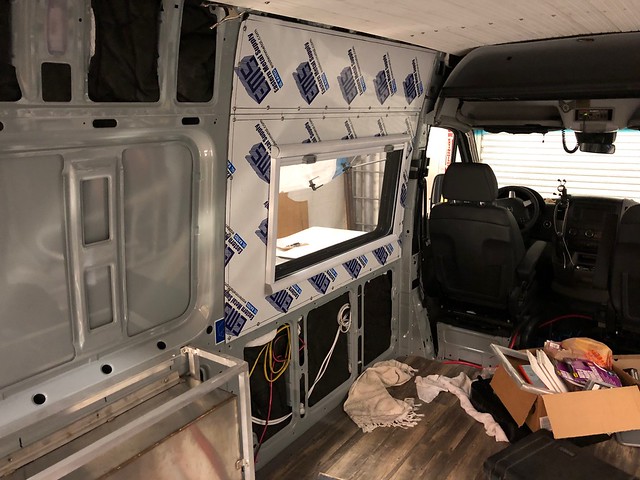
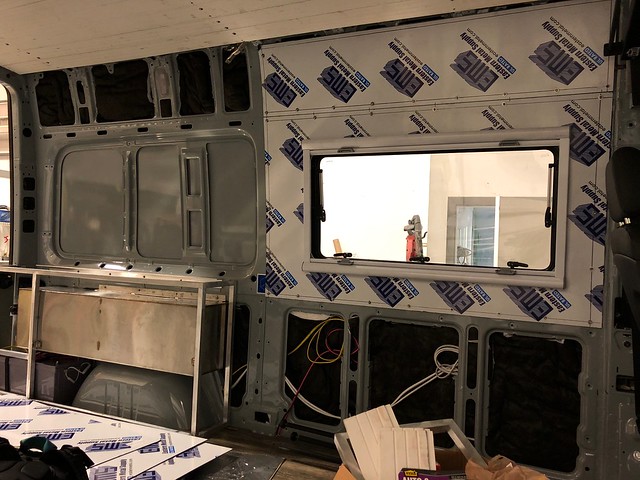
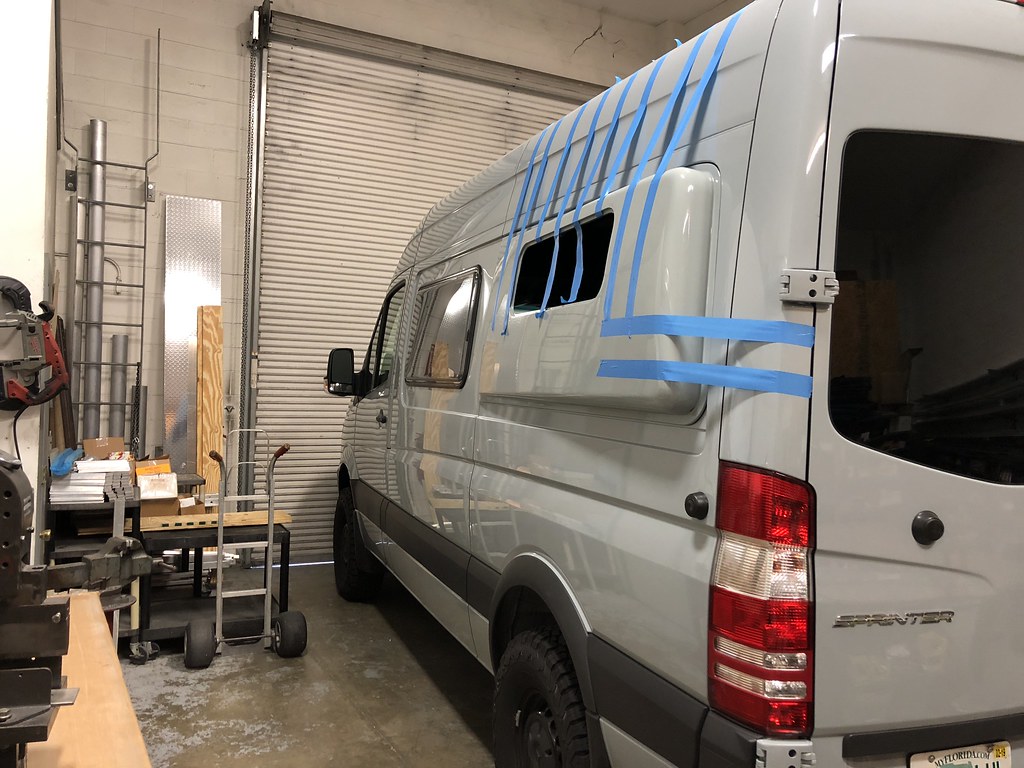
Finally also got most of that driver wall installed. Tomorrow i will cut out the window and work on the trim piece as well as the lower panel, fuse panel installation for that wall and the electrical outlet installation as well. fingers crossed anyways.
Have to get the whole rear all done by thursday. Bedslide should be here thursday, so need to get the side panels all buttoned up before then. This weekend iw ill install the Van Compass suspension as well!
The ceiling is about 90% up. gotta make some side pieces to fill that gap on the edges, then pull it down, finish doing some nuterts and paint it all.
Untitled by Grant Wilson, on FlickrTook far too long to do. Put every single piece up, measured where to drill the holes so every single bolt is in the same spot on each board. a bit over the top lol
Untitled by Grant Wilson, on FlickrFinally also got most of that driver wall installed. Tomorrow i will cut out the window and work on the trim piece as well as the lower panel, fuse panel installation for that wall and the electrical outlet installation as well. fingers crossed anyways.
Have to get the whole rear all done by thursday. Bedslide should be here thursday, so need to get the side panels all buttoned up before then. This weekend iw ill install the Van Compass suspension as well!
grantwilson
Adventurist
and again more progress
I hate it, because I only really get 2-3 hours after work to mess with it before i have to get home, and 45 minutes of that is spend getting everything set up and cleaning up at the end. So I never get what I want done lol.
Finished skinning the passenger side and mounted all the electrical items in final locations. The little open spot down there is annoying me, But i will figure out something to put there. The panels won't stay white (some are black), everything will be covered with 1/2" foam and a really cool outdoor fabric that is a killer blue color the wife picked, but I wont be doing that until I am done touching whatever area I'm working on so it doesn't get dirty. Most likely the very last thing to be done.
 Untitled by Grant Wilson, on Flickr
Blue sea switch panel is mounted on the back of the cover, easy to turn things on and off (water pump, under bed lights, outlets etc)
 Untitled by Grant Wilson, on Flickr
Left a small gap between the two to prevent any rattling or squeaking, and allow for cable passthru for smaller gauges
 Untitled by Grant Wilson, on Flickr
Water tank back panel, and Tern Overland water fill are mounted. The color is off on the cover, so gotta take that part back and get them all resprayed
 Untitled by Grant Wilson, on Flickr
 Untitled by Grant Wilson, on Flickr
 Untitled by Grant Wilson, on Flickr
And got the Tern Overland window shade unit installed as well. Trying to source some 3" thick foam to use to trim out the space between the window and the wall, not sure what i will use for that just yet.
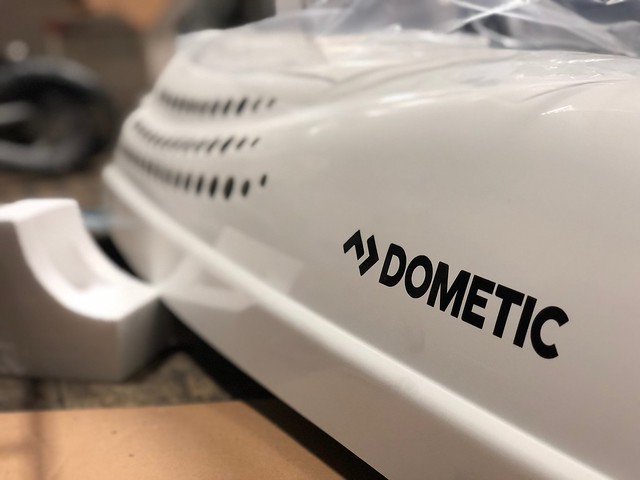
Overall somewhat satisfied. I would like to get the water tank unit covered today, and the lower driver wall skinned as well. If i can manage that, I will be happy. The Van Compass suspension gets here tomorrow, and the Bedslide on thursday. By having the rear all done, i can put the bedslide in and be done with that and the suspension this weekend hopefully. The dometic stuff should be on the way (penguin 2 ac, 75dz fridge, stove/sink) and im kind of waiting on them so i can build some important parts before i go too far and have to remake things because of size issues.
I hate it, because I only really get 2-3 hours after work to mess with it before i have to get home, and 45 minutes of that is spend getting everything set up and cleaning up at the end. So I never get what I want done lol.
Finished skinning the passenger side and mounted all the electrical items in final locations. The little open spot down there is annoying me, But i will figure out something to put there. The panels won't stay white (some are black), everything will be covered with 1/2" foam and a really cool outdoor fabric that is a killer blue color the wife picked, but I wont be doing that until I am done touching whatever area I'm working on so it doesn't get dirty. Most likely the very last thing to be done.
Untitled by Grant Wilson, on FlickrBlue sea switch panel is mounted on the back of the cover, easy to turn things on and off (water pump, under bed lights, outlets etc)
Untitled by Grant Wilson, on FlickrLeft a small gap between the two to prevent any rattling or squeaking, and allow for cable passthru for smaller gauges
Untitled by Grant Wilson, on FlickrWater tank back panel, and Tern Overland water fill are mounted. The color is off on the cover, so gotta take that part back and get them all resprayed
Untitled by Grant Wilson, on FlickrUntitled by Grant Wilson, on FlickrUntitled by Grant Wilson, on FlickrAnd got the Tern Overland window shade unit installed as well. Trying to source some 3" thick foam to use to trim out the space between the window and the wall, not sure what i will use for that just yet.
Overall somewhat satisfied. I would like to get the water tank unit covered today, and the lower driver wall skinned as well. If i can manage that, I will be happy. The Van Compass suspension gets here tomorrow, and the Bedslide on thursday. By having the rear all done, i can put the bedslide in and be done with that and the suspension this weekend hopefully. The dometic stuff should be on the way (penguin 2 ac, 75dz fridge, stove/sink) and im kind of waiting on them so i can build some important parts before i go too far and have to remake things because of size issues.
grantwilson
Adventurist
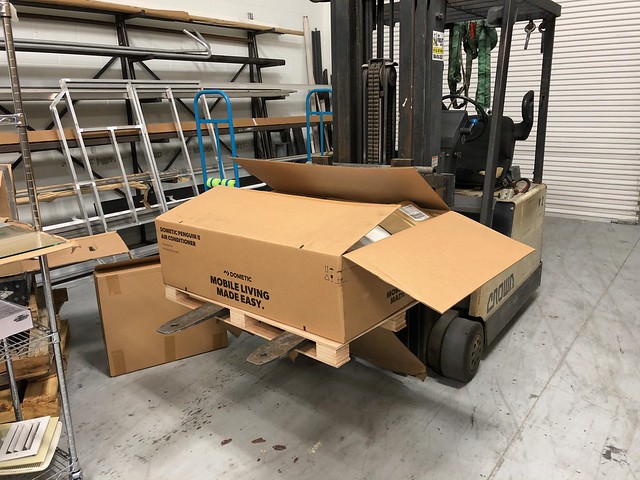
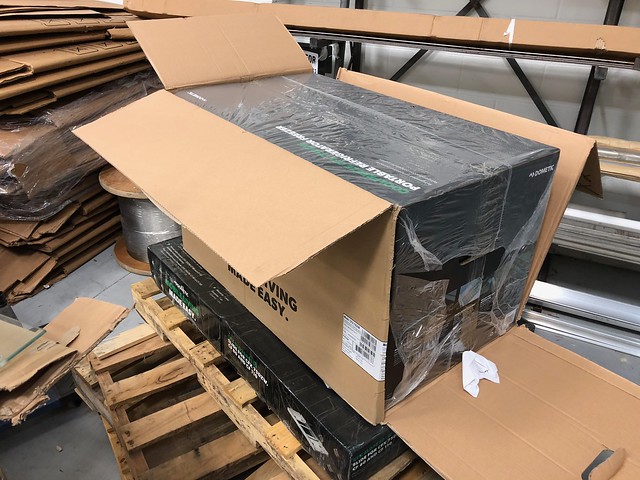
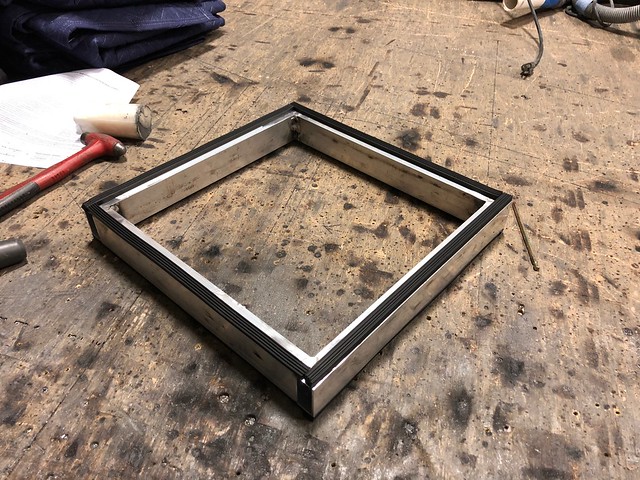
A number of things, such as finishing the roof, ordering the roof rack from Voyager Offroad and 110 wiring and stuff have been waiting on the arrival of the Dometic Penguin 2 AC unit. I got the version with the thermostat, well to be fancy or something. No heat strip since i have a Diesel heater. Plan is to run off the CTEK Smartpass and Inverter when driving/stationary whatever. I can also get a couple hours off the battery, or run from a honda 2000 generator when beach camping.
 Untitled by Grant Wilson, on Flickr
 Untitled by Grant Wilson, on Flickr
The CFX75 and slide also came in as well, but that wont be messed with until next week most likely.
 Untitled by Grant Wilson, on Flickr
 Untitled by Grant Wilson, on Flickr
Took the cover off to well, take the cover off and take a look at all the stuff inside. Everything looks pretty well built and fastened. Was mainly checking to see if anything is going to break or vibrate loose from taking the van off sweet jumps. Doesn't look too shabby.
 Untitled by Grant Wilson, on Flickr
Had to make a roughly 2" spacer to space the mounting plate down to the level it needs to be at. sealed on both sides with weatherstripping
 Untitled by Grant Wilson, on Flickr
all mounted up and pretty. Next up is wiring, then trimming the wood to fit
 Untitled by Grant Wilson, on Flickr
Id say it looks pretty sly up there.
I will be color matching it as well.
Untitled by Grant Wilson, on FlickrUntitled by Grant Wilson, on FlickrThe CFX75 and slide also came in as well, but that wont be messed with until next week most likely.
Untitled by Grant Wilson, on FlickrUntitled by Grant Wilson, on FlickrTook the cover off to well, take the cover off and take a look at all the stuff inside. Everything looks pretty well built and fastened. Was mainly checking to see if anything is going to break or vibrate loose from taking the van off sweet jumps. Doesn't look too shabby.
Untitled by Grant Wilson, on FlickrHad to make a roughly 2" spacer to space the mounting plate down to the level it needs to be at. sealed on both sides with weatherstripping
Untitled by Grant Wilson, on Flickrall mounted up and pretty. Next up is wiring, then trimming the wood to fit
Untitled by Grant Wilson, on FlickrId say it looks pretty sly up there.
I will be color matching it as well.
grantwilson
Adventurist
Im drained. Getting to the point where i have to take some time off lol. on top of 40 hours a week, i am averaging another 25 hours on the van, and its catching up hah. I think i may take a few days off after this weekend (or maybe this weekend)
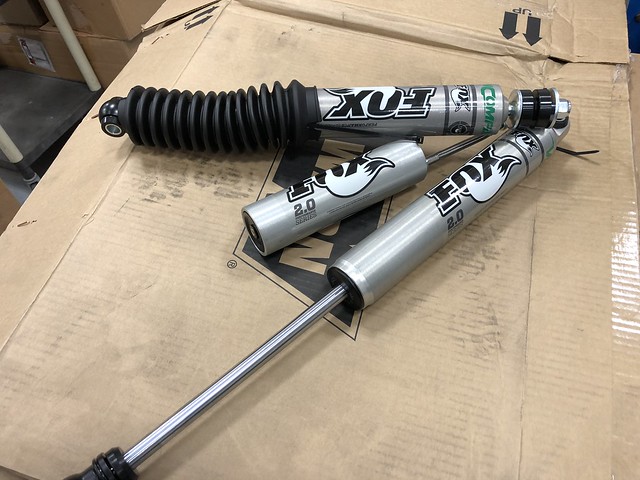
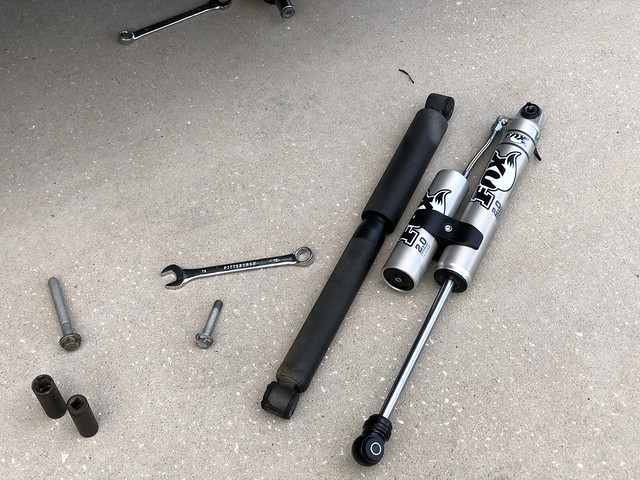
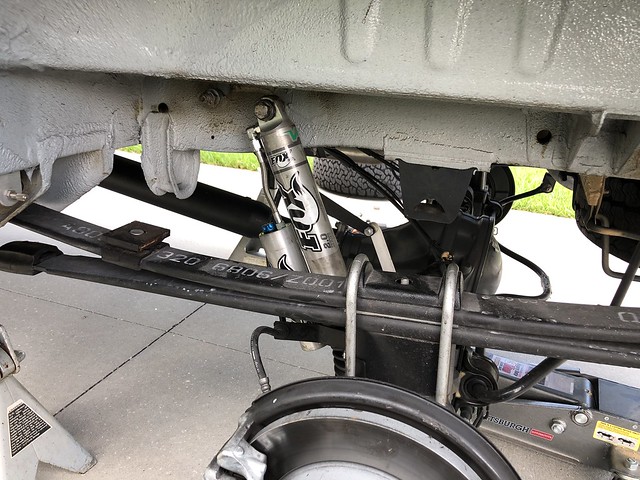
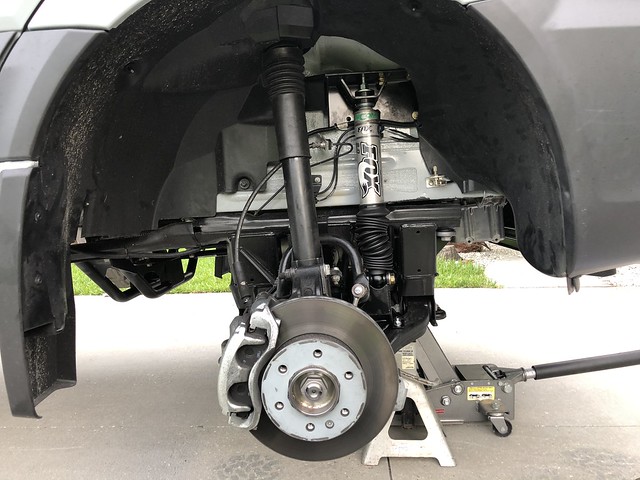
The Van Compass suspension came in and opted to go ahead and put in the killer Fox stuff. TBH never was or am a huge fan of fox. But its the only option out there, so it is what it is. Did the rear, and after putting them in backwards the first time because i didnt read directions, and flopping it back around, i still got the rears done in an hour. at 630, I start the front, see the instructions said 4-6 in a driveway, or 3-4 for a pro on a lift.
Hold my beer.
Knocked out the front in just under 3 in a driveway sitting on a tire. Did a little hooning on the way to work on some powerline trails and the difference is so night and day, that it is hard to explain.
It just works so much better. No more bouncing around, the rear especially is a huge difference. The back end even with a full load hopped and bounced its way down the trail. Not anymore. Cant wait to get the sumo springs and the rear spring pack in when it is all said and done.
 Untitled by Grant Wilson, on Flickr
 Untitled by Grant Wilson, on Flickr
 Untitled by Grant Wilson, on Flickr
 Untitled by Grant Wilson, on Flickr
The Van Compass suspension came in and opted to go ahead and put in the killer Fox stuff. TBH never was or am a huge fan of fox. But its the only option out there, so it is what it is. Did the rear, and after putting them in backwards the first time because i didnt read directions, and flopping it back around, i still got the rears done in an hour. at 630, I start the front, see the instructions said 4-6 in a driveway, or 3-4 for a pro on a lift.
Hold my beer.
Knocked out the front in just under 3 in a driveway sitting on a tire. Did a little hooning on the way to work on some powerline trails and the difference is so night and day, that it is hard to explain.
It just works so much better. No more bouncing around, the rear especially is a huge difference. The back end even with a full load hopped and bounced its way down the trail. Not anymore. Cant wait to get the sumo springs and the rear spring pack in when it is all said and done.
Untitled by Grant Wilson, on FlickrUntitled by Grant Wilson, on FlickrUntitled by Grant Wilson, on FlickrUntitled by Grant Wilson, on Flickrgrantwilson
Adventurist
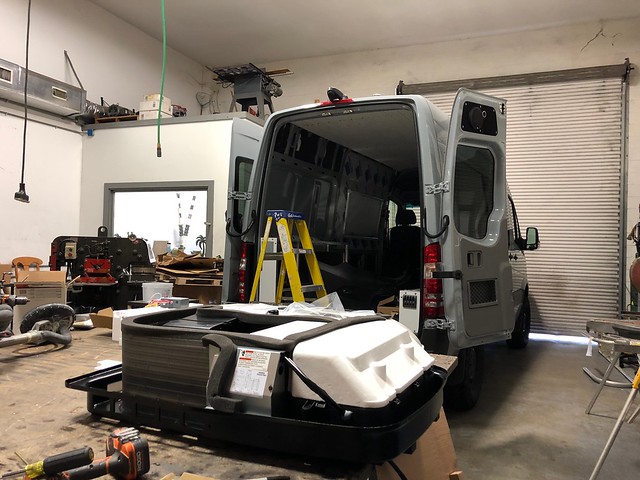
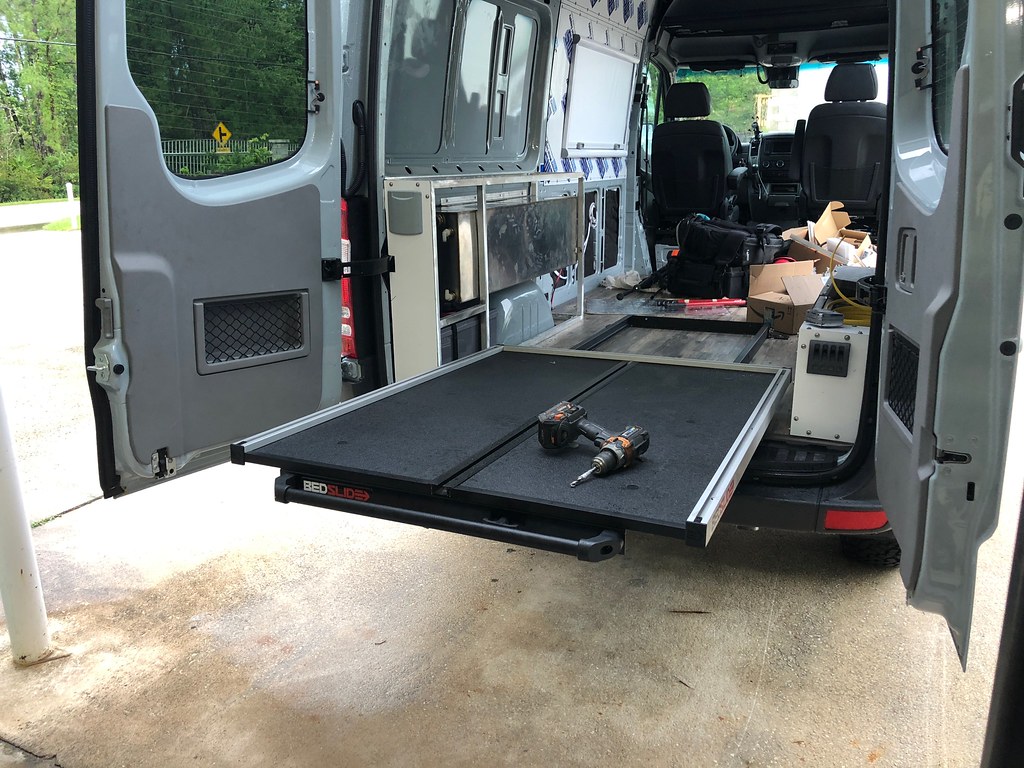
In the last van I built, not having a way to get cargo out from under the cavernous under bed storage area was super annoying. On this one, I decided I wanted to rectify that very early on in the build.
I designed the whole rear end so the side panels for wheel well covers and stuff were as tight as possible (roughly extend 2" from the wheel well total, due to battery width)
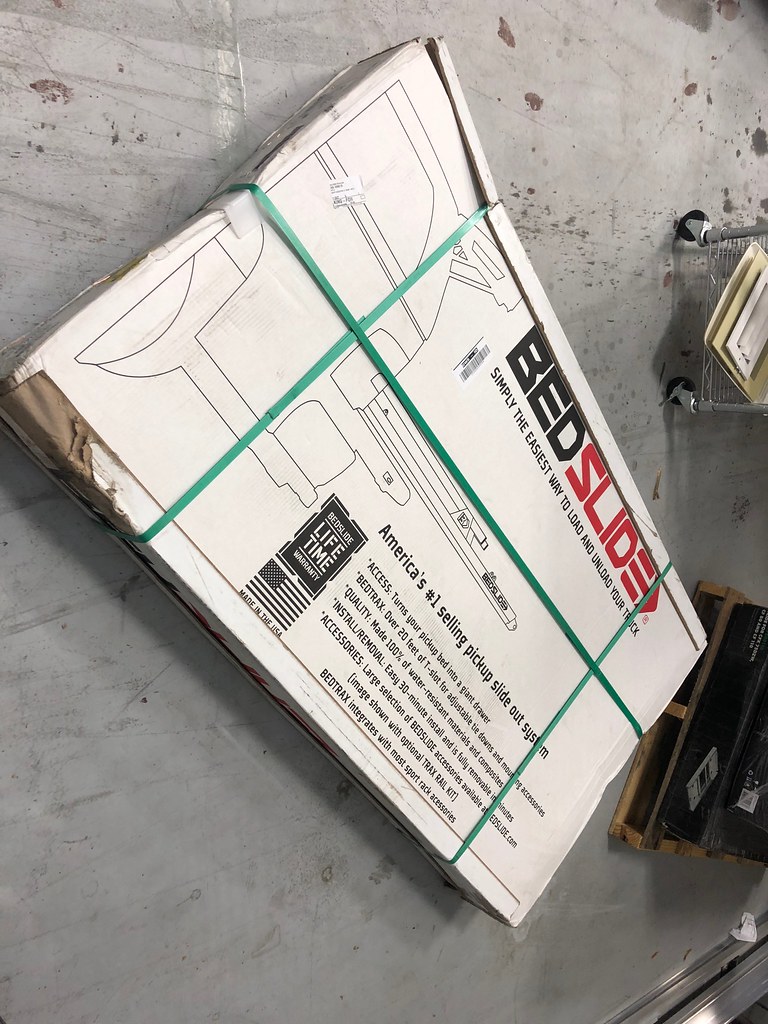
The slide I personally chose was the 00-12 Dodge Dakota Short bed Part Number 1-6243-S
This fit my use case perfectly. They do have other sizes, and another may fit yours better!
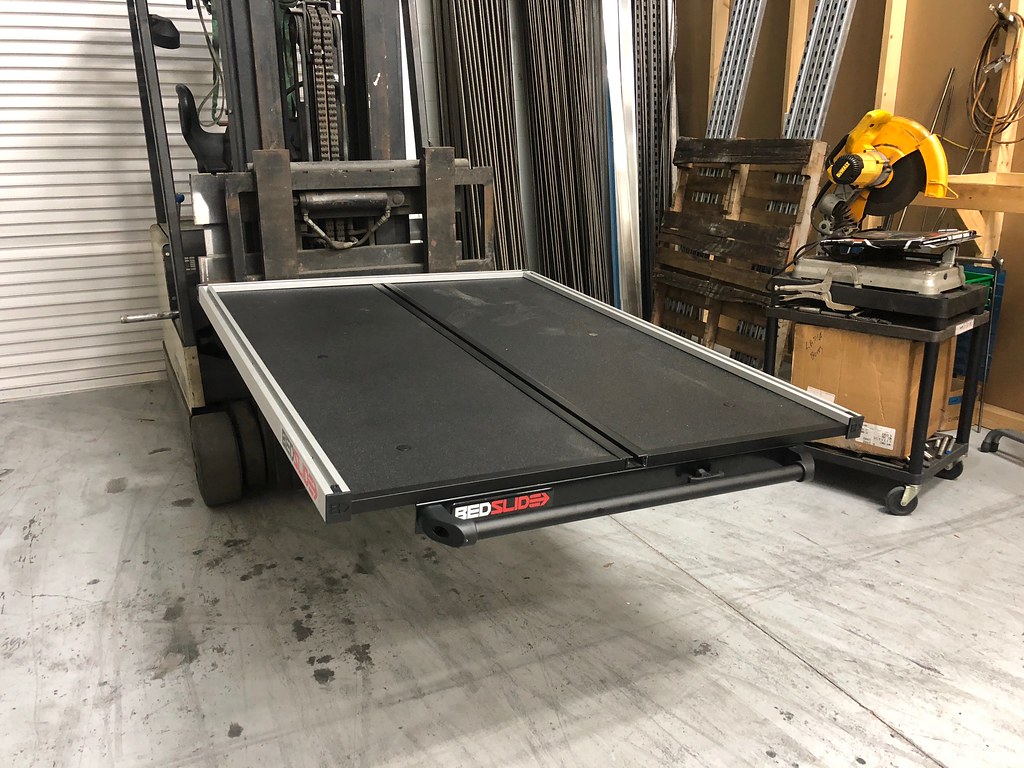
The whole process was super quick (IMO) and took about an hour total with some putzing around.
The whole thing was well packaged, heavy, but well packaged. Made it through UPS with no problems (and that is a feat)
 Untitled by Grant Wilson, on Flickr
The assembly is easy with 10 total bolts and about 10 minutes doing it
 Untitled by Grant Wilson, on Flickr
From there had a friend help me set it in the van. I chose to set it as far back as possible just barely not touching the rear door and center it from there
 Untitled by Grant Wilson, on Flickr
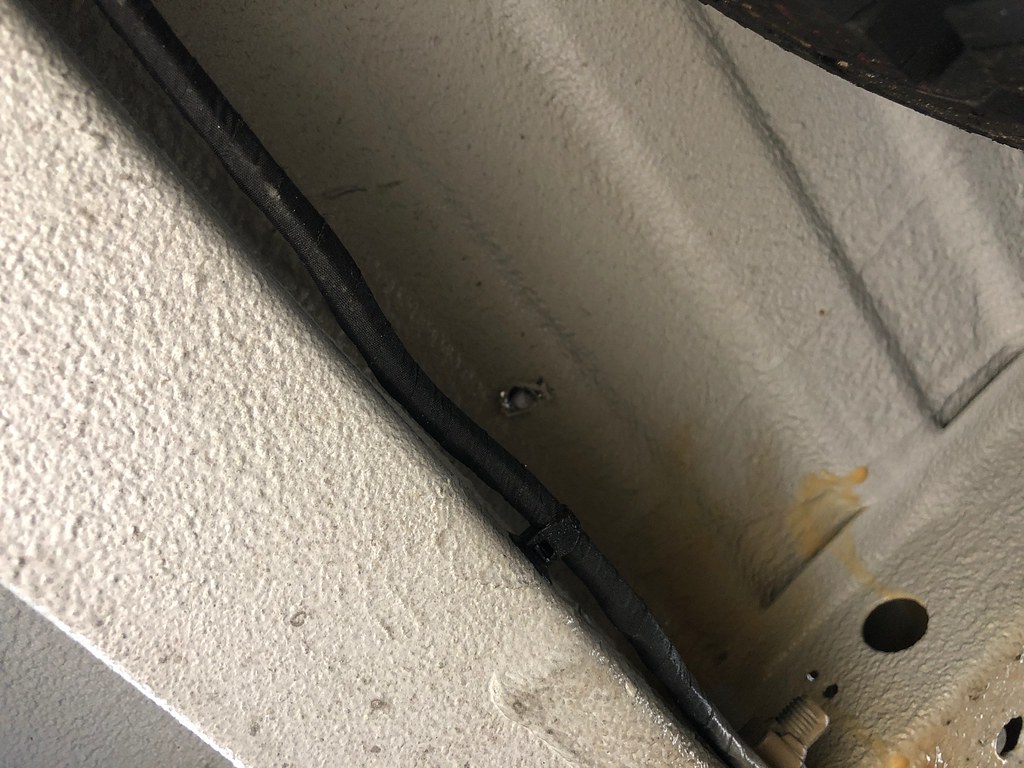
To bolt it in, I chose not to use the plus nut stuff that they included. Instead I thru bolted the slide down into the van. I anticipated the slide, so i put a large number of battons on the floor to support the clamping load this creates with the space in the floor, and made sure my wires were ran nowhere near the slide fastening area.
I used a 3/8 stainless bolt, fender washers on both side and a nylon lock nut with anti seize on it to prevent galling.
The location of the holes ended up being perfect, right next to the support structure, so lots of meat
 Untitled by Grant Wilson, on Flickr
 Untitled by Grant Wilson, on Flickr
And final installation
 Untitled by Grant Wilson, on Flickr
 Untitled by Grant Wilson, on Flickr
Overall, well worth it. I do have some slight concerns about vibration based noises, but until I do more offroading, i wont be able to tell, or sort it out. Around town with speedbumps and road irregularities it isn't an annoyance (and I'm the guy that finds the sunglass holder vibrating annoying)
Will update as time goes on.
I purchased through YotaMafia (info@yotamafia.com) Cause I know the guy from toyota days and he gives a few bucks off for peoples.
I designed the whole rear end so the side panels for wheel well covers and stuff were as tight as possible (roughly extend 2" from the wheel well total, due to battery width)
The slide I personally chose was the 00-12 Dodge Dakota Short bed Part Number 1-6243-S
This fit my use case perfectly. They do have other sizes, and another may fit yours better!
The whole process was super quick (IMO) and took about an hour total with some putzing around.
The whole thing was well packaged, heavy, but well packaged. Made it through UPS with no problems (and that is a feat)
Untitled by Grant Wilson, on FlickrThe assembly is easy with 10 total bolts and about 10 minutes doing it
Untitled by Grant Wilson, on FlickrFrom there had a friend help me set it in the van. I chose to set it as far back as possible just barely not touching the rear door and center it from there
Untitled by Grant Wilson, on FlickrTo bolt it in, I chose not to use the plus nut stuff that they included. Instead I thru bolted the slide down into the van. I anticipated the slide, so i put a large number of battons on the floor to support the clamping load this creates with the space in the floor, and made sure my wires were ran nowhere near the slide fastening area.
I used a 3/8 stainless bolt, fender washers on both side and a nylon lock nut with anti seize on it to prevent galling.
The location of the holes ended up being perfect, right next to the support structure, so lots of meat
Untitled by Grant Wilson, on FlickrUntitled by Grant Wilson, on FlickrAnd final installation
Untitled by Grant Wilson, on FlickrUntitled by Grant Wilson, on FlickrOverall, well worth it. I do have some slight concerns about vibration based noises, but until I do more offroading, i wont be able to tell, or sort it out. Around town with speedbumps and road irregularities it isn't an annoyance (and I'm the guy that finds the sunglass holder vibrating annoying)
Will update as time goes on.
I purchased through YotaMafia (info@yotamafia.com) Cause I know the guy from toyota days and he gives a few bucks off for peoples.
KTMRIDER
Adventurist
It looks like your inverter has a built in charger. Is the CTEK a charger also? What was your goal with this setup?Water tank is all done, just gotta weld on the brackets for support, and install!
Starting to mock up electrical components to put on rivnuts and and heat shrink and stuff. Gotta build some 90* terminal blocks for the inverter to clean up the wiring a bit.
Eric
grantwilson
Adventurist
Ctek charges while idling/drivingIt looks like your inverter has a built in charger. Is the CTEK a charger also? What was your goal with this setup?
Eric
Inverter charges when on shore/generator/
grantwilson
Adventurist
A few big things this weekend.
Flarespace flares are installed.
Not alot of words for it, pretty simple install. if you have questions please ask!
 Untitled by Grant Wilson, on Flickr
 Untitled by Grant Wilson, on Flickr
 Untitled by Grant Wilson, on Flickr
 Untitled by Grant Wilson, on Flickr
 Untitled by Grant Wilson, on Flickr
 Untitled by Grant Wilson, on Flickr
 Untitled by Grant Wilson, on Flickr
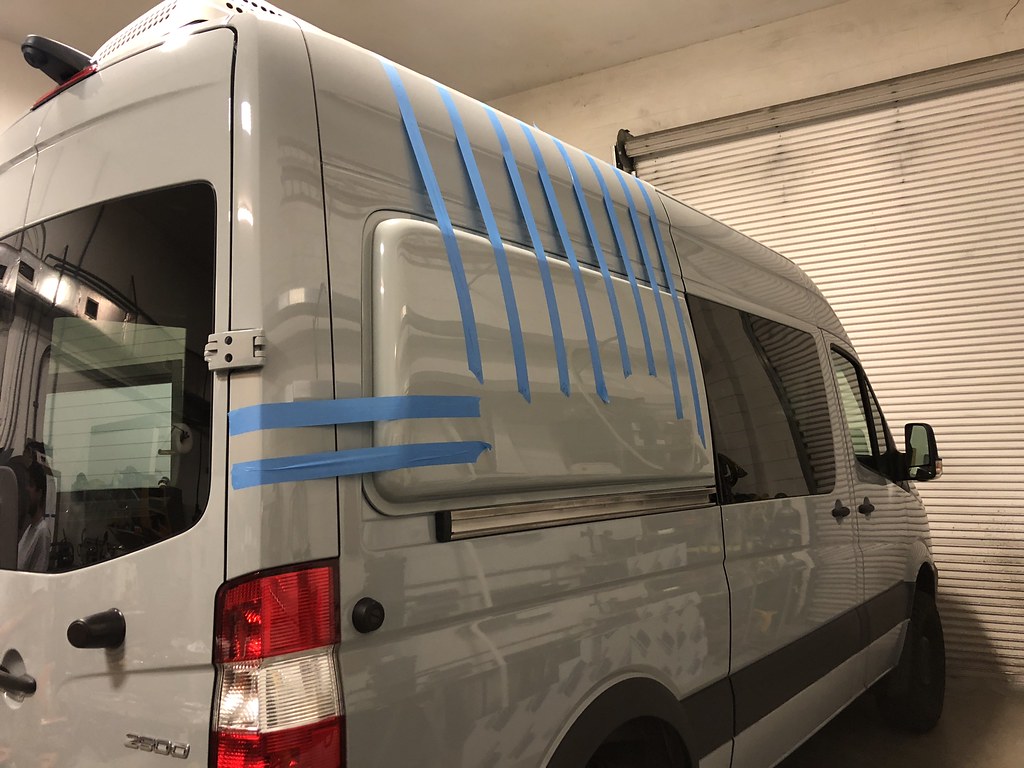
I will say this. I changed from a window on the passenger to the driver side. The reason for this was i found when i was traveling and staying in a city on the streets, the window on the sidewalk side sucked. People were easily able to see in the window and it was kind of awkward at times. By moving it to the traffic side, it alleviates that. So cool story right?
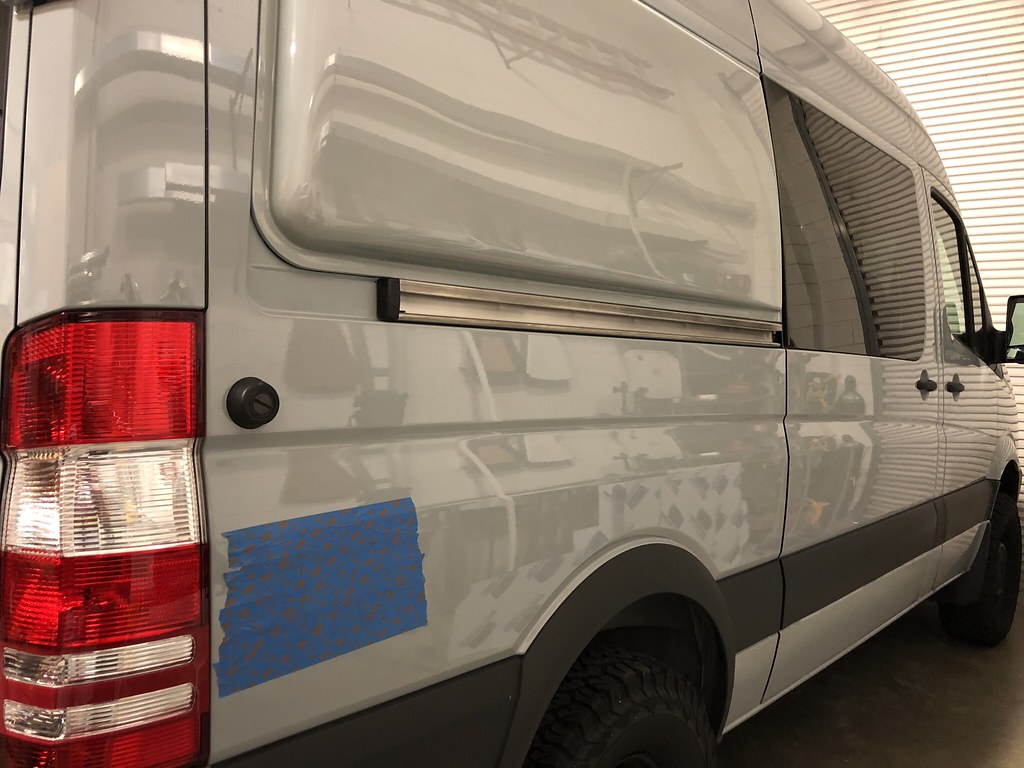
On to installing the Tern Overland Electrical Socket. It's a cool unit that i found on the site and wanted to use rather than the janky noco thing i was going to do.
 Untitled by Grant Wilson, on Flickr
 Untitled by Grant Wilson, on Flickr
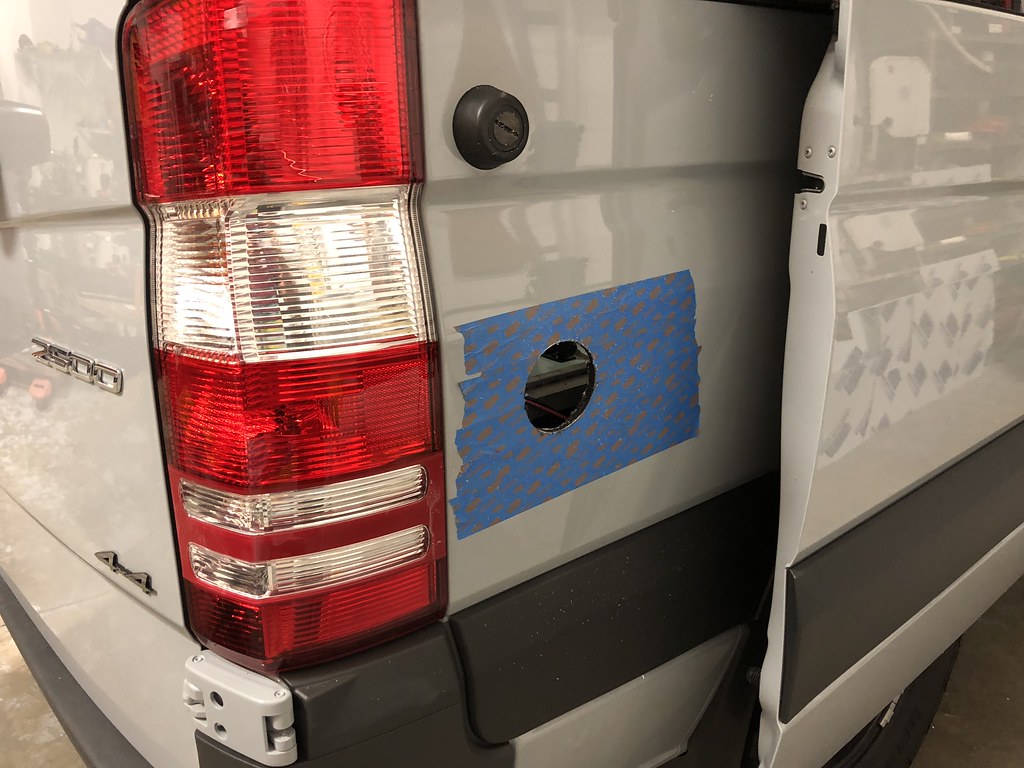
Its a 3 5/8 hole that has to be used for a pretty tight fit
 Untitled by Grant Wilson, on Flickr
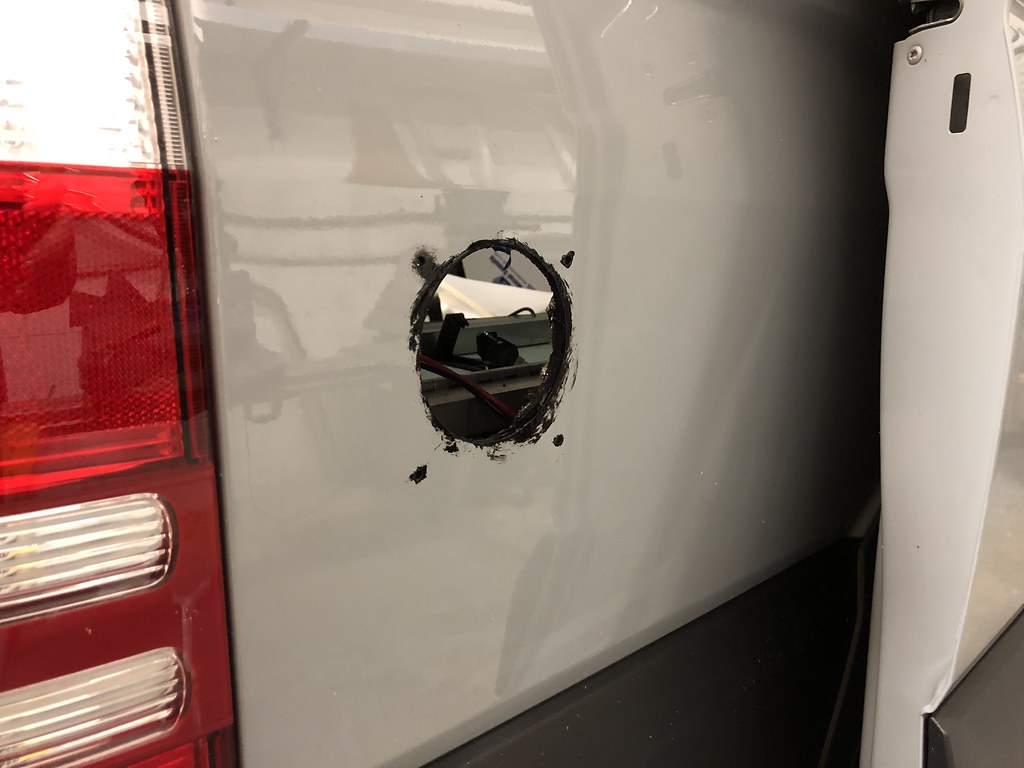
Make sure you add some paint to keep corrosion at bay
 Untitled by Grant Wilson, on Flickr
it looks super nice and clean color matched
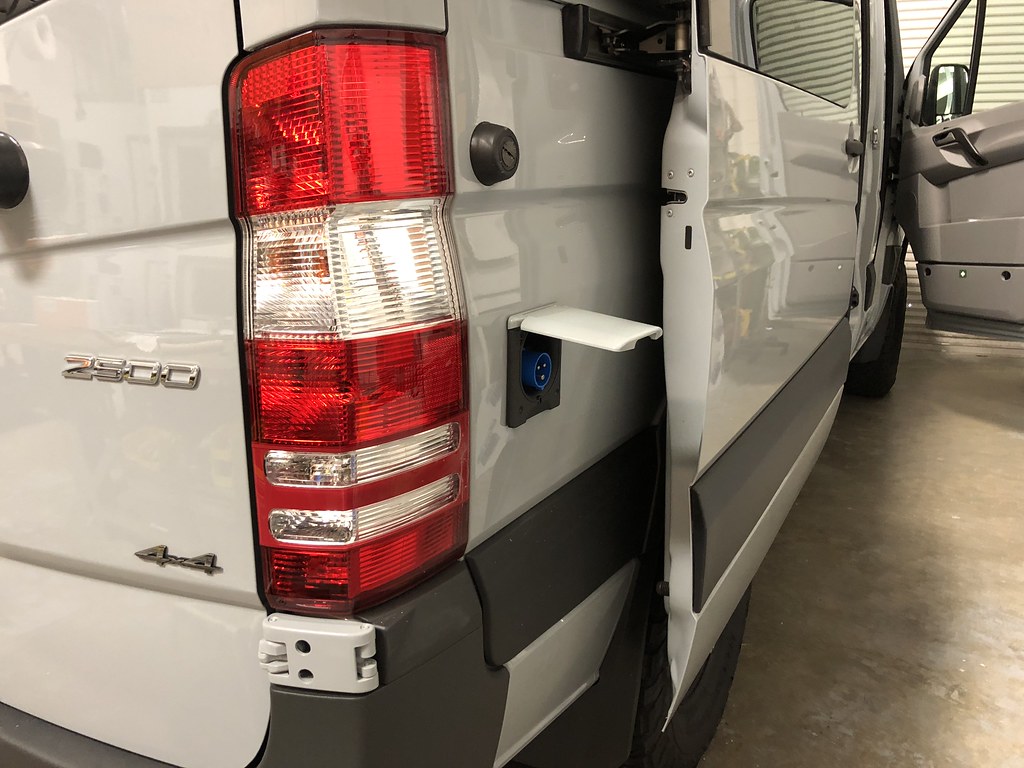 Untitled by Grant Wilson, on Flickr
I also did a ton of wiring. Ran all the ceiling lights, switch wires for the door opening like the last van, ac 12 fan wires, 110 wires in and out.
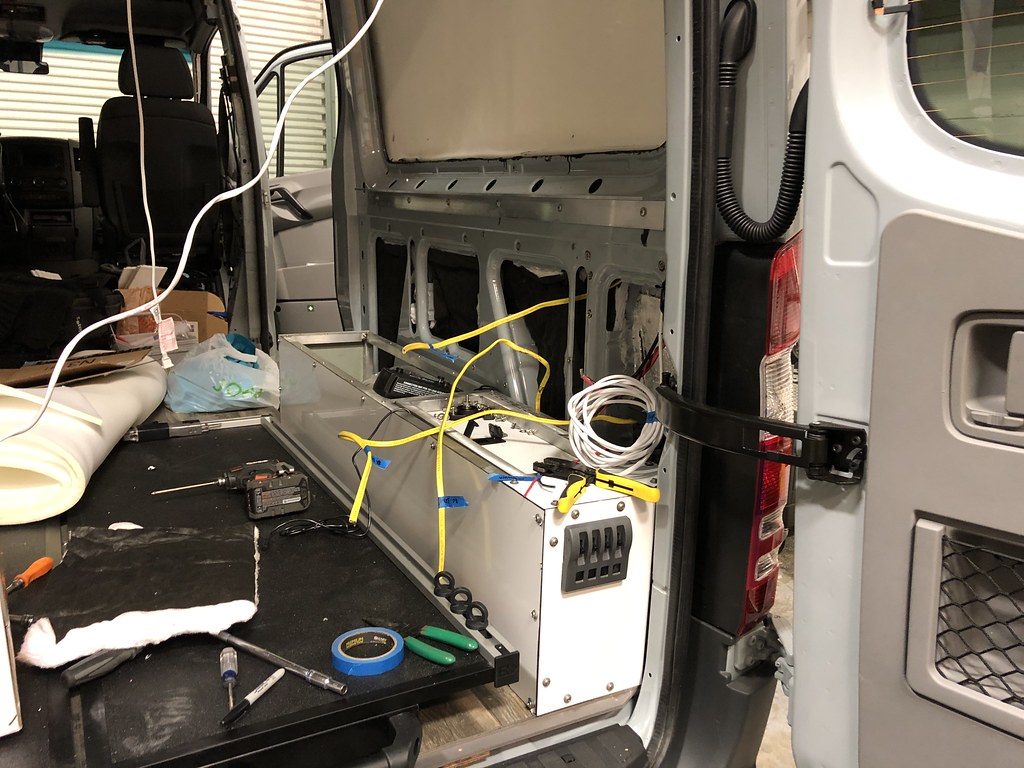 Untitled by Grant Wilson, on Flickr
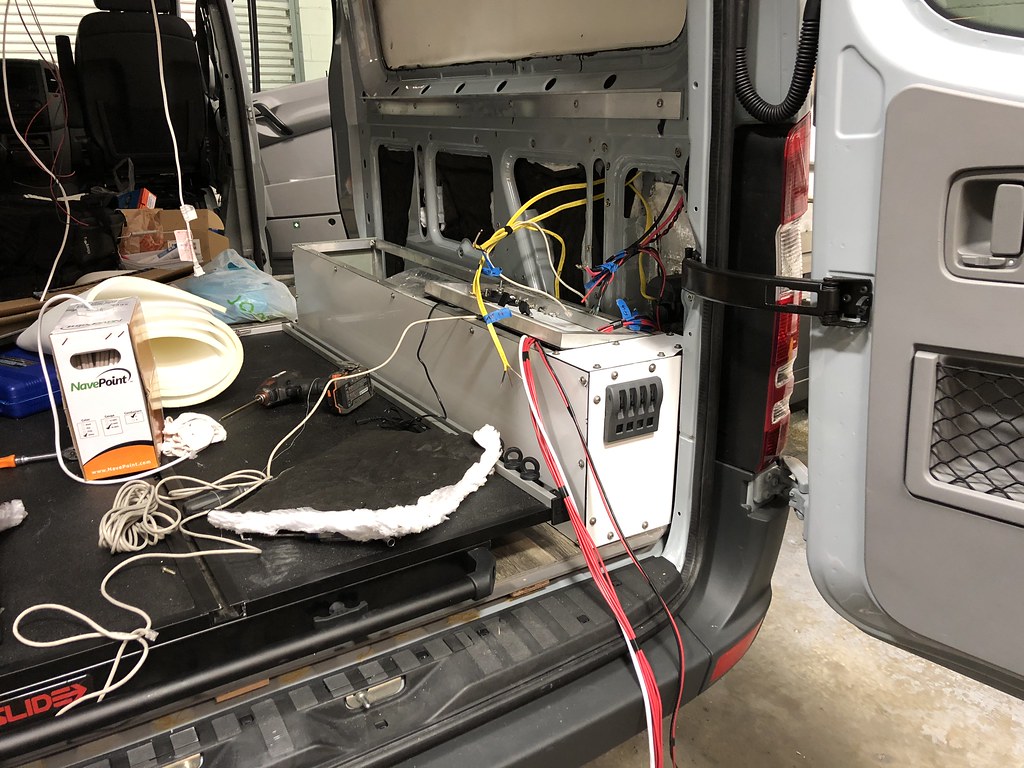 Untitled by Grant Wilson, on Flickr
Also remembered this time to run the victron Battery monitor cable ahead of time lol.
 Untitled by Grant Wilson, on Flickr
However. I did forget to run the 8ga wire for the blue sea fuse box -_-
go figure.
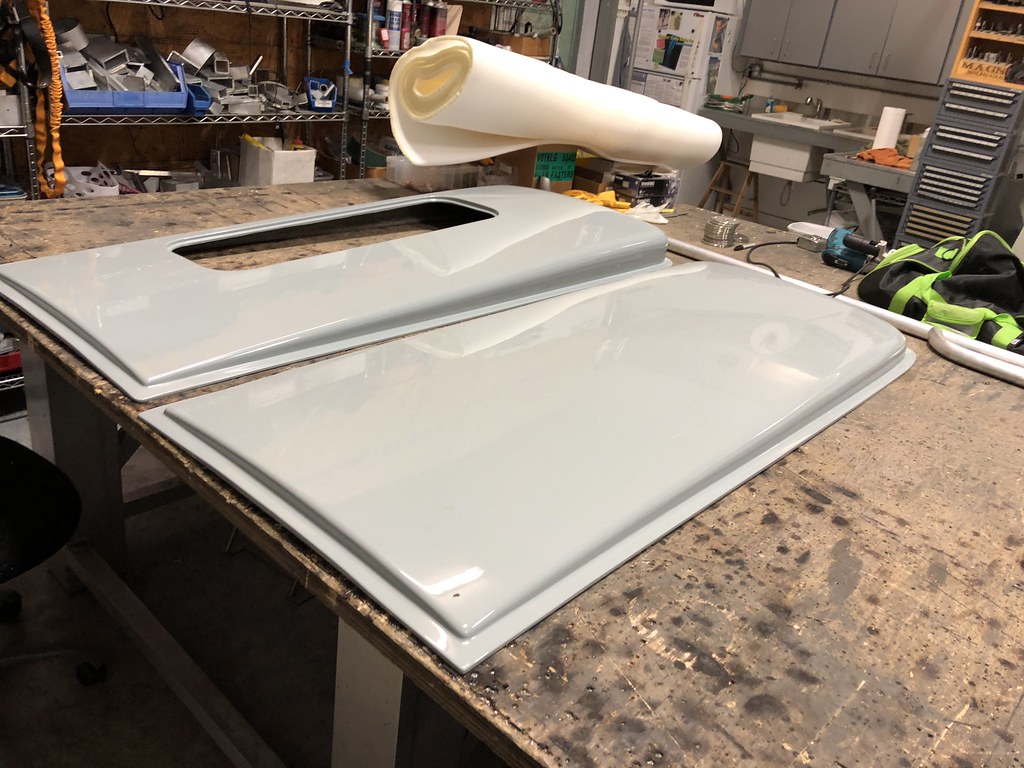
Lastly, did the first panel in the final decided color/style
 Untitled by Grant Wilson, on Flickr
All the panels you see in the van will be covered like this.
Flarespace flares are installed.
Not alot of words for it, pretty simple install. if you have questions please ask!
Untitled by Grant Wilson, on FlickrUntitled by Grant Wilson, on FlickrUntitled by Grant Wilson, on FlickrUntitled by Grant Wilson, on FlickrUntitled by Grant Wilson, on FlickrUntitled by Grant Wilson, on FlickrUntitled by Grant Wilson, on FlickrI will say this. I changed from a window on the passenger to the driver side. The reason for this was i found when i was traveling and staying in a city on the streets, the window on the sidewalk side sucked. People were easily able to see in the window and it was kind of awkward at times. By moving it to the traffic side, it alleviates that. So cool story right?
On to installing the Tern Overland Electrical Socket. It's a cool unit that i found on the site and wanted to use rather than the janky noco thing i was going to do.
Untitled by Grant Wilson, on FlickrUntitled by Grant Wilson, on FlickrIts a 3 5/8 hole that has to be used for a pretty tight fit
Untitled by Grant Wilson, on FlickrMake sure you add some paint to keep corrosion at bay
Untitled by Grant Wilson, on Flickrit looks super nice and clean color matched
Untitled by Grant Wilson, on FlickrI also did a ton of wiring. Ran all the ceiling lights, switch wires for the door opening like the last van, ac 12 fan wires, 110 wires in and out.
Untitled by Grant Wilson, on FlickrUntitled by Grant Wilson, on FlickrAlso remembered this time to run the victron Battery monitor cable ahead of time lol.
Untitled by Grant Wilson, on FlickrHowever. I did forget to run the 8ga wire for the blue sea fuse box -_-
go figure.
Lastly, did the first panel in the final decided color/style
Untitled by Grant Wilson, on FlickrAll the panels you see in the van will be covered like this.
kalieaire
Adventurist
Got my Van Wife Components headliner in.
Covered the bottom with carpet (yes i prefer carpet to tweed and other materials)
Untitled by Grant Wilson, on Flickr
What adhesive did you use? I've used 3m High-Strength 90 and it's not quite as strong as I'd like it to be, esp when velcro is involved.

grantwilson
Adventurist
I used the sameWhat adhesive did you use? I've used 3m High-Strength 90 and it's not quite as strong as I'd like it to be, esp when velcro is involved.
I dont take stuff off an on, so no real issues
kalieaire
Adventurist
I used the same
I dont take stuff off an on, so no real issues
Yeah, I have a slightly different use case. I use the velcro ifaks and have them mounted on my wall. I suppose I should install an aluminum molle panel instead.
Anudder question though. Any issues with DEF? been reading that Mercedes have been really nasty on running out of DEF and it not resetting when you fill it up on some vehicles. I can't imagine having to deal w/ limp mode in the middle of a trail.
grantwilson
Adventurist
I mean, dont run out?Yeah, I have a slightly different use case. I use the velcro ifaks and have them mounted on my wall. I suppose I should install an aluminum molle panel instead.
Anudder question though. Any issues with DEF? been reading that Mercedes have been really nasty on running out of DEF and it not resetting when you fill it up on some vehicles. I can't imagine having to deal w/ limp mode in the middle of a trail.
it's a 5k mile def tank. if you run out and are on limp mode, its your own damn fault. Also you get 5 starts when you run completely out.
Last edited: