
You are using an out of date browser. It may not display this or other websites correctly.
You should upgrade or use an alternative browser.
You should upgrade or use an alternative browser.
The Everyman Van
- Thread starter grantwilson
- Start date
grantwilson
Adventurist
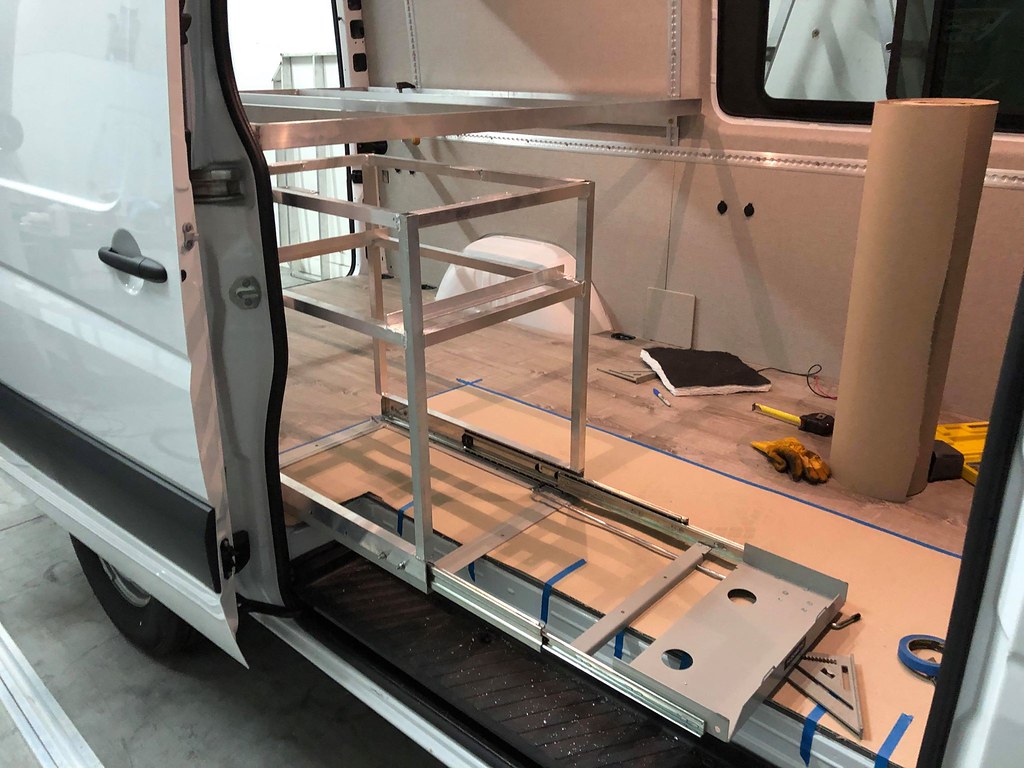
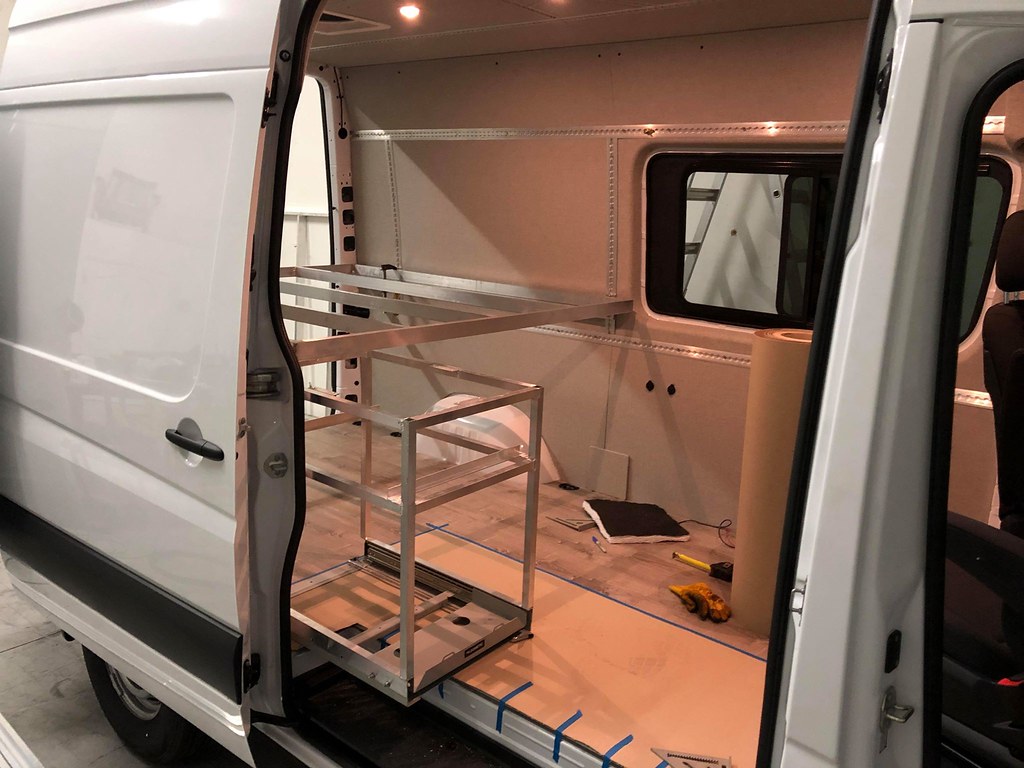
 Untitled by Grant Wilson, on Flickr
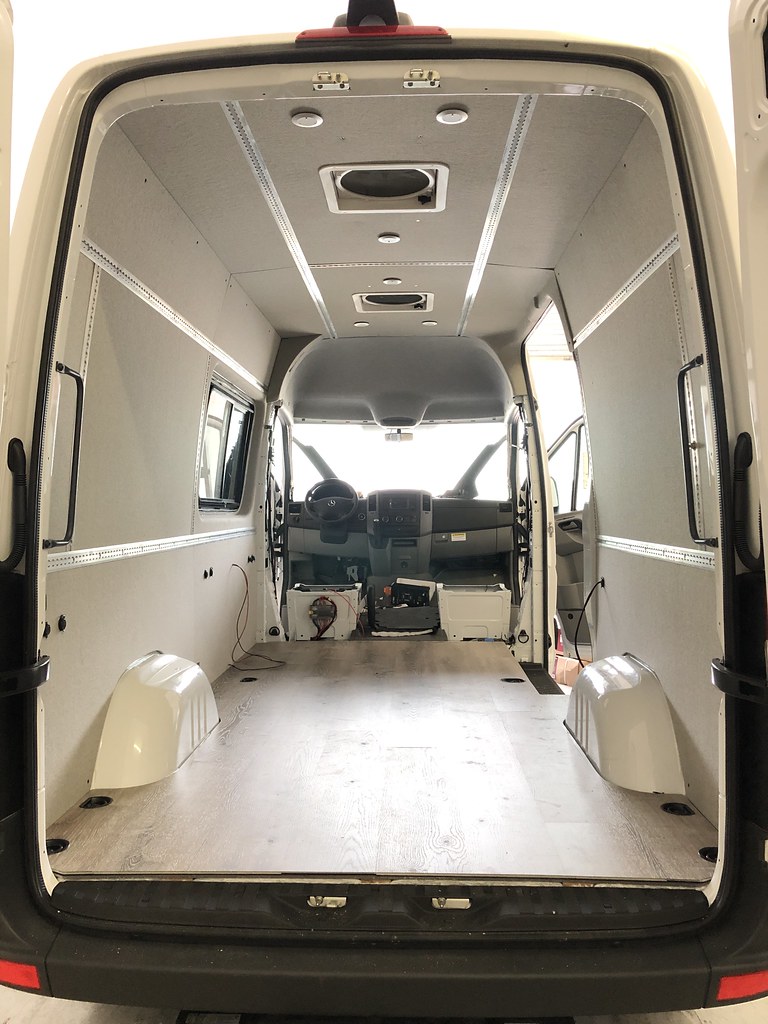 Untitled by Grant Wilson, on Flickr
 Untitled by Grant Wilson, on Flickr
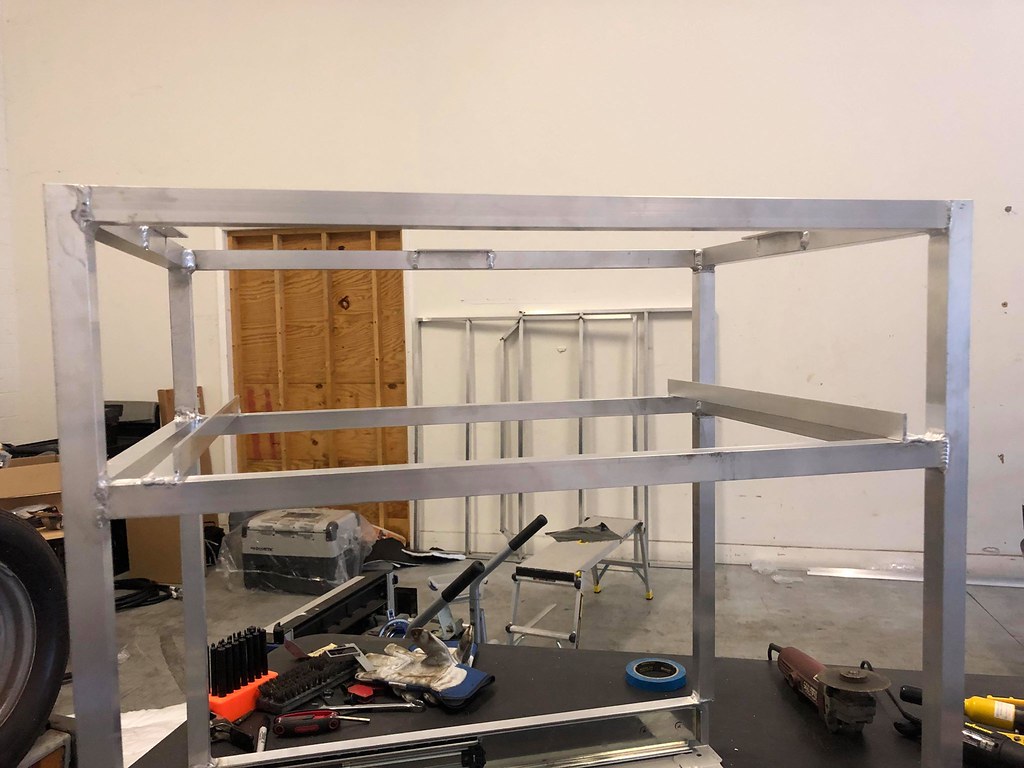
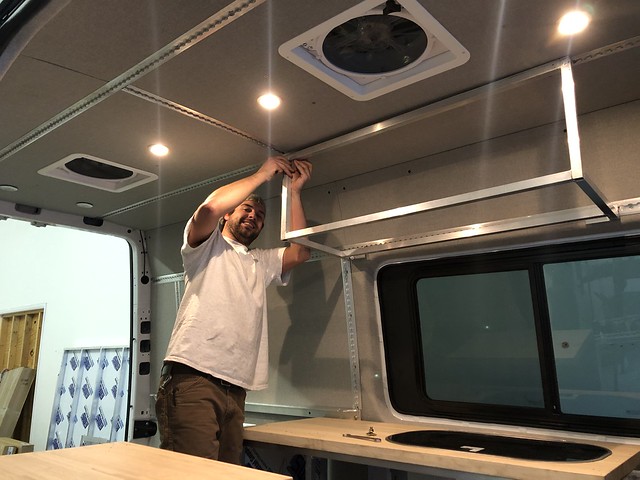
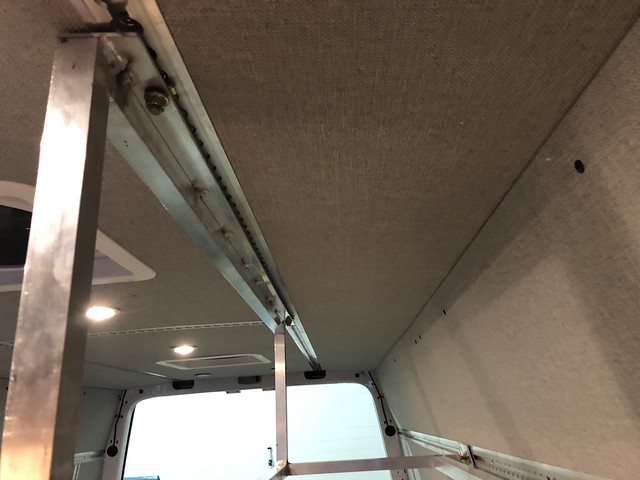
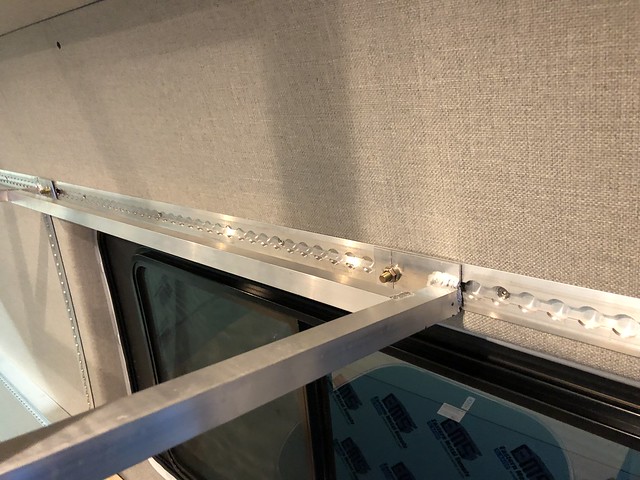
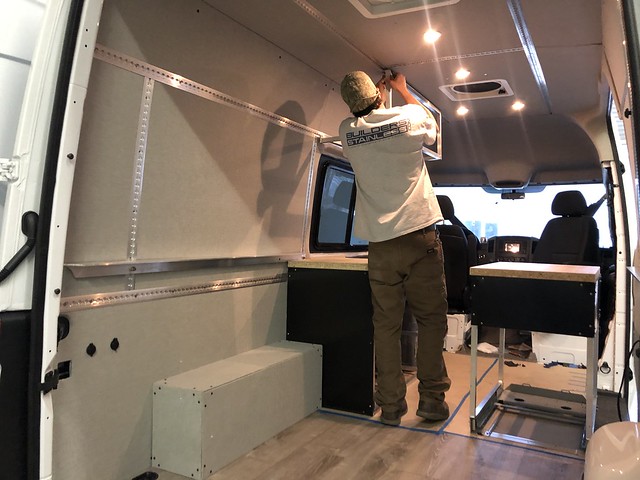
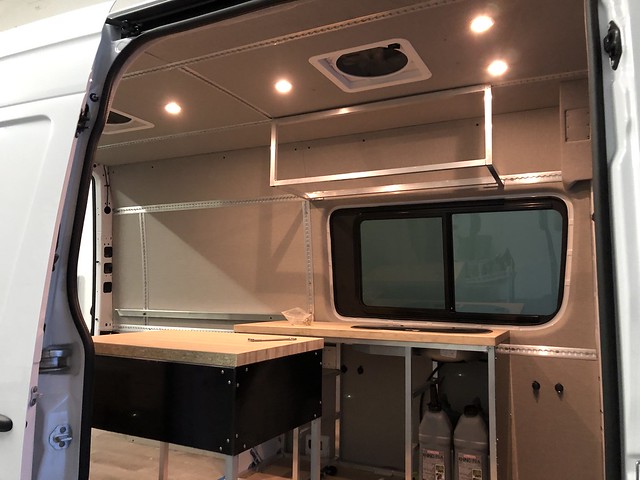
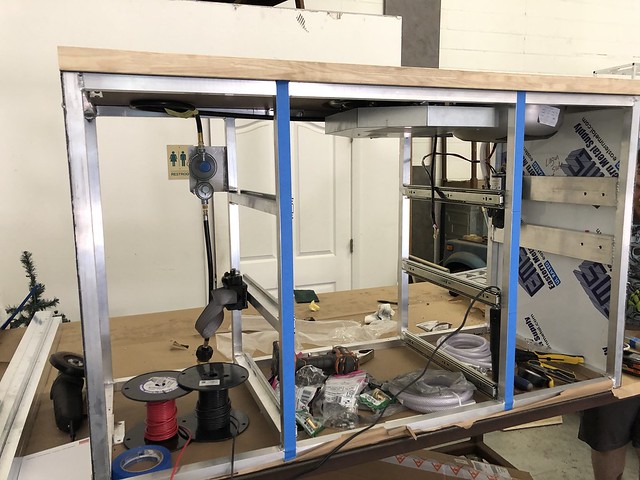
Got the entire interior kit installed, and wired up.
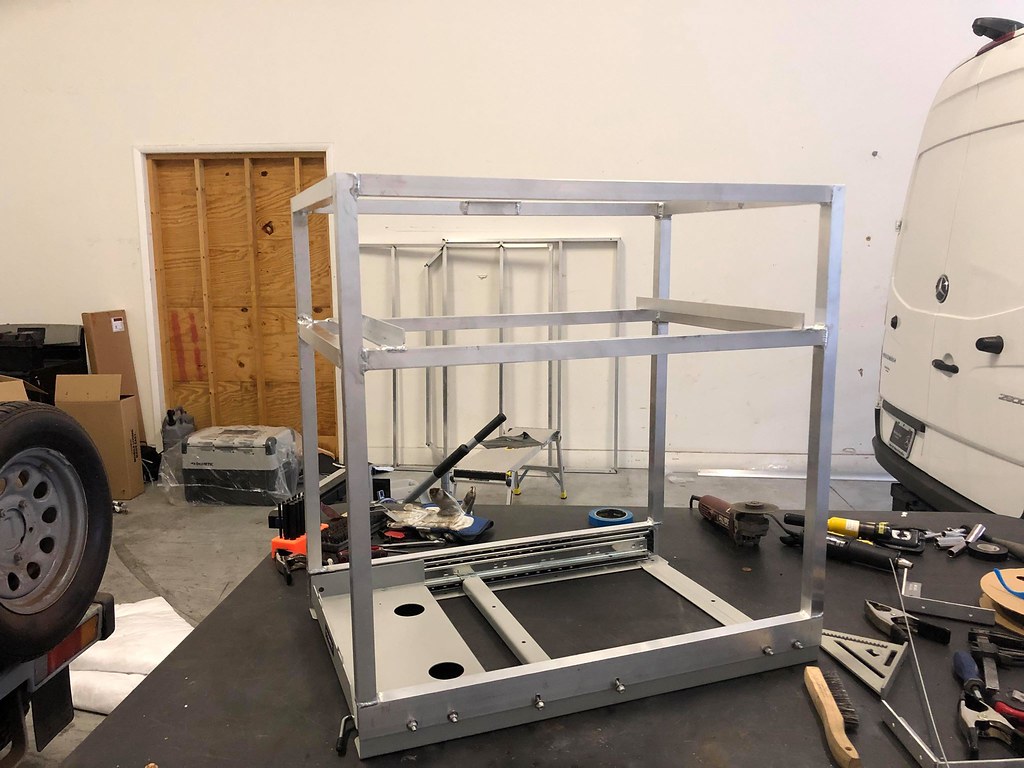
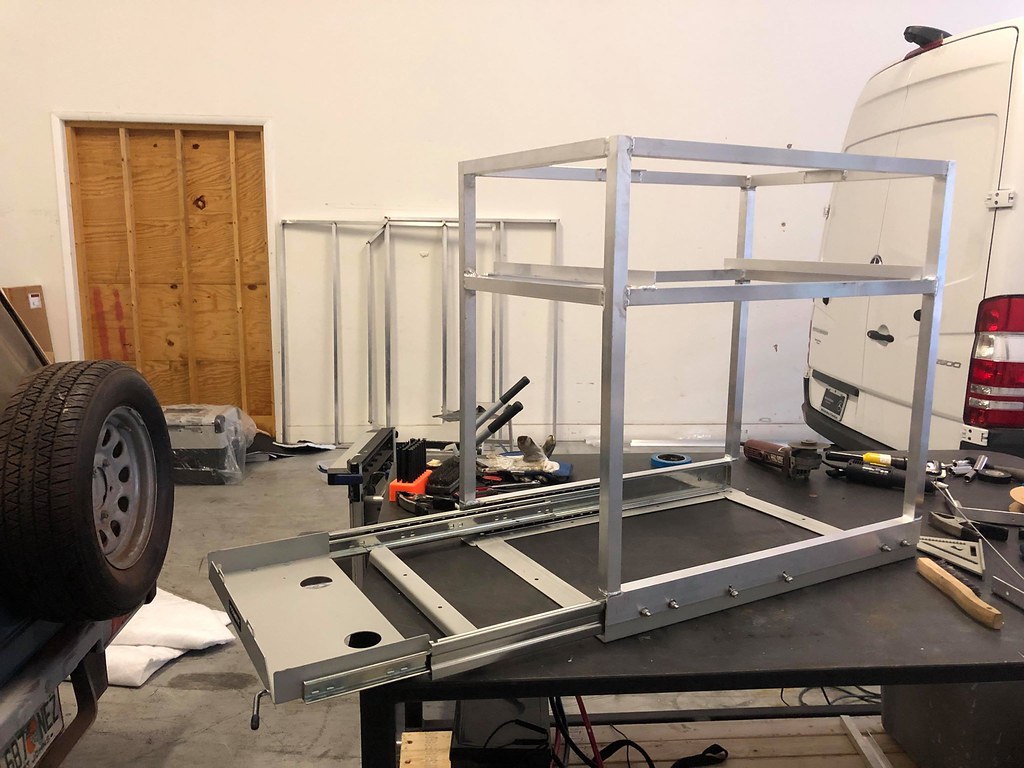
Needed somewhere to mount the Ctek Charger for solar and DC to DC, so made a bracket!
 Untitled by Grant Wilson, on Flickr
 Untitled by Grant Wilson, on Flickr
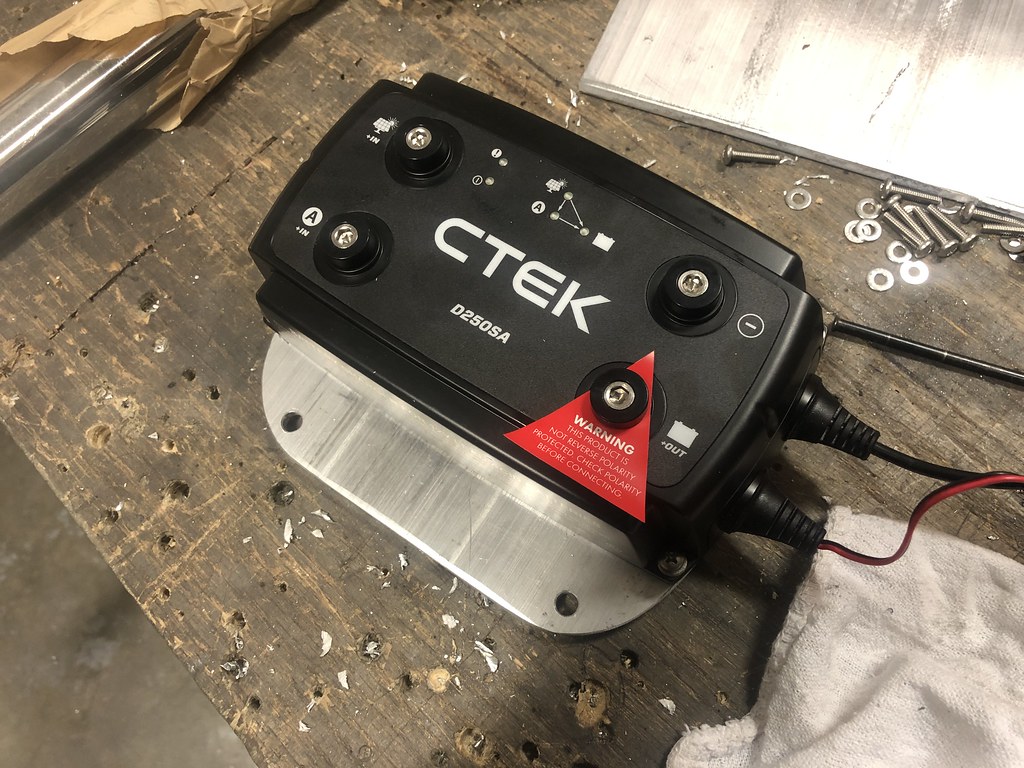 Untitled by Grant Wilson, on Flickr
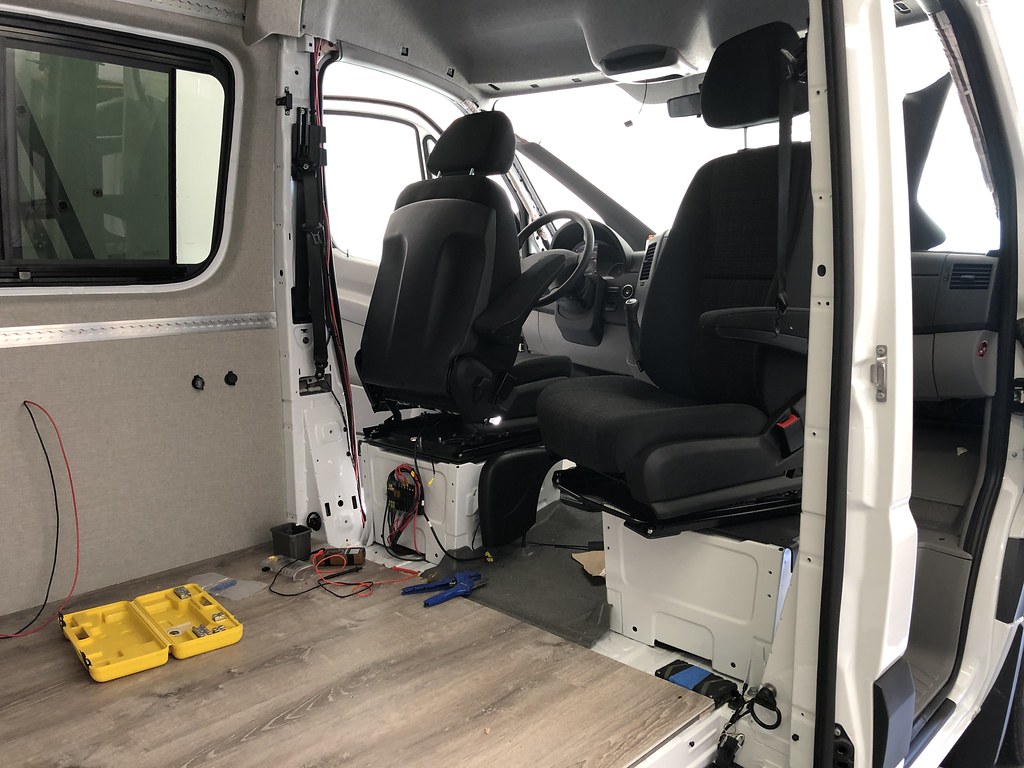
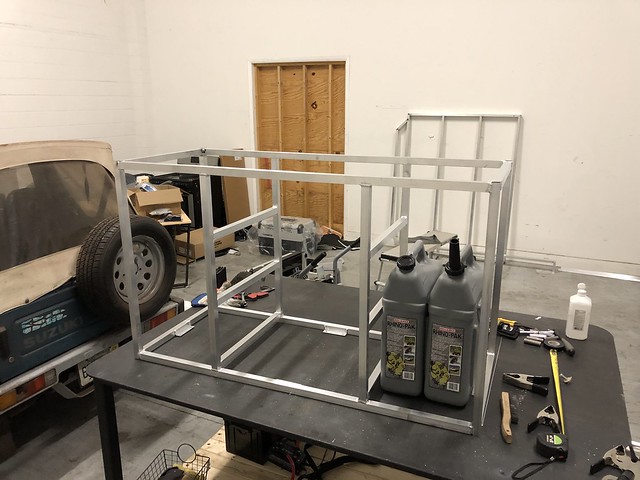
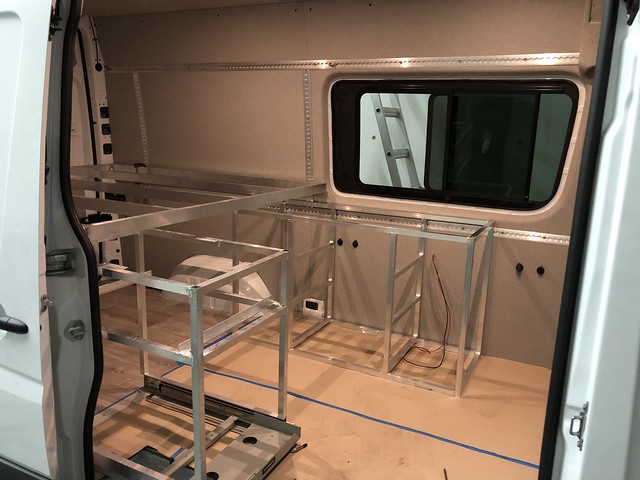
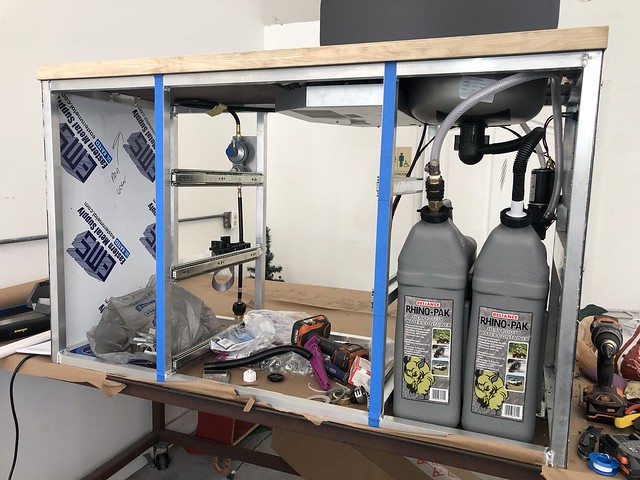
At this point just need to connect the battery and charger to the system, and then its on to fabricating a bunch of interior stuff!
grantwilson
Adventurist
I was quite pleased once it was all put togetherWow, really like how clean the interior is with that wood floor and the side/roof panels.
WashingtonTaco
Adventurist
Will you do any type of sub floor to make it flat? I am considering this type of floor for my cargo trailer. I think it would be more water proof than a floor that pieces together.View attachment 43482
I used something similar on a platform build. That stuff was heavy.
I agree! That is something I would pay for... spartan, easy to maintain interior that promotes visibility. I'm anxious to see what's next.Wow, really like how clean the interior is with that wood floor and the side/roof panels.
Although often clever, many of the custom vans are too personalized with builders decorating notions, which often conflict with consumers tastes. Keep It Simple Stupid (KISS) is a brilliant strategy that it appears you've embraced with this project - smart move!
grantwilson
Adventurist
basically, yeah.I agree! That is something I would pay for... spartan, easy to maintain interior that promotes visibility. I'm anxious to see what's next.
Although often clever, many of the custom vans are too personalized with builders decorating notions, which often conflict with consumers tastes. Keep It Simple Stupid (KISS) is a brilliant strategy that it appears you've embraced with this project - smart move!
The interior structures will be close to the same as the last van, with matching fabric sides nad bottom cabinet covering, and a weathered grey stain. Super neutral, but easy to change if someone wants to have some pizzaz.
Hopefuly this will get people on board to put an order in and choose all their own colors and stuff.
grantwilson
Adventurist
Got alot done, but not as much as id like over hte past week or so.
Sick today, so sending in an update!
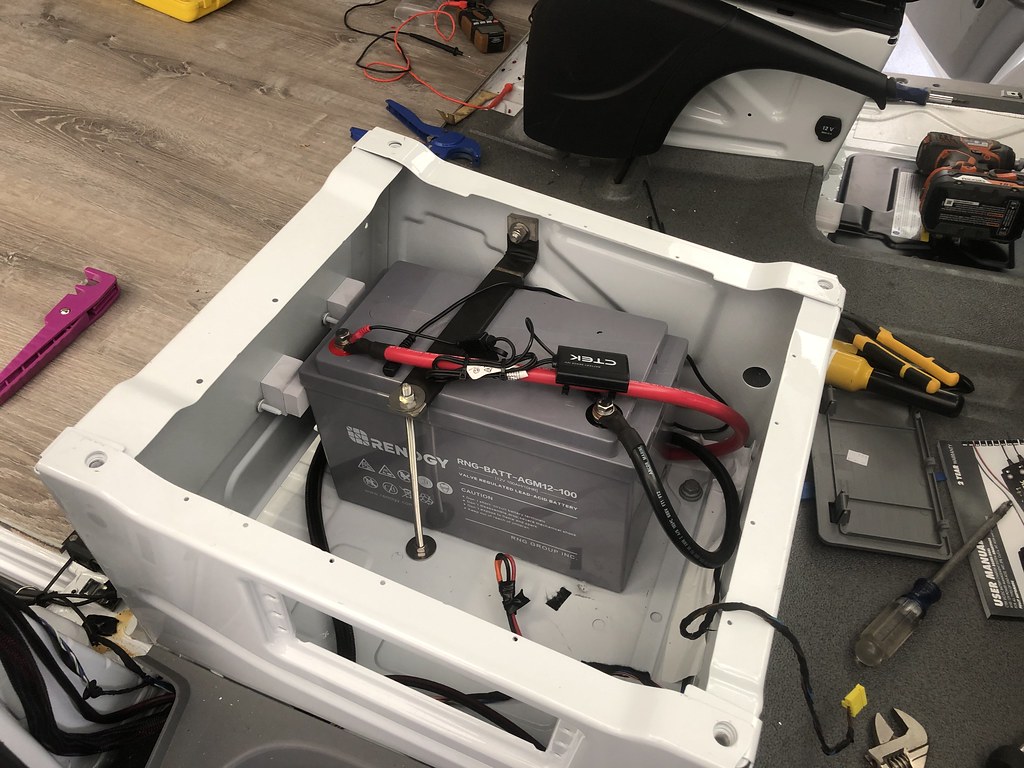
Wiring is 100% complete, battery tie down made, and pads from movement made. 100AH AGM battery, with DC to DC Charging, and 200watts of solar. Should be pretty golden. Can also monitor your voltages via Ctek App. Its not quite victron level, but its much less expensive.
 Untitled by Grant Wilson, on Flickr
As always all stainless. Fasteners and tie down
Then installed the rather pricey Alpine Mechanism swivels. Must have for every van for sure
 Untitled by Grant Wilson, on Flickr
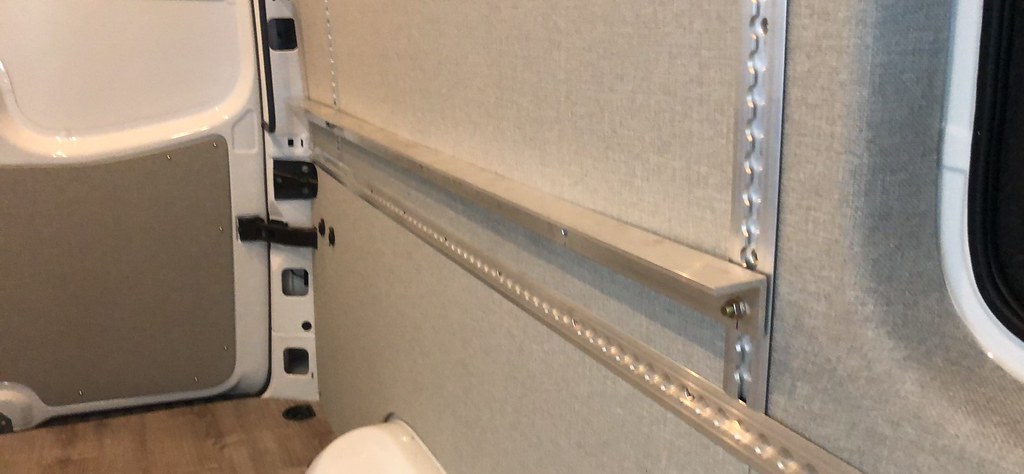
Horrible picture but mounted up the bed mount tracks. Will open up the holes a bit more so they sit more flush. Plenty of structure for the bed
 Untitled by Grant Wilson, on Flickr
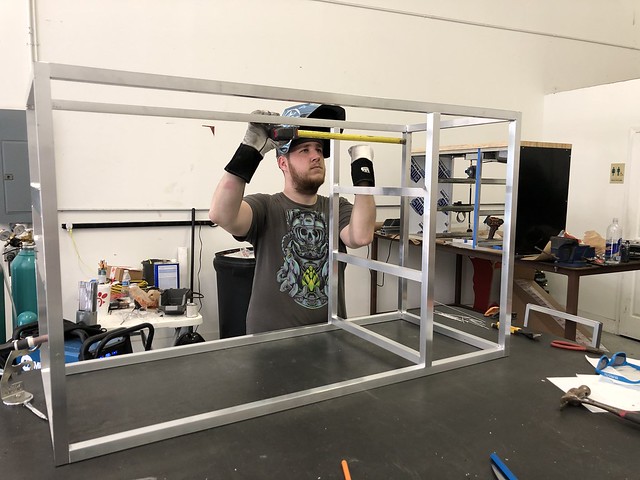
Then i build the bed frame. Its actually an inch narrower at the back than the front, go figure. Is what it is i guess.
 Untitled by Grant Wilson, on Flickr
Ill add in some more structure, then skin the top with some composite aluminum as always. Should fit a queen bed butted up against the back door.
Sick today, so sending in an update!
Wiring is 100% complete, battery tie down made, and pads from movement made. 100AH AGM battery, with DC to DC Charging, and 200watts of solar. Should be pretty golden. Can also monitor your voltages via Ctek App. Its not quite victron level, but its much less expensive.
Untitled by Grant Wilson, on FlickrAs always all stainless. Fasteners and tie down
Then installed the rather pricey Alpine Mechanism swivels. Must have for every van for sure
Untitled by Grant Wilson, on FlickrHorrible picture but mounted up the bed mount tracks. Will open up the holes a bit more so they sit more flush. Plenty of structure for the bed
Untitled by Grant Wilson, on FlickrThen i build the bed frame. Its actually an inch narrower at the back than the front, go figure. Is what it is i guess.
Untitled by Grant Wilson, on FlickrIll add in some more structure, then skin the top with some composite aluminum as always. Should fit a queen bed butted up against the back door.
grantwilson
Adventurist
Did some cad work last night to get the wheel well covers and supports welded into the bed.
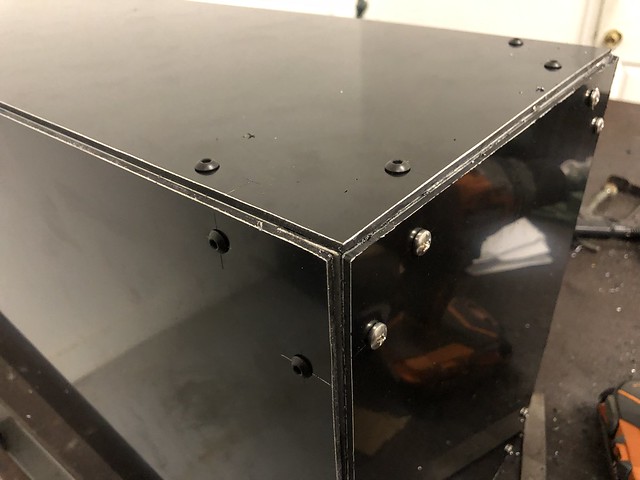
Welded up both of the wheel well covers, all Tig welded and ready to be covered. I do have matching fabric to skin the boxes and cabinets in, so that will happen as well.
Next up today is to do some electrical work on a customer van, finish up the bed frame protrusion into the door area, and start on the galley. May need to make it a bit longer, as it will be sliding under the bed, so i can maximize storage space!
 design by Grant Wilson, on Flickr
 Untitled by Grant Wilson, on Flickr
 Untitled by Grant Wilson, on Flickr
Welded up both of the wheel well covers, all Tig welded and ready to be covered. I do have matching fabric to skin the boxes and cabinets in, so that will happen as well.
Next up today is to do some electrical work on a customer van, finish up the bed frame protrusion into the door area, and start on the galley. May need to make it a bit longer, as it will be sliding under the bed, so i can maximize storage space!
design by Grant Wilson, on FlickrUntitled by Grant Wilson, on FlickrUntitled by Grant Wilson, on Flickrgrantwilson
Adventurist
Got the cabinet unit for the fridge slide completed yesterday
 Dometic Slide Based Cabinet by Grant Wilson, on Flickr
 Dometic Slide Based Cabinet by Grant Wilson, on Flickr
 Dometic Slide Based Cabinet by Grant Wilson, on Flickr
 Dometic Slide Based Cabinet by Grant Wilson, on Flickr
 Dometic Slide Based Cabinet by Grant Wilson, on Flickr
 Dometic Slide Based Cabinet by Grant Wilson, on Flickr
Next up is to start working on the Galley today! Then the upper cabinets, and send it out for cabinet faces and powder! Getting close")
Dometic Slide Based Cabinet by Grant Wilson, on FlickrDometic Slide Based Cabinet by Grant Wilson, on FlickrDometic Slide Based Cabinet by Grant Wilson, on FlickrDometic Slide Based Cabinet by Grant Wilson, on FlickrDometic Slide Based Cabinet by Grant Wilson, on FlickrDometic Slide Based Cabinet by Grant Wilson, on FlickrNext up is to start working on the Galley today! Then the upper cabinets, and send it out for cabinet faces and powder! Getting close
grantwilson
Adventurist
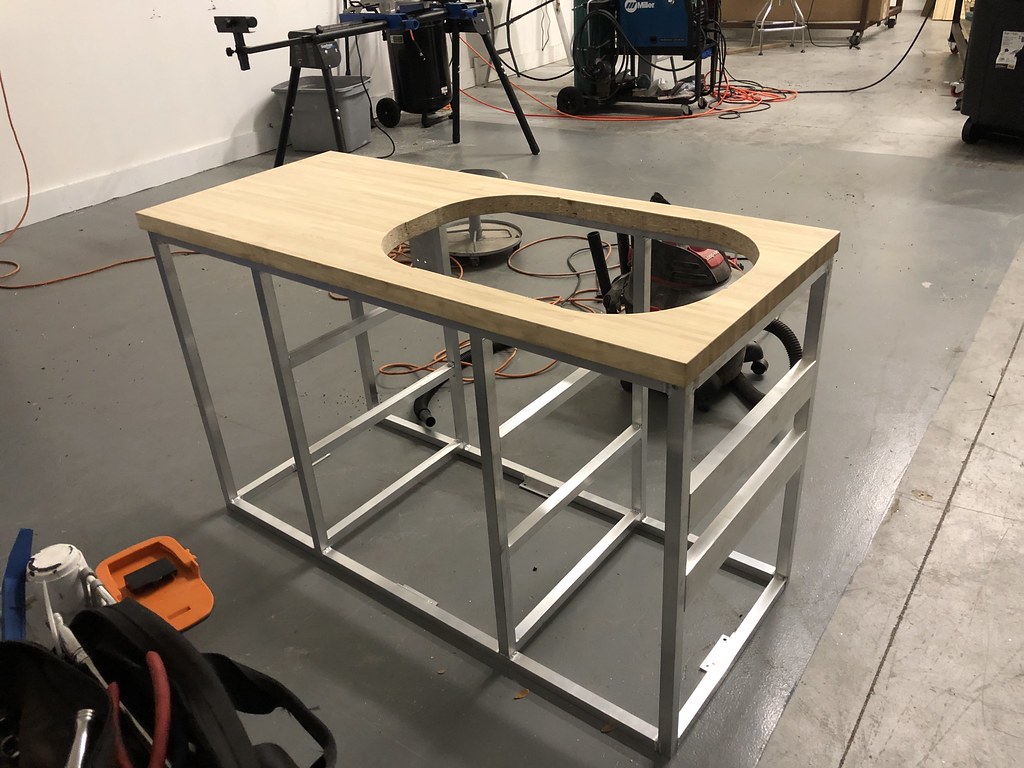
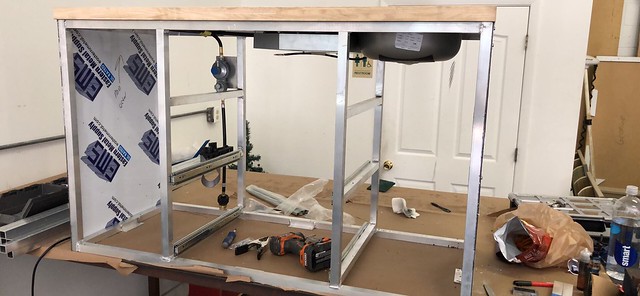
Galley is mostly done. Need to make and weld in the bracket for the propane regulator, lagun table supports, and the countertop brackets.
I dont have any time currently to work on it anymore until sunday. So we will see what i get done!
 Untitled by Grant Wilson, on Flickr
 Untitled by Grant Wilson, on Flickr
 Untitled by Grant Wilson, on Flickr
I dont have any time currently to work on it anymore until sunday. So we will see what i get done!
Untitled by Grant Wilson, on FlickrUntitled by Grant Wilson, on FlickrUntitled by Grant Wilson, on Flickrgrantwilson
Adventurist
Video update on the van!
grantwilson
Adventurist
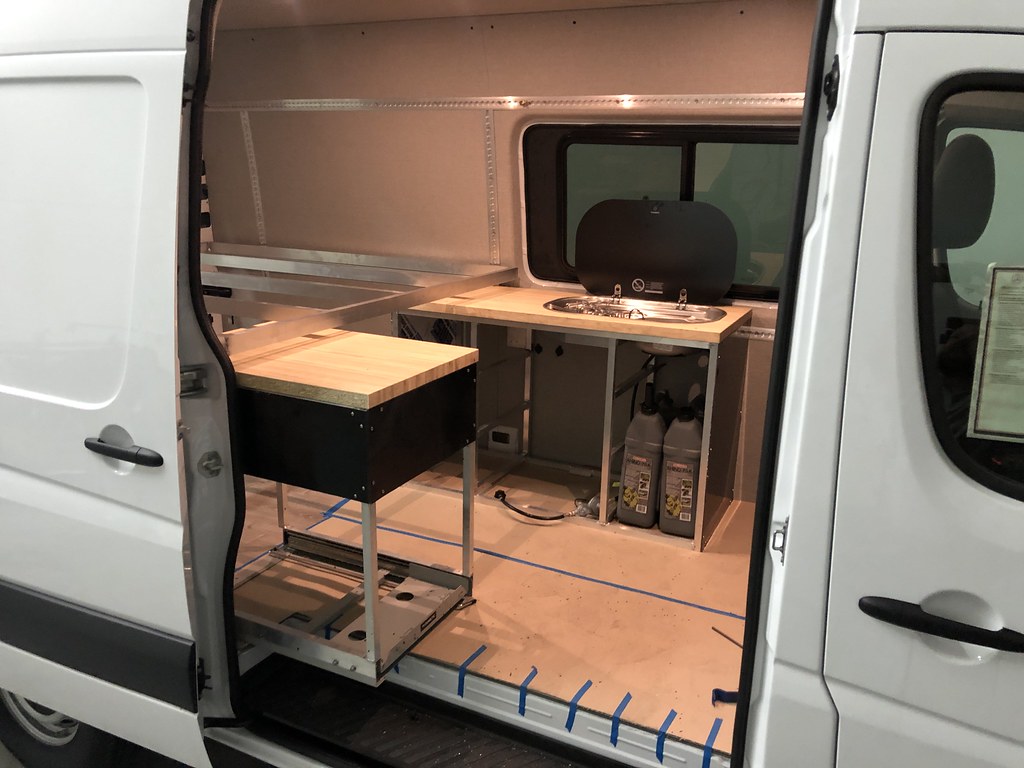
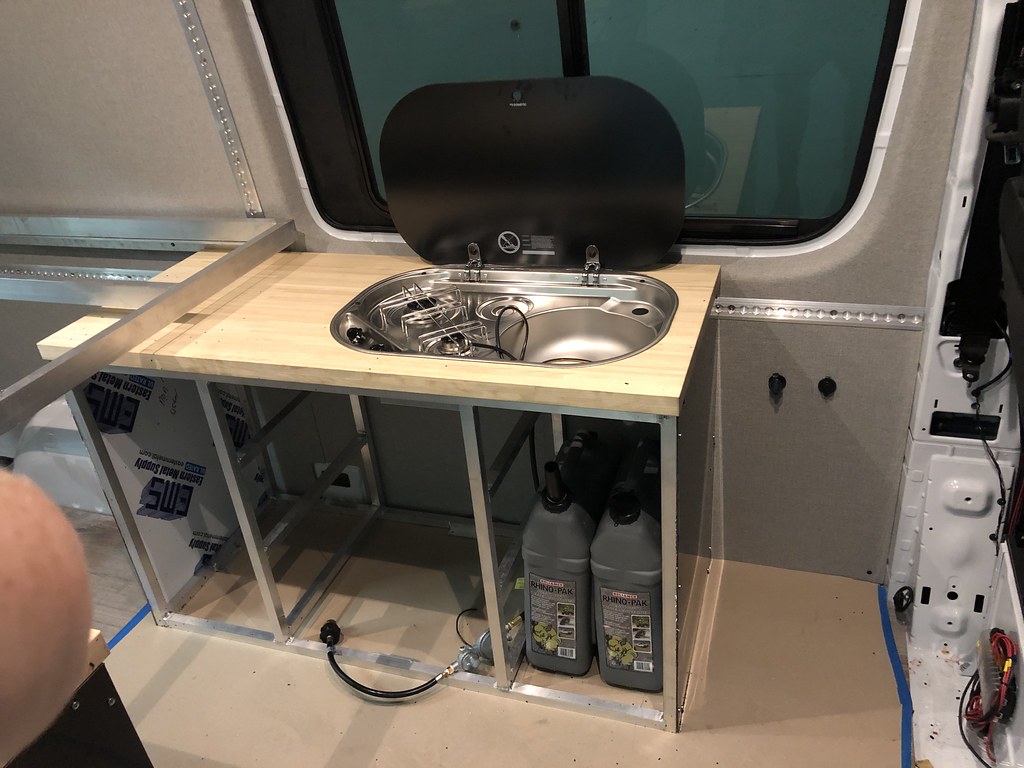
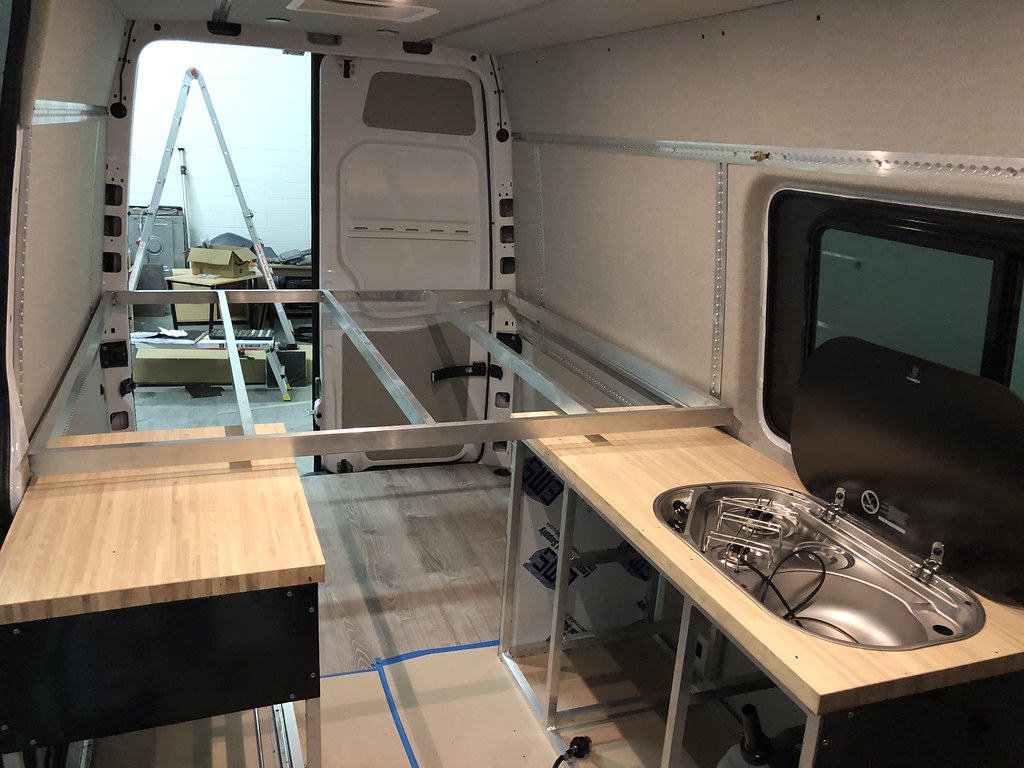
Galley and fridge cabinet are all done and skinned with composite. Headed out to my cabinet guy, then ill cover the composite with matching fabric!
Next up is the upper cabinets and this build is pretty much done
 Untitled by Grant Wilson, on Flickr
 Untitled by Grant Wilson, on Flickr
 Untitled by Grant Wilson, on Flickr
 Untitled by Grant Wilson, on Flickr
The Galley has predrilled and located Lagun Table mount as well, so if you would like to add it, no need to worry about how to mount it!
Next up is the upper cabinets and this build is pretty much done
Untitled by Grant Wilson, on FlickrUntitled by Grant Wilson, on FlickrUntitled by Grant Wilson, on FlickrUntitled by Grant Wilson, on FlickrThe Galley has predrilled and located Lagun Table mount as well, so if you would like to add it, no need to worry about how to mount it!
Galley and fridge cabinet are all done and skinned with composite. Headed out to my cabinet guy, then ill cover the composite with matching fabric!
Next up is the upper cabinets and this build is pretty much done
The Galley has predrilled and located Lagun Table mount as well, so if you would like to add it, no need to worry about how to mount it!
What’s the latest Grant?
grantwilson
Adventurist
i need a cabinet guy lolWhat’s the latest Grant?
two 2019 4x4s are reserved for may production
I am in the middle of building 4 vans worth of interiors
Lots of customer vans as well.
i need a cabinet guy lol
two 2019 4x4s are reserved for may production
I am in the middle of building 4 vans worth of interiors
Lots of customer vans as well.
Nice
grantwilson
Adventurist
Got some more done!
Upper cabinet is all finished and fitted. Direct bolt in on adventure wagon kits. just gotta add side framing in and then skin the sides and bottom! Three of these will go in each van for upper storage.
 Untitled by Grant Wilson, on Flickr
 Untitled by Grant Wilson, on Flickr
 Untitled by Grant Wilson, on Flickr
 Untitled by Grant Wilson, on Flickr
 Untitled by Grant Wilson, on Flickr
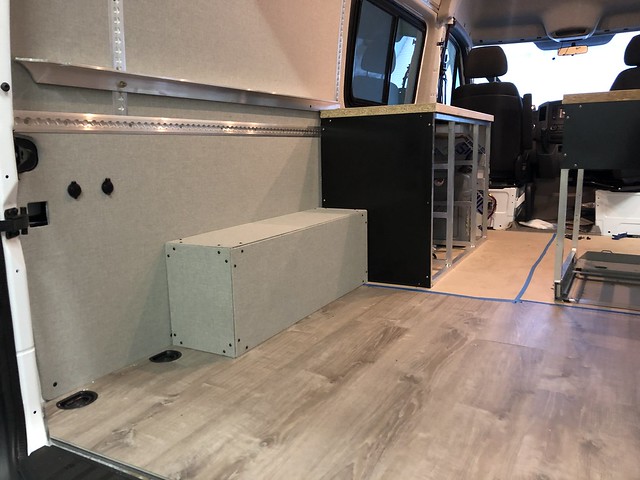
Also got the fender well cover all done!
 Untitled by Grant Wilson, on Flickr
 Untitled by Grant Wilson, on Flickr
I will finish covering the other fenderwell cover tomorrow and skin the upper cabinets!.
All that is left on the van really is for a cabinet person to finish up the drawers and faces!
Upper cabinet is all finished and fitted. Direct bolt in on adventure wagon kits. just gotta add side framing in and then skin the sides and bottom! Three of these will go in each van for upper storage.
Untitled by Grant Wilson, on FlickrUntitled by Grant Wilson, on FlickrUntitled by Grant Wilson, on FlickrUntitled by Grant Wilson, on FlickrUntitled by Grant Wilson, on FlickrAlso got the fender well cover all done!
Untitled by Grant Wilson, on FlickrUntitled by Grant Wilson, on FlickrI will finish covering the other fenderwell cover tomorrow and skin the upper cabinets!.
All that is left on the van really is for a cabinet person to finish up the drawers and faces!
grantwilson
Adventurist
Finally at a solid point. About to drop everything off for powdercoat. Finishing up the galley assembly and drawers before taking it all apart.
 Untitled by Grant Wilson, on Flickr
 Untitled by Grant Wilson, on Flickr
 Untitled by Grant Wilson, on Flickr
 Untitled by Grant Wilson, on Flickr
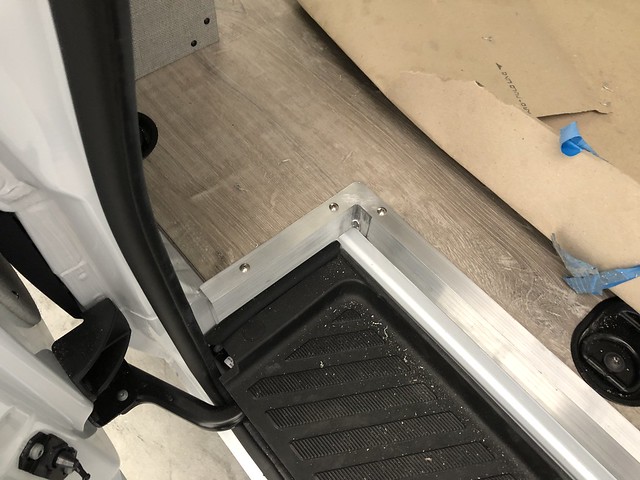
Then I welded up a one piece step/cab and cargo trim piece
 Untitled by Grant Wilson, on Flickr
 Untitled by Grant Wilson, on Flickr
 Untitled by Grant Wilson, on Flickr
And even better. Hired a good friend to do a bunch of welding so i can get ahead. building four vans worth of interiors
 Untitled by Grant Wilson, on Flickr
This is four galley units and 8 wheel well covers
The fridge units and most of the upper cabinets are done as well at this point
 Untitled by Grant Wilson, on Flickr
Untitled by Grant Wilson, on FlickrUntitled by Grant Wilson, on FlickrUntitled by Grant Wilson, on FlickrUntitled by Grant Wilson, on FlickrThen I welded up a one piece step/cab and cargo trim piece
Untitled by Grant Wilson, on FlickrUntitled by Grant Wilson, on FlickrUntitled by Grant Wilson, on FlickrAnd even better. Hired a good friend to do a bunch of welding so i can get ahead. building four vans worth of interiors
Untitled by Grant Wilson, on FlickrThis is four galley units and 8 wheel well covers
The fridge units and most of the upper cabinets are done as well at this point
Untitled by Grant Wilson, on Flickr